How to Propagate Marigold: Seeds & Cuttings
How to Propagate Marigold: Seeds & Cuttings
How to Propagate Marigold: Seeds & Cuttings
Marigold propagation is one of the easier annual bedding jobs once you accept the hierarchy: seed is the default, reliable, economical path for Tagetes marigolds, and stem cuttings are a secondary option when you need to clone a specific color or form. Marigolds are warm-season annuals native to Mexico and Central America - not shade houseplants that root casually in a jar on a dim shelf. They germinate quickly in warm soil, bloom within weeks of sowing, and finish their life cycle in a single season. That biology favors seed trays and direct sowing over complicated vegetative setups.
The main propagation mistake is waiting until parent stems are woody, exhausted, or already flowering heavily before taking cuttings - or sowing seed into cold, wet soil and wondering why nothing emerges. This guide walks through numbered seed and cutting workflows grounded in NC State Extension, Wisconsin Horticulture, Iowa State Extension, and University of Minnesota Extension propagation guidance. For sun, watering, and cultivar types, start with the Marigold care overview.
Quick Choice: Seeds vs Stem Cuttings
| Method | Best for | Time to first bloom | Clone fidelity | Difficulty |
|---|---|---|---|---|
| Seed (indoor start) | Earliest color, large quantities, lowest cost | ~6–8 weeks from sow under warm conditions | Low for F1 hybrids - offspring vary | Easy to moderate |
| Seed (direct sow) | In-ground beds, containers, succession planting | ~6–8 weeks from sow after soil warms | Low for hybrids | Easy if soil is warm |
| Stem cuttings | Preserving a specific double-flower form or color | ~4–6 weeks to root + weeks to bloom | High - genetic copy | Moderate - parent quality critical |
Choose seed when you want dozens of plants for beds, borders, or companion rows - the standard bedding workflow. Choose cuttings when one perfect orange African marigold or a favorite French bicolor must match exactly next season. Buy nursery packs when you need six plants and seed-starting gear is not worth the setup.
Method Comparison at a Glance
Seeds win on scale, speed to bloom, and simplicity. Cuttings win on clone fidelity but require healthy soft parent growth and more attentive moisture management. NC State Extension lists seed as the best propagation method for African marigold; stem cuttings are viable but secondary for home gardeners cloning a favorite plant.
Marigold Propagation Basics
Marigold in modern gardening means Tagetes species in the Asteraceae family - annual ornamentals bred for heat tolerance, heavy bloom, and garden durability. Wisconsin Horticulture notes marigolds can be direct seeded when soil temperatures exceed 65°F or started indoors about eight weeks before transplanting outdoors after frost.
African, French, and Signet Tagetes
Three types dominate bedding sales, per Iowa State Extension:
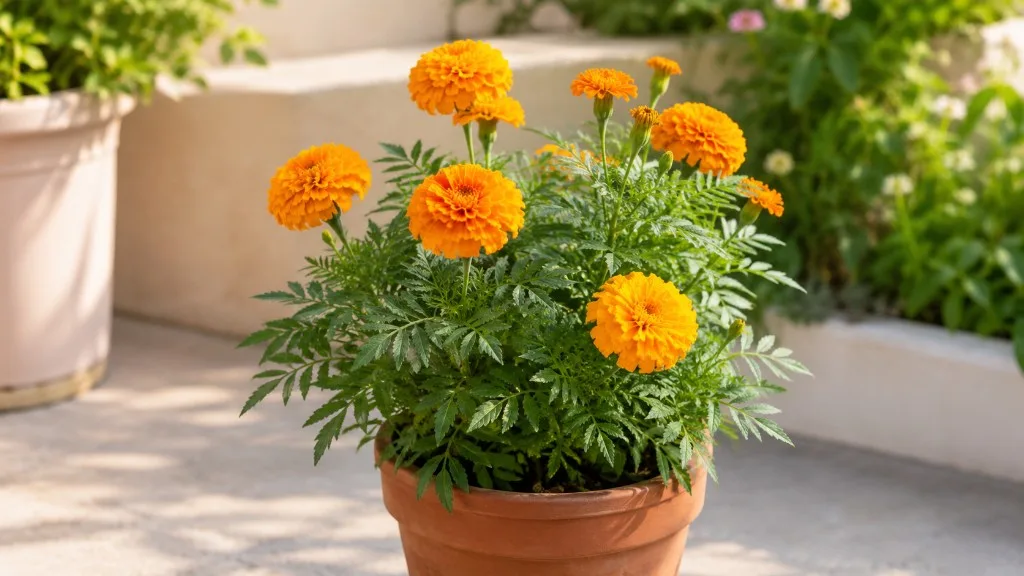
African marigold (Tagetes erecta) - tall, upright, 10–36 inches high with the largest flowers (often double, up to 5 inches across). Best for back-of-border height and hot, dry positions. Benefits from deadheading.
French marigold (Tagetes patula) - compact, 6–18 inches tall, smaller flowers in single, semi-double, and double forms. More tolerant of moist soils than African types. Deadheading optional but keeps plants tidy.
Signet marigold (Tagetes tenuifolia) - fine-textured, usually under 12 inches, with small single flowers and lemony-scented foliage. Excellent for edging and containers.
Despite the names, African and French marigolds both originate in the Americas, not Africa or France - the labels reflect trade history, not native range.
Why Seed Is the Standard Method
NC State Extension states marigolds grow best from seed started indoors 6 to 8 weeks before the last frost date, then set out after frost passes. Seed gives each plant enough stored energy to push through germination and reach first bloom in roughly 6–8 weeks from sowing under warm conditions - Missouri Botanical Garden notes marigolds flower on that timeline. A single packet produces dozens of plants for pennies. F1 hybrid cultivars (Antigua, Bonanza, Taishan, and most named series) will not breed true from saved seed - offspring vary in color and habit. Use fresh purchased seed for predictable results, or save seed only from open-pollinated varieties if you accept some variation.
When to Propagate Marigold
Seed indoors: Sow 6–8 weeks before your average last frost date - NC State and Wisconsin Horticulture both recommend this lead time for indoor starts. Example: last frost May 15 → sow indoors between March 20 and April 1.
Direct sow outdoors: Wait until all danger of frost has passed and soil temperature at sowing depth reaches at least 65°F (18°C) - Wisconsin Horticulture and UMN Extension both cite this threshold. Iowa State instructs sowing seeds one-quarter inch deep after frost danger is past.
Stem cuttings: Take cuttings during active spring or early-summer growth from soft, non-flowering shoots. Avoid stressed parents recovering from drought, root rot, or heavy retail bloom. Marigold is not on Iowa State’s primary list of annuals that root most reliably from cuttings - treat cuttings as a clone-preservation tool, not the default multiplication path.
Supplies You Will Need
For seed: Sterile seed-starting mix, shallow trays or cell flats, clear humidity dome, labels, fine mister or bottom-watering tray, LED or fluorescent grow lights on a timer, optional heat mat for consistent 70–75°F (21–24°C) germination per UMN Extension.
For cuttings: Clean scissors or knife, small pots, perlite-heavy mix or peat-perlite blend, optional rooting hormone, clear bag or dome for humidity during rooting.
For both: Full-sun hardening space outdoors, marigold-appropriate soil for transplant (well-draining mix with moderate fertility), and base-watering can.
Method 1: Growing Marigolds From Seed
Starting Seeds Indoors (6–8 Weeks Before Last Frost)
- Moisten seed-starting mix until spongy; fill trays or 2–3 inch cells.
- Sow 1–2 seeds per cell, planting ¼ inch (6 mm) deep - UMN Extension and Iowa State both specify this depth. Cover lightly with mix or fine vermiculite.
- Mist gently or bottom-water so seeds stay in place.
- Cover with dome until sprouts appear, then remove promptly to prevent damping-off.
- Provide bottom heat if room air is cool - target 70–75°F (21–24°C) for germination.
- Label cultivar and sow date immediately - cotyledons look alike across colors.
Expect germination in 5–8 days at proper temperature per UMN Extension. After germination, grow seedlings at 65–75°F daytime / 65–70°F nighttime until transplant.
Direct Sowing Outdoors
Direct sowing skips trays and hardening-off labor when weather cooperates. Choose a site with full sun - six or more hours of direct light daily - because marigolds flower poorly in shade.
- Wait until frost danger has passed and soil at 5 cm depth reads ≥65°F (18°C).
- Loosen soil to 15–20 cm (6–8 inches) and rake level.
- Sow seeds ¼ inch deep in shallow furrows or by pressing seeds into the surface and covering lightly.
- Space seeds 5–8 cm (2–3 inches) apart in the row; thin later to final spacing - 30 cm (12 inches) for African types, 15–23 cm (6–9 inches) for French types per UMN Extension spacing guidance.
- Water gently with a fine spray; keep soil evenly moist but not soggy until emergence.
Direct-sown marigolds never experience transplant shock - a major advantage in hot climates with long seasons.
Germination Temperature, Depth, and Timeline
Marigold seeds need warm soil to germinate reliably. Cool, wet soil delays emergence or causes rot - one of the most common direct-sow failures. Target 70–75°F (21–24°C) during germination; UMN Extension reports 5–8 days to sprout at that range.
Depth matters: ¼ inch is the standard - deep enough for contact and moisture, shallow enough for seedlings to reach light quickly. Marigold seeds do not require surface-sowing like petunia; a light cover is correct.
Worked timeline example: Sow indoors 6 weeks before last frost (March 25 for May 15 frost) → cotyledons day 5–7 → two true-leaf stage week 3 → harden off week 5–6 → transplant after frost → first blooms ~6–8 weeks from original sow date in warm sun.
Seedling Care and Hardening Off
Once cotyledons expand, provide bright light immediately - a south window alone is often insufficient. Position grow lights 5–8 cm (2–3 inches) above leaves for 14–16 hours daily per UMN’s indoor-start guide. Leggy pale seedlings signal insufficient light; see the leggy growth problem guide if stems stretch before transplant.
Keep mix evenly moist with bottom watering; avoid soggy cells that invite damping-off (collapsed seedlings at the soil line). Do not fertilize until true leaves expand; starter mix carries enough nutrients for the first weeks.
Harden off over 7–10 days before permanent outdoor placement: start with shaded outdoor hours, increase sun exposure daily, and bring trays in if frost threatens. Transplant when seedlings are 10–15 cm (4–6 inches) tall with two to three sets of true leaves, after last frost and when soil is warm. Set plants at the same depth they grew in cells. Water in at the base - match seedling moisture discipline with the marigold watering guide.
Method 2: Stem Cuttings
Stem cuttings preserve a specific cultivar that hybrid seed cannot reproduce - useful for a favorite double African orange or a French bicolor you cannot find in seed catalogs.
Selecting and Preparing Cuttings
- Choose a healthy parent with clean foliage - avoid woody, drought-stressed, or heavily flowering stems.
- Cut an 8–10 cm (3–4 inch) soft tip just below a node with clean scissors.
- Remove lower leaves that would bury in mix - at least one node must contact the rooting medium.
- Remove all flower buds and open flowers - reproductive tissue drains energy the cutting needs for roots.
- Optional: dip cut end in rooting hormone; marigolds often root without it, but hormone can improve uniformity.
- Take cuttings in morning when stems are turgid; stick immediately.
Store-bought marigolds in full retail bloom are poor donors. Trim back lightly, feed, wait two weeks for soft new shoots, then cut.
Rooting Medium, Light, and Moisture
Insert cuttings into moist 50:50 peat-perlite or sterile seed mix in small pots. Cover with a clear bag or dome for humidity; vent daily to prevent mold. Place in bright light - marigolds are full-sun plants, but freshly stuck cuttings benefit from bright indirect light during rooting, then transition to stronger light as roots form. Do not root in a dark corner.
Keep medium lightly moist, not waterlogged. Iowa State Extension notes most annual cuttings root in 4–6 weeks; marigold soft cuttings in warm bright conditions often root in 2–3 weeks. Gently tug-test after two weeks - resistance means roots are forming.
Once roots are 2–3 cm long, pot individually with marigold soil and harden off before full sun per the marigold light guide - mature marigolds need 6+ hours of direct sun for maximum flowering.
Aftercare for New Marigold Plants
First two weeks after transplant or pot-up: Keep soil evenly moist but not soggy - check top 2–3 cm before watering at the base, never overhead on flowers. Hold fertilizer until new growth looks active; then follow the marigold fertilizer guide - excess nitrogen reduces flowers.
Temperature: Marigolds thrive 18–32°C (65–90°F) once established. Frost kills seedlings and young plants - do not plant out early without hardening and frost-free nights.
Humidity: Marigolds tolerate low to moderate humidity; crowded wet foliage invites Botrytis grey mold on flowers - prioritize airflow in propagation domes and finished plantings. Penn State Extension notes excess humidity causes botrytis on marigold flowers.
Deadheading: Pinch or snip spent African marigold blooms to encourage more flowers; French types rebloom without deadheading but stay tidier with it - see the marigold overview for companion-planting context if you are propagating extra plants for vegetable-garden nematode suppression.
Signs Propagation Is Failing
Seed failures: No germination after 10 days at proper temperature - seed planted too deep, expired seed, or cold wet mix. Damping-off - seedlings collapse at soil line; improve airflow, reduce water, use sterile mix. See mold on soil and fungus gnats if propagation trays stay too wet.
Cutting failures: Mushy stem base, sour water, blackened nodes - tissue too old, parent stressed, or medium too wet with poor airflow. Cutting shrivels while medium is wet - insufficient leaf area or extreme heat without humidity. Roots form but plant stalls - kept in shade too long; move through hardening to full sun.
Start again with cleaner, younger material rather than nursing rotting cuttings indefinitely.
When Not to Propagate
Do not propagate as a rescue for active root rot, severe aphid infestation, or aster yellows - discard infected plants. Avoid cuttings from pesticide-treated nursery stock if you intend organic beds or pet-accessible containers. Skip seeding when you need six plants total and local packs cost less than trays, lights, and eight weeks of tending.
If the parent is woody, exhausted, or flowering on every stem, trim and feed first, then propagate from regrowth - the mistake that ends more cutting attempts than any other error.
Related Marigold Guides
Propagation succeeds inside a full care system - not in isolation.
- Marigold overview - species types, companion planting, deadheading
- Light - full-sun placement and hardening targets
- Watering - seedling moisture vs mature rhythm
- Soil - mix for seed-start and final pots
- Fertilizer - when to start feeding young plants
- Pruning - pinch timing after propagation
- Problem guides: leggy growth, overwatering, root rot, not enough light
Conclusion
Marigold propagation is a choice between seed economy and cutting fidelity. Sow ¼ inch deep at 70–75°F, start indoors 6–8 weeks before last frost or direct sow after soil warms above 65°F, and harden off before full sun. Clone a favorite form with 8–10 cm soft cuttings rooted in perlite mix, then treat young plants like the sun-hungry annuals they are. Match method to goal: seed for beds, borders, and companion rows; cuttings for exact color repeats; nursery packs when scale does not justify trays. Get light, moisture, and timing aligned with the rest of the marigold care cluster, and propagation becomes one of the fastest ways to fill a garden with heat-tolerant color from spring through frost.