Marigold Soil: Mix, Bed Prep & Drainage
Marigold Soil: Mix, Bed Prep & Drainage
Marigold Soil: Mix, Bed Prep & Drainage
Marigolds are not picky about gourmet potting blends - they are picky about drainage, fertility level, and staying out of swampy root zones. Tagetes marigolds (African, French, and Signet types) are warm-season annuals bred for sun and heat. Give them lean, well-drained soil and they bloom heavily with modest feeding. Park them in dense, nitrogen-heavy, or waterlogged mix and you get the classic failure mode: lush green leaves, almost no flowers, then yellow lower foliage and sour soil as roots suffocate. Soil is the foundation that makes marigold watering and fertilizer decisions predictable instead of guesswork.
This guide is the soil-depth page for Tagetes bedding plants - container mix recipes, in-ground bed prep, clay fixes, species moisture differences, seed-start vs mature mix, and drainage checks. For full-season care, deadheading, and pest notes, start with the Marigold care overview. For transplant timing and annual pot-up rules, see the dedicated marigold repotting guide.
Why Soil Matters More Than Fertilizer for Marigold Blooms
Marigolds are low feeders that prefer well-drained soil at pH 6 to 7. Wisconsin Horticulture and University of Minnesota Extension both emphasize that excess nitrogen pushes leaves instead of flowers - a pattern Penn State Extension documents for marigolds grown in overly rich conditions. That means the most common “soil problem” is not deficiency. It is too much organic richness or too little drainage, especially in containers that stay cool and wet.
Drainage matters because marigold roots need oxygen between waterings. Iowa State Yard and Garden notes that most marigolds prefer full sun with well-drained to dry soils and become drought tolerant once established. UMN Extension adds that marigolds tolerate drought better than being overly wet - so a mix that holds moisture like a tropical houseplant blend is actively working against the plant’s biology.
The practical takeaway: build soil for fast dry-down and moderate fertility, then add modest feed during growth if plants look pale. Do not start with manure-heavy beds or moisture-control potting soil and try to fix bloom failure with more fertilizer. If lower leaves yellow on wet mix, check root rot on marigolds before changing anything else.
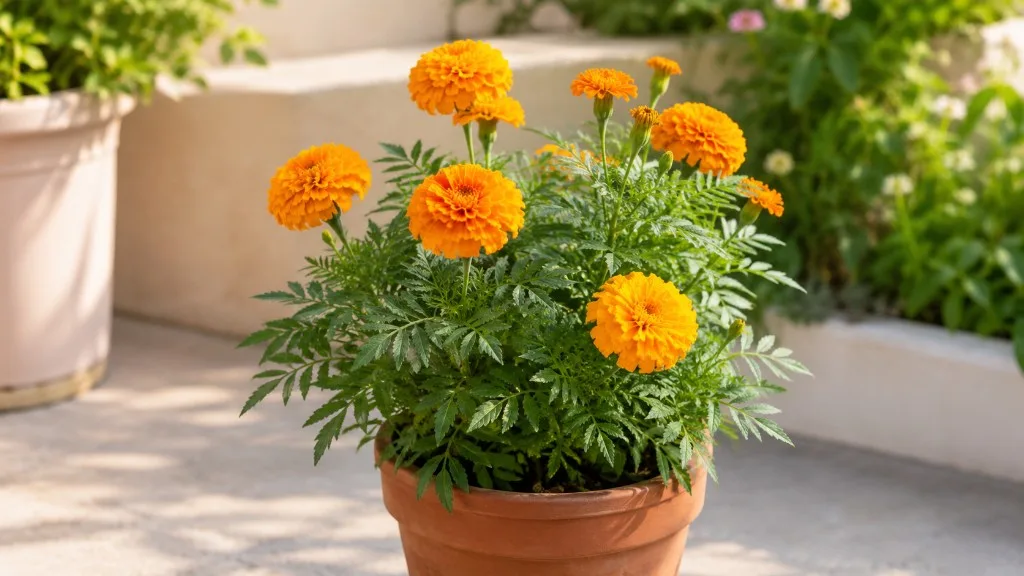
Best Soil Mix for Containers
Container marigolds succeed on three ingredients: a quality potting base, perlite or grit for pore space, and a pot with drainage holes. Signet types are especially well suited to pots per UMN Extension; African and French types also perform well when the mix drains within minutes and the pot is sized to the root ball.
Baseline: Potting Soil + 15% Perlite
For balcony pots and patio containers, use standard peat- or bark-based potting soil amended with about 15% perlite by volume. That is the single baseline recipe to trust - not a conflicting 60/20/20 sand formula unless you are amending an in-ground clay bed (covered below). The goal is a mix that:
- Accepts water evenly when you irrigate at the base
- Drains freely from the bottom within a minute or two on a warm day
- Does not compact into a brick after four to six weeks of watering
Avoid straight garden soil in closed containers. It compacts, drains poorly, and introduces weed seeds and pathogens. Avoid dense “moisture control” blends with extra wetting agents if you tend to water on a calendar - those formulas stay wet longer in cool spring weather when marigold roots are still establishing.
When to Add Coarse Sand or Grit
Perlite is the default aeration amendment for pots. Coarse sand or horticultural grit enters the picture mainly for in-ground clay beds, not as a wholesale replacement for perlite in peat-based container mix. UMN Extension recommends incorporating compost or sand to increase drainage of heavy garden soil - the sand opens clay structure so water moves laterally and downward instead of pooling.
In containers, add extra perlite (up to 25–30% total) if:
- You use plastic pots in humid, partly shaded spots
- The plant wilts midday but the mix stays dark and cool at depth
- Water sits on the surface after irrigation
Terracotta dries faster than plastic; underwaterers often do better in plastic with the standard 15% perlite recipe, while overwaterers benefit from terracotta plus slightly higher perlite. Match the pot material to your habits, not just aesthetics.
Preparing In-Ground Beds
Most marigolds in home gardens grow in open beds, borders, and vegetable-garden edges - not long-term indoor pots. Bed prep is simpler than container culture but the drainage rule is identical: roots cannot sit in pooled water after rain.
Loosening and Clay Amendment
A reliable bed-prep routine:
- Clear weeds and loosen the top 6 to 8 inches of soil - the depth marigold fibrous roots actually use in one season.
- If you have heavy clay, work in compost plus coarse sand or horticultural grit so water moves through instead of sitting against the crown. Iowa State warns that root rots in moist soils can be more damaging to African marigolds and may kill plants outright - clay that stays slick after rain is a high-risk site for tall Tagetes erecta types.
- For average loam, often a modest compost incorporation is enough. You do not need to build a raised bed unless drainage is chronically poor.
NC State Extension lists African marigold as tolerating clay and dry soil but preferring evenly moist, well-drained soil - translation: clay is survivable only when amended for structure, not when it holds puddles.
Low-Feeder Reality: Avoid Over-Rich Top Dressing
Freshly manured vegetable beds can produce vigorous marigold foliage with disappointing bloom count. Wisconsin Horticulture lists low fertilization requirements for Tagetes - lean soil plus sun beats rich soil plus shade every time. If you are rotating French marigolds through a vegetable plot for nematode management, remember that UF IFAS publication NG045 documents alpha-terthienyl from French marigold roots as toxic to nematode eggs - the benefit comes from growing the cover crop in the same soil for months, not from loading nitrogen before transplant.
Spacing interacts with soil moisture: UMN Extension advises at least 12 inches between African marigolds and closer spacing for French edging types. Crowded plants in moist soil increase botrytis pressure on heavy double blooms - a soil-airflow problem as much as a watering problem.
African, French & Signet: Moisture Tolerance Differences
All Tagetes types need drainage. They do not all tolerate the same moisture envelope:
| Type | Species | Moisture tolerance | Soil notes |
|---|---|---|---|
| African | Tagetes erecta | Lowest - most rot-sensitive in wet clay | Prefer lean, fast-draining mix; Iowa State flags root rots in moist soils as especially damaging |
| French | Tagetes patula | Moderate - more adaptable to moister edging soils | Workhorse bedding type; still requires drainage but forgives brief wet spells better than African doubles |
| Signet | Tagetes tenuifolia | Moderate - excellent in containers | Smaller habit; Wisconsin Horticulture notes edible flowers and fine foliage that dries faster after rain than large African heads |
When someone asks whether African and French marigolds need different soil, the honest answer is the same drainage standard, different risk tolerance. Put African marigolds on the highest, best-drained section of the bed or in a pot with extra perlite. French types can handle slightly heavier edging soil if the bed still drains within hours after a soak. Signet types excel in 10-inch pots with the 15% perlite baseline.
Drainage Speed and the One-Minute Check
After a full base watering, excess water should exit the pot quickly rather than pooling around the lower roots. UC IPM lists marigolds as needing moderate to regular water while emphasizing that culture must avoid chronic waterlogging - the same extension network ties wet flowers and overhead irrigation to disease, which is why soil drainage and base watering belong in the same conversation.
One-minute drainage check (containers):
- Water slowly until it runs from drainage holes.
- Watch the surface - water should not pool for more than a few seconds on a warm day.
- Lift the pot 60 seconds later - you should hear water finishing its exit, not sloshing at the bottom.
- If the mix is still glistening and heavy on top after several minutes, add perlite at the next refresh or reduce pot size.
In garden beds, dig a shallow hole after heavy rain. If water stands for hours, amend before planting African types.
Pot Choice and Root-Zone Volume
Soil performance depends on how much of it you give the roots and what holds it:
- Drainage holes are mandatory for any marigold kept more than a few days in a container. Sealed decorative cachepots without holes are a direct route to anaerobic mix and root failure.
- Pot size: A 10- to 12-inch pot supports one large African marigold or two to three French plants. Oversized pots surround small root balls with wet, unused mix that dries unevenly.
- Depth: Marigolds are fibrous-rooted annuals, not deep taproots - wide, moderately shallow pots often outperform tall narrow cylinders that stay wet at the bottom.
- Material: Terracotta breathes and dries faster; plastic retains moisture. There is no universal winner - match material to your watering frequency and balcony microclimate.
pH and Mineral Buildup
Target pH 6.0 to 7.0 for marigolds. NC State Extension lists neutral pH 6.0–8.0 for Tagetes erecta with good drainage - most home garden soils already fall in range. Hobbyists rarely need lime or sulfur unless a soil test shows a real problem.
In containers, repeated tap-water irrigation can leave mineral crust on the mix surface and tip-burn on leaves. If you see white deposits and edge burn despite correct watering, flush the pot with plain water until runoff clears, or refresh the mix at the next repot. Do not respond with more fertilizer on dry or crusted mix - that compounds salt stress.
Iowa State notes that low pH in soilless media can cause iron and manganese toxicity (bronze speckling on lower leaves) - another reason to avoid guessing amendments without a test in long-season container culture.
Seed-Starting Mix vs Mature Container Mix
Seedlings and mature bedding plants do not use the same substrate goals:
Seed-starting mix should be lighter, sterile, and finer than finished container blend - high drainage, low fertility, no large bark chunks that block tiny roots. Start seeds indoors about 6 to 8 weeks before last frost per NC State guidance for Tagetes erecta, or direct-sow when soil temperatures reach 65°F (18°C) per UMN Extension. Keep germination mix evenly moist but not waterlogged; damping-off is a wet-cold-air problem, not a nutrient problem.
Mature container mix shifts to the potting soil + 15% perlite baseline with modest compost or a starter charge already in the bag. Transplant seedlings at the same depth they grew in cells, then water in at the base. Do not plant small seedlings into heavy, cold, waterlogged garden clay on the same day - harden off and wait for warm soil.
When to Refresh or Replace the Mix
Marigolds are annuals - many gardeners never refresh mid-season because the plant finishes by frost. Refresh or replace mix when:
- The surface compacts and water runs down the pot sides without wetting the root ball
- The mix smells sour, swampy, or stagnant (anaerobic breakdown)
- Roots circle the bottom and water pours straight through (hydrophobic peat)
- White mold on the surface pairs with gnats and constantly cool, wet mix
For seasonal containers, replacing mix each spring is cheaper than fighting collapsed peat from last year’s marigold pot. For in-ground beds, rotate planting sites or loosen and amend the top 6 inches rather than “refreshing” in the houseplant sense. Detailed transplant steps live on the marigold repotting page - this soil guide covers what to put in the pot, not when to move a stressed annual.
Soil Mistakes to Avoid
Using two conflicting recipes. Trust 15% perlite in potting soil for containers and compost + grit amendment for clay beds - not both formulas in the same pot.
Stones in the pot bottom. A layer of gravel does not fix bad mix; it reduces soil volume and can create a perched water table. Fix the blend instead.
Burying stems too deep at transplant. Marigolds are not rhizomatous perennials - planting too deep smothers the crown. Set transplants at the same depth as the nursery cell.
Rich compost top-dress right before bloom season. A nitrogen surge greens leaves and delays flowers. If soil was prepared correctly at planting, midseason feed should be modest and phosphorus-aware per the fertilizer guide.
Peat-heavy retail mix on a cool balcony. Unamended peat stays cold and wet in spring; roots stall while leaves look deceptively fine. Add perlite and wait for warm nights before expecting explosive growth.
Ignoring species risk. African marigolds in unamended clay after a rainy week are a root-rot case waiting to happen. French types may limp through; Africans often do not.
Practical Soil Checks Before You Change Mix
Before you repot, add sand, or tear out a bed, run two fast diagnostics. They save you from fixing the wrong variable.
One-Minute Drainage Check
After irrigation, confirm water enters the mix, not just the rim channel. Press a finger 3 cm (about an inch) down once the surface looks wet - cool, clingy mix at that depth after 24 hours in a warm pot means drainage is too slow. On garden beds, scrape the surface after rain; if it smears like paste, clay needs grit before the next planting.
Root-Zone Smell Test
Lift or tip a container carefully and smell the drainage hole area. Earthy is healthy. Sour, rotten-egg, or swampy means anaerobic bacteria are winning - roots are next. Sour smell plus yellow lower leaves on wet mix is an urgency pattern, not a wait-and-see situation. Refresh mix, trim damaged roots if mushy, and improve drainage before the next full soak.
Related Marigold Care Guides
Soil connects directly to how you water, feed, and troubleshoot:
- Marigold overview - species types, full sun, deadheading, companion planting, and pest context
- Watering - base watering, container vs in-ground rhythm, overwatering signs
- Fertilizer - low-feeder schedule and why excess nitrogen steals blooms
- Repotting - annual transplant timing and seedling pot-up rules
- Root rot - recovery when wet soil has already damaged roots
Conclusion
Marigold soil is not about finding a secret recipe - it is about drainage first, fertility second, species awareness third. Use potting soil with 15% perlite in containers, loosen and amend clay beds with compost and grit before planting, and keep nitrogen modest so flowers stay the priority. African marigolds demand the sharpest drainage; French and Signet types forgive slightly moister edging soil but still rot in puddles. Run the one-minute drainage check and root-zone smell test before repotting on impulse, link soil fixes to watering habits, and treat sour, compacted mix as a root emergency - not a cue to fertilize. Get those pieces right and marigolds do what they were bred for: bloom through heat with minimal fuss.