Snake Plant Propagation: Leaf Cuttings & Division
Snake Plant Propagation: Leaf Cuttings & Division
Snake Plant Propagation: Leaf Cuttings & Division
Snake plant propagation is one of the most approachable multiplication projects in indoor gardening because the plant evolved to survive harsh conditions by regenerating from rhizome fragments and severed leaf tissue. Botanically classified as Dracaena trifasciata - the name that replaced the long-familiar Sansevieria trifasciata after molecular studies moved these plants into the Dracaena genus - the snake plant stores water in thick, sword-shaped leaves and spreads underground through tough rhizomes that push up offsets called pups. You are not coaxing a finicky tropical into rooting; you are working with a West African understory survivor that tolerates neglect better than pampering.
Two methods cover nearly every home scenario: division, which separates an existing clump or pup with roots already attached, and leaf cuttings, which ask a severed leaf segment to grow a new rhizome and pup from scratch. Division is faster, more reliable, and the only practical way to preserve variegation on cultivars like Laurentii with gold margins. Leaf cuttings are slower - often measured in months, not weeks - but they let you produce multiple plants from a single damaged or overlong leaf without disturbing the parent root ball. This guide walks through both paths with the decision rules, timing, setup, and troubleshooting that separate a pot full of new plants from a jar of rotting leaf tips.
Why Snake Plants Are Built to Regenerate
Snake plants belong to Asparagaceae and behave like succulent-stemmed rhizomatous perennials rather than typical leafy houseplants. In their native range from Nigeria through the Congo basin, they grow in filtered light on rocky, fast-draining soils where drought and occasional physical damage are normal. A leaf chewed by grazing animals or a rhizome broken by shifting substrate can still restart because the tissue holds water reserves and dormant meristem cells capable of producing new growth once conditions stabilize. Home propagation exploits exactly that biology: you provide clean cuts, dry wounds, Snake Plant light guide, and restrained moisture while the plant rebuilds its root-and-shoot system.
Unlike stem cuttings on vining plants that require a node with an axillary bud, snake plant leaves carry enough cellular potential to initiate a basal rhizome and eventually a pup - but the process is metabolically expensive and slow. Division skips that rebuild entirely by giving each section an existing rhizome and root system. Understanding that difference sets realistic expectations before you choose a method. The Missouri Botanical Garden describes Dracaena trifasciata as a stemless evergreen with creeping rhizomes and stiff vertical leaves - language that maps directly onto why division through rhizomes works so well and why leaf segments need patience.
Understanding Dracaena trifasciata Anatomy
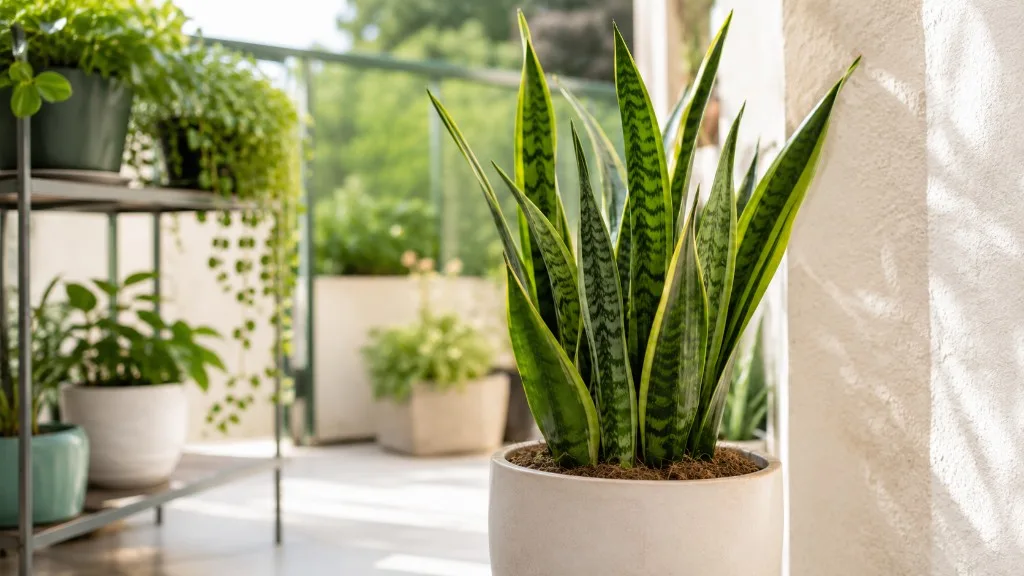
Every propagation decision starts with anatomy. A mature snake plant consists of leaves emerging from a compressed crown, rhizomes running horizontally beneath the soil surface, and pups - juvenile shoots sharing the parent’s rhizome network or sprouting from it independently. Leaves are not deciduous; they persist for years, photosynthesizing through CAM metabolism that opens stomata at night to conserve water. That water storage is why cuttings survive long callus periods but also why they rot instantly if planted wet into saturated mix.
Rhizomes look like thick, pale underground stems - not fibrous roots, though roots emerge from them. When you divide, you cut rhizome tissue connecting pups to the mother plant. When you leaf-propagate, you wait for a new rhizome to form at the buried base of a callused segment before any pup appears above soil. Pups are the fastest route to a plant that looks like the parent because they often inherit size, color, and variegation pattern immediately. Leaf-grown plants start as a single small shoot that takes a full season to resemble a nursery specimen.
Variegated cultivars add a wrinkle. Gold, silver, or cream margins on varieties like Laurentii or Moonshine exist because of chimeric tissue - a mix of pigmented and non-pigmented cell layers in the meristem at the crown, not in every leaf cell. Leaf cuttings regenerate from leaf tissue alone, so variegated margins typically revert to solid green. Division preserves the crown meristem and therefore the pattern. That single fact should drive your method choice more than any social-media tutorial showing water jars full of leaves.
Division vs Leaf Cuttings: When to Use Each
Choose division when your plant has visible pups, the pot is overcrowded, you need results within weeks, or variegation must stay true. Division gives you independent plants with roots on day one - essentially instant propagation with a short adjustment period. It is the method professional growers use to multiply patterned cultivars and the one I recommend first to anyone who already has a multi-stem clump.
Choose leaf cuttings when you want many plants from one leaf, the parent is a solid-green form where reversion does not matter, you are salvaging a bent or broken leaf still attached to the mother, or you prefer not to disturb a root ball that is finally happy in its pot. Leaf cuttings also suit sharing experiments: one long leaf can yield four to six segments, each capable of producing a pup months later. Accept the timeline before you start - rooting may take four to ten weeks in soil or water, and visible pups often need an additional two to four months after roots form.
Neither method requires rooting hormone; snake plants root readily without IBA powder when callus and moisture are correct. A propagation heating mat set to around 21–24°C (70–75°F) can shorten leaf-cutting timelines in cool homes by keeping rhizome initials active, but it is optional, not mandatory. If your snake plant is variegated and you care about the pattern, treat leaf cuttings as a fun side project and division as the serious multiplication path.
When to Propagate Snake Plant
Timing influences speed more than success with snake plants because they are forgiving, but propagating during active growth still produces cleaner cuts, faster rooting, and less rot pressure. Avoid taking divisions or leaf sections while the parent is recovering from root rot on Snake Plant, recent Snake Plant repotting guide shock, pest infestation, or post-shipping wilt. Stressed tissue propagates poorly even when the technique is textbook.
That said, indoor growers with stable warmth and supplemental light can propagate year-round - just expect winter batches to sit quietly for longer before anything visible happens. Match watering to metabolism: a cutting in a cool December room needs far less moisture than the same cutting in a bright June window. Propagation fails more often from overwatering on Snake Plant idle cuttings than from propagating in the “wrong” month.
Best Season for Active Rooting
Spring through early summer is the optimal window for snake plant propagation in most temperate homes. Rising temperatures in the 18–27°C (65–80°F) range accelerate cell division at wound sites, and lengthening daylight supports the parent and offspring without the leaf-scorch risk of midsummer direct sun on de-rooted material. If your plant pushes a fresh pup or a new leaf tier in March or April, that visible flush confirms metabolic readiness.
Early fall works in warm climates or heated indoor environments - think Tucson, Phoenix, or south-facing apartment conditions where autumn still feels like summer indoors. Avoid starting leaf cuttings in late winter unless you can provide warmth and bright indirect light; cold soil idle for months invites fungal growth on segments that have not yet rooted. Outdoor growers in frost-free zones (USDA 10–11) can align with natural rainy-season patterns, but bring cuttings under cover if nights drop below 10°C (50°F). Division tolerates slightly wider seasonal range than leaf cuttings because existing roots keep limited function after separation - still, avoid dividing a cold, wet root ball in midwinter and watering heavily right away.
Signs Your Parent Plant Is Ready
A propagation-ready parent shows firm upright leaves with consistent color, no widespread yellowing or soft bases, and soil that dries within one to two weeks in normal indoor light. Check for mealybugs hiding in leaf axils and fungus gnats suggesting chronically wet mix - pests and pathogens transfer to divisions and cuttings silently. If the pot is bulging with rhizomes against the container walls or pups are crowding the main crown, division is overdue anyway.
For leaf cuttings, select leaves that are fully mature - not the newest thin spear still unfolding, and not the oldest basal leaf that may be declining. Mid-canopy leaves root well and store adequate water for the long wait. If a leaf has bent and broken at the base from its own weight - common on tall trifasciata - that is ideal cutting material once you trim the damaged section cleanly.
Consider pet safety when planning to share plants: the ASPCA lists snake plant as toxic to cats and dogs due to saponins that can cause gastrointestinal upset if chewed. Propagation does not change toxicity; warn recipients if leaves might be accessible to curious pets.
Propagating Snake Plant by Division
Division is the fastest and most dependable snake plant propagation method because each section keeps its own rhizome tissue and root system. Rather than asking a leaf to invent new roots, you separate a pup or split a multi-crown clump into independent plants that already know how to drink and stand upright. Success rates approach certainty when cuts are clean, callus brief, and aftercare conservative.
NC State Extension lists division and stem cutting as recommended propagation strategies for snake plants. You can divide during repotting or as a standalone task when pups are obvious. Small Bird’s Nest forms like Dracaena trifasciata ‘Hahnii’ divide the same way as tall upright types - only the scale changes. One crowded Hahnii pot might yield three to five rosettes; a mature Laurentii clump might give two large sections plus several pups.
Identifying Pups and Rhizome Connections
Pups appear as smaller leaf clusters emerging beside the main plant, often sharing soil space but connected underground by a rhizome you cannot see until unpotting. Trace visually from the pup base toward the mother crown - the connection point is where your cut belongs. Some pups already have their own white roots when you expose the rhizome; others rely on shared vascular tissue until separated.
Rhizomes feel firm and slightly woody, pale tan to white, unlike dark fibrous roots. Cutting through rhizome is normal and expected; cutting through the main crown of the mother without planning can damage the display plant. Prefer separating lateral pups rather than slicing the primary rosette in half unless the clump is truly massive and you accept asymmetric recovery time on each half.
If a pup has no visible roots but firm rhizome tissue, it can still survive after division - treat it like a small cutting with a brief callus on the rhizome face before potting. Pups with established roots settle in two to three weeks; rootless pups may need four to six weeks before new growth resumes.
Step-by-Step Division Process
Gather sterilized pruning shears or a sharp knife, a clean workspace, fresh fast-draining mix, and pots one size appropriate for each division - usually 10–15 cm (4–6 inches) for pups and larger for major sections. Water the parent two to three days before dividing so rhizomes are hydrated but not soggy; bone-dry root balls shatter, soaking-wet ones tear.
Slide the plant from its pot and brush away loose soil to expose rhizome connections. Identify each pup or natural split point with roots attached, then cut through the connecting rhizome with one clean stroke - avoid sawing, which crushes tissue. Let cut rhizome faces dry in air for two to twelve hours if tissue is moist; a thin callus reduces rot risk. Pot each division at the same depth it previously grew, water lightly around the perimeter rather than into the crown, and place in bright indirect light.
New growth on divisions typically resumes within four to six weeks during active season. Skip fertilizer for the first month; roots are re-establishing contact with fresh mix. Direct sun immediately after division can stress leaves that already lost some root mass - filtered light for two weeks, then normal snake plant light tolerance.
Propagating Snake Plant From Leaf Cuttings
Leaf cuttings turn one leaf into one or many plants by burying callused segments and waiting for rhizome and pup formation. The method is easy but slow, and it demands two habits beginners skip: drying the cut end and planting with correct orientation. Get those wrong and even a healthy leaf rots or roots without ever producing a shoot.
You can propagate an entire leaf as a single unit or cut it into multiple horizontal segments two to three inches long - each segment can yield one pup. More segments mean more plants but also more pots to monitor. For first attempts, two or three segments from one leaf teach the rhythm without overwhelming your windowsill.
Choosing and Preparing Leaves
Select a healthy mature leaf from the middle of the plant. Remove it at the base with a clean horizontal cut as close to the soil line as practical, or cut a leaf that has already bent and broken if the tissue above the break is firm. Avoid leaves with brown tip damage only - that cosmetic issue does not block rooting - but reject any leaf with soft, translucent bases indicating rot.
Lay the removed leaf on a clean surface. If using the whole leaf, you are done cutting. If segmenting, slice the leaf crosswise into 5–8 cm (2–3 inch) sections with sterilized shears, keeping track of which end was closer to the root. Each cut face needs callus time. Discard the very tip segment if it is too short to anchor - less than about 5 cm often desiccates before rooting.
Callus the cut ends by leaving segments in a dry, shaded spot with good airflow for one to three days. Dry rooms may need only 24 hours; humid kitchens may need 72. The cut surface should look matte and dry, not glossy or wet. Snake plant leaves are less rot-prone than many succulents once callused, but planting immediately into wet soil still invites basal decay.
The Critical Orientation Rule
Snake plant leaves are polar - vascular bundles run base to tip, and roots and pups emerge from the basal end that was attached to the mother plant. Upside-down segments rarely produce pups even if they root; the tissue cannot reorganize growth direction easily. This is the single most important technical rule in snake plant leaf propagation.
Mark the bottom of each segment before callusing: a permanent marker tick on the lower third, a piece of masking tape on the basal end, or simply laying all segments in the same orientation on your drying tray. When planting, bury the marked end 2–3 cm (about 1 inch) deep and leave the rest above soil. If you forget orientation on a segment, try planting it anyway - occasional success happens - but expect failure often enough that marking is worth ten seconds.
Whole-leaf propagation skips segment confusion but takes longer to show pups and uses more pot space. Insert the callused base shallowly into mix with the leaf standing or leaning supported by the pot rim. Some growers lay tall leaves horizontally on mix with the basal third buried; both orientations work if the buried portion is the true base.
Rooting Leaf Cuttings in Soil
Soil propagation is the set-and-forget method most experienced snake plant growers prefer for leaf cuttings. Roots form in their permanent medium, avoiding the transfer shock of water-to-soil moves, and you can ignore the pot for weeks at a time - matching the plant’s low-maintenance nature.
Use a small pot with drainage for each segment or a shallow tray for multiple cuttings spaced apart. Terracotta dries quickly, which protects idle segments from rot before roots activate. Plastic works if you adjust watering downward.
Best Potting Mix and Planting Depth
Snake plants need fast-draining, gritty mix - the same philosophy as mature plant soil, sometimes with extra perlite for propagation. A reliable formula:
- 50% cactus or succulent potting mix
- 30% perlite or pumice
- 20% coarse sand or fine grit
Pre-moisten mix until it holds shape when squeezed but does not drip. Poke a pilot hole, insert the callused basal end 2–3 cm deep, and firm lightly without compacting. Do not water immediately if mix was pre-moistened; wait three to five days, then mist or water lightly near the base - not a flood.
Place pots in bright indirect light. A spot one to two meters from a south or west window or directly in an east window suits leaf cuttings. Avoid dark corners where soil stays cold and damp, and avoid direct midday sun on de-rooted segments that cannot replace water loss.
Rooting timeline in soil: expect four to eight weeks for roots under normal indoor warmth, sometimes faster with a heating mat beneath the pot. Pups emerge separately, often two to four months after rooting begins - a February cutting might show its first pup in June, which matches what experienced propagators report across temperate climates. Patience is not optional; checking daily and repotting prematurely breaks fragile new roots.
When you feel slight resistance on a very gentle tug after six weeks, roots are likely working. New green shoots breaking soil surface are definitive success. Until then, keep moisture minimal - the leaf segment’s internal water reserves sustain it; your job is not to rot the base with kindness.
Water Propagation for Leaf Cuttings
Water propagation satisfies the urge to watch roots grow and works for snake plant leaf segments once they have callused. Submerge only the basal inch of the segment in a clear jar of room-temperature water; the rest of the leaf stays in air. Place in bright indirect light and change water every three to five days to limit bacteria - cloudy water is a warning, not a normal stage.
Roots typically appear in six to ten weeks, sometimes slightly faster than soil in warm bright conditions. Pups still take additional months after roots form; water-rooted segments are not “done” when white roots fill the jar. Transplant to gritty mix when roots reach 3–5 cm (1–2 inches), water once thoroughly, then let the top centimeter dry before the next drink. The two weeks after transfer are fragile - keep light bright but filtered.
Water propagation has trade-offs: submerged roots can struggle briefly after transfer to mix, and top-heavy whole leaves tip jars easily. Segment propagation in water is more manageable. For long-term plant health, soil remains the default; water suits learning or visual monitoring.
Timeline: What to Expect at Each Stage
Realistic timelines prevent the most common propagation abandonment - throwing out healthy cuttings at week five because nothing visible happened yet. Division produces independent plants immediately; new leaf growth confirms success in four to six weeks. Leaf cuttings in soil follow a two-phase schedule: roots in four to eight weeks, then pups two to four months after rooting starts, meaning three to five months from cut to visible baby plant is normal, not failure.
Leaf cuttings in water mirror soil timing for roots, with pups still lagging months behind. Winter propagation can stretch each phase by fifty percent or more in unheated rooms. A heating mat under propagation pots shaves time but does not replace light or correct moisture.
| Method | Roots / establishment | Visible new growth | Variegation preserved |
|---|---|---|---|
| Division | Immediate (existing roots) | 4–6 weeks | Yes |
| Leaf in soil | 4–8 weeks | 3–5 months total | No (reverts on variegated types) |
| Leaf in water | 6–10 weeks | 3–5 months total | No (reverts on variegated types) |
Spring and summer propagation often hits the shorter end of each range; cool dim winter conditions hit the longer end. Document your start date and check monthly rather than daily - snake plant propagation rewards the forgetful gardener who resists overwatering.
Aftercare for New Snake Plants
Newly divided snake plants and young pup-bearing cuttings need boring care for the first six to eight weeks. Light stays bright indirect; watering follows the same dry-down logic as mature plants but with extra caution while root systems are small. Water when the top 3–5 cm (1–2 inches) of mix is dry - often every two to three weeks for small pup pots, less in cool months.
Do not fertilize until new growth is clearly self-sustained - typically one to two months after division or after a leaf-grown pup has several inches of height. A quarter-strength balanced liquid feed once monthly in spring is enough thereafter. Repot into the next size up only when roots circle the pot or a pup outgrows its starter container; oversized pots stay wet too long around tiny root balls.
Quarantine new propagations two weeks if the parent ever had pests. Mealybugs and spider mites hitchhike on leaf bases. Keep new plants separate from your main collection until you confirm clean growth. When sharing divisions with friends, mention ASPCA toxicity for pet households - a practical courtesy that prevents avoidable vet visits.
Acclimate slowly to stronger light after establishment. Snake plants tolerate lower light than many houseplants, but newly separated divisions sunburn more easily than mature clumps. Increase exposure over two weeks if moving to a brighter spot.
Common Propagation Mistakes and How to Fix Them
Most snake plant propagation failures trace to moisture at the wrong stage or orientation errors, not bad luck or missing rooting hormone.
Basal rot on leaf segments means planting before callus, overwatering idle cuttings, or water creeping up the leaf in jars. Trim back to firm green tissue with a sterile blade, re-callus two to three days, restart in fresh dry mix with minimal water. Discard fully mushy segments.
No pup after roots formed on upside-down segments is usually permanent - restart with correctly oriented material. Occasionally a segment roots but stalls; warmth and patience may still produce a pup after many months.
Variegation lost on Laurentii after leaf propagation is expected biology, not a mistake - use division next time if pattern matters. Solid-green offspring from variegated parents are still healthy plants.
Division rot follows soaking wet mix in cold rooms or burying rhizomes too deep. Unpot, trim soft rhizome tissue, air-dry cuts, repot shallow in fresh gritty mix, withhold water one week, then resume lightly.
Shriveling leaf segments during callus signal excessive heat or segments too short. Move to bright indirect rather than hot sun; slightly longer segments store more water. Mild shriveling often reverses once rooted.
Propagating from a sick parent spreads weakness and pests. Stabilize the donor - fix chronic overwatering, treat mealybugs, refresh sour mix - before taking material.
Daily disturbance - pulling cuttings to inspect, repotting at first root tip - breaks fragile initials. Trust the timeline; look for surface pups and gentle tug resistance instead of excavating weekly.
Conclusion
Snake plant propagation rewards method choice more than gadgetry. Division through rhizome-connected pups is the fastest path to true-to-type plants and the only reliable way to keep Laurentii gold margins or other variegation intact. Leaf cuttings - callused, oriented base-down, rooted in gritty soil or shallow water - multiply solid-green forms and salvage damaged leaves with minimal parent disturbance, provided you accept a multi-month timeline from cut to visible pup.
If you remember three rules, make them these: divide variegated cultivars instead of leaf-cutting them, mark and plant the basal end down, and keep moisture low until roots and pups prove the plant is working. Match those habits with spring-or-summer warmth, bright indirect light, and sterile cuts, and Dracaena trifasciata becomes one of the easiest houseplants to share - not because propagation is magic, but because the plant already knows how to grow again once you stop drowning the wound.
When to use this page vs other Snake Plant guides
- Snake Plant overview - Start here for whole-plant context before deep-diving this topic.
- Snake Plant problems hub - Jump to symptom-specific fix guides when this care topic does not resolve the issue.