Peperomia Repotting Guide: When, How, and Pot Size
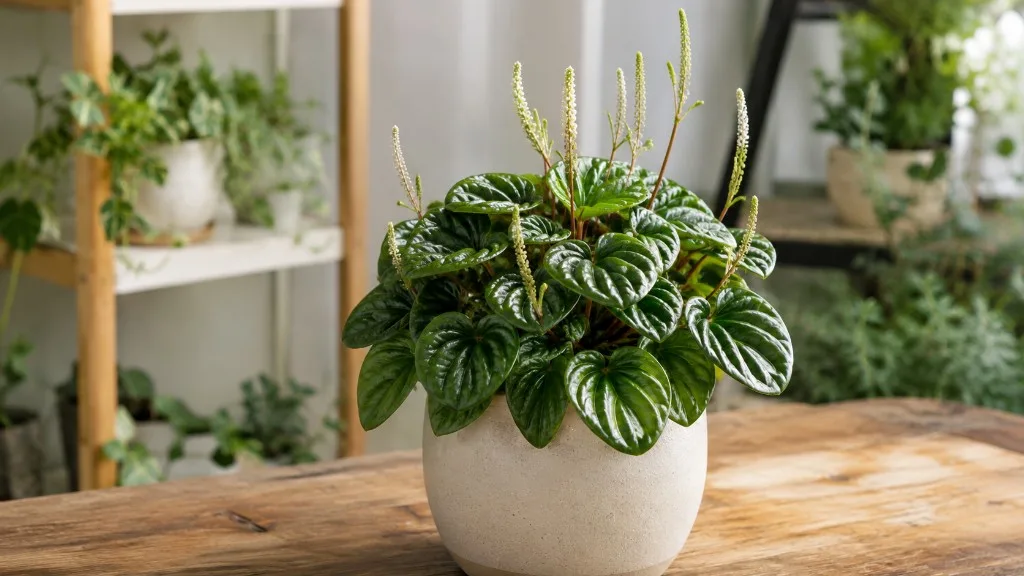
Peperomia Repotting Guide: When, How, and Pot Size
Peperomia Repotting Guide: When, How, and Pot Size
Why Peperomia Repotting Works Differently Than Most Houseplants
If you have repotted a pothos or a monstera, you already know the routine: pull the plant out, loosen a dense root ball, jump up a pot size, and watch new growth explode within weeks. Peperomia repotting follows a different logic entirely. These are slow-growing, compact plants with small, fragile root systems that spread horizontally rather than diving deep. They tolerate - and in many cases prefer - being slightly root-bound. Repot them too often, into a pot that is too large or too deep, and you are far more likely to cause problems than to solve them.
That is not a reason to never repot. Over time, potting mix breaks down, salts accumulate, and roots eventually circle the bottom of the container. When that happens, a careful repot in spring with a shallow pot one size up and a fresh, fast-draining mix gives the plant another two or three years of healthy growth. The key is matching the procedure to the plant’s biology rather than applying a generic houseplant calendar.
This guide covers every decision involved: when repotting is actually necessary, why shallow pots matter, how to handle delicate roots without bare-rooting, which soil mix to use, and what the first month of recovery looks like.
Shallow Root Architecture and an Epiphytic Heritage
Peperomias belong to the Piperaceae family - the same family as black pepper - and most cultivated species trace their ancestry to the moist, shaded understory of tropical forests in Central and South America, according to the Missouri Botanical Garden. Many species, including the widely grown Peperomia obtusifolia (baby rubber plant) and Peperomia caperata (emerald ripple), behave as facultative epiphytes in the wild. Their roots are adapted to crawl across tree bark, rock surfaces, and thin layers of leaf litter rather than penetrate deep soil columns.
That evolutionary history explains why peperomia root systems stay compact and shallow indoors. The roots explore outward, not downward. In a deep pot, the lower half of the soil column often stays wet long after the top has dried, creating an oxygen-poor zone where roots cannot reach and where root rot on Peperomia takes hold. Oxygen moves slowly through saturated soil, and peperomia roots simply do not grow deep enough to use water sitting at the bottom of a tall container. The result is a permanent perched water table - wet, stagnant soil that the plant never accesses but that slowly destroys the roots above it.
Understanding this changes how you choose a pot. For peperomia, pot depth matters as much as pot width. A wide, shallow container that matches the root spread is almost always safer than a narrow, deep one that looks proportional to the foliage.
Why Slightly Root-Bound Is OK - Even Preferred
Do peperomias like to be root bound? Yes, within reason. The Royal Horticultural Society notes that slow-growing peperomias can stay in their original container for two to three years and prefer a pot only a few centimetres larger than the rootball. A slightly root-bound peperomia tends to stay compact, water more predictably, and focus energy on foliage rather than root expansion.
Being slightly root-bound is not the same as being severely pot-bound. There is a useful middle ground. A plant with roots visible at the drainage hole, circling the bottom of the root ball, or pushing the soil surface upward is ready for a gentle upgrade. A plant that still has visible soil between the roots and the pot wall, drains normally, and pushes out steady new growth does not need intervention - even if it has been in the same pot for two years.
The practical takeaway: resist the urge to repot a healthy peperomia just because spring arrived or because you repotted everything else on your shelf. Wait for the plant to show you it needs more room.
When to Repot Peperomia
Every Two to Three Years, Not Every Spring
How often should you repot peperomia? Every two to three years is the standard cadence for most species, according to the Royal Horticultural Society. Some slow-growing varieties - trailing types like Peperomia prostrata (string of turtles) or compact caperata cultivars - may stay happy for three years or longer. Faster growers like Peperomia obtusifolia in bright, warm conditions may need attention closer to the two-year mark.
Treat the calendar as a backstop, not a schedule. The plant’s roots, drainage behavior, and growth rate are better indicators than the date you last repotted. If you bought a peperomia in a nursery pot six months ago and it is thriving, there is nothing to do. If you have had the same plant in the same pot for four years and water runs straight through without soaking in, it is time.
One useful alternative to a full repot is an annual top-dressing in spring: scrape off the top inch or two of old soil and replace it with fresh mix without disturbing the root ball or changing pot size. This refreshes the upper root zone - where most peperomia roots actively feed - with minimal stress.
Clear Signs Your Peperomia Actually Needs Repotting
Peperomias do not announce repotting needs as loudly as fast-growing tropicals. You need to look deliberately. These are the most reliable signals:
- Roots emerging from the drainage hole or circling tightly on the soil surface. This is the clearest sign and worth checking for once a year by gently sliding the plant partway out of its pot.
- Water runs straight through without absorbing, then the plant wilts anyway. Compacted, root-dense soil sheds water rather than holding it, and the roots cannot access moisture even immediately after watering.
- Growth has stalled despite good light, appropriate watering, and regular feeding during the growing season. When everything else checks out, the root system is often the bottleneck.
- The plant dries out much faster than it used to, requiring watering two or three times as often as the previous year. A root mass that has filled the pot leaves little soil volume to hold moisture.
- Soil has broken down - it smells sour, looks dense and gray, or stays wet for days after watering. Decomposed mix loses the air pockets peperomia roots depend on.
- Salt crust visible on the soil surface or pot rim, indicating fertilizer and mineral buildup that a soil refresh would solve.
If you see two or more of these signs together, plan a repot during the next active growth window. A single sign on its own - especially faster drying - may only call for top-dressing or a slight watering adjustment.
Why Spring Is the Best Window (and When to Wait)
Spring is the best time to repot peperomia. As daylight lengthens and temperatures rise, the plant shifts from its slower winter pace into active growth. New roots establish quickly in warm soil, and any minor transplant shock resolves within one to two weeks rather than dragging on for months. Early summer works as a backup if you missed the spring window, especially for species that grow steadily through warm weather.
Avoid repotting in fall or winter unless the situation is urgent - severe root rot, a pot cracking from root pressure, or a plant clearly in decline from exhausted soil. During the cooler, darker months, peperomia growth slows dramatically. Root damage takes far longer to repair, and the wet, cold soil of a freshly repotted plant in a dim room is a setup for rot. If you can wait until March or April, wait.
There is one exception worth naming: if you discover mushy, brown roots during a routine check, repot immediately regardless of season. Cut away the damaged tissue, replant in fresh mix, and keep the plant warm and in Peperomia light guide while it recovers. Saving the roots matters more than respecting the calendar.
Choosing the Right Pot for Peperomia
Shallow Azalea or Bulb Pots Beat Deep Containers
For most peperomia species, a shallow pot is the single most important container choice you can make. Azalea pots and bulb pots - containers that are wider than they are deep, typically about three-quarters the height of a standard pot - match the plant’s natural root architecture. The drainage hole sits closer to the root mass, the entire soil column dries more evenly, and there is no deep dead zone of stagnant moisture at the bottom.
This matters more for peperomia than for almost any other common houseplant. A 6-inch azalea pot gives a Peperomia obtusifolia or Peperomia argyreia (watermelon peperomia) more usable root space than a 6-inch standard-depth pot, because every cubic inch of soil in the shallow container is within reach of the roots and exposed to air. If azalea pots are not available locally, choose the widest, shortest pot that fits your shelf and has a drainage hole. A standard nursery pot one size up works fine - just avoid deliberately deep decorative planters.
If you love a tall cachepot, keep the peperomia in its plastic nursery pot inside the decorative outer container. Water the inner pot, let it drain completely, then return it to the cachepot. Never plant peperomia directly into a deep decorative pot filled with soil.
The One-Size-Up Rule: 1–2 Inches Maximum
When you do repot, go up only one pot size - about 1 to 2 inches (2.5 to 5 cm) wider in diameter than the current container. The Royal Horticultural Society specifically warns that a pot too large will hold compost that stays wet too long, leading to root rot. This is the most common post-repot failure for peperomia, and it happens because the plant’s small root system cannot use the water held in a large volume of fresh, moisture-retentive soil.
A peperomia in a 4-inch pot moves to a 5- or 6-inch pot, not an 8-inch one. A plant in a 6-inch pot moves to a 7- or 8-inch pot at most. The new pot should look almost too small next to the foliage. That is correct. Peperomia fills its pot slowly, and the extra soil volume of an oversized container stays wet for weeks, creating the exact conditions that cause stem rot and leaf drop.
If the root ball is small relative to the current pot - common with recently propagated plants - you may not need to size up at all. Refresh the soil and return the plant to the same container.
Drainage Holes and Pot Material
Drainage holes are non-negotiable. No hole, no peperomia in that pot - unless it is functioning purely as a cachepot for a nursery pot that drains freely. Peperomias are sensitive to waterlogged soil, and even a perfect soil mix cannot compensate for a sealed bottom.
Pot material affects how quickly soil dries:
- Terracotta breathes through its walls, pulling moisture out of the soil faster. It is the safest choice if you tend to overwater, and it pairs well with peperomia’s preference for soil that dries between waterings.
- Plastic or glazed ceramic holds moisture longer. These work well in dry homes or for growers who water conservatively, but they demand more attention to drainage and pot size because the soil stays wet longer after each watering.
- Self-watering pots are generally a poor fit for peperomia. The constant moisture supply at the bottom conflicts with the plant’s need for cycles of drying between waterings.
Whatever material you choose, scrub reused pots with hot soapy water before planting. Peperomia roots are fragile after repotting and cannot fight off pathogens lurking in old container residue.
The Best Soil Mix for Repotting Peperomia
Fast-Draining Mix That Matches Shallow Roots
Peperomia roots need a mix that drains quickly, holds some moisture in the upper layers, and never compacts into a dense, airless block. The Royal Horticultural Society recommends a loose, free-draining, slightly acidic compost - ideally two parts peat-free ericaceous compost, one part perlite, and one part medium orchid bark. Clemson HGIC advises a well-drained houseplant or cactus potting mix for peperomia. For most indoor growers, a simpler recipe works just as well: 50% standard indoor potting compost and 50% perlite, targeting a pH of 6.0 to 7.0.
The perlite is not optional. It creates permanent air pockets that keep the mix open even after months of watering. Peperomias rot easily in dense, moisture-retentive soil - a trait shared across the genus, from thick-leaved obtusifolia to the thinner-leaved caperata varieties. Many growers also add a handful of orchid bark or coco coir for extra structure and to mimic the loose, fibrous substrates these plants encounter in nature.
When you mix or buy soil, run a quick drainage test. Wet a handful, squeeze it, and observe. Water should not stream out instantly (that means too much perlite), but the mix should not clump into a wet ball either. It should feel light, slightly springy, and crumble apart when you open your hand. If water pools on the surface of a test pot for more than a few seconds, add more perlite.
Good store-bought starting points include any peat- or coco-coir-based indoor potting mix amended with extra perlite at a one-to-one ratio. Avoid mixes with water-retaining crystals or heavy garden soil. Succulent mixes can work for thick-leaved species like obtusifolia but may dry too quickly for caperata or prostrata in warm, bright conditions - blend succulent mix with standard potting compost if you go that route.
Step-by-Step: How to Repot Peperomia Gently
Repotting peperomia is straightforward if you respect one rule above all others: handle the roots gently. These are fine, fragile structures, not the tough, woody roots of a fiddle-leaf fig. Bare-rooting, aggressive teasing, and heavy pruning set peperomia back weeks or months. The goal is to refresh the soil and give the roots slightly more room, not to rebuild the root system from scratch.
Water the plant the day before repotting. A hydrated root ball holds together when you slide it out of the pot, and a well-watered plant tolerates transplant stress better than a dry one. Gather your materials: the new shallow pot, fresh soil mix, clean scissors, a chopstick or pencil, and a watering can.
Remove the plant carefully. Turn the pot on its side, support the base of the plant with one hand, and gently squeeze or tap the pot to loosen the root ball. If the plant is stuck, run a butter knife around the inside edge of the pot. Slide the plant out without pulling the stems. Peperomia stems snap easily under tension.
Inspect the roots. Healthy peperomia roots are white, cream, or pale tan and feel firm. Brown, black, or mushy roots indicate rot and should be trimmed with sterile scissors. Dense circling roots at the bottom and sides are normal in a root-bound plant.
Handle the Root Ball With Minimal Disturbance
This is where most repotting guides give advice that does not suit peperomia. Do not strip the root ball bare. Do not wash all the old soil off under a tap. The fine root hairs clinging to the existing soil are the plant’s water-and-nutrient uptake system, and destroying them is the fastest way to trigger severe transplant shock.
Instead, use your fingers to gently loosen only the bottom and outer edges of the root ball. Break up the densest circling roots at the base, but leave the center of the root mass intact with most of its original soil attached. If roots are tightly wrapped around the outside, you can make two or three shallow vertical scores with a clean knife through the outer root layer to encourage outward growth - but cut lightly, not deeply.
Trim only roots that are clearly dead, brown, or mushy. On a healthy plant that simply needs a soil refresh and one size up, you may not need to remove any roots at all. Peperomia tolerates minimal root disturbance far better than aggressive pruning.
Add a thin layer of fresh mix to the bottom of the new pot - just enough to sit the root ball at the same depth it was growing before. Place the plant in the center and backfill around the sides with fresh mix. Use a chopstick to settle soil into gaps without compacting it. The crown of the plant (where stems meet soil) should sit at the same level as before; burying peperomia stems leads to rot.
Backfill, Water, and First-Week Placement
Water thoroughly immediately after potting. Let water run through the drainage hole, then let the pot drain completely before returning it to its saucer or cachepot. This first watering settles the soil around the roots and eliminates air pockets. If the soil level drops noticeably, top up with a little more mix.
Move the plant to bright, indirect light - the same conditions it had before, or slightly gentler for the first week. Avoid direct sun hitting the leaves during recovery; repotted roots cannot yet supply the water demand that strong light creates. Keep the temperature stable, between 18 and 24°C (65 and 75°F), and avoid drafts from heaters, air conditioners, or cold windows.
Hold off on fertilizer for at least four to six weeks. Fresh potting mix contains enough nutrients to sustain the plant during root establishment, and fertilizer salts on stressed, freshly disturbed roots cause burn. When you do resume feeding, start at half strength.
Post-Repot Recovery: What to Expect in the First Month
Mild transplant shock is normal. A peperomia may look slightly droopy for two to five days after repotting, and new growth may pause briefly. That is the plant redirecting energy to root repair, not a sign that you did something wrong - as long as the leaves remain firm and green rather than turning yellow or soft.
Within one to two weeks, the plant should look stable. By four to six weeks, new leaves or stem tips signal that the roots have anchored in the fresh mix. If the plant continues to wilt, yellow, or drop leaves beyond the three-week mark, investigate: the pot may be too large, the soil may be staying too wet, or the roots may have been damaged more than intended.
Adjust watering during recovery. Fresh mix often holds moisture differently from old, broken-down soil - usually more evenly and predictably. Check the top inch with your finger before watering rather than following your old schedule blindly. The pot will feel lighter when it is time to water. Overwatering a freshly repotted peperomia in an oversized pot is the most common reason recovery fails.
Peperomias are sensitive to fluoride in tap water, which can cause brown leaf tips. If you notice tip burn after repotting, switch to filtered or room-temperature rainwater for a few weeks while the plant settles. This is not transplant shock - it is a water quality issue that repotting sometimes brings to the surface when new roots encounter fresh minerals.
Common Peperomia Repotting Mistakes and How to Avoid Them
Using a pot that is too large or too deep is the most damaging mistake. An oversized container holds water the small root system cannot use, and a deep container creates a wet bottom layer the roots never reach. Both lead to root rot. Stick to the one-size-up rule and choose shallow pots whenever possible.
Repotting too frequently stresses a plant that was doing fine. If your peperomia is healthy, growing, and draining normally, leave it alone - even if the calendar says it has been two years. Top-dress in spring if you want to refresh the soil without the disruption of a full repot.
Bare-rooting or over-teasing the root ball destroys the fine root hairs that absorb water and nutrients. Keep most of the original soil attached. Only loosen the outer bottom and sides. Never rinse all the soil away under running water unless you are treating active root rot and need to inspect every root.
Repotting in winter forces root repair during the plant’s slowest growth phase. Recovery takes months instead of weeks, and the combination of cold soil, reduced light, and disturbed roots invites rot. Wait for spring unless the plant is in active decline.
Fertilizing too soon after repotting burns recovering roots. Fresh mix already contains nutrients. Wait four to six weeks minimum before resuming your normal feeding schedule.
Using heavy, moisture-retentive soil without enough perlite or bark sets up the same waterlogging problem as an oversized pot, regardless of container size. If your peperomia wilts in wet soil or develops soft stems after repotting, the mix - not the plant - is the likely culprit. Repot again into a faster-draining blend if necessary, even if it has only been a few weeks.
Conclusion
Peperomia repotting is a low-frequency, high-precision task. Most plants need a new pot every two to three years, not every spring. When the time comes, choose a shallow container just one size larger, fill it with a fast-draining mix heavy on perlite, and handle the root ball with as little disturbance as possible. Repot in spring, water thoroughly once, keep the plant in bright indirect light, and wait at least a month before fertilizing. Slightly root-bound peperomias are healthy peperomias - the goal is not to maximize pot size but to refresh the soil and give the roots a modest upgrade when the plant asks for it. Get those decisions right, and your peperomia will settle in within weeks and reward you with compact, vibrant foliage for years before it needs your attention again.
When to use this page vs other Peperomia guides
- Peperomia overview - Start here for whole-plant context before deep-diving this topic.
- Peperomia problems hub - Jump to symptom-specific fix guides when this care topic does not resolve the issue.
- Root Rot on Peperomia - Escalate here when repotting adjustments are not enough.