Peperomia Propagation: Stem, Leaf & Division
Peperomia Propagation: Stem, Leaf & Division
Peperomia Propagation: Stem, Leaf & Division
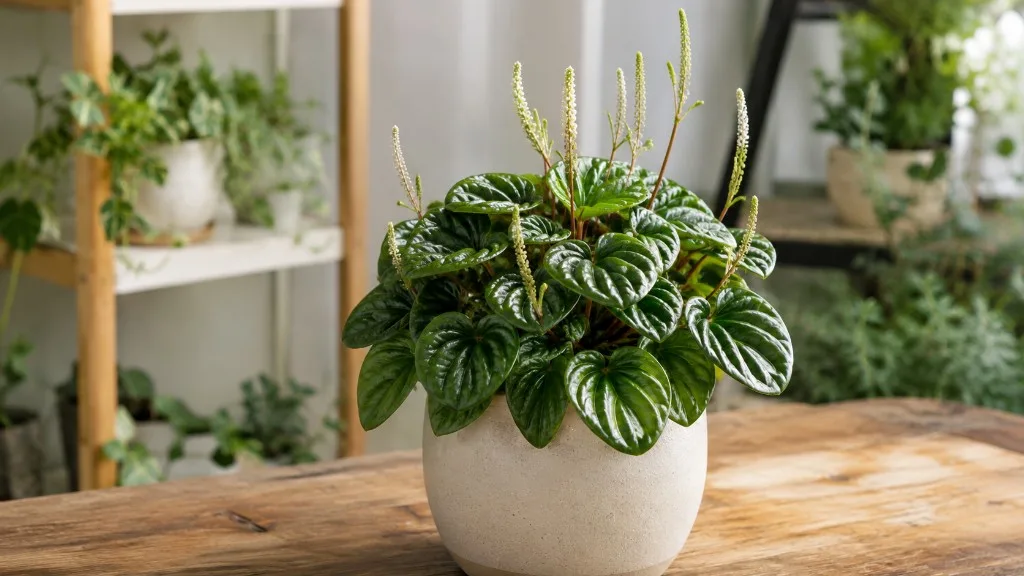
Peperomia propagation is one of the most approachable projects in indoor plant care because the genus is built for restart. Peperomia species - from the thick-leaved baby rubber plant (Peperomia obtusifolia) to trailing string of turtles (Peperomia prostrata) and rippled Peperomia caperata - carry semi-succulent tissue that roots from stem nodes, petiole bases, and mature clumps without specialist equipment. You are not fighting the plant’s biology; you are cooperating with a Piperaceae family member that evolved shallow, efficient root systems for life on forest floors and tree bark in tropical and subtropical regions.
The core methods are straightforward: stem cuttings with at least one node, leaf cuttings with the petiole attached, division of a crowded clump, or simply rooting the healthy trimmings left over from a shaping session. What separates a rooted new plant from a mushy failure is almost always material quality and moisture discipline, not propagation skill. This guide walks through every decision - which method fits your plant, when to cut, how to set up water or soil rooting, how to read progress, and what to do when the only material you have is a pile of pruning debris.
If symptoms persist, see the Ants on Plant on Peperomia guide.
Why Peperomia Is One of the Easiest Houseplants to Propagate
Peperomia earns its beginner-friendly reputation honestly. Unlike finicky plants that demand laboratory humidity or precise hormone concentrations, most peperomias root from small pieces of living tissue kept in Peperomia light guide with a lightly moist, airy medium. Their leaves store water, so cuttings tolerate the brief drying period before roots form better than thin-leaved tropicals like ferns or calatheas. Their roots stay compact and shallow, which means a 8–10 cm (3–4 inch) nursery pot and a fast-draining mix are enough for the entire propagation cycle.
The genus also rewards opportunistic propagation. Leggy stems pinched back for shape, leaves knocked off during Peperomia repotting guide, and side shoots trimmed to open a crowded crown can all become new plants if the tissue is firm and green. Clemson HGIC and University of Missouri Extension both note that peperomia roots readily from stem and leaf cuttings under normal indoor conditions - warm room, clean tools, and patience cover most scenarios. If you have rooted pothos or tradescantia in water, peperomia stem cuttings will feel familiar, with one extra nuance: semi-succulent tissue rots faster than it desiccates when the medium stays wet too long.
How Peperomia Rooting Works in Plain Terms
Root formation on peperomia cuttings is adventitious - new roots emerge from stem tissue rather than from a pre-existing root tip. On a stem cutting, the key zone is the node, the slightly swollen joint where a leaf attached and where dormant root initials can activate when moisture, warmth, and oxygen align. On a leaf cutting, the critical zone is the petiole, the short stalk connecting the leaf blade to the main stem. The petiole carries vascular tissue linked to the plant’s growth system; a leaf blade alone, sliced off flush with no stalk, may survive for weeks but rarely produces a full plant because it lacks the meristematic connection needed to push new shoots.
Peperomia roots are fine, fibrous, and shallow compared with many houseplants. They explore the top few centimetres of mix and prefer air pockets between particles. That physiology explains two practical rules: use a small pot so the mix dries on a reasonable schedule, and use a chunky, well-draining blend rather than heavy peat that compacts and suffocates new roots. Rooting in water works because the node or petiole base gets constant moisture and high oxygen at the air–water interface; rooting in soil works because you control moisture more precisely once you understand the plant’s semi-succulent tolerance for brief dryness.
Choosing the Right Propagation Method for Your Peperomia
No single propagation method wins for every peperomia in every situation. The best choice depends on your plant’s growth habit, whether you need to preserve variegation, how mature the parent is, and what material you already have on hand. A trailing Peperomia prostrata stem laid across moist mix behaves differently from a bushy Peperomia caperata crown you plan to divide at repotting time. Matching method to plant saves weeks of waiting and reduces the rot risk that comes from forcing the wrong tissue into the wrong setup.
Match the Method to Growth Habit and Variety
Upright and bushy peperomias - Peperomia obtusifolia, Peperomia clusiifolia, Peperomia caperata - respond best to stem cuttings and division once the plant has multiple stems emerging from the soil line. Stem cuttings give you genetic copies with the same leaf shape and color pattern; division gives you instant small plants with roots already attached, which is the fastest route to a presentable pot.
Trailing and vining peperomias - Peperomia prostrata, Peperomia rotundifolia, Peperomia quadrangularis - are ideal for stem cuttings taken along the length of a strand. You can root several short segments from one long trim and fill a shallow bowl planter in a single session. Division is less common on purely trailing specimens unless the mat has thickened into multiple anchored crowns.
Thick-leaved non-variegated types - many Peperomia obtusifolia green forms and some Peperomia argyreia selections - also accept leaf cuttings with petiole attached. This method is slower than stems but useful when you have a perfect leaf and no spare stem, or when you want to experiment without altering the parent plant’s silhouette.
Variegated peperomias - including variegated baby rubber plant, Peperomia obtusifolia ‘Variegata’, and multicolor Peperomia clusiifolia cultivars - should be propagated by stem cuttings only. Leaf cuttings from variegated plants frequently produce all-green offspring because the regeneration pathway does not reliably carry the variegation pattern. Choose stem sections that already display the color distribution you want the offspring to inherit.
Leaf Cuttings Versus Stem Cuttings Versus Division
Stem cuttings with nodes are the default for most readers. They root in two to four weeks under warm, bright conditions, produce a normal plant architecture quickly, and preserve variegation when you select appropriately marked stems. The trade-off is that removing stems changes the parent plant’s shape, so plan cuts where you want bushier regrowth.
Leaf cuttings with petiole are the slow-but-steady option for solid-green, thick-leaved types. A single leaf with its stalk buried in mix can produce a tiny plantlet at the petiole base, but expect four to eight weeks before you see meaningful new growth - sometimes longer in cool or dim rooms. The trade-off is minimal impact on the parent: you remove one leaf, not a branch.
Division is the most reliable method when you have a mature, multi-stem plant ready for repotting. Each section already has roots and leaves, so there is no rooting lottery. The trade-off is that you need a plant large enough to split without leaving both halves too sparse, and root disturbance can cause temporary wilting even when done carefully.
When to Propagate Peperomia for the Fastest Results
Timing is not about lunar calendars; it is about metabolic activity. Peperomia roots fastest when the parent is pushing visible new leaves, the room stays warm, and daylight hours support photosynthesis. Propagation during a stress period - immediately after shipping, mid-root-rot recovery, or while mealybugs are active - stacks the odds against you even though the technique is sound.
That said, peperomia is more forgiving on timing than strict seasonal dormancy plants. Indoor growers with stable warmth and supplemental light can root cuttings in winter, just expect a longer wait and a higher rot risk if humidity is high and airflow is poor. Match your moisture to the slower winter pace when you cannot wait for spring.
Best Season and Active Growth Signals
Spring through early summer is the best window for peperomia propagation in most homes. Rising temperatures in the 18–26°C (65–78°F) comfort range speed cell division at the wound site, and increasing light fuels the cutting without the harsh direct sun that can stress a rootless piece. If your parent plant shows fresh pale green tips, shorter internodes on new stems, or a clear growth flush in March or April, that is your green light.
Late autumn and winter bring slower rooting - not impossible, but patience-testing. Short days and cooler rooms mean a stem cutting may sit unchanged for five or six weeks before you feel resistance in the pot. Reduce watering frequency accordingly; a mix that dries in four days in July might take ten days in January, and wet idle mix is where peperomia rot begins. If you propagate in winter, use the smallest pot that fits the cutting, maximize bright indirect light, and skip the plastic humidity tent unless your air is genuinely dry below about 35% relative humidity.
Before you cut, confirm the parent shows firm leaves with even color, no widespread yellowing, and no sticky honeydew suggesting scale or mealybugs. A healthy donor is the silent prerequisite every propagation guide underplays. Weak, soft stems from chronic overwatering or root loss can still sit in mix, but they often collapse before anchoring because their internal water reserves are already depleted.
Stem Cuttings With Nodes - The Default Method
Stem cuttings are the highest-success, highest-speed method for peperomia propagation. Each cutting that includes at least one node and one or two healthy leaves carries enough tissue to photosynthesize, respire, and fund root production at the buried joint. You are cloning the parent genetically, so leaf shape, texture, and variegation carry over intact when you select stems that display those traits. NC State Extension lists stem cuttings, leaf cuttings, and division as recommended propagation strategies for the genus.
Gather sharp pruning shears or scissors, 70% isopropyl alcohol for sterilization, a clean work surface, and labels if you are running water and soil batches side by side. Work calmly: clean tools, correct node placement, and right-sized cuttings determine everything that follows.
Taking a Clean Cutting With at Least One Node
Select a stem with at least 5–8 cm (2–3 inches) of length, one or two nodes, and two to four healthy leaves at the tip. Longer cuttings work, but very large leaves on a rootless stem can transpire more water than the node can replace before roots form - trimming oversized leaves by one-third is acceptable when the cutting wilts in the first week.
Make your cut just below a node - the point where a leaf attached to the stem. That junction concentrates the vascular tissue capable of producing roots. Remove the lowest leaf or pair of leaves so one bare node sits below the soil or water line while one or two leaves remain at the top for photosynthesis. One clean snip; sawing crushes cells and invites bacterial infection.
Sterilize blades between cuts if you are harvesting multiple stems or if you previously trimmed diseased tissue. Never remove more than one-third of the parent plant’s visible growth in a single session; stagger harvests two weeks apart if you want both new plants and a full parent display. When propagating to share with friends, note that peperomia is listed as non-toxic to cats and dogs by the ASPCA, which eases concern when passing cuttings to pet-owning households - a practical detail gift-givers appreciate.
Rooting Stem Cuttings in Water or Soil
Water propagation is the most visible method and works well for peperomia stems. Clemson HGIC notes that Peperomia obtusifolia is easily propagated in water from 4- to 6-inch cuttings with lower leaves removed. Place the cutting in a clear glass or jar so the cut end and at least one node are submerged while all leaves stay above the water line. Set the container in bright indirect light - a north or east window with filtered sun, or a few feet back from a south window. Change the water every three to five days to limit bacterial bloom; cloudy or sour-smelling water is a rot risk, not a patience test.
Roots typically appear in two to four weeks during active growth. Wait until they reach 2–3 cm (about an inch) long before transplanting into soil. The transition to mix is the fragile moment: plant in a small pot of well-draining blend, water lightly once, and keep bright indirect light without saturating the mix daily. The water-grown roots are delicate; rough handling and heavy watering break them.
Soil propagation skips the transplant shock and is often more reliable long-term. Fill a small pot with 50% potting compost and 50% perlite or an equivalent fast-draining houseplant mix. Insert the stem so the bare node is 1–2 cm (½–¾ inch) deep, firm the mix gently, and water until a little drains from the bottom. A optional dip in rooting hormone (indole-3-butyric acid gel or powder) can speed root initiation but is not required for peperomia - skip it if you do not already own it.
Keep the mix lightly moist, not wet. Check with a finger or dry chopstick: the top should approach dryness between waterings while the node zone stays barely damp. A clear plastic bag propped over the pot like a tent raises humidity and reduces wilting, but vent it daily so condensation does not turn the enclosure into a rot chamber. New growth at the tip - a fresh leaf unfurling or a stem stiffening - is a better success signal than pulling the cutting to inspect roots every few days.
Leaf Cuttings With Petiole Attached
Leaf cuttings let you multiply solid-green, thick-leaved peperomias with minimal change to the parent plant’s shape. The method is slower than stems and unsuitable for variegated varieties you want to keep variegated, but it is satisfying to watch a single leaf push a tiny plantlet from its base. The non-negotiable requirement is the petiole - the short leaf stalk - still attached to the blade.
Why the Petiole Matters More Than the Leaf Blade
A peperomia leaf blade alone, laid flat on soil or inserted with no stalk, can root adventitiously in some species but rarely produces a normal plant with a stem and multiple leaves. The petiole connects the leaf to the plant’s vascular and meristematic systems. Buried upright in mix, the petiole base is where new shoots and roots emerge in successful leaf propagation.
Cut the leaf from the parent at the point where the petiole meets the main stem, leaving 5–10 mm (¼–½ inch) of petiole on the leaf. Missouri Botanical Garden notes that peperomia propagates by stem or leaf cuttings. Choose mature, firm leaves free of spots, pest damage, or yellowing. For very large leaves on Peperomia obtusifolia, some growers halve the blade vertically to reduce transpiration load while keeping the petiole intact - the cut surface calluses quickly and the petiole still drives regeneration.
Insert the petiole into moist mix so it stands nearly vertical with the leaf blade above the surface. Bury only the petiole, not the blade. An optional rooting hormone dip on the petiole end can help but is not mandatory. Label the pot; leaf cuttings look unchanged for weeks while work happens underground, and impatience causes more failures than biology does.
Setting Up Humidity for Leaf Cuttings
Leaf cuttings have no stem reservoir and lose water through the blade while roots are absent. Elevated humidity during the first four to six weeks reduces wilting and buys time for the petiole base to activate. The simplest setup is a clear plastic bag or humidity dome over the pot, propped on stakes so plastic does not touch the leaf, with daily ventilation to exchange stale air.
Place the setup in bright indirect light, never direct sun through the bag - greenhouse temperatures build in minutes and cook the leaf. Keep the mix barely moist: a spray on the surface when it lightens in color, not a soaking that leaves the petiole base wet for days. Peperomia leaf cuttings fail more often from overwatering than from dryness; the semi-succulent blade stores surprising water.
Expect four to eight weeks before a small plantlet appears at the petiole base. The original leaf may eventually yellow and drop; that is normal once the new plant has its own leaves. Do not discard the pot early. When the plantlet has two or three small leaves and resists a gentle tug, treat it as an established seedling - small pot, normal peperomia Peperomia watering guide, bright indirect light.
Division for Mature Clumping Plants
Division is the most reliable propagation method when you have a mature peperomia with multiple stems emerging from separate root zones in one pot. Instead of waiting for cuttings to root, you separate existing root clusters into independent plants. This pairs naturally with repotting day when you already have the plant out of its container and can inspect the root ball.
Division suits bushy species - Peperomia caperata, Peperomia obtusifolia, multi-stem Peperomia clusiifolia - more than sparsely stemmed specimens where splitting would leave each section too bare. If the plant is one main stem with no side shoots, use stem cuttings instead.
Dividing the Root Ball Without Unnecessary Damage
Water the parent one day before dividing so the root ball holds together but is not soggy. Slide the plant out and brush away loose mix to expose natural separation lines between crowns. Gently tease apart root clusters with your fingers, using clean scissors only when a rhizome or stem bridge will not separate by hand. Each division needs roots plus at least one stem with several leaves; a rootless stem division is just a cutting and should be treated as such.
Pot each section into its own small container with fresh well-draining mix. Plant at the same depth the crown sat before - burying peperomia stems too deep invites stem rot. Water lightly to settle the mix, then place in bright indirect light without direct sun for the first week. Some limp leaves are normal while roots re-establish; firm new growth within two to three weeks confirms success.
Do not fertilize for four to six weeks after division. The disturbed roots need time to heal before salts in fertilizer stress them. If a division wilts severely and does not recover after ten days, check that the mix is barely moist rather than wet and that the pot is not oversized - a division in a pot too large for its root mass sits in stale moisture and stalls.
Propagating From Trimmings and Pruning Debris
One reason peperomia propagation feels easy is that trimmings from routine maintenance often root without a dedicated propagation session. When you pinch a leggy Peperomia obtusifolia to encourage bushiness, shorten a trailing Peperomia prostrata strand, or remove a damaged leaf stem, the removed material is frequently viable if it is firm and green.
Treat each trimming by the same rules as a deliberate cutting. Stem pieces need at least one node; a bare internode with no node and no leaves will not root. Leaf pieces need the petiole attached. If you trimmed just below a node and the cutting has two leaves, it is ready for water or soil immediately. If the break is ragged, trim to a clean cut below the nearest node with sterilized scissors and proceed.
Trimmings left on a dry counter for days desiccate and lose viability faster than intentional cuttings handled promptly. Process pruning debris the same day when possible. Lay out stems by length, discard mushy or yellow sections, and group water-root candidates in labeled glasses so you remember which cultivar each jar holds. Trimming season in spring can produce a windowsill of rooting jars from a single shaping session - the plant teaches propagation before you open a guide.
Aftercare for Newly Rooted Peperomia
New peperomia plants need steadier, gentler conditions than mature specimens. The root system is young, the pot is small, and the plant cannot tolerate the moisture swings a established peperomia shrugs off. Your goal for the first six to eight weeks is stability: bright indirect light, controlled watering, no fertilizer rush, and minimal root disturbance.
Water when the top 1–2 cm (½–¾ inch) of mix is dry, then water thoroughly until a little drains out. Empty the saucer. Peperomia’s semi-succulent leaves forgive a brief dry spell better than wet roots. If the cutting came from water propagation, keep the first soil weeks slightly more attentive - the fine water roots are fragile until they adapt to mix.
Hold off on fertilizer until new growth is clearly self-sustained - usually four to six weeks after visible root establishment. A quarter-strength balanced houseplant fertilizer is enough when you start; peperomia is a light feeder and excess nitrogen on a small root system burns tips. Repot into the next size container only when roots circle the pot or growth stalls - typically six to twelve months for a cutting-started plant.
Success looks like firm leaves, shorter internodes on new growth, and resistance to a gentle upward tug at the stem base. Yellowing of the oldest leaf on a cutting is often normal as the plant redirects energy to roots. Widespread yellowing, blackening at the soil line, or a stem that goes soft and hollow means rot - remove the plant, trim back to firm tissue if any remains, and restart with drier mix rather than hoping wet soil recovers.
Common Propagation Mistakes and How to Fix Them
Most peperomia propagation failures trace to a short list of causes. Diagnose the symptom, match it to the cause, and restart with cleaner material rather than nursing a rotting cutting indefinitely.
Mushy stem at the soil line or water line means too much moisture, poor airflow, or a cutting that was weak before you started. Fix: discard the rotten section, cut back to firm green stem, let the fresh cut air-dry for two to four hours, and restart in drier mix or fresh water. Reduce watering frequency and vent any humidity tent daily.
Leaf collapse on a stem cutting with no roots often means the remaining leaves transpire faster than the node can supply water. Fix: trim one leaf by half, move to slightly brighter indirect light, and ensure the humidity tent is not cooking the plant. Do not compensate with heavier watering.
Cutting sits unchanged for eight or more weeks in winter or dim light is often slow metabolism, not death. Fix: move closer to a bright window without direct sun, ensure room temperature stays above 18°C (65°F), and confirm the node is actually buried or submerged - a node above the soil line will not root. If spring arrives and nothing happens, the cutting may lack a viable node; re-cut below the next joint.
All-green offspring from a variegated parent after leaf propagation is expected biology, not bad luck. Fix: propagate variegated types from stem cuttings that show the desired color pattern on multiple leaves, not from single leaves.
Sour or cloudy water in a propagation jar breeds bacteria that colonize the stem wound. Fix: change water immediately, rinse the stem, and switch to fresh water in a cleaned jar. If the stem end turns brown and soft, cut back to firm tissue or discard.
Pest transfer from parent to cutting happens when you propagate from a plant with hidden mealybugs or spider mites in leaf axils. Fix: inspect the parent under good light before cutting, wipe stems with diluted isopropyl alcohol if pests are present, and quarantine new cuttings for two weeks after rooting.
Conclusion
Peperomia propagation rewards a simple, consistent approach: start with firm, healthy tissue, match the method to your plant’s habit, and keep moisture lightly controlled until roots and new growth confirm success. Stem cuttings with nodes are the default for speed, variegation preservation, and trailing types. Leaf cuttings with petiole attached work for solid-green thick-leaved varieties when you have patience. Division delivers instant plants when a mature clump is ready for repotting. Even trimmings from a shaping session can become new pots if you handle them the same day with clean cuts and bright indirect light.
Rooting timelines stretch in cool, dim months and compress in spring warmth - plan your effort when the parent is actively growing and your expectations match the season. Watch for firm new leaves and gentle tug resistance rather than digging up cuttings every week. When something rots, restart with drier mix and better material instead of waiting for a lost cause to recover. Follow that rhythm and peperomia becomes one of the easiest genera to multiply - for your own shelves, for gifts, and for turning a single leggy plant into a small collection without another trip to the nursery.
When to use this page vs other Peperomia guides
- Peperomia overview - Start here for whole-plant context before deep-diving this topic.
- Peperomia problems hub - Jump to symptom-specific fix guides when this care topic does not resolve the issue.