How to Prune Anubias: When, Where & What to Cut
How to Prune Anubias: When, Where & What to Cut
How to Prune Anubias: When, Where & What to Cut
Start every Anubias grooming session with one inspection pass: during a water change, look at each leaf and the exposed rhizome, then snip off only leaves that are more than half yellow, melting, physically torn, or coated in stubborn algae - cutting flush where the petiole meets the rhizome, never into the rhizome itself. That single habit covers most tanks for months. Rhizome division and rot surgery are separate, occasional jobs.
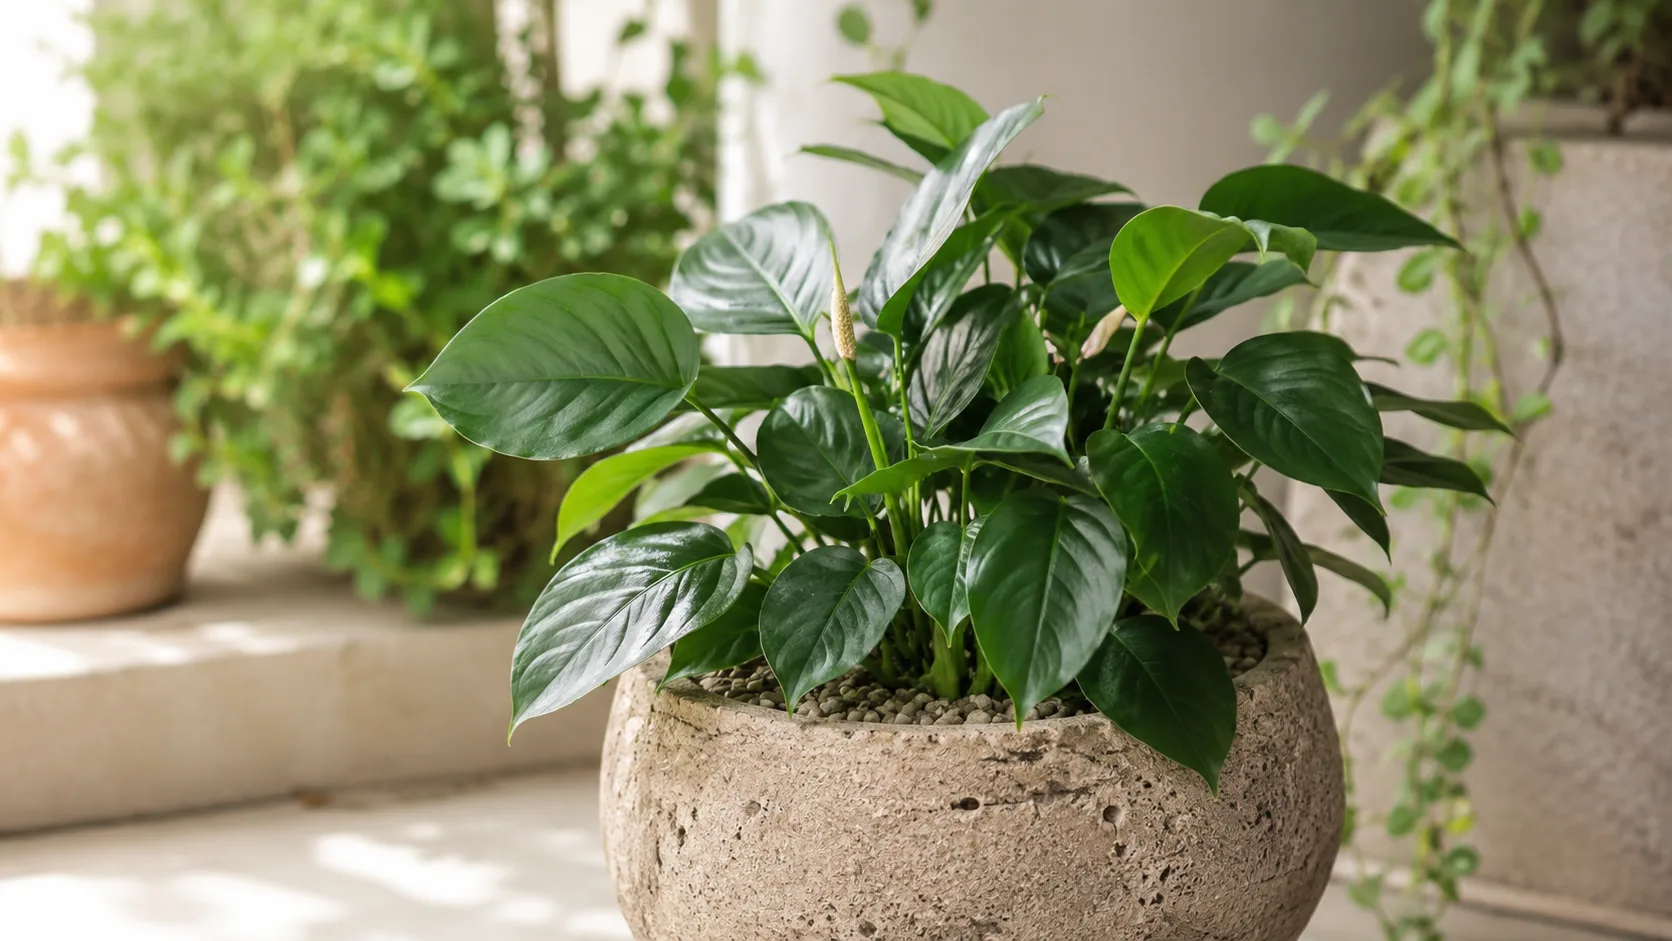
Anubias (Anubias barteri and related species) is a slow-growing rhizomatous epiphyte in the Araceae family. It anchors to rock or driftwood with holdfast roots while the thick horizontal rhizome stays in the water column. Unlike stem plants such as Rotala or Ludwigia, Anubias does not bush out from leaf nodes. New foliage emerges from the rhizome tip and from lateral shoots along the stem. Tropica’s Anubias barteri nana profile lists a slow growth rate and notes that leaves persist for years - which is why pruning here is selective cleanup, not scheduled shaping.
Whether you keep compact Anubias barteri var. nana on wood in a betta tank or a tall Anubias congensis in a West African layout, the cutting rules are identical: protect the rhizome, remove spent leaves at their base, and divide only when the plant can spare the tissue.
What Anubias Pruning Actually Means (and What It Does Not)
Anubias pruning falls into three distinct jobs. Leaf removal takes off individual foliage that is aged, damaged, melting, or algae-bound while leaving the rhizome intact. Rhizome division splits one attached plant into two or more sections for propagation or size control. Rot surgery excises soft, infected rhizome tissue - a rescue cut, not routine grooming.
What it does not mean: shearing the plant into a tight mound, pinching tips to force branching, or following a “remove one-third of foliage” houseplant rule. Cut a petiole stub and no replacement leaf sprouts from that stub. Aquasabi’s rhizome-plant trimming guide explains that new leaves and roots develop at the rhizome tip and that side shoots branch from the rhizome itself - not from random points on a leaf stem.
A healthy attached plant may need no trimming beyond the occasional dead leaf for half a year. Pruning earns its place when algae-choked leaves block light, melting tissue decays in the water, the rhizome has outgrown its hardscape slot, or you need a clean division for a second planting.
Know the Anatomy Before You Cut
Identify three structures before you pick up scissors. The rhizome is the firm, creeping stem - greenish to brown when healthy - from which all growth arises. Holdfast roots dangle beneath it and grip surfaces; trim damaged roots if needed, but they are not where new leaves form. Each leaf connects to the rhizome through a short petiole (leaf stalk).
Rhizome, Petioles, and Holdfast Roots
The rhizome is the control center. Aquasabi compares it to a creeping stem: meristem tissue at the tip and along the sides drives new shoots, and the rhizome can regenerate even when leaves are sparse if the tissue stays firm and exposed to flow.
In nature, Anubias grows as a rheophyte on rocks and wood in shaded, flowing streams across West and Central Africa. Aquarium care mirrors that geometry - attach to hardscape, keep the rhizome above substrate, and let water move across it. Tropica warns that burying the rhizome causes rot, a point echoed across rhizome-plant references. Any pruning plan that buries, crushes, or smothers the stem works against the plant’s biology.
Where New Leaves Actually Emerge
New Anubias leaves do not sprout from old petiole stubs or from cuts halfway up a leaf blade. Growth comes from the rhizome tip and from lateral buds along the rhizome surface. That is why a clean petiole-base cut is cosmetic and safe, while a mid-blade cut leaves a dying stub that adds nothing to the plant’s future shape.
What to Check Before You Cut
Run a quick diagnostic before scissors touch tissue. Feel the rhizome with clean fingers - firm and dense is healthy; soft, jelly-like, or foul-smelling tissue is rot and needs a different protocol. Count how many fully green leaves remain; Anubias photosynthesizes slowly, so stripping too much green tissue at once stresses a plant that cannot replace leaves quickly.
Check attachment: is the rhizome fully exposed above substrate, or has gravel drifted over it during the last rescape? Is cotton thread or fishing line crushing the stem? Fix attachment problems before or alongside trimming - otherwise fresh cuts sit in stagnant, smothered tissue and fail to heal.
Note whether the plant is mid-melt from emersed nursery stock converting to submerged growth. During melt, the rhizome may stay firm while older leaves die - that is not the same as rot, and aggressive stripping makes recovery harder.
When to Remove Anubias Leaves
Leaf trimming is as-needed, not seasonal. Aquarium Anubias under stable lighting has no distinct outdoor “late spring” growth window. Remove problem leaves when you see them. Cosmetic cuts - shortening a leaf that overhangs a foreground carpet - can wait until the plant is settled, not actively melting, and not recovering from a sharp parameter swing.
Good moments for a slightly larger cleanup: after algae pressure has been corrected (shorter photoperiod, adjusted intensity), during a scheduled aquascape maintenance day, or once a newly attached plant has been stable for several weeks. Avoid stripping many leaves right after a large water change that shifted pH or temperature, or while emersed-grown stock is converting to submerged growth.
Leaves That Should Come Off
Remove foliage that is clearly costing more than it contributes. Yellow or brown tissue spreading from tips or margins usually will not green up again - age, nutrient stress, or melt. Algae-encrusted leaves, especially with green spot or black beard algae baked onto the surface, rarely recover; snip them and fix lighting rather than scrub forever. Physical damage from fish, snails, or shipping warrants removal when more than half the blade is torn. Melting leaves after planting should go as they turn translucent or mushy so decay does not foul the water.
Keep mostly green leaves with minor blemishes. Because Anubias adds new foliage slowly, each healthy leaf still feeds the rhizome while the next bud develops.
When to Delay Trimming
Hold off on aggressive grooming when the plant is mid-melt from emersed-to-submersed transition - common on nursery-grown stock. Aquarium Co-Op’s Anubias rot guide notes that melting differs from rot: emersed leaves may die back while the rhizome stays firm and eventually pushes submerged leaves. During this phase, remove only fully dead tissue, not half-green leaves you hope will recover. Also delay heavy cuts immediately after Anubias repotting guide attachment or division; let the rhizome stabilize first.
When Rhizome Division Makes Sense
Rhizome cutting is optional and infrequent. Divide when you want to propagate, shorten an elongated stem to fit hardscape, or excise a damaged zone between healthy clusters. Do not divide a healthy rhizome on a calendar schedule.
Wait until the plant is substantial. Practical guides recommend dividing when the rhizome is roughly 4–5 inches (10–13 cm) with five or more healthy leaves. Anubias grows slowly; meaningful division opportunities typically arrive every six to twelve months on a thriving specimen, not every few weeks.
Propagation Cuts vs Rescue Cuts
Propagation cuts split one rhizome into independent plants. Each section needs firm rhizome tissue, several leaves, and preferably some roots. Reattach to hardscape and treat as a new plant.
Rescue cuts remove failing tissue - bare tip sections with no buds, or a narrow bridge between two healthy clusters that is turning soft. The same sterility rules apply, but the goal is survival, not multiplication.
If you only need a smaller footprint, try repositioning the rhizome on the same wood - fold it back and re-tie - before reaching for a blade.
Tools and Tank Setup
You need little equipment, scaled for wet work. Aquascaping scissors or sharp snips handle petiole cuts. A razor blade or craft knife gives cleaner single passes on thick rhizomes. Rubbing alcohol (70% isopropyl) sterilizes metal between plants. Super glue gel (cyanoacrylate), cotton thread, or fishing line reattaches divisions. A soft brush removes loose algae from remaining leaves after trimming.
Avoid large garden pruners and dull household scissors that crush tissue. Keep a net or siphon ready to remove floating debris so it does not decay in the tank.
For leaf removal, most aquarists work in situ. For division or rot surgery, lift the plant to a clean tray for visibility. Wipe blades with alcohol, let them air-dry briefly, and sterilize again when moving between tanks.
Step-by-Step: Removing Leaves Safely
This is the cut you will make most often. Target the junction where the petiole meets the rhizome - not midway up the stalk, and not into the rhizome.
Trace the petiole down to its attachment point. Slide scissors parallel to the rhizome and snip flush at the base. One clean cut beats several nibbles. Remove the leaf from the water promptly. Inspect the attachment point: it should look intact, not gouged. A shallow nick on firm rhizome usually heals; a deep gash on already-soft tissue needs rot-protocol attention.
Do not pull leaves by hand. Tugging tears meristem tissue and can peel surface layers off the rhizome, leaving ragged wounds that heal slowly underwater. Aquasabi stresses keeping the rootstock undamaged - pulling violates that rule even when a yellow leaf seems loose.
After removal, brush remaining leaves gently if algae flakes off easily, but avoid aggressive scrubbing that tears the waxy cuticle. The plant may look sparse immediately after a thorough algae cleanup; new leaves emerge from the rhizome tip over the following weeks, not from old petiole stubs.
Step-by-Step: Dividing the Rhizome
Division is straightforward when you respect minimum sizes and sterility. Remove the plant, pat the rhizome dry enough to see clearly, and identify natural break points where leaf clusters and roots already separate.
Hold the rhizome without squeezing. Make one decisive cut perpendicular to the stem with a sharp blade - sawing crushes cells along the wound. Each section should include continuous firm rhizome, at least three to four healthy leaves, and some roots when possible. Rootless pieces with firm rhizome and several leaves can still establish; roots often follow within weeks in stable water.
Reattach each division to rock or driftwood with super glue gel on contact points or loose cotton thread. Keep the entire rhizome exposed to the water column. Return to the tank with gentle flow across cut faces. Do not bury even the roots deeply until attachment is secure.
Minimum Size for a Viable Piece
Undersized divisions are the main reason propagation fails. Use this quick check before cutting:
| Piece | Minimum | Risk if smaller |
|---|---|---|
| Leaves | 3–4 healthy leaves | Too little photosynthesis while roots regrow |
| Rhizome | ~1 inch (2.5 cm) of firm tissue | Insufficient stored energy and meristem |
| Roots | Preferred but not always required | Slower establishment, higher melt risk |
| Health | Firm rhizome, no mushy zones | Rot spreads from stressed tissue |
When uncertain, make fewer, larger divisions. Halving one rhizome is safer than quartering it unless the parent is exceptionally large.
How Much You Can Safely Remove
There is no one-third rule for Anubias. Remove only leaves that are clearly failing - yellow, melting, algae-saturated, or torn beyond usefulness. Taking off several problem leaves in one session is fine if the rhizome stays firm and enough green foliage remains to photosynthesize.
Avoid stripping the plant to a bare rhizome unless you are performing rot surgery and have no choice. Rhizome division should produce sections with at least three to four healthy leaves each, not paper-thin fragments. If you are unsure whether a leaf is dead enough to cut, wait one water change - Anubias punishes hasty repeated trimming more than it punishes patience.
Pruning will not make Anubias bushier the way pinching makes a pothos fuller. It keeps the plant clean, sized, and rot-free. Expect sparse appearance after heavy algae cleanup until the rhizome tip pushes new leaves.
Pruning for Algae and Layout Control
Algae on Anubias is usually a lighting and flow issue wearing a plant disguise. Removing infested leaves helps cosmetically, but without shortening photoperiod, reducing intensity, or adding grazers, the next persistent leaf will algae up just as fast. After trimming, address the cause: six- to seven-hour photoperiods in high-light tanks, floating-plant shade, stable CO₂ if injected, and helpers such as Amano shrimp or Nerite snails on remaining foliage.
For size control, remove the oldest outer leaves on a crowded rhizome before repeatedly hacking the stem. Anubias barteri var. nana stays small by nature; if it dominates a nano layout, division plus relocation beats endless leaf stripping. Tall varieties such as Anubias congensis may need lower-leaf removal as the rhizome climbs vertically - same petiole-base rule.
You cannot train Anubias into a dense hedge like stem plants. Think curation: expose rhizome curves on wood, clear leaves that hide stone texture, and divide to fill multiple crevices.
Rhizome Rot Rescue - Emergency Trimming
Rhizome rot is not mysterious - it is tissue failure, often triggered by burial or smothering. Aquarium Co-Op describes classic signs: a rhizome that should feel firm instead feels mushy, may show jelly-like, white, yellow, brown, or black zones, sometimes smells foul, and roots near the infection soften.
Rot rescue is aggressive excision. Remove the plant. With a sterile blade, cut away all soft, discolored, or translucent rhizome until only firm tissue remains - when in doubt, cut further back. Trim affected roots to healthy holdfasts. If every leaf attaches to rotten tissue, you may remove all foliage yet still save a clean rhizome segment; meristem tissue can push new leaves if the core survives.
Reattach the remnant with the rhizome fully exposed to good flow. Do not pack substrate over the wound. Hold off on heavy fertilization until new growth appears. Discard the plant if no firm rhizome zone remains.
Recovery and Aftercare
Anubias recovers slowly - plan in weeks, not days. After leaf removal, expect the plant to look unchanged for a while, then a new leaf from the rhizome tip. After division, two to four weeks before obvious new growth is normal on a healthy piece in stable water.
Signs pruning worked: the rhizome stays firm, new leaves emerge from the tip or lateral shoots, algae on remaining foliage stabilizes once lighting is corrected, and no soft zones spread from cut faces.
Signs something went wrong: the rhizome softens near a fresh cut, leaves melt faster than new ones appear, or repeated tampering prevents healing. Stop cutting, verify the rhizome is not buried or thread-bound too tight, and increase gentle flow past the stem.
Maintenance rhythm: glance at leaves and rhizome during each water change. Snip problem foliage, confirm the rhizome is still exposed, and siphon detritus off the stem surface. That five-second habit prevents most rot surgeries.
Mistakes That Turn Trims Into Rot
Cutting into the rhizome during leaf trims - snipping too deep at the petiole base gouges the stem. Stay parallel and shallow.
Over-dividing - turning one strong plant into four weak fragments that melt together.
Tying thread too tight during reattachment - crushing the rhizome exactly where rot starts.
Expecting fast recovery - repeated re-trimming every few days prevents healing on a slow grower.
Ignoring flow after cuts - stagnant pockets around fresh wounds, especially in crowded hardscape.
Pruning during active melt - stripping half-green emersed leaves adds stress; remove only dead tissue.
Applying terrestrial rules - node-based stem cuts, seasonal calendars, and one-third foliage removal do not map to Anubias anatomy.
Pulling leaves instead of cutting - even when a yellow leaf hangs by a thread, resistance means scissors are mandatory.
Burying the rhizome after division or rot surgery to “hold it in place” - the fastest way to kill the section you just saved. Attach to hardscape; roots may reach substrate, but the horizontal stem must stay in the water column (Tropica; Aquasabi planting guidance).
Conclusion
Anubias pruning is precise, anatomy-aware maintenance - not frequent reshaping. Inspect during water changes, snip yellow, melting, damaged, or algae-saturated leaves at the petiole base, and leave the rhizome intact for routine grooming. Divide only when the plant is large enough to support multiple sections, reattach with the stem fully exposed to flow, and treat rot surgery as emergency removal of all soft tissue plus a fix to whatever buried or smothered the plant.
Protect the rhizome above all else. It stores the energy and meristem that outlast bad months and bad advice. Leaves come and go slowly on a plant built to cling to wood in moving water - cut cleanly, sterilize your tools, and let slow growth be the recovery timeline.
When to use this page vs other Anubias guides
- Anubias overview - Start here for whole-plant context before deep-diving this topic.
- Anubias problems hub - Jump to symptom-specific fix guides when this care topic does not resolve the issue.
- Leggy Growth on Anubias - Escalate here when pruning adjustments are not enough.
- Slow Growth on Anubias - Escalate here when pruning adjustments are not enough.
- Brown Tips on Anubias - Escalate here when pruning adjustments are not enough.