Anubias Propagation: Rhizome Division Guide
Anubias Propagation: Rhizome Division Guide
Anubias Propagation: Rhizome Division Guide
What Anubias Propagation Actually Means
Anubias propagation in the aquarium hobby means creating new plants by dividing the parent plant’s rhizome-the thick, horizontal stem from which leaves sprout upward and anchor roots grow downward. Unlike stem plants you trim and replant, or rosette plants you split at the crown, Anubias multiplies almost exclusively through rhizome division followed by hardscape attachment. You cut the rhizome, give each piece enough leaves and roots to survive on its own, then secure it to driftwood, rock, or another stable surface where water can flow around the cut ends.
That single method reflects how Anubias lives in the wild. Species in the genus Anubias, a member of the arum family Araceae, grow as rheophytes and semi-aquatic epiphytes along shaded streams in West and Central Africa, clinging to stones and submerged wood with exposed rhizomes in current. The plant did not evolve to be buried in gravel or to regenerate from a detached leaf floating in the water column. Propagation works when you imitate that ecology: firm rhizome, open water flow, hard surface to grip.
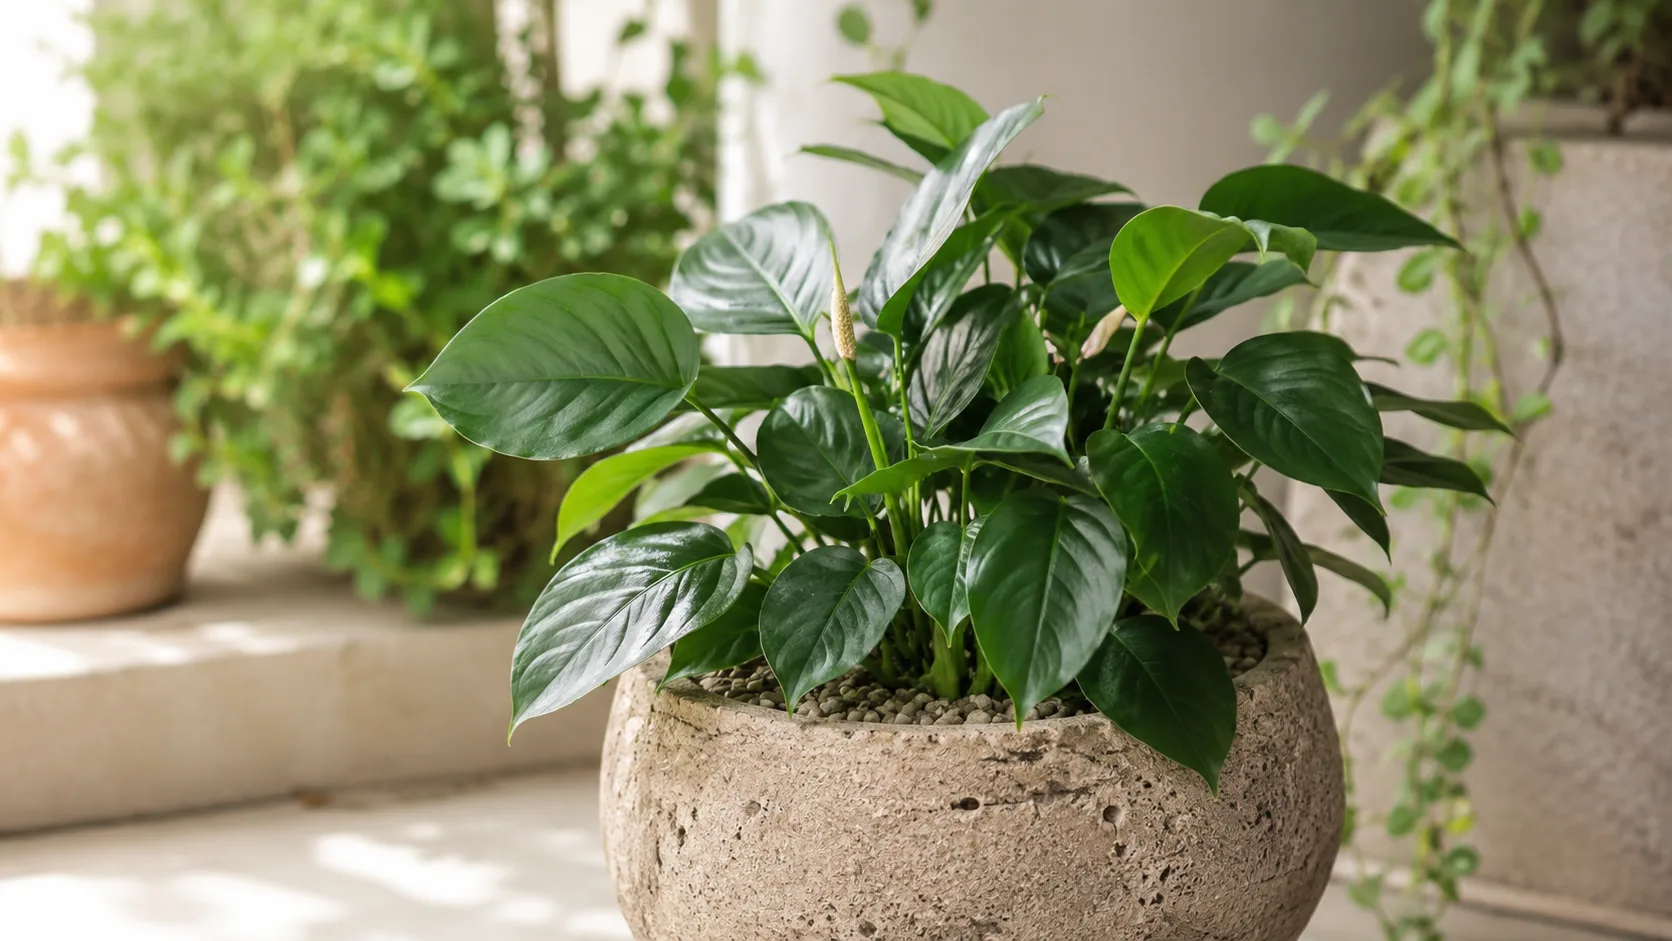
For most aquarists, propagation is practical rather than botanical. A single pot of Anubias barteri var. nana can eventually carpet several pieces of hardscape. A tall Anubias congensis on one branch can become two background plants. Because Anubias is notoriously slow-growing-Tropica lists a low growth rate for nana, with hobbyists often seeing one new leaf every two to four weeks in low-tech setups-division is the only realistic way to fill a scape without buying more pots. The trade-off is patience: propagation is easy, but the timeline is measured in weeks and months, not days.
Understanding the Anubias Rhizome Before You Cut
Every propagation decision starts with the rhizome. If you understand what it does, when to cut becomes obvious and most post-division failures become preventable. The rhizome is not a root; it is a modified stem that stores energy, produces new growth points, and sends roots downward for anchoring rather than heavy nutrient uptake. Leaves emerge from the upper surface. Roots emerge from the lower surface and sides. As long as the rhizome tissue is firm and greenish-brown-not soft, black, or mushy-the plant can recover from losing leaves or being cut in half.
How Leaves and Roots Grow From the Rhizome
Anubias grows horizontally along the rhizome, with new leaves appearing at intervals along its length. Over time, older sections may lose leaves while the growing tip produces a cluster of fresh foliage. That pattern matters for division because the healthiest cuttings usually include both mature tissue with established roots and a section near active growth. A piece cut from a bare middle segment with no roots and only one leaf can survive in experienced hands, but it establishes far more slowly and fails more often in beginner tanks.
Roots on Anubias are thin, white to pale green, and primarily anchoring structures. They will wrap driftwood, penetrate crevices in lava rock, and grip glue spots once they extend. After division, new cuttings often prioritize root growth before new leaves, which can look like “nothing is happening” for several weeks even when propagation succeeded. Seeing fresh white root tips from the cut end or along the rhizome underside is the first reliable sign that a divided piece has accepted its new home.
The non-negotiable rule that connects anatomy to propagation: never bury the rhizome. Burying restricts oxygen flow, traps detritus, and invites anaerobic bacteria-the same conditions that cause rhizome rot on intact plants and that kill fresh cuttings faster because the wound is open tissue. You may tuck roots lightly into gravel while keeping the rhizome above the substrate line, but attachment to hardscape above the substrate is safer and matches how the plant is sold and grown in the trade.
When Your Anubias Is Ready to Divide
Timing separates confident propagation from unnecessary stress on a slow plant. Divide Anubias when the rhizome has enough length and foliage that each resulting section can meet the minimum survival requirements without leaving the parent stripped bare. Canton Aquatics and multiple hobby guides recommend waiting until the rhizome is at least 4–5 inches (10–13 cm) long with five or more healthy leaves before the first division. Aquifarm and Steenfott Aquatics suggest a similar threshold: a few inches of rhizome and roughly six to eight leaves total on the plant.
Because Anubias grows slowly, that size may take many months in a low-tech tank and slightly less time with good light, stable nutrients, and optional CO₂. Trying to divide a newly purchased pot the week it arrives is usually counterproductive. Let the plant acclimate, attach firmly, and produce a visible length of rhizome beyond the original pot cluster. If leaves are emerging steadily and the rhizome feels firm when you gently press it between finger and thumb, the plant is likely ready.
Frequency matters too. Even healthy Anubias should not be divided aggressively every few weeks. Canton Aquatics recommends dividing at most once every 6–12 months. Over-dividing stalls overall growth because each section must rebuild root mass and leaf area from a reduced energy reserve. If your goal is a fuller scape quickly, leaving one larger rhizome attached to a prominent piece of wood often looks better than ten tiny struggling fragments.
Minimum Size and Leaf Count for a Clean Split
The most widely repeated safe standard is three to four healthy leaves plus some roots on every cutting. The Shrimp Farm, Steenfott Aquatics, and Aquarium Essentials all cite that range for Anubias barteri and nana. Each leaf is a photosynthetic factory; with only one or two leaves, a cutting has little margin if one leaf yellows, gets algae, or is nipped by fish.
Experienced growers on forums such as Aquatic Plant Central sometimes report success with smaller pieces-one or two leaves-on very healthy stock. That is real experience, but it is not the recommendation to follow when you want predictable results. Smaller cuttings fail silently: the rhizome hardens, stops growing, and slowly rots while offering no obvious warning beyond stalled growth. For teaching, trading, or filling a display tank, stick to three to four leaves minimum.
Root mass does not need to be dramatic, but each section should have visible anchor roots or the immediate potential to produce them from the rhizome near a leaf cluster. A leaf with no adjacent root tissue is weaker than a leaf pair emerging from a node that already shows white root tips.
Tools and Setup for Rhizome Division
You need very little equipment, but what you use must be clean and sharp. Gather aquarium scissors, a razor blade, or a scalpel; isopropyl alcohol or flame for sterilizing metal blades; paper towels if you plan to use glue; cyanoacrylate gel, fishing line, or cotton thread for attachment; and a small container of tank water or a shallow dish to hold pieces briefly while you work.
Sterilize cutting tools before you touch the rhizome. Anubias rhizome tissue is tough, but a jagged crush wound from dull scissors invites infection in warm aquarium water. A single clean slice heals faster than a sawed, frayed cut-Steenfott Aquatics and specialty propagation guides both emphasize one firm cut rather than a back-and-forth sawing motion. If you are dividing inside the tank and cannot remove the plant, turn off powerheads near the work area so loose plant bits are not blasted into the filter intake, and work slowly so detritus stays minimal.
Choose your attachment hardscape before you cut. Having the wood or rock ready means cut pieces spend less time drying out or rolling around in a net. For glue attachment, identify flat spots or crevices where the rhizome can sit naturally without torque that pulls the plant off while the bond cures.
How to Divide an Anubias Rhizome Step by Step
Anubias propagation by rhizome division follows a straightforward sequence once the plant is mature enough. Remove the plant from the tank if possible so you can see the full rhizome in good light. Identify sections with leaf clusters and roots. Plan cuts so each piece meets the three-to-four-leaf minimum. Make one sterilized cut per division. Attach immediately. Return pieces to stable water with gentle flow around the rhizome.
- Remove and inspect. Lift the plant from the tank or unthread it from hardscape. Rinse debris from the rhizome and check for soft rot. Trim any mushy tissue with a sterile blade until you reach firm rhizome.
- Mark cutting points. Choose spots between leaf clusters, not through the middle of a leaf base. Each resulting section needs its own leaves and preferably its own roots.
- Cut once, cleanly. Slice straight through the rhizome in one motion. Avoid crushing or hacking.
- Attach each section. Use glue, line, or a crevice wedge-details in the attachment sections below-keeping the rhizome fully exposed to water.
- Return to the tank. Place attached pieces where flow is moderate and lighting is not extreme. Avoid burying cut ends under substrate or dense moss that traps debris.
If the parent was thriving before division, both pieces should resume growth after a settling period. If the parent was already declining-Yellow Leaves on Anubias, soft rhizome, algae-choked foliage-fix those problems before propagating or you will multiply a sick plant.
Where to Cut and What Each Section Needs
The best cut location is a straight segment between two groups of leaves where the rhizome has a slight narrowing or natural separation point. Avoid cutting through a active growing tip if you can instead split the older portion behind it, leaving the tip intact on the piece you want to grow fastest. When one end of the rhizome has a dense leaf rosette and the other end is a long bare runner, dividing the runner side lets you redistribute growth more evenly-a technique The Shrimp Farm notes for barteri that has become lopsided.
Each section needs at least three to four leaves, some roots or root initials, and firm rhizome tissue with no soft spots. If you must choose between giving one piece five leaves and another two, adjust the cut line rather than creating a weak fragment. When dividing into more than two pieces, work sequentially: cut the rhizome in half first, attach both halves, then subdivide again only after new growth confirms both halves are stable-unless you are experienced and attaching many pieces at once in a dedicated grow-out tub.
Cut ends should face open water, not substrate. Exposure to the water column lets wounds heal and lets you spot early rot. Some advanced growers make shallow slits on healthy rhizomes to encourage branching; that is optional and separate from basic division.
Attachment Method 1: Cyanoacrylate Gel Glue
Cyanoacrylate gel glue-the thick “super glue gel” sold in hardware stores and labeled aquarium-safe by planted-tank suppliers-is the fastest, most reliable way to attach divided Anubias to hardscape. Gel formula is critical: liquid super glue runs, cures unevenly on wet surfaces, and can glue your fingers to the wood. Gel stays where you put it, cures in seconds to minutes even on damp surfaces, and holds the rhizome still while roots develop.
Aquarium Co-Op and Canton Aquatics both recommend gel glue as the primary attachment method for epiphytes. The active ingredient cyanoacrylate becomes inert once fully cured, which is why it is widely used in aquascaping despite sounding alarming to beginners. Roots eventually grow over the glue spot anyway.
Glue Technique for Driftwood and Rock
Pat the rhizome lightly with a paper towel if it is dripping; a damp rhizome is fine, but puddled water on the glue site reduces initial grab. Apply a small dab of gel to the hardscape-not a mountain of glue-or a tiny amount on the underside of the rhizome away from leaf bases. Press the rhizome firmly against the wood or rock for 15 to 30 seconds until the bond holds. Position the plant so leaves face the direction you want and roots can hang freely toward the substrate or open water.
On dark lava rock, dragon stone, or Seiryu stone, glue bonds especially well and looks natural once algae and biofilm coat the surface. On smooth glass or ceramic ornaments, glue works but may be more visible until overgrown. Do not glue the entire rhizome length flat to a surface if that forces a sharp bend; stress points slow growth and can crack tissue over time. A single anchor point near the rhizome center or base is usually enough.
Never submerge uncured glue blobs in a shrimp tank without securing the plant first; cured glue is inert, but the brief curing moment matters for placement accuracy. If you misplace a glued plant, you can usually twist it off within the first few seconds before the bond fully sets.
Attachment Method 2: Fishing Line and Cotton Thread
Fishing line and cotton thread are the classic reversible attachment methods. They hold the rhizome against driftwood or rock until roots grip naturally, then you remove the tie or leave it in place. Cotton thread eventually degrades in water over weeks to months; fishing line lasts indefinitely unless you cut it off. Both methods suit larger rhizomes, irregular wood, or aquarists who dislike glue on prized hardscape.
Wrap the line or thread around the rhizome and hardscape together, tying a snug knot that does not cut into the rhizome tissue. You want firm contact between roots and surface, not constriction that damages the stem. Position knots on the underside or hidden side of the wood for aesthetics. Within two to four weeks under normal conditions-and up to six weeks in slow low-tech tanks-white roots should begin gripping the surface (Aquarium Essentials, Aquifarm). At that point you may remove fishing line with scissors; leaving cotton thread to rot away is also acceptable.
Fishing line excels when the rhizome is long and you need to train it along a branch. Cotton thread is gentler on delicate small nana rhizomes and is easier to tie in tight crevices. Neither method works well if the plant is constantly bumped by large cichlids or goldfish; glue or a deeply wedged crevice may survive boisterous tank mates better.
Attachment Method 3: Wedging Roots Into Hardscape Crevices
The third attachment method uses natural crevices in driftwood or stacked stone rather than glue or ties. Slide the rhizome or its root mass into a fork in the wood, a gap between two rocks, or a pocket in lava rock so the plant stays mechanically stable while roots explore the surface. This mimics how Anubias sits in riverbed wood in nature and can look more organic than a visible glue dot or thread wrap.
Wedge attachment works best when the crevice pinches roots, not the rhizome body. If only the rhizome is squeezed, growth slows and rot risk rises in the compressed zone. If roots are spread into the crevice and the rhizome rests loosely above the gap, the plant often anchors itself within a few weeks as roots bind to the texture of the wood or stone. You can combine methods: a single thread loop plus a crevice, or a tiny glue dot at one end while the rest of the rhizome trails freely.
This approach suits Anubias barteri var. nana on branching wood in iwagumi-influenced scapes where visible hardware is undesirable. It is less reliable on smooth, round pebbles with no texture for roots to grip. Check wedged plants after water changes; sometimes a strong flow dislodges a piece before roots have locked on.
Aftercare for Newly Divided Anubias
After division and attachment, the job shifts to stability and observation. Newly cut Anubias does not need special fertilizers beyond what the parent tank already receives, and CO₂ is optional-not required for propagation success. What divided pieces need most is consistent water quality, gentle to moderate flow across the rhizome, stable light without sudden intensity jumps, and protection from digging fish that uproot fresh attachments.
Avoid moving glued or tied plants for at least two weeks unless they detach. Every repositioning tears developing root tips and resets the clock. If a piece floats loose because glue was applied to a wet, algae-slick surface, dry the hardscape spot slightly with a paper towel outside the tank, re-glue, and hold longer during curing. For thread-tied plants that shift, add a second loop rather than overtightening one knot.
Do not bury cut ends in substrate to “help” the plant stay down. That is the most common aftercare mistake and it converts a successful cut into a rot site within days. If a piece must sit near the bottom, use a small stone on the wood base or a root wedge-not gravel piled on the rhizome.
What to Expect in the First Two to Six Weeks
Week one often looks uneventful. Leaves may show minor transport stress if the plant was out of water during work, but permanent damage is rare on healthy stock. White root fuzz appearing from the rhizome near cut ends or along the underside is positive. Week two to four is when roots begin gripping glue, thread, or wood texture; fishing line ties can loosen slightly as the rhizome diameter changes minutely with hydration. Week four to six may bring the first new leaf on faster-growing barteri forms; nana may take longer.
Growth priority after division is anchor first, foliage second. Do not interpret a month without new leaves as failure if roots are visible and the rhizome remains firm. Conversely, a firm rhizome with no root activity after six weeks in a healthy tank suggests poor attachment contact, insufficient flow, or a piece that was too small-especially if it had only two leaves at division.
Photoperiod and algae pressure matter during healing. Anubias leaves are slow to replace; if intense light hits a weakened cutting, green spot algae on leaf surfaces can further reduce photosynthesis. Shade from taller plants or floating species during the healing window is reasonable insurance.
Common Propagation Mistakes and How to Fix Them
The same mistakes appear repeatedly in propagation threads: burying the rhizome, cutting too small, dirty tools, sawing cuts, gluing only leaves instead of rhizome, and dividing unhealthy stock. Each is fixable if caught early.
Burying the rhizome after division causes soft brown patches that spread along the stem. Fix: lift the plant, trim soft tissue back to firm rhizome with a sterile blade, reattach above substrate with glue or thread, and improve flow around the cut zone.
Pieces too small stall with two leaves and no roots. Fix: combine weak pieces only if still attached by rhizome; otherwise grow them out in a quiet tank section, accept slower progress, or remove failed fragments before they decay and spike ammonia in nano tanks.
Dirty cutting tools introduce bacteria into the open wound. Fix: sterilize blades, trim affected tissue if softness appears, and perform water changes if detritus accumulates on the cut face.
Sawing instead of slicing leaves frayed cambium that heals poorly. Fix: next time use one clean cut; for current plants, monitor frayed ends and trim back to solid tissue if softness develops.
Gluing leaves instead of rhizome creates a bond that tears when leaves age. Fix: re-glue with rhizome contact only; leaves should point outward freely.
Dividing sick plants spreads rot to every new piece. Fix: treat yellowing, algae, snail damage, or soft rhizome on the parent before propagating; discard sections that cannot be trimmed to clean tissue.
Rhizome Rot After Division
Rhizome rot after propagation smells earthy or sour, feels mushy between fingers, and often starts at a buried section or cut end sitting in detritus with poor flow. It is not unique to division-intact Anubias rots when buried-but fresh wounds accelerate it. Treatment is surgical: remove the plant from hardscape, cut away all soft brown or black tissue until only firm greenish rhizome remains, even if that means removing half the plant. Reattach the healthy remnant exposed to water. Mild hydrogen peroxide dips are used by some experienced aquarists on trimmed rhizomes; if you try this, rinse gently and return the plant to clean water promptly rather than soaking extended periods.
Prevention beats surgery: expose rhizomes, maintain moderate flow, avoid oversized cuttings with only minimal root mass, and do not stack moss directly on cut faces in the first month. If rot keeps returning on one lineage, inspect tank conditions- stagnant corners, deep substrate against wood, or chronic overfeeding that coats rhizomes in mulm.
Propagating Different Anubias Varieties
Most propagation advice applies across the genus because all traded Anubias share rhizome anatomy, but scale and speed differ by variety. Anubias barteri var. nana and petite forms produce small rhizomes and short internodes; you get smaller divisions and slower visual fill-in, but they attach easily to nano hardscape and glue dots. Anubias barteri var. barteri, coffeefolia, and caladiifolia have longer leaf stems and thicker rhizomes; each division is a substantial midground plant, and thread ties often work better than tiny glue spots because of weight.
Tall species such as Anubias congensis, frazeri, and gigantea propagate the same way but need larger hardscape and stronger attachment. A congensis division with four large leaves can torque glue bonds if placed on vertical smooth wood; use multiple tie points or a crevice seat plus glue at the base. Emersed-grown tissue culture or nursery pots may melt older leaves after division while rhizome remains alive; treat that as acclimation, not propagation failure, and avoid dividing until submersed growth stabilizes.
Tropica notes nana’s creeping rhizome can extend 10–15 cm or more over time-useful when planning how many divisions a single mother plant will eventually support. Larger barteri forms reach tens of centimeters in leaf length; divide less often but into fewer, bigger pieces for immediate impact.
Why Anubias Does Not Root From Leaf Cuttings
Beginners often ask whether a broken Anubias leaf or a trimmed petiole can grow a new plant. In home aquarium conditions, no-Anubias does not propagate reliably from detached leaves the way stem plants root from cut nodes or some terrestrial aroids produce plantlets on leaves. The leaf is supported by the rhizome’s stored energy and vascular connection; once severed from the rhizome, it may stay green for weeks but will not develop a new rhizome under typical tank conditions.
PlantedBox mentions dividing rhizomes with “at least one leaf attached” as the practical minimum, which underscores that leaves alone are insufficient without rhizome tissue. The propagation unit is rhizome plus leaves, not leaf alone. Seeds exist in nature and in specialist propagation, but they are irrelevant to almost all hobbyists multiplying a named variety in a display tank.
If a leaf breaks off during division, discard it or let it decay in a shrimp tank as biofilm fodder-do not expect a plantlet. Focus effort on rhizome sections with healthy nodes. That clarity saves months of waiting for a leaf that will never root.
Conclusion
Anubias propagation is one of the simplest multiplication methods in the planted aquarium hobby because it requires no special hormones, no CO₂ injection, and no high light-only a mature rhizome, a clean cut, and correct attachment. Wait until the plant has several inches of rhizome and enough leaves to give each section three or four of its own. Divide with a sterilized blade in one firm cut between leaf clusters. Attach each piece to driftwood or rock using cyanoacrylate gel, fishing line or cotton thread, or a secure crevice wedge, always keeping the rhizome exposed to flowing water rather than buried in substrate.
Expect roots to anchor in two to six weeks and new leaves to follow on a slower schedule, especially on nana. Watch cut ends for firm tissue and white root tips; trim rot early if softness appears. Avoid leaf-cuttings myths, oversized division schedules, and tiny two-leaf fragments unless you are deliberately experimenting. Done patiently, one healthy Anubias becomes many-without changing the low-maintenance character that made the genus a staple in beginner tanks, shrimp setups, and biotope aquascapes alike.
When to use this page vs other Anubias guides
- Anubias overview - Start here for whole-plant context before deep-diving this topic.
- Anubias problems hub - Jump to symptom-specific fix guides when this care topic does not resolve the issue.