Alocasia Polly Fertilizer Guide: NPK, Schedule
Alocasia Polly Fertilizer Guide: NPK, Schedule, and Dormancy Feeding Rules
Alocasia Polly Fertilizer Guide: NPK, Schedule, and Dormancy Feeding Rules
What Alocasia Polly actually needs from fertilizer
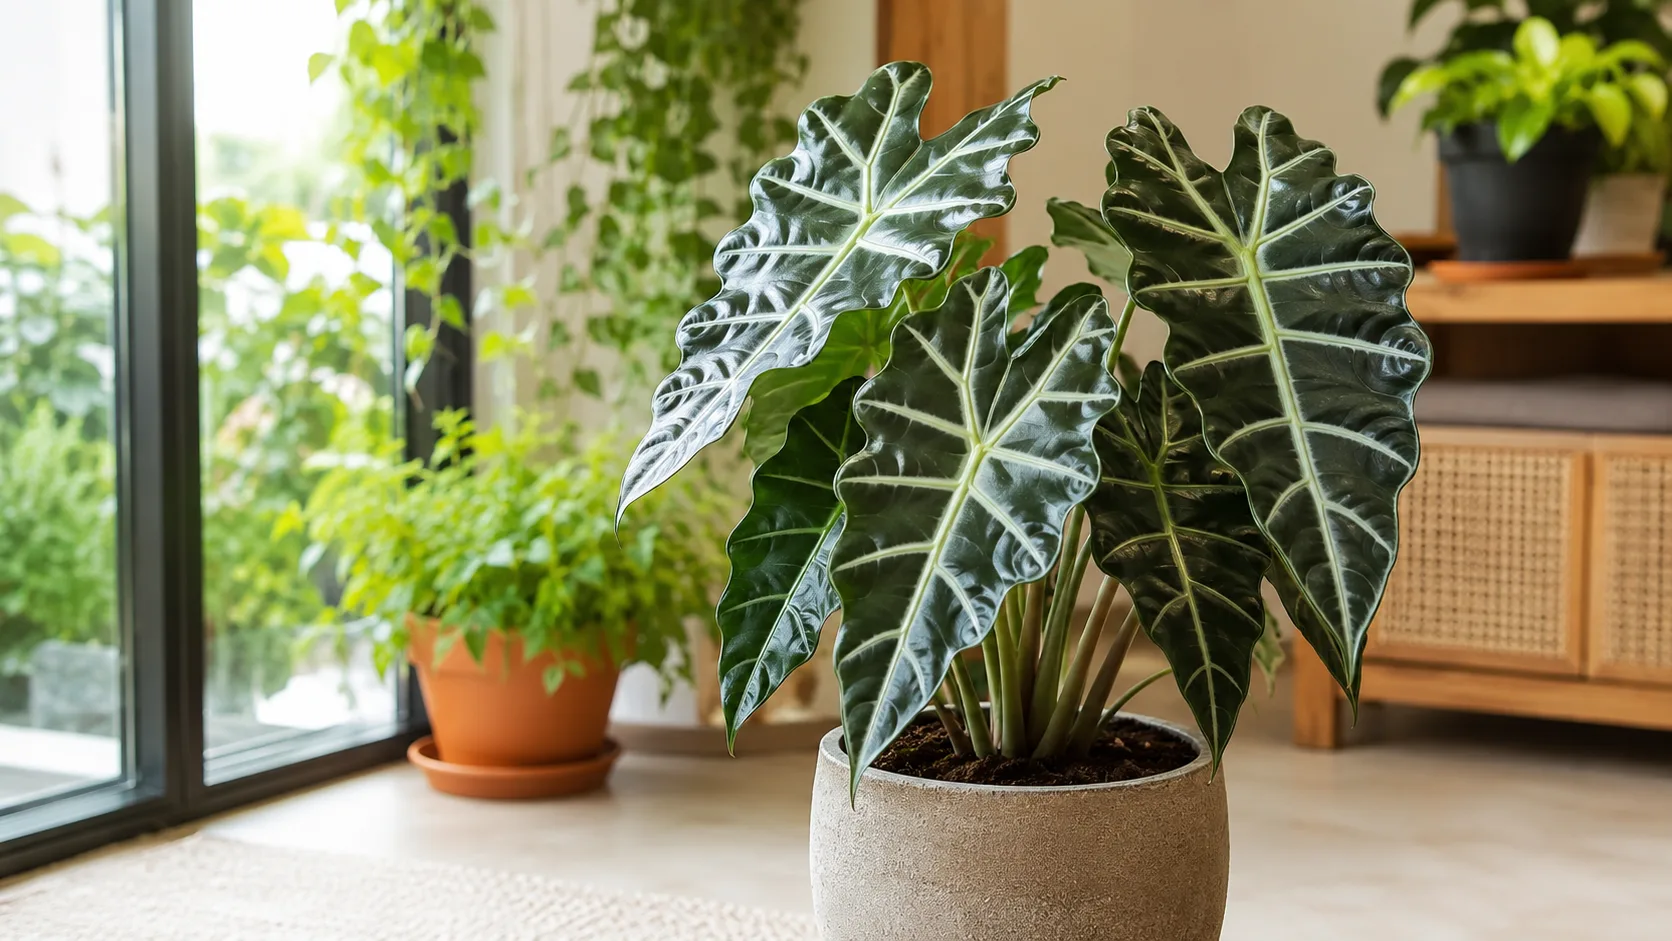
Alocasia Polly (Alocasia × amazonica) is a small but hungry tropical aroid. The dark, arrow-shaped leaves with pale veins are not decoration - they are production machinery, and production requires fuel. Fertilizer is the fuel, but the plant is unusually sensitive to the concentration, the timing, and the form of nitrogen in whatever you pour through the pot. Get those three things right and the plant throws a new leaf every two to four weeks through summer. Get any of them wrong and the same plant either stalls, drops its oldest leaf, or starts showing brown, crispy tips within days.
A useful way to frame the whole topic: Alocasia Polly is a heavy feeder during active growth and a non-feeder the rest of the year. The Royal Horticultural Society’s Alocasia growing guide recommends feeding with a general liquid fertilizer “during the growing season, from April to October” and letting the plant rest in winter, which is consistent with the broader aroid literature and with growers’ commercial experience. The Missouri Botanical Garden Plant Finder entry for Alocasia × amazonica is less prescriptive on numbers but explicitly recommends to “water and fertilize regularly” during active growth and to reduce watering in winter, with the same dormancy logic built in. Both of those sources are generalist, but they line up with what specialty aroid growers and the International Aroid Society’s Aroideana journal have documented for years: the genus is built for a long, well-fed growing season punctuated by an honest winter rest.
What that means in practice is that “Alocasia Polly fertilizer” is not a single product question. It is four linked decisions: which NPK ratio, at what dilution, on what schedule, and with what to do during dormancy. The rest of this guide walks through each one with the reasoning behind it, the trade-offs, and the recovery plan if something goes sideways.
Why Alocasia is a heavy-feeding aroid
Alocasia stores energy in a below-ground corm - that thickened rhizome at the base of every petiole. In spring and summer, the corm pushes up new leaves, and each new leaf can be substantially larger than the last while light and warmth are favorable. Building a 20 to 30 cm arrow-shaped leaf with thick, waxy cuticle, dramatic veining, and a sturdy petiole takes a real amount of nitrogen, phosphorus, potassium, calcium, magnesium, and iron. The University of Wisconsin Extension, cited in industry guidance for container-grown tropicals, notes that actively growing container plants require substantial fertilizer input because the limited soil volume cannot buffer nutrient demand the way a garden bed can.
Alocasia Polly is not a fast, weedy grower like a pothos, but it is also not a slow, low-demand plant like a sansevieria. It sits in a middle category where it can produce a meaningful new leaf every two to four weeks in active growth, which translates into a real, sustained nutrient demand through spring and summer. The corm also has to bank reserves for the dormant months, which means the growing-season feeding program is doing two jobs at once: fueling current leaves and refilling the corm for winter.
How NPK translates to leaf, root, and corm growth
Every fertilizer label shows three numbers - nitrogen, phosphorus, potassium, in that order. The numbers are percentages by weight, not the ratio you should dose to. A 20-20-20 product is 20 percent nitrogen, 20 percent phosphorus (as P₂O₅), and 20 percent potassium (as K₂O); the rest is filler, micronutrients, and carrier. A 9-3-6 product is the same shape in a different concentration.
Nitrogen drives leaf size, chlorophyll, and the deep green color Alocasia is prized for. Phosphorus supports root and corm development and energy transfer, but it is needed in much smaller amounts for a foliage plant than for a flowering or fruiting one. Potassium regulates water movement, stiffens cell walls, and improves stress and disease tolerance. For a foliage aroid that is not being grown for flowers, the practical ratio is nitrogen-forward, phosphorus-moderate, potassium-balanced - which is why the 3-1-2 family of ratios (for example 9-3-6, 11-3-8, or 24-8-16) shows up again and again in aroid fertilizer guidance. Balanced 20-20-20 also works, but it delivers a lot more phosphorus than the plant will ever use, and that excess phosphorus is one of the things that builds up as salt in the pot over time.
Choosing the right NPK ratio for Alocasia Polly
If you want the short version: a 3-1-2 style ratio (9-3-6, 11-3-8, or 24-8-16) at half the label strength, every two to four weeks during active growth, is the cleanest, most forgiving program for an Alocasia Polly in a typical indoor mix. If you already own a balanced 20-20-20 or a 10-10-10, that is also fine as long as you dilute it to half strength and flush the pot every couple of months to keep salts from accumulating. The two approaches differ in how much phosphorus they push through the pot, and that difference matters more over months than it does in a single feeding.
3-1-2 vs. balanced 20-20-20: which is better?
A 3-1-2 fertilizer is nitrogen-forward. The first number is roughly three times the second, which matches what a foliage aroid actually demands: a lot of nitrogen for the canopy, a moderate amount of phosphorus for roots and the corm, and a balanced amount of potassium for water regulation and stress tolerance. Houseplant-focused sources including the House Plant Journal reference guide have used 3-1-2 as a single default ratio for almost every foliage houseplant for years, with the practical justification that the ratio’s higher nitrogen supports steady leaf production without the salt-loading effect of a high-phosphorus product.
Balanced 20-20-20 is more widely available and cheaper. It works. The risk is that a balanced formula delivers a lot more phosphorus than a non-flowering tropical needs, and any nutrient the plant does not absorb stays in the pot as dissolved salt. Over six months of feeding, the difference between a 3-1-2 product and a balanced 20-20-20 product at the same dilution is measurable in the salt crust on the soil surface and the rate at which you have to flush. Either ratio is safe at half strength; the 3-1-2 just makes life easier.
If your tap water is hard or you are using a mineral-heavy substrate like LECA, the salt-loading concern gets louder. In that case, a 3-1-2 product at half or even quarter strength, applied on a weakly weekly basis, will keep the nutrient supply steady without ever spiking the electrical conductivity in the pot.
Urea-free, micronutrient-complete formulas
Two more details on the label matter for Alocasia Polly. First, look for a urea-free formula. Urea is a cheap nitrogen source, but it has to be broken down by soil microbes before the plant can use it. In a small, indoor, often-sterile potting mix, that breakdown is incomplete, and the leftover urea contributes to salt accumulation. Nitrate- and ammoniacal-nitrogen sources are taken up more cleanly. Specialty aroid fertilizers like Dyna-Gro Foliage Pro 9-3-6 and Foliage Focus are formulated this way and are popular in the aroid community for that reason.
Second, make sure the fertilizer includes chelated iron, calcium, magnesium, and the standard micronutrient package. Iron deficiency shows up as interveinal chlorosis on new leaves - green veins with yellowing between them - and is one of the more common micronutrient issues in aroid culture. Calcium and magnesium deficiencies show up as edge and tip browning, which is easy to misread as fertilizer burn. A complete fertilizer removes the guesswork. A pure NPK product with no micros is technically a fertilizer, but it is an incomplete nutritional profile and a frequent cause of vague “something is off” symptoms that do not match any single nutrient deficiency cleanly.
The full year-round Alocasia Polly fertilizer schedule
Alocasia Polly has a strong seasonal rhythm. It grows hard in spring and summer, slows in autumn, and either goes fully or partially dormant in winter depending on temperature, light, and humidity. The feeding schedule has to follow that rhythm, not fight it. The general rule is straightforward: feed during active growth, taper in autumn, stop during dormancy, and restart only after the plant is clearly back in growth.
| Month (Northern Hemisphere) | Growth phase | Feeding frequency | Dilution |
|---|---|---|---|
| March | Waking up | First half-strength feed only after a new leaf unfurls | 1/2 strength |
| April – May | Active growth begins | Every 2–3 weeks | 1/2 strength |
| June – August | Peak growth | Every 2 weeks (or weakly weekly at 1/4 strength) | 1/2 strength |
| September | Growth slowing | Every 3–4 weeks | 1/2 strength |
| October | Taper | One final light feed, only if plant is still pushing leaves | 1/2 strength |
| November – February | Dormancy | No fertilizer | - |
Spring and summer: feed every 2 to 4 weeks
Through spring and the first half of summer, Alocasia Polly responds to a straightforward biweekly feeding with a half-strength 3-1-2 or balanced liquid fertilizer. The plant will push a new leaf every two to four weeks when light, warmth, and humidity are in range, and a steady half-strength dose supports that pace without overloading the root zone. Water the plant the day before, or at minimum water it first and let the excess drain, then pour the fertilizer solution over the moist soil. Never apply fertilizer to dry soil - the concentration gradient pulls water out of the roots and burns the fine root hairs.
If your plant is in a warm, bright spot - a south-facing window with sheer curtain, a heated greenhouse cabinet, or under grow lights - you can move to a weekly schedule at quarter strength. This is the “weakly weekly” approach that commercial aroid growers use: small, frequent doses that track the plant’s actual uptake and never spike the salt level in the pot. The trade-off is that it requires you to remember every week. If you would rather feed every two to four weeks, the half-strength approach is more forgiving.
Autumn: taper off as growth slows
As daylight shortens and indoor temperatures drop, the plant’s growth rate falls off before you actually see leaves stop emerging. September is the month to stretch the interval - go from every two weeks to every three or four - and to start watching the new growth. If the plant is still pushing leaves and the corm is still firm, you can give one more light feed in early October and then stop. If the plant is already showing slower leaf emergence or a slightly droopier posture by mid-September, that is the signal to skip the last feed entirely.
The taper matters because if you keep feeding at summer strength into late autumn, the plant cannot use the nutrients. They accumulate as salt. By the time you notice the white crust on the soil surface, the root zone is already under osmotic stress. A clean taper avoids that whole category of problem.
Winter and dormancy: stop feeding entirely
When Alocasia Polly drops its leaves or stops pushing new growth in winter, the corm is still alive underground, but the metabolic rate has dropped to a fraction of its summer level. Roots are not pulling in nutrients at any meaningful rate. Any fertilizer you add to the pot during this period is, in practice, just adding salt to a system that is not flushing it. The University of Maryland Extension’s guidance on fertilizer toxicity in indoor plants is direct on this point: “excessive use of fertilizers, frequent applications of fertilizer, and the incorrect use of fertilizer concentrates” drive up soluble salt levels, and the symptoms show up as leaf-tip browning, root dieback, and stunted growth when the plant comes back online in spring.
The dormancy pause is not optional. It is the single biggest difference between a plant that comes back bigger in spring and one that comes back with a salt-crusted pot and a struggling root system. Stop feeding in October or November depending on your climate, do not resume until the plant has pushed its first or second new leaf in spring, and do not be tempted to “help it along” with a little winter feeding. The corm is doing exactly what it is supposed to do. Leave it alone.
Restarting fertilizer after dormancy
The right way to come out of dormancy is incremental. The corm has spent three or four months running on stored energy, and its root system has partially retreated. When the first new leaf emerges, the plant is in a delicate state: it is finally taking up water and nutrients again, but its root mass is reduced. Fertilizing at full strength at this point is a common cause of leaf burn and stalled recovery.
The safer protocol: resume half-strength fertilizer only after the plant has pushed its second new leaf, when the root system has had time to rebuild. If you want to be cautious, the first feeding after dormancy can be at quarter strength, and you can step up to half strength for the third or fourth leaf. Once the plant is clearly in active growth - a new leaf every three or four weeks, deep color, sturdy petioles - you can settle into the regular spring and summer schedule.
If your Alocasia Polly came out of dormancy in leaf and never dropped its foliage at all, the same rule still applies in a softer form. Wait until you see a new leaf actively unfurling, then resume half-strength feeding on the regular interval. The plant tells you when it is ready; the new growth is the signal.
How to apply fertilizer the right way
The application method matters as much as the product. Alocasia has a sensitive, relatively fine root system that is easily burned by direct contact with concentrated fertilizer, and the corm at the base of the plant is vulnerable to salt accumulation in the top inch of soil. A few habits keep both safe.
Dilution, watering first, and the “weakly weekly” approach
The standard indoor approach is to dilute the fertilizer to half the label strength and apply it to already-moist soil. “Already moist” is doing a lot of work in that sentence. It means you water the plant normally, wait for the excess to drain, and then pour the fertilizer solution through. The reasoning is osmotic: dry soil plus concentrated fertilizer pulls water out of the roots, which is the literal mechanism of fertilizer burn. Wet soil plus diluted fertilizer gives the roots water and nutrients in the same direction they want them to flow.
The “weakly weekly” alternative is quarter-strength fertilizer at every watering. The plant gets a small, steady supply of nutrients that more closely matches actual uptake, the salt concentration in the pot never spikes, and you do not have to remember a biweekly schedule. The downside is that you have to remember to add fertilizer to every watering, and you have to commit to flushing the pot every six to eight weeks regardless of which approach you use, because even at quarter strength the salts build up over time.
Whichever method you pick, the flush is non-negotiable. Every six to eight weeks, take the plant to a sink and run plain, room-temperature water through the pot for three to five minutes, letting it drain freely. This carries the accumulated salts out of the root zone. Detailed flush steps are covered later in the guide.
Foliar feeding, slow-release, and other formats
Foliar feeding - misting a diluted fertilizer solution onto the leaves - is sometimes suggested for aroids. The leaves can absorb some nutrients through the cuticle, but Alocasia Polly’s leaves have a thick, waxy coating that limits foliar uptake, and wet leaves sitting in low-airflow indoor conditions are an open invitation to fungal and bacterial leaf spot. Foliar feeding is optional, low-value, and slightly risky for Alocasia Polly overview. Skip it.
Slow-release granular fertilizer is a different story. Osmocote-style polymer-coated prills release nutrients gradually over two to six months depending on the formulation and the soil temperature. For Alocasia Polly in a chunky aroid mix, a single light application of slow-release in early spring can carry the plant through most of the growing season with no liquid feed at all. The risk is uneven release: if the pot heats up or stays wet for too long, the prills can dump their load. If you go this route, use a low-dose formulation, mix it into the top two inches of the substrate rather than top-dressing, and remember that it counts as fertilizer - do not also feed liquids on the same schedule.
Organic amendments like worm castings and compost are slow-release by nature and have a different risk profile, which is covered in the next section.
Organic options: worm castings, fish emulsion, and compost
Organic fertilizers are not required for Alocasia Polly, but they have real advantages, especially for growers who want to build long-term soil health rather than just feed the plant through the next leaf. The catch is that organic feeding is messier, smellier in some cases, and slower to act, and the analysis on the bag is often less precise than a synthetic product. Most experienced aroid growers use a mix: a clean synthetic liquid for the bulk of the feeding, with organic amendments worked into the soil mix or applied as a top dressing.
Worm castings are the most popular organic option for aroids. They are the digested output of earthworms, and they contain a broad, balanced nutrient profile, beneficial microbes, and a small amount of humic acid. Worm castings do not burn plants the way synthetic fertilizers do, even at higher volumes, because the nutrients are released slowly as soil microbes break them down. For Alocasia Polly, you can mix worm castings at roughly 10 to 20 percent by volume into the potting mix at Alocasia Polly repotting guide, or top-dress with a half-inch layer every two to three months during the growing season. The top-dress is worked into the top of the soil over time and is gradually taken up by the soil food web. A common, very forgiving routine is to use a half-strength synthetic liquid for the regular biweekly feeding and refresh a worm castings top-dress once a quarter.
Fish emulsion is a fast-acting nitrogen source that gives a quick green-up when a plant is lagging. It is also famously smelly for the first day or two after application. For indoor Alocasia Polly, fish emulsion at half the label strength can be used as a once-a-month supplement in summer, but it is not a great primary fertilizer for an indoor plant because of the odor and because the nutrient analysis is loose. Kelp meal and seaweed extract are useful complements: they add trace micronutrients and natural growth stimulants, but they are not a complete fertilizer on their own. Treat them as supplements, not the main feed.
Compost is the most variable organic option. Well-finished, fully decomposed compost is a good slow-release amendment at 10 to 20 percent of the mix. Unfinished compost or compost tea introduces unpredictable microbes and nutrient ratios, and it can bring fungal gnats. For Alocasia Polly, the safest organic play is worm castings worked into the substrate and a quarterly top-dress, with fish emulsion or kelp as an occasional boost rather than a standing feed.
Signs of over-fertilization and salt buildup
Alocasia Polly is unusually good at telling you when something is wrong, because the leaves are large, the petioles are thick, and any change in nutrient status shows up quickly. The classic symptoms of over-fertilization and salt accumulation are consistent across the literature and across growers, and they are easy to recognize once you know what to look for.
Brown, crispy leaf tips and margins are the most consistent early symptom. The University of Maryland Extension describes this as the “typical” presentation of fertilizer toxicity in indoor plants, and it is usually the first thing a grower notices. The tips and the very edges of the oldest leaves turn brown and dry, while the rest of the leaf looks normal. This is a direct osmotic effect: the salt concentration in the soil is high enough that water flows out of the root cells instead of into them, and the leaf tips - the part of the plant furthest from the roots and the last to receive water - die first.
A white or pale yellow crust on the soil surface, around the inside rim of the pot, or on the outside of a terracotta pot is a more obvious sign. That crust is dried mineral salt. If you see it, the salt level in the pot is already high.
Slowed or stopped growth during the active season is a subtler sign. If your Alocasia is in bright light, warm temperatures, and good humidity but has not pushed a new leaf in six or eight weeks during spring or summer, over-fertilization is one of the things to check. The combination of stunted growth plus leaf-tip browning is a near-diagnostic for salt stress.
Wilting despite moist soil is the more serious symptom. The plant is wilting because the roots cannot take up water, not because the soil is dry. This is a sign that the salt load is high enough to be actively damaging roots, and it is the point at which immediate action is needed.
Yellowing of older leaves with the rest of the canopy still green can also indicate salt damage, but it is easier to confuse with underwatering on Alocasia Polly, low nitrogen, or natural leaf aging. Use the other symptoms to confirm.
How to flush Alocasia Polly soil to remove salts
Once salts have built up, the fix is a thorough flush. This is the standard university-extension protocol and it works reliably when done correctly. The University of Maryland Extension and the University of California ANR (UC Stanislaus Sprout) both describe the same basic procedure, with minor variations.
The steps, in order. First, scrape off the visible white salt crust and the top half-inch to one inch of potting mix. Discard that material; do not reuse it. Be careful not to damage surface roots. Second, take the plant to a sink, bathtub, or outdoor space where water can drain freely. Make sure the pot’s drainage holes are not blocked. Third, water the plant with plain, room-temperature water at a slow, steady rate. Fill the pot to the top, let it drain completely, and repeat. The goal is to dissolve the accumulated salts in the root zone and carry them out with the drainage water. Fourth, repeat the flush two more times over the next 48 hours. One thorough flush is not enough to leach a heavily salted potting mix; multiple passes are. Fifth, after the third flush, replace the top inch of potting mix you removed with fresh mix, water lightly, and resume normal watering. Sixth, do not fertilize for at least four to six weeks. The plant needs time to recover, and adding more fertilizer before it does is the most common mistake people make after a flush.
A few details that matter. Use room-temperature water, not cold, because cold water shocks the roots. If your tap water is very hard or softened, use rainwater or filtered water for the flush; the goal is to add less salt, not more. The pot must drain freely the entire time. Standing in a saucer of runoff defeats the purpose, because the dissolved salts just migrate back up into the substrate as the water evaporates. Empty the saucer every time.
As a preventive measure rather than an emergency treatment, flushing every six to eight weeks during the active growing season keeps the salt load from building up in the first place. Most growers who feed at half strength biweekly can get away with a monthly flush; growers who use the weakly weekly approach should flush every six weeks. Either way, the flush is what keeps a long-term feeding program sustainable in a small indoor pot.
Common fertilizer mistakes to avoid
Most Alocasia Polly fertilizer problems are not exotic - they are the same handful of mistakes repeated across hundreds of houseplants. Knowing what they are makes it much easier to avoid them.
Feeding at full strength is the most common mistake. Liquid fertilizers are concentrated, and the label rate is calibrated for plants in commercial production with daily irrigation and active root systems. Indoors, with a smaller pot, lower light, and slower uptake, the label rate is almost always too much. Dilute to half strength for biweekly feeding or quarter strength for weekly feeding, and stop there.
Feeding during dormancy is the second most common. The plant is not using nutrients, the salts are accumulating, and the corm is under stress that is made worse by a salt-loaded substrate. The temptation to “keep it going through winter” should be resisted. The plant does not need it, and the soil does not need the extra load.
Feeding a stressed, dry, or newly repotted plant is the third. Roots that have been damaged by dryness, root rot on Alocasia Polly, or recent repotting cannot regulate nutrient uptake, and a fertilizer dose at that moment acts like a chemical burn on exposed tissue. Water the plant, let it recover, and only resume feeding after a full new leaf has emerged.
Ignoring water quality is the fourth. If your tap water is hard, you are adding calcium and magnesium salts to the pot on every watering in addition to the salts in the fertilizer. Over months, that adds up. If you see persistent salt crust even at half-strength feeding, switch to rainwater or filtered water for both watering and the flush. If your water is softened, do not use it on houseplants at all - the sodium in softened water is its own source of toxicity.
Feeding into bone-dry soil is the fifth. The combination of dry soil and concentrated fertilizer creates the steepest possible osmotic gradient across the root membrane, and that is the mechanism behind the most dramatic leaf-tip burn cases. Water first, then feed. The two are not interchangeable, and the order matters.
Finally, treating fertilizer as a substitute for light, water, and humidity. A well-fed Alocasia in a dim corner with soggy soil will still decline. Fertilizer is the fourth pillar of a good care routine, not the first three, and it cannot rescue a plant whose other needs are not being met.
Conclusion
Alocasia Polly is one of the more fertilizer-responsive aroids once you understand its rhythm. A nitrogen-forward 3-1-2 ratio or a balanced 20-20-20, both at half the label strength, every two to four weeks from spring through early autumn, is the foundation. Water the plant first, never fertilize dry soil, and stop entirely from late autumn through winter when the corm is dormant. A flush every six to eight weeks with plain water keeps the salt load from compounding, and worm castings worked into the substrate give a slow-release base layer that buffers against over- and under-feeding.
If something goes sideways - brown leaf tips, white crust on the soil, slowed growth during active season - the fix is almost always the same: flush thoroughly, pause feeding for four to six weeks, and restart at half strength only after the plant has pushed a new leaf. Over-fertilization is far easier to cause than to reverse, so the safer default is always a little less, a little less often, and a flush more frequently than you think you need.
The result, when the routine is right, is a plant that pushes a fresh, dramatic leaf every few weeks through summer, holds its color and form into autumn, and comes back the next spring from a healthy corm that has had a real winter rest. That is what a good Alocasia Polly fertilizer program looks like in practice: not maximum feeding, but consistent, well-timed, well-diluted feeding matched to the plant’s actual growth cycle.
When to use this page vs other Alocasia Polly guides
- Alocasia Polly overview - Start here for whole-plant context before deep-diving this topic.
- Alocasia Polly problems hub - Jump to symptom-specific fix guides when this care topic does not resolve the issue.