Thrips on Houseplants: The Mistake That Lets Them Spread
A new plant can bring thrips into a collection. Use a practical plan for inspection, isolation, repeated treatment, and safer plant care while you travel.
An infestation rarely destroys a collection in a single moment. The bigger risk is a chain of ordinary decisions: a pest arrives on one new plant, several plants are grouped close together for convenience, and no one notices the first signs until the insects have had time to spread. Thrips are especially frustrating because the damage can show before the insects are easy to spot, and one round of treatment may leave protected stages untouched.
The most useful lesson is not to panic or throw away every plant that stood in the same room. It is to stop the connections that let a small problem become a collection-wide one. Separate the suspect plant, inspect the plants that shared its space, and build a follow-up routine before you choose a treatment.
One mistake rarely stands alone: it connects plants
“I put the plants together” sounds like one mistake, but it usually means several risk factors came together. A newly purchased plant may have carried a few insects; tightly packed leaves created a route between hosts; and a long stretch without inspection gave the population time to grow. Changing only one part of that chain can reduce the damage, but addressing all three gives the collection a better chance.
Imagine arranging dozens of pots shoulder-to-shoulder before leaving town so a plant sitter can water them quickly. That is convenient for watering, but the leaves may touch, pots may share a tray, and an adult thrips that can fly or be dislodged has fewer barriers between one host and the next. If one plant is already infested, the arrangement turns a manageable isolation problem into a much larger inspection job.
The lesson is not that houseplants must always be far apart. Healthy plants can share a shelf when you check them regularly; the danger is mixing a plant of unknown pest status into a dense group and then leaving it unchecked. A collection needs a quarantine area and an inspection habit just as much as it needs a watering schedule.
Why a new plant is a plausible entry point
Indoor plants do not need to touch outdoor soil to acquire thrips. A pest can arrive on a new purchase, a cutting, a plant brought in after summer outside, or foliage that was exposed near an open window or balcony. The National Pesticide Information Center notes that pests sometimes hitchhike indoors on new plants, which is why indoor pest management starts with identification and prevention instead of routine pesticide use (NPIC’s houseplant integrated pest management guide).
A plant can look healthy at the register and still carry a low-level infestation. Thrips are small and often feed in sheltered areas such as leaf folds, buds, and tender growing tips; some species insert eggs into plant tissue, while others lay them on a plant surface. The University of Illinois Extension describes both egg-laying patterns, so a quick glance at the top of the leaves cannot rule out every life stage (University of Illinois Extension’s thrips profile).
This does not mean every nursery plant is unsafe or that you need to treat every purchase preemptively. It means that a short quarantine is a sensible inspection period, especially when the plant will sit near a collection you value. Garden Design recommends isolating new houseplants for about 30 days; the practical point is to keep the newcomer apart long enough to inspect it more than once, not to rely on one calendar date as a guarantee (Garden Design’s thrips guidance).
How thrips move through a home
Thrips move in more than one way, and this is why “I moved it to the other end of the shelf” may not be enough. Adults are small and can fly, although they are not strong fliers; insects can also be shaken loose when a plant is handled, pruned, watered, or carried past other foliage. The University of California Statewide IPM Program notes that thrips may move on infested plants and that the pest group includes species with different habits (UC IPM’s thrips overview).
Contact between leaves is the most obvious bridge, but it is not the only one. Shared saucers, a crowded plant stand, a plant sitter moving from an infested plant to a healthy one, and tools used without cleaning can all make it harder to contain an outbreak. Those routes do not mean every object is a confirmed source; they are simply reasons to keep suspect plants physically separate and clean hands or tools after handling them.
Distance reduces easy contact, but it is not the same as isolation. For a confirmed infestation, a separate room with a closed door is a stronger boundary than a few inches of empty shelf, especially if the plant will remain untreated or unchecked for several days. If your home has no spare room, choose the most separated spot available, avoid leaf-to-leaf contact, and inspect the surrounding plants more often.
Recognize thrips before treating every plant
Thrips feeding damages the surface of leaves, stems, buds, and flowers. The University of Illinois Extension describes the injury as pale to silvery lines and sometimes dieback; UC IPM also describes stippling, discolored flecking, silvering, and dark frass near feeding sites. The pattern can vary by plant and thrips species, so treat the symptoms as clues rather than a diagnosis.
What the damage looks like
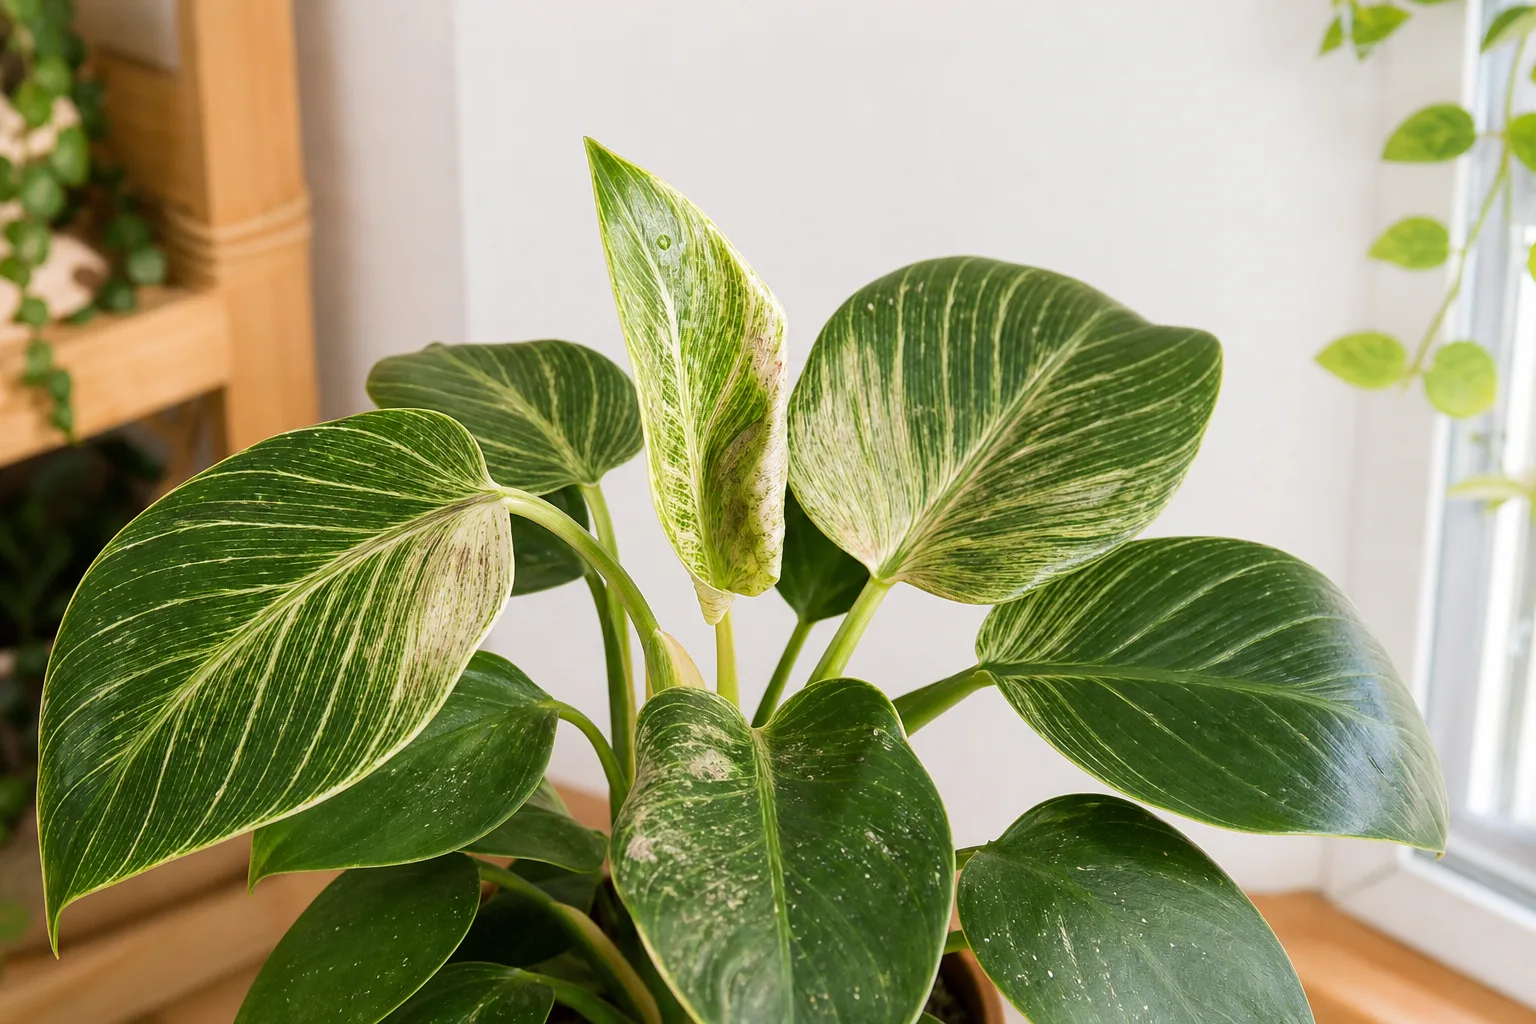
Look for irregular silvery or bronze scars, pale streaks that seem rubbed into the leaf, tiny black specks, and new growth that emerges twisted or misshapen. On a broad leaf, the damaged area may look scraped or dulled rather than like a round spot; flowers can also show streaking or buds that fail to open normally. Old scars will remain even after the pest is controlled because the damaged tissue does not turn green again.
The look-alikes matter. Spider mites more often cause fine stippling and may leave webbing; sun scorch tends to be strongest on the side facing the window; mineral residue may wipe off; and disease or nutrient stress can distort growth without leaving the same combination of scars and black frass. If the pattern is unclear, take close photos and ask a local extension service or plant clinic before applying a pesticide.

Confirm insects with a simple tap test
Hold a sheet of white paper under a suspect leaf or flower and tap the plant gently. Tiny slender insects that drop onto the paper are easier to see against the white background; use a hand lens if you have one, and look for movement rather than relying on color alone. UC IPM recommends shaking foliage or flowers over white paper and using blue or bright-yellow sticky cards to detect flying thrips.
Check several places, not just one leaf. Inspect the undersides of leaves, the folds of curled foliage, petioles, flower buds, and the newest growth; adults and pale immature thrips may be hiding in different places. A sticky card can help show whether flying adults are still present, but a trap cannot reveal eggs inside leaves or prove that the plant is free of larvae.
The first-day response that limits spread
Start with containment, not a shopping trip. Move the suspect plant away from other plants without brushing it against them, and place it in a separate room if possible; then note where it was and which pots had touching leaves, shared trays, or recent handling in common. This turns a vague fear about “all my plants” into a list of plants that deserve an inspection.
Inspect neighboring plants before deciding to spray anything. Look for fresh silvering, black frass, distorted growth, and live insects on the same vulnerable areas; mark each plant as confirmed, exposed, or not currently showing signs. A plant that shared the shelf but has no signs is exposed, not automatically infested, so monitoring it is more proportionate than applying pesticides to every pot.
Remove heavily infested fallen leaves or flowers and bag them before carrying them through the home. Clean the shelf, windowsill, saucer, or plant stand where the suspect pot sat, and wash or wipe tools that touched it before using them elsewhere. Do not shake a plant over your other pots or bring loose clippings through the collection.
If the plant has to cross a room, keep its foliage from brushing furniture and neighboring leaves. A large, awkward plant can be moved in a clean box or bag that contains the foliage during transport, then uncovered in the isolation area; avoid sealing it in plastic for an extended period, which can trap heat and moisture and stress the plant. The goal is a calm move that does not scatter insects or create a new plant-to-plant contact.
Quarantine has to mean more than moving a pot
Quarantine is a separate space plus repeated observation. A plant placed on a different shelf in the same dense cluster may still contact other leaves, and thrips can move between locations. A spare room is ideal; otherwise choose the farthest practical spot, keep the plant from touching others, use a dedicated tray, and avoid carrying it through the collection during routine care.
Inspect new arrivals and isolated plants at least weekly for several weeks, paying close attention to fresh growth and the undersides of leaves. Garden Design suggests a 30-day isolation period for new houseplants, a useful conservative starting point for many home collections; if you discover new damage or live insects during that period, continue isolation and begin a fresh period of monitoring after the last confirmed activity. No fixed number of days can guarantee that every species or life stage has been detected.

Use a separate cloth, gloves, or small tools for the quarantine plant, or clean them before returning to healthy plants. Work from the apparently healthy group toward the isolated plant, not the other way around, and wash your hands after handling suspect foliage. These habits are simple, but they prevent a treatment session from becoming the route by which insects move to the rest of the room.
Treatment works as a repeated, monitored process
Thrips are difficult to control with one pass because some stages are exposed on the foliage while eggs and other stages can be protected in plant tissue or the growing medium, depending on species. Gardener’s Path describes feeding larval stages and less-visible prepupal or pupal stages, while noting that timing changes with species and temperature (Gardener’s Path’s thrips guide). UC IPM notes that hidden feeding, protected stages, poor timing, and incomplete spray coverage can all undermine control; it recommends combining methods rather than relying on pesticides alone. A treatment that knocks down visible adults can therefore look successful for a few days and still be followed by newly emerged insects.
Think in terms of a cycle: reduce the population you can reach, apply a suitable method as directed, inspect again, and repeat only according to the product label and current evidence. Do not invent a weekly spray schedule or increase a concentration because a plant still has scars; product formulations, permitted uses, and safe intervals vary. If the plant continues to show live thrips after label-directed use, recheck the diagnosis and coverage and seek local extension advice rather than layering on products.
Remove, rinse, and clean what you can reach
Prune leaves or flower parts that are badly infested when removing them will not strip the plant of most of its healthy foliage. Put the clippings straight into a bag and discard them; pruning a few damaged leaves can reduce hiding places, but stripping a weak plant can create extra stress without reaching eggs elsewhere. Keep healthy new growth and do not expect removal of scarred leaves to cure the infestation by itself.
For a sturdy plant, a gentle rinse over the sink or in a shower can dislodge some exposed insects and wash dust from the leaves. Support delicate stems, avoid blasting tender growth, and let excess water drain fully; this is a population-reduction step, not a substitute for inspection and follow-up. After rinsing, wipe or clean the nearby sink and surfaces so insects are not simply moved to another plant.

Use a labeled product only when it fits
If you choose a pesticide, use a product whose label permits use on indoor ornamental plants and lists the target pest or a relevant control claim in your country. Follow its dose, coverage, repeat interval, ventilation, protective-equipment, re-entry, and disposal instructions exactly; never treat a homemade dish-soap mixture as interchangeable with a formulated insecticidal soap. The National Pesticide Information Center warns that pesticide use indoors creates different exposure concerns because people spend time in enclosed spaces and overspray can reach floors or furnishings.
Test a small area first when the label allows the product on that plant, since some foliage is sensitive to soaps or oils. Keep pets and children away as the label directs, do not spray a flowering plant where pollinators may visit, and do not combine products unless the label specifically permits it. “Natural” is not a safety category, and a product sold as a leaf shine or cosmetic may not be registered for pest control.
Blue or yellow sticky cards are useful for monitoring adults and may catch some flying insects, but they do not control eggs in tissue or larvae tucked into new growth. They are a dashboard, not the engine: use them to notice activity and compare trends, while inspecting the plant itself. For a broader identification and treatment walkthrough, see our thrips guide for houseplants.
Triage a large collection without panic
When many plants were grouped together, start with exposure mapping rather than a whole-room spray. Divide the collection into three practical groups: confirmed plants with live thrips or convincing fresh damage; exposed plants that shared close contact or handling; and plants that were elsewhere with no known connection. This lets you isolate and treat the confirmed group, inspect the exposed group closely, and continue ordinary monitoring for the rest.
| Group | What to do now | What not to assume |
|---|---|---|
| Confirmed | Isolate, record signs, remove heavily infested debris, and choose a label-compliant treatment plan. | That one spray will reach every stage. |
| Exposed | Inspect leaf undersides and new growth; use a monitoring card and repeat checks. | That every plant nearby is already infested. |
| No known exposure | Continue routine weekly checks and avoid moving plants through the quarantine area. | That a lack of symptoms today proves permanent immunity. |
Record the date, plant, signs, and action each time you inspect. A simple note such as “Monday: no live insects; two new leaves clean” is more useful than trying to remember whether the plant looked better last week. If several plants are affected, this log helps distinguish old scars from fresh damage and makes it easier to see whether the plan is working.
When discarding an infested plant is reasonable
Saving every plant is not always the kindest or most practical choice. Consider discarding a plant when it is already in poor condition, the infestation is extensive, the plant cannot tolerate the available treatment, or keeping it would put many valued plants at ongoing risk. The decision should account for both plant health and the time you can realistically give repeated inspection and treatment.
Do not wait until a plant is nearly dead simply because you feel guilty about throwing it away. If you choose to discard it, place the pot and foliage in a sturdy bag before moving it through the home, tie it closed, and put it in household waste rather than carrying loose leaves across the collection or composting them near plants. Clean the surface where it stood and inspect the plants that had the closest contact.
Some plants can recover even when their leaves look rough, because new growth may emerge without fresh scars once the pest is controlled. Keep the plant if the growing point and roots are sound and you can maintain isolation; make the decision based on new activity and its overall condition, not the appearance of old damage alone. If the plant is rare or sentimental, a local extension office or experienced horticulturist can help assess whether a cutting can be salvaged safely.
Prevent the same problem when buying plants
Look at new plants before they enter your home routine. Check the undersides of leaves, leaf joints, rolled growth, flower buds, and the soil surface; tap suspect foliage over white paper and look for movement. Reject a visibly infested plant if you can, and keep even a clean-looking purchase separate from your main collection while you inspect it over time.
Quarantine should be a real boundary, not “the new plant sits at the end of the same shelf.” Choose a separate room or the most distant workable space, keep leaves from touching other plants, and use a dedicated tray. If you bring plants home frequently, keep the quarantine corner set up so the extra step does not feel like a major project each time.
Keep a routine inspection day, especially after bringing home a new plant or moving outdoor plants indoors. Check one or two leaves on each plant for pests and unusual damage, then use a hand lens and white paper when something looks suspicious. Early detection is a stronger form of prevention than trying to make your home pest-proof.
Prepare your collection before travel
Do not rearrange plants into one tight group just to make watering easier. Leave them in their established positions with no foliage touching, and write care instructions that identify which plants need water, how to check the soil, and which pots should not be watered yet. A plant sitter should not have to guess or move pots to reach them.
Before leaving, inspect every plant that will receive regular care, with extra attention to the newest arrivals and any plant that recently spent time outdoors. Remove fallen leaves, wipe saucers, and leave the tools and watering can where the sitter can use them without moving plants around. If an infested plant is already in quarantine, label its care instructions clearly and ask the sitter to handle it last and keep its tools separate.
For a long trip, arrange an inspection visit rather than asking someone only to water a large collection once. A sitter does not need to diagnose every insect, but they can notice a sudden cluster of pale damage, black specks, or moving insects and send you a photo before handling nearby plants. If no one can check, reduce the number of last-minute changes and keep the collection’s spacing stable.
Know what “under control” looks like
A plant is not clear just because the visible insects disappeared after rinsing. Continue checking new growth, the undersides of leaves, and the sticky card; look for no live thrips and no newly appearing scars over repeated inspections. The damage already on a leaf will stay, so use fresh leaves and current activity as your progress markers.
Keep a confirmed plant separate while you complete the label-directed treatment period and continue monitoring for several weeks afterward. If new damage appears, return to the confirmation step: identify the insect, check coverage, inspect neighboring plants, and verify that the product was appropriate for indoor use and the target pest. A reappearance can mean missed stages, a new arrival, or a mistaken diagnosis; it does not automatically mean the plant is hopeless.
Collection recovery may be uneven. One plant can be clear while a nearby plant still has hidden activity, so do not move the entire group back together on the first good inspection. Reconnect plants gradually only after repeated checks show clean new growth and no live thrips, and keep the weekly inspection habit that would catch the next problem early.
Conclusion
The preventable mistake is not simply owning many plants or leaving home for two weeks. It is removing the barriers between a new or suspect plant and the rest of the collection, then going too long without checking what is happening. Thrips can move and hide, but isolation, a white-paper check, a mapped inspection plan, and careful follow-up give you a way to act before every plant becomes part of the same problem.
Start with the plant that has the clearest signs, separate it, and inspect the plants that shared its space. Treat only what you can identify, follow the label if you use a pesticide, and judge success by clean new growth rather than by whether old leaves look perfect. That routine will not make pests impossible, but it can prevent one unseen introduction from turning into a collection-wide loss.