20 DIY Strawberry Planter Ideas for Any Patio or Yard
Compare 20 DIY strawberry planters, from cedar boxes to hanging baskets, with space, drainage, capacity, effort, and upkeep explained before you choose.

A good strawberry planter is less about novelty than the daily jobs it makes easier: watering the root zone, letting excess water escape, keeping fruit reachable, and giving each plant enough room. A beautiful tower that dries before lunch may be a poor fit for a sunny, windy balcony; a plain trough can be the smarter choice if you want dependable access and simple upkeep.
The ideas below range from basic boxes to vertical displays and repurposed vessels. Each includes an approximate capacity, materials, drainage needs, effort, cost level, and a real tradeoff. Counts are planning estimates for typical full-size garden strawberries, not a guarantee of production. Compact alpine strawberries and large cultivars need different spacing, and your local extension service can help you choose varieties suited to your climate.
Start with a planter that solves the right problem
Size and spacing before shape
Strawberry roots are relatively shallow, but that does not mean a tiny pocket is ideal. Penn State Extension notes that most strawberry roots in heavier soils can sit in the top six inches; Utah State University Extension describes most roots as occupying the top 10 to 12 inches. Those are observations in regional garden conditions, not a universal planter specification. As a practical design target, provide about 8 to 12 inches of usable growing medium, then choose a wider container when you want more plants or less frequent watering. Avoid counting decorative space outside the actual root chamber.
For a standard open trough, start with roughly 8 inches between plant centers. The RHS container guidance uses about 20 centimeters (8 inches), while Savvy Gardening also advises leaving at least that much room. A 24-inch box may therefore hold about three plants after allowing for end clearance; a 36-inch box may hold about four. Treat that as a starting layout, not a rigid rule: larger plants, airflow, and easy picking can justify fewer.
Drainage, materials, access, and support
Every direct-filled container needs open drainage outlets at its lowest points. A saucer can catch drips, but it should not leave the planter sitting in a pool. Do not add a thick gravel layer as a substitute for holes; it reduces usable root volume without fixing a blocked outlet. If a design uses several levels, give each level its own drainage route so the top tier does not dump muddy water over the plants below.
Plan for the weight when the growing mix is wet. A long box on a railing, wall, or shelf needs brackets and anchors suited to that structure; a hanging basket needs a secure hook, not a light decorative screw. For edible crops, prefer new materials or reused vessels with a known, appropriate history. Skip containers that held pesticides, fuels, cleaners, or unknown chemicals. Light-colored outer surfaces and some shelter from wind can also reduce heat and drying stress; Utah State University Extension specifically cautions against dark containers in hot summer sun.
20 DIY strawberry planter ideas
Wood and box builds
1. A straightforward cedar trough. Use cedar boards, exterior-rated screws, corner supports, and a few feet or blocks to lift the base off the patio. A box about 36 inches long, 10 to 12 inches wide, and 8 to 12 inches deep can fit roughly four plants at an 8-inch layout. Drill several clear holes through the bottom before filling; keep the outlets accessible for cleaning. Skill and cost are low to moderate, depending on lumber and tools. It is easy to plant, weed, and pick, but it uses more horizontal space than a tower.
2. A slatted sleeve around a removable planter. Build a decorative cedar or reclaimed-wood shell that holds a separate, food-safe rectangular grow tub. The insert provides the root volume and drainage, while the slats create a finished look without making the wood itself the soil container. A 30- to 36-inch insert usually accommodates three or four plants; confirm its actual inside dimensions. Basic carpentry and moderate cost are enough. You can lift the insert for cleaning or winter storage, though the shell must not trap runoff or prevent airflow around the tub.
3. A hexagonal island planter. Cut six equal boards for each side, fasten them around a base, and add a stable foot or broad pavers. A roughly 30-inch-wide, 10-inch-deep interior can hold about five or six plants around the perimeter, spaced away from the corners. Add more than one bottom outlet and place the planter where you can reach every side. This is a moderate-skill, moderate-cost project because angled cuts take care. Its compact footprint is attractive in a courtyard, but the center can become hard to reach if the top is too wide.
4. A stair-step set of three boxes. Make three open-bottom or fully bottomed cedar boxes in graduated lengths, then support each level on a rigid frame so the tiers do not lean on one another. For example, three 24- to 30-inch runs, each with 10 to 12 inches of media depth, might fit seven to nine plants total. Each box needs its own drainage holes and enough front-to-back separation for leaves and fruit to clear the tier below. Skill and cost are moderate. The display saves floor area, but check the sun angle: an upper box can shade a lower one, so leave room to rotate or reposition the planter.
5. A deep window box for a sunny sill or parapet. Use a 30- to 36-inch-long box with a broad base, drainage slots, and a properly sized support; three or four plants is a realistic starting count. Choose a design at least about 8 inches deep rather than a narrow decorative trough, and make sure runoff cannot stain a wall or drip onto a neighbor below. This is a beginner-friendly build with low to moderate cost. The shallow footprint is convenient for clipping fruit, but it dries faster than a larger container. On a ledge, confirm the sill and brackets can carry the wet load before installing it.
Vertical and modular displays
6. A classic side-pocket strawberry jar. A glazed or terracotta strawberry pot has a top opening plus planting pockets around its sides; a 12- to 14-inch model may offer several pockets, but the usable root volume per plant is small. Make sure every pocket drains and consider a removable inner pot rather than filling inaccessible cavities with compacted mix. Skill is low; a quality jar can cost more than a simple box. The shape is decorative and compact, yet the RHS notes that traditional pocket pots can make healthy, productive plants harder to maintain. Buy it for the look and accept more careful watering, not because the openings promise extra yield.
7. A stack of ordinary, wide pots. Nest two or three sturdy pots of decreasing diameter with their rims offset, keeping each pot’s main opening exposed; do not stack them so tightly that the upper base covers lower drainage holes. A three-pot arrangement with 12- to 16-inch-wide pots may hold roughly six to eight plants total, depending on each opening. Use free-draining mix, a level base, and lighter-colored pots for hot locations. Assembly is easy and cost is moderate. Unlike a side-pocket jar, the plants keep full top access, but the tiers can cast shade and become difficult to rotate once filled and watered.
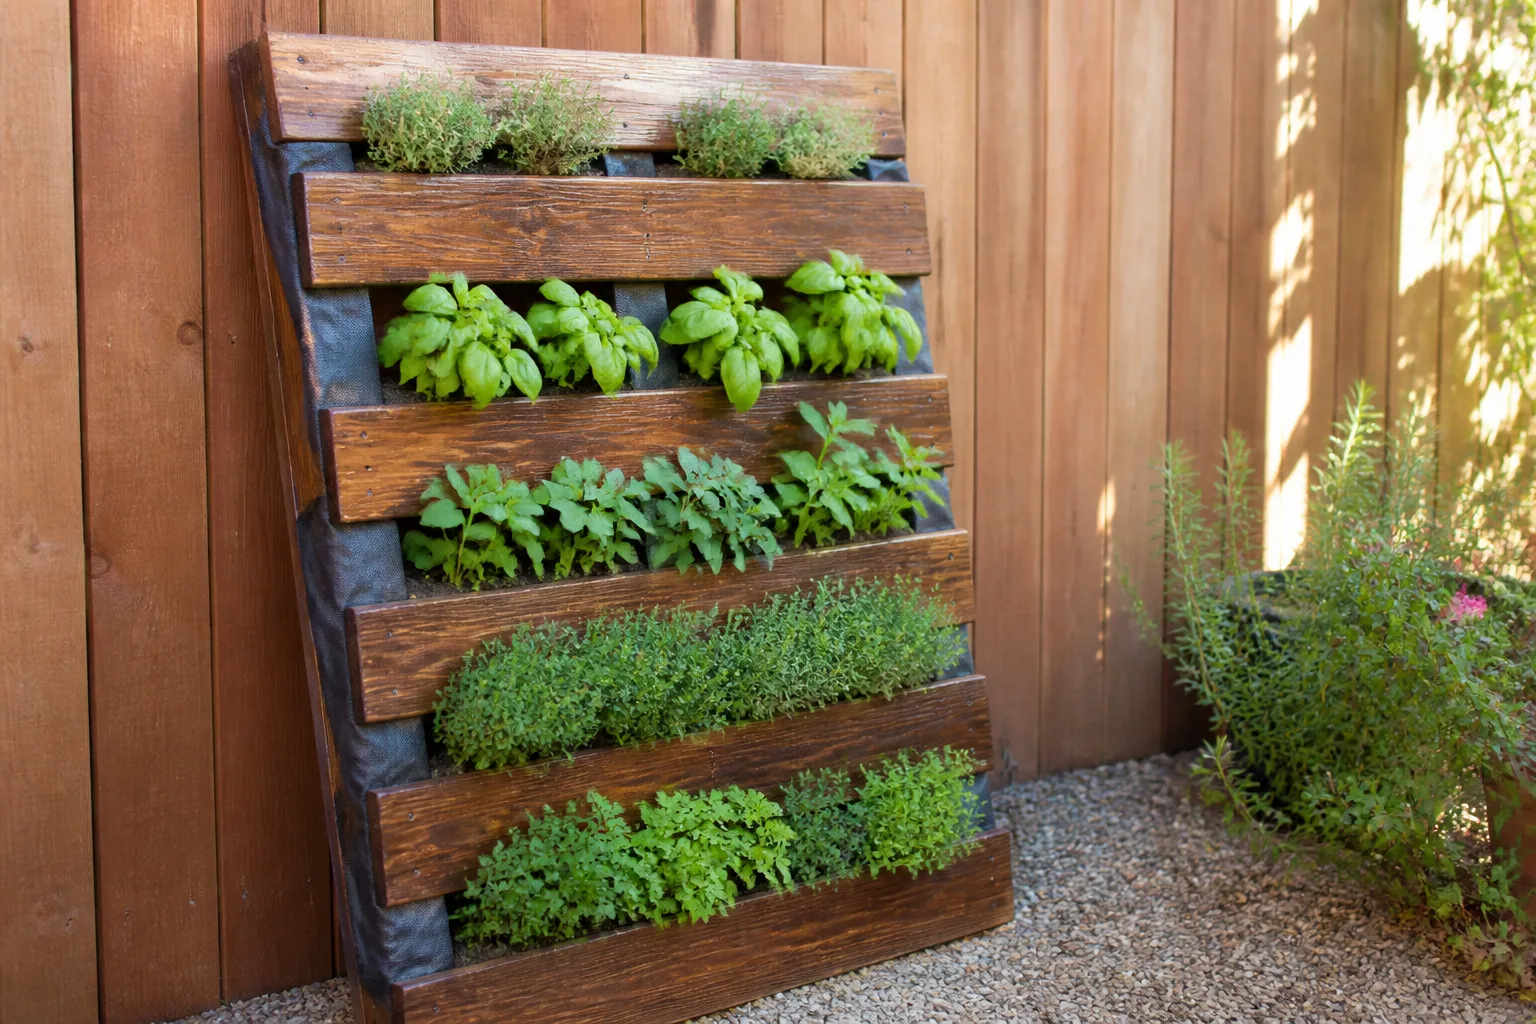
8. A pallet-front planter box. One pallet can become the frame for a wide box with a solid base, closed ends, and feet; a named-author Lovely Greens build illustrates this box-like approach and how pallet dimensions vary. Plant only in a clean, known-history structure, or use the pallet as a frame for separate food-safe containers. A common footprint around 40 to 48 inches long may fit five or six plants with proper spacing. The project takes moderate carpentry and low cost if materials are on hand. It offers a rustic vertical profile, but gaps must retain mix without blocking drainage, and the filled structure is awkward to move.
9. A ladder shelf holding individual pots. Repurpose or build a stable three-shelf ladder and place two to three 10- to 12-inch pots on each level. Six pots can hold approximately 12 to 18 plants if each pot has the volume and spacing for two or three; fewer plants make picking and airflow easier. Each pot drains independently into a removable catch tray that you empty after watering. The shelf is a moderate-skill, moderate-cost project, but it avoids a single large soil mass. Its modularity makes replacement easy; the tradeoff is that upper pots can shade the lower shelf and the entire frame must resist tipping.
10. A double-sided A-frame planter. Build a braced wooden A-frame with two or three troughs fixed across each sloping face. Six 24-inch trough sections, each holding about three plants, can create a 12- to 18-plant display without one continuous deep tower. Give every trough a bottom outlet and a small lip so the mix stays contained; do not let upper-level runoff pour into a lower box. This needs intermediate carpentry, a level footprint, and a moderate-to-high materials budget. Both faces can receive light, but one side may be shaded depending on orientation. A-frame support is essential because wet troughs make the structure heavy and top-heavy.
Hanging and narrow-space builds
11. A single hanging basket. Start with a 12- to 14-inch wire basket with a liner or a rigid basket with drainage holes, and use two or three plants as a practical upper range. The Savvy Gardening container guide gives that count for a typical basket size. Installation is easy, though the hook and support must be rated for a heavy, wet basket. Cost is low to moderate. Fruit hangs within reach and the basket saves floor space, but wind and sun dry it quickly; choose a sheltered spot, water by checking the root zone, and avoid hanging where runoff will fall on people or property.
12. A deck-rail trough with a real bracket. Use a 24- to 36-inch planter with a wide base, drainage holes, and a bracket system made for the rail’s shape and load. Three or four plants fit a 30- to 36-inch box at roughly 8-inch spacing. This is a low-skill build if the box is ready-made and moderate in cost once secure brackets are included. Keep the planter on the inside of the railing when possible, use a catch tray if runoff is a problem, and verify the rail is structurally suitable. The main benefit is a compact harvest at hand height; the limitation is exposure to hot reflected surfaces and drying wind.
13. A tiered gutter rack with deep inserts. Standard rain gutters are often too shallow to be dependable root containers. Instead, build a freestanding rack with wide, deeper channels or set individual pots into the gutter as a decorative rail, so the pots—not the channel—hold the root volume. A 30-inch run might display three or four plants at 8-inch intervals. Drill outlets in any channel that holds water and route each tier’s runoff separately. Skill and cost are moderate, especially if you make a frame. This design is good for a narrow fence line, but shallow gutters filled directly with mix dry quickly and can spill during heavy rain.

14. A wire-grid wall of individual pots. Secure a coated wire panel to a sturdy outdoor post or masonry anchors, then attach small pots with locking clips or purpose-made brackets. Six to eight pots measuring about 8 to 10 inches across might hold six to 16 plants, depending on pot volume and spacing. The panel itself needs no growing medium, and each pot keeps its own drainage outlet. This is a moderate-skill, moderate-cost option. It is easier to change the layout than a built-in wall planter, but small pots dry rapidly and the grid’s load must transfer to a sound structure. Leave room to remove pots for cleaning or winter protection.
15. A canvas pocket panel that carries pots. Sew or buy a heavy outdoor panel with broad sleeves, then slip a small rigid, draining pot into each sleeve rather than filling shallow fabric pockets directly. Four to six 8- to 10-inch pots make a manageable first panel; capacity depends on the pot’s root volume, not the fabric. Mount the panel to a free-standing frame or secure exterior structure, never to an unprotected interior wall. Skill ranges from low to high depending on sewing; cost is moderate. The soft panel looks lighter than wood, but it can wick water, stain a wall, and dry quickly, so a waterproof backer and accessible pot removal matter.
Reuse and hardscape builds
16. A repurposed wheelbarrow planter. A clean wheelbarrow with a known history can become a mobile, deep container. A basin about 24 to 30 inches wide may fit four to six plants; drill several drainage holes in its lowest areas and raise the basin so the holes are not sealed against pavement. Skill is low, with low cost if the wheelbarrow is already available. The wheel and handles make it easier to turn toward light or move under cover, but a filled barrow is heavy and may tip. Avoid a vessel that previously carried fuel, solvents, pesticides, or other chemicals, and check that the metal has no sharp edges.
17. A half-barrel berry tub. A clean half-barrel roughly 24 to 30 inches across and at least 10 to 12 inches deep can support six to eight plants around its rim and center, depending on the interior width. Add several unobstructed base holes, raise it on bricks or feet, and use a liner only if it has drainage openings that remain clear. This is a moderate-skill project if you add a stand and moderate-to-high cost for a new barrel. The wide volume buffers moisture better than small pockets, yet wet soil makes it difficult to move. Place it before filling and allow fruit to spill over an accessible edge.
18. A food-grade stock tub or storage tote. A new food-contact-rated tub or a clean, known-history storage container can be a low-cost grow vessel. Choose a broad shape with 8 to 12 inches of usable depth; a 24- to 36-inch container may hold four to eight plants depending on width. Drill several distributed bottom holes and place the tub on feet so water can leave. Skill is minimal, cost is low to moderate, and the capacity is easy to change. A dark plastic tub can heat in direct summer sun, so use a light outer sleeve or shade the sides. Do not repurpose a chemical drum or any container with an unknown past.
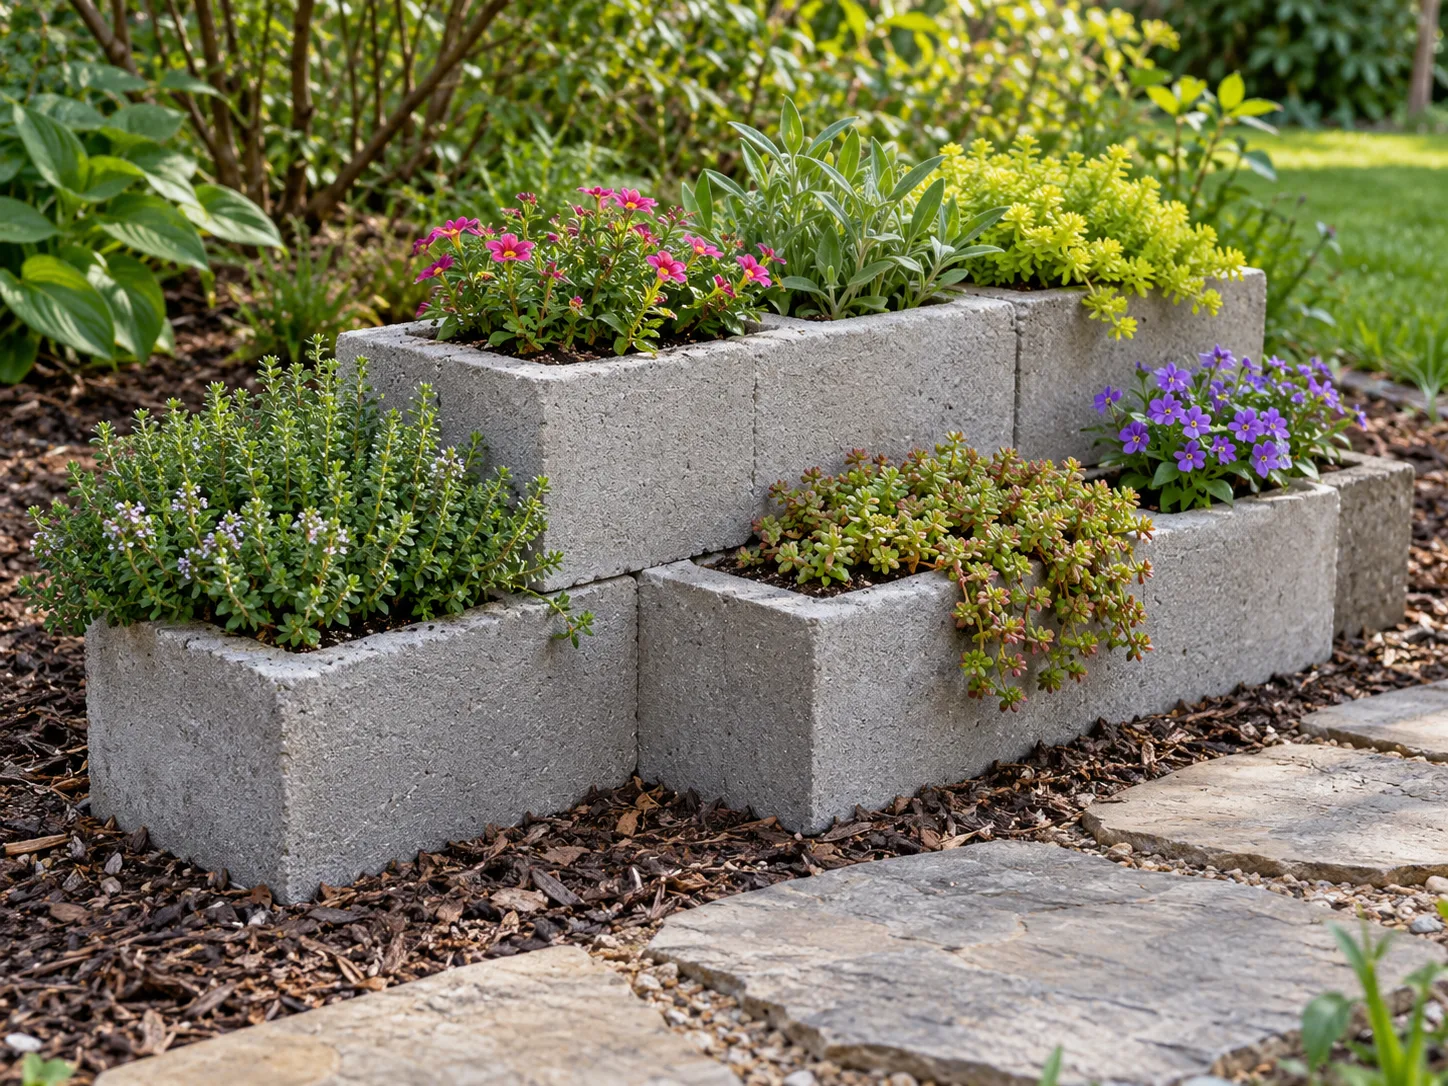
19. A cinder-block planting bench. Arrange two or three rows of stable concrete blocks on a level, compacted base, with selected cavities holding separate nursery pots or a retained soil insert. A short, two-block-wide run may display four to six small pots; count the actual planting cavities rather than the blocks. Pot inserts preserve drainage and make plant replacement easier than filling every cavity directly. Skill is low, but materials are heavy and moderate in cost if blocks must be moved. This is durable and modular; the tradeoff is that stacked blocks need a safe, stable layout and may create uneven sun, hot surfaces, or awkward picking height.
20. A wide concrete or hypertufa trough. Cast a broad basin with a drain hole or use an existing concrete trough that is at least about 10 inches deep. A 24- to 30-inch interior can fit three or four plants at a restrained spacing. Add drainage before planting and use feet or a stand to keep outlets open. Making the mold, reinforcing it, and curing the material require intermediate skill; cost is moderate to high. The heavy, permanent container is stable and long-lived, but moving it after filling is unrealistic. Choose this for a fixed patio location, not a balcony or rental where access, weight, and runoff may change.
Match a planter to your space
Compare footprint, capacity, effort, and upkeep
If you want the fewest daily surprises, begin with a wide trough or a removable pot insert. Both let you see the entire root surface, check moisture, reach every plant, and clear a blocked outlet. A tiered display or wall rack is useful when floor space is scarce, but each level adds shade, runoff, and access questions. The classic strawberry jar is compact and decorative; its side pockets are also the hardest places to keep evenly moist and to inspect. A small, open basket is easy to hang but demands more frequent checks in hot or windy weather.
The simplest rule is to choose shape after deciding where water will go and how often you can check the planter. A gardener away during hot afternoons might prefer a larger trough with greater media volume over many small pots. Someone with only a sunny railing may accept the extra care of a rail planter, provided it is safely mounted. For a playful feature beside a patio door, a jar may be worth the added maintenance. There is no best design for every climate, surface, or watering routine.
Check the real capacity before buying materials
Measure the inside planting area, not the outer frame. For a row, divide the usable length by about eight inches, then leave an end margin; for a cluster or circular pot, lay out the plant centers on paper so you can see whether leaves and fruit will crowd. A 24-inch by 12-inch trough is not automatically a six-plant box just because the surface looks roomy. Root volume, airflow, and access are part of capacity too.
Use this short pre-build check:
- Can each plant sit in about 8 to 12 inches of usable growing depth, or is a shallow channel merely a decorative holder for individual pots?
- Can every drainage opening release water after the planter is installed?
- Can you reach the inner plants without leaning over a drop or removing another tier?
- Is the wall, rail, shelf, or stand appropriate for the filled weight?
- Will water drain where it is allowed to drain?
If any answer is uncertain, simplify the design or test the empty structure before filling it. A small test with a hose can expose a blocked outlet or a stream that runs onto a walkway. For complex mounting, check the manufacturer’s load rating or ask a qualified builder rather than guessing from appearance.
Build for easy maintenance
Make drainage and liners serviceable
Drill the outlets before assembly if the base will be difficult to reach later. Use enough holes to avoid a single-point failure, and cover large openings with a coarse mesh that holds the mix without sealing the water path. Do not line a box with an unperforated plastic sheet. If you use a removable liner, make sure its drain holes align with free space beneath it, and leave a small gap around the insert so water does not stay trapped against wood.
For reservoir designs, build a visible overflow at the intended maximum water level and keep the root zone from sitting continuously in stagnant water. A container that hides the reservoir can look tidy but makes it harder to know whether water is draining or accumulating. Before planting, add water to the empty planter and watch where it exits. After filling, repeat the check; mix can settle against an outlet and block it.
Plan for heat, water, and seasonal access
Container walls warm and dry sooner than surrounding ground, particularly when the vessel is small, dark, exposed to reflected sun, or suspended in wind. Choose a light finish for a hot site, group small containers where they receive some shelter, or use a larger liner to increase the volume of mix. The RHS recommends regular watering for strawberries in containers, and Utah State cautions that dark pots can heat roots under summer sun. The exact interval depends on weather and the actual pot; check moisture rather than following a calendar.
Keep the growing instructions simple: place the container in a suitable sunny location, keep its mix from swinging between bone-dry and waterlogged, and make picking comfortable. See how to plant a strawberry pot, plants suited to strawberry pots, and how to grow strawberries in pots for planting and seasonal care. Those guides cover cultivation; this page is about choosing and building the vessel.
Before each season, remove debris from the outlets, tighten loose brackets, and inspect wood or fabric for damage. If your region has freezing winters, consider whether the planter can be moved or protected; a large permanent vessel may need local winter guidance. Make the design serviceable from day one, because a drain you cannot reach or a basket you cannot safely lower turns routine care into a chore.
Conclusion
The most successful DIY strawberry planter is the one that gives roots a usable volume, sheds extra water, holds its wet weight safely, and fits the amount of attention you can give it. A deep cedar trough, lined box, or individual pots on a shelf usually makes those jobs straightforward; a jar, hanging basket, gutter display, or vertical wall can work when you plan for its smaller root spaces and faster drying.
Use the 20 ideas as starting designs rather than fixed plans. Measure the planting area, sketch the plant centers, decide where drainage will go, and check the support before you buy lumber or fill a container. If a design makes access or watering hard, change the design before the first plant goes in.