How to Make a Pallet Planter: Safe, Step-by-Step
Build a pallet planter with known-source wood, sound pockets, clear drainage, and secure support. Learn to choose safe materials and plants for your garden.
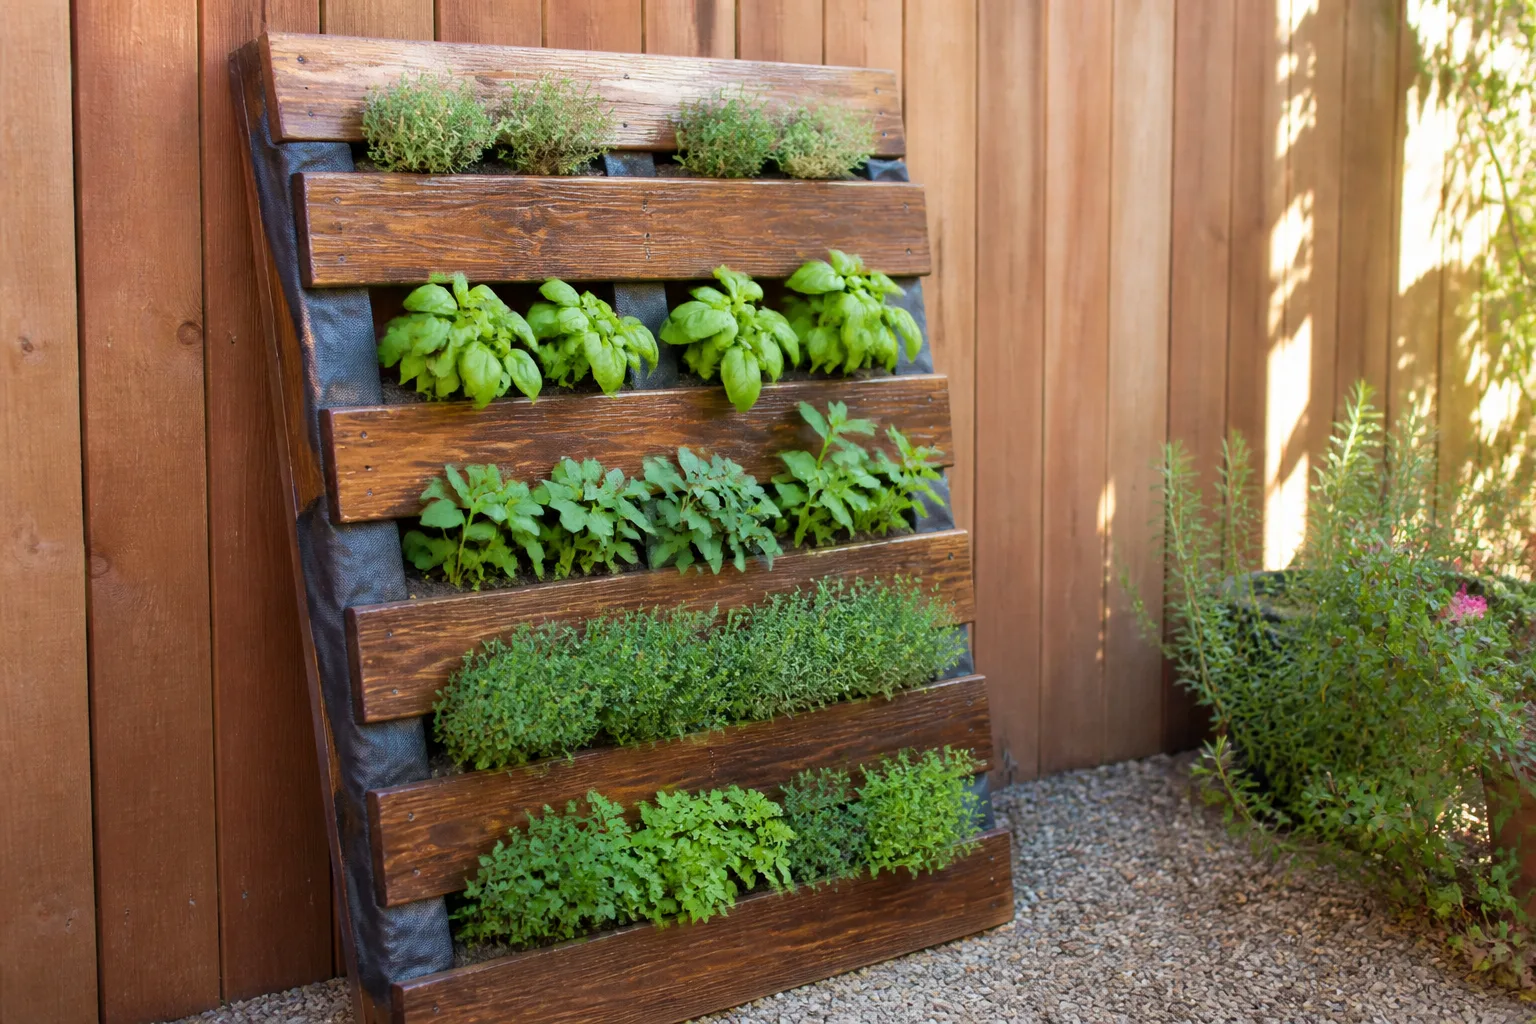
A pallet can become a compact vertical planter, but the garden-worthy version is more than a pallet with soil pushed between its slats. Each pocket needs a firm base, a back that holds mix while allowing water to drain, and enough support to stay upright after the wood and soil become wet. The first decision comes before the saw or staple gun: whether the pallet’s history is clear enough for the plants you intend to grow.
For flowers or foliage, choose a clean, sound pallet with a known source and no paint, stains, oily residue, or chemical smell. For food crops, take a stricter approach: use only wood with a known, untreated history that the supplier can confirm is suitable for food-growing use. A shipping-treatment stamp alone cannot tell you what the pallet carried or contacted. If the history is uncertain, build the same design from new untreated lumber instead.
Decide whether a vertical pallet planter fits your garden
A pallet planter makes sense when ground space is scarce, you want to display shallow-rooted herbs or flowers, and you can water it regularly. It is less useful for crops that need a deep, consistently moist root zone, for a windy balcony where a tall structure could topple, or for a wall that cannot take a heavy, wet load. Decide where it will stand and how water will drain before you assemble it; moving a filled pallet is difficult and can damage both the planter and its support.
Think about reach as well as footprint. The upper pockets should be comfortable to water and harvest without stretching over a railing, while the bottom pocket needs enough clearance to drain without sitting in a puddle. Check the site at different times of day: direct sun, reflected heat from a wall, and wind exposure can make the upper and lower rows dry at different rates.
Compare vertical pockets, a low planter, and a wall display
An upright pallet uses less floor space, but each pocket is relatively shallow and exposed to air on one or more sides. A low box made from pallet boards holds a deeper, more continuous root zone and is easier to water evenly; it also occupies more ground and needs a strong bottom. A pallet used only as a backing for separate pots or fabric pockets is easier to replant, but it still requires reliable support and safe wall attachment.
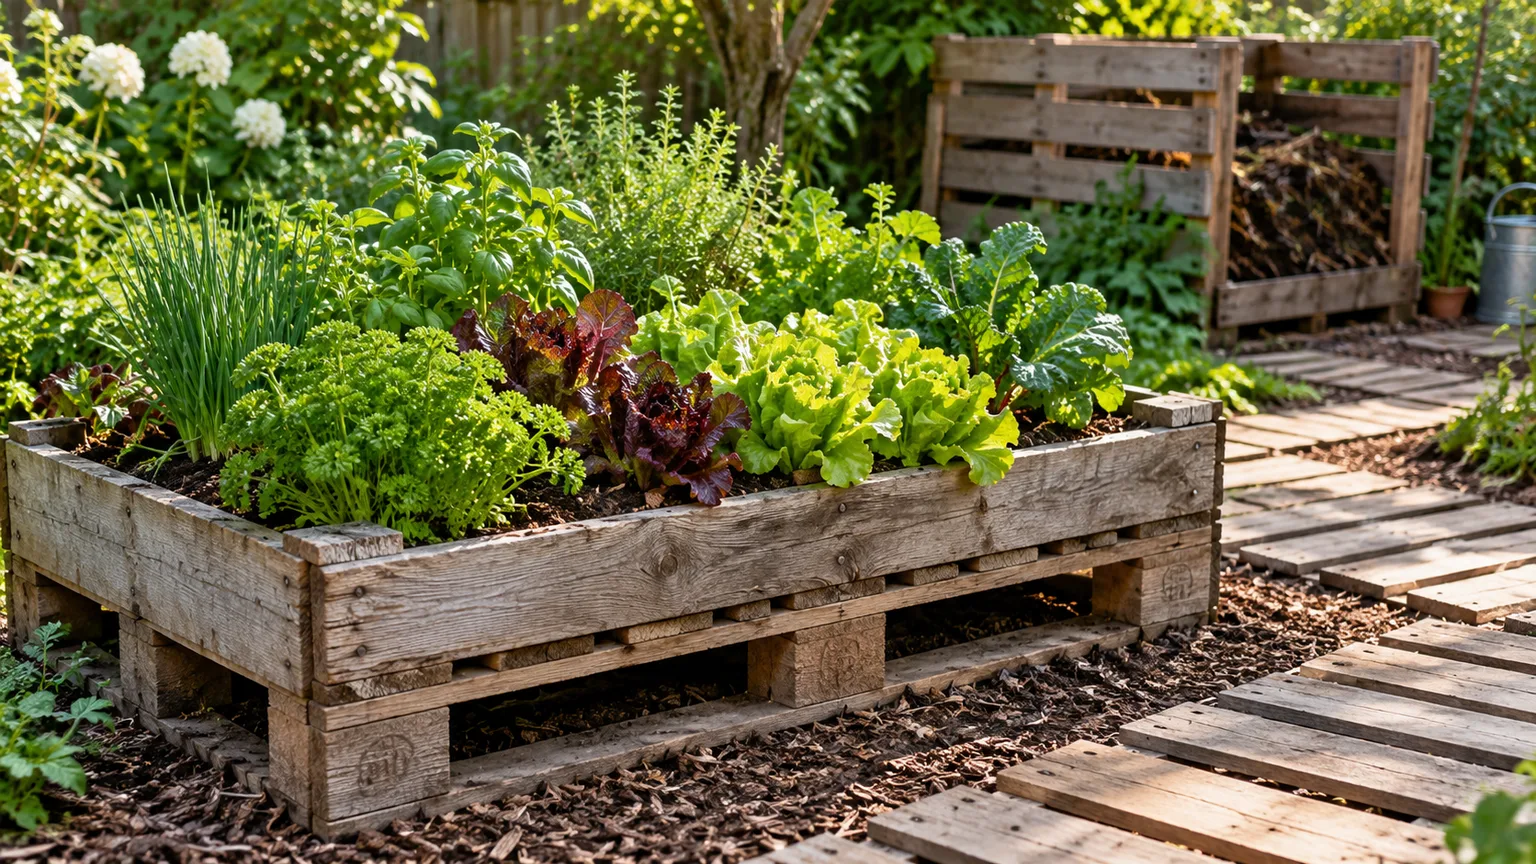
If your priority is salad greens, small herbs, trailing annuals, or a planted wall, vertical pockets can be a good fit. If you want tomatoes, potatoes, carrots, or plants that need a large root run, choose a deeper bed or individual containers instead. The right design is the one that matches the mature plant, not just the empty pallet’s shape.
Choose a pallet with a traceable, suitable history
Ask the owner where the pallet came from, whether it is being offered for reuse, and what it carried. Do not take pallets from a business without permission. Prefer clean wood with a source you can identify; a pallet from a known plant nursery or garden supplier is easier to evaluate than one pulled from an unknown loading area. Even a clean appearance cannot prove what a pallet contacted, so appearance is only one part of the decision.
When growing edible plants, the most conservative option is new untreated lumber sold for garden use or a pallet whose supplier can document that the wood is untreated, unpainted, and appropriate for food-growing. Do not use a pallet just because it is free. The savings disappear if you have to dismantle it, repair hidden damage, or replace a crop after discovering that its history is unknown.
Read HT and MB marks without overinterpreting them
International shipping pallets may carry treatment marks used for wood packaging under the international phytosanitary standard. In general, HT identifies heat treatment, while MB identifies methyl-bromide fumigation. USDA APHIS explains the inspection and marking requirements for wood packaging material, and Penn State Extension describes pallet treatment codes and the hazards of reused pallets.
An intact HT mark is useful information about the shipping-pest treatment; it is not a food-contact certificate, a chemical analysis, or a record of every load the pallet carried. It does not tell you whether the wood was exposed to spills, cleaners, pesticides, oils, or other contaminants during use. A mark can also be missing, damaged, or hard to interpret. For edible crops, confirm the pallet’s source and untreated status separately; if you cannot, do not use it for food.
Pass on any pallet marked MB. Also reject an illegible or suspicious stamp, an unknown painted or dyed pallet, and any pallet with a strong odor, oily patch, sticky residue, unusual discoloration, or unexplained powder. Do not sand or wash a questionable pallet in an attempt to make it safe: cleaning cannot reliably remove substances that have soaked into wood, and sanding can spread contaminated dust.
Reject paint, spills, odors, and structural damage
Painted and brightly colored pallets may belong to a pooling or rental system and may not be yours to take. Their coating and history are also unknown, so choose plain, unpainted wood. Avoid pallets with broken or soft boards, split stringers, loose blocks, extensive mold, insect exit holes, or deep rot. USDA APHIS identifies holes, feeding trails, and sawdust-like frass as signs of wood-boring pests in wood packaging; visible damage is a reason to leave the pallet where it is, not a cosmetic flaw to cover.
A pallet with one loose board may be repairable if its main supports are sound and its source is acceptable. A pallet with a cracked stringer or several compromised boards is a poor planter frame: adding soil and water increases strain on already weak joints. Do not rely on landscape fabric, paint, or extra staples to compensate for a failing structure.
Gather tools and materials before dismantling anything
For a simple upright build, gather a sound pallet, spare untreated boards that fit its width, exterior-rated screws, a drill with a pilot bit, a tape measure, a square, sandpaper, a pry bar or nail puller, a staple gun, and durable porous landscape fabric. Wear work gloves and eye protection while inspecting or fastening the wood. If sanding or cutting, control the dust and wear a suitable dust mask; secure each piece so it cannot shift.
Use screws long enough to grip the supports but short enough not to emerge through the opposite face. Check both sides before drilling. Pre-drilling near board ends reduces splitting, especially in dry pallet wood. A builder who documented a pallet flower planter found that some boards warped when they got wet and replaced brad nails with screws, a useful reminder that outdoor joints need to tolerate repeated wetting (Her Tool Belt’s pallet planter build). Keep a container for removed nails and pull each nail completely rather than leaving sharp points hidden inside the planter. Penn State Extension warns that pallet fasteners can be difficult to remove and that deconstruction injuries are common; if a board resists, stop and choose a safer method or leave that pallet intact.
For pockets, use sound boards salvaged from the same pallet or new untreated boards. Choose a porous landscape fabric made for outdoor soil containment. Plastic bags and solid plastic sheeting can block drainage, trap water against the wood, and create stagnant pockets, so they are poor substitutes for a breathable liner. Do not add a wood coating to an edible planter unless the maker specifically documents that it is appropriate for food-growing use and gives clear use instructions; the simpler choice is to leave suitable untreated wood unfinished.
Inspect, clean, and repair the pallet
Measure the pallet and sketch which side will face forward before removing anything. Pallets vary in board spacing, thickness, and construction, so do not copy measurements from a different pallet. Stand it upright temporarily and identify the deck boards, the thicker runners or stringers that support them, and the open bays where soil pockets can fit. Mark each proposed shelf and back board with pencil so you can see whether the boxes will be level and deep enough for the intended plants.
Brush away loose dirt outdoors and let damp wood dry completely. A little clean soil or dust is not the same as a chemical spill, but cleaning is not a decontamination method; reject suspicious residues rather than scrubbing them into the grain. Tap and press every board, then tighten or replace loose fasteners. If you need to remove boards, use a nail puller or pry bar carefully and work against a stable surface. Never kick, jump on, or stand on a pallet to break it apart. Remove or flatten every exposed nail before sanding.
Sand only to remove splinters and sharp edges, not to make questionable wood usable. Keep the boards supported while sanding, avoid breathing the dust, and sweep it up instead of blowing it around the garden. If a board splits while you work, replace it with a sound board; a repaired planter should not have points, cracks, or sharp ends where you reach to plant or water.
Build stable planting pockets from deck boards
For a common vertical design, the pallet’s stringers become the side walls and dividers of several horizontal planting pockets. The front deck boards remain visible across the face. Board pieces placed across each bay form a shelf that supports potting mix, while a back board or continuous fabric closes the rear so soil does not spill through. The exact number of pockets depends on the pallet’s existing slats; do not force a four-pocket layout if the boards cannot make strong, level bottoms.
Set the pallet on a flat surface with the face you want visible pointing down. Fit the shelf boards across each opening, resting their ends on the inner supports. Fasten them into the stringers, not just into a thin neighboring slat. Keep each shelf square to the frame and test it with firm hand pressure before adding fabric. If one bay is much deeper than the others, shorten it with a back stop rather than filling the entire cavity with extra soil; unused volume adds weight without giving roots a useful growing space.
A few small gaps between bottom boards let excess water escape, but gaps that are wide enough to lose potting mix need to be covered from the inside with porous fabric. Leave a clear outlet along the lowest edge of each pocket. Do not create a sealed trough and then rely on a single hole at the back: wet media held against wood encourages rot, while water trapped at a pocket’s base can suffocate roots.
Make the bottom shelves fit each bay
Dry-fit every shelf and check that it sits level from side to side. Each board should have sound support at both ends; if the pallet’s stringers do not span the bay securely, add a short cleat or a new untreated support board rather than hanging a shelf from fabric. Use exterior-rated fasteners and pre-drill near the ends. A screw head should sit flush, with no sharp tip protruding through a surface where hands or roots may contact it.
Fill each pocket with a small amount of dry mix as a test, then lift and gently shake the empty planter. If a shelf flexes, a fastener shifts, or the frame twists, reinforce or rebuild it before planting. This test is not a substitute for a structural load calculation when mounting the planter to a wall; it only catches obvious workmanship problems while the frame is still light.
Close the back with a breathable liner
Cut landscape fabric wide enough to cover the back and fold into each pocket. Staple it to solid wood at regular intervals, keeping staples outside the soil-contact area where possible. At the pocket corners, overlap the fabric rather than stretching it tight across a sharp edge. The liner should hold media in place, not pull loose under its weight.
Line each pocket’s rear face and sides, then fold the fabric over the bottom only where needed to retain the mix. Leave the drainage edge open. Water should be able to pass through the medium, exit each pocket, and drip away from the wall and wood. If you can, test with a watering can before adding plants: the liner should stay attached, the pocket should drain, and no large amount of mix should wash out.

Secure the planter before filling
Choose the final location while the planter is empty. A full pallet can weigh far more than the frame alone because potting mix holds water; adding plants, rain, and wind increases the load. A shipping pallet’s original capacity is not a rating for a vertical planter, a fence, or a wall fastener. Its design and condition may also change after outdoor weathering, repairs, and years of use.
The lowest-risk setup is to keep the planter’s bottom edge on stable ground and restrain the top so it cannot tip. Add a broad base or braced feet if it will stand on its own. If attaching it to a wall, use a mounting system suited to the wall material and fasten into structural framing or masonry with hardware rated for the expected load. Do not screw a soil-filled pallet into siding, thin fence pickets, or a decorative panel and assume it is secure. Ask a qualified installer if you cannot verify the support.
Leave a small air gap between the back of the planter and the wall so water can escape and air can circulate. Point the open drainage edges away from siding, doors, walkways, and electrical equipment. On a balcony or deck, confirm the structure can support the planter and direct runoff so it will not drip onto neighbors or stain the surface. A wide, low box or several separate pots may be a better choice where a tall wet structure cannot be restrained confidently.
Add a growing mix and plants suited to shallow pockets
Use a fresh container potting mix rather than dense garden soil. Container mix stays more workable in a confined pocket and drains differently from native soil; garden soil can settle and compress until water struggles to move through it. A modest amount of mature compost can add organic matter, but do not fill the planter with pure compost or fresh manure. Fill each pocket loosely, leaving room to water without washing media over the front edge.
Do not add a layer of rocks at the bottom to “improve drainage.” Drainage depends on an open outlet and a suitable growing medium; a layer of coarse material beneath finer mix can leave a saturated zone above it. The pallet already has limited depth, so preserve the root area for the plant rather than sacrificing it to filler. Fill pockets individually instead of pouring from the top, which can compact lower pockets and bury crowns or seedlings.
Choose plants for the sun and root depth
Choose compact plants with modest root systems and match them to the light each level receives. Leaf lettuce, baby greens, radishes harvested young, chives, parsley, thyme, small strawberries, violas, alyssum, and trailing annuals can work when pocket depth and local climate suit them. Herbs such as rosemary may eventually become woody and oversized for a shallow pocket; use a separate pot if you want to keep a larger plant long term. Mint spreads aggressively and is easier to contain in its own pot. The horticulture team at Epic Gardening’s pallet-garden guide also advises choosing shallow-rooted or container-tolerant plants; the key is to match that root habit to the actual depth and light in each pocket.
Avoid large tomatoes, pumpkins, potatoes, and other heavy or deep-rooted crops in narrow pockets. They can outgrow the available root zone, dry out quickly, and pull the frame out of balance. If you want fruiting crops, use a deeper container or bed with room for their roots and any needed support. In edible pockets, plant only after you have accepted the pallet’s known history; fabric lining does not make contaminated wood safe.
Set seedlings so their root balls sit fully inside the pocket and the crown is not buried beneath wet fabric or soil. Plant the top and bottom rows according to their light and moisture conditions rather than making every row identical. Taller plants can shade lower ones, while a sunny top row may dry first. Leave enough space for mature foliage and airflow; overfilling can shade the center, hold moisture against the wood, and make harvesting awkward.
Water and maintain a vertical planter
Check moisture in each pocket separately. The top may be dry while water has just run through the lower rows, so a fixed daily schedule can lead to overwatering in one place and wilt in another. The Royal Horticultural Society’s container-watering guidance recommends checking the growing medium and adapting to weather and position instead of relying on one universal interval. In a pallet planter, feel the mix a little below the surface; water when the root zone is beginning to dry, then observe how quickly that pocket drains.
Water slowly at the soil line. Upper pockets may shed water before the mix absorbs it, so pause and make a second light pass if the first drains away immediately. Do not assume runoff from above has fully watered the pockets below: check them. Hot sun, wind, small pocket volume, and thirsty mature plants can increase watering needs, while cool weather and shaded positions slow drying. A porous liner and open drainage prevent water from pooling, but they also mean the planter cannot hold moisture like a deep bed.
Container plants use available nutrients over time. Follow the directions on a fertilizer labeled for the crops you grow, and avoid compensating for poor growth by adding increasingly strong doses. Flush accumulated fertilizer salts only if the medium drains freely and runoff can be managed. Remove dead foliage, check for loosened staples and screws, and clear blocked drainage paths after heavy rain.
Troubleshoot common pallet-planter failures
Soil washes out: Pause watering and check for an oversized gap or loose fabric seam. Add a fabric patch from the inside and staple it to sound wood, leaving the bottom outlet open. If the mix itself is very fine, replace it with a container mix that stays better structured; plugging every gap with plastic can trade soil loss for waterlogging.
Plants wilt soon after watering: Check the root zone, not only the surface. If it is dry, water more slowly and verify that the pocket is deep enough for the plant. If it is wet, inspect drainage and roots rather than adding more water. Heat reflected by a wall or strong afternoon wind may make a different location or less demanding crop the better fix.
The pallet leans, bows, or loosens: Stop adding soil and unload it while you can do so safely. Check the stringers, shelf supports, base, and wall attachment. A cracked main runner or a frame that twists under a light test is not fixed by adding more screws into damaged wood; replace the pallet or switch to a planter designed for that load. Keep people out of the fall zone while you stabilize it.
Wood softens or develops persistent damp patches: Improve the air gap and drainage, and avoid keeping the back of the planter against a wet wall. Remove a pocket that remains saturated. Pallet wood outdoors has a finite life, and no sealant can make an unknown or contaminated pallet appropriate for growing food. Replace deteriorated components early rather than waiting for a soil-filled shelf to fail.
Conclusion
A useful pallet planter begins with a pallet whose source and condition you can defend, then uses sound pocket shelves, a breathable liner, open drainage, and dependable support. For edible crops, use known untreated and food-growing-suitable wood; treat an HT mark as treatment information, never as proof of a harmless load history. If the pallet fails that test, build the same design from new untreated lumber.
Measure the actual pallet, fit each pocket to shallow-rooted plants, and secure it before adding wet mix. After planting, check each row’s moisture rather than watering by the calendar. Those choices turn a quick reuse project into a planter that is easier to maintain and less likely to spill soil, rot, dry out, or tip.