How to Propagate Ivy in Water or a Rooting Mix
Learn how to propagate ivy from a healthy vine using water or a rooting mix, when to transplant, and how to troubleshoot cuttings that wilt or stall.
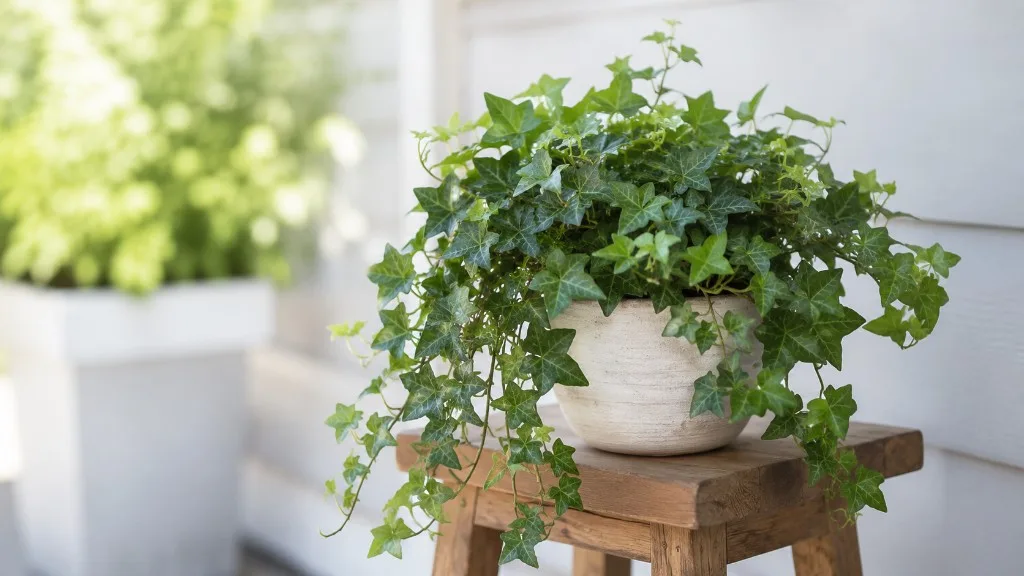
Ivy is easy to multiply once you give the cutting two things it cannot do without: a live node and steady moisture without stagnant, airless conditions. You can root a healthy piece of vine in water and watch the roots appear, or place it directly into a clean, airy propagation medium. Either way, the most useful cutting is not simply a leaf with a long stem; it is a piece of stem with one or more nodes, because that is where new roots and shoots can develop.
This guide focuses on English ivy (Hedera helix), the common trailing or climbing houseplant. “Ivy” is also used for unrelated plants, so check the plant’s label or identify it before applying these steps. For Hedera helix, choose water when you want to see root progress and do not mind transplanting later; choose a moist rooting mix when you would rather avoid the water-to-pot transition. Neither method can rescue a weak or pest-ridden parent vine, so start with healthy growth and keep the setup clean.
Identify the Ivy and Choose a Suitable Cutting
English ivy is a woody evergreen vine with juvenile stems that trail or climb and bear the familiar lobed leaves. It can be a houseplant in a hanging basket or pot, but its outdoor behavior is very different: NC State Extension describes it as invasive in North Carolina and notes that juvenile stems form adventitious roots as they climb and spread. The same rooting ability that makes it straightforward to propagate is a reason to keep starts contained and check local guidance before planting outdoors. (NC State Extension)
Choose a parent plant with firm, hydrated stems, clean leaves, and active growth. Avoid sections that are yellowing, collapsing, scarred, or covered in webbing, cottony insects, or sticky residue; pests and disease can move from the parent plant onto every cutting. If one vine has several growth tips, take a few cuttings rather than stripping one long stem bare. This creates more chances to root while leaving enough foliage for the original plant to recover.
If the plant is a variegated cultivar, take the cutting from a stem that still shows the color pattern you want. A cutting normally carries the characteristics of its parent, but it cannot restore variegation on a branch that has already reverted to solid green. Make the new plant from an actively growing, true-to-type portion instead of hoping its leaves will change later.
Choose Between Water and a Rooting Medium
Both methods work by keeping a viable stem node in contact with moisture while the cutting produces roots. The decision is mostly about how you prefer to monitor it and how much root disturbance you want at transplanting. Water offers a visible view; a medium provides a more soil-like start and avoids moving water-grown roots into potting mix.
| Your priority | Better starting method | Main advantage | Watch for |
|---|---|---|---|
| Seeing whether roots have formed | Water in a clean jar | Progress is visible without pulling the cutting out | Refresh stagnant water; keep leaves above it |
| Skipping the water-to-mix transition | Clean, airy propagation medium | Roots develop where the plant will keep growing | Keep it evenly moist, never waterlogged |
| Using what is already at home | Either | Ivy stems can root in water or a suitable medium | Avoid heavy garden soil and dirty containers |
The second method below uses a light propagation medium rather than garden soil. Clean horticultural sand is an option, but an equal-part perlite-and-peat medium or a commercial cutting mix is easier to keep aerated in a small pot. Penn State Extension lists sand, perlite, vermiculite, and water among suitable propagation media and cautions that ordinary compost or garden soil may be heavy and more likely to carry unwanted organisms. (Penn State Extension)
Which Method Fits Your Setup?
Choose water if you want an easy visual check, are comfortable transplanting later, and can keep the jar in a stable spot. A clear glass is useful for observation, though it does not need to sit in a sunny window; warm direct sun can heat the water and encourage algae. Use a small jar that supports the stem without crushing it, and change the water when it turns cloudy or develops a film.
Choose a rooting medium if you prefer the cutting to form roots in a material closer to its final potting environment. This is especially convenient when you plan to root several cuttings together in a nursery pot. Medium can hide progress, so resist the urge to tug at the stem; wait for visible new growth or gently check for resistance after several weeks. If you are uncertain, start one cutting in each method and compare them under the same light and temperature.
Take Cuttings While the Plant Is Actively Growing
There is no single calendar date that suits every indoor plant. For potted English ivy, take cuttings when the parent is making healthy growth and the room is warm enough to maintain steady conditions. In most homes, that is spring through early fall. A cool, dim winter windowsill slows rooting and gives the cutting less light to replace water lost through its leaves.
If you keep a plant outdoors in a permitted area, take cuttings during mild weather and give them time to root before cold temperatures arrive. Do not collect stems from wild or unmanaged English ivy, and do not move a new plant outdoors merely because it has roots. In some regions it is invasive or restricted; a container indoors or on a contained patio is the lower-spread option.
Timing matters less than the parent plant’s condition. A healthy ivy can often root outside the ideal window if it has warmth, bright indirect light, and consistent care. A stressed vine taken at the “right” time is still a poor source, so correct underwatering, pests, or severe light problems before taking cuttings.
Gather Clean Tools and Simple Supplies
You need a sharp pair of pruning shears or scissors, a clean glass or a small pot with drainage holes, and either water or a fresh propagation medium. Keep a label nearby if you are rooting more than one cultivar. A humidity cover is useful for the medium method, but it is optional for water; a clear bag held above the leaves with small vents can work as a simple cover.
Wash the cutting container before use, and wipe the blade clean between plants. Penn State Extension recommends beginning with healthy plant material, sharp clean tools, and sterilized propagation media. Clean handling is especially worthwhile when several cuttings share a jar or pot: decay in one stem can cloud the water or spread through a crowded medium. (University of Nebraska–Lincoln Extension)
Rooting hormone is optional. Ivy commonly roots from node-bearing stems without it; hormone cannot compensate for a cutting with no node, an unhealthy parent, or a saturated setup. If you choose to use one, follow the product label and use only a light application on the cut end. More is not better: excess hormone can slow rooting rather than speed it.
Prepare a Stem That Can Make Both Roots and Shoots
Using a clean blade, select a flexible but firm section of vine about 4 to 6 inches long. Make the lower cut just below a node and include at least two nodes if the stem allows. One node will go into water or medium; the other gives the cutting another potential rooting site and can keep a leaf or bud above the surface. Penn State Extension’s general guidance for houseplant cuttings likewise emphasizes node-bearing stem sections and healthy, actively growing material. (Penn State Extension)
That length is a starting point, not a rule that overrides the stem’s structure. Gardening Know How uses a similar short vine cutting for English ivy and roots it in water before potting; the important check is still that the piece carries a viable node. (Gardening Know How)
Remove leaves from the lower part of the stem so none will sit underwater or become buried in the rooting medium. Keep one or two healthy leaves above the surface to continue supporting the cutting. If the remaining leaves are very large, do not remove them all; instead, reduce the leaf area slightly only if the cutting wilts quickly and the setup cannot maintain humidity. A leafy cutting can photosynthesize, but too much foliage loses water before roots have formed.
Avoid cutting an ivy leaf from its petiole and expecting it to grow into a full vine. A leaf-bud cutting must include a small piece of stem carrying the bud or node; a leaf alone lacks the growing point required to form a new shoot. NC State Extension lists English ivy as capable of stem and leaf-bud cutting propagation, which reinforces the importance of including stem tissue rather than relying on a detached leaf. (NC State Extension)
Find Nodes, Leaves, and Useful Stem Sections
A node is the slightly thickened joint where a leaf attaches to the stem. The short stretch between joints is an internode. Look closely where a leaf stalk meets the vine: you may see a small bud, a slight swelling, or tiny rootlets, especially on mature climbing growth. Make sure the cutting includes the joint itself, not just the smooth stem between two leaves.
On a short cutting, leave at least one leaf-and-node above the rooting surface and place one or more lower nodes into water or medium. If an aerial root is already growing from a node, keep it intact rather than trimming it off. That root is not required, but it can help the cutting anchor as it establishes. Remove damaged leaves and keep the remaining foliage from touching a moist cover, where persistent condensation can encourage decay.
Method 1: Root Ivy Cuttings in Water
Water is the most transparent method because you can see new roots. Fill a clean, narrow glass with room-temperature water, then place the prepared cutting so one or two lower nodes sit below the waterline. Keep every leaf above the water; submerged foliage decays and can foul the jar before the stem roots. Use enough water to cover the nodes, not the entire lower half of the cutting.
Set Up the Jar So a Node Is Submerged
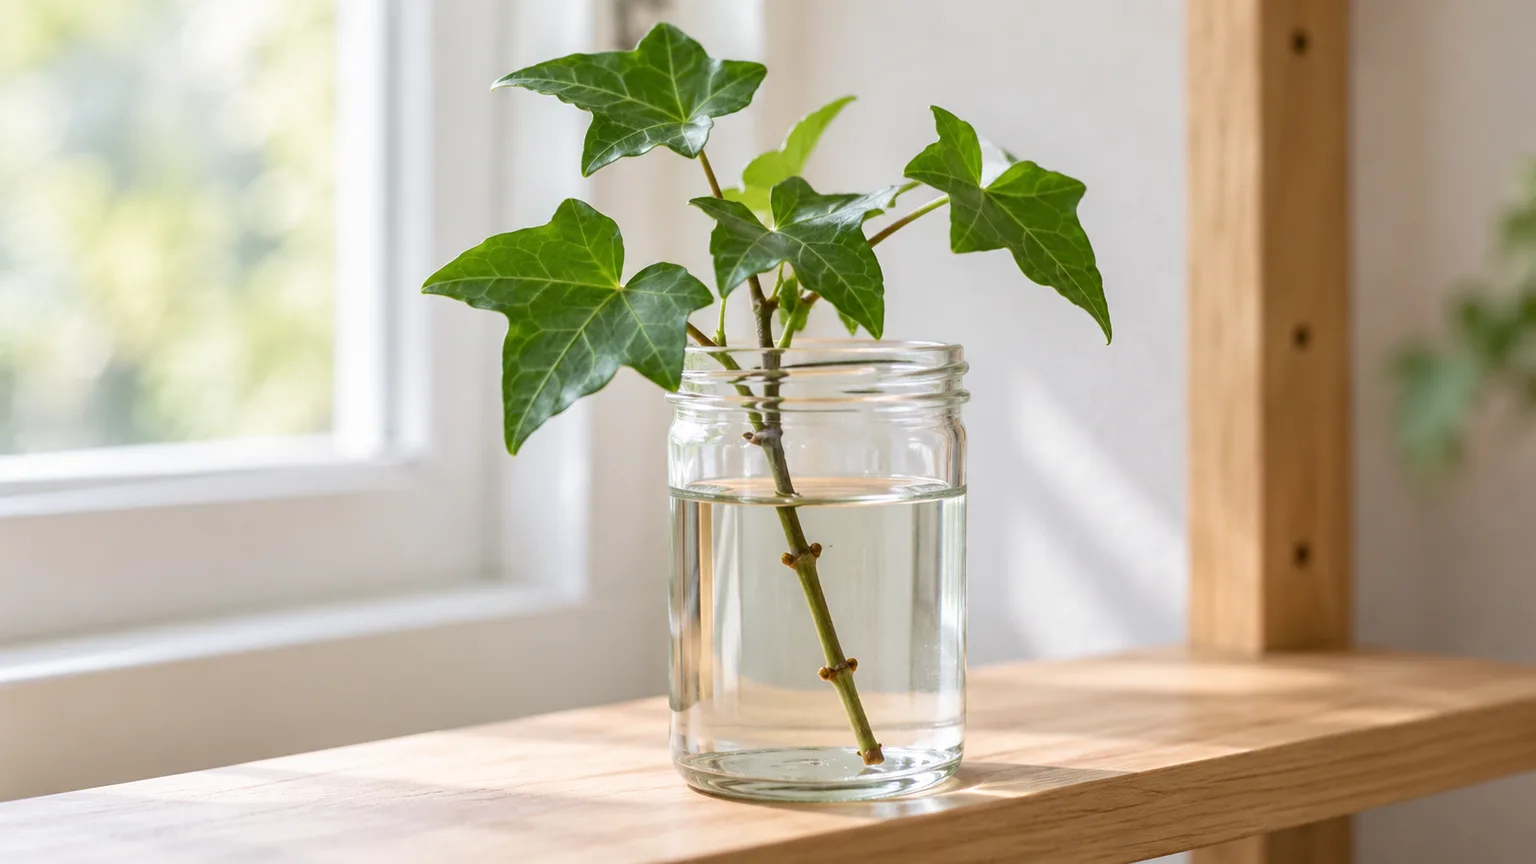
Place the jar in bright, indirect light, away from harsh afternoon sun, heating vents, and cold drafts. A stable shelf near a bright window often works better than a sill that gets direct midday heat. If the ivy is variegated, enough indirect light helps it maintain its pattern, while shade can make new shoots weak and sparse.
The jar should hold the stem upright without pinching it. If several cuttings share a container, leave space between them so leaves do not sit in water and you can remove a failing stem without disturbing all the others. There is no need to add fertilizer or sugar to the water; plain clean water is sufficient while the cutting makes roots. Some growers reuse water from a healthy established cutting, but a clean jar and fresh water are simpler for a first attempt.
Maintain the Water and Check for Roots
Check the jar every few days to keep nodes covered and notice early signs of trouble. Top up as the water evaporates, and replace it if it becomes cloudy, slimy, or foul-smelling. There is no benefit to repeatedly changing perfectly clear water every day; overly frequent handling can damage delicate new roots. If algae starts to coat the glass, wash the vessel and refill it rather than moving the cutting into direct sun.
Rooting takes longer when conditions are cool, dim, or unstable. You may see pale roots emerging from the submerged nodes within a few weeks, but the pace varies, so do not discard a firm, green cutting just because a calendar estimate has passed. Leave it until it has several roots around 1 to 2 inches long or a small branching root system. Move it before the roots are long and tangled; very long water roots are harder to spread through potting mix without breaking.
Method 2: Root Ivy in a Moist Propagation Medium
A rooting medium suits growers who want roots to form in a porous material from the start. Use a small clean pot with drainage, filled with a fresh, lightly moistened cutting mix, or mix equal parts perlite and peat as described in University of Nebraska–Lincoln Extension guidance. Clean horticultural sand can also be used, preferably blended with a moisture-holding component rather than packed by itself into a pot. The goal is a medium that stays damp while still letting air reach the nodes.
Choose and Prepare an Airy Medium
Pre-moisten the mix before inserting a cutting. It should feel evenly damp and hold together loosely when squeezed, but it should not drip or form a muddy clump. If using a purchased seed-starting or propagation mix, check that it is fresh and free of fertilizer pellets; a high-nutrient potting soil is unnecessary while roots are developing.
Fill the pot without compacting the surface. A small container with drainage is safer than a large pot because excess wet medium around one tiny cutting dries slowly. If you use clean sand, rinse out dust and use a pot with an open drainage hole. Avoid digging soil from the garden: it is dense in a small container and can carry weed seeds or pathogens. (University of Nebraska–Lincoln Extension)
Insert the Cutting and Manage Humidity
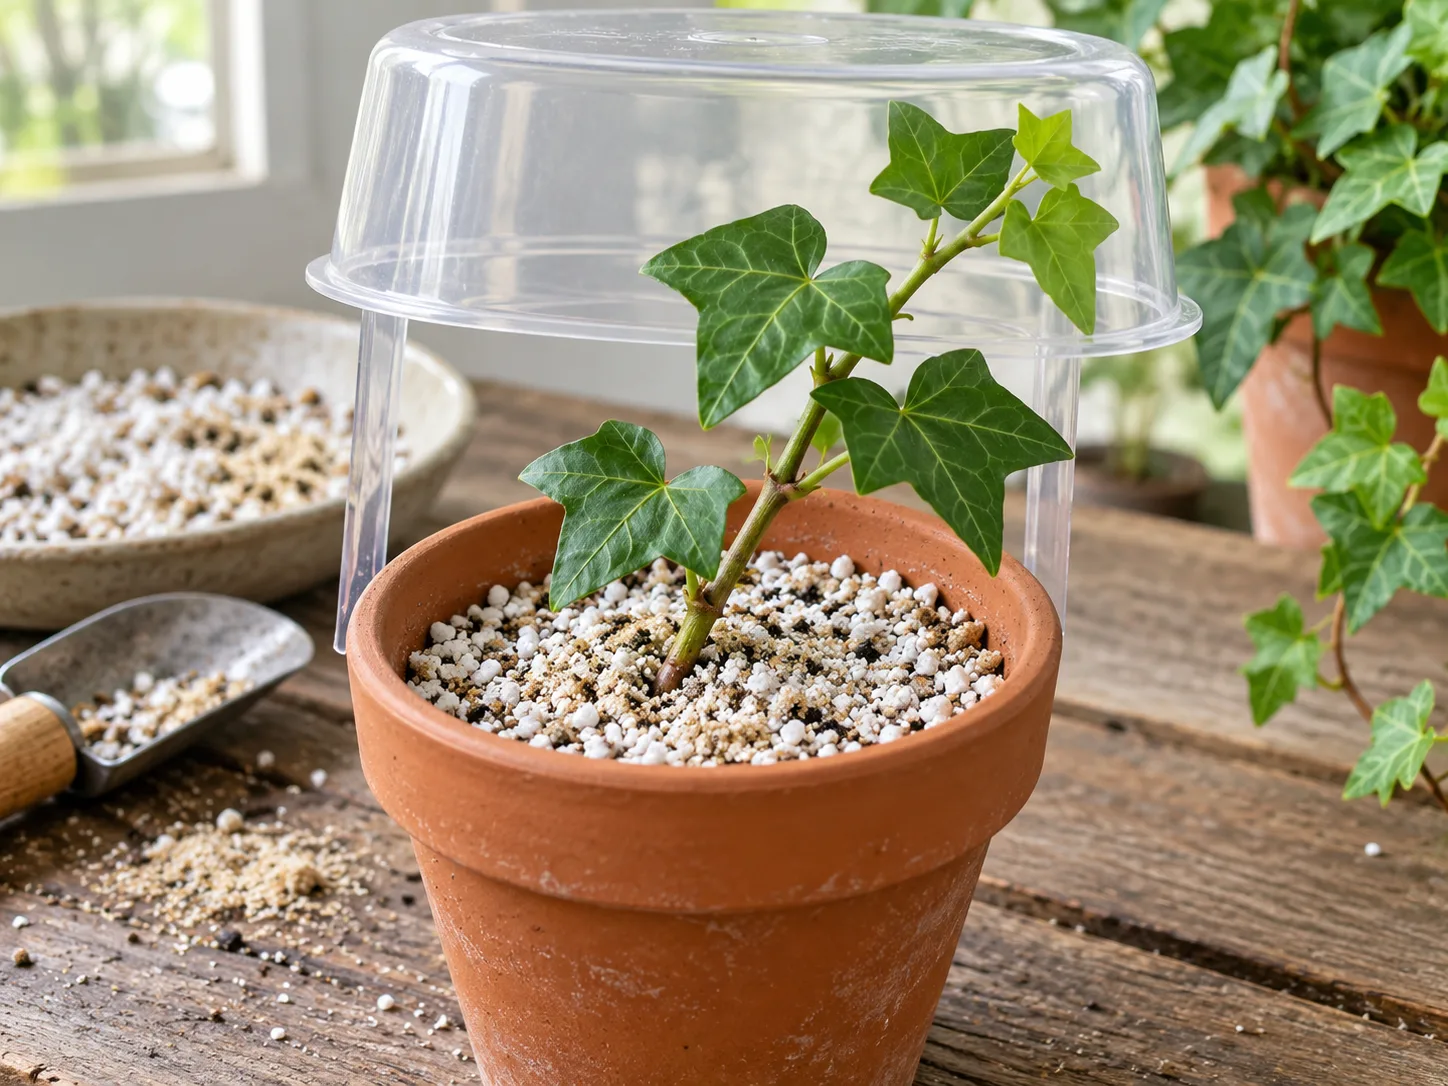
Make a planting hole first with a pencil or clean stick so you do not scrape hormone or damage the stem. Insert the cutting with at least one node below the surface and firm the medium gently around it. Keep all leaves above the mix. Space several cuttings so foliage has airflow and any one stem can be removed if it starts to rot.
Set the pot in bright indirect light. A loose clear bag or humidity dome slows water loss, but leave space between the plastic and leaves and open it briefly each day so stale, saturated air can escape. Penn State Extension recommends bright indirect light, moist rather than saturated media, and humidity that reduces drying without encouraging disease. If condensation drips constantly or the medium stays glossy-wet, vent the cover and let the surface lose a little moisture.
Fine Gardening makes the same useful distinction between methods: water-rooted cuttings generally do not need a cover, while cuttings in an inert medium benefit from a humidity dome or loose plastic cover. Epic Gardening’s English ivy guide also describes sand rooting under a cover; a perlite blend is another option when you want more air around the cutting. (Fine Gardening) (Epic Gardening)
Check the mix by touching the surface rather than watering on a fixed daily schedule. Add a small amount of water when the top begins to dry; allow excess water to drain away and empty the saucer. A cutting without roots cannot use much water, so constant soaking can make its base decay. When you see fresh growth, do not assume roots are ready the same day: new leaves can develop from stored energy before a substantial root system has formed.
Pot Rooted Cuttings and Ease the Transition
For water-rooted starts, choose a small pot with drainage and lightly moistened houseplant mix. Make a hole deep enough for the roots to spread downward without folding them sharply, place the stem with the roots covered, then firm the mix gently. Water once to settle it and let excess drain; keep the mix lightly moist during the first couple of weeks, not continuously soggy. Avoid placing a newly potted cutting in hot sun or feeding it immediately.
For medium-rooted starts, look for gentle resistance when you tug very lightly at the stem or see new growth holding steady. If several cuttings are together, ease the medium apart and separate them only when their roots can handle it; tugging a rootless stem just to check progress creates damage. Pot each established cutting at the same depth it was rooting, then water it in and give it a week or two to adjust before returning to normal care.
Water roots formed in a jar are adapted to constant water, so a transfer into airy potting mix can cause brief wilting or leaf loss. Keep the pot evenly moist while the roots adapt, provide bright indirect light, and avoid swings between bone-dry mix and saturated soil. A clear sign of establishment is continued firm growth after the initial transition, not one new leaf alone. Once new growth continues, care for it like a small ivy plant and pinch the tip only if you want a fuller shape.
Troubleshoot Ivy Cuttings That Stall or Fail
A few weeks without visible roots is not automatically a failure. First check the basics in order: does the cutting include a node; is that node actually in contact with water or medium; is the stem firm and green; is the light bright but indirect; and is the setup warm and stable? Fix one problem at a time. Changing water, moving the jar, adding hormone, and stripping leaves all at once makes it harder to tell what helped.
Houseplant propagation guidance from Nebraska Extension notes that clean tools and containers, healthy cuttings, appropriate moisture, and aeration all affect rooting. The same principles make a useful diagnosis for ivy: remove contamination, improve node contact, and correct soggy or drying conditions before starting over. (University of Nebraska–Lincoln Extension)
A Cutting Turns Soft, Brown, or Black
A mushy base, darkening stem, or unpleasant-smelling water usually points to decay, commonly made worse by a submerged leaf, dirty container, stagnant water, or saturated medium. Remove the cutting from the setup. If the damaged tissue reaches only the base, use a clean blade to recut above the soft section, making sure the new piece still contains a healthy node. Wash the jar or replace the potting medium; do not put the same rotting stem back into contaminated water.
If all nodes are soft or the leaves are collapsing, discard that piece and take a fresh cutting from healthy growth. Do not save it with more fertilizer or rooting hormone. In a covered medium setup, reduce watering, improve drainage, and vent the cover. If every cutting rots, review the tool and medium cleanliness before taking more from the parent plant.
A Cutting Wilts or Stays Green Without Roots
A firm, green cutting that has not rooted may simply need more time, particularly in a cool room. Check that a node is submerged or buried and that the medium has not dried around it. For a medium-rooted cutting, add a loose humidity cover if the leaves lose firmness quickly; keep the cover from touching foliage and do not trap the pot in full sun.
A limp cutting may be losing water faster than it can replace it. Move it away from sun and drafts, reduce the leaf area only if foliage is excessive, and keep the medium evenly moist. Do not solve wilting by flooding the pot: if the stem base is wet and brown, treat it as rot instead. If there is no improvement after several weeks and the stem has no swelling or roots, recut a healthier, younger tip with clear nodes and try the other method.
Keep English Ivy Contained and Handle It Carefully
English ivy is not a harmless outdoor ground cover everywhere. NC State Extension documents it as invasive in North Carolina and describes the way juvenile vines spread and climb. Local status differs, so check the invasive-plant list or cooperative extension guidance for your county before setting a rooted cutting outside. Growing English ivy in a stable indoor pot avoids escape into nearby trees, fences, and natural areas; do not plant it as ground cover simply because the cutting rooted well. (NC State Extension)
Wear gloves if ivy sap irritates your skin, and wash tools and hands after cutting. NC State Extension lists English ivy among plants with poison characteristics and notes that foliage and berries can be harmful if eaten. Keep discarded cuttings and trimmed vines away from curious children and pets, and follow local guidance for invasive-plant disposal. A rooted cutting is a new plant, not just a harmless piece of pruning waste.
Conclusion
To propagate ivy, take a healthy 4- to 6-inch stem section with at least one usable node, remove the lower leaves, then keep that node moist in either water or an airy propagation medium. Use water when seeing root growth matters; use a clean rooting mix when you want to skip the later water-to-soil transition. In both cases, bright indirect light, clean equipment, steady warmth, and moisture without saturation do more for success than a rooting-hormone shortcut.
Wait for several established roots before potting or separating starts, then keep them lightly moist while they adjust. If the base turns soft, correct the wet or dirty setup and restart with a healthy node-bearing cutting. Finally, keep English ivy contained and check local invasive-plant guidance before growing it outdoors.