How to Propagate Angel Wing Begonia in 6 Steps
Propagate angel wing begonia in six clear steps, with a soil-versus-water choice, rooting timeline, troubleshooting, and a careful note on leaf cuttings.
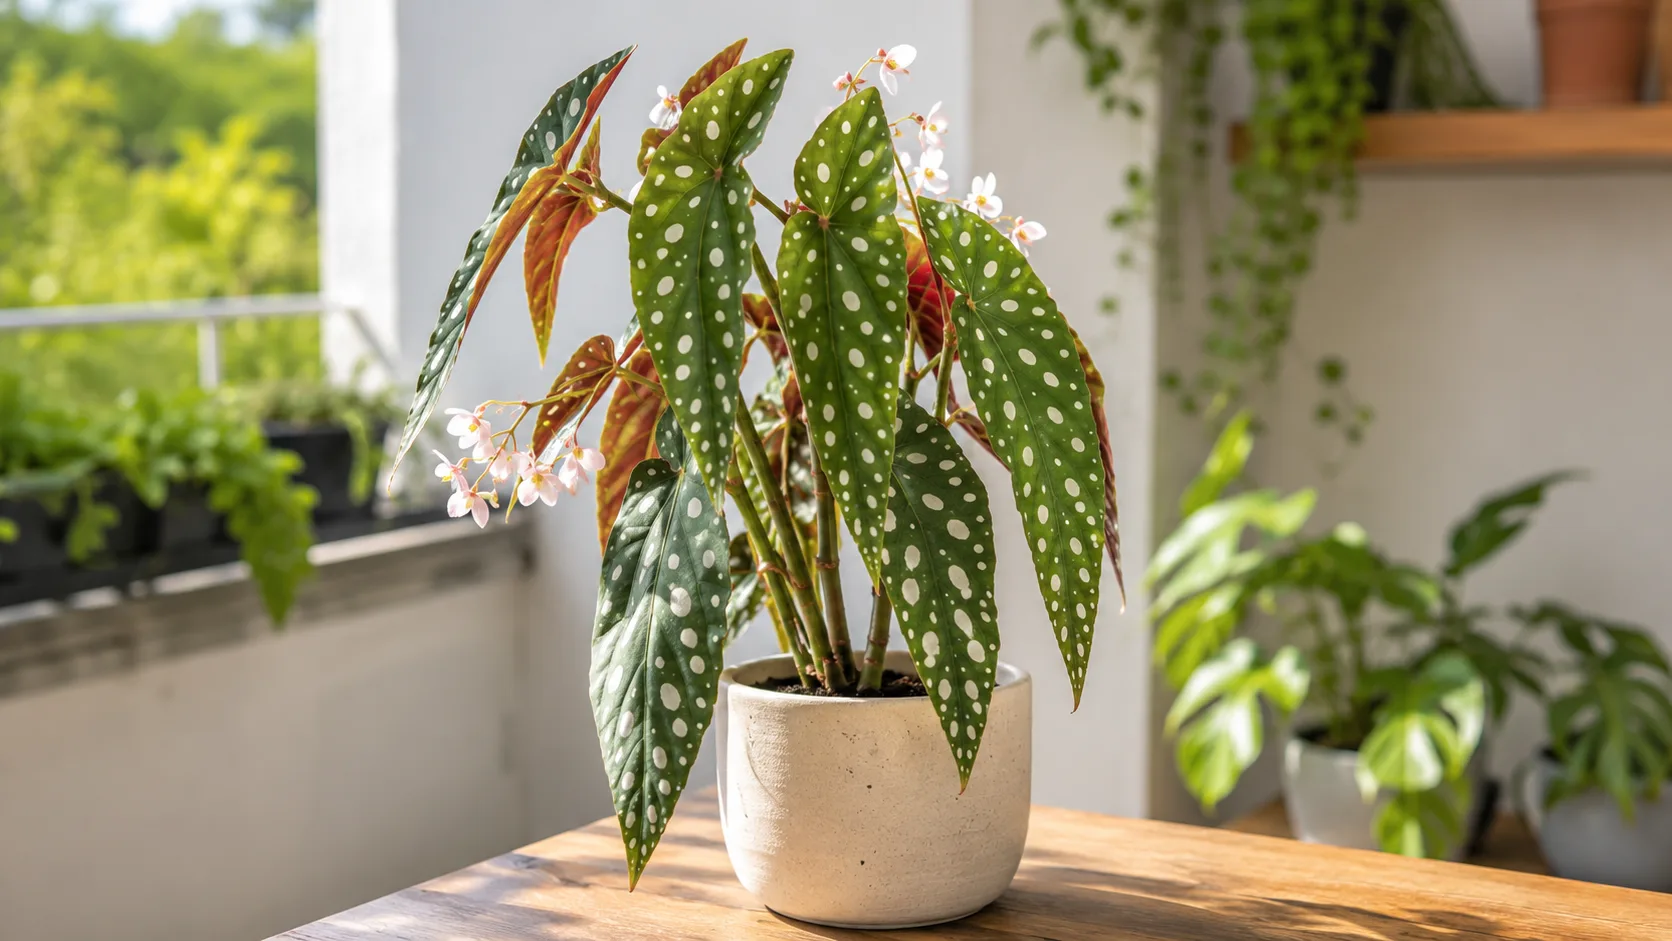
To propagate an angel wing begonia reliably, take a short piece of healthy cane stem with at least one visible node, then root that node in water or a moist, airy propagation medium. The node is the joint where a leaf attaches to the stem; it is the key feature that turns a leafy clipping into a viable cane cutting. A detached leaf can sometimes produce a begonia plantlet, but it is a different method with more variable results, so use a node-bearing stem as your first attempt.
Angel wing is a common name for several upright, cane-type begonias rather than one single cultivar. NC State Extension lists stem cuttings as the easiest propagation method for cane begonias, while other broad begonia guides discuss leaf cuttings across the genus. The distinction matters: cane begonias have thickened joints along upright stems, while many famous leaf-propagation examples are rhizomatous or rex types. NC State Extension’s cane begonia profile describes the group and its recommended propagation strategy; UF/IFAS explains how cane-like angel wings differ from rhizomatous begonias.
The reliable method is a cane cutting with a node
A cane begonia’s stem is not just a support for leaves. Its upright, jointed structure holds growing points at the nodes, where leaves and buds emerge. A cutting that includes a node carries the stem tissue needed to form roots and continue as a cane; a loose leaf blade does not contain that same stem joint.
Begonia maculata is one familiar spotted cane begonia; many angel wing cultivars share the same upright, jointed growth habit.
This is why a small but well-chosen stem piece is more useful than a large leaf removed at random. The NC State Extension Plant Toolbox describes cane begonias as upright, usually unbranched stems with thickened nodes and calls stem cuttings their easiest propagation method. The goal is not to cut a fixed number of inches regardless of plant shape; it is to keep a healthy node on the cutting and leave enough foliage above it to fuel new growth.
A practical cutting is often about 2 to 4 inches long, with at least one node below the leaf cluster and preferably a second node available as insurance. Cane internodes—the stem sections between nodes—can vary in length, so follow the joints rather than a ruler. The UF/IFAS propagation guidance gives a similar 2-to-4-inch range for begonia stem cuttings and recommends rooting them in moist perlite, potting soil, or another sterile medium.
When to take angel wing begonia cuttings
Spring through early summer is the easiest time to propagate because the parent is actively growing and the cutting can root while light and warmth are increasing. A plant that is pushing fresh leaves usually has better material than one sitting still in a dim winter room. The Royal Horticultural Society recommends early-season timing for leaf cuttings, and both Gardening Know How and Get Busy Gardening describe spring or the active warm season as a practical window for begonia propagation.
Indoor cuttings can still root at other times if the plant is growing and the room stays warm, but expect slower progress under short winter days. A grow light can help if the cutting would otherwise sit far from a window, but it should be close enough to provide useful light without heating or drying the leaves. Avoid taking several cuttings from a stressed plant just because it has a long stem; first correct cold, wet soil, pest, or light problems in the parent.
Pruning is a convenient time to take cuttings because you are already removing a piece of cane. Make the propagation cut from a healthy section rather than using every pruning scrap. Leave enough foliage and growing points on the parent so it can branch back, and don’t remove a large share of the plant in one session.
Choose soil or water before you cut
Both methods can work for cane begonia stem cuttings, but they offer different advantages. Direct rooting in soil or a sterile soilless medium is the best default if you want fewer transitions and roots that are already adapting to their final environment. Water is useful when you want to see root development and monitor the cutting’s base, but the plant must later adjust to potting mix.
| Method | Best fit | Main benefit | Main trade-off |
|---|---|---|---|
| Moist medium | A cutting you want to pot once | Roots develop in the medium the plant will keep using | Moisture is less visible; soggy mix can rot the stem |
| Water | A small monitored trial or a beginner who wants visible progress | Rooting is easy to observe | Water can foul, and water-grown roots need a careful transition |
Soil rooting skips the water-to-soil transition
Use fresh, clean propagation mix, seed-starting mix, or moist perlite. The medium should hold enough moisture to prevent the cutting from drying while leaving air around the buried node. Regular heavy potting soil can stay too wet in a tiny propagation pot; if that is what you have, mixing in perlite can make it less dense.
A small container with drainage holes is easier to manage than a large pot full of wet mix. Pre-moisten the medium, let excess water drain, and insert the cutting into a narrow hole so the fresh cut is not scraped as you push it down. Keep the leaves above the surface; only the lower stem and node belong in the medium.
Water rooting lets you watch the roots
Use a clean, narrow glass or jar so the cutting stays upright. Add just enough room-temperature water to cover the lowest node, leaving all leaves above the waterline. If the cane has two lower nodes, submerging both is fine; submerging leaves or the entire leafy top is not.
Water is a viewing medium, not a set-and-forget growing system. Check the level every few days, top it off as needed, and replace cloudy or foul-smelling water with fresh water. If the lower stem becomes soft or dark, take the cutting out immediately, trim back to firm healthy tissue with clean snips if enough stem remains, and restart it in a clean jar or fresh medium.
Gather supplies and prepare the parent plant
You need a healthy angel wing begonia, clean sharp scissors or pruners, and either a small jar of water or a small pot filled with a sterile, airy medium. A clear humidity cover is optional for soil-rooted cuttings in a dry room; a loose clear bag or propagation dome can slow moisture loss, but the leaves should not press against wet plastic. Rooting hormone is optional, not a requirement for a healthy cane cutting with a node.
Wipe the blade before cutting and let it dry. Clean tools lower the chance of moving rot or disease from one plant to another, while a sharp edge makes a cleaner cut than dull scissors that crush the stem. If you are taking several cuttings, clean the blade between parent plants.
Choose a parent that is firm, actively growing, and free of visible pests, black lesions, and soft spots at the stem base. Use a healthy green cane with a few leaf joints rather than a leafless, badly stretched, or woody-looking section. If the plant has flowers, choose a vegetative side shoot when one is available; you can remove buds or flowers from the cutting so it spends less energy supporting them while it has no roots.
Begonias can irritate pets if chewed, and NC State lists cane begonias as having low-severity poison characteristics. Keep cuttings and fallen leaves away from cats, dogs, and small children, and wash your hands after handling sap. This is a simple way to avoid turning propagation into a pet-safety problem while the new plant is still small.
Six steps to propagate angel wing begonia
Follow this sequence whether you choose water or a potting medium. The key checkpoints are that the cutting carries a node, the submerged or buried section has no leaves, and the stem remains firm while roots develop.
Step 1: Choose a healthy, actively growing cane
Look for a stem with several intact leaves, even color, and no pest damage. A fresh green tip is convenient, but a healthy lower section can work if it has a node and enough foliage remains above the rooting line. Avoid any cane with mushy tissue, deep cracks, black patches, or severe stretching from low light.
If the plant is very tall, take one or two pieces rather than cutting it down to bare canes. Leaving leaves and uncut nodes helps the parent regrow. If the only available stem looks weak, wait until the plant is healthier instead of multiplying a problem.
Step 2: Cut below a node and keep nodes on the piece
Find the point where a leaf stalk joins the cane; that joint is a node. Make a clean cut just below it so the cutting retains the node above the cut. Ideally, choose a 2-to-4-inch tip section with one or two nodes and a couple of leaves at the top.
A good node is a visible joint or slight swelling, not just any stretch of bare stem. When the cutting is later placed in water or medium, at least one node must sit below the surface so it can root. If your chosen piece has long gaps between leaves, keep a little more stem rather than cutting it too short to include a useful joint.
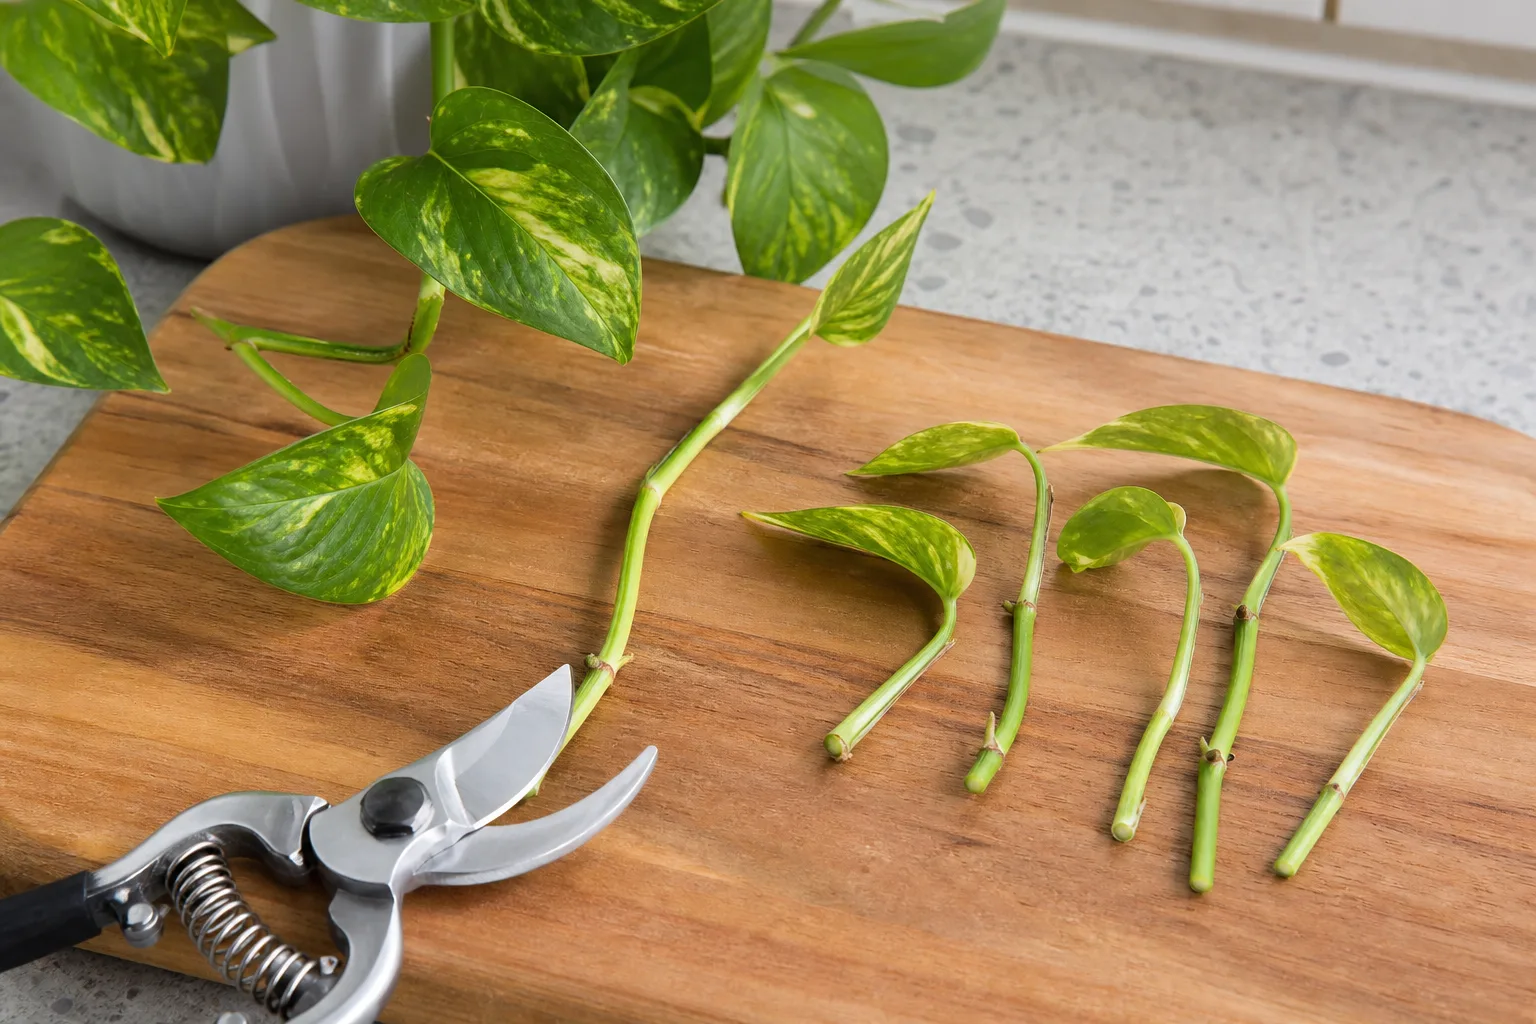
This library example shows nodes on a different houseplant; on an angel wing begonia, follow the same joint-based logic along the upright cane.
Step 3: Remove submerged leaves and flowers
Snip off leaves from the lower part of the cutting if they would touch water or sit under the mix. A leaf left below the waterline tends to decay and can foul the jar; a leaf buried in mix can stay wet and invite rot. Keep at least one or two healthy leaves above the surface because the cutting still needs foliage while it develops roots.
If the cutting carries flowers or buds, pinch them off rather than asking a rootless piece of cane to maintain a bloom. Some broad propagation guides recommend nonflowering material, but a flowered section is not automatically incapable of rooting. The useful rule is to choose vigorous vegetative growth when possible and remove flower parts from the cutting before rooting.
Step 4: Set the cutting in water or airy medium
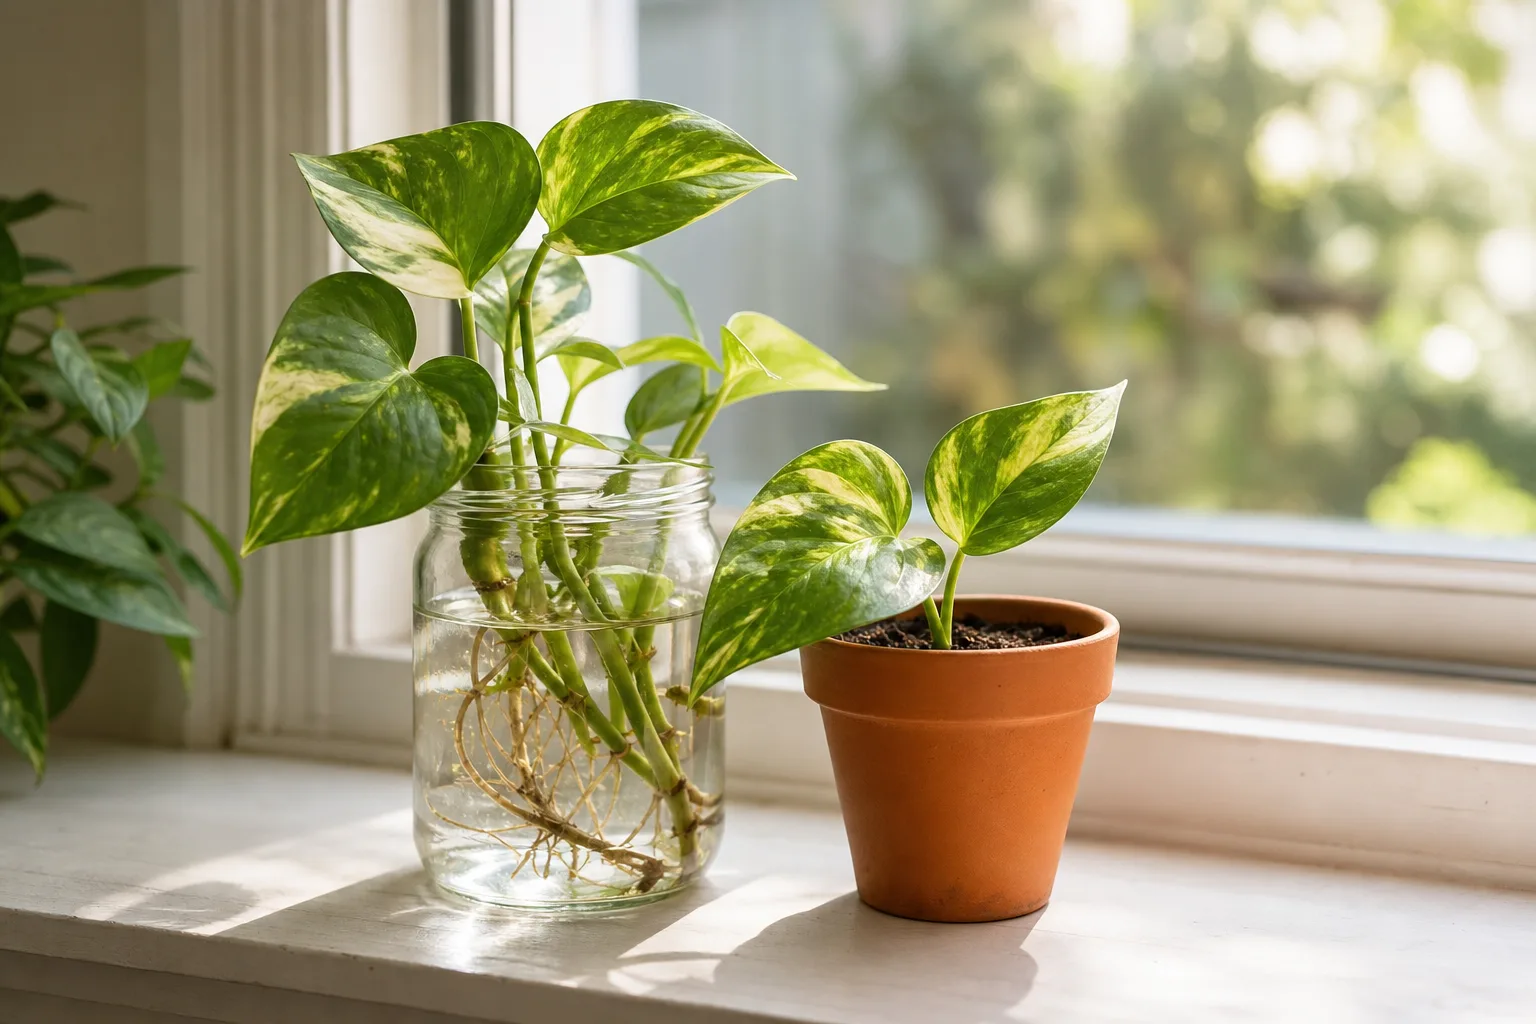
For water, place the cutting in a clean jar with the lowest node submerged and the foliage dry. For soil or perlite, make a pencil-width hole and set the cutting deep enough that the lowest node is covered, then firm the medium lightly around the stem. Do not bury the leaf cluster or pack the mix hard enough to block air around the node.
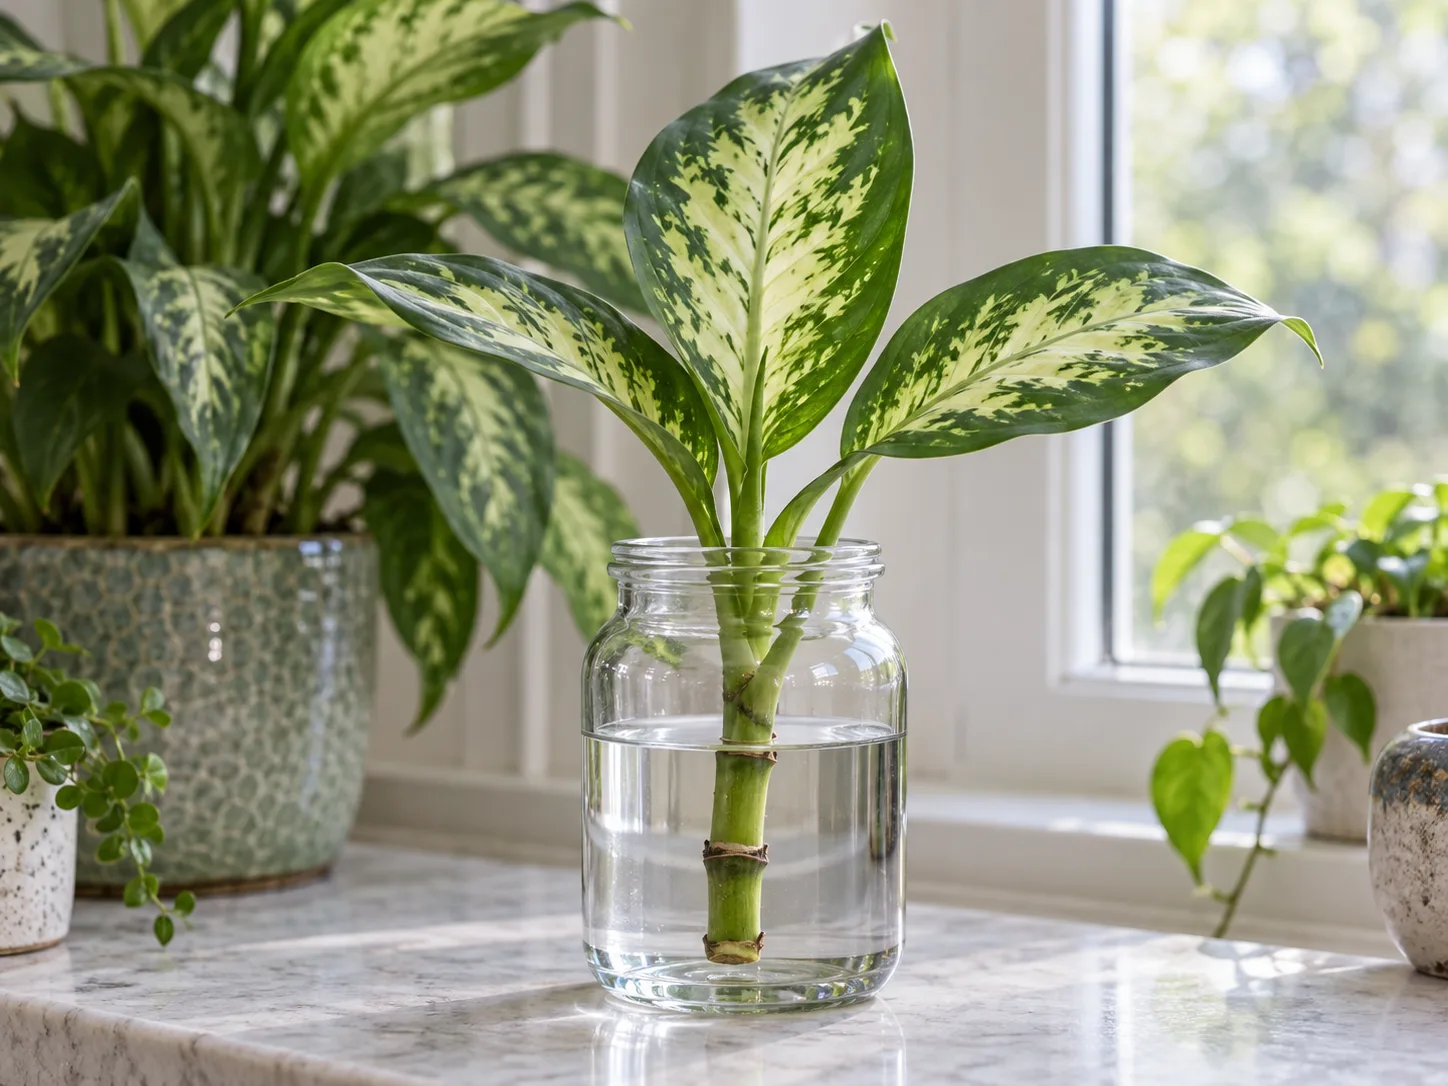
This general cane-cutting example shows the water setup; use an angel wing begonia stem and submerge only its lower node.
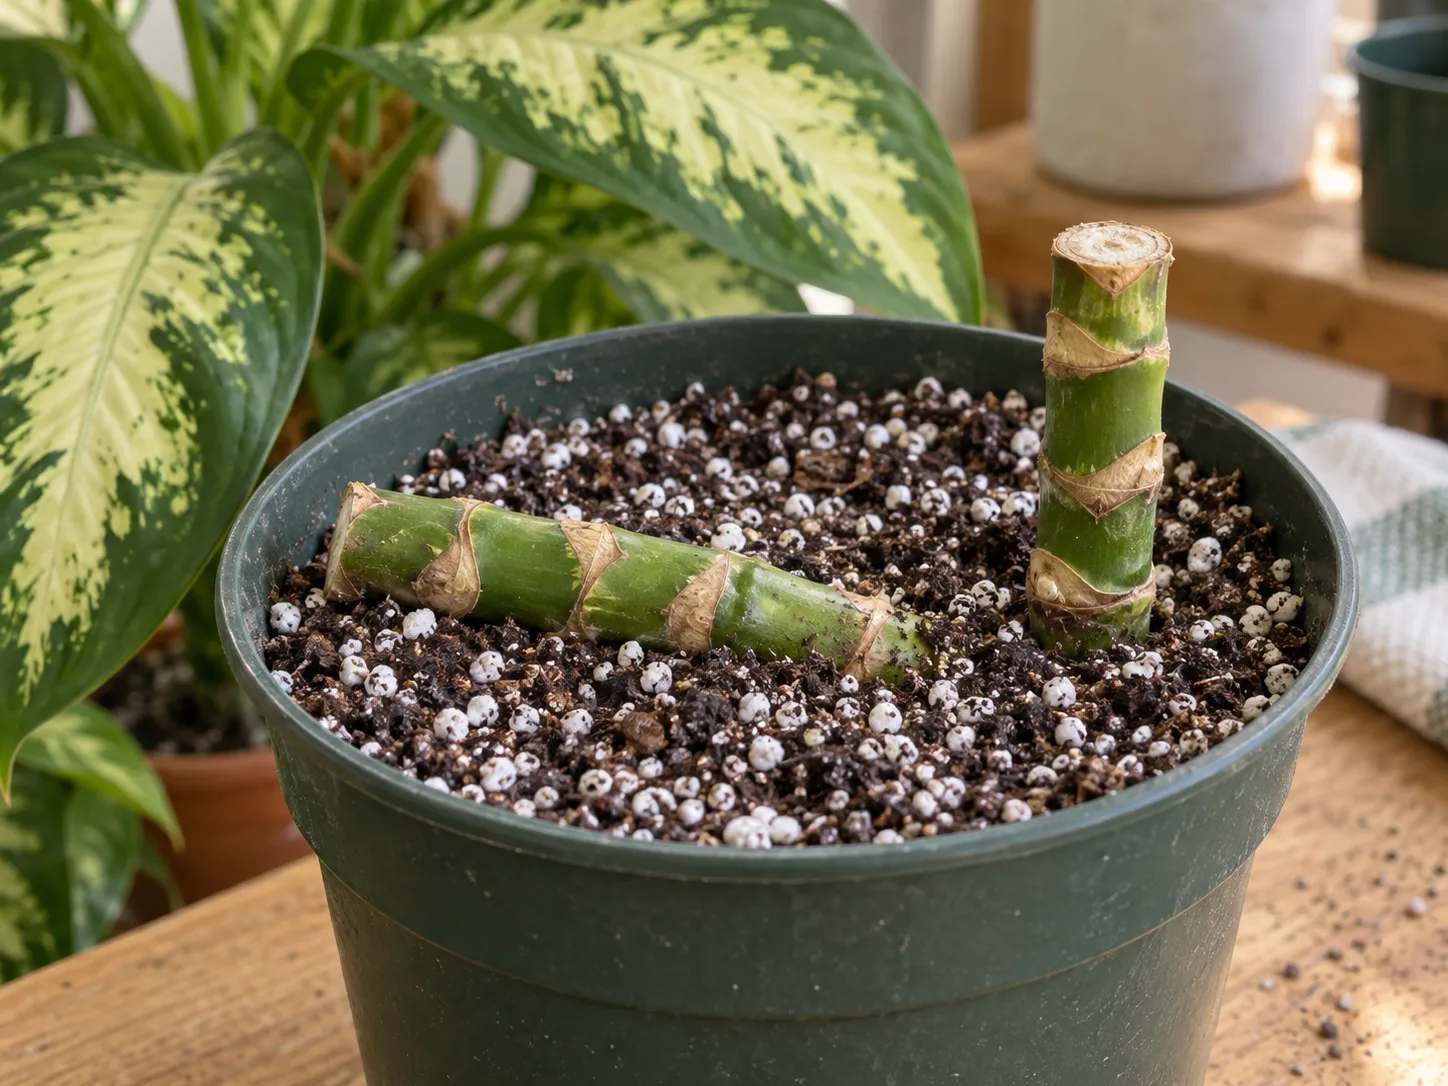
The pictured cane cuttings are a general propagation example rather than angel wing begonia; use the same placement principle, with the begonia’s lower node in the mix.
If you use rooting hormone, follow its label and apply only a light coating to the freshly cut end. It may be useful for a reluctant cutting, but it cannot make a node-free leaf into a cane stem or rescue tissue that is already rotting. Most growers can skip it for a fresh, healthy angel wing stem cutting.
Step 5: Keep it warm, bright, and evenly moist
Place the jar or pot in bright indirect light. Direct midday sun can heat a jar or overheat a covered pot, while deep shade can leave a cutting alive but stalled. Choose a warm, stable spot away from cold drafts, heat vents, and sudden temperature swings.
For a soil-rooted cutting, keep the mix lightly and evenly moist, not saturated; drain any water from the saucer. A loose humidity cover can help in a very dry home, but vent it once daily and remove it if leaves stay wet or fuzzy growth appears. For a water cutting, refresh cloudy water and keep just the lower node submerged so the stem base can stay clean and oxygenated.
Step 6: Pot the cutting after roots are established
A water-rooted cutting is ready for a small pot when it has several pale roots, usually at least an inch or two long, rather than one short root nub. Move it gently into pre-moistened, well-draining mix, spread the roots without bending or snapping them, and firm the medium around the stem. Water just enough to settle the mix, then let the pot drain completely.
A soil-rooted cutting does not need to be lifted to inspect it. After several weeks, look for fresh growth and a cutting that resists a very gentle sideways nudge. Repeated tugging tears new roots, so test only once after there has been time for growth. Pot each established cutting separately if several were rooted in one container.
How to tell a cutting has rooted
Water makes the earliest signs obvious: small cream or white roots emerge from the submerged node and lengthen over time. A healthy root system has firm pale roots; slimy brown roots, a sour smell, or a soft cane base point to decay rather than successful rooting. Do not wait for a tangled mass of roots in the jar, because long water-grown roots can be more awkward to arrange in potting mix.
In soil, the roots are hidden, so rely on the cutting’s behavior instead of digging it up. New leaf growth is encouraging, but it is not a guarantee by itself; a cutting may push a leaf using stored energy before it has a strong root system. After roughly four to six weeks in warm bright conditions, a gentle increase in resistance and sustained new growth together are more convincing signs than either signal alone. Timing varies with cultivar, season, temperature, and light, so a firm, green cutting that is still quiet may need more time.
Once potted, keep the new plant in bright indirect light and avoid fertilizer until it resumes steady growth. Water when the surface begins to dry rather than keeping the pot constantly wet. If the cutting wilts briefly after transplanting, protect it from harsh light and drafts, keep the mix lightly moist, and give it several days before making another change.
Leaf-only propagation is a different, less certain trial
A begonia leaf can sometimes form roots or plantlets, but a leaf blade is not a stem cutting. A cane stem cutting carries a joint on the upright stem; a leaf-only cutting depends on the leaf’s petiole or veins forming new growth. Those structures and outcomes differ, so a leaf that remains green or produces roots is not automatically the same as a young cane with a growing point.
This is where general begonia advice can be confusing. The RHS leaf-cutting guide names rex hybrids and Begonia masoniana among begonias suited to part-leaf cuttings, while NC State’s cane-type profile recommends stem cuttings. Gardening Know How includes angel wing begonias among the types that may be tried from leaves, but that broader statement does not make leaf-only propagation as predictable as a cane node. Treat it as an optional experiment and keep at least one nodal stem cutting as your dependable backup.
If you want to experiment, use a separate mature, healthy leaf and a clean blade. You can keep the petiole attached, or cut the blade into sections that each retain a major vein; place the vein-side or cut surface against moist sterile medium, cover loosely to hold humidity, and provide bright indirect light. Label it with the date, keep the mix moist rather than wet, and look for independent plantlets rather than just a callused cut edge.
Do not force this method if the plant has only one or two leaves or is stressed. Removing a whole leaf reduces the parent’s photosynthetic area, and a leaf may take longer to yield a usable plant than a stem cutting. The safe takeaway is straightforward: use a stem node when you want a predictable new cane begonia; try a leaf only when you are comfortable with slower, less certain results.
Division and seed are alternatives with trade-offs
Division makes sense when a mature plant has several separate canes with roots attached and the root ball can be split without leaving every piece unsupported. It is not the same as taking a cutting: each division needs a portion of the existing root system. Repot in clean mix, keep the root ball intact as much as possible, and avoid dividing a small single-cane plant just to create more pieces.
Seed is possible, but it is not the best route when the goal is to reproduce a named angel wing cultivar. Many familiar cane begonias are hybrids, and NC State notes that hybrid seedlings are not identical to the parent. Seed can be interesting if you want variation or are growing a species, but vegetative cuttings preserve the parent’s traits more directly.
Troubleshoot soft stems, wilting, and slow roots
The stem base turns black or mushy. Remove it from the jar or medium and inspect the tissue. If decay is limited to the bottom, trim above it with a clean blade and restart the firm section; if the dark, soft area reaches the node or leaf joints, discard the cutting and clean the jar and tools before trying again. The likely causes are a saturated mix, a dirty container, submerged leaves, or a damaged stem.
The cutting droops but the stem is firm. A rootless cutting can lose water through its leaves faster than it can replace it. Move it away from direct sun, check that the lower node is still in contact with water or moist medium, and consider a loose humidity cover for a soil-rooted cutting. Don’t compensate by soaking the pot; wet roots cannot form in a waterlogged mix.
Nothing seems to happen. First check the basics: is the cutting warm, receiving bright indirect light, and carrying a node below the surface? If the cutting is green and firm, wait rather than tugging or replacing the water unnecessarily. Short winter days, cool rooms, and an old or woody cutting can all slow root formation.
The cutting grows a leaf but has weak roots. New growth may come from stored reserves before roots can support it. Keep the cutting stable and do not fertilize or pot it into an oversized container; give it more time to make a balanced root system. If it is water-rooted and has several roots, pot it gently and keep conditions steady while it adapts.
A leaf cutting stays alive but does not make a plantlet. A healthy-looking leaf is not proof that it can regenerate a cane. Confirm that the section contains a main vein, maintain clean, lightly moist medium and high humidity, and give it time; if no separate plantlet forms, return to a node-bearing stem cutting rather than leaving the parent depleted.
Conclusion: start with the cane node
The simplest dependable way to multiply an angel wing begonia is to cut a healthy piece of cane just below a node, keep a node in contact with water or airy medium, and give the cutting warmth, indirect light, and steady moisture without saturation. Soil simplifies the transition to a pot; water lets you see the roots, but needs clean water and a careful pot-up. Either route works best when the cutting is firm, the leaves stay above the rooting line, and you judge progress by roots and sustained growth rather than by a calendar alone.
Leaf-only propagation belongs in a separate, optional trial because begonia species and groups differ in how they regenerate from leaves. If you want the new plant to match a named cane hybrid, take the stem cutting first and treat a leaf cutting as extra—not as your only plan. A few weeks of patient monitoring usually gives you a clear answer about whether your cutting is rooting or needs to be restarted.