New England Aster Care: Planting, Watering, and Pruning
Learn how to grow New England asters with the right cultivar, planting site, water, spring pinching, propagation, and fixes for mildew and flopping.
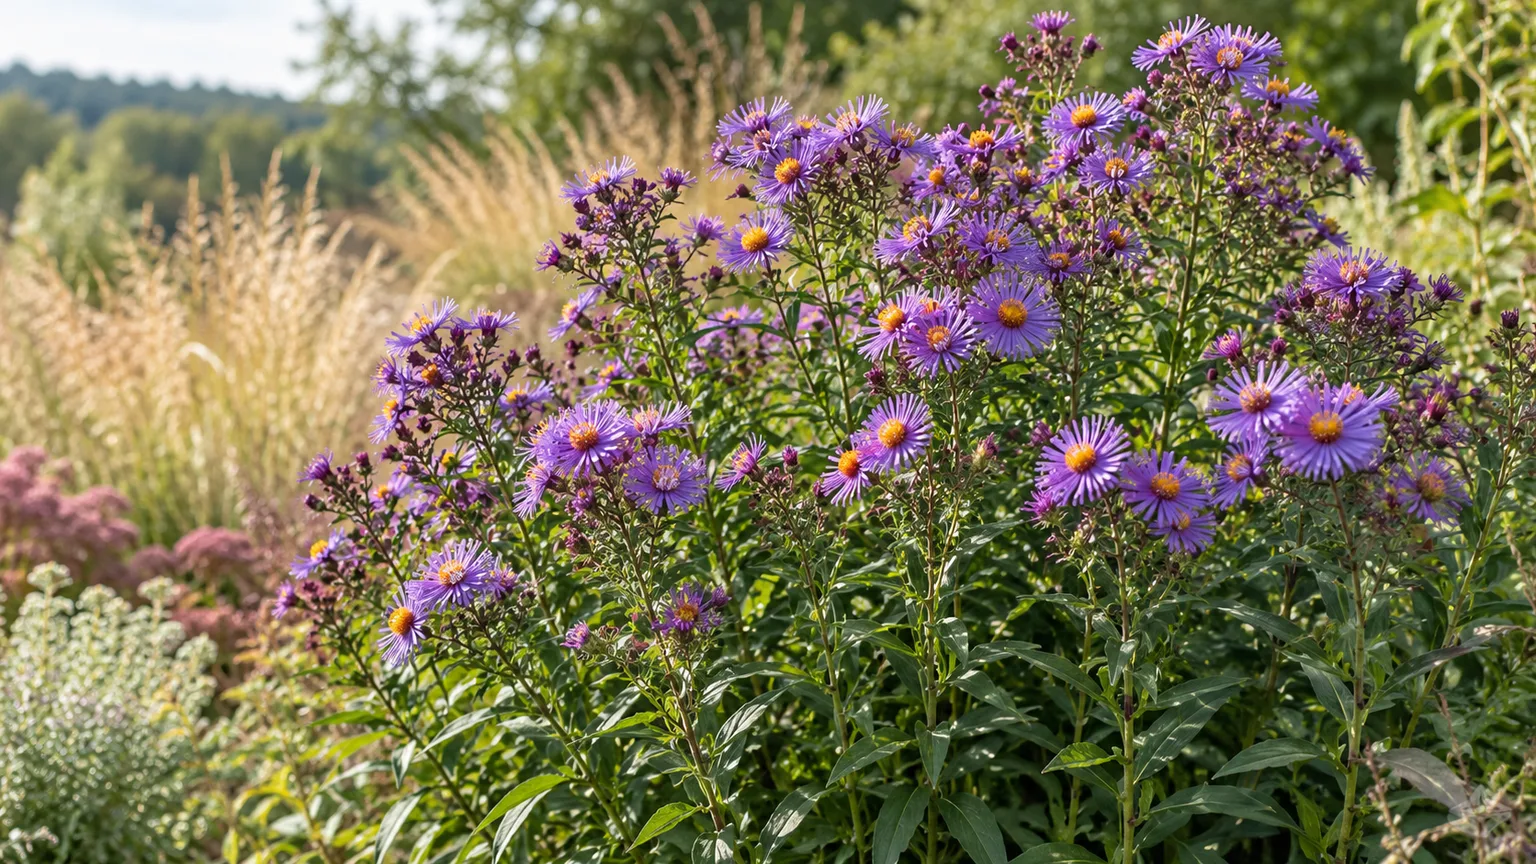
New England asters bring a late-season wave of purple, violet, rose, or pink blooms just as many summer perennials are fading. The native North American perennial, Symphyotrichum novae-angliae (formerly Aster novae-angliae), is a vigorous, upright plant that can fill the back of a border, anchor a rain-garden edge, or feed pollinators in a sunny meadow-style planting. Its one design drawback is size: a standard selection can reach 3 to 6 feet tall, and some stems lean when they grow in shade or rich, exposed conditions.
The most useful care decision often happens before planting: choose a cultivar that fits the space instead of relying on pruning to correct a poor match later. Give it sun, soil that stays evenly moist but drains, and enough room for air to move through the clump. Then decide whether you want a compact mound, a tall native-looking sweep, or a later bloom from early-season pinching.
New England aster at a glance
| Feature | What to expect |
|---|---|
| Botanical name | Symphyotrichum novae-angliae; formerly Aster novae-angliae |
| Plant type | Herbaceous perennial in the daisy family, Asteraceae |
| Typical size | About 3–6 feet tall and 1–3 feet wide; cultivar size varies |
| Bloom | Late summer into fall, usually with purple, violet, lavender, pink, or rose rays and yellow centers |
| Light | Full sun is best; some selections tolerate part shade |
| Soil | Moist, fertile, well-drained soil; clay loam can work |
| Common regional range | Often listed for USDA zones 4–8 or 4–8b; check the cultivar and local conditions |
NC State Extension describes New England aster as a tall, bushy perennial native to eastern North America, growing in places such as prairies, meadows, thickets, and stream banks. Clemson Extension gives a common size of 3 to 6 feet tall and notes that the flowers arrive from late summer into fall. These are useful ranges, not promises: cultivar, latitude, soil moisture, and the length of your growing season all affect the plant you get. NC State Extension Clemson Extension
The flower head is a cluster, not a single simple bloom: colorful ray florets surround a golden-yellow center. That structure gives the plant a long, busy-looking display and makes it easy for late-season bees and butterflies to find. New England aster is deciduous; bare stems in winter do not mean it has died if the crown is healthy and spring shoots return.
Choose the right cultivar before you plant
A cultivar’s mature height matters more than its flower color when you are trying to prevent a floppy border. A 5-foot selection in the front of a narrow bed will need support or an early-season cutback, while a compact variety may keep its shape without extra work. Read the nursery label for both height and width, and compare those numbers with the space available at mature size rather than the small pot in front of you.
‘Purple Dome’ is a useful choice for a short border or the front half of a pollinator planting. Extension and horticulture references describe it as a compact purple-flowered selection around 18 inches to 2 feet tall; Horticulture magazine also identifies it as a sturdier, mildew-resistant cultivar. ‘Alma Potschke’ offers bright pink flowers but is taller, while ‘Harrington’s Pink’ can reach 4 to 6 feet. If mildew has been a recurring problem in your garden, cultivar choice is a more dependable starting point than trying to spray your way out of a susceptible plant’s genetics. NC State Extension Horticulture Fine Gardening
Match height and bloom timing to the bed
Choose tall forms when you have a roomy back border, meadow, or naturalized area where a loose outline looks intentional. They pair especially well with sturdy grasses or other substantial fall plants because the neighboring foliage can help screen lower stems without choking the aster. Leave a path or access strip if the planting will need staking, division, or deadheading.
Use a compact selection when the bed is small, the border is exposed to wind, or you do not want to add supports. Cultivar bloom dates also vary, so one named variety is not a guarantee of a specific calendar week. If extending the display matters, combine selections with different bloom windows and let local nursery guidance help you choose for your region; Horticulture magazine recommends using early-, mid-, and late-season asters to stretch autumn interest. Do not buy a plant solely for its color photo if its mature height is not printed on the tag.
Planting New England asters: a practical sequence
Plant nursery-grown asters in spring after the soil can be worked or in early fall while there is still time for roots to establish before hard freezes. In areas with hot summers, spring planting gives the plant a full season to root before its first winter. The best timing can shift with local heat and frost patterns, so use your extension service’s regional planting guidance when the season is unusual.
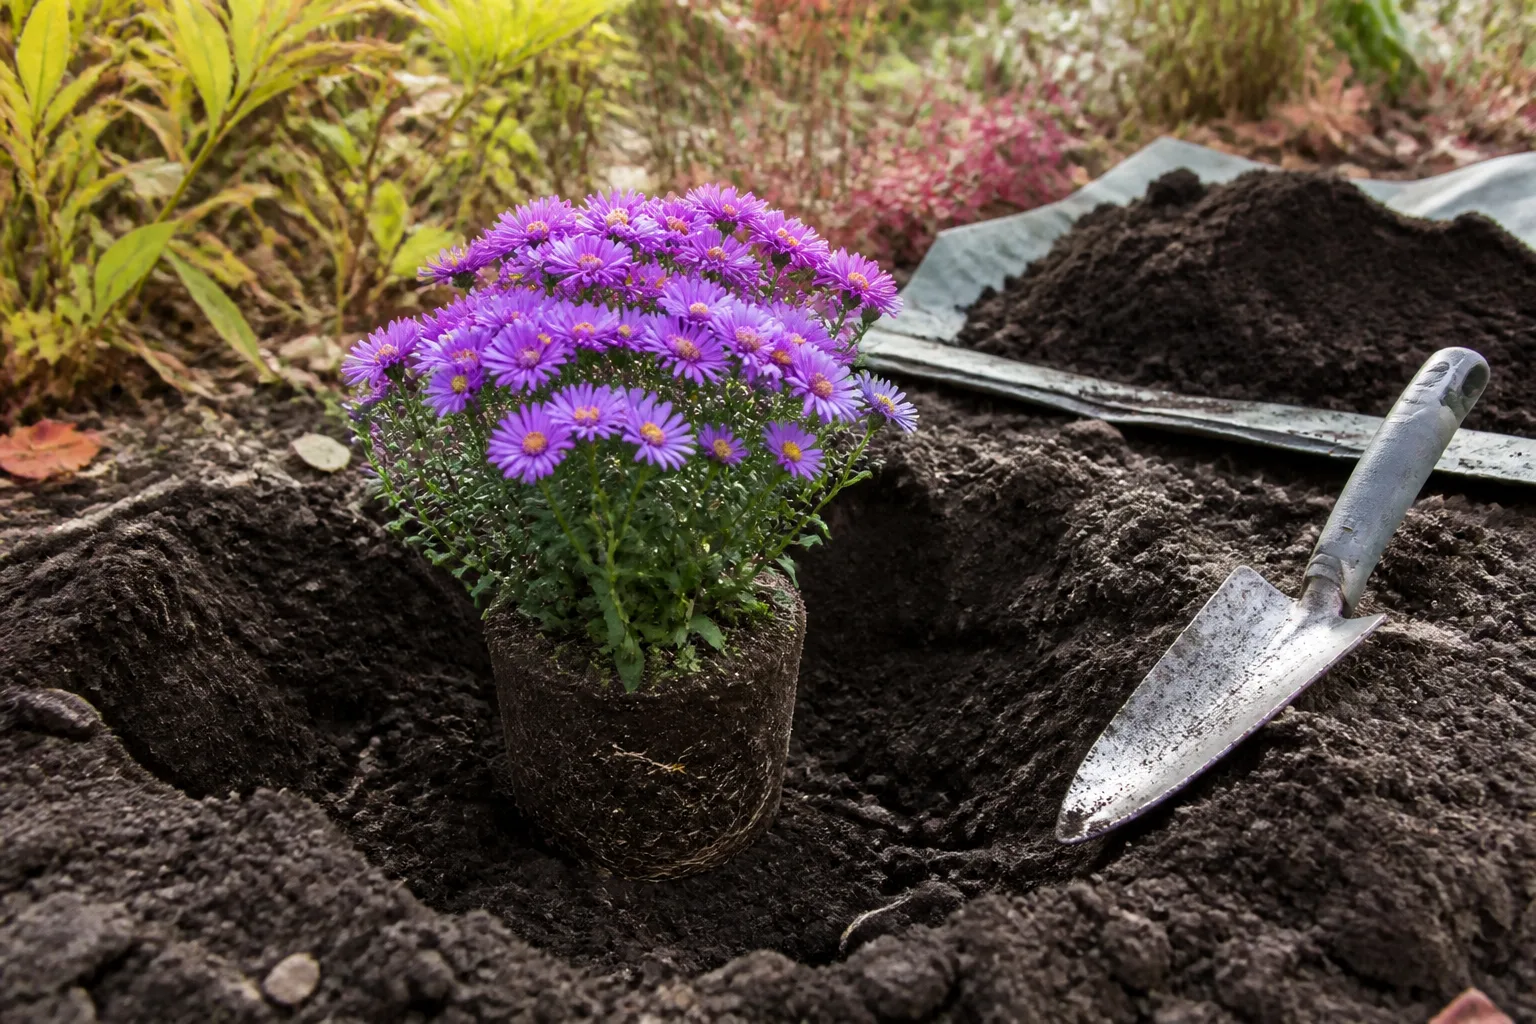
Start by choosing a site with room for the cultivar’s mature spread and with sunlight for most of the day. Loosen the soil over a broad area rather than making a small, rich planting pocket; a broad loosened zone encourages roots to expand outward and makes the transition from nursery mix to garden soil less abrupt. If the bed is compacted, work in compost across the planting area, but do not make a deep pocket of fluffy compost surrounded by dense clay that can hold water like a basin.
Water the nursery pot before planting, slide the root ball out, and gently loosen circling roots around the outside. Set the crown at the same level it sat in the pot, backfill with the native soil, and firm gently so large air gaps close without packing the bed hard. Water slowly until the root ball and surrounding soil are moist, then add a light layer of mulch while keeping it away from the crown. Space plants according to the cultivar’s mature width; crowding several tall clumps together can restrict airflow and turn a single manageable plant into a humid thicket.
Light: sun makes a sturdier plant
Full sun is the safest default for flowering and stem strength. In a hot region, a little afternoon shade may reduce stress, but the plant should still receive strong light for much of the day. NC State lists full sun as the preferred exposure, while Fine Gardening allows full sun to partial shade; in practice, the shadier the site, the more likely tall stems are to stretch toward light and need support.
If a plant is leaning toward one side, check the pattern before adding a stake. A one-sided lean often points to shade from a building, tree, or taller neighbor rather than a weak crown. Moving a crowded aster to a brighter site during dormancy can solve the cause; a stake only manages the symptom. NC State Extension Fine Gardening
Soil and drainage: moisture without stagnant water
New England aster likes moisture and fertile soil, but “moist” does not mean roots should sit in a puddle. NC State lists moist, fertile, well-drained soil and includes clay loam among acceptable soils. Illinois Extension notes that the plant occurs in meadows and wet soils, while also describing well-drained ground as suitable. Read those points together: it can handle heavier and damper soil than many border perennials, yet a compacted hole that stays saturated is still a poor planting site. NC State Extension University of Illinois Extension
A simple drainage check is to watch the bed after a steady rain. If water remains pooled for much of the day or the soil smells sour, improve drainage or choose a slightly raised area. If the soil is clay but water moves through it, add organic matter across the bed and avoid tilling it when wet; working sticky clay when saturated can compact it further. Do not add sand to a small planting hole as a quick fix, because a little sand mixed with clay can create a dense, concrete-like texture.
The available extension sources do not establish that this species needs acidic soil. Do not add sulfur, lime, or a pH-adjusting product simply because a generic aster guide says “acidic.” If a soil test identifies a pH issue or nutrient imbalance, follow its recommendation; otherwise focus on moisture, structure, and drainage.
Watering: establish roots, then respond to weather
Water newly planted asters deeply enough to moisten the full root ball and nearby soil, then let the surface begin to dry before watering again. During the first growing season, check the soil every few days in hot, windy weather and less often after rain or in cool conditions. The goal is steady establishment, not a fixed calendar schedule that keeps the crown wet.
Once the plant is rooted in, it can usually rely more on rainfall, but a long dry spell during active growth or bud formation can reduce vigor and flower quality. Check the soil at finger depth near the root zone rather than reading only the dry mulch surface. If the soil is dry several inches down, give it a slow soak; a quick sprinkle that wets only the top inch encourages shallow roots.
Water at the base in the morning when possible. That keeps the foliage drier overnight and helps reduce the conditions that favor leaf diseases. If the plant wilts during a hot afternoon but recovers by evening, it may be reacting to heat; if it stays limp in the morning, inspect soil moisture and drainage before assuming it needs more water. Both drought and saturated roots can produce stress symptoms, so check the soil before acting.
Fertilizer: use compost before a bloom booster
New England aster does not need a special high-phosphorus “bloom” fertilizer by default. Clemson Extension recommends an annual 2-inch layer of compost and says an all-purpose, slow-release fertilizer can be used in late spring if needed. Start with soil improvement and observe how the plant grows; strong leafy growth with few flowers can be a sign that the site is too shady, the cultivar is young, or nitrogen is excessive rather than a signal to add more fertilizer. Clemson Extension
Spread compost over the bed surface without burying the crown. If nearby plants are growing normally and the aster has healthy foliage, skip extra fertilizer. When a soil test or clear nutrient deficiency justifies feeding, use a balanced slow-release product at the label rate and stop before late summer; pushing soft growth late in the season does not make a sturdy fall plant.
Pinching, staking, and controlling flopping
Spring or early-summer pinching is an option for tall selections, not a requirement for every New England aster. When stems are actively growing but have not started making flower buds, pinch or cut the tips back once to encourage branching. The trade-off is later bloom: NC State notes that spring pinching delays flowering, and Horticulture magazine reports that cutting taller asters by about half in early July can delay bloom by roughly 10 days while making the plants more self-supporting. The exact delay will vary with cultivar, region, and how hard you cut. NC State Extension Horticulture

Do not keep pinching on a calendar after buds are forming. Late pinching can remove the very tips that would flower, shifting the show later or reducing it in a short-season garden. If you need flowers as early as possible, choose a compact, naturally sturdy cultivar instead of cutting a tall one hard.
Staking is the better choice when a mature plant is already leaning or when wind and rain routinely flatten it. Set a discreet stake early enough that stems can grow up through loose twine or a ring, but keep the support from cinching the stems tightly. A ring placed after the plant has flopped can trap stems at an awkward angle; early support looks more natural. Overcrowding, shade, overly rich soil, and late storms all contribute to leaning, so support works best alongside a site correction.
Blooming, deadheading, and winter cleanup
New England asters usually open from late summer into fall, with the exact window varying across cultivars and climates. Clemson Extension describes a bloom period of six weeks or longer in favorable conditions, while NC State places the main display in late summer to fall. Young plants may spend their first season establishing roots and produce a lighter show; do not judge a new planting solely by its first autumn. Clemson Extension NC State Extension
Deadhead individual faded clusters if you want a tidier look or want to limit self-seeding. You do not have to remove every spent flower for the plant’s health. If the seed heads are attractive to birds or you want the stems to remain as winter structure, leave some or all healthy heads until late winter or early spring. Clemson Extension notes that plants can self-seed, so a small garden where seedlings are unwelcome is a good reason to remove heads before seeds mature.
After flowering, choose between a clean cutback and a wildlife-friendly winter pause. In a disease-prone bed, Horticulture magazine recommends cutting and discarding stems in autumn to reduce overwintering fungal spores. If mildew has not been a recurring issue and you value winter habitat, leave healthy stems standing through the cold season and cut them back before new spring growth begins. Either way, remove obviously diseased debris and do not leave it in the bed or home compost. Horticulture
Propagating New England asters
The two most dependable home-garden methods are dividing a mature clump or sowing seed. Division keeps a named cultivar true to type; seed is simpler when you welcome variation and want more plants for a naturalized area. Clemson Extension recommends dividing mature plants every three or more years and notes that seed can be saved and sown outdoors in fall. Clemson Extension
Divide a mature clump
Divide when the clump is established and actively dormant or just beginning growth, usually in spring or early fall where the plant has time to re-root. Water the day before if the soil is dry, then lift a section with a sharp spade and keep a generous amount of roots attached. Separate the clump into manageable pieces, discarding any hollow, mushy, or dead center rather than replanting it.
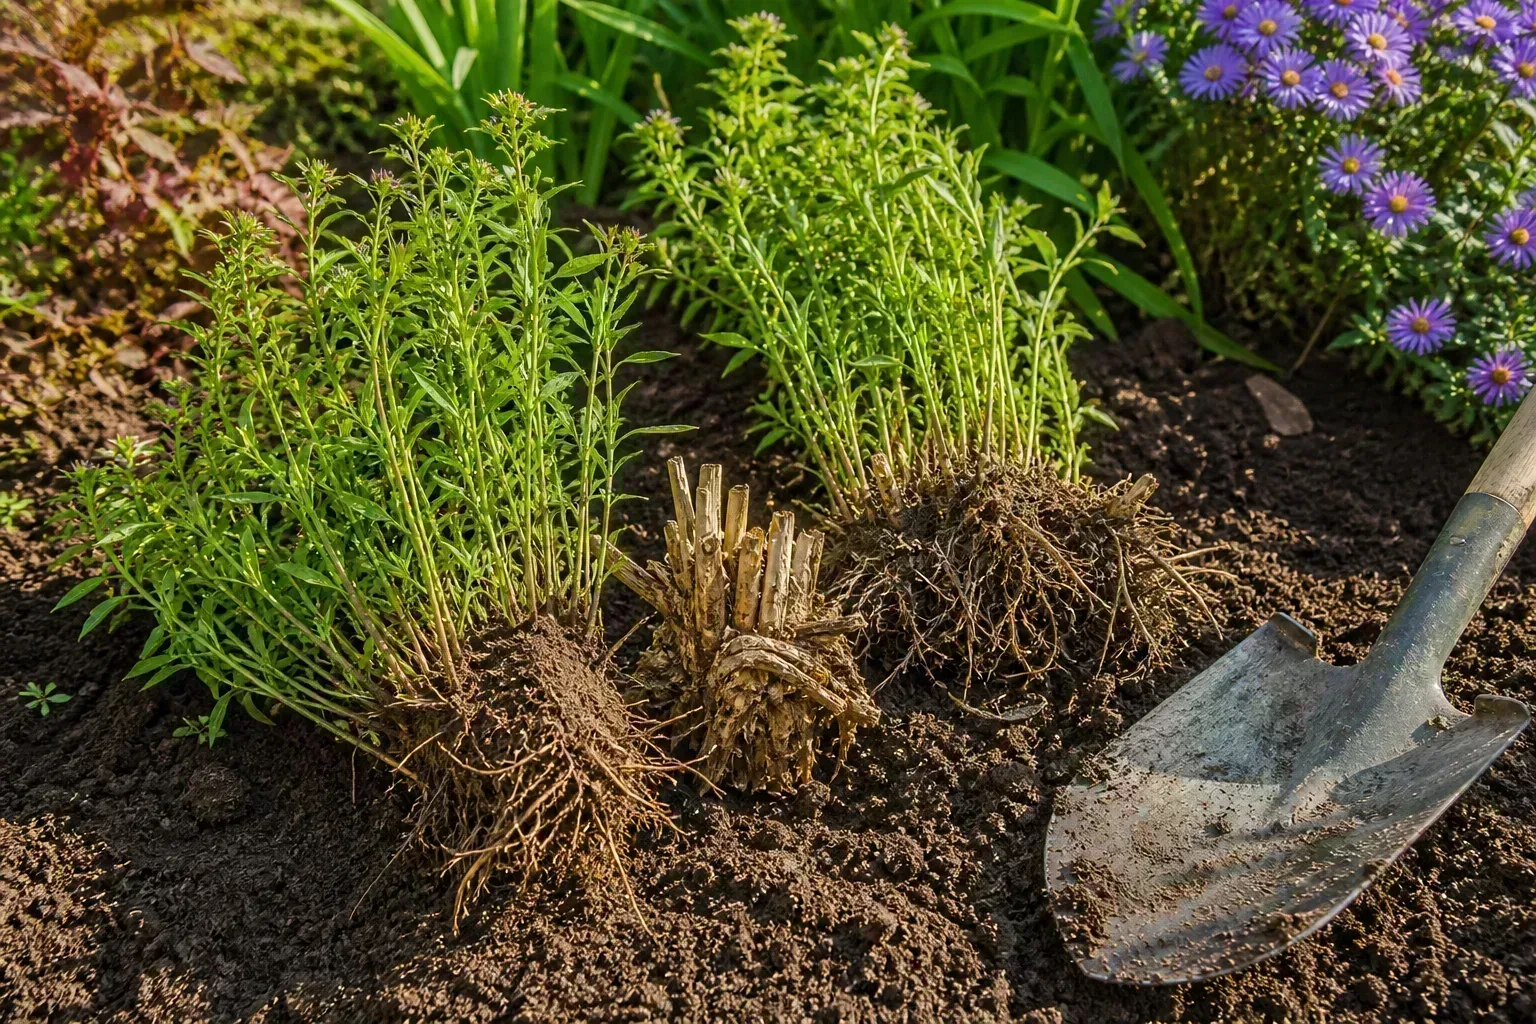
Replant divisions promptly at the same depth they were growing, firm soil around them, and water well. Keep the soil evenly moist while new roots establish, especially if you divide in warm weather. A divided plant may flower less the first season while it rebuilds its root system; that is not a reason to fertilize heavily or keep the soil soggy. If the parent cultivar has been flopping or mildewing, divide it only after deciding whether the site or cultivar is the real problem, since division alone will not correct poor placement.
Grow from seed when variation is welcome
Collect dry seed heads after flowers fade, or buy seed labeled with the species name. For a naturalistic planting, sow outdoors in fall in a prepared patch, cover lightly, and mark the area so it is not mistaken for weeds in spring. Seedlings may vary in flower color and habit, especially when they come from garden plants rather than a carefully controlled seed source. If you want the precise look of a named cultivar, buy that cultivar or divide an existing one instead.
Keep newly emerged seedlings watered while they develop roots, and thin them so air and light can reach the leaves. Do not expect a dense patch from one season of seed: germination and bloom timing vary, and young perennials often prioritize establishment before they make a mature display. For that reason, division is usually faster when you want a known plant in a specific border position.
Growing New England asters in containers
A tall New England aster can be awkward in a small pot because its top growth catches wind while its root ball dries faster than garden soil. If container growing is the only option, select a compact cultivar such as ‘Purple Dome’, use a wide, heavy pot with drainage holes, and choose a quality outdoor potting mix rather than garden soil. A larger volume of mix buffers moisture swings and gives the roots room to develop.
Place the pot where it receives strong light and can drain freely. Check moisture more often than you would for an in-ground plant; water thoroughly when the mix begins to dry rather than giving frequent small sips. Avoid standing the pot in a saucer of water. Container roots are also more exposed to winter temperature swings, so group pots in a sheltered spot or use local guidance for insulating perennial containers in your climate. If the plant repeatedly dries out or tips over, move it into the ground rather than increasing fertilizer or watering frequency alone.
Common problems and how to read the symptoms
Powdery mildew is the most familiar foliage issue: a white, dusty or felty coating appears on leaves and may spread across the plant. Susceptibility varies among cultivars, and dense growth, limited airflow, shade, and late-season humidity can make the problem more noticeable. Start with prevention—give plants breathing room, use a more resistant cultivar when available, and remove infected debris—rather than assuming a fungicide is the first step. NC State lists powdery mildew among common problems, while Penn State Extension describes the white growth and notes other possible aster diseases, including wilt, leaf spots, and botrytis. NC State Extension Penn State Extension
Lower leaves can brown or disappear as flowering approaches, especially on tall clumps; Clemson Extension notes that lower foliage may die back in late summer. That can be normal aging, but widespread yellowing, one-sided wilt, soft stems, or a rapidly collapsing plant deserve a closer look at watering, drainage, and disease. Do not diagnose every brown leaf as drought and respond with more water. Check the soil and inspect both the base and upper growth first.
Separate mildew from aster yellows
Aster yellows is a different and more serious problem than a surface mildew. Infected plants may become stunted or twisted, with yellow, purple, or red foliage and distorted flowers; flower parts can turn green or leafy, and the plant may become sterile. The disease is caused by a phytoplasma carried by aster leafhoppers, and Wisconsin Extension states that there is no known cure. Wisconsin Horticulture
If a plant shows this combination of abnormal growth and deformed flowers, do not try to fix it with fertilizer or a fungicide. Aster yellows can resemble other disorders, so confirm the diagnosis with a local extension plant clinic when the symptoms are unclear. Once confirmed or strongly suspected, remove the entire infected plant promptly and discard it; do not compost it. Wisconsin Extension cautions that controlling leafhoppers in landscape settings is not an effective or recommended way to manage the disease, so focus on removing infected plants and maintaining a diverse garden rather than spraying indiscriminately.
Aphids, spider mites, and leaf miners can also occur, but they do not all require the same response. Look for the pest or its characteristic feeding pattern before treating. A few aphids on a large perennial may be tolerated by predators and birds; a worsening infestation on stressed plants is a cue to improve conditions and choose an appropriate, locally approved method rather than reaching immediately for a broad-spectrum pesticide.
Pollinators, companions, and self-seeding
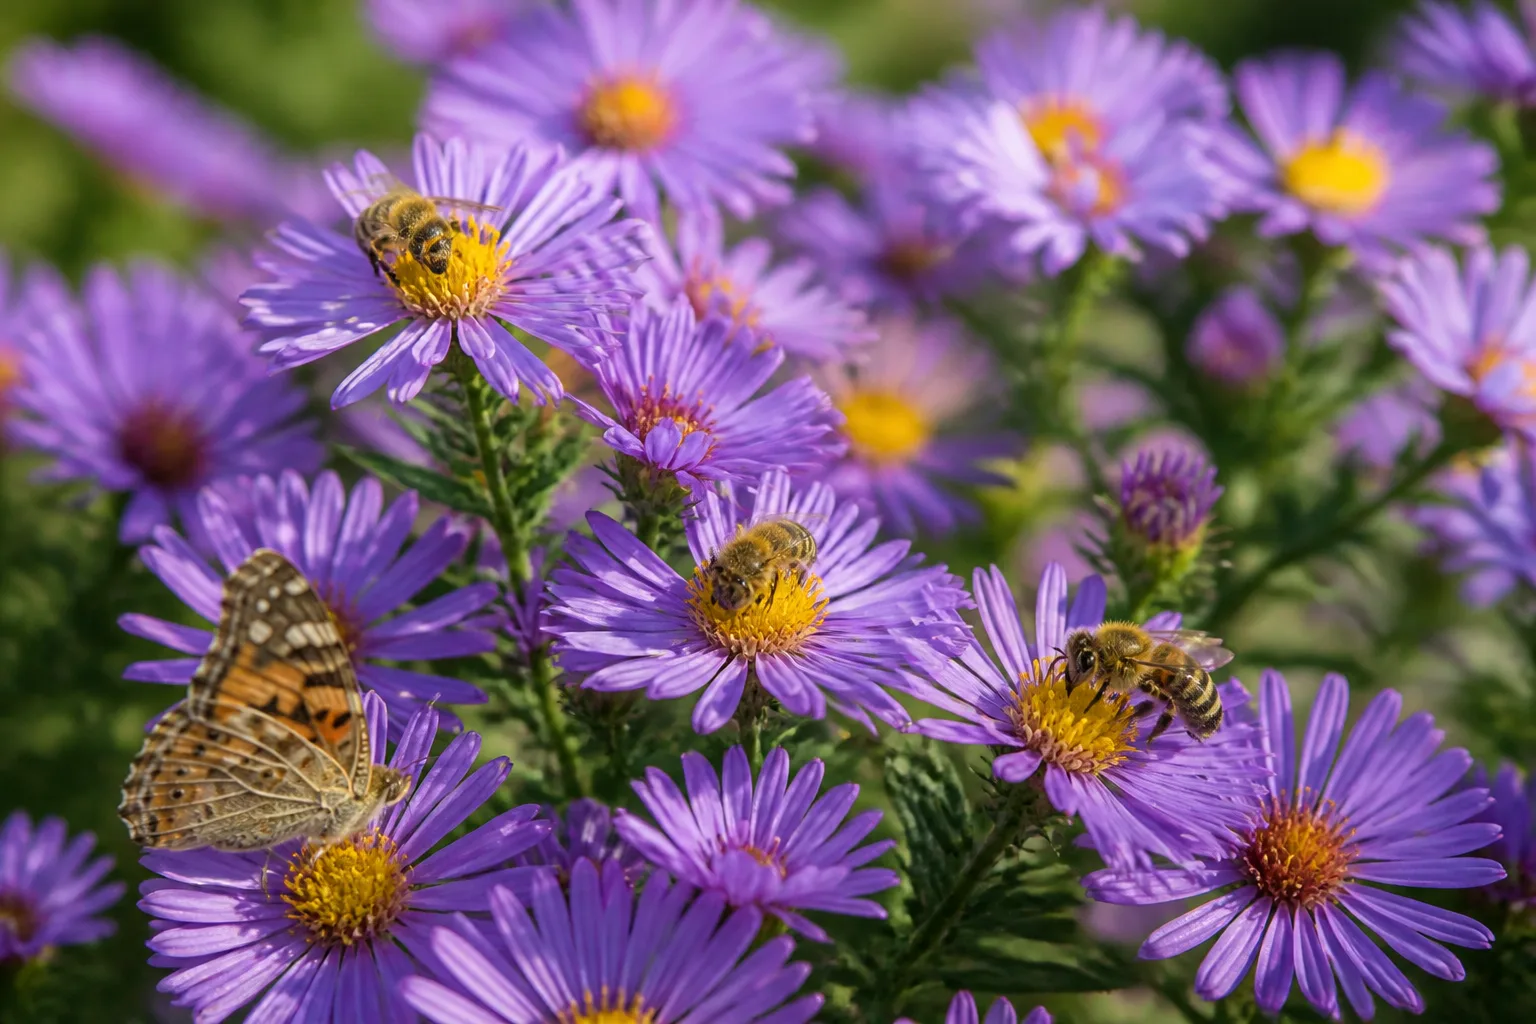
New England asters provide late-season nectar and pollen when many summer flowers are finished. Clemson Extension identifies bees and butterflies among their visitors and notes that the plant hosts Pearl Crescent caterpillars. Planting several native species with staggered bloom times supports a more continuous food supply than relying on one large patch of asters alone. Clemson Extension Horticulture
Pair the upright flowers with goldenrods (Solidago), native grasses, or other late-season perennials that share similar light and moisture needs. NC State specifically suggests fall-blooming goldenrod as a colorful partner. Place shorter plants in front and allow taller asters to sit toward the back, while leaving enough distance for airflow and access. Choose companions for overlapping habitat needs rather than color alone; a drought-loving plant can struggle beside an aster in a consistently moist bed.
New England aster may self-seed, especially where seed heads remain and soil is bare. If you want seedlings, leave selected heads and let a few establish; if the bed is formal or crowded, deadhead before seed matures and pull young volunteers while they are small. Check seedlings before removing them if you want to keep the native planting diverse, because many young asters look similar until they develop mature leaves and flower buds.
Conclusion
New England asters are easiest to manage when you match the cultivar to the space before planting. Give them sun, fertile soil that holds moisture without staying saturated, and enough room for their natural height; water consistently while they establish, then respond to actual rainfall and soil conditions. Compost is usually a better starting point than a heavy fertilizer routine.
For a sturdier display, choose a compact cultivar or pinch tall stems early enough to accept a later bloom. Stake plants before storms flatten them, divide mature clumps when they become crowded, and choose whether to leave healthy seed heads for winter wildlife or remove them to control seedlings. If mildew appears, improve airflow and remove infected debris; if growth is twisted and flowers are deformed, consider aster yellows and seek a reliable diagnosis. With the right site and a realistic maintenance plan, this perennial can carry a border through the end of the growing season and give pollinators a useful late source of forage.