Camellia sinensis (Tea Plant) Care Guide
Learn how to grow Camellia sinensis in a garden or pot, manage acidic soil and winter protection, and harvest young leaves without slowing establishment.
Decide whether you want an ornamental shrub, a tea harvest, or both
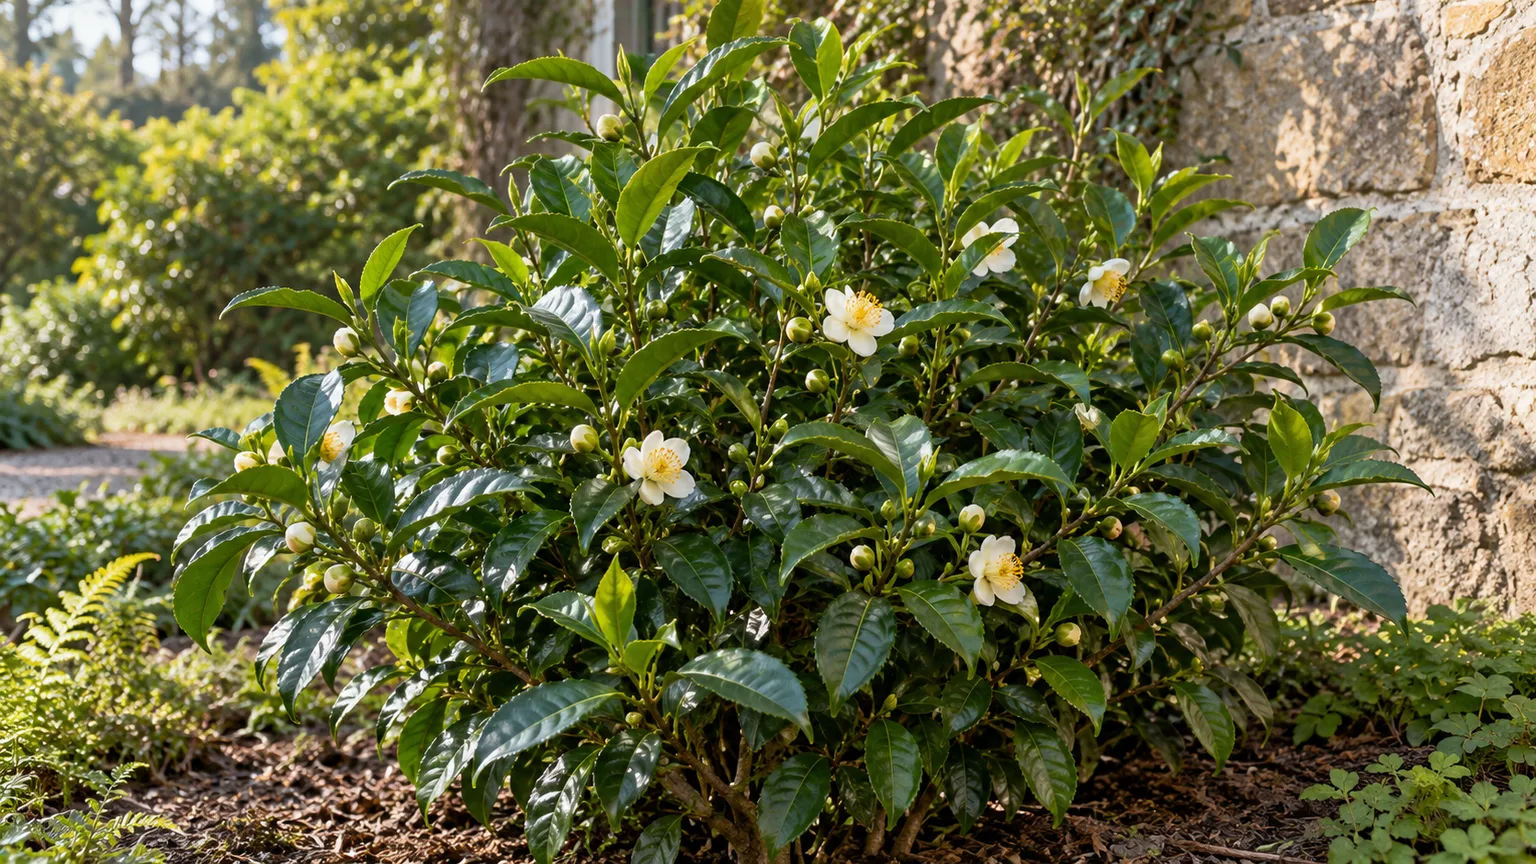
Camellia sinensis is the evergreen shrub whose young leaves are processed into tea. It can also earn a place in a garden for its dense, glossy foliage and small fall or winter flowers. The care is manageable, but the best pruning and harvesting choices depend on whether you mainly want a handsome shrub, a supply of leaves, or a little of each.
For a low-maintenance landscape plant, let it develop a natural rounded form and take only occasional leaves. For a productive plant, gradually encourage low, branched growth so new shoots are easy to reach. Neither approach turns a young nursery plant into a productive tea bush overnight: it first needs to establish roots and build enough healthy leaf area to recover from picking.
The leaves from this species can become green, white, oolong, or black tea. The differences come chiefly from when the leaves are picked and how they are withered, bruised, heated, oxidized, and dried, not from buying a separate plant for each tea style. North Carolina State Extension describes the species as an evergreen shrub or small tree grown for caffeinated tea and ornamental use. NC State Extension’s plant profile is useful for checking its identity and basic growing range.
Choose a tea plant suited to your climate
When comparing plants, look for the botanical name Camellia sinensis. A general “camellia” label may refer to a different species grown primarily for large ornamental flowers. C. sinensis has smaller, toothed, leathery leaves and modest white flowers; its foliage, not its blooms, is the crop.
Ask the nursery which variety or cultivar it is selling, how the plant was propagated, and what winter conditions it has already experienced. A plant acclimated outdoors in your region may adjust more smoothly than a greenhouse-grown specimen moved directly into a windy, exposed bed. If your goal is harvesting, ask whether the cultivar is intended for leaf production; otherwise, a healthy specimen can still make a good garden shrub.
Chinese tea and Assam tea are varieties, not different tea styles
The two familiar botanical varieties are C. sinensis var. sinensis, often called Chinese tea, and C. sinensis var. assamica, or Assam tea. The former usually has smaller leaves and is more cold tolerant; the latter tends to have larger leaves and is associated with warmer climates. Those are broad tendencies, not a promise that every cultivar will behave identically.
In a cold-winter garden, a locally proven var. sinensis cultivar is usually the sensible starting point. In a warm, humid site, var. assamica may be an option, but heat, dry air, and wind still matter. Research evaluating nine cultivars in Mississippi found differences in growth and cold injury among plants, even though the trial cultivars resumed growth after winter damage. That is a useful reminder that “tea plant hardiness” is not one fixed temperature for every plant. The cultivar study in Frontiers in Plant Science reports results from one site and should be read as regional evidence, not a universal guarantee.
Set realistic expectations for winter and summer
Published hardiness ranges vary. NC State lists the species for USDA Zones 6a through 9b; the American Camellia Society says Zones 7–9 are the most suitable outdoor climates and recommends protection or containers in colder areas. WSU’s home-growing guidance reflects its Pacific Northwest research site. These ranges overlap, but they do not account for every cultivar, wind exposure, duration of a freeze, drainage, or the vulnerability of a newly planted shrub.
Use your local winter pattern as the decision point. A sheltered garden with reliably acidic soil and short, moderate freezes is different from an exposed site with drying winds, repeated hard freezes, or winter rain around saturated roots. In marginal areas, grow the plant in a pot that you can move into an unheated greenhouse, enclosed porch, or bright, cool shelter during the most severe weather.
Summer can be limiting too. Tea plants grow best with steady moisture and do not appreciate a long spell of hot, dry wind. In hot-summer climates, a location with morning sun and afternoon shade can reduce leaf stress; in cooler areas, more direct light may support denser growth. The RHS also recommends a protected position for tea plants and notes that a container can help gardeners who do not have suitable soil or mild winters. RHS advice on growing tea is based on UK conditions, so translate its frost and seasonal timing to your own location.
Test the soil before planting or feeding
Acidic soil is one of the few non-negotiable starting points. WSU’s tea planting guide recommends a soil pH of about 4.5 to 5.5; it reports poorer growth and untimely flowering when pH rises above 5.5 in the conditions they studied. NC State describes the species more broadly as requiring acidic soil below pH 6. Together, those sources point to a practical target around 4.5–5.5, while emphasizing that the result of a soil test matters more than a guessed amendment.
Test the bed before planting. If the pH is too high, use an extension soil-test recommendation or a product labeled for acid-loving plants, and follow its rate and re-test schedule. Elemental sulfur or acid-forming fertilizers can change soil conditions, but the speed and effect depend on soil texture, existing chemistry, and product formulation. Avoid trying to force a quick pH change with vinegar or other improvised acid treatments.
Drainage matters as much as pH. Tea prefers soil that stays evenly moist but does not hold stagnant water around its roots. If a bed remains soggy after rain, choose a raised or better-drained planting area, or use a large container with drainage holes. A layer of organic mulch can help retain moisture and buffer soil temperature; keep it away from direct contact with the stem. For a broader primer on safe pH adjustments, see the LeafyPixels guide to lowering soil pH.
Choose a sheltered site with the right light
Pick a place protected from strong prevailing winds and winter exposure, ideally near a wall or a larger planting that does not cast dense shade all day. Wind can desiccate evergreen leaves in winter and speed water loss in summer. Avoid a cold pocket where frost settles, as well as a roof edge where runoff repeatedly saturates the root zone.
Light advice can sound contradictory because climate changes the answer. NC State lists both full sun and partial shade; WSU says a very sunny, hot location may need shade, particularly for Assam-type plants. For a cool or mild garden, give a tea plant several hours of sun and watch new growth for scorch. In a hot location, use dappled light or shade in the hottest part of the afternoon. Acclimate a greenhouse-grown plant gradually rather than placing it in intense sun on its first day outdoors.
Plant it where you can reach the leaves if harvest matters. Tea grown as a tree can become much taller than a home gardener can conveniently pick, while a low, regularly shaped shrub keeps new shoots accessible. Allow enough space for the plant’s mature spread unless you plan to maintain it as a hedge; do not wedge it tightly against a wall merely for warmth.
Plant tea at the existing root-collar level
Plant in spring after the worst frost risk has passed, especially in colder climates where a new root system would face winter before it has settled in. Early autumn planting may suit a mild region with warm soil and time for roots to establish, but do not assume that the same calendar advice works everywhere. Water the nursery pot first so the root ball is evenly damp, not dripping.
Dig a hole about twice as wide as the root ball and no deeper than the existing root system. Loosen the sides of a compacted hole, set the plant so the top of its root ball sits level with the surrounding soil, then backfill with the native soil. Avoid burying the stem or creating a rich, sharply different pocket that holds water around the roots. Water slowly to settle the soil and check that the root collar has not sunk.
During the first growing season, keep the root zone evenly moist and use mulch to limit evaporation. Do not apply a hard pruning or harvest as soon as the plant looks attractive; new leaves are the plant’s solar panels, and it needs them to rebuild roots and branches. WSU’s establishment guidance says to avoid pruning and plucking from October through February in its climate, and to prioritize root development over early yield. WSU’s planting and establishment guide gives region-specific details for site preparation and young plants.
Grow tea in a container when soil or winter weather is a problem
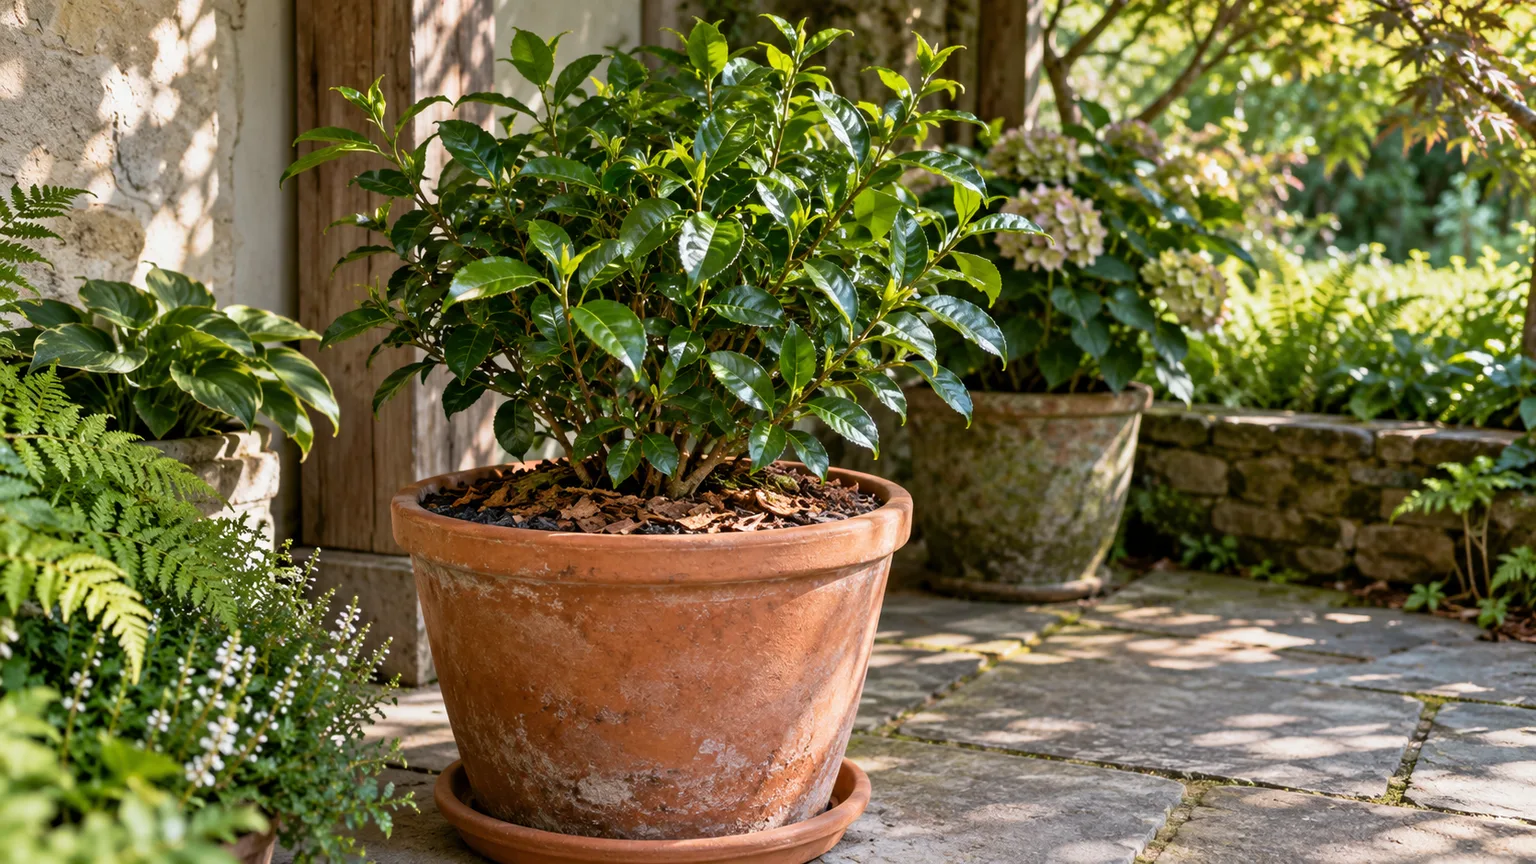
A container makes it easier to manage soil acidity and move the plant away from severe cold, but it also dries faster and leaves roots more exposed to temperature swings. Choose a sturdy, deep pot with several drainage holes and enough room for the root ball plus future growth. WSU recommends a large container of more than five gallons for tea; the American Camellia Society also lists containers as a useful option in colder climates.
Use a peat-free ericaceous mix or a well-drained potting medium formulated for acid-loving plants. Do not fill the pot with garden soil, which can compact and drain poorly in a container. Set the root ball at its original level, fill around it without packing the mix hard, and water until excess runs freely from the base. Empty a saucer after watering so the roots are not left standing in water.
Keep the pot outdoors during the active season if local weather permits, then move it before a prolonged freeze reaches the root ball. A cool, bright, sheltered location is usually more suitable for winter rest than a heated living room. Reduce watering when growth slows, but do not let the mix become bone dry. If the plant must stay outside, group pots against a protected wall and insulate the container; protecting leaves alone does not prevent a pot’s roots from freezing.
Water for even moisture without waterlogging
Water the soil, not just the leaves, and let the surface begin to dry slightly before watering again. The root zone should remain consistently moist during active growth, but a tea plant that sits in cold, saturated ground can develop root problems. Check soil a few inches down rather than following a rigid daily schedule.
After establishment, WSU’s western Washington guide uses about one inch of water every seven to ten days from June through October as a starting point, adjusted for rainfall and soil. That number is not a universal prescription: a hot week, sandy bed, newly planted shrub, and large container all change how quickly roots dry. Potted plants can need daily watering in hot weather; on cool, overcast days they may need much less.
If your tap water is hard or strongly alkaline, repeated use may gradually raise the pH of the potting mix or bed. Rainwater is a useful alternative when available. If foliage yellows despite regular feeding, test the soil and inspect drainage before adding more fertilizer; a high pH or damaged roots can prevent nutrients from reaching leaves even when nutrients are present.
Fertilize gently during active growth
Tea does not need a heavy feeding schedule to remain a healthy shrub. Use a slow-release or liquid fertilizer labeled for acid-loving plants, and apply it at the label rate during the growing season. WSU’s Pacific Northwest program applies fertilizer in spring and late summer to establishing plants and increases frequency for mature plants being harvested, but it also cautions against fall and winter feeding because tender new growth can be vulnerable to cold.
For a home plant, start with the lighter label rate rather than copying a field-production rate from a commercial guide. If the shrub is growing well, leaves are a normal deep green, and new shoots mature before autumn, more fertilizer is unlikely to help. Stop feeding when growth slows for the season. Do not combine several fertilizers or add nitrogen simply because the plant seems small; check pH, root health, light, water, and time since planting first.
Choose a fertilizer that maintains acidity without burning roots. Keep granules away from the stem and water after application as directed. If you are harvesting leaves, use only products whose label permits use on edible crops and observe all label instructions, including any waiting interval before harvest. A fertilizer suitable for ornamental shrubs is not automatically suitable for leaves you plan to steep.
Prune to match the plant’s purpose
An ornamental tea shrub needs only light shaping and removal of dead, damaged, or crossing branches. Prune after flowering or before the main spring flush, avoiding a severe cut just before a cold spell. If you want flowers, do not shear the shrub into a tight formal hedge every season; repeated cutting can remove flower buds and make it harder to enjoy the plant’s natural form.
For harvest, the aim is a low, branching canopy with many reachable growing points. WSU explains that commercial tea plants are shaped into a waist- to chest-high plucking surface, but a home shrub does not need an exact plantation form. Begin shaping only after the plant has settled in and is producing vigorous new growth. Remove no more than about one-third of its height at one time, and postpone pruning if it is wilted, chlorotic, recently transplanted, or recovering from winter injury.
New shoots are the future harvest, so pruning has a trade-off: it can encourage branching, but too much at once removes the leaf area that powers recovery. WSU’s regional guide advises against pruning newly transplanted plants in the first year and describes gradually shaping plants in later summers. Its month-by-month schedule applies to western Washington; in your garden, work backward from the local last freeze and first hard frost. WSU’s care and maintenance guide explains why timing and plant condition matter.
Use an establishment timeline before planning a harvest
Think in years, not weeks. In WSU’s Pacific Northwest planting guidance, tea plants are generally ready for a first harvest after three to four years, although the climate and cultivar alter the pace. A plant may make shoots before it can spare them; visible growth does not mean the roots and branches are strong enough for regular picking.
During year one, prioritize roots, water, and survival through the first winter. During the next one or two growing seasons, let shoots lengthen and branch; protect plants from severe cold and remove only damaged material. WSU notes that young tea plants in its region may lose most of their leaves after their first or second winter and still send up new growth in summer. Do not declare a plant dead solely because it looks sparse in spring; scratch a small patch of bark on a questionable stem and check for green tissue before removing it.
Once the shrub is established and repeatedly produces vigorous flushes, take a light first harvest and watch how quickly it resprouts. If new growth is weak, sparse, or yellow, pause picking for that season. A mature shrub can produce more leaves over time, but no calendar guarantees a useful crop in a short summer or a difficult winter. In very warm regions, WSU cites earlier first harvests in Hawaii, which illustrates why one timeline should not be applied to every climate.
Pick a small, healthy flush of leaves
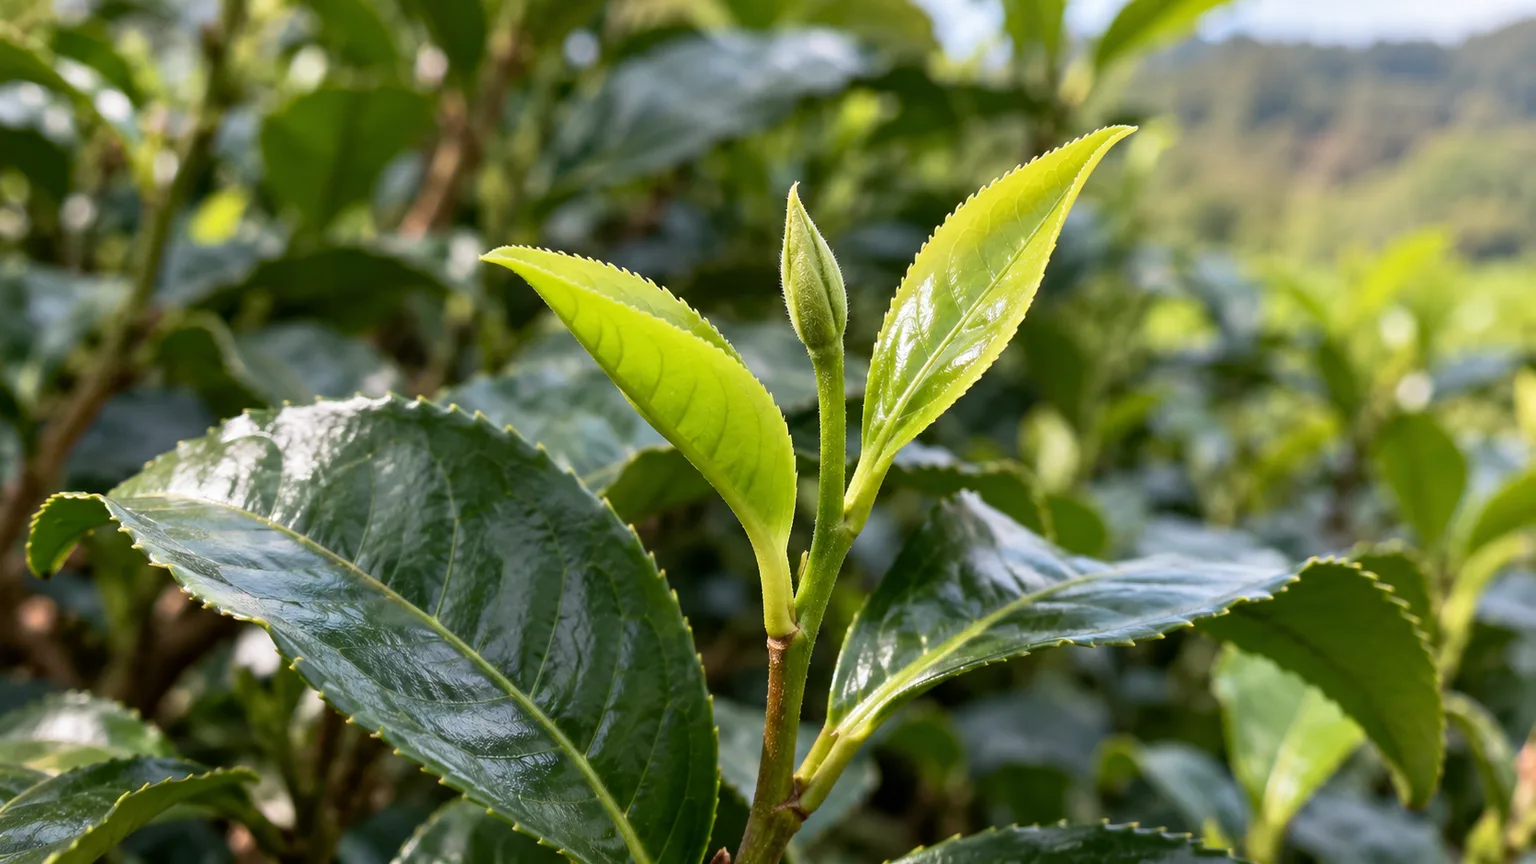
Harvest the tender tip of an actively growing shoot, usually the unopened bud with the two youngest leaves below it. WSU describes harvesting the top two to five leaves, depending on the batch and intended processing; for a small home plant, a bud-and-two-leaves pick is a conservative place to begin. Use clean fingers or sharp clean snips, and avoid stripping every shoot from a branch.
Pick only what the plant can replace. Leave plenty of mature foliage and growing points, particularly on a young shrub, and spread the harvest across several branches. Do not harvest immediately after transplanting, during drought stress, or from a plant recovering from winter damage. Stop picking well before the coldest part of the year so new shoots have time to mature rather than being encouraged into frost-sensitive growth.
Bring leaves indoors promptly and process them while fresh. Rinse only if they are visibly dusty or dirty, then dry them thoroughly before storage. If the plant has been treated with a pesticide or other product, do not assume its leaves are safe for tea; follow the product label exactly, and do not use leaves from a plant treated with a product that is not approved for edible crops.
Understand how processing creates different teas
The plant does not decide whether a leaf becomes green, white, oolong, or black tea by itself. Handling after harvest changes the leaf’s color and flavor. WSU’s home-processing guide describes the basic stages as withering to remove moisture, bruising or rolling to expose leaf contents to air, oxidation, heat treatment to stop or limit that oxidation, and final drying.
For a simple home experiment, divide one small harvest into two batches. Dry one batch with minimal handling for a light, delicate result. For a greener style, heat fresh leaves briefly to slow oxidation, cool and roll them, then dry them fully. A partially oxidized batch becomes oolong-like, while longer oxidation before drying yields a darker style. The exact sequence, timing, and flavor vary with leaf maturity, room conditions, and technique; a first batch is a learning exercise rather than a guaranteed replica of commercial tea.
Use a clean screen, tray, pan, or dehydrator, and handle small quantities so leaves dry evenly. Store only fully dried leaves in an airtight container away from light, heat, and moisture. If leaves remain pliable or smell musty, continue drying rather than sealing them. WSU’s guide includes small-batch methods and explains that all of these styles begin with C. sinensis leaves. RHS home-tea instructions also outline a simple green-tea method, while WSU offers a broader tea types and home processing guide.
Propagate tea with patience and healthy stem cuttings
Stem cuttings make a clone of a selected plant, while seedlings can vary from the parent. Tea can be slow and difficult to root, so start with several cuttings instead of assuming one will take. WSU’s propagation protocol uses mature, healthy shoots and a humid mist chamber; it reports that rooting can take four to five months under its controlled conditions.
For a small home attempt, choose a healthy semi-ripe shoot with several nodes and no pest damage. Take cuttings with clean pruners, keep them shaded and moist while you prepare them, and place them in a sterile, airy, acidic propagation mix. Remove lower leaves that would sit in the medium, retain healthy leaves above the surface, and keep the mix damp rather than waterlogged. A clear humidity cover can help limit moisture loss, but open it regularly for fresh air and remove it gradually once new growth appears.
Rooting hormone may help some cuttings but cannot compensate for overly soft or old wood, stale medium, cold conditions, or drying leaves. Once rooted, acclimate the young plant to brighter light and outdoor air in stages. Keep it protected through its first winter and wait for sustained new growth before transplanting or harvesting. WSU’s tea propagation protocol gives a detailed method for home gardeners and small growers; it is more specialized than a quick leaf-cutting shortcut.
Troubleshoot poor growth, leaf loss, and pests
When a tea plant looks unhappy, check the growing conditions before reaching for a spray. Yellow leaves can result from alkaline soil, waterlogged roots, drought, cold injury, or nutrient stress. Test pH, feel the soil below the surface, and inspect drainage holes or the bed after rain. Correct the cause in stages; fertilizer cannot fix roots that are starved of oxygen.
A young plant may drop leaves after its first or second winter, especially in a cold site. If stems remain green and roots are firm, protect the plant and wait for new growth rather than pruning it back aggressively. Brown tips or scorched patches can point to cold, wind, sudden strong sun, or inconsistent moisture. Change one condition at a time so you can tell whether the plant is recovering.
Scale insects, aphids, mites, and other sap-feeders can trouble stressed tea plants. Inspect leaf undersides and stems, isolate a potted plant if possible, and identify the pest before treatment. A small infestation may be managed by removing badly affected shoots or washing pests away; for any pesticide, use only a product labeled for the plant and intended use, and follow the label’s harvest interval. NC State Extension’s profile lists common insect and disease problems associated with tea camellia.
Keep or remove flowers according to your goal
Established tea plants can produce small white or pinkish flowers in fall and early winter. Their blooms are modest compared with the large flowers of many ornamental camellias, but they add seasonal interest and attract pollinators. NC State reports that flowering typically starts when plants are around four years old, although growth and timing vary.
If you mainly want a flowering shrub, leave the buds and prune lightly after bloom. If leaf production is your priority, WSU advises removing flower buds as they appear because reproductive growth competes with the flush you want to pick. On a small home plant, you can split the difference: keep some flowers and remove only a portion of buds, then compare the next season’s shoot growth. A tea plant does not have to be forced into commercial production to be useful.
Conclusion
Grow Camellia sinensis as a slow-building evergreen shrub first and a crop second. Start with an identified cultivar, test the soil, provide acidic drainage and shelter, and adjust light and winter protection to your climate. A container is often the practical choice where soil is alkaline or freezes are severe.
Let the plant establish before pruning hard or taking leaves. Once it produces strong, repeated flushes, harvest a modest bud-and-leaf tip, leave plenty of foliage, and experiment with small processing batches. Those habits protect the shrub while giving you the best chance of enjoying both its ornamental character and leaves for homegrown tea.