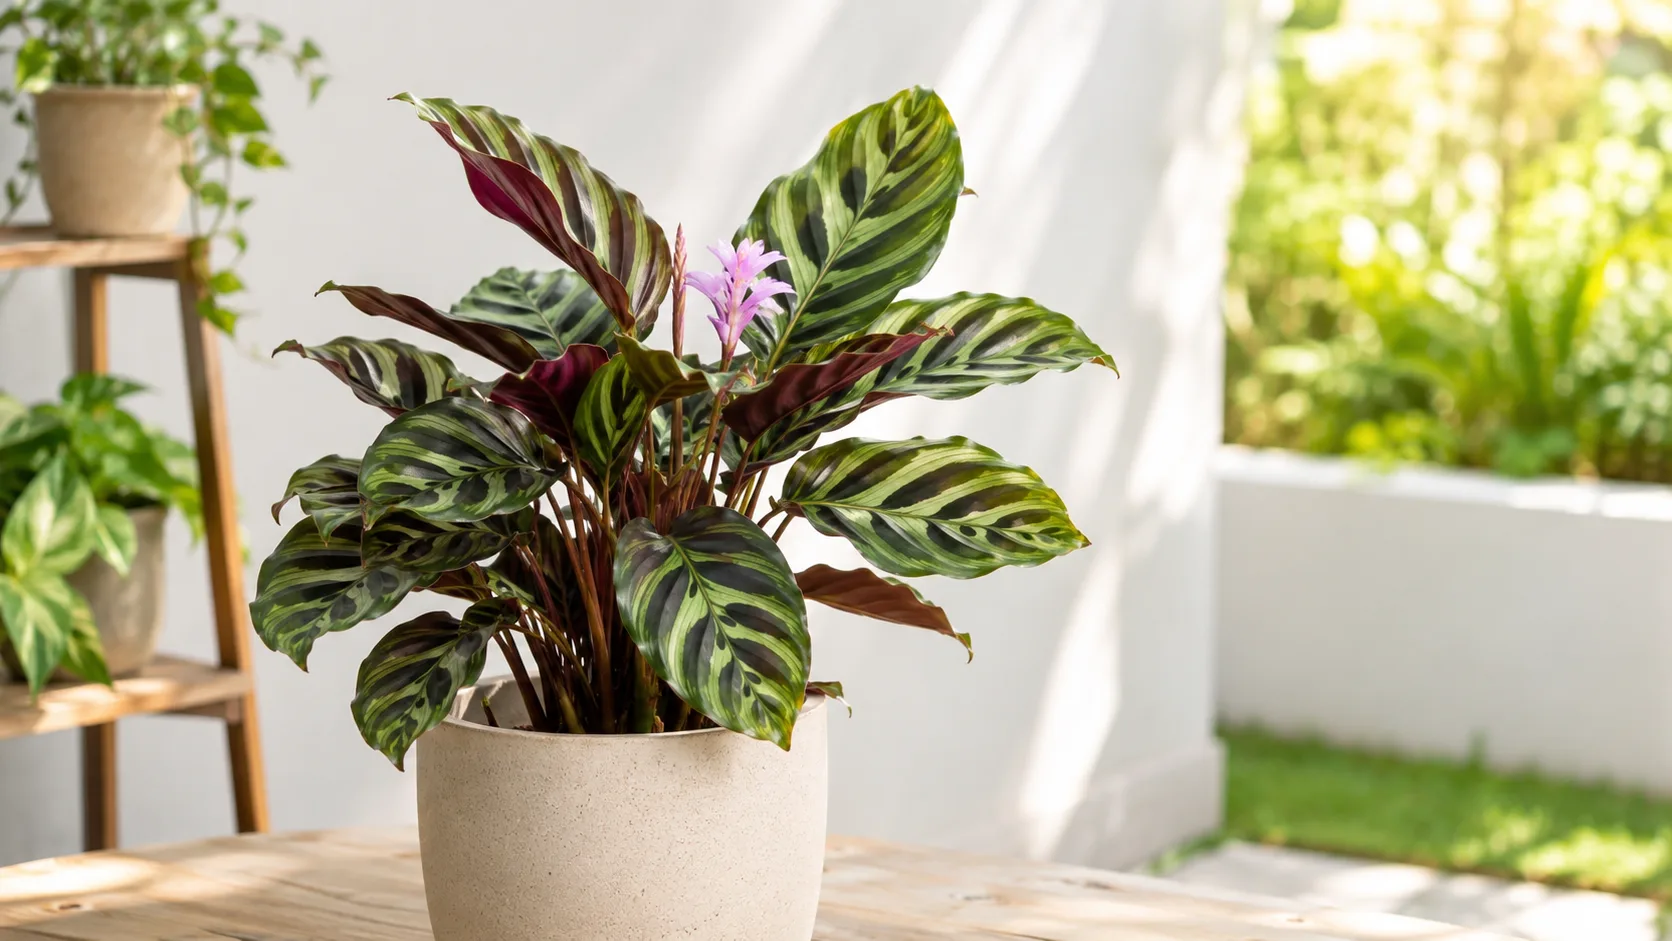
Calathea Repotting: When, How, and Mistakes to Avoid
Calathea Repotting: When, How, and Mistakes to Avoid
Calathea Repotting: When, How, and Mistakes to Avoid
Why Repotting Matters More for Calathea Than Most Houseplants
Calathea repotting is not a generic houseplant chore you can rush through on a Sunday afternoon and forget. These tropical prayer plants in the Marantaceae family grow from rhizomes with relatively fine, moisture-sensitive roots that need a steady balance of water and oxygen. When that balance breaks - because the soil has compacted, the pot has become too small, or someone jumps to a container that stays wet for days - Calathea shows stress fast. Leaves curl, edges crisp, color fades, and the plant can look worse than a pothos ever would under the same mistake.
That sensitivity is not a character flaw. In their native understory habitats across tropical Central and South America, Calatheas root into loose, organic forest floor material that drains quickly after rain but never desiccates completely. Indoor potting mix gradually loses that open structure. Peat and coco coir break down, salts from tap water and fertilizer accumulate, and the root zone becomes either a brick that repels water or a sponge that suffocates roots. Repotting resets that environment. Done well, it gives the plant room to grow and a fresh medium that holds moisture evenly. Done poorly, it triggers weeks of drooping that many growers blame on “transplant shock” when the real problem was an oversized pot, dense mix, or repotting at the wrong time of year.
The goal is not simply a bigger pot. It is a better root environment: airy soil, appropriate container size, stable humidity, and a timing window when the plant has enough warmth and light to rebuild its root system. If you treat repotting as maintenance for the roots rather than a cosmetic upgrade for the leaves, most of the anxiety around Calathea goes away.
When Calathea Actually Needs a New Pot
Most healthy Calatheas need repotting roughly every one to two years, but the calendar is a weak guide compared to what the plant and soil are telling you. The Royal Horticultural Society recommends repotting calatheas every few years once the clump has filled the pot, typically in spring or summer using free-draining, moisture-retentive compost. That “every few years” framing is useful because Calatheas often perform well when slightly snug. You are not trying to give the roots a mansion. You are trying to refresh the system before decline becomes visible on every leaf.
Two situations drive most repots. The first is genuine crowding: roots have filled the available space and the plant cannot access water or nutrients efficiently. The second is soil failure: the mix has compacted, smells sour, dries in patches, or no longer drains at a normal speed even though the pot size is still reasonable. In the second case, you may not need a larger pot at all - just a clean container of the same size with fresh mix. Many growers overlook that distinction and upsize unnecessarily, which is how a healthy plant ends up sitting in a wet soil column it cannot use.
Signs the roots have outgrown the pot
Root-bound Calatheas give practical signals before the situation turns into an emergency. Roots emerging from drainage holes are the most obvious sign, especially if they are thick, white, and actively growing rather than dry and dead. Another clue is water behavior: if water runs straight through the pot within seconds and the root ball still feels dry in the center, the mix may have become hydrophobic or so root-packed that water cannot penetrate evenly. Growth stalling is a softer sign. If new leaves are smaller than older ones, the plant wilts quickly after watering despite your normal schedule, or the whole plant becomes top-heavy and wobbles in the pot, roots may be the limiting factor.
Lift the plant gently from its pot when you suspect crowding. Healthy Calathea roots are pale tan to white and firm. A solid mass of roots circling the bottom and sides like a woven mat confirms the plant has outgrown its container. A few circling roots at the bottom are normal and can be teased out; a root ball that looks like a tight cylinder needs more space or, at minimum, a soil refresh with some circling roots loosened. Do not repot just because you see a single root tip in the drainage hole. Calatheas do not need constant upsizing, and premature repotting adds stress without solving anything.
When compacted soil is the real problem
Compacted soil mimics many root-bound symptoms without the plant actually needing more volume. The top inch may dry quickly while the center stays wet for days. Water pools on the surface before slowly sinking in. White crusts from fertilizer salts or hard tap water can appear on the soil surface or pot rim. The mix may smell stale or slightly sour when you dig into it with a finger. In these cases, the roots are not necessarily “too big” - they are suffocating in a medium that has lost pore space.
This is one of the most underexplained reasons to repot Calathea. A full repot into the same size pot with fresh, airy mix can transform a plant that seemed chronically thirsty or chronically overwatered when the real issue was uneven moisture distribution. If you only add water or change your watering day without fixing the soil structure, the leaf problems return. Compacted soil also magnifies tap-water sensitivity. Calatheas prefer rainwater, distilled water, or tap water that has stood overnight to reduce chlorine and fluoride exposure. When the mix cannot breathe, mineral buildup hurts the roots faster than it would in a loose medium.
The Best Time of Year to Repot Calathea
Spring through early summer is the safest window for Calathea repotting. During active growth, the plant has enough warmth, daylight, and metabolic momentum to produce new roots and push new leaves after the disturbance. Early spring is ideal because the plant is waking up but has not yet committed all its energy to peak summer foliage production. Late spring and early summer remain workable if you missed the first window, provided indoor temperatures stay above roughly 18°C (65°F) and the plant is not already stressed by heat, dry air, or pests.
Avoid repotting in late fall and winter unless you have no choice. When growth slows, root repair slows too. A Calathea repotted in a cold, dim room may sit wilted for weeks not because you handled it badly, but because the plant lacks the conditions to rebuild its root system. Winter repotting is justified when the soil is clearly failing - sour smell, persistent wetness, visible root rot on Calathea - or when the plant is so root-bound that delaying until spring risks serious decline. In those cases, keep the change as gentle as possible: minimal root disturbance, no upsizing unless necessary, and extra attention to warmth and humidity afterward.
There is also a waiting period many guides skip. If you just brought a Calathea home from a nursery or garden center, give it two to four weeks to acclimate before repotting unless the soil is obviously wrong. New plants are already adjusting to your light, humidity, and water chemistry. Adding a root-zone overhaul on top of that often produces the dramatic leaf curl new growers panic about. The exception is rescue: if the nursery soil is waterlogged, smells bad, or the plant arrives with mushy roots, address that promptly rather than waiting for a calendar date.
Choosing the Right Pot Size and Material
Pot choice is where repotting success is won or lost for Calathea. The container must have drainage holes. A decorative pot without drainage is only safe if it holds a nursery pot that can drain freely and you empty excess water every time. Calathea roots standing in pooled water rot quickly, and fresh repotting mix holds moisture more evenly than old, broken-down soil - which means an undrained setup becomes dangerous faster after a repot.
One pot size up: why bigger is not better
The standard rule is one pot size up: roughly 2 to 5 cm (1 to 2 inches) wider in diameter than the current pot. The RHS advises choosing a container just one or two sizes larger than the rootball diameter to avoid overpotting problems. That conservative sizing is not stinginess. It is physics. A much larger pot holds a large volume of moist soil that a small root system cannot colonize quickly. Unused wet soil stays oxygen-poor. Roots sit at the edge of the old root ball while the surrounding mix remains soggy, and the plant looks overwatered even when you are careful.
If you are refreshing soil without upsizing - because the plant still fits its current pot but the mix is exhausted - clean and reuse the same container. Scrub away old mineral deposits and rinse briefly. If you are moving up one size, the new pot should feel modest when you hold it next to the old one. When in doubt, smaller is safer than larger, especially for a stressed plant or one recovering from root trimming.
Calathea roots spread relatively shallow compared with deep-rooted trees. A pot that is too tall relative to its width can leave a lower layer of soil that stays wet while the upper root zone dries, creating uneven moisture that Calathea hates. Shallow-to-medium depth pots often work better than very deep ones, provided the root ball fits comfortably with a small margin below for new growth. Plastic pots retain moisture longer than unglazed terracotta, which breathes and dries faster. Neither is automatically correct. In a dry home with bright light, plastic may reduce wilting stress. In a humid room where you tend to overwater, terracotta can add a margin of safety. Self-watering pots can work for experienced Calathea growers who understand wicking and use a very airy mix, but they are unforgiving for beginners because the reservoir keeps the soil consistently moist at the bottom.
The Soil Mix That Supports Fast Recovery
Calathea needs soil that contradicts itself in a useful way: moisture-retentive enough that fine roots do not dry out sharply, yet porous enough that water drains and air reaches the root zone. Heavy garden soil, straight peat without amendment, or dense all-purpose potting mix used straight from the bag often fails that test within a few months as it compacts under repeated watering.
A reliable starting mix for repotting is roughly 50 percent high-quality peat-free houseplant compost or coco coir base, 25 percent perlite or pumice for aeration, and 25 percent orchid bark or coarse coconut husk chips for structure. The RHS suggests free-draining, moisture-retentive peat-free compost, either purchased as a houseplant mix or blended from multi-purpose compost with around ten percent potting grit by volume. Grit, coarse sand, or additional perlite can substitute if bark is unavailable. The finished mix should feel springy and crumbly when slightly damp, not like wet clay.
Moisten the mix before repotting so it is evenly damp but not dripping. Dry dusty mix pulls moisture from tender roots after transplant. Sopping wet mix eliminates air pockets when you backfill. A practical test: squeeze a handful. It should hold together loosely and break apart when you prod it. If water streams out, it is too wet. If it will not hold any shape at all, add a little more coir or compost for moisture retention. Calatheas prefer a slightly acidic to neutral pH range, generally around 6.0 to 7.5, which most peat-free houseplant blends already provide.
Do not pack the mix tightly around the roots. Calathea recovery depends on air spaces surviving the repot. Tap the pot gently to settle soil, or use a chopstick to guide mix into gaps, but avoid pressing down with force. The old advice of tamping soil “firmly” like you are paving a patio is one reason repotted prayer plants suffocate.
Step-by-Step: How to Repot Calathea
A calm setup prevents the rough handling that turns a manageable repot into a leaf-dropping ordeal. Work on a clean table or tray with good light so you can see root color clearly. Gather a new or cleaned pot, fresh mix, sharp scissors or pruning shears, a chopstick or pencil, newspaper or a tarp for mess, and room-temperature water. Sterilize cutting tools with rubbing alcohol if you may trim rotted roots, especially if you repot multiple plants in one session. Water the Calathea lightly the day before if the root ball is bone dry. A slightly moist root ball holds together when you slide the plant out and reduces breakage of fine absorbing roots. Do not soak the plant right before repotting unless you are dealing with hydrophobic soil that refuses to accept water. Remove dead or obviously damaged leaves beforehand, but do not strip healthy foliage just to reduce transpiration. Calathea is listed as non-toxic to dogs and cats by the ASPCA under prayer plant listings.
Repotting Calathea rewards patience more than force. The rhizome and root system are the asset you are protecting; the leaves are going to complain regardless. Move slowly, keep the plant at the same depth it was growing before, and stop when the roots are settled - not when the pot is packed to the rim with soil.
Gentle removal and root inspection
Tip the pot on its side and support the plant at the base with one hand. Slide the pot away with the other rather than yanking the Calathea by its stems. If it resists, squeeze a flexible nursery pot or run a knife around the inside edge of a rigid pot to break the seal. Never pull hard on leaves; they tear easily and the plant loses both display value and photosynthetic surface.
Once the root ball is free, brush away only the loose old soil from the sides and bottom. Leave the core of the root ball intact. Inspect root color and texture. Healthy roots are firm and pale. Mushy brown roots, a sour smell, or blackened sections signal rot and require trimming before replanting. Tease circling roots at the bottom outward with your fingers. If they are densely matted, make a few shallow vertical scores on the lower third of the ball with clean scissors - not deep gouges, just enough to redirect growth outward into fresh mix.
Trimming, positioning, and backfilling
Trim only dead or rotted roots. Healthy white roots should stay unless they are impossibly tangled and you must remove a small portion to fit the new pot. Dip trimmed rot-affected roots in hydrogen peroxide diluted to roughly one part peroxide to three parts water only if you are doing a rescue repot; routine repots do not need chemical rinses. Place a layer of moist mix in the bottom of the new pot so the top of the root ball will sit about 1 to 2 cm below the rim. Position the Calathea so the rhizome sits at the same depth it was before - burying the crown deeper invites stem rot, and planting too shallow exposes roots that dry out.
Hold the plant centered and add mix around the sides in small handfuls, gently tapping the pot to settle without compressing. Use a chopstick to guide mix under the root ball if air pockets form. Stop filling when the soil line is slightly below the rim, leaving room for watering without overflow. Do not mound mix against the stems.
Water thoroughly until excess drains from the bottom, then empty the saucer or cachepot. This first watering settles the mix and establishes contact between roots and soil. If the mix sinks and exposes roots, add a little more mix and water lightly again. Mark the date somewhere you will remember. You will need it to judge when recovery is on track and when to resume fertilizer.
Aftercare During the First Month
The four to six weeks after repotting matter as much as the repot itself. Calathea is adjusting to a new moisture rhythm in fresh mix, and even a careful repot causes some root hair damage. Expect mild wilting, slight leaf curl, or a pause in new growth for one to two weeks in good conditions. That is normal stress, not necessarily failure.
Place the plant back in Calathea light guide - not direct sun, which will burn leaves and dry the recovering root zone. Maintain humidity at 50 to 70 percent if you can, using a humidifier, pebble tray, or grouping with other plants. Avoid relocating the pot every few days. Calathea is already recalibrating; constant moves add unnecessary variables. Keep temperatures in the comfortable indoor range, roughly 18 to 27°C (65 to 80°F), and away from cold drafts or heating vents that desiccate leaves.
Watering after repot requires attention, not autopilot. Fresh mix often holds moisture longer than old compacted soil, so your old schedule may be too frequent. Check the top 2 to 3 cm with your finger and water when it begins to dry, using filtered or rainwater when possible. Do not let the plant sit in a full saucer. Do not fertilize for at least three to four weeks, and many growers wait six weeks until they see stable new growth. Roots with micro-damage from handling are vulnerable to fertilizer burn. When you resume feeding, use a diluted balanced liquid fertilizer at half strength during spring and summer only.
Watch for warning signs that cross from normal stress into trouble: persistent wilting with wet soil, spreading yellow leaves, black stems at the soil line, or a return of sour smell. Those point to overwatering on Calathea, buried too deep, or rot that was not fully removed. Catching them early - with less water, better airflow, or a second gentle inspection of the roots - prevents a full plant loss.
Repotting and Division: Splitting Without Killing the Plant
Repotting is also the only practical time to propagate Calathea, because these plants are not propagated from leaf or stem cuttings the way many aroids are. Division is the method: separate natural clumps that already have their own stems and roots. Spring repotting aligns perfectly with this, since both tasks benefit from active growth.
To divide, remove the plant and identify sections where multiple stems emerge from distinct root clusters. Gently tease the root mass apart with your fingers along natural seams. Each division should have at least two or three healthy stems and a proportionate root system. If the plant is badly root-bound and seams are not obvious, you may need a clean knife to cut through the rhizome - make one decisive cut rather than sawing repeatedly. Dusting cut surfaces with cinnamon is optional folklore; what matters more is potting each division immediately into appropriately small containers with fresh mix.
Undersized divisions with few roots belong in smaller pots than the mother plant occupied. Treat them like seedlings for the first month: higher humidity, no fertilizer, and careful watering. The mother plant may look sparse after division if you removed a large section, but it often pushes new shoots from the rhizome once settled. Do not divide a severely weakened plant as a rescue attempt. Fix the root problem first, let it stabilize, and divide next season if you still want more plants.
Emergency Repotting for Root Rot or Sour Soil
Emergency repotting follows different rules than routine maintenance. Triggers include mushy stems at the soil line, black or brown roots that smell bad, soil that stays wet for weeks without drying, or a plant that wilts constantly despite wet mix. In these cases, waiting for spring can cost you the plant.
Remove the Calathea from the pot and rinse away as much old soil as needed to see the roots clearly - this is one situation where more thorough cleaning is justified. Cut away all soft, dark, or hollow roots with sterile scissors until you reach firm tissue. If rot has consumed most of the root system, pot into a smaller container than before so the remaining roots are not swimming in unused wet soil. Use fresh, very airy mix heavy on perlite and bark. Some growers skip the hydrogen peroxide rinse; others use a dilute solution briefly. Either way, do not return the plant to the same soil or same waterlogged cachepot setup that caused the problem.
After an emergency repot, expect a harder recovery. The plant may lose leaves as it reallocates resources to root repair. Keep humidity high, light bright but indirect, and watering conservative - moist but never soggy. Recovery may take six to eight weeks. New growth is the signal that you succeeded; old damaged leaves will not revert to perfect form.
Common Calathea Repotting Mistakes
Most Calathea repot failures trace back to a short list of repeatable errors. Knowing them in advance is cheaper than nursing a drooping plant for a month.
Oversized pots and overwatering traps
Choosing a pot that is “room to grow” rather than one size up is the most common mistake. The plant does not grow faster in a big pot. It sits in wet soil, roots stall, and leaves yellow from oxygen starvation while the grower adds more water because the top looks dry. If you already made this error, do not repot again immediately unless rot is present. Instead, reduce watering frequency sharply, improve airflow, and consider top-dressing with dry perlite to slow surface evaporation misleading you. If the plant continues to decline, a second repot into an appropriately sized container may be necessary - but treat that as a rescue, not a routine.
Other frequent mistakes include bare-rooting and aggressively washing away all old soil on a healthy plant, which strips fine root hairs that absorb water; fertilizing within the first week “to help it along,” which burns recovering roots; repotting immediately after purchase when the plant only needs acclimation; using dense unamended potting soil; burying the rhizome too deep; repotting in winter without cause; and moving the plant to a brighter window right after repot to “give it energy,” which often scorches stressed foliage. Another subtle error is repotting when the real problem is low humidity or harsh tap water. If leaves crisp at the edges but roots look healthy and soil dries normally, fix the environment before disturbing the root ball.
How Repotting Connects to Watering, Light, and Humidity
Repotting does not happen in isolation. It changes how fast soil dries, how minerals accumulate, and how the plant responds to your normal care routine. After a repot, assume your previous watering interval is wrong until the plant proves otherwise. Fresh airy mix may need less frequent watering even though the top layer looks dry on the same schedule as before. Pair that adjustment with Calathea’s preference for lower-mineral water where possible, especially in the first month when roots are most sensitive.
Light should remain stable and indirect. A repotted Calathea is not a sun-starved seedling that needs boosting. It is a plant with a temporarily smaller functional root system supporting the same leaf mass. High light increases transpiration faster than roots can replace water. Humidity becomes more important, not less, because stressed leaves lose water easily when root uptake is reduced. If you only own one humidifier, prioritize the freshly repotted prayer plant for a few weeks.
Fertilizer, pest checks, and seasonal rhythm all shift after repot. Hold feeding until new growth appears. Inspect for fungus gnats, which are attracted to freshly disturbed moist soil; letting the top layer dry slightly between waterings and avoiding overwatering reduces them. As roots colonize the new mix over four to six weeks, gradually return to your normal Calathea care rhythm for watering, light, and feeding. The plant will tell you when that moment arrives: a new leaf unfurling at normal size and color is a better indicator than any calendar.
Recovery Timeline: What Normal Stress Looks Like
Understanding the timeline keeps you from panic-repotting or overcorrecting. Days one to three: mild wilt or curl, especially in older leaves; plant may look unchanged or slightly subdued. Days four to fourteen: some yellowing of lower leaves is common as the plant sheds tissue it cannot support; do not fertilize or repot again. Weeks two to four: if conditions are good, wilting should ease and the plant should feel firmer in the pot; you may see a new leaf spike beginning. Weeks four to six: new growth is the green light that roots are functioning; resume diluted fertilizer if desired.
If wilting worsens after day ten while soil stays wet, you are likely overwatering or the pot is too large. If wilting persists with dry soil, you may have removed too many roots or the mix is not making contact with the root ball - a gentle bottom soak for twenty minutes can help in that case, followed by drainage. Damaged leaf edges from before the repot will not heal. Judge success by new leaves, not old blemishes.
Conclusion
Calathea repotting succeeds when you respect what the plant is: a humidity-loving tropical grower with fine roots that need airy, evenly moist soil and conservative pot sizing. Repot on signs - crowding, compacted mix, drainage failure, or root rot - not on a rigid calendar, and favor spring through early summer when the plant can actually rebuild. Choose one pot size up with drainage holes, use a peat-free, moisture-retentive blend amended with perlite and bark, handle the root ball gently, and hold off on fertilizer until new growth confirms recovery. Division at repot time is a bonus for multiplying healthy plants, not a requirement for every repot. If you remember that the goal is a better root environment rather than a bigger pot, you will avoid the mistakes that turn a simple refresh into weeks of drooping leaves - and your Calathea will reward you with the unrolling new foliage that makes these prayer plants worth the extra care.
When to use this page vs other Calathea guides
- Calathea overview - Start here for whole-plant context before deep-diving this topic.
- Calathea problems hub - Jump to symptom-specific fix guides when this care topic does not resolve the issue.
- Root Rot on Calathea - Escalate here when repotting adjustments are not enough.