Why Are My Potato Leaves Turning Yellow? 6 Causes and Fixes
Potato leaves turning yellow can signal natural dieback, pests, water stress or disease. Learn the leaf clues, first checks and safest fix before you dig.
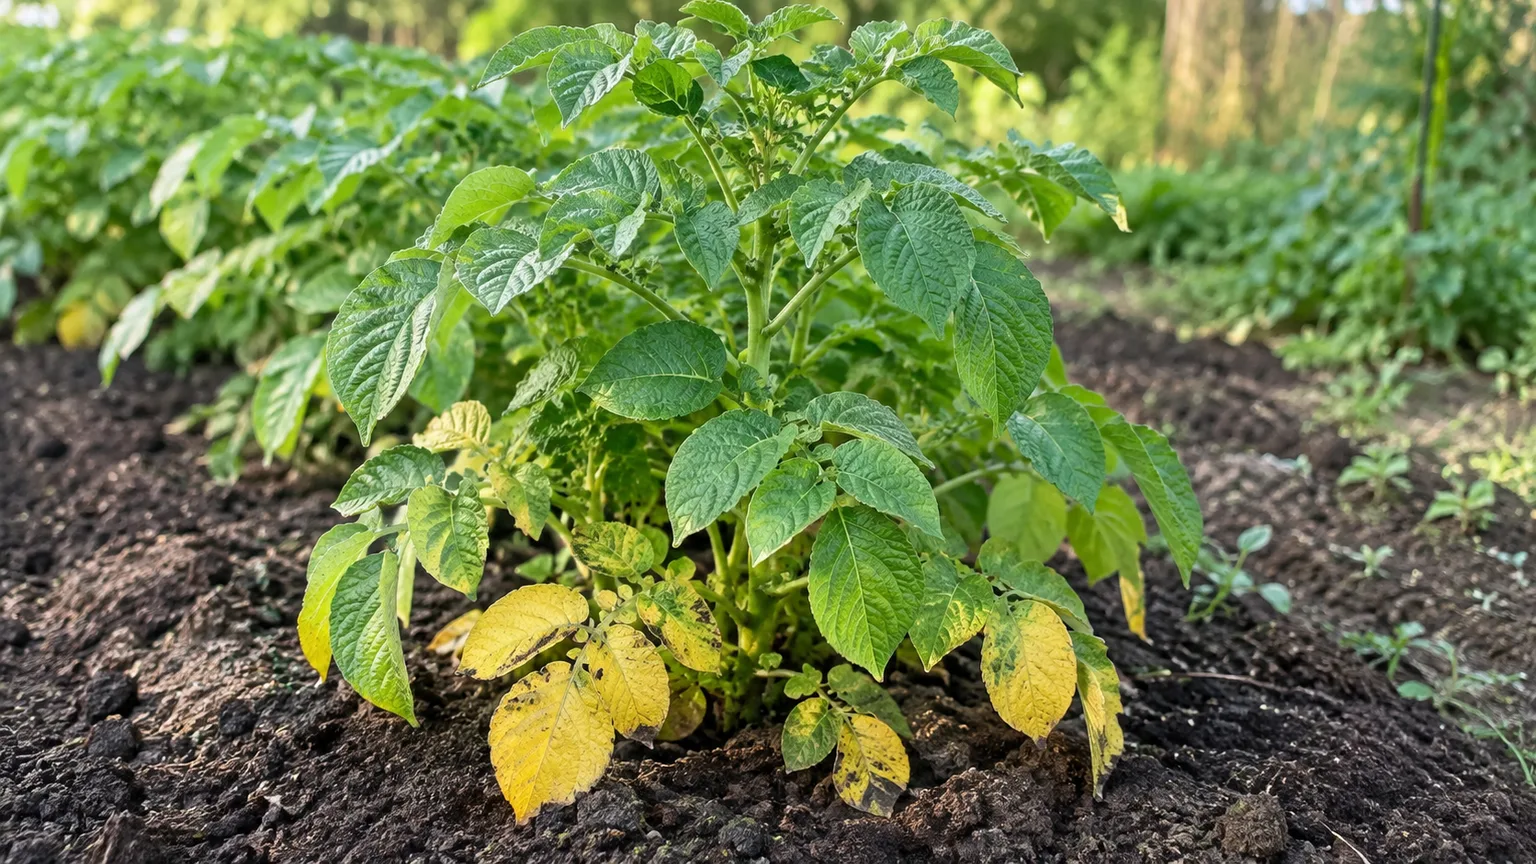
Yellow potato leaves can mean the vines are finishing normally, but they can also point to water stress, a nutrient problem, insects, or disease. The fastest way to tell the difference is to look at which leaves yellow first, whether the change is spreading, and what the soil and weather have been doing. Don’t start with fertilizer or a spray: color alone does not identify the cause.
Read the pattern before treating potato leaves
A few lower leaves fading while the rest of a full-grown plant stays upright is very different from a whole row turning yellow in a week. Spots, holes, curling, wilt, and the condition of the soil narrow the possibilities further. Use the table as a first pass, not a diagnosis; more than one stress can occur at once.
| What you see | What it may point to | First check |
|---|---|---|
| The oldest leaves fade gradually near the end of the variety’s growing time | Normal vine dieback | Check planting date, variety, and whether the whole plant is senescing evenly |
| Yellowing follows rain, irrigation, or a persistently wet bed | Waterlogged roots | Feel the soil below the surface and look for standing water or poor drainage |
| Older leaves pale evenly while growth is weak | Nitrogen shortage or unavailable nutrients | Review fertilizer history and get a soil test before adding nutrients |
| Holes, ragged edges, colonies, curled tips, or stippling appear | Insect feeding | Inspect the undersides of leaves and the growing tips |
| Yellow leaves also have round target-like spots or fast-growing dark, wet patches | Early or late blight | Check for lesion pattern, recent cool/wet weather, and affected stems |
| Leaves are mottled, distorted, or wilt one-sided across an otherwise moist bed | Virus, vascular wilt, or spray injury | Compare nearby plants and note recent spraying, cold, or pest activity |
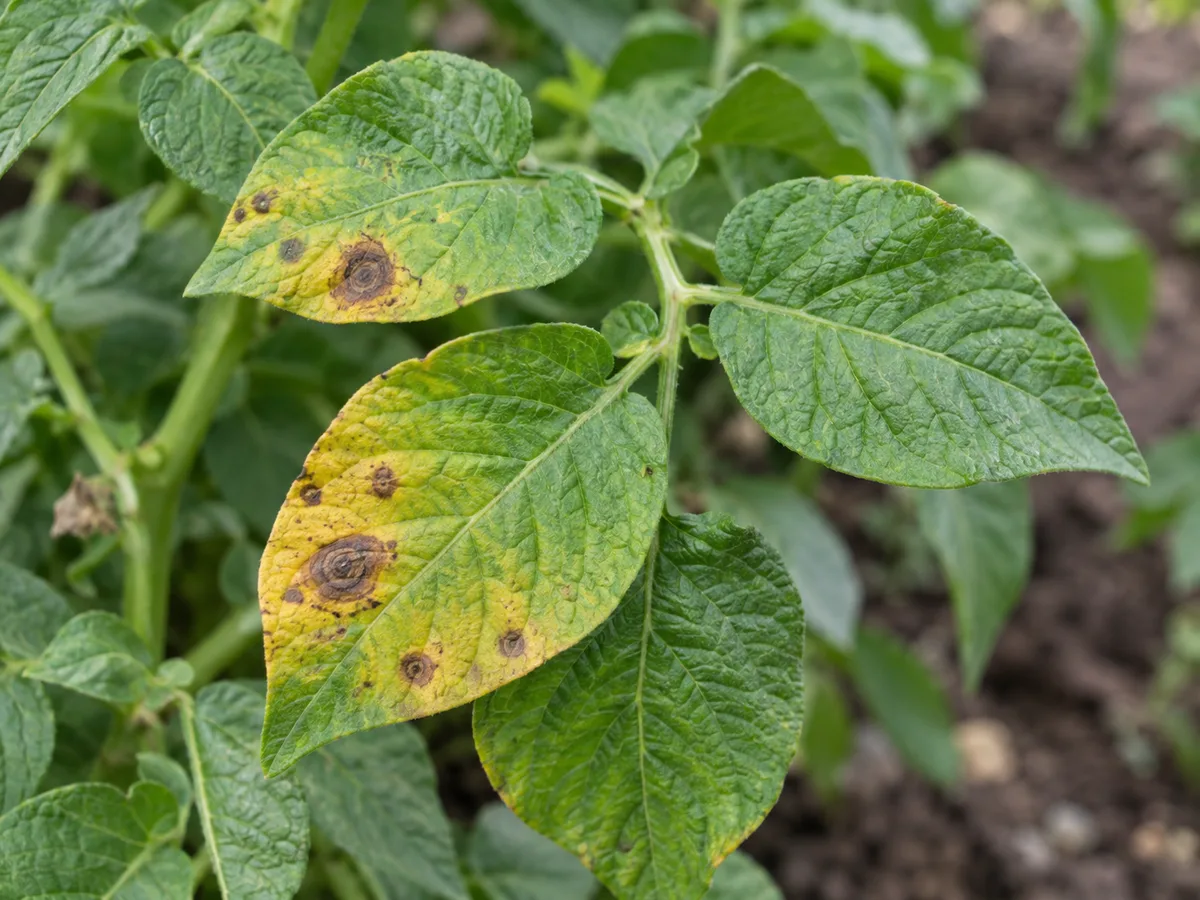
Target-like brown spots with yellow tissue around them are a disease clue; uniform yellowing alone does not identify blight.
Do a five-minute check before using a product
Walk the entire row before you change anything. If only one plant is affected, root damage, a damaged stem, or a localized pest may be involved; if plants in the same patch change together, think about a shared cause such as drainage, weather, soil, drift, or a spreading pathogen.
Find out how many plants are affected
Write down when the yellowing started, which variety you planted, and roughly how long the crop has been growing. Recent frost, a heat spell, prolonged rain, a missed irrigation, or a nearby herbicide application can be more useful clues than the shade of the leaves. A practical first response is to check weather, watering, soil condition, and fertilizer history together, as Tui Garden’s answer to a potato grower advises, then compare those clues with what you see on the plant.
Inspect leaf surfaces, stems, and soil
Look at both sides of several leaves, especially near the bottom and at the growing tips. Check for egg clusters, larvae, small insects, webbing, sticky honeydew, black specks, holes, or lesions with a clear edge; then check whether the stems are firm and whether the soil is wet, dry, or merely moist a few inches down.
Don’t prune, feed, or spray before that check. A fertilizer cannot repair a rotted root system, and a fungicide will not correct drought or insect feeding. If you suspect a fast-moving disease, photograph the whole plant and close-ups before removing anything so a local extension office or plant clinic can help confirm the diagnosis.
1. Natural vine dieback as potatoes mature
Potato foliage normally yellows as a crop reaches maturity. The change usually begins on older, lower leaves, then progresses through the plant as the vines lose vigor; it is more reassuring when the variety is near its expected harvest window and the pattern is gradual rather than blotchy or sudden. Flowers alone are not a reliable calendar, because varieties and growing conditions differ.
Harvest timing depends on whether you want tender new potatoes or a storage crop. Early varieties can be test-dug while the foliage is still green, while maincrop potatoes are commonly left until the vines die back; Lovely Greens’ potato-harvest guide explains how those signs differ by crop type. Maturity windows vary widely by cultivar and climate, so a universal “100 to 120 days” estimate can mislead; check the seed label and your planting date.
For storage potatoes, gardeners often wait about two weeks after healthy foliage has fully died so the skins can set, but don’t use that wait as a rule when blight is suspected or the soil is saturated. A test dig is more useful than guessing from one yellow leaf: inspect a plant from the edge of the row and see whether the tubers are the size and skin firmness you want.
Dig one plant carefully rather than uprooting the entire bed to check readiness. If the tubers are still too small and the plant remains healthy, leave the others growing; if the vines are yellowing far earlier than expected, keep investigating instead of assuming maturity.
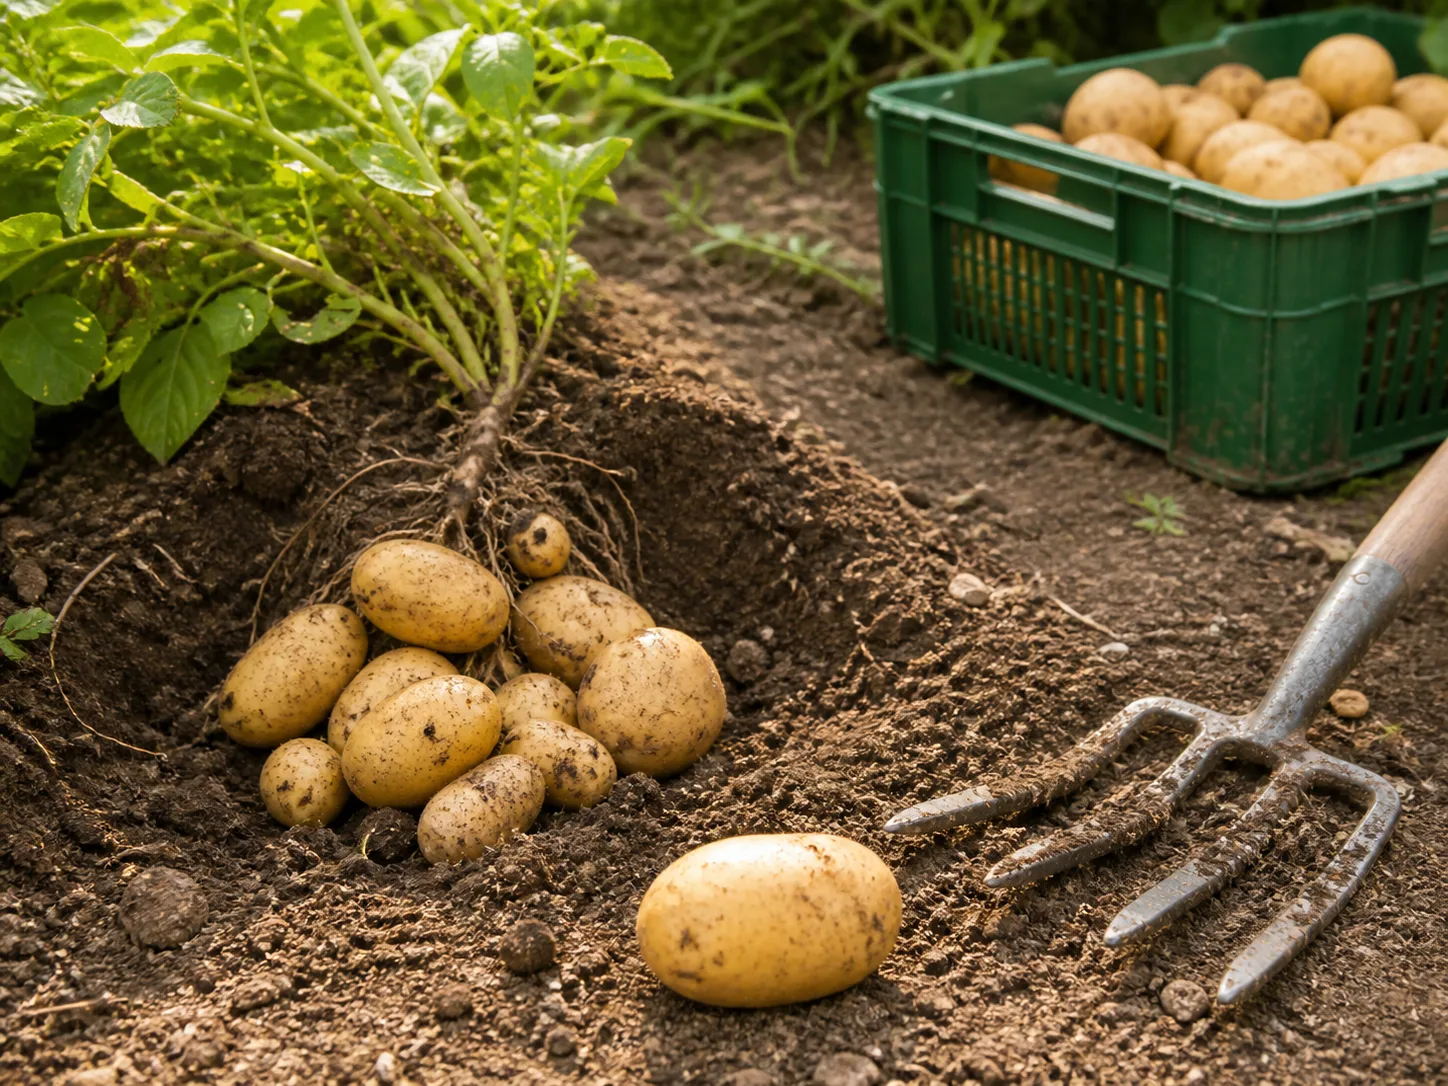
A small test dig shows tuber size without disturbing the rest of the row.
2. Too much or too little water
Water stress can yellow leaves in opposite ways. Soil that stays waterlogged deprives roots of oxygen, so they struggle to take up water and nutrients even though the bed is wet; drought leaves the roots short of water, often causing limp foliage, curled leaflets, and dry soil. A watering calendar alone cannot distinguish them because rain, soil texture, mulch, containers, and heat all change how quickly the root zone dries.

Check the soil around the roots after rain; wet ground and yellow foliage can indicate poor drainage rather than a need for more water.
Push a finger or trowel a few inches into the soil near the plant, not right against the stem. If the root zone is still wet, pause irrigation and address standing water or compacted drainage; if it is dry at that depth, water slowly at soil level so moisture reaches the roots. Aim for evenly moist soil while plants are actively growing, not daily surface sprinkles or a weekly amount applied regardless of rain.
The same bed can contain both conditions: sandy or raised-bed edges dry first, while a compacted low spot stays saturated. Check more than one location before changing irrigation for an entire row, and keep a note of recent rain so a passing shower does not trick you into watering—or skipping water—by habit.
Avoid overhead watering late in the day when foliage is already wet, especially if spots are developing. When healthy vines naturally enter dieback, reduce watering rather than keeping the soil continuously wet around mature tubers. If yellowing continues after the moisture pattern is corrected, inspect the roots and stems and move to the other clues instead of repeatedly changing the watering schedule.
3. Nitrogen shortage or a nutrient-availability problem
A shortage of nitrogen can make older leaves lose green color first and slow overall growth. But yellowing is not proof that the soil needs fertilizer: damaged roots, waterlogged soil, unsuitable soil chemistry, or a disease can prevent nutrient uptake even when nutrients are present. Potatoes also respond poorly to guesswork at the end of the season, when extra nitrogen can push leafy growth instead of helping tubers finish.
Get a soil test before adding lime or a large fertilizer dose. It can show whether pH or nutrient levels need attention and give a recommendation for your soil and region; follow the report rather than assuming the crop needs a balanced fertilizer. If a test confirms a deficiency and the plant is still actively growing, apply only the recommended amount in the placement and timing the report specifies.
Leaf age can be a useful clue, not a fertilizer prescription: mobile nutrients such as nitrogen are often drawn from older leaves first, while a problem with less-mobile nutrients may show more strongly on new growth. That distinction still cannot identify the missing element reliably because poor roots and unsuitable soil chemistry can mimic a shortage. A soil test is cheaper than stacking several products and hoping one happens to be right.
Too much fertilizer can burn roots or leave the plant lush and late to mature. Don’t try to “green up” already yellow leaves with repeated feeding, manure, or homemade salts. Correct the root-zone condition first, then use a measured soil-test recommendation for future growth.
4. Insects are feeding on the foliage
Chewing insects remove leaf tissue; sap-feeding insects distort leaves or leave a fine yellow stipple. Colorado potato beetle adults and larvae feed directly on potato foliage, while flea beetles make many tiny round holes. Heavy feeding can remove enough leaf area to reduce the plant’s ability to support tuber growth, so look for the insect and its characteristic damage rather than treating yellow color alone.
Match the damage to the pest
Check leaf undersides for clusters of yellow-orange eggs and red-orange larvae with dark spots, which are clues to Colorado potato beetles. Flea beetles are small and jump when disturbed; the pinprick holes they leave are more useful than trying to identify every adult. Aphids cluster on tender growth and can cause curling or mottling, while potato leafhoppers feed from below and may leave yellow or brown leaf tips and margins known as hopperburn. NC State Extension describes these distinctions, including how leafhopper injury can resemble drought stress, in its potato pest guide. Colorado potato beetle feeding can begin in isolated patches, so a damaged corner with nearby egg clusters is more informative than yellow color across the bed. Adults are yellowish brown with black stripes; larvae are reddish orange with rows of dark spots. A potato leafhopper is much smaller and spindle-shaped, often springing away when disturbed; its feeding from leaf undersides can leave tips and margins pale, then brown and curled. Aphids usually cluster on soft new growth and may leave sticky honeydew, another clue that distinguishes sap feeding from holes made by chewing insects.
For a small garden, hand-pick visible beetles, larvae, and egg clusters, and check plants again over the next few days. Keep weeds and volunteer potatoes from providing a bridge between crops, and avoid killing beneficial insects with a broad, unnecessary spray. Aphid numbers may be modest even when they look alarming in a close-up, so judge whether colonies are expanding and whether new leaves are deforming before you choose any control.
If damage is severe enough to consider an insecticide, use a product labeled for potatoes and the specific pest, follow the current label exactly, and observe its preharvest interval; never spray simply because leaves are yellow. Check the label’s crop and target pest rather than borrowing a recommendation for tomatoes or ornamentals, and ask a local extension office if the pest is uncertain.
5. Early blight or late blight
Blight causes lesions as well as yellowing, and the two common potato blights do not look identical. Early blight often begins on older lower leaves with brown, roughly round spots that develop concentric rings and a yellow halo. As lesions merge, leaves may die while remaining attached. It tends to build gradually, especially in dense foliage that stays damp.
Late blight is more urgent. It can begin as pale or olive areas that enlarge into brown-black, water-soaked, oily-looking patches; in humid weather, white-gray growth may appear on leaf undersides, stems, or affected tissue. The University of Wisconsin Extension’s early blight guidance describes the target-like lesion pattern, while its late blight guidance warns that cool, wet conditions can allow plants to collapse in seven to ten days.
Separate slow spotting from a fast-spreading blight
A few dry target spots low on an older plant fit early blight better than the rapidly expanding, wet-looking patches associated with late blight, but symptoms overlap and other leaf spots can be mistaken for either. The Gardening Know How potato-blight overview also contrasts early and late blight; use its symptom descriptions as a field clue, not as a lab diagnosis. When lesions spread quickly after cool, wet weather or reach stems, treat the situation as potentially serious and contact a local plant diagnostic service.
If late blight is plausible, don’t wait for a home remedy or assume a fungicide will cure affected tissue. Wisconsin Extension advises that symptomatic plants cannot be saved and should be bagged and disposed of rather than composted; follow your local extension’s current directions for the affected plant and any tubers. For slower early blight, remove badly affected foliage carefully, keep leaves dry, improve airflow, clean up crop debris, and rotate potatoes to a different bed next season.
Weather changes the level of concern: a few dry lower-leaf spots on a nearly mature plant call for observation and cleanup, while spreading water-soaked lesions after cool, rainy nights deserve prompt attention. Do not touch several healthy plants after handling a suspect plant without cleaning hands or tools, and avoid moving wet foliage through the garden. Use a fungicide only if local guidance and its label support that specific crop, disease, timing, and harvest interval.
6. Virus, vascular wilt, or herbicide injury
A virus or vascular wilt can make a plant yellow even when the soil is not obviously too wet or dry. Mosaic viruses may create irregular light and dark green or yellow patches, curled or distorted leaves, and stunted growth; aphids can spread some potato viruses as they move between plants. Verticillium or Fusarium wilt more often starts with lower-leaf yellowing, curling, and drooping, sometimes progressing unevenly through a plant. These symptoms are not specific enough to tell which pathogen is present by eye.
Use pattern and exposure history to narrow it down
Compare affected plants with healthy ones in the same row. A single plant that wilts while surrounding soil is moist may have a vascular or root problem; a cluster of distorted new growth across a field edge may point toward drift or another shared exposure. Herbicide injury often affects fresh growth first, making leaves narrow, cupped, twisted, or oddly shaped; check whether a lawn or neighboring bed was sprayed and which way the wind was blowing.
For a suspected virus or wilt, don’t save seed tubers from the affected plant or move its soil and debris around the garden. Remove plants only when the signs make infection plausible or a local diagnostic service confirms it, then bag diseased material and clean tools before working in healthy rows. A diagnostic office may need a fresh sample that includes both healthy and affected tissue, so take a clear photo first and ask how to package or deliver a sample before mailing anything.
If the pattern looks like drift, do not apply a second product to “counteract” it; record the date and product exposure, protect new growth from further contact, and wait to see whether unaffected leaves emerge normally. Spray injury is not contagious, so removing neighboring healthy plants will not solve it; the useful next step is preventing repeat exposure and checking whether new leaves return to a normal shape.
What to do today without harming the crop
Start with the least disruptive check: note whether the yellowing is confined to old leaves or is spreading through new growth, inspect for spots and insects, and feel the soil at root depth. That sequence prevents the most common wrong turns: watering an already soggy bed, fertilizing a plant with diseased roots, or spraying when the problem is normal maturity.
Then make one change that matches the evidence. Water a dry root zone; let a saturated bed drain; remove a few clearly infested pests by hand; or photograph suspected lesions and ask an extension office for help. Leave healthy green foliage in place because potatoes rely on it to keep building tubers, and avoid cutting the whole top off unless disease guidance calls for removal or the vines have died naturally.
If the plants are near maturity and the yellowing is gradual, test-dig one plant before deciding what to do with the row. If symptoms are rapid, spotted, distorted, or accompanied by collapse, prioritize identification and disease containment over harvest timing. A useful diagnosis often comes from how the symptom changes over a day or two, not from an immediate product application.
Take one photo of the whole row and one of the affected leaf’s top and underside; add a note about rain, irrigation, and recent spraying. If you contact an extension service, those details help a specialist decide whether the next step is a soil test, insect control, a plant sample, or simply waiting for a healthy crop to finish ripening.
Make next season less likely to repeat the problem
Start with certified seed potatoes and a bed that drains well. Rotate potatoes away from potatoes, tomatoes, peppers, and eggplants so the same disease-prone crop family does not return to the same patch year after year; remove volunteer potatoes and diseased debris rather than leaving a reservoir for pests or pathogens. Keep plants spaced enough for foliage to dry and irrigate at soil level when the root zone needs water.
Rotation is not a quick cure for every soil-borne disease, and it does not replace clean planting stock or sanitation. Still, changing beds breaks up repeated exposure and makes it easier to spot whether a problem follows the crop or follows a particular wet corner, spray drift path, or pest hotspot. If the same issue returns despite those changes, submit a sample rather than repeating the same treatment.
Before planting, test the soil and correct only what the report identifies. Avoid a heavy nitrogen application late in the season, and keep simple notes on variety, planting date, rain, fertilizer, and when yellowing began. Those records make normal ripening easier to recognize next time and reveal repeat problems tied to one bed or one watering pattern.
Conclusion
Yellow potato leaves are a clue, not a verdict. Gradual yellowing of older leaves near maturity is often part of a normal harvest cycle; wet soil, dry roots, nutrient stress, insects, blights, viruses, wilt, or spray drift need different responses. Check the pattern and the root zone first, then act only on evidence—especially when lesions spread quickly or the plant is collapsing.