How to Install a French Drain in Your Yard
Learn how to install a French drain with a dependable outlet, steady slope, clean gravel, and pipe. Includes utility safety, permits, and troubleshooting.
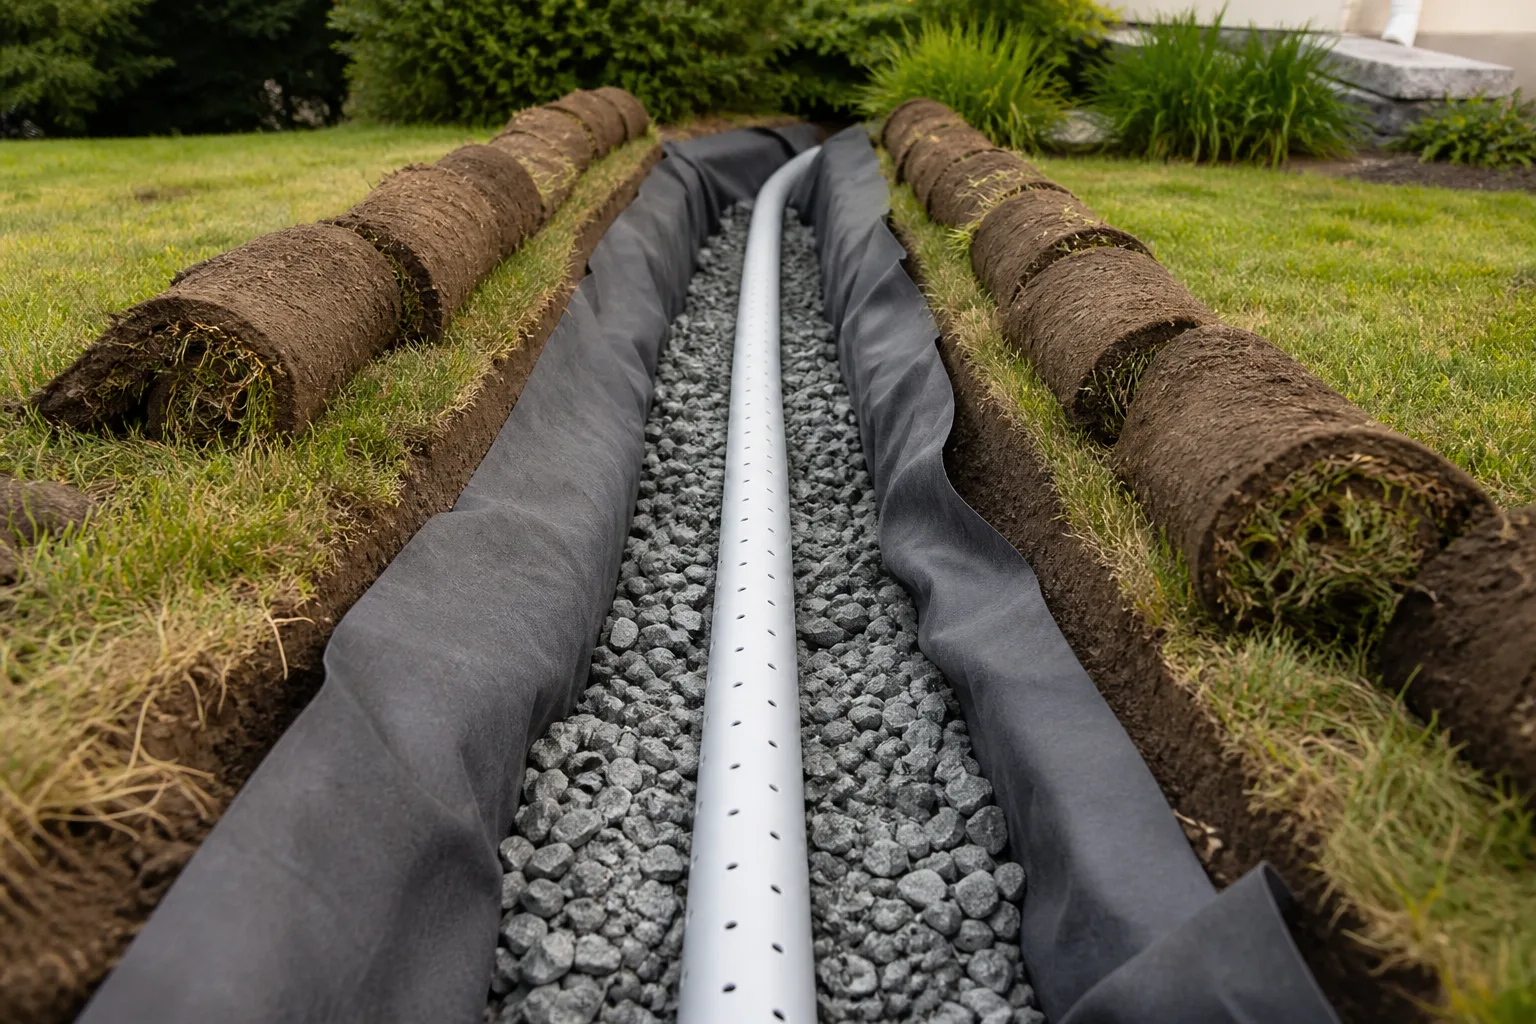
A French drain works only when it has three things: a place to collect water, a continuous downward route, and an outlet that can accept the flow. Plan those pieces before you excavate. A gravel-filled trench with a perforated pipe can intercept water moving through saturated soil, but it cannot make water disappear from a flat yard or correct every grading, roof-runoff, or foundation problem.
For a small landscape project, the reliable order is to identify the source of water, confirm an approved destination, map utilities, set the trench grade, then install fabric, clean stone, and pipe. The details vary with soil and local rules, so treat the dimensions below as practical starting points rather than a permit-ready engineering design.
Decide Whether a French Drain Fits the Problem
A French drain is a gravel-filled trench, commonly containing a perforated pipe, that collects water moving through the ground and carries it downslope. Soil water enters the gravel, passes through the pipe openings, and follows the pipe to an outlet such as a daylight opening or a designed infiltration feature. The drainage system is useful where water gathers along a slope, beside a hardscape edge, or in a soggy area that remains wet after rain.
First watch the yard during a storm and again after it. If water runs across the surface from a downspout or paved area, fixing the source, adjusting surface grades, or using a shallow swale or catch basin may be more direct than burying a perforated drain. If the ground is saturated and seepage moves through it, an intercepting French drain may make sense; if a single patch stays wet because soil is compacted, aeration or soil improvement may solve the cause with less excavation.
The RHS drainage guide recommends checking whether drainage is needed and identifying a suitable outlet before installing a system. A simple infiltration check can help you understand the site: dig a small test hole away from utilities and structures, fill it with water, and observe whether it drains over several hours. This is only a screening step, not a substitute for a designed soakaway or a diagnosis of a spring, broken water line, high water table, or foundation leak.
Choose Between a Gravel Trench and a Piped Drain
The term “French drain” is used for more than one assembly. A shallow gravel trench without pipe can act as a porous channel or intercept a small flow, and it can be finished as a visible stone strip. A piped French drain adds a perforated line inside the gravel so collected water can be conveyed more predictably to an outlet; this is usually the better starting design for a defined yard route with an actual discharge point.
A gravel-only trench is not an underground storage tank. Once the surrounding soil and rock voids fill, water still needs somewhere to go, and fine soil can gradually occupy those voids if the aggregate is not separated with suitable filter fabric. A pipe also does not rescue a poor plan: it can clog, receive more water than its outlet can handle, or remain full if the grade reverses.
Keep roof leaders and other concentrated flows separate unless a drainage professional designs them together. A roof can deliver a large surge through a downspout, while a French drain is meant to collect groundwater along its length; directing the roof line into the perforated section can overwhelm it or send water back into the wet area. Fine Gardening’s installation guidance likewise distinguishes the perforated collection section from a solid-wall conveyance pipe and cautions against combining unrelated drainage flows (Fine Gardening).
Plan the Outlet Before You Draw the Trench
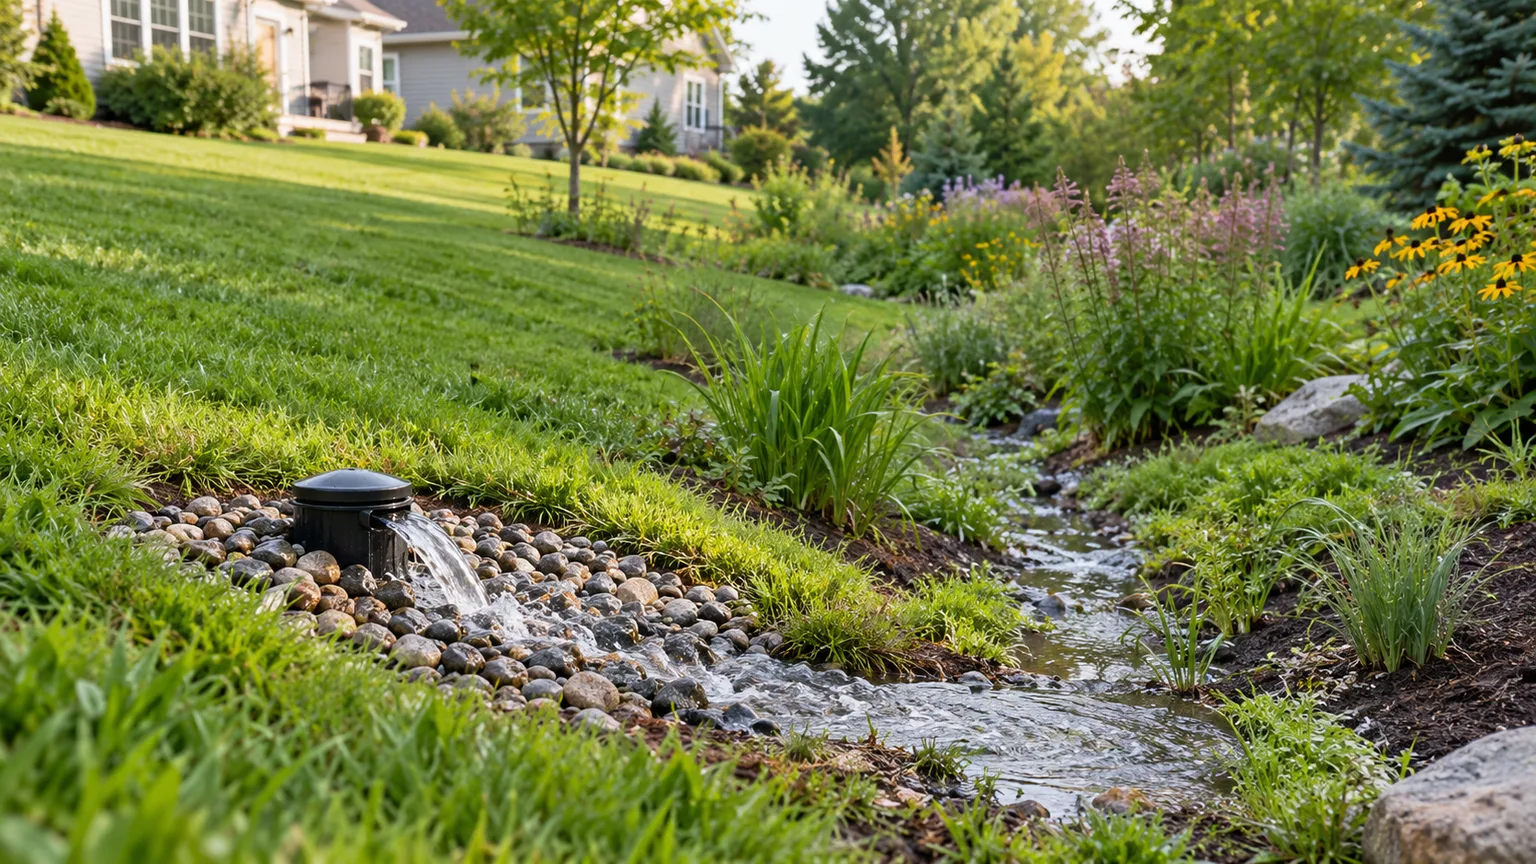
Choose the destination first, then see whether a trench can reach it with a continuous fall. Possible destinations include a daylight outlet on your own property where water can spread safely, a properly sized rain garden or dry well, or a municipal stormwater connection that the local authority has approved. A dry well is appropriate only if local rules, groundwater conditions, soil infiltration, setbacks, and capacity support it; it is not just a hole filled with rubble.
Do not aim the outlet at a neighbor’s lot, a sidewalk, a driveway, a foundation, a septic drain field, or a slope that could erode. A daylight outlet needs a stable receiving surface, often with coarse stone or a splash area to slow the flow. The PNNL Building America Solution Center specifically advises that a daylight outlet discharge onto a grade that carries water away from buildings and that stone or a splash block can limit erosion (PNNL).
Rules vary sharply by municipality and by whether the outlet connects to public infrastructure. For example, the Town of Cary describes specific ways to discharge into its right-of-way and requires a town agreement for work in that area; Los Angeles requires a storm-drain connection permit for certain connections to its public system (Cary drainage FAQ, Los Angeles permit guidance). Those are examples, not rules for every city, so call your local building, stormwater, or public-works office before connecting to a storm drain, curb, ditch, or public easement.
Test the destination, not just the trench
A dry well or rain garden must be able to accept the volume delivered to it. Check local sizing and setback guidance, and test the soil at the proposed location rather than assuming that water will infiltrate because the surface looks sandy. Clay, shallow bedrock, a seasonally high water table, contaminated soil, nearby wells, or a slope can make an infiltration destination unsuitable or require professional design.
Do not treat a storm sewer as a convenient default. Some communities want stormwater managed on the lot; others allow a connection only under a permit or standard detail. The RHS notes that local byelaws may restrict discharging garden drainage to sewers or storm drains, while local guidance such as Cary’s shows that accepted methods and approvals are place-specific.
Map the Route and Calculate a Reliable Fall
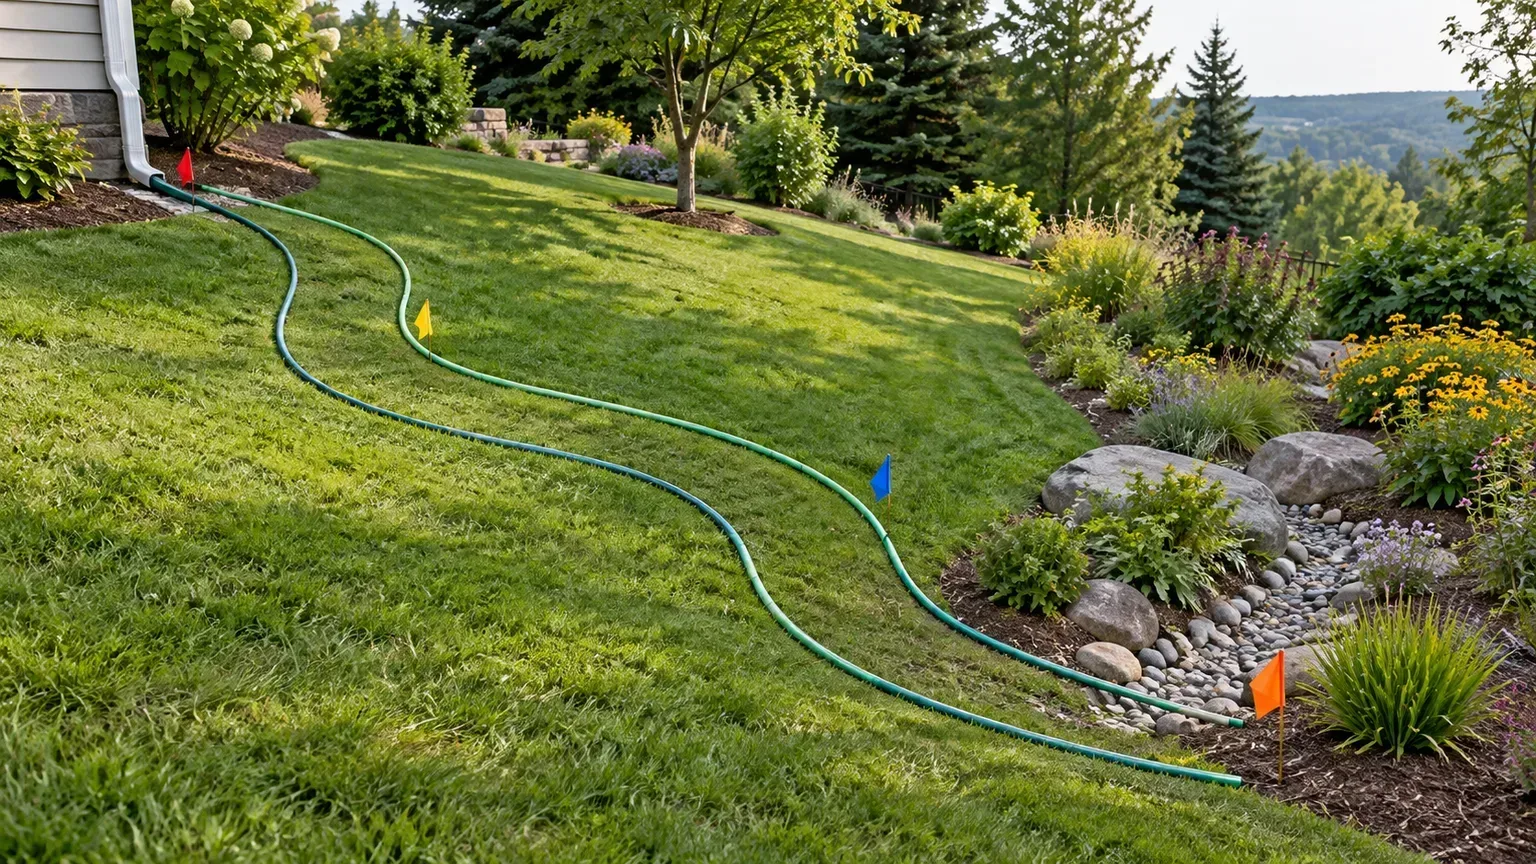
Lay out the trench to intercept water before it reaches the problem area, not necessarily through the deepest puddle. For seepage moving downhill, a line across the slope and slightly uphill of the soggy patch can catch water before it spreads. Avoid large tree roots, foundations, retaining walls, septic components, buried irrigation, and locations where the trench would cut across an existing drainage easement.
A common small-yard starting grade is about 1 percent—roughly 1 foot of drop over 100 feet, or 1.2 inches over 10 feet. Some garden-drainage guidance specifies a steeper grade for its own pipe layouts; the RHS uses a 1:40 fall for small-scale piped drainage, while Fine Gardening describes about 1 percent as a minimal slope. Those recommendations are not universal specifications: pipe type, length, flow, outlet elevation, and local design requirements can change what is appropriate.
The first constraint is gravity. If the outlet is not lower than the collection end, a gravity French drain cannot empty reliably; a pump, a different outlet, or a different surface-water plan may be needed. Do not create a trench with humps or low pockets in an attempt to average out the grade, because trapped sections hold sediment and reduce capacity.
Use a level line to translate slope into depth
Set stakes at the collection end and outlet. Stretch a mason’s line between them and use a line level to make a level reference line; then calculate how far the trench bottom must drop over the measured run. At a 1 percent target, a 24-foot run needs about 2.9 inches of total drop, because 24 feet × 0.12 inch per foot is 2.88 inches.
Measure the line height above the trench invert at regular intervals as you dig. The measurement to the bottom should increase consistently toward the outlet by the planned amount; if the line is level, the far end needs to sit lower than the near end to create fall. A laser level or builder’s level makes a long route easier to check, but a taut line and tape measure work for a short, unobstructed run.
Choose Materials That Keep Soil Out of the Drain
For many modest yard drains, homeowners use a 3- or 4-inch perforated pipe, clean washed drainage stone around it, and permeable filter geotextile to separate the stone from surrounding soil. Rigid smooth-wall pipe holds its grade and is easier to clean through access points; flexible corrugated pipe is easier to route but can sag between supports and is harder to inspect. Confirm compatibility and hole orientation with the pipe manufacturer rather than buying pipe by color alone.
| Component | Practical starting point | Why it matters |
|---|---|---|
| Trench | About 12–14 inches wide; commonly 18–24 inches deep for a small yard line | Leaves room for aggregate around the pipe; depth depends on the water source and outlet |
| Pipe | Often 3–4 inches, perforated along the collection run | Captures water through the gravel and carries it to the outlet |
| Stone | Clean, washed, coarse aggregate, often around ¾–1½ inches | Open voids allow water to move; fines and soil clog them |
| Fabric | Permeable drainage geotextile wide enough to wrap over the aggregate | Keeps surrounding soil from migrating into the stone envelope |
These dimensions are not a design for a foundation drain, retaining-wall drainage, a large roof area, or a long network. The PNNL Building America Solution Center describes a larger example trench and specifies clean rock and a positive outlet grade, while the RHS lists different depths and slopes for garden-scale drainage; the variation reflects different site and system designs. Use the pipe maker’s installation instructions and local requirements, and call a drainage contractor or civil engineer where the consequences of failure are significant.
Use drainage filter fabric, not an impermeable plastic sheet or thin weed barrier that is not rated for this use. The fabric should line the trench and fold over the gravel envelope so soil does not mix into the stone; leave enough excess to overlap the top without stretching it tight. Use stone sold as washed drainage aggregate, not crusher run, screenings, or gravel mixed with sand and dust.
Check Permits and Locate Every Underground Line
Before digging, check whether your project needs a building, grading, stormwater, or right-of-way approval. Ask specifically about the proposed destination, trench depth, work near an easement, and any discharge to a public system. Drainage law and permit requirements are local; an outlet that is accepted on one lot or in one municipality may be prohibited a few miles away.
In the United States, contact 811 or your state’s one-call center before excavation and wait the required time for utilities to respond. State timing varies, and a locate request is not the same as permission to dig. University of Illinois Extension explains that 811 locators generally do not mark private lines such as sprinkler systems, outbuilding service, or a gas line to a grill, so arrange a private locate for those features and identify septic, landscape-lighting, irrigation, and other owner-installed lines yourself.
Mark the proposed route in white paint or flags if requested by your one-call center, keep the utility marks visible, and follow local tolerance-zone rules when working near them. Do not assume that a shallow garden trench is too small to matter: a utility may lie just below the turf, and utility depth is not a guarantee. If the markings conflict with your route, move the route or ask the utility for guidance before breaking ground.
Install the Drain in a Sequence That Preserves Its Grade
Once the outlet, approvals, and utility marks are settled, assemble the pipe, fittings, cleanout, fabric, and stone before excavation. Keep excavated soil off the fabric and out of the aggregate, and make sure your wheelbarrow route will not compact or damage the parts of the yard you are trying to fix. A helper makes a long trench safer and lets one person check grade while the other removes soil.
1. Mark the route and protect the site
Mark the centerline and the two trench edges, then photograph or sketch nearby irrigation heads, cables, valves, and other features. Cut and roll back sod in manageable strips so it can be replaced after backfill. Keep spoil on one side, away from the trench edge, and avoid digging when saturated soil is likely to slump or smear into a smooth, compacted layer.
Set the grade line or level marks before you start. The trench needs both the planned collection elevation and a continuous fall toward the outlet; correcting the depth after the bottom is already irregular takes more work than checking it every few feet. If tree roots block the route, change the alignment or ask an arborist before cutting structural roots.
2. Excavate and shape the trench bottom
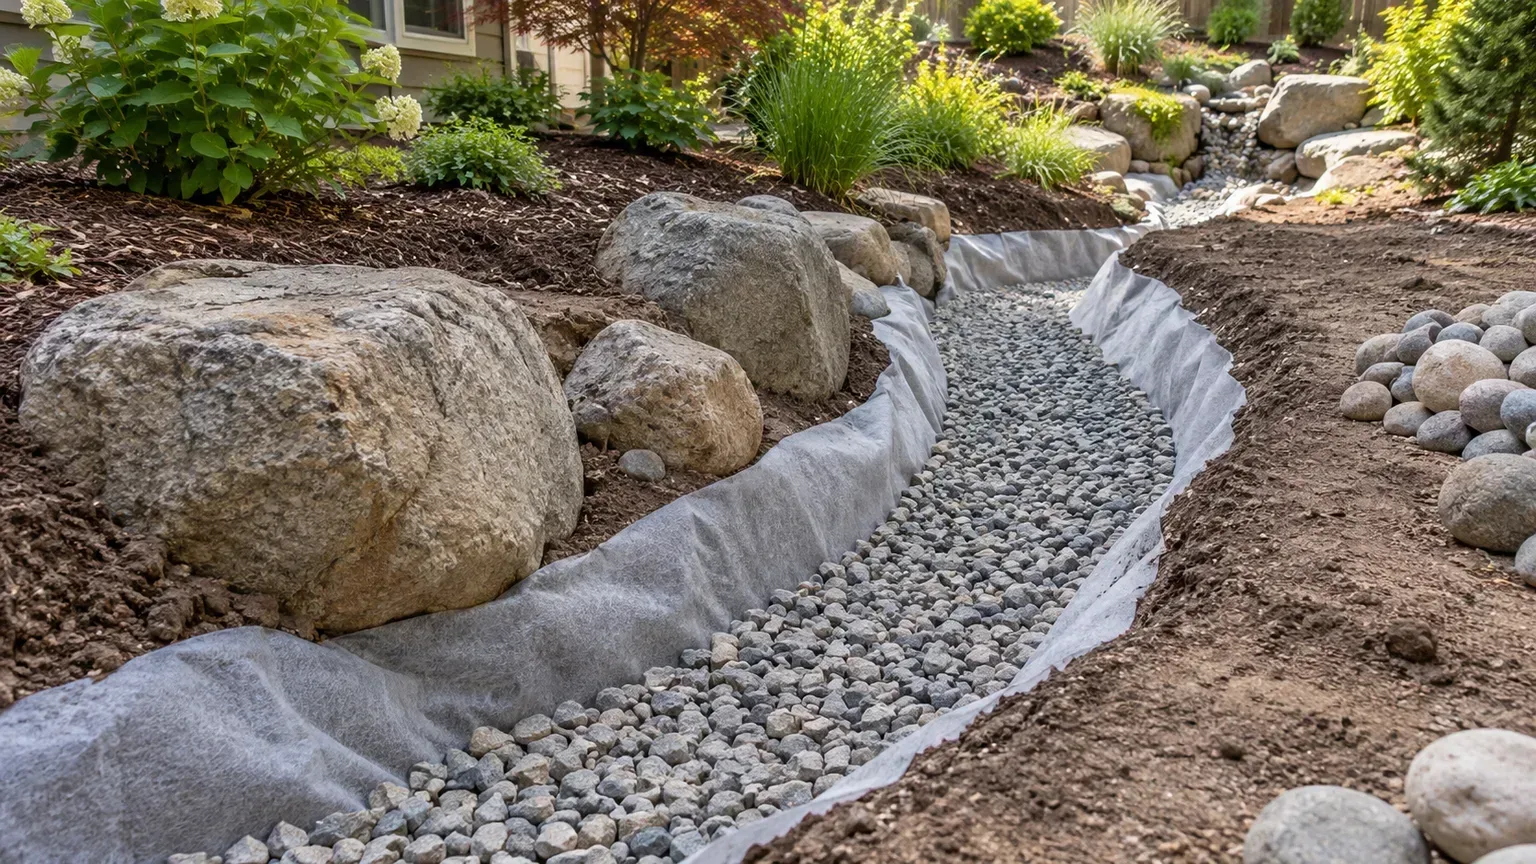
Dig to the planned width and depth while maintaining the measured fall. The trench bottom should be firm, smooth, and free of loose clods; remove soft pockets rather than burying them under stone. Recheck the invert at short intervals, especially at bends and where the ground changes, because a small reverse pitch can leave a permanent pool inside the pipe.
Avoid a deeper-than-needed trench. A very deep or long excavation takes more material, increases collapse risk, and may expose you to groundwater, foundations, or utilities; deeper drainage systems are not casual weekend work. Where the trench approaches a building or retaining wall, stop and consult a qualified professional instead of digging below a footing or removing soil that supports the structure.
3. Build the gravel, pipe, and filter envelope
Drape the drainage geotextile into the trench with enough material on both sides to fold across the finished stone. Add a bedding layer of clean coarse stone, set the perforated pipe on it, and check the slope again before covering the pipe. Follow the pipe manufacturer’s instructions for perforations; many rigid French-drain layouts place openings downward, but some products have slots or holes distributed around the circumference.
Add clean stone around and above the pipe, keeping the pipe centered and covered by the amount specified for the chosen design. Pull the fabric over the aggregate with a generous overlap so the soil backfill does not touch the stone directly. Fine Gardening illustrates this fabric-and-stone envelope and the transition from perforated collection pipe to solid outlet pipe (installation method); the exact filter arrangement should match the fabric and pipe products you bought.
Install an accessible cleanout at the upper end or at a planned inspection point if the design allows. Use solid-wall pipe after the collection area to carry water to the outlet, and seal or cap the upstream end so soil cannot enter. Keep bends gradual where possible; sharp turns make a pipe harder to flush or inspect later.
4. Carry water to the approved outlet and test
Connect the perforated run to the solid outlet line with the correct fittings, then support and bed the solid section so it cannot settle into a reverse slope. At a daylight outlet, terminate above the receiving grade and protect the soil with stone or an erosion-control feature; keep the outlet visible enough to inspect. If the line connects to a catch basin, dry well, rain garden, or public system, follow that structure’s approved detail rather than improvising a connection.
Before closing the fabric or replacing sod, run water into the collection trench and verify that it reaches the outlet without backing up. This hose test will not duplicate a cloudburst or prove the system is sized for every storm, but it can catch a blocked pipe, loose fitting, incorrect grade, or obstructed outlet while repairs are still accessible. Correct problems before covering the work; once the trench is hidden, troubleshooting usually means digging it up again.
Finish the Surface Without Trapping Sediment
Fold the fabric over the stone first. If the design is intended to remain visible, top it with decorative stone that will not wash into the pipe; if it is buried beneath lawn, cover the fabric with a suitable soil layer and replace sod without pushing topsoil directly into the gravel envelope. A properly separated buried drain can be covered, but dumping soil into an open gravel channel defeats the filter layer and can fill the voids.
Set the finished grade so water can enter the collection zone without creating a depression that holds mud, but do not direct new runoff toward a building or neighbor. Leave the cleanout and outlet accessible, and mark the drain route on a simple property sketch or save the installation photos with measurements. Avoid planting large shrubs or trees directly over the pipe, where roots and future digging can complicate maintenance.
Diagnose Failures Before Rebuilding
A new French drain may not correct the problem if the source was misidentified, the outlet is too high, the trench is flat, or water is being delivered faster than the system can carry it. Compare what happens during rain with the original water pattern: if surface flow still crosses the yard, a buried collector may be in the wrong place; if the drain is flowing but the low spot remains wet, the soil may have poor infiltration or the drainage area may exceed the system’s capacity. Do not respond by simply making the trench deeper or adding more gravel without finding where flow stops.
Common signs and first checks are simple: a dry outlet during a wet spell can mean the line is blocked, too high, or not intercepting the water; a constantly wet outlet may indicate a spring or a full receiving area; and erosion at the discharge suggests the outlet needs a stable splash zone or a redesigned destination. If water appears at a foundation, basement, or retaining wall, treat that as a building-drainage issue rather than assuming a garden trench will fix it. This Old House’s installation guide likewise emphasizes planning the route, slope, and outlet before installation.
Pooling, slow flow, and a wet outlet
If water stands in the trench before backfill, recheck the invert with your level and confirm every pipe joint is open. If the line worked initially and then slowed, inspect the outlet, remove leaves and sediment from the cleanout, and look for fabric tears or soil entering the gravel. A pipe camera or professional flush may help locate a blockage, but high-pressure cleaning should only be used if the pipe and fittings are rated for it.
If the outlet runs but the yard remains soggy, the drain may be undersized, placed below or beside the flow rather than across it, or delivering into soil that cannot absorb the water. A dry well that stays full is not a functioning destination; verify its infiltration, seasonal groundwater level, and size using local standards. For intense or frequent storms, surface grading, a catch basin, an expanded drainage plan, or a professionally designed system may be needed instead of a single narrow trench.
Maintain the Outlet and Keep a Record
Inspect the outlet and cleanout after the first few significant storms and at the start of the wet season. Remove leaves, mulch, and sediment from the opening; check for animal nests, displaced stone, erosion, or standing water around the destination. If the outlet is hidden under vegetation or covered with soil, uncover it before assuming that the buried pipe has failed.
Keep a record of the route, depth, pipe type, fittings, and outlet location, along with photographs before backfill. This helps you avoid cutting the line during future planting or fencing and gives a contractor useful information if the system needs repair. A French drain is passive, but it is not maintenance-free: in silty soils, after landscaping changes, or where leaves accumulate at the outlet, periodic inspection can reveal problems while they are still local.
Know When to Hire a Drainage Professional
A small, shallow yard drain with a clear gravity outlet and no nearby utilities may be a manageable DIY project. Hire a qualified drainage contractor or civil engineer for long runs, major grade changes, high groundwater, repeated foundation flooding, a drain beside a footing or retaining wall, an outlet to public infrastructure, or water that crosses property boundaries. These conditions affect structure, neighbors, permits, and the amount of water the destination must accept.
Do not enter a deep or unstable excavation, use a trencher around unlocated services, or cut into a public storm line yourself. If the yard is flat, consult before adding a pump or dry well; a pump needs power, service, and a safe overflow plan, while an infiltration system needs soil and groundwater checks. The RHS notes that large-scale piped drainage is skilled work and points to a specialist for difficult installations; that is a useful line between a garden project and an engineered drainage system.
Conclusion
To install a French drain that can keep working, solve the route and outlet on paper before digging. Confirm where the water begins, verify that the destination can accept it legally and physically, call 811 and locate private services, then build a continuously sloped gravel-and-pipe run protected from soil.
Check the grade before covering the pipe, test the flow while the trench is still open, and keep the outlet visible for maintenance. If gravity, infiltration, a foundation, a retaining wall, or a public connection makes the design uncertain, bring in a drainage professional before excavation rather than spending the weekend burying a problem.