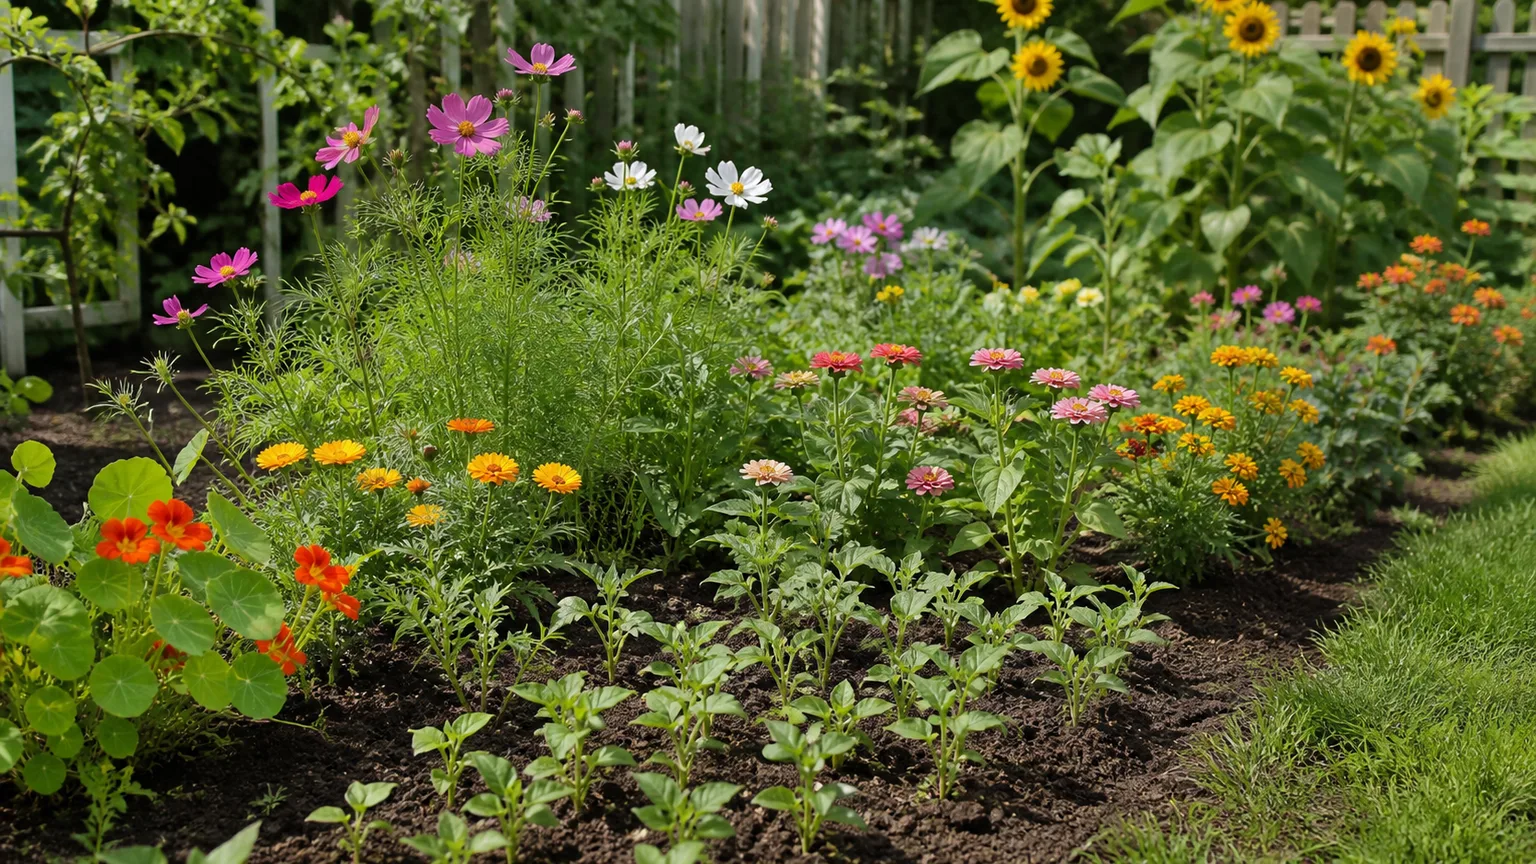
How to Make a Lasagna Garden: A Complete Step-by-Step Guide
Learn how to make a lasagna garden with cardboard, compost, and yard waste. Get layer-by-layer instructions, a planting timeline, and fixes for common problems.
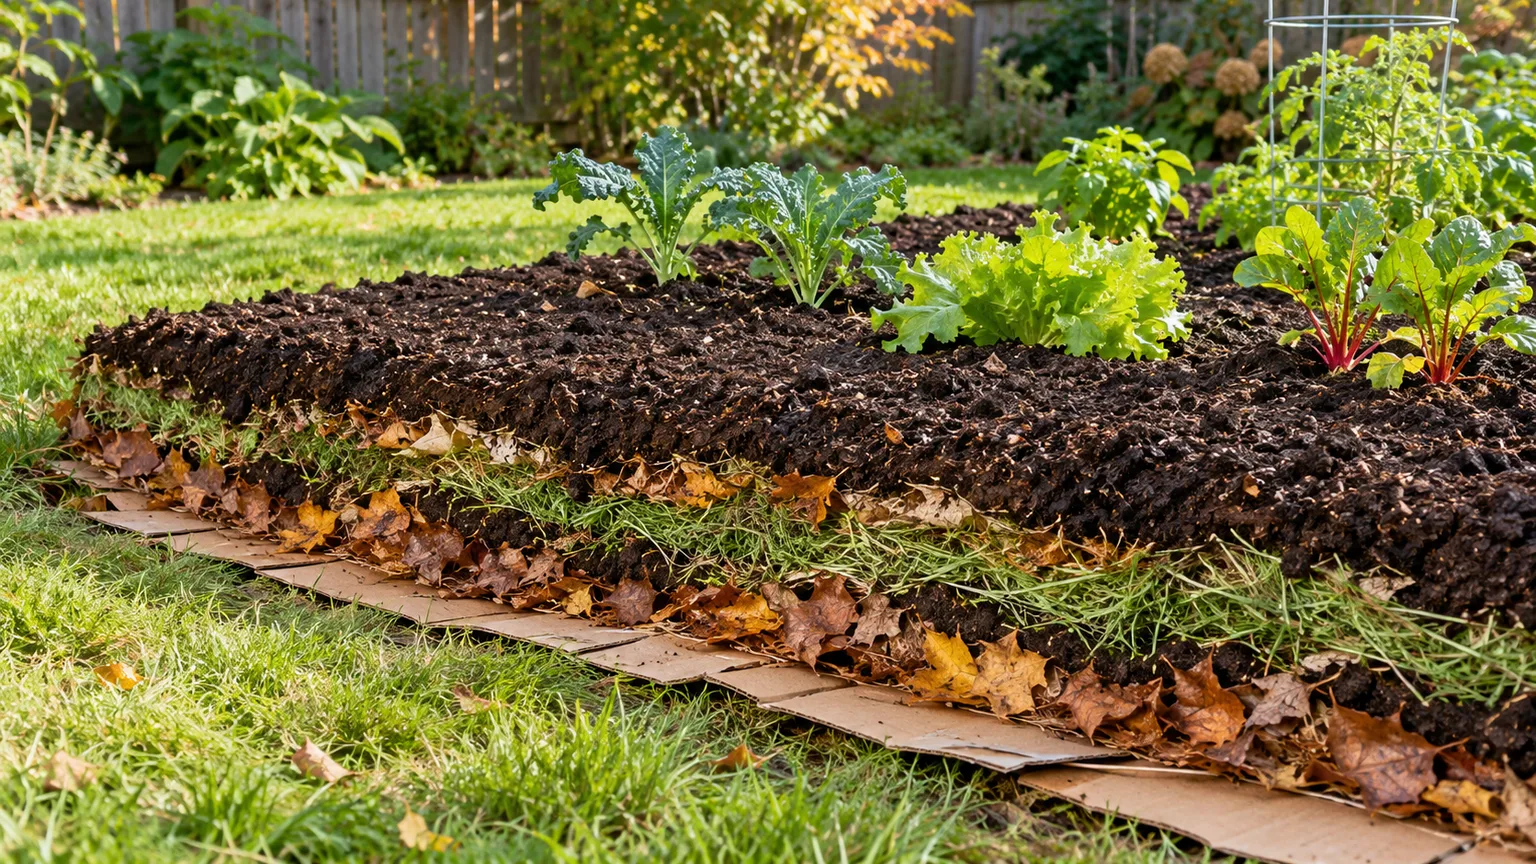
A lasagna garden is a new planting bed built in place by stacking organic materials over the ground instead of digging or tilling the whole area. A paper or cardboard layer blocks light from existing grass, while compost, leaves, and other yard materials gradually break down above it. The name describes the layers, not a special kind of plant or a bed that is ready the day you build it.
The main decision is whether you can wait for the layers to settle. If you start in autumn and let the bed rest through winter, you can build it mostly from yard waste and plant later; if you need to plant this week, you need a generous cap of finished compost or topsoil. The method is useful, but it is not a shortcut around material planning, moisture, or persistent weeds.
What a Lasagna Garden Is—and What It Is Not
Lasagna gardening is a form of deep sheet mulching or sheet composting: organic materials are laid over a garden area and decompose where the future plants will grow. The layers usually include a temporary paper barrier, finished compost, carbon-rich “brown” materials such as dry leaves, and nitrogen-rich “green” materials such as fresh grass clippings. There is no need to turn the layers like a compost pile, because the goal is to create a bed in place.
Gardeners use the phrase in more than one way. Some mean the full stack of alternating browns and greens; others use it for a simpler sheet-mulch bed with cardboard under a thick layer of mulch. Fine Gardening describes that practical distinction as shallow sheet mulching for suppressing weeds versus deep sheet mulching for building a new, deeper planting bed. Both approaches can reduce digging, but only the deeper version is designed to make a substantial layer of growing medium from mixed organic material.
This is also not the same as filling a raised box with layers of logs, branches, and soil to save on purchased soil. A lasagna bed is usually built on existing ground so roots, water, and soil organisms can connect with the soil below as the paper breaks down. You can define the edges with boards or stone, but a bottom liner or a sealed base changes drainage and interrupts that contact.
Decide Whether This Method Fits Your Bed
Choose lasagna gardening when the site is reasonably level, drains adequately, and you have time to let bulky material settle. It works especially well when a lawn area needs to become a vegetable or flower bed and you can collect leaves, compost, or clean yard trimmings locally. Once established, the bed is maintained much like any other garden, with watering, weeding, and seasonal top-dressing.
It is a poor choice when you need a smooth seedbed immediately but do not have enough finished compost or topsoil to cap it. It also should not be treated as a reliable way to erase every perennial weed: plants with persistent underground roots or rhizomes can survive beneath a paper layer or grow back around its edges. Remove those weeds first, or use another control plan before building the bed.
The method changes the amount of work; it does not remove the need to match the site to the plants. A sunny vegetable bed needs the light exposure required by the crops you plan to grow, while a shade planting should be designed for shade-tolerant plants. Keep the bed reachable from its paths so you do not have to step on and compact the new layers.
Choose the Location and Timing
Pick the final bed location before gathering materials. Moving a deep, wet stack later is difficult, and the bed can settle lower than its starting height. Think about sun, access to a hose, the route for wheelbarrows, and whether the area is close enough to the house for regular harvests without being under roof runoff or in a place where stormwater pools.
Mark a practical width: a bed that can be reached from both long sides is easier to tend without walking on the soil. Leave paths wide enough for the equipment and people who will use them. If a raised border will help hold loose leaves in place, install it before layering, but make sure water can drain through or away from the bed.
Match the start date to your planting deadline
Autumn is convenient because leaves are abundant and the bed can rest during cooler months, but it is not the only time to start. Penn State Extension notes that a sheet-mulched lawn-to-bed conversion is often rested for four to six months before planting, while University of Maine Cooperative Extension advises that sheet-mulch layers may need six months or more to break down. Those are useful planning ranges, not guarantees: cold weather, dry conditions, thick material, or persistent turf can extend the wait. (Penn State Extension; University of Maine Cooperative Extension)
If you want to plant in spring, build as early as possible in fall and use fine, moist material rather than a very deep stack of coarse branches. If you are starting in spring or summer, either accept that the bed may be ready for a later season or buy enough finished material to create a separate root zone on top. Oregon State University describes no-till gardening as one way to use organic material to build a bed in place, but the living bed still needs time to decompose. (Oregon State University)
Gather Materials for Each Layer
Plan to use clean, plant-safe material from known sources. The exact recipe depends on what is available, but every deep bed needs a base layer that blocks light, a mix of moist greens and dry browns, and a finished cap if you intend to plant before everything decomposes.
| Layer role | Suitable materials | What they contribute |
|---|---|---|
| Light-blocking base | Plain corrugated cardboard or several layers of plain newspaper | Suppresses turf and weeds while it begins to soften |
| Greens | Fresh grass clippings in thin layers, vegetable and fruit scraps, green garden trimmings | Moisture and relatively nitrogen-rich material |
| Browns | Dry leaves, shredded uncoated paper, straw, small amounts of untreated wood chips or shredded stems | Bulk, carbon-rich material, and spaces between wet greens |
| Starter and cap | Finished compost or clean topsoil mixed with compost | A more uniform surface for roots, seeds, or transplants |
| Top cover | Leaves, straw, or coarse mulch | Holds loose material in place and protects the surface |
There is no need to buy every material on the list. A practical bed can be made from cardboard, leaves, clean grass clippings, and finished compost; it is better to build a simpler stack from materials you trust than to accept an unknown load just to achieve a textbook sequence. If you have lots of leaves but little grass, use them as the main brown layer and add compost or another known green material between them.
The carbon and nitrogen labels are a useful guide, not a recipe that can be measured by counting equal-looking layers. A fluffy leaf layer has much more air space than a dense layer of fresh clippings, and materials vary in moisture and composition. Savvy Gardening recommends alternating thinner nitrogen-rich material with carbon-rich layers and adding aged compost to help seed the process; use the same principle while keeping each layer loose enough for air and water to move through it. (Savvy Gardening)
Keep risky or slow materials out of the bed
Use plain, uncoated cardboard and remove packing tape, plastic labels, staples, and shipping stickers. Avoid waxed or waterproof boxes, glossy inserts, and heavily coated paper, which will not break down like ordinary paper. A single thin layer with overlapping seams is more manageable than piling on so much paper that water cannot reach the soil.
Do not add meat, bones, dairy, oily foods, pet waste, or material contaminated with herbicides or other garden chemicals. These can attract animals, introduce unwanted residues, or create sanitation problems. Avoid diseased plants and weed seed heads unless you know that the material has been processed hot enough to destroy them; a slow lasagna bed does not reliably heat every ingredient.
Fresh grass clippings can be useful, but spread them thinly and let wet clippings loosen before adding another layer. Thick, compacted clippings can mat together, smell sour, and slow decomposition. Keep large woody branches out of the active root zone if you need a bed soon; intact wood breaks down slowly and can leave uneven voids as it shrinks.
Estimate How Much Material You Need
Estimate volume before collecting materials, especially if you are building more than one small bed. Multiply the bed’s square footage by the depth in inches, then divide by 324 to get cubic yards. For example, a 4-by-8-foot bed is 32 square feet; at 12 inches deep, it needs about 1.2 cubic yards of loose material before settling.
That number is total volume, not a requirement to buy 1.2 cubic yards of compost. Divide the intended depth among the materials you have: cardboard is thin, compost may be a modest starter layer, and most of the bulk can come from leaves or other clean browns. A deep lasagna bed can start 12 to 18 inches high and settle substantially; going taller consumes more material and usually means a longer wait.
For a shallow weed-suppressing sheet mulch, use a thinner stack and a few inches of mulch over the paper. For a true soil-building lasagna bed, plan on multiple substantial organic layers and expect them to collapse as they decompose. Do not build an extremely tall pile just because one source gives a maximum depth; the best height is one you can supply, keep moist, and let mature.
Prepare the Ground Without Turning It
Mow the grass or cut low vegetation close to the ground and leave the clippings if they are healthy and untreated. Rake away thick mats of thatch, sticks, plastic, and trash that could create a gap beneath the base layer. You do not need to strip away ordinary lawn turf, loosen the entire bed with a shovel, or remove every small annual weed.
Make a deliberate exception for persistent weeds. Dig out or otherwise manage rhizomatous or deep-rooted weeds such as bindweed, quackgrass, or invasive grasses before covering the area; their underground stems can outlast the smothering layer. Also remove woody roots, large perennial crowns, and any mature weed that would simply send shoots through openings in the cardboard.
Check how water behaves after rain. If the area regularly holds standing water, solve the drainage problem or choose another site rather than burying it under additional organic matter. Lasagna layers improve the surface and add organic matter over time, but they do not correct a high water table or a compacted subsoil that prevents drainage.
Step 1: Water the Site and Lay the Weed Barrier
If the ground is dry, water it before you cover it. The soil should be moist, not muddy; moisture already present beneath the bed helps the grass die and gives decomposers a workable environment. Then place plain cardboard over the entire area, or use overlapping sheets of newspaper if that is what you have.
Overlap seams by roughly 6 to 10 inches so sunlight cannot find a narrow path to the grass. Extend the paper a few inches beyond the planned planting area and tuck the edge under the border if there is one. Wet the cardboard as you work so it conforms to the ground and stays put; this is especially helpful on a breezy day, even though the later layers also hold it down.
Do not seal the bed with plastic or landscape fabric. Unlike a temporary paper barrier, those materials do not decompose into the garden and can prevent roots from reaching the soil below. A photo example of paper used as a garden-bed base shows how the seams and surface mulch work together; cover the paper promptly so wind does not lift it.

Step 2: Build the Brown-and-Green Layers
Start with a thin layer of finished compost over the damp base if you have it. This adds a fine-textured, already decomposed material near the top of the old ground and helps the new bed transition from paper to organic layers. It is optional when materials are scarce, but particularly useful if you plan to plant sooner.
Add a loose layer of brown material, then a thinner layer of green material, and repeat. Dry leaves, straw, shredded paper, and small amounts of shredded stems are common browns; fresh grass clippings and vegetable scraps are common greens. Each layer should cover the bed fairly evenly without being pressed flat.
Keep the green layers moderate. A thin, broken layer of clippings or scraps is easier to decompose than a thick slab of wet grass or a concentrated pocket of kitchen scraps. Cover scraps with leaves or compost so they are not exposed to animals, and keep the materials away from the immediate stems of any plants already growing at the border.

Use a repeatable layer pattern, not a rigid formula
A workable pattern is a few inches of loose browns, a thinner green layer, and another brown layer on top. Repeat until the bed reaches the planned height. Savvy Gardening describes individual layers around an inch deep for its sheet-mulch recipe, while Fine Gardening notes that deep sheet mulching can use alternating layers several inches deep; in practice, material texture and intended waiting time matter more than exact measurements. (Savvy Gardening; Fine Gardening)
Use smaller material near the top if you need a smoother surface, and keep coarse chips or branches to a minimum in the root zone. Large chunks do not provide an immediate seedbed and can settle unevenly. They are more useful as a surface cover or in a separate long-term wood-based bed where slow decomposition is part of the plan.
Water lightly between layers if the material is dusty or dry, but do not soak the whole stack until it becomes heavy and airless. The target is evenly damp material that stays loosely piled, like a squeezed sponge rather than a bucket of slurry. A cross-section of layers is helpful when assembling a bed because it shows the difference between distinct layers and a single compressed mass.
Step 3: Add a Plantable Cap
If you are waiting several months, finish the stack with leaves or a coarse mulch to keep the lighter material from blowing away and to reduce drying. If you want to plant soon, finish instead with at least 4 to 6 inches of finished compost or clean topsoil blended with compost. That cap creates a more predictable root zone while the layers below continue to break down.
Do not mistake unfinished grass, whole leaves, or chunky branches for planting soil. Small seeds need a fine, even surface and consistent moisture; placing them directly into a layer of decomposing scraps makes germination uneven. For seedlings and transplants, each plant needs enough finished material around its root ball to establish before it reaches an undecomposed layer.
Water the completed bed slowly so the paper remains in contact with the ground and the upper layers settle without washing off. If the surface drops or exposes cardboard, add more leaves, compost, or mulch rather than digging the whole bed over. A little settling is normal and is one reason to start the bed slightly higher than its final planting surface.
How Long to Wait—and How to Tell It Is Ready
Expect the process to take months, not days. Penn State Extension gives four to six months as a common resting period for a lawn-to-bed sheet mulch, and Maine Extension notes that six months or more may be needed before the layers become a plantable medium. A cold winter or a dry site slows decomposition; warmth, moisture, smaller materials, and a moderate layer depth generally help it move along. (Penn State Extension; University of Maine Cooperative Extension)
Use the bed itself to decide, not the date you wrote on a calendar. At several spots, dig a small test hole through the stack. If you can still identify intact cardboard, distinct layers of leaves and clippings, or dry pockets that have barely changed, the bed is still in progress. Keep it moist and give it more time, or top it with finished compost if the planting deadline cannot move.
A mature section should feel dark, crumbly, and reasonably uniform through the root zone. Some recognizable leaf pieces may remain; decomposition does not have to turn every fragment into powder. The important checks are that roots can move through the material, the bed is not hot or sour-smelling, and there is enough finished medium at the surface for the plants you want to establish. Fine Gardening cautions that deep sheet mulching can take several months to a year or longer, so spring readiness should be treated as a possibility rather than a promise. (Fine Gardening)
Planting Before the Layers Finish Breaking Down
You can plant before the whole stack is mature if you create a finished root zone on top. Add a 4- to 6-inch cap of finished compost or screened topsoil and compost, then plant transplants into that layer. Open a hole through the cardboard beneath each root ball if it is still intact; do not leave the transplant perched on an impermeable paper sheet.
Direct sowing needs a finer, more consistent surface than most fresh layers provide. If the bed still contains visible pieces of cardboard and chunky leaves, add enough screened growing medium for the seed depth and keep it evenly moist. Small-seeded carrots, salad greens, and other crops that need a fine seedbed are less forgiving than a larger transplant with an established root ball.
For a fall-built bed intended for spring planting, inspect it before buying seedlings. If the cap has settled but the base paper is mostly broken down, top up with compost and plant. If the paper is intact and the soil is lumpy, leave the bed to mature and use containers or an existing bed for crops that cannot wait.
Maintain the Bed as It Settles
During the first few weeks, check that the layers remain damp after rain and are not drying out under a thick leaf or mulch cap. In a dry spell, water slowly enough to soak the stack; a quick surface sprinkle may wet the cover but leave the cardboard and lower layers dry. Fine Gardening recommends thorough watering during dry periods while sheet mulch decomposes, but adjust to actual rainfall and soil conditions rather than following a fixed weekly schedule. (Fine Gardening)
Once plants are growing, water according to their needs and keep mulch away from stems and crowns. Pull weeds that establish in openings while they are small, and check the bed edges where grass can creep back in. The paper barrier suppresses light; it does not sterilize the soil or guarantee that no weed will return.
Replenish organic matter with a thin top-dressing of finished compost and a loose mulch of leaves or straw when the surface thins. You do not need to rebuild a thick cardboard base every season. If the bed has settled low, add soil or compost to the planting surface instead of burying live plants under another deep stack of raw material.
Troubleshoot Weeds, Dry Layers, and Bad Odors
Grass or weeds are growing through. Look for a seam, an edge that shifted, or a persistent root system. Pull or dig out the living weed, patch the opening with a piece of cardboard or newspaper, wet it, and cover it with mulch. If the shoots return from underground rhizomes, remove those roots before the next round rather than adding more cardboard over the same plant.
The stack remains dry and unchanged. Open a small inspection spot. If the paper is crisp and leaves are still dry, water slowly until the layers are evenly damp, then replace the cover. If the bed is under a roof overhang or receives little rain, plan on checking it more often than an exposed bed.
The bed smells sour or rotten. A strong sour odor usually signals wet, compacted pockets with too much fresh green material and too little air. Pull apart the matted material in the affected area, mix in dry leaves or shredded cardboard, and stop adding water until it drains and loosens. Do not bury the smell under another wet layer.
The garden sinks more than expected. Decomposition and settling are part of the method. Add finished compost or soil to restore the planting depth; avoid stepping in the bed to compact it back into shape. If the bed collapses into a hollow or water pools in it, check whether the site drains and whether the initial materials were too wet or packed too tightly.
Conclusion
To make a lasagna garden, mow low vegetation, lay overlapping plain cardboard over moist ground, then build loose layers of browns, greens, and compost. Finish with mulch if you can wait, or with several inches of finished compost or soil if you need a plantable surface now. Keep the stack damp but not waterlogged, remove persistent weeds before covering, and expect the materials to settle over several months.
The most reliable planting signal is a bed that is dark, crumbly, and open enough for roots—not simply the arrival of spring. If the test hole still shows intact paper and distinct raw layers, give it more time or add a finished-soil cap for transplants. That one check prevents the common mistake of treating a new stack of organic waste as finished garden soil.