How to Grow and Care for Persian Buttercups Outdoors
Grow Persian buttercups in beds or pots with a climate-based planting plan, corm-soaking guidance, reliable drainage, bloom care, storage, and safety tips.

Persian buttercups (Ranunculus asiaticus) are cool-season flowers grown for their layered, rose-like blooms and long, straight stems. They can thrive in a garden bed or container when their roots get bright light, steady but not soggy moisture, and soil that drains quickly. Their growing calendar depends more on winter cold and spring heat than on a single planting date.
Most gardeners start them from dry, claw-shaped storage roots sold as corms, even though botanical references may call them tubers or tuberous roots. The label matters less than the plant’s needs: keep dormant stock dry, plant it during a cool growing window, and protect it from waterlogged soil and hard freezes. A spring flush of flowers is a realistic goal; reliable return every year is not.
Choose a planting season that fits your winter
Ranunculus grows best while the weather is cool and the soil is moist but aerated. NC State Extension describes the plant as a full-sun, well-drained-soil perennial that often goes dormant in summer; it also notes that the plant is injured by temperatures below about 28°F in North Carolina.
That figure is useful context, not a universal threshold for every cultivar or garden. Your corm supplier’s regional advice and the pattern of winter wet and freezes at your site should guide the decision.
As a broad rule, fall planting suits mild-winter areas where drainage is excellent and severe freezes are uncommon or can be buffered. In colder places, late-winter or spring planting avoids months of exposure to freezing soil, though the plants must still have enough cool weather to grow and bloom before heat arrives. The NC State Extension plant profile and Floret Flowers’ growing guide describe different regional approaches because their climates and production systems differ.
| Your growing conditions | Better starting plan | Main trade-off |
|---|---|---|
| Mild winter, free-draining bed, occasional light frost | Plant in fall; keep frost cloth available | Earlier flowers, but wet winter soil can still rot corms |
| Frequent hard freezes or frozen ground | Plant in late winter or spring, or start under cover | Lower winter exposure, but a shorter cool season |
| Mild winter with long wet periods | Use a raised bed or container; test fall planting on a small scale | Drainage may matter more than the zone number |
| Hot spring that warms quickly | Start as early as local conditions safely allow | The bloom window may be brief even when care is good |
Fall planting in mild-winter gardens
Planting in fall gives roots time to develop before spring growth, so flowers can arrive earlier than from corms planted in spring. Choose a spot where rain drains away rather than pooling over winter. Raised beds and sloped ground can help; a heavy clay bed that remains saturated is a poor place to gamble on dormant corms, even if winters are generally mild.
A low tunnel or frost cloth can reduce exposure during cold snaps, but it cannot make a waterlogged or deeply frozen site reliably safe. Growers at Floret describe overwintering in protected conditions and still treat return as uncertain because cold, drainage, and pests vary. If this is your first season, plant a small trial patch rather than committing the whole display to fall planting.
Spring planting in colder regions
Where the ground freezes hard, wait until it is workable and plant before the spring turns hot. You can start the corms in pots or trays in a cool, sheltered place, then move rooted growth outside when the local forecast and frost protection plan make that reasonable. This approach reduces winter losses, but it does not eliminate the risk of late frost or guarantee a long flowering period.
If spring warms quickly where you live, prioritize an early start without leaving unsprouted corms exposed to frozen ground. A flower farm may use tunnels and succession planting that are unnecessary for a home bed; follow the corm supplier’s directions for the cultivar you bought. If the cool season is short, expect fewer weeks of bloom and use ranunculus as a spring feature alongside later-flowering plants.
Choose a bright site with fast-draining soil
Give Persian buttercups a sunny position with at least six hours of direct light during the cool growing season. In a hot-spring climate, light afternoon shade can reduce heat stress, but deep shade usually produces stretched stems and fewer flowers. Avoid a spot beside a heat-reflecting wall or paved surface if the spring sun quickly pushes temperatures upward.
Soil drainage is the non-negotiable part. The roots need moisture while leaves and stems are actively growing, but standing water around a dormant or newly planted corm can cause rot.
Sandy loam is naturally helpful; in heavier soil, build a raised bed or use a container rather than trying to fix a planting hole with a little sand. Improve the broader bed with organic matter, and do not let a dense, compacted layer trap water below the corms.
Choose the spot by watching it through the season you plan to grow the flowers, not only on a dry summer afternoon. A bed that bakes in July may be bright and comfortable during a cool spring, while a low corner that collects winter rain can fail before the leaves appear. If you are unsure whether your soil drains quickly enough, try a small group in a raised bed or pot first; the comparison is more useful than losing a whole packet of corms.
Leave enough space to reach the plants without stepping into the bed. Ranunculus foliage is finely divided and can look delicate, but wet leaves pressed together stay damp longer and make inspection harder. A path along one side also makes deadheading and cutting flowers easier, especially when the plants are crowded into a productive patch.
Prepare dormant corms before planting
When dry ranunculus corms arrive, they may look shriveled and oddly clawed. That is normal.
Keep them in a cool, dry, ventilated place in their breathable packaging until the planting window; do not seal them in a damp plastic bag or soak them weeks before you are ready to plant. A firm, dry corm is viable-looking, while a corm that is mushy, leaking, or foul-smelling should be discarded.
Check the package before using any preparation method. Grower advice ranges from planting dry stock into prepared soil to rehydrating corms first.
Floret and Country Living describe a short room-temperature soak, while regional extension guidance gives different handling directions. Treat a soak as one option, not a requirement for every product. If the supplier specifies a duration, use it rather than combining instructions from several sources.
Decide whether soaking and pre-sprouting are useful
If your supplier recommends soaking, use clean room-temperature water for the stated short period, then drain and plant promptly. Do not leave the roots underwater overnight: too much time in warm, stagnant water can deprive tissue of oxygen and encourage decay. A soak should rehydrate a dry corm, not turn it into a soft, waterlogged one.
Pre-sprouting is optional and most useful when you want to check viability or gain a modest head start in a short season. Floret’s method uses a tray of lightly moist potting mix in a cool place; tiny white roots signal that a corm is ready to plant.
Keep the medium barely moist, inspect every few days, and remove any corm that turns soft or moldy. If you cannot provide a consistently cool, airy setup, plant directly instead—the extra handling is not worth creating a warm, wet rot pocket.
Plant corms at the right depth and orientation
Prepare the bed first, so soaked or pre-sprouted corms do not sit waiting in the open air. Work the surface loose, remove large stones, and make sure the site drains after a thorough watering.
Set each corm with its narrow claws pointing down and the broader crown above them. If it is difficult to tell which end is which, plant it on its side rather than forcing it upside down.
A useful starting range is about 2 to 3 inches deep and 6 to 9 inches apart. NC State Extension lists planting tuberous ranunculus roots about 2 inches deep and 6 to 8 inches apart, while Floret uses wider spacing for cut-flower beds.
Cultivar size, airflow, and the kind of display you want explain some of that variation. Use the package as the final word; closer spacing makes a fuller patch but can reduce air movement and access for harvesting.
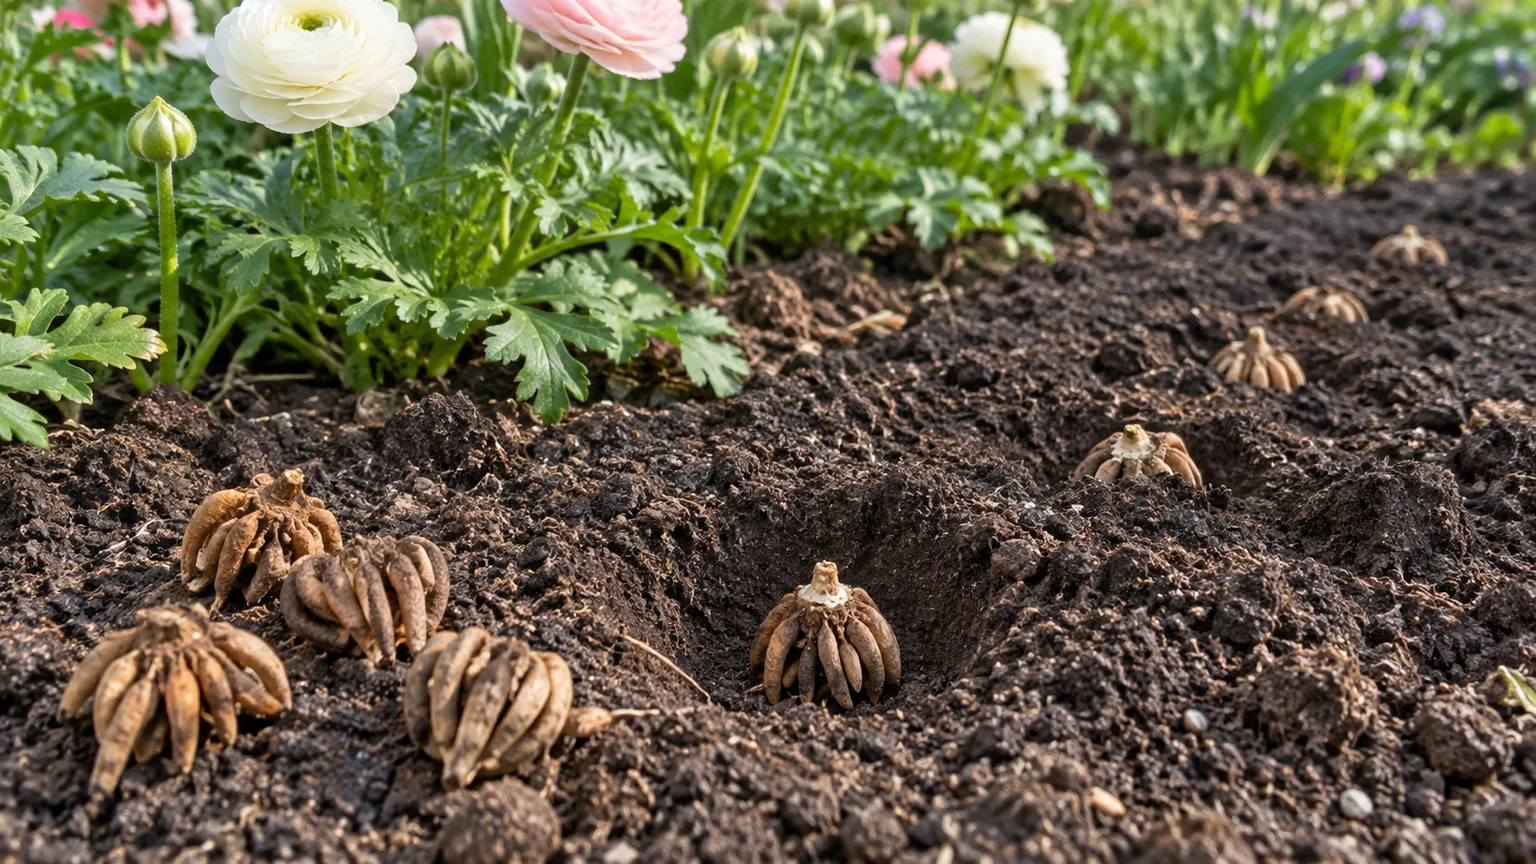
Cover the corms with soil and water once to settle it around them. Then let drainage and weather determine the next watering rather than soaking the bed on a fixed schedule. Mark the row so you do not dig it up while waiting; new growth can take a few weeks, especially in cool soil.
Grow Persian buttercups in pots
A container is a practical choice when garden soil is clay-heavy, winter rain is persistent, or you want to move the flowers out of a hot corner. Choose a pot with several clear drainage holes and enough depth for the roots to establish. Use a loose, quality potting mix, and elevate the container slightly if its base would otherwise sit in a puddle on a patio.
Plant corms at the depth and spacing on the package, leaving room for air to move through the foliage. Pots are tempting to crowd because the surface looks empty on planting day, but an overfilled container dries unevenly and makes it harder to spot rot.
Set it where it receives strong light during cool weather, and move it before the growing area becomes an oven. A saucer can catch runoff, but empty it after watering; standing water defeats the point of using a well-drained pot.
Water and feed during active growth
After shoots appear, keep the root zone evenly moist but never waterlogged. Check the soil with a finger instead of watering because a calendar says it is time: if the surface is dry but the soil beneath is cool and damp, wait.
Water when the upper layer begins to dry, then soak the root zone and let excess drain. Rainfall counts, and containers usually need checks more often than in-ground beds.
Apply water to the soil rather than splashing foliage late in the day. That keeps leaves from staying wet overnight and helps reduce conditions that favor fungal problems.
If a bed is mulched, keep mulch away from the corm crown and avoid a thick layer that holds water against the stems. In cool, rainy weather, less irrigation is usually the safer adjustment.
A modest dose of compost before planting may improve soil structure. If you use a packaged fertilizer, choose a balanced product and follow its label for the crop and container; there is no need to double the rate to force flowers.
Excess nitrogen can produce soft leafy growth, while too much water can damage roots even when foliage looks lush. A Country Living growing guide that includes advice from a flower farmer likewise stresses moist, not drenched, soil and airflow around foliage. Stop feeding as plants approach natural summer dormancy rather than trying to make them bloom through heat.
Extend the bloom window and deadhead cleanly
Flowers open as temperatures stay cool and days brighten, usually in spring. Fall-planted corms can bloom earlier than spring-planted ones, but the exact start and duration depend on region, cultivar, and when warm weather arrives. A display that lasts several weeks is common under favorable conditions; a hot spell can shorten it even if watering and feeding have been sensible.
Remove faded flowers by cutting the stem down toward its base with clean snips. This keeps the bed tidy and discourages the plant from diverting energy into seed after the bloom is spent.
Leave the foliage in place. Green leaves still replenish the underground storage root, so cutting all the leaves when flowers fade can reduce the chance of a strong plant next season.
Cut stems at the right stage
For a vase, harvest when the bud has developed color but is still partly closed and feels springy rather than fully soft. Cut in the cooler part of the day with clean snips, and place stems in clean water promptly. Floret reports that well-timed ranunculus can last around ten days or longer as a cut flower, but the actual vase life depends on variety, harvest stage, water hygiene, and room temperature.
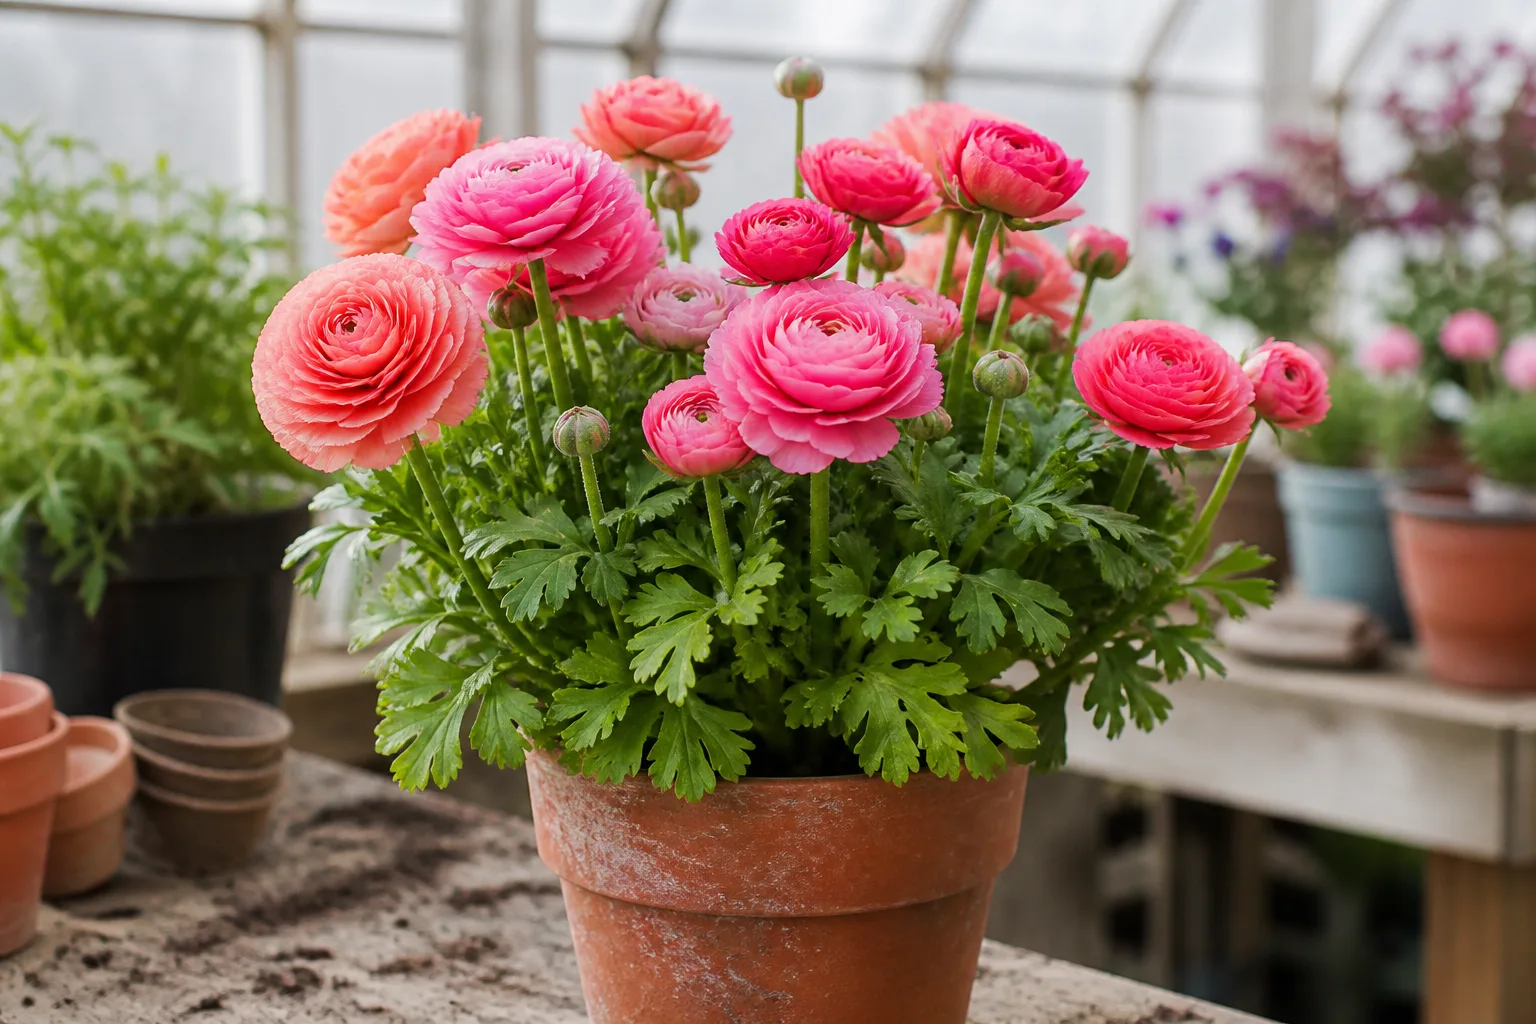
If you want both a garden display and bouquets, harvest selectively instead of cutting every stem from one clump. Remove a spent bloom at the stem base, but leave enough leaves to feed the corm. Keep a bucket of cut stems out of direct sun and away from heaters while arranging; heat speeds opening and wilting.
Troubleshoot slow growth, rot, and weak flowering
Start with the corm and the soil before reaching for fertilizer. Persian buttercups often struggle because the planting window was too cold or too warm, or because moisture stayed around the roots too long. Look at the whole sequence: how dry the corm was on arrival, whether it was soaked, how quickly the bed drains, and whether the plant is still in its natural cool-season growth period.
Above-ground problems deserve a different check. Look under leaves for aphids or mites, and watch crowded foliage during cool, damp spells for powdery mildew or gray mold.
Improve spacing and airflow, remove badly affected plant material, and water at the soil line; if the damage keeps spreading, ask a local extension service to identify the cause before choosing a treatment. Country Living lists these pests and fungal problems among ranunculus concerns, but symptoms can overlap, so a close look matters more than guessing from one yellow leaf.
Soft corms or no shoots
A soft, dark, or foul-smelling corm is usually rotten and will not be rescued by more water or fertilizer. Remove it and check whether nearby soil stays saturated; correct drainage before planting replacements.
If corms disappeared, look for signs of digging or animal activity as well as decay. A container or a protected trial bed can help distinguish a pest problem from a planting problem.
If corms remain firm but have not sprouted, check the planting date and soil temperature. Cold soil can slow emergence, and dormant roots do not send up leaves on a precise calendar.
Keep the bed lightly moist, not wet, and wait rather than repeatedly digging to inspect. If the season has already become hot, the corm may have missed its best window; store unused firm corms dry and cool according to the supplier’s instructions, or try again in the next suitable season.
Yellow leaves or few flowers
Yellow foliage can signal several different things. When it appears after flowering as weather warms, it may be normal dormancy.
When leaves yellow early while soil is wet, roots may be stressed or rotting; when stems stretch and flowers are scarce, the site may be too shaded. Check the soil moisture and hours of sun before changing fertilizer.
If foliage is plentiful but bloom is weak, consider excessive nitrogen, deep shade, or a spring that warmed too quickly. Do not use a high-phosphorus product as a quick fix without evidence that soil fertility is the problem.
Remove badly diseased leaves, improve spacing and airflow next time, and avoid overhead watering if mildew or gray mold appears. Treat persistent, spreading disease according to locally appropriate extension advice rather than applying a pesticide by guesswork.
Handle summer dormancy and overwinter corms
When spring flowers finish and temperatures rise, the plant may slow down, yellow, and die back above ground. That seasonal retreat is expected for this cool-season species. While foliage remains green, continue modest care so it can replenish its storage root; once it has yellowed naturally, reduce watering and let the soil dry.
Whether to leave corms in place depends on winter cold, summer wetness, and drainage. In a mild climate with dry, free-draining soil, some may survive outdoors and return, but even favorable hardiness zones do not guarantee that every cultivar will persist.
NC State Extension lists dry storage as an option, and Floret advises growers not to count on overwintered corms. In cold or wet gardens, lift the roots after the foliage dries, brush off loose soil, and let them cure in a shaded, airy place before storing them cool and dry. Discard soft or moldy stock before replanting.
A container makes the decision easier: stop watering as the foliage fades, let the pot dry, and move it to a cool, protected place if the cultivar and local conditions support storage. Do not keep a dormant pot in a warm, damp room. If storage has repeatedly produced weak or rotten corms, growing ranunculus as a seasonal annual and buying fresh planting stock may be the more reliable choice.
Propagate by offsets or seed
A mature corm can form smaller offsets, which may be separated after the plant has finished growing and the storage roots are dry. Handle the brittle roots gently and keep each division intact; tiny damaged pieces are less likely to establish. Replant offsets in a suitable cool season, but expect smaller divisions to take time to reach the size and strength of a flowering corm.
Seed is possible but is slower and less predictable for the double-flowered hybrids sold as Persian buttercups. Seed-grown plants may not match the parent’s color or flower form, so it is a better route for experimentation than for reproducing a named cultivar. For a reliable repeat of a particular color, purchase that cultivar again or retain healthy offsets, and label each group before it goes into storage.
Handle plants safely around people and pets
Treat ranunculus as an ornamental, not an edible flower. NC State Extension notes that its sap can irritate skin and that ingestion can cause illness; the ASPCA’s buttercup entry lists buttercups as toxic to dogs, cats, and horses, with signs that include vomiting, diarrhea, and oral irritation. Wear gloves if you are prone to skin reactions, wash after handling cut or crushed stems, and keep corms and plant material away from children and pets who may chew them.
If a pet may have eaten any part of a ranunculus, contact your veterinarian or an animal poison-control service promptly and share the plant’s identity. Do not wait for symptoms or try to induce vomiting unless a professional tells you to. Keep bouquets and discarded trimmings out of reach as well; a vase does not make the plant safe to chew.
Conclusion
Persian buttercups reward gardeners who match planting time to their local cool season and give the roots a bright, well-drained home. Start with firm dormant corms, follow the supplier’s soaking guidance, plant claws down at the recommended depth, and water according to soil conditions rather than a fixed weekly rule.
Fall planting can bring earlier flowers in mild, well-drained gardens; spring planting or protected starts make more sense where hard freezes dominate. Deadhead blooms, let healthy foliage fade naturally, and treat overwintering as a climate-dependent experiment. That plan gives the flowers their best chance without mistaking a short spring season or a failed wet corm for a lack of gardening skill.