How to Grow Wasabi at Home: A Complete Care Guide
Grow wasabi in a container or shaded bed with practical guidance on starts, soil, water, heat, pests, propagation, and a realistic rhizome harvest timeline.
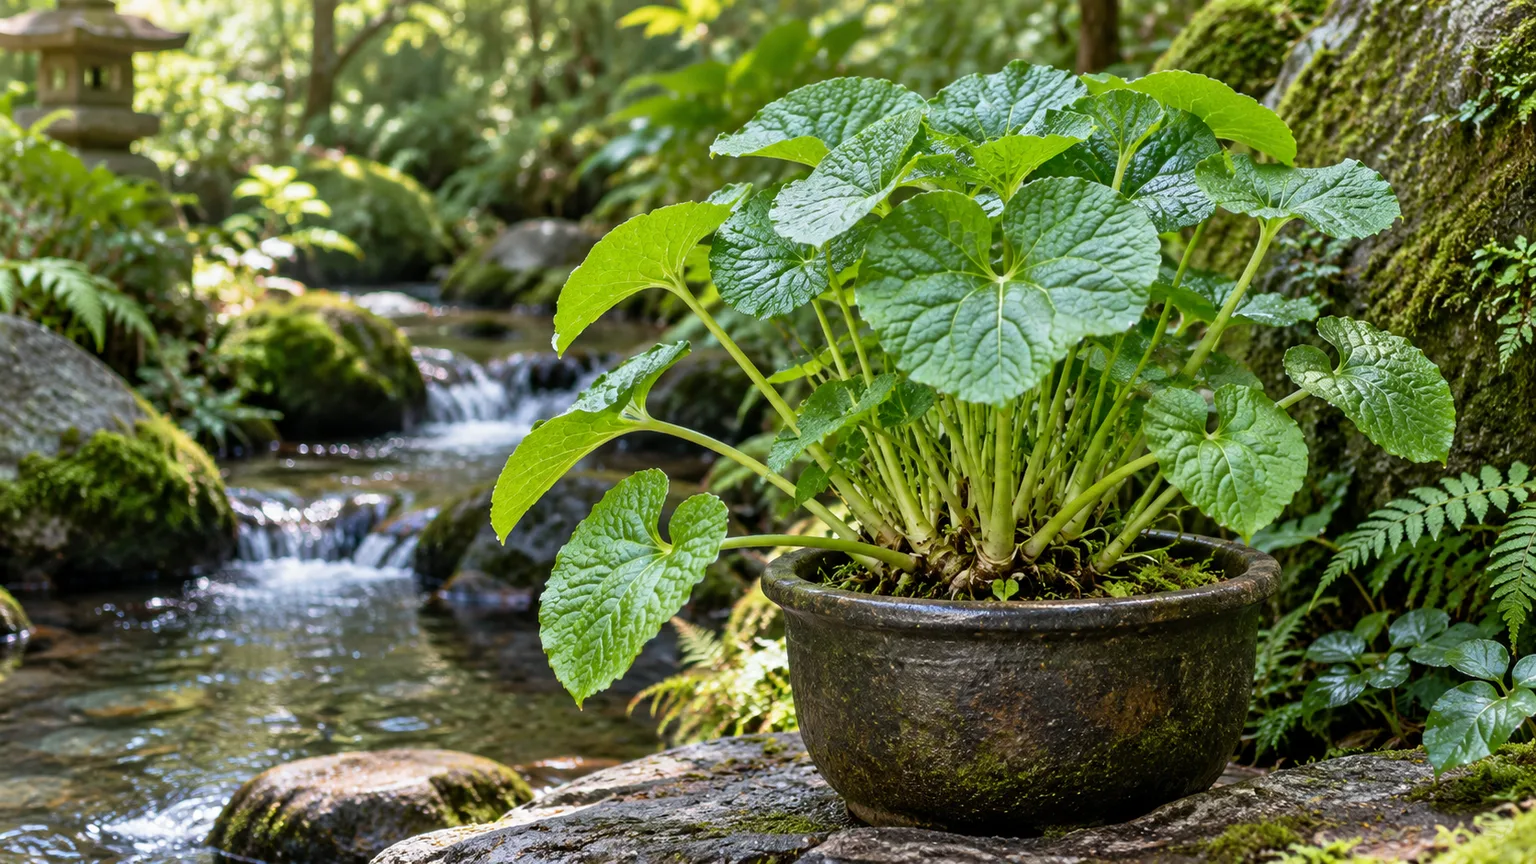
Real wasabi can grow in a home garden, but it is not a low-effort kitchen herb. The plant wants cool air, deep shade, high and steady moisture, and a root zone that still drains freely. If your summers are hot, your soil stays wet after rain, or the only available spot gets direct afternoon sun, plan to grow it in a movable container or consider a different crop.
Start with a correctly identified plant, then solve the climate and drainage problem before you buy it. The rhizome may take one to three years to reach harvestable size, depending on the cultivar and growing conditions, so success is measured first by healthy leaves and steady growth—not by a quick sushi harvest.
Is Real Wasabi a Realistic Home-Garden Crop?
Wasabi is the edible perennial commonly listed as Eutrema japonicum; many sellers and older references use Wasabia japonica. It belongs to the mustard family, Brassicaceae, and grows naturally in cool, shaded, humid places in Japan and nearby parts of East Asia. The familiar condiment is grated from the plant’s swollen stem, or rhizome. The plant also produces edible leaves and leaf stalks, but those are not substitutes for the mature rhizome when your goal is fresh wasabi paste. NC State Extension describes the plant as a difficult crop even in suitable settings and notes that rhizomes can take up to three years to mature. NC State Extension
Check the botanical name before purchasing. “Wasabi arugula,” “wasabi mustard,” and similarly named greens are usually spicy varieties of other plants, not true wasabi. They can be useful crops, but they will not produce the same rhizome. A reputable nursery should identify the plant as Eutrema japonicum or Wasabia japonica and explain whether it is selling a rooted start, an offset, or seed.
Use this quick feasibility check:
| Your growing space | Likely approach |
|---|---|
| Cool, humid summers; shaded bed with rich, draining soil | Plant a rooted start in the bed and monitor summer heat |
| Warm summers or changeable light; protected patio or cool greenhouse | Use a container that can move to deeper shade or a cooler room |
| Hot, dry summer; no cool indoor space and no reliable shade | Wasabi is a risky purchase; try a shade-tolerant leafy crop instead |
| Heavy clay, standing water, or a sunny bed only | Improve drainage and shade first, or grow in a pot |
USDA hardiness-zone labels alone cannot tell you whether a site will work. A plant may survive winter in a broad zone range yet struggle through a long hot summer. Focus on the temperature around the leaves and the root zone, how quickly the soil drains, and whether you can intervene when a heat spell arrives.
Choose a Planting Method Before You Buy
For most home growers, a nursery start is the clearest path. Wasabi seed can germinate, but it is slow and inconsistent, and seed listings using the word “wasabi” do not always mean the true species. Decide whether you want to experiment with propagation or simply establish one plant before spending time on seed sourcing.
Why a nursery start usually saves time
Look for a healthy rooted plantlet or young plant from a specialist grower. Choose one with firm stems, unblemished leaves, and a visible crown rather than a bare or shriveled rhizome. Ask the seller for the botanical name, the age of the start, how it has been grown, and its recent light and moisture conditions; a plant moved abruptly from a humid nursery to dry afternoon sun can decline even when the garden is otherwise suitable.
Keep a shipped plant cool and lightly moist while you prepare its new home. Do not leave roots sealed in a soaking bag or standing water. If you cannot plant immediately, follow the grower’s storage instructions and avoid letting the crown dry out. When you plant it, remove leaves that are clearly damaged, but preserve healthy foliage that the start needs to establish itself.
When seed is worth attempting
Seed makes sense if you enjoy a slower propagation project and can verify the species. NC State Extension reports that wasabi seed needs a cold period of roughly two months before germination; it can be sown in late fall or conditioned in a refrigerator before sowing. Follow the seed supplier’s instructions for temperature and handling, because seed age, moisture, and storage all affect germination. NC State Extension
Sow more than one seed if you need a plant, since not every seed will sprout and young seedlings are vulnerable to drying and temperature swings. Keep the medium evenly moist, not saturated, and place seedlings in bright shade once they emerge. Expect a longer wait before harvest than with a mature plantlet. If the seed packet says “wasabi” but identifies rocket, arugula, or mustard, you are growing a flavorful green, not a rhizome-producing wasabi plant.
Give Wasabi the Climate It Needs
A cool, shaded microclimate is the main requirement that separates a workable site from a frustrating one. Utah State University Extension describes an optimal growing-season temperature near 50–60°F, while NC State Extension gives a broader growing range of about 46–70°F. These are guidance ranges, not universal thresholds at which every plant suddenly fails; humidity, sun exposure, wind, and root temperature affect how a plant responds. Together, the sources point to a clear rule: aim for cool conditions and protect wasabi from prolonged heat. Utah State University Extension and NC State Extension
Light and shade
Give wasabi deep shade outdoors, especially during the afternoon. Utah State recommends at least 75 percent shade, and NC State lists deep or dappled shade as suitable. A north-facing wall, the protected side of a building, or the space below a high tree canopy can work if the spot stays cool and has enough open air movement. Avoid placing the pot where a reflective wall or paving heats it even if direct sunlight does not hit the leaves.
Shade is not the same as a dark room. The plant needs enough indirect light to sustain foliage, but it does not need a sunny vegetable-bed position. If leaves bleach, crisp at the edges, or droop soon after the sun reaches them, add shade or move the pot before increasing water. Shade cloth can help in a bright site, but a movable pot offers more control when sunlight and temperature both change during the day.
Temperature and humidity
Wasabi grows best where the air and roots stay cool and humid without becoming stagnant. A streamside habitat is a useful clue about the kind of microclimate to recreate, not a requirement to install a stream. Washington State University Extension describes traditional wasabi cultivation in cold, flowing water, while home-garden references also describe container and soil-grown methods. At home, steady moisture, drainage, shade, and airflow matter more than imitating a commercial water bed exactly. Washington State University Extension and Epic Gardening
In warm climates, try the plant in a pot you can move during heat waves. A cool greenhouse, shaded porch, or bright, air-conditioned room may provide a temporary refuge when outdoor conditions become too hot. Do not move it from deep shade into a strong indoor grow light or a bright window without acclimating it. In cold-winter areas, protect the plant from hard freezes; container growing makes it easier to move the root ball to a cool, protected place.
Build a Moist but Well-Drained Root Zone
Wasabi likes a root zone that stays evenly moist, but that does not mean the roots should sit in stagnant water. Utah State University Extension recommends loose, organic-rich soil around pH 6–7 and warns that the crop is difficult in dry climates with freezing winters. NC State Extension similarly describes a moisture-retentive but well-drained medium. The practical target is soil that feels cool and damp below the surface, with enough pore space for air and excess water to escape. Utah State University Extension and NC State Extension
For a garden bed, choose a location where water does not pool after rain. Work in mature compost to improve organic matter, then check the drainage before planting. If the soil is heavy clay, a raised bed or container is usually easier to manage than trying to keep a deep, wet hole aerated. A simple pH test can guide whether your soil is near the mildly acidic-to-neutral range; avoid adding sulfur or lime by guesswork.
For a container, use a deep pot with several open drainage holes and a quality potting medium that holds moisture without packing down. A blend with a substantial organic base plus a coarse ingredient such as fine bark, pumice, or perlite can help balance water retention and airflow. Do not use garden soil in a pot, and do not let the pot drain into a full saucer for hours. The plant wants repeated access to moisture, not a waterlogged root ball.
Plant Wasabi Starts in a Pot or Bed
Plant in spring when conditions are cool and the site is ready. Utah State University Extension suggests spacing garden plants about 12 inches apart and planting the roots fully while keeping the soil up to the base of the lowest stems. In practice, set the roots below the surface and keep the crown—the point where leaf stems emerge—at or just above the finished soil line. Burying the crown under a heavy layer of wet mix can trap moisture against the growing point; leaving the roots exposed lets them dry. Utah State University Extension
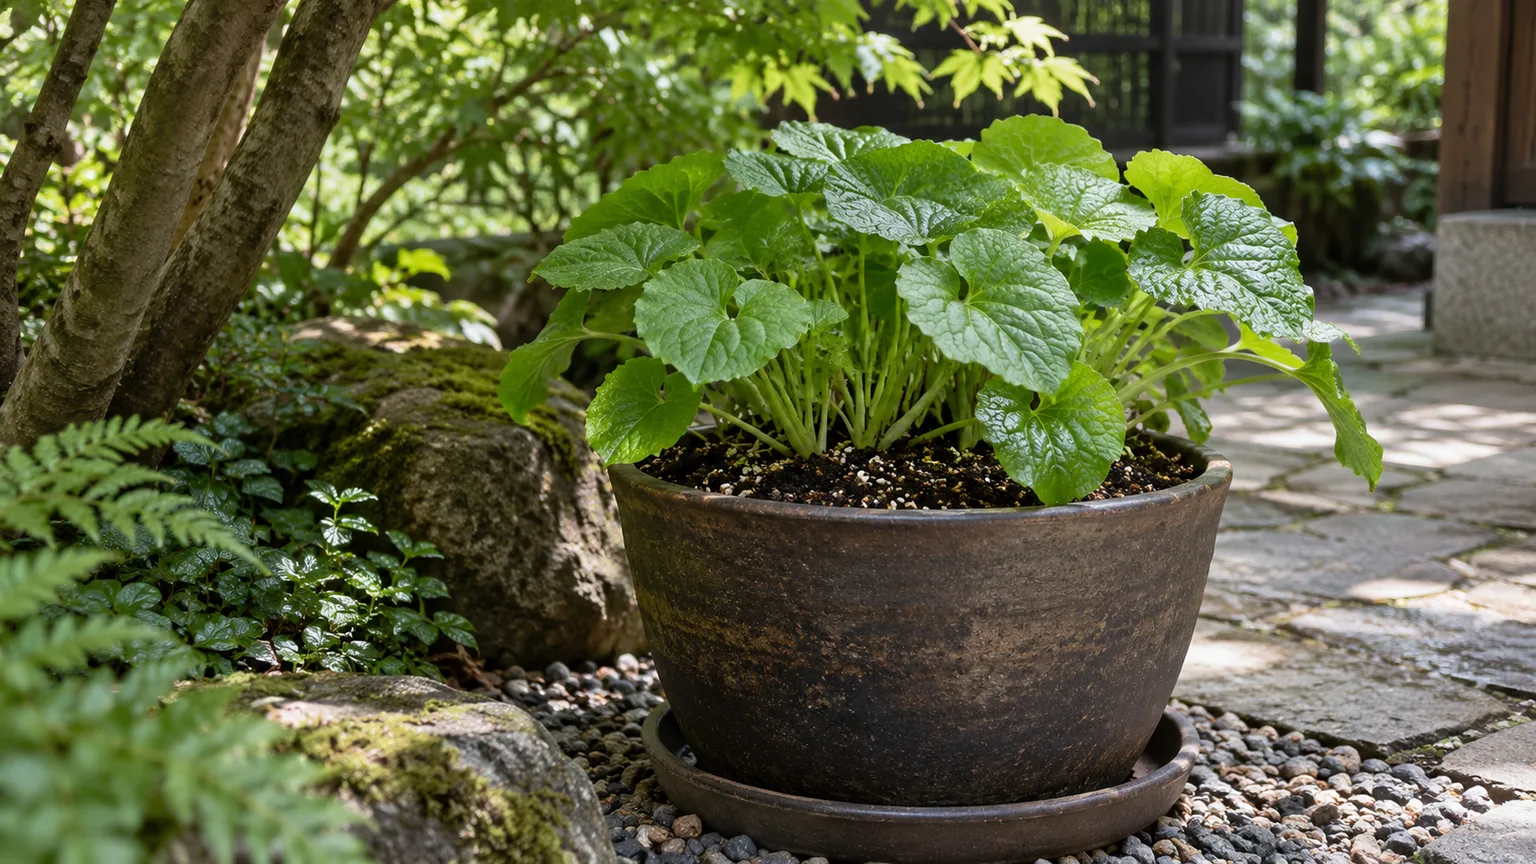
A container gives you a useful “climate control” tool. Use a pot roughly 10–12 inches deep with drainage holes, and choose a width that gives the roots room to establish. A larger container dries more slowly than a small nursery pot and is less likely to swing from soggy to dry in a day. Set it in deep shade with airflow, and use a saucer only to catch runoff—empty it after watering rather than letting the pot stand in water. Garden writer guidance from Homes & Gardens and The Wasabi Company also favors container growing when it helps gardeners adjust the plant’s conditions.
For an in-ground start, prepare the whole planting area rather than adding a small pocket of rich mix to compacted soil. A sharp change between amended soil and dense native soil can leave water trapped in the planting hole. Space plants about a foot apart, mulch lightly with compost or leaf mold to slow evaporation, and keep mulch away from direct contact with the crown. Water thoroughly after planting so the soil settles around the roots without leaving a puddle.
Water, Feed, and Adjust Care by Season
Once established, wasabi needs consistent attention to moisture and temperature. Check the soil every few days at first so you learn how quickly the pot dries in your conditions. A calendar can remind you to inspect, but it cannot decide when to water: a cool week, a larger pot, a warm wall, and a windy spell all change water use.
Water by root-zone condition, not a fixed calendar
Water when the surface begins to lose its damp look and the mix below still feels lightly moist. If the top few centimeters are dry and the pot feels lighter, water slowly until it runs from the drainage holes, then empty any collected runoff. If the mix is still wet and heavy, wait and improve airflow or drainage rather than adding more water. This simple check helps prevent both drought stress and the root-rot risk that comes with a continuously saturated pot.
In a garden bed, mulch can reduce rapid drying, but it does not replace checking the soil. During hot weather, inspect daily; during cool, cloudy weather, the interval may be longer. Avoid frequent overhead misting as a substitute for watering the roots. Misting does little to correct dry soil, and repeatedly wet foliage in a still area can prolong leaf wetness and encourage disease. Direct water at the root zone and keep air moving through the leaves.
Feed lightly and avoid untested sulfur amendments
Start with fertile soil and feed modestly while the plant is actively growing. Utah State Extension notes that Japanese growers use slow-release balanced fertilizer and that sulfur-containing fertilizer may influence rhizome pungency. That observation is not a reason to add garden sulfur or a high-sulfur fertilizer automatically: the correct amount depends on the product, soil, and pH, and excess fertilizer can damage roots or upset the soil balance. Use a soil test for an in-ground bed and follow the fertilizer label for containers. Utah State University Extension
A light top-dressing of mature compost can maintain organic matter, but do not pile it over the crown. If new growth is pale or unusually slow, check light, root condition, and temperature before assuming the plant needs more fertilizer. A wasabi plant held in heat or standing water will not be fixed by feeding it.
Troubleshoot Heat, Rot, and Chewed Leaves
When wasabi declines, check the site before reaching for a spray bottle or fertilizer. Start with the simplest order: recent sunlight and temperature, soil moisture, drainage, then pests. The leaves often show stress before a rhizome problem is visible.
| What you see | First checks | Useful response |
|---|---|---|
| Sudden drooping on a warm or sunny day | Afternoon sun, hot paving, dry pot | Move to deeper shade and check root-zone moisture |
| Yellow or scorched leaf edges | Heat, direct sun, dry wind, salt buildup | Cool the plant, water consistently, and pause feeding until stable |
| Soft crown or foul-smelling roots | Saturated mix, blocked holes, water-filled saucer | Remove standing water, improve drainage, and inspect damaged roots |
| Irregular holes in leaves | Slugs, snails, caterpillars | Inspect at dusk and remove pests by hand where practical |
| Sticky, curled new growth | Aphids on leaf undersides and stems | Rinse pests away and recheck new growth over several days |
Aphids, slugs, snails, and some caterpillars can feed on wasabi. NC State Extension also lists leaf spot, root rot, and rhizome rot among possible problems. Remove badly damaged leaves and clear fallen foliage, but keep healthy leaves so the plant can continue growing. If considering a pesticide, use only a product labeled for the intended edible crop and pest, and follow its label, including harvest restrictions; treatment options vary by location. NC State Extension and Utah State University Extension
Root rot is harder to reverse than a brief wilt. If the mix smells sour, roots are dark and soft, or the crown is collapsing, stop keeping the pot saturated and check whether its drainage holes are blocked. Cut away only clearly rotten tissue with a clean tool, then repot into fresh, airy medium if healthy roots and crown remain. If rot has reached the crown or most of the rhizome, saving that plant may not be realistic; correct the wet-site cause before trying again.
Harvest Leaves and Mature Rhizomes
Harvesting depends on the goal. A young plant can provide a small number of leaves or leaf stalks once it is actively growing, but removing too much foliage slows the plant that you are trying to mature. Pick only a few outer leaves from a vigorous plant and leave the center and most of the canopy intact. The leaves can season cooked greens or pickles. Wash them well; NC State Extension notes that raw leaves can cause diarrhea, so cooked preparations are a more cautious first use if you are unsure how they will affect you. NC State Extension
For the rhizome, plan on patience. Published guidance ranges from about two years to as long as three, and the actual timing depends on the start’s age, cultivar, season length, and stress. Utah State Extension describes a roughly two-year crop with rhizomes several inches long, while NC State Extension notes that a rhizome can take up to three years to reach a useful size. Use those figures as a range, not a guarantee. Utah State University Extension and NC State Extension
The rhizome is the thickened stem at the base of the leaf stalks, not a conventional root. It may become visible above the soil as it grows, but appearance alone does not tell you exactly how pungent or mature it is. If you need to check progress, gently brush soil away from one side rather than pulling a young plant out repeatedly. Harvest the whole plant when the rhizome has developed enough to justify it, then separate any healthy basal offsets for replanting.
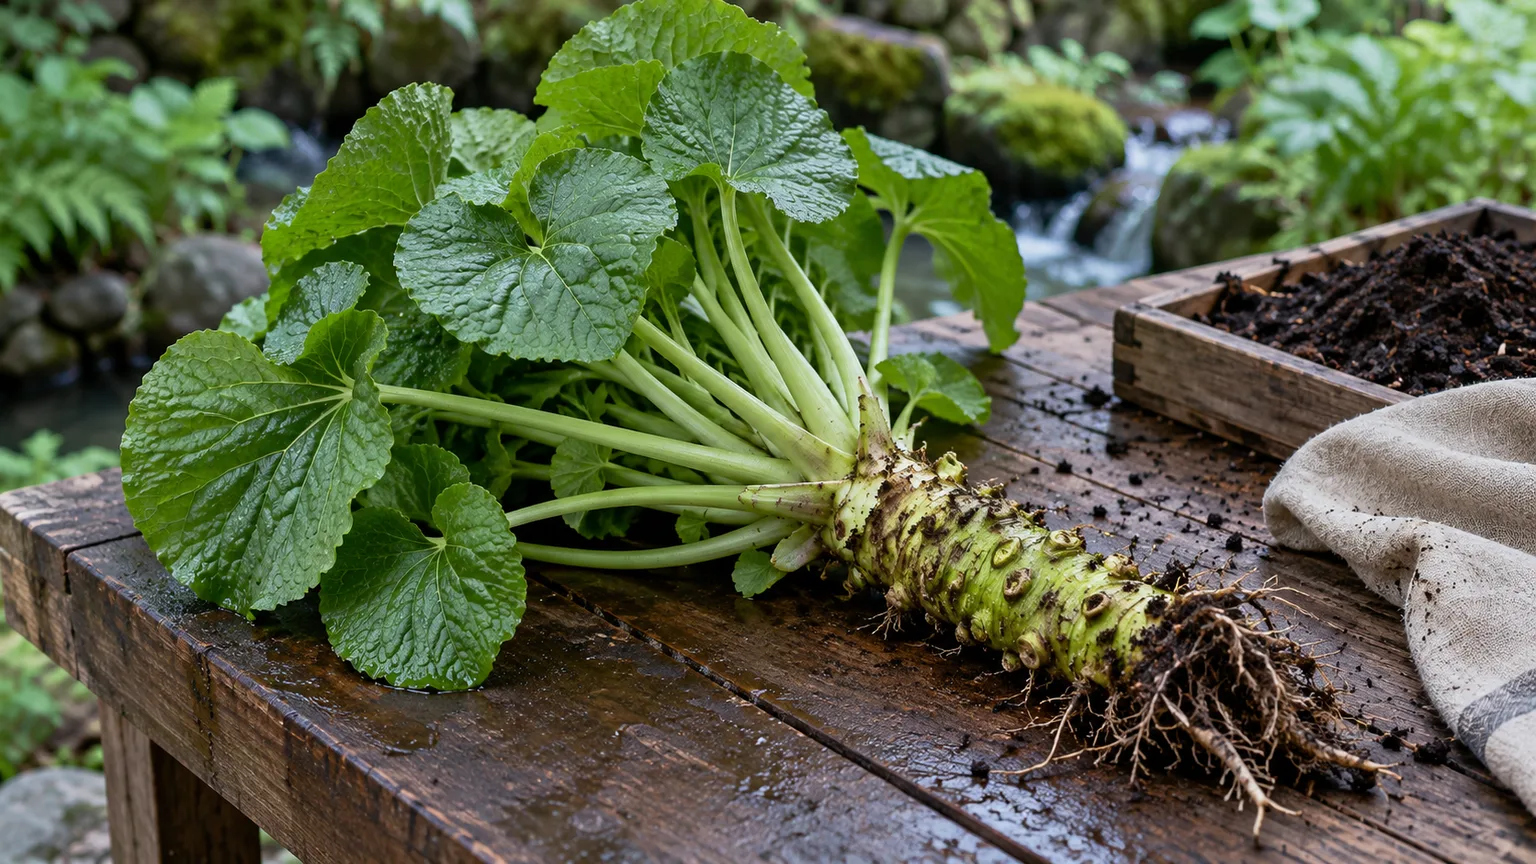
Rinse the rhizome and grate only the amount you plan to serve. NC State Extension notes that the best flavor comes from grating soon after harvest; fresh wasabi’s aroma fades with time, so it is most rewarding when prepared close to serving. Refrigerate any unused rhizome promptly and follow safe produce-handling practices. A small home-grown rhizome is a satisfying harvest, but it should not be mistaken for a large, guaranteed yield from one plant.
Propagate Wasabi from Plantlets
Mature wasabi plants may produce small offsets around the base. These plantlets are generally a more dependable home propagation route than starting from seed, provided an offset has its own roots or a viable growing point. When you harvest or repot a mature plant, separate a rooted offset gently with a clean blade, keeping as much root tissue attached as possible. Pot it into moist, free-draining medium and keep it in deep shade while it establishes.
Do not divide a small or stressed plant just because it has a tiny side shoot. The parent needs a healthy leaf canopy and intact crown to keep growing, while an offset without roots may dry out before it can establish. Keep the new plant slightly moist and protected from wind; once new leaf growth appears, gradually return it to the same cool, shaded conditions as the parent. If you do not have a mature plant to divide, buying a rooted start is simpler than expecting a seedling to produce a harvest quickly.
Conclusion
Wasabi is possible at home when you can keep it cool, shaded, evenly moist, and well drained. A container is often the most forgiving starting point because you can move it when a heat wave, harsh sun, or winter freeze threatens the plant. Begin with a verified Eutrema japonicum start, set the crown at soil level, check moisture by feel, and treat stress as a clue to inspect the environment before adding fertilizer or water.
Expect foliage first and a rhizome later. Give the plant time, take only modest leaf harvests, and wait until the rhizome has reached a useful size before pulling the whole plant. If your garden cannot provide the needed microclimate, growing a spicy “wasabi” green is a reasonable alternative—but it is a different crop from true wasabi.