How to Grow Lima Beans: Why Soil Temperature Matters
Grow lima beans with a soil-temperature planting rule, clear bush-versus-pole advice, practical watering guidance, and steps for fresh and dry harvests.
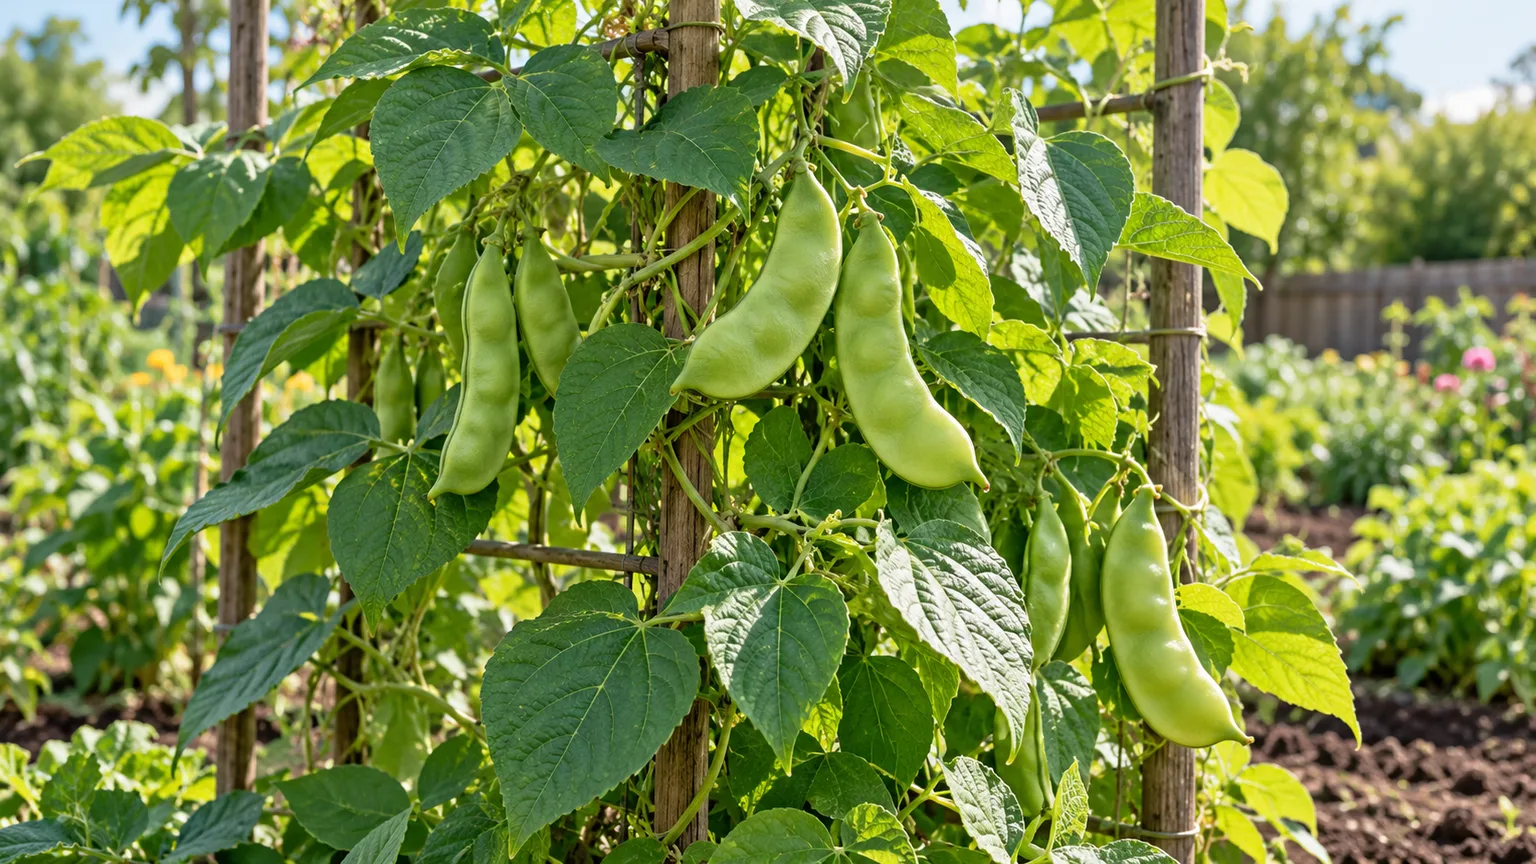
Lima beans are warm-season shelling beans, not snap beans: you eat the plump seeds inside the pod rather than the pod itself. The most reliable way to start them is to wait for frost danger to pass and confirm that the soil is warm, because a sunny forecast does not mean a cold spring bed is ready. From there, choose a bush type for a compact, concentrated crop or a pole type if you can provide sturdy vertical support and want a longer picking window.
Lima bean growing at a glance
| Decision | Practical starting point | Why it matters |
|---|---|---|
| Planting time | After frost danger, when soil is consistently at least 65°F; warmer soil usually gives more even emergence | Lima seeds are sensitive to cold, wet ground |
| Site | Full sun, loose soil, and drainage that prevents standing water | Roots need air as well as moisture |
| Growth habit | Bush for compact plants and a concentrated harvest; pole for vertical growth and repeated picking | Support and space depend on the cultivar |
| Water | Keep the root zone evenly moist, with extra attention during flowering and pod fill | Dry spells can interrupt pod set |
| Harvest | Pick green pods when seeds are filled for fresh shelling, or wait until pods dry for storage beans | Harvest stage changes texture and storage life |
These are starting points, not a rigid recipe for every cultivar or climate. Oregon State University Extension gives 65°F as a soil-temperature threshold and notes that germination is most favorable in warmer soil; your seed packet and local extension calendar can refine spacing and maturity expectations for your region.
Read soil temperature before choosing a planting date
Lima beans (Phaseolus lunatus) need a longer, warmer stretch than many gardeners expect from familiar green beans. Calendar dates help you plan, but soil temperature is the better final check. Utah State University Extension describes lima beans as warm-season crops that germinate best above 65°F, while Oregon State notes an ideal germination range around 75–85°F. Treat 65°F as a lower threshold, not a guarantee of rapid emergence; cold soil can delay sprouting and leave seed vulnerable to rot.
Measure the bed where the seeds will sit, at roughly the same depth you plan to sow, rather than reading a weather app’s daytime air temperature. Take readings in the morning for several days, especially after cool nights or rain. If the bed repeatedly falls below the threshold, wait; one warm afternoon does not make the root zone consistently warm.
Adjust the schedule for your region
In a cool-summer or short-season area, start with your local last-frost guidance, then check the soil. A seed packet’s “days to maturity” is an estimate under favorable growing conditions, so a cultivar listed at 65 days may take longer when spring soil warms slowly or summer nights remain cool. Choose an early bush cultivar if your frost-free window is limited, and avoid planting so late that pods are still filling when autumn cold arrives.
In a long, hot season, do not assume that earlier is always better. Wait until nights and soil are reliably warm, then plan the crop so flowering and pod fill are not concentrated in the hottest part of summer if your region regularly experiences heat stress. In very warm climates, local planting calendars may recommend a spring or late-summer window; follow that regional advice rather than applying a northern frost date to a different climate.
A simple decision rule works across regions: plant after frost risk has passed, when morning soil readings at seed depth stay above 65°F and the forecast offers a stable warm stretch. If your soil is still cold and saturated, a week of patience is usually more useful than sowing early and replanting a patchy row.
Choose bush or pole lima beans
The variety label tells you more than seed color. Lima beans grow as compact bushes or as climbing vines, and that choice changes the support, bed layout, harvest rhythm, and sometimes the time required to mature. NC State Extension’s plant profile lists both habits and includes named cultivars, while GardenersPath’s lima bean guide explains the practical difference between compact and vining types.
Check the packet for growth habit, mature height, days to maturity, and whether the variety is intended for fresh shelling or dry beans. Those traits are more useful than assuming every lima bean behaves like the same plant. If the packet is vague, look up the cultivar from a university or established seed supplier before setting the bed layout.
Bush types: compact plants and concentrated harvest
Bush limas suit raised beds and small gardens because they do not need a tall trellis. Many stay in the general range of 1 to 3 feet, though height and spread vary by cultivar. Their crop often matures over a shorter window than pole types, which is useful if you want to shell a batch at once or have a shorter frost-free season.
Compact does not mean unsupported in every situation. A bush plant loaded with pods can lean or sprawl, particularly after wind or heavy rain. Leave enough space for air to move through the row, and use a low cage or light stakes if stems bend under the crop; avoid tying stems tightly, which can constrict them as they thicken.
Pole types: longer vines and more picking
Pole limas need something strong to climb. Vines can grow several feet and carry heavy pods, so install a trellis, fence, or sturdy teepee before sowing; placing supports later risks damaging shallow roots and tangled stems. Confirm the expected mature height on the packet and anchor the support securely, especially in exposed gardens.
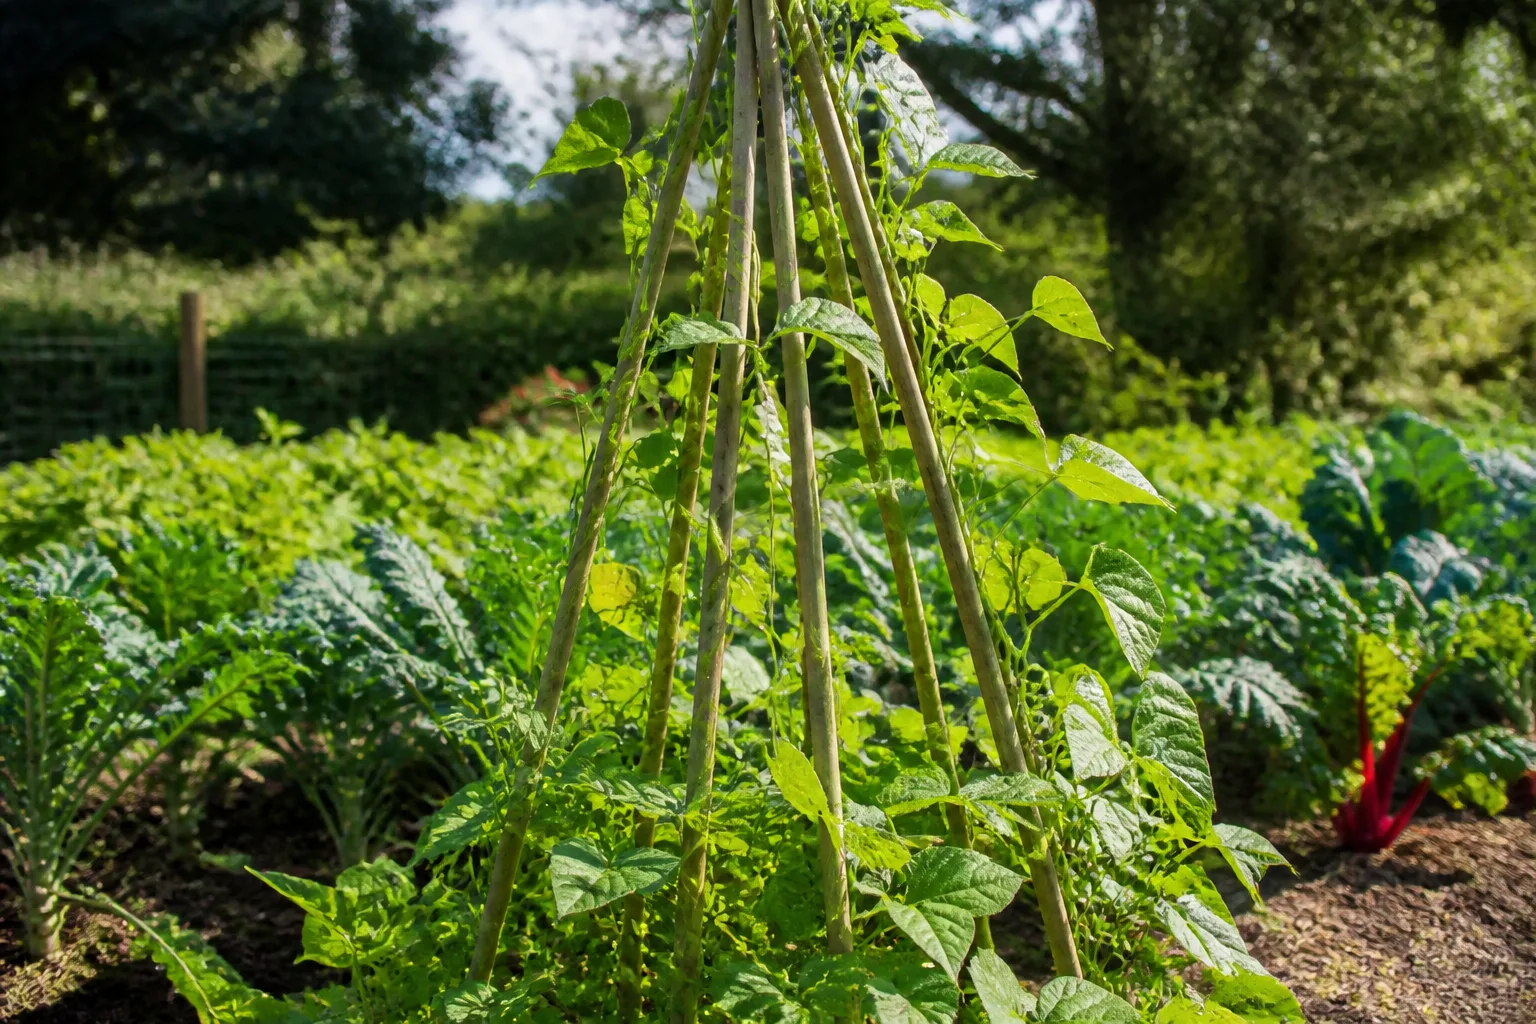
Guide young vines toward the support while they are still flexible, then let them climb rather than winding every stem tightly by hand. Pole plants usually spread production over a longer period, so pick every few days once pods begin to fill. If your garden has limited floor space but a long growing season, vertical growth can be a better fit than a bush row.
Prepare the bed and sow seed
Choose a spot where you can reach both sides of the plants without stepping into the root zone. Lima beans are usually direct-sown because moving established seedlings can disturb their roots, and seed is inexpensive compared with the work of nursing transplants. A raised bed is useful where soil drains poorly, but it still needs regular watering because it can dry faster than in-ground soil.
Give plants sun, drainage, and room
Give lima beans at least six hours of direct sun, with more sun generally supporting stronger growth and quicker drying of foliage after rain. Use loose, well-drained soil with moderate organic matter. If water stands after rain, improve drainage or use a raised bed; do not try to solve waterlogging by withholding water during later flowering and pod fill.
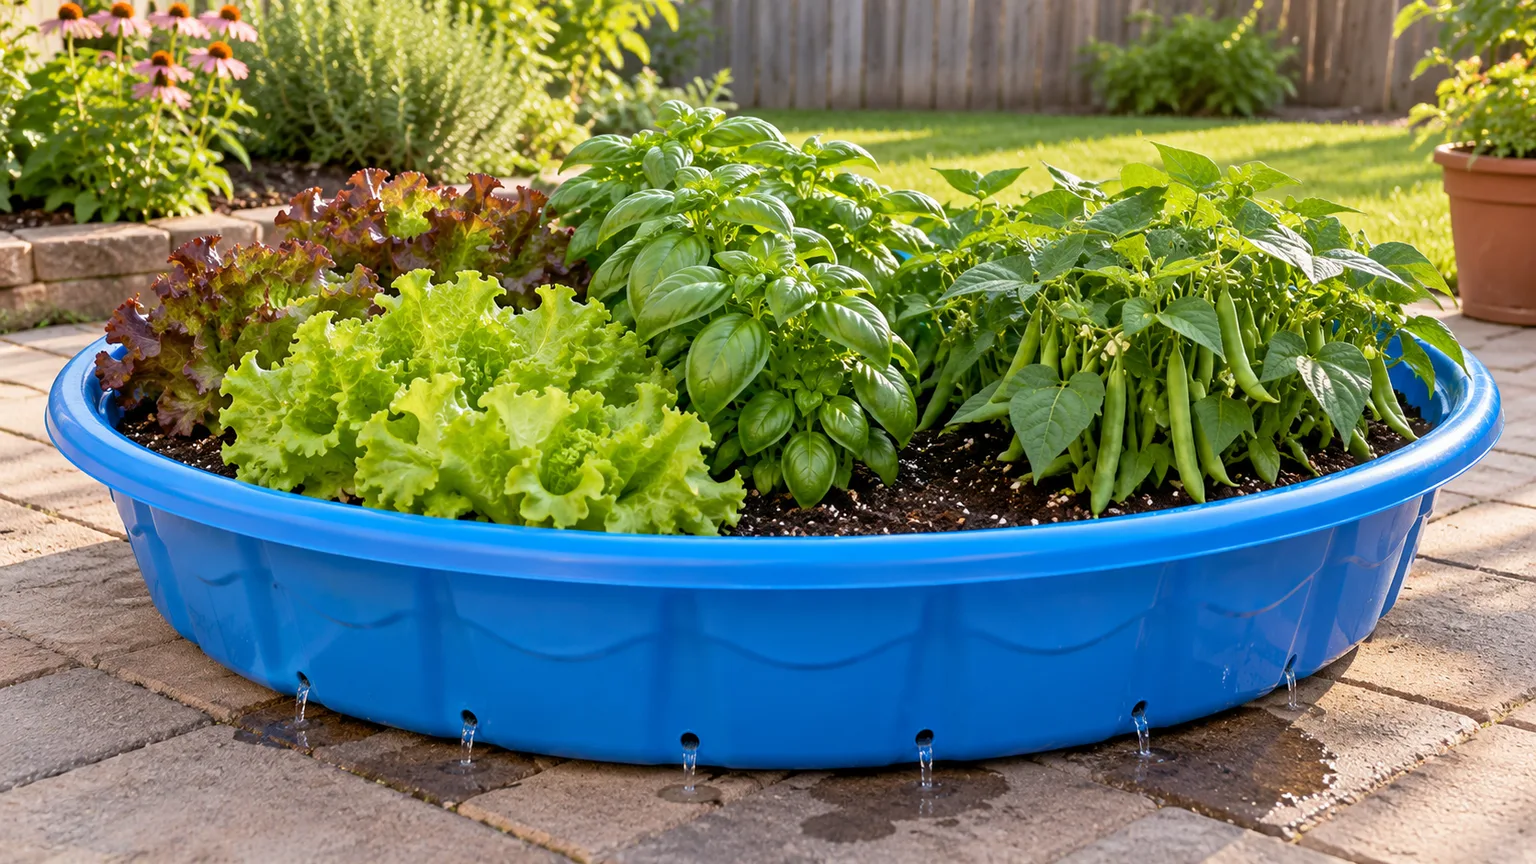
A patio grower can use a large container, but the setup needs enough soil volume to buffer moisture swings and a drainage opening that stays clear. A bush cultivar is often simpler in a pot; a pole cultivar can work if its trellis is firmly secured to the container or wall and will not tip in wind. Use a quality potting mix rather than heavy garden soil, and check moisture more often than you would in a bed because containers dry faster in warm weather.
Work finished compost into poor soil before planting, but avoid adding a high-nitrogen fertilizer by default. Legumes can associate with nitrogen-fixing bacteria, but that does not make them immune to poor soil or nutrient imbalance. A soil test is the best guide when a bed has a history of weak growth, while a modest compost amendment is often enough in an established vegetable garden.
Space according to the cultivar and packet. A common home-garden starting point for bush types is to sow seeds several inches apart and thin to roughly 4–6 inches between plants, with wider row spacing for airflow and harvest access. Pole varieties can be set closer along a trellis, but exact spacing depends on whether you are using a row, netting, or a teepee; overcrowding makes vines harder to inspect and can keep leaves damp.
Sow directly and protect germination
Set trellises first for pole varieties, then sow into moist—not saturated—soil. Lima seeds are relatively large; many gardeners sow around 1 inch deep, while some extension guides recommend a shallower range depending on seed size and soil texture. Follow the packet where it differs, cover the seed gently, and water once to settle the soil around it.
Do not soak seeds for a long time or plant them into cold, muddy ground in an effort to speed the season. Lima beans can be sensitive to cold water uptake, and a seed sitting in oxygen-poor soil may decay before it emerges. If the soil crusts after rain, break the surface carefully between rows rather than digging around the planted seed.
Germination can take a week or two or longer when conditions are not ideal. Mark the row so you do not hoe it by accident, and wait until seedlings are clearly established before thinning. If gaps appear, first diagnose the cause—cold soil, saturated ground, birds, or a dry seed zone—then re-sow only after conditions improve.
If you want to spread fresh-shelling harvests in a long season, you can sow a second small block after the first planting establishes, provided enough warm weather remains for that cultivar to mature. This is less useful in a short season or when you want all the dry beans to finish together. Let the seed packet’s maturity estimate and your first expected fall frost set the cutoff; successive sowing should extend the harvest, not leave pods stranded by cold.
Care for plants through flowering and pods
Once seedlings have several true leaves, care is mostly about steady moisture, weed control, and keeping plants from becoming crowded. Lima beans do not need elaborate pruning. Protect the root zone and keep the bed manageable so you can see flowers, inspect leaves, and pick pods without pulling at the vines.
Water evenly, especially during pod set
Keep soil evenly moist from emergence through harvest, but let excess water drain away. Water deeply enough to reach the roots rather than applying frequent light sprinkles that wet only the surface. If rainfall is irregular, use a rain gauge or check soil a few inches below the surface before watering; sandy soil and containers dry more quickly than loam.
Flowering and early pod formation are the stages when a dry spell can be especially costly. If flowers drop or young pods stop developing after hot, dry weather, restore consistent root-zone moisture and use mulch to slow evaporation. Do not compensate with a sudden flood; gradual, regular watering is easier on the plants and reduces the risk of waterlogged soil.
A layer of clean organic mulch can help conserve moisture after the soil has warmed. Keep mulch slightly away from the stems so the crown does not stay damp. In humid or rainy climates, prioritize drainage and airflow rather than piling on a thick moisture-holding layer.
Use rainfall as part of the watering plan instead of watering by habit. A week with a soaking storm may require no irrigation in a moisture-retentive bed, while a windy spell can dry a raised bed or pot quickly. Check below the surface near the root zone, not just the top crust, and aim to keep the soil consistently moist without leaving it saturated.
Feed modestly and control weeds carefully
Avoid heavy nitrogen applications unless a soil test identifies a need. Too much nitrogen can favor leafy growth at the expense of timely pod production, and fertilizer does not fix cold soil or drought stress. If plants are pale or stunted despite warm, well-drained soil and steady moisture, check for root damage, pH problems, and nutrient deficiencies before adding a balanced fertilizer.
Weed early while weeds are small, but keep tools shallow near the row. Bean roots spread close to the surface, and deep hoeing can cut them or loosen young plants. Pull larger weeds by hand after rain when the soil is soft, supporting the lima stem with your other hand rather than yanking the weed through the plant.
Do not remove healthy leaves to “open up” the plant unless foliage is damaged or diseased. Leaves supply energy for pod development; unnecessary pruning can reduce production. For pole types, redirect a loose vine toward the trellis when needed, but avoid forcing a brittle mature stem into a tight turn.
Solve common setbacks
A patch that fails to emerge is often a soil problem before it is a seed problem. Cold, wet soil slows germination and can rot seed; very dry soil can interrupt germination after the seed begins to swell. Check seed depth and moisture, then compare the bed’s morning temperature with the 65°F threshold before planting a replacement row.
If flowers appear but few pods form, review heat and moisture first. Lima beans are warm-season plants, but very high temperatures or water stress can disrupt flowering and pod set. Keep moisture even and avoid applying extra nitrogen as a quick fix; if extreme heat is persistent, a later planting may perform better in a region with a sufficiently long remaining season.
Yellowing lower leaves can result from normal aging, excess water, nutrient issues, or disease, so inspect the whole plant and soil before choosing a remedy. A sour smell, persistently wet soil, or soft roots points toward drainage trouble. Improve air movement by avoiding overcrowding, water at the base when practical, and remove badly diseased plant material rather than composting it if your home compost does not reliably heat.
Chewed leaves or seedlings may indicate insects or wildlife. Inspect both sides of leaves and check the bed at dusk if damage continues; use physical barriers for young plants where rabbits or birds are the likely cause. Identify a pest before applying any control, and follow local extension guidance for the specific insect and product rather than treating every leaf hole as the same problem.
Harvest for fresh shelling or dry storage
Lima beans can be harvested at two useful stages, and the right one depends on how you plan to cook or store them. Seed-packet maturity estimates help you begin checking, but pod feel and seed development are more reliable than the calendar because weather changes the pace of growth. Harvest to Table’s growing guide and GardenersPath both distinguish fresh shelling from dry-bean harvest.
Pick fresh pods when seeds fill them
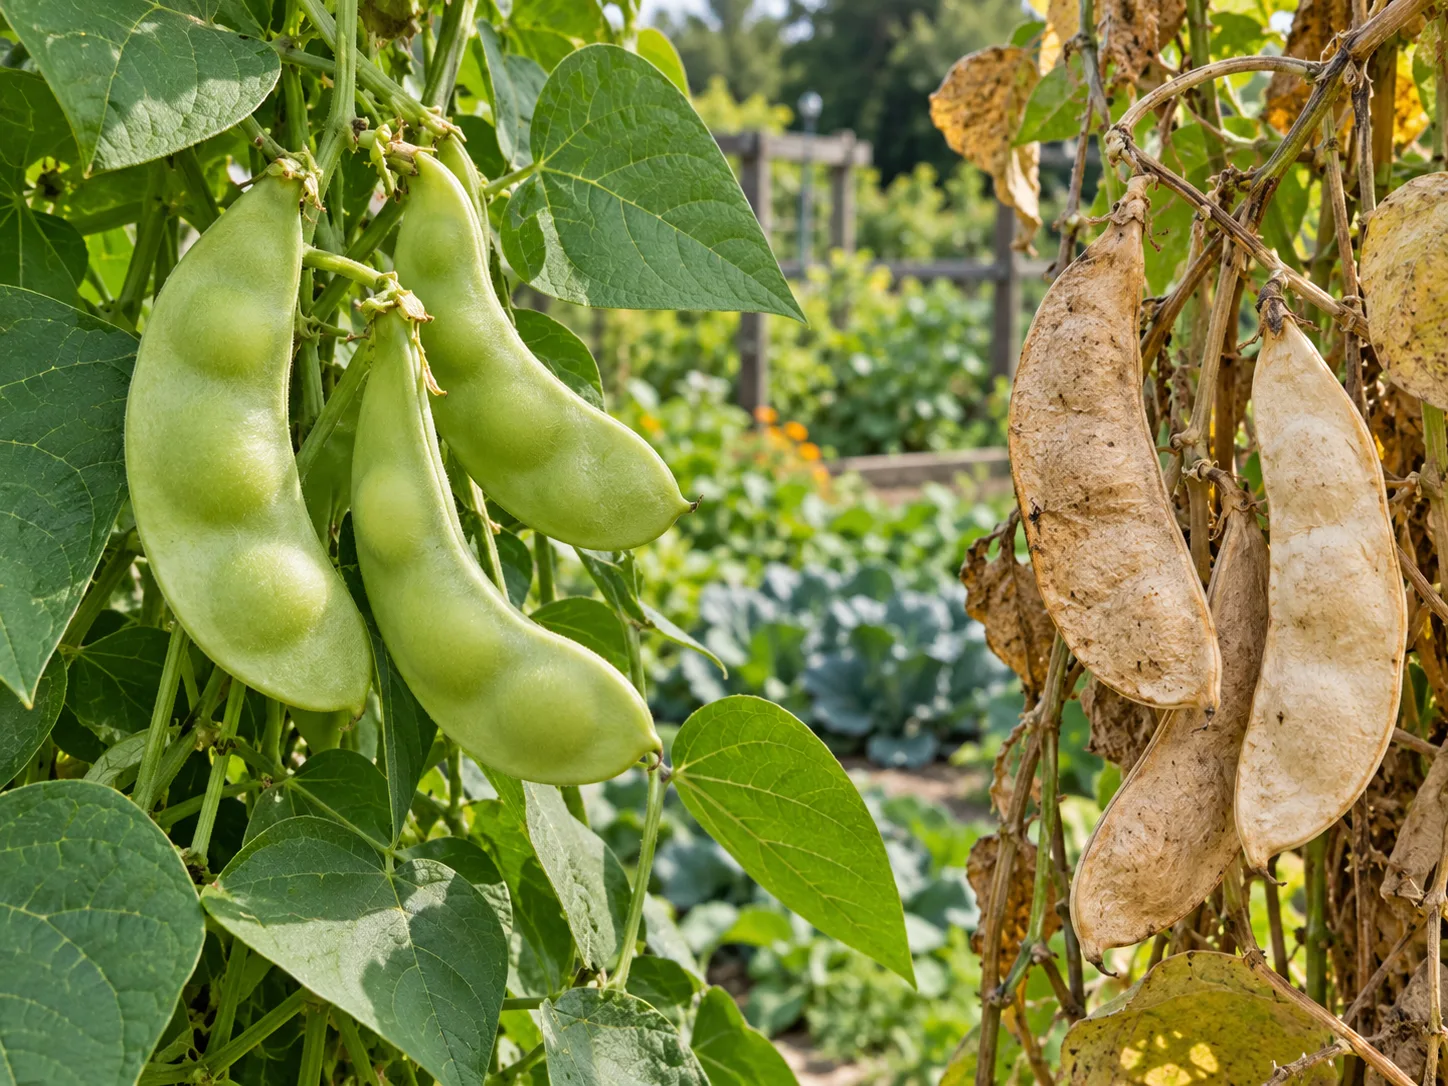
For fresh shelling beans, wait until pods are full and firm with seeds that make distinct bulges, but pick before the pods turn dry and brittle. Harvest every few days once the first pods reach that stage. Leaving mature pods on the plant can slow new flowering in some cultivars, while frequent picking keeps the harvest moving and avoids tough, overly mature seeds.
Use clean snips or hold the vine with one hand while removing the pod with the other. Pulling sharply can break stems or loosen the plant, especially on a trellis. Shell the beans soon after harvest; if you cannot use them immediately, refrigerate the pods and shell them shortly before cooking for better quality.
The picking window varies by type. Bush plants may give a concentrated flush that is easy to shell in one or two sessions, while pole plants can produce over a longer span. If you want to freeze fresh shelled limas, blanching is commonly used before freezing; use a trusted food-preservation guide for the precise time and method rather than improvising.
Dry pods fully before storing
For dry beans, leave healthy pods on the plant until they are brown, papery, and brittle, and the seeds inside feel hard. If autumn rain or frost threatens before pods dry, pull or cut the whole plant and hang it in a dry, ventilated, protected place. Do not seal damp pods in a bag; trapped moisture can lead to mold and spoilage.
Shell dry pods once they are crisp. If any seeds still feel soft, spread them in a single layer in a cool, dry room with good air circulation until they are uniformly hard. Let the beans cool completely before packing them, then store in a labeled airtight container away from light, heat, and humidity. Check a stored batch occasionally for condensation, insects, or an off smell and discard any seed that shows mold.
Dry beans store best only when thoroughly cured, so do not judge readiness by the pod alone if the weather has been damp. A cool pantry is better than a warm shelf above an oven. If you save seed for next season, keep it separate from food lots, label the cultivar and harvest year, and use seed from healthy, true-to-type plants.
Cook and use the harvest safely
Fresh-shelled limas have a tender, buttery texture and work well in soups, stews, succotash, grain bowls, and simple vegetable sides. Dried beans are useful for slow-simmered dishes because they hold their shape and absorb seasoning as they cook. The plant is a shelling bean: the pod is not the usual edible part, so shell the seeds and discard tough or damaged pods.
Cook lima beans thoroughly before eating and do not taste raw mature seeds. NC State Extension identifies the mature raw seed as poisonous and says thorough cooking destroys the toxic principle. If you preserve beans by canning, follow a current tested pressure-canning method from a food-safety authority; California Department of Public Health’s home-canning guidance warns that low-acid vegetables require pressure processing, not a boiling-water bath.
For dried beans, sort out stones or damaged seeds, rinse, and cook using a reliable recipe. Older dried beans can take longer to soften, so keep them in a clearly labeled container and rotate your supply. Do not promise yourself a multi-year shelf life unless storage conditions are consistently cool, dry, and protected from pests.
Conclusion
The planting date for lima beans is a combination of local frost risk and measured soil warmth, not a single date on the calendar. Wait until morning readings at seed depth stay above 65°F, choose bush or pole varieties to match your season and space, and maintain steady moisture as flowers and pods form.
Harvest green pods when the seeds are plump for fresh shelling, or let them dry completely for pantry storage. A sound trellis, warm well-drained soil, and a little patience at the start will do more for a dependable crop than rushing seeds into a cold bed.