How to Grow and Care for Creeping Wire Vine
Grow creeping wire vine in sun and free-draining soil. Get spacing, container, winter, propagation, and spread-control advice for Muehlenbeckia axillaris.
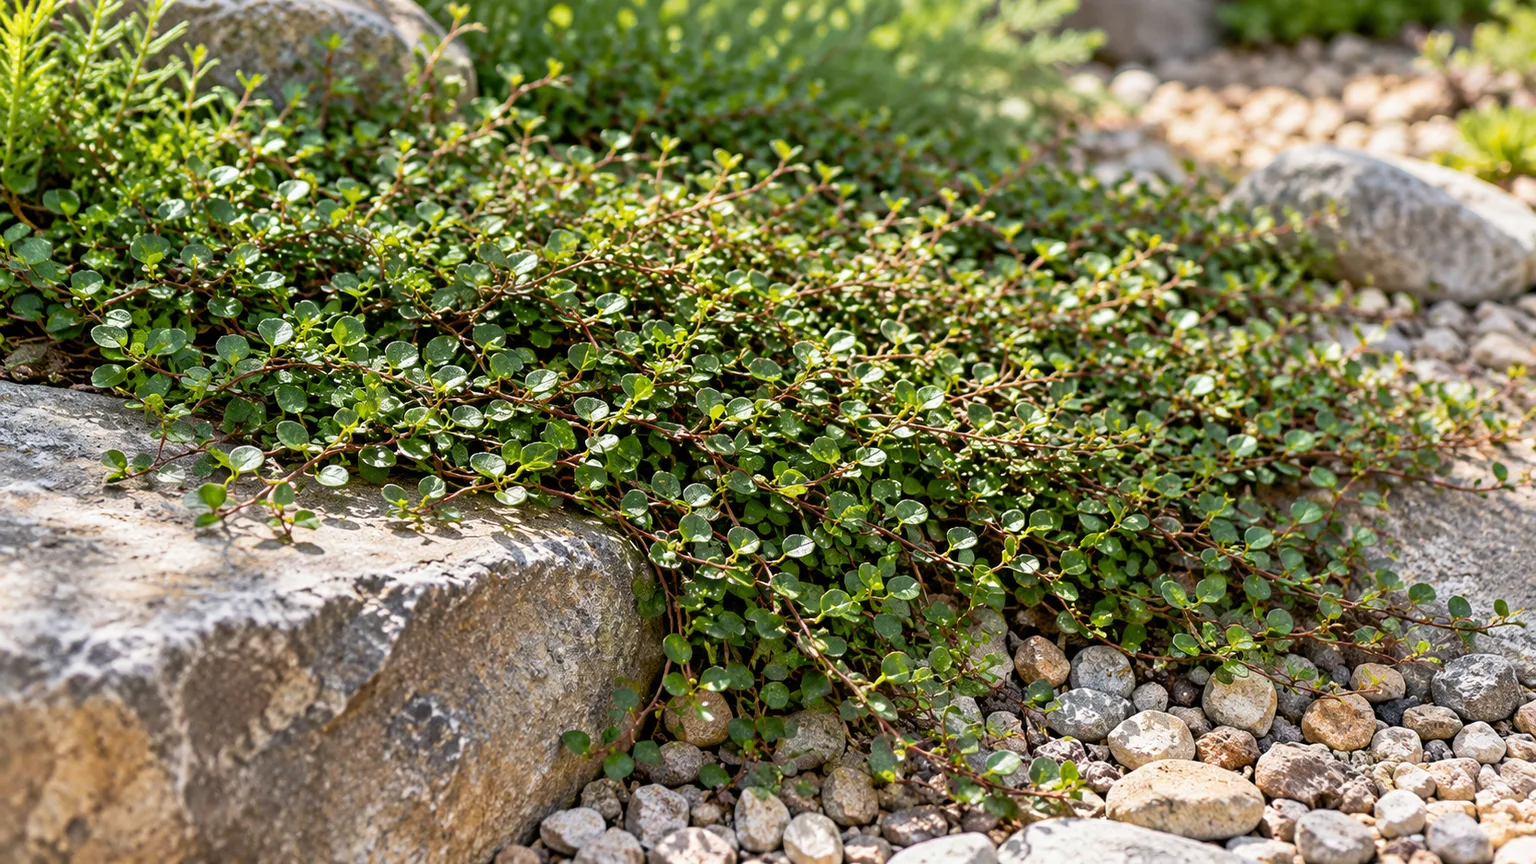
Creeping wire vine (Muehlenbeckia axillaris) is a low, mat-forming evergreen-to-semi-evergreen groundcover with tiny oval leaves on fine red-brown stems. It works best where you want a soft green layer to weave between stones, edge a rock garden, or spill over a container—but its ability to travel makes placement the first care decision. Give it sun or light shade, soil that drains freely, and a boundary you can inspect, and it needs little routine attention after it establishes.
| Care point | Practical guidance |
|---|---|
| Habit | Prostrate, wiry mat; usually only a few inches tall, with stems that can spread about 3 feet or more in a favorable site |
| Light | Full sun to partial shade; afternoon shade can help in very hot climates |
| Soil | Most garden soils if drainage is good; rocky or gravelly ground is a natural fit |
| Water | Keep the root zone evenly moist while establishing; established plants tolerate some dry spells but not prolonged waterlogging |
| Spacing | Start around 18–24 inches apart for a connected planting; use wider spacing if you want separate mats |
| Main upkeep | Edge or shear stems that cross a boundary; monitor the mat at least a few times each growing season |
| Winter | Hardiness is often listed near USDA Zone 6, but foliage retention and survival depend on exposure, drainage, and local conditions |
What creeping wire vine looks like—and what it is
The name describes its form well: narrow, flexible reddish-brown stems spread horizontally, carrying small, smooth, round-to-oval leaves that are generally less than half an inch long. A mature patch can read as a fine-textured carpet rather than a conventional climbing vine, though stems may drape over a wall or weave through neighboring plants. The University of Auckland’s NZ Plants profile describes it as a prostrate shrub forming matted patches, while Oregon State University’s Landscape Plants database notes wiry mats around 1 meter in diameter and leaves under 1 centimeter.
The species belongs to the buckwheat family, Polygonaceae, and Kew’s Plants of the World Online accepts the botanical name Muehlenbeckia axillaris. It is native to New Zealand and parts of southeastern Australia, including New South Wales, Victoria, and Tasmania. That origin helps explain its comfort with rocky, open settings, but it does not mean it will behave the same way in every garden where it is introduced.
Creeping wire vine is grown mainly for foliage and texture, not for showy flowers. It produces very small yellowish-white to greenish flowers in the leaf axils; the fruit is also small and inconspicuous, so a plant can be healthy even if you rarely notice either. Expect a groundcover only a few inches high in many cultivated settings, but give it room to spread laterally: width varies with climate, cultivar, age, and how often stems are trimmed.
Is this groundcover right for your site?
Use creeping wire vine where a low layer is welcome and easy to inspect: a rock garden, a sunny bank, the top of a retaining wall, or a broad container rim. Its fine leaves soften stone and hard edges without the height of a shrub, and its flexible stems can cover small gaps once they settle in. It is not a substitute for a lawn or a plant to place between every stepping stone; stems can obscure the edge of paving and become a trip hazard if they cross a walking line.
Its vigor is a benefit on an open slope or a bare gravel strip, but a liability in a mixed border full of small perennials. The Australian National Botanic Gardens notes that the species can spread by underground shoots and overwhelm smaller nearby plants; the UF/IFAS Extension Charlotte County guide likewise recommends keeping it in bounds even where it is not reported as invasive. If you want a plant that stays exactly the size of its nursery pot, choose a clump-forming alternative or grow wire vine in a container.
Before you plant, ask three questions: can the soil drain after heavy rain, can you reach the edge to trim it, and would you be comfortable removing it if the mat spreads farther than expected? If any answer is no, use a pot or a contained stone bed rather than planting directly into an open border. Aggressive growth is not automatically the same as an officially invasive plant, so gardeners should also check regional invasive-species lists and local extension guidance before purchasing.
Choose the right Muehlenbeckia before planting
Nursery labels sometimes use “wire vine,” “maidenhair vine,” or “Muehlenbeckia” loosely, although these names can refer to different species with different habits. Confirm the botanical name on the tag before you buy: for this low groundcover, look for Muehlenbeckia axillaris. If the plant is already in your garden, compare leaf size and overall shape before deciding how much space it needs.
Creeping wire vine versus maidenhair vine
Muehlenbeckia axillaris is typically a prostrate, close-to-the-ground mat with tiny leaves. By contrast, Muehlenbeckia complexa is more likely to climb, mound, or tangle over supports; the Royal Botanic Gardens and Domain Trust FloraOnline key distinguishes the more or less prostrate M. axillaris from the twining, climbing, and mounding habit of M. complexa. The RHS profile for M. complexa lists “Muehlenbeckia axillaris misapplied” among its synonyms, a useful reminder that trade labels can be inconsistent.
A plant with longer, climbing stems and larger leaves may still be a Muehlenbeckia, but it may not be the creeping species described here. That matters for support, pruning, winter response, and containment. If the label is unclear, ask the nursery for the botanical name and mature spread rather than relying on a common name alone.
Give it sun and fast-draining soil
Choose full sun for the most compact growth and best coverage, or partial shade where summers are intense or the site runs hot and dry. Oregon State reports that creeping wire vine adapts from sun to shade, but “tolerates shade” does not mean it will fill a shaded patch as quickly as it does in brighter conditions. In heavy afternoon heat, a little shade may reduce stress; in deep shade, expect slower growth and a thinner mat.
Drainage matters more than rich soil. The species occurs in rocky slopes and streamside habitats at higher elevations, and the Australian National Botanic Gardens describes it as favoring full sun and well-drained, rocky soil. Ordinary loam can work if excess water moves away from the crown; gravelly or sandy ground is useful but not essential.
If the garden has dense clay, test it before planting by digging a hole about a spade deep, filling it with water, and watching whether water remains for hours after the surrounding ground has drained. A small amendment pocket of potting mix in a clay hole can trap water like a sump, so do not create a rich, loose bowl surrounded by compacted soil. Instead, plant on a raised berm, use a slope, or choose a container if the site remains wet after rain.
Skip routine fertilizer in average soil. Extra nitrogen can push lush, fast stem growth when the plant’s natural advantage is a tight, manageable mat; fertilizer will not correct shade, poor drainage, or winter injury. If new growth is weak after the plant has settled in, first check light, root moisture, and crowding, then use a modest balanced feed only if the soil is genuinely depleted.
Plant and space it for the coverage you want
Plant in spring or early fall when weather is mild and the root ball is not baking in heat or frozen into cold soil. Water the nursery pot before planting, loosen any circling roots, and set the root crown level with the surrounding grade. Backfill and firm gently, then water slowly to settle soil around the roots without leaving a puddle at the base.
For a connected groundcover, Gardening Know How’s creeping wire vine guide suggests spacing plants 18–24 inches apart. Use that as a starting range, not a promise that gaps will close by a specific date: a warmer, sunny site may fill faster than a cool, shaded one, and container-grown stock may vary in vigor. Plant wider apart if you want individual patches and closer only when you have a firm boundary and are willing to manage a denser mat.
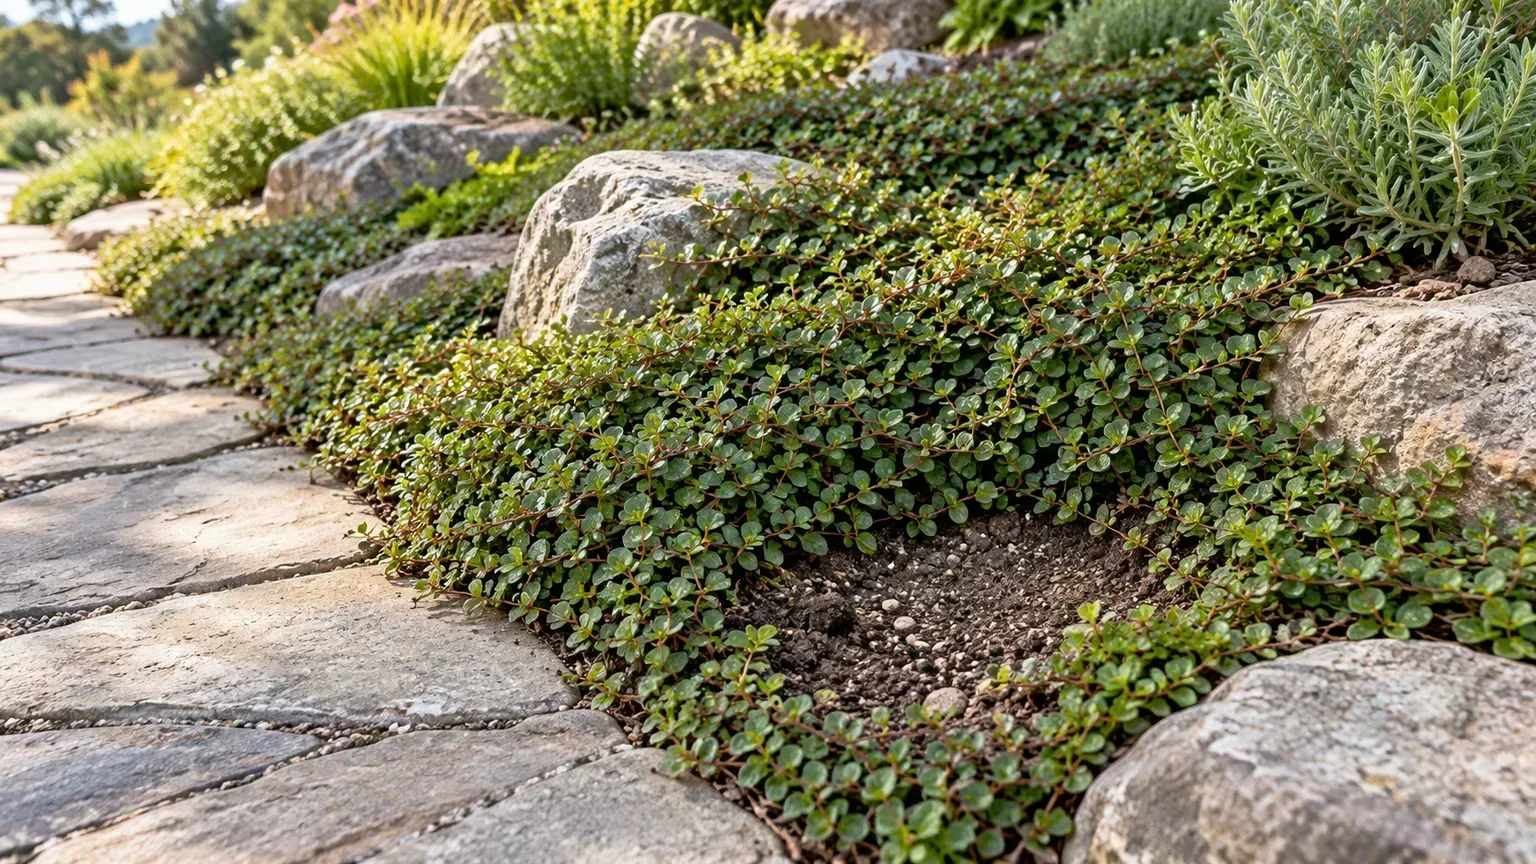
Clear weeds before planting and keep the area visible through the first growing season. Small weeds are easier to pull before the wire-vine stems knit together, and early observation shows you which shoots are crossing the intended boundary. Avoid deep mulch over the center of the mat; it can hide stems and keep the crown unnecessarily wet.
Water for establishment, then let drainage do its job
Water newly planted creeping wire vine when the root ball begins to dry, checking the soil beneath the surface rather than watering by calendar. During the first growing season, consistent moisture helps new roots connect with the surrounding soil, especially in a sunny gravel bed or on a slope. Aim for evenly moist, not saturated, soil; shallow daily sprinkling is less useful than a slower soak followed by time for excess water to drain.
Once established, the plant tolerates periods of dry weather better than prolonged wetness. Water during an extended drought if leaves lose firmness and the soil is dry several inches down, but do not assume every dull or brown patch is thirst. A wet, poorly drained root zone can cause decline that looks like drought stress above ground, and additional water then makes the problem worse.
Container plants need more frequent checks because their root zone is small and exposed to sun and wind. Water until excess drains from the holes, empty any saucer, and wait until the top layer begins to dry before watering again. In cool weather, growth slows and the mix stays wet longer, so reduce watering rather than following the warm-season routine.
Grow creeping wire vine in a container
A broad, shallow-to-medium-depth container lets the wiry stems spill over the rim while keeping the root spread contained. Choose a pot with several unobstructed drainage holes; a decorative cachepot without drainage is not a safe long-term home unless the plant remains in a removable nursery pot that can be drained after watering. Use a free-draining general potting mix and add a modest amount of coarse perlite or fine bark if the mix compacts and remains wet.
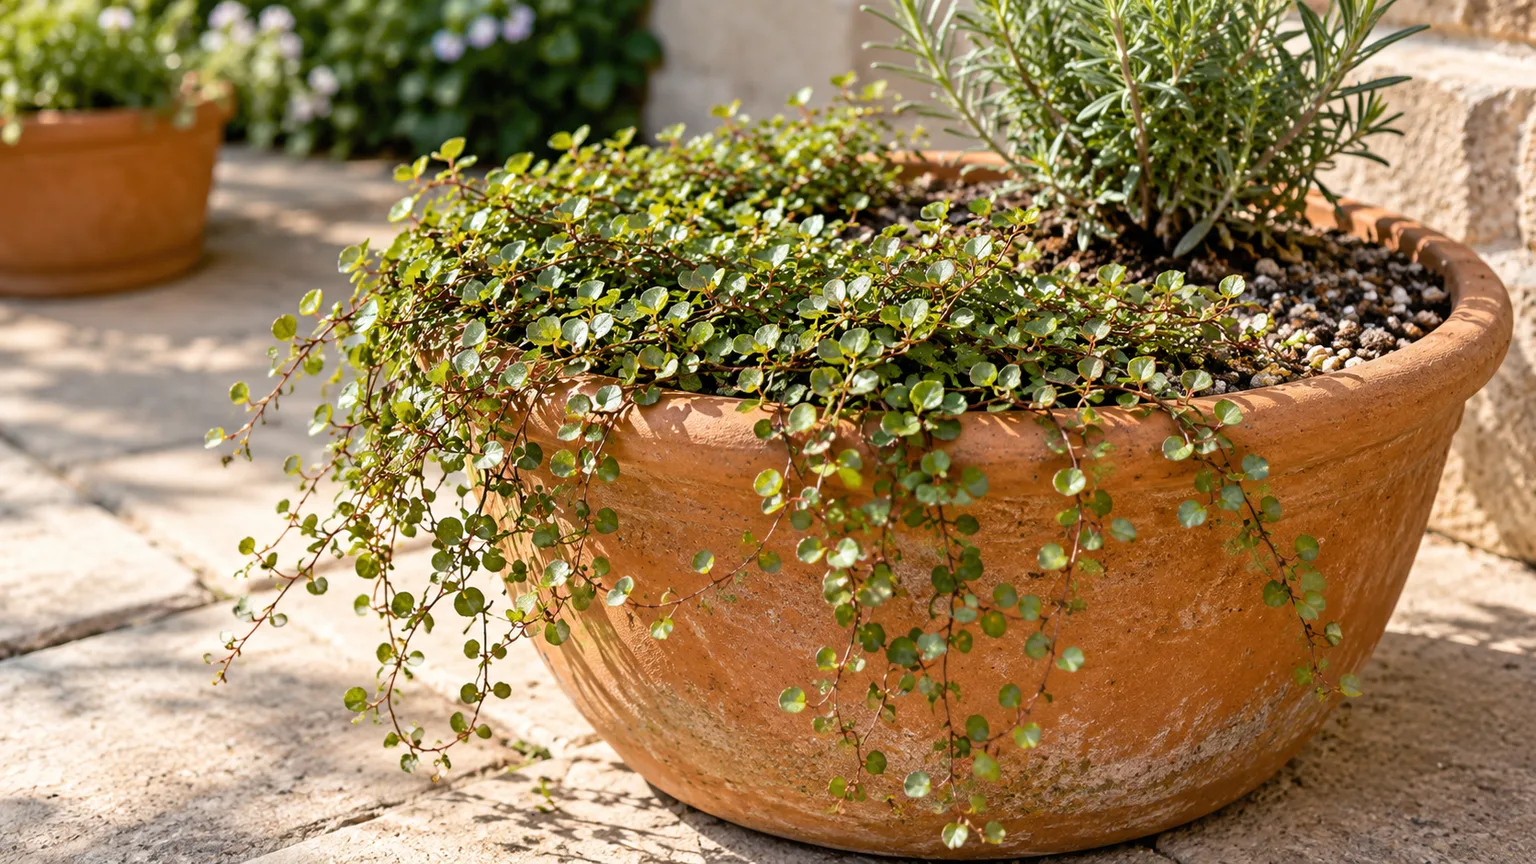
Place the pot outdoors in sun or partial shade. In a mixed container, treat creeping wire vine as the spiller and pair it with plants that can handle similar light and watering; avoid crowding slow, delicate neighbors because the vine can weave into their stems. Check the rim and underside regularly, trimming shoots before they root into a nearby bed or trail across a walkway.
A hanging basket is possible, but it dries faster than a floor-level pot and may need water checks more often during hot, windy periods. The UF/IFAS Extension article describes M. axillaris ‘Nana’ as a useful container spiller, while Oregon State also lists it as a suitable potted plant. Keep the container raised enough for water to escape, and do not let its trailing stems become a permanent bridge into the landscape.
In cold climates, container roots are less insulated than roots in the ground. Move the pot to a sheltered, unheated place or wrap the container before severe freezes, while keeping the mix only lightly moist; the exact protection depends on local winter lows and the cultivar. A sunny indoor windowsill can keep a small plant alive, but the species is generally easier to manage as an outdoor groundcover or patio plant than as a low-light houseplant.
Prune the mat before it reaches paths and neighbors
Pruning is mainly for boundaries and access, not to make the plant bloom. Use clean hand pruners or shears to shorten runners that have crossed a path, covered a stone edge, or started climbing into a neighboring plant. Cut back to a point where the remaining mat still has leaves and rooted stems; removing a few offending runners early is easier than untangling a thick layer later.
Light shaping can be done whenever growth is active, but avoid cutting everything to bare ground just before a stressful freeze or heat wave. If the patch is too thick, shear it selectively and inspect the crown underneath so air and light can reach the interior. A small patch can be trimmed by hand; a large, open area may tolerate a higher mower setting, but avoid mowing where it could damage edging, expose soil, or send stems into paths.
Treat pruning as regular containment. Walk the perimeter several times during the growing season, lift stems to see whether they have rooted beyond the intended edge, and remove the rooted sections with a hand fork if needed. Do not assume a brick or stone edge alone will stop every stem, especially where soil or mulch connects both sides.
Propagate by cuttings, layering, or division
The simplest way to make another plant is to root a stem that is already mature enough to hold its shape. The Australian National Botanic Gardens recommends taking cuttings from growth at least a year old because very soft stems may be too moist to root reliably; its suggested medium is free-draining. This is more useful than treating every flexible tip as an equally good cutting.

For a small batch, take several 3–5-inch sections with a few leaves and at least one node, remove leaves from the lower portion, and insert the bare node into a lightly moist, airy propagation mix. Keep the pot in bright shade, not hot direct sun, and maintain gentle moisture without sealing the cutting into a constantly wet environment. New leaves or resistance to a very gentle tug suggest rooting; wait until roots hold the mix before moving the young plant outdoors.
Layering uses the plant’s spreading habit: pin a flexible stem against damp soil while it is still attached to the parent. Once it has rooted at the contact point, sever it from the parent and lift it with a small root section. Division is faster when an established mat has several rooted sections; cut out a piece with stems and roots together, replant promptly, and water it like a new transplant.
Use propagation only when you have a destination for the new plant. It is easy to create more wire vine than a garden can accommodate, and detached stems should not be left on moist soil or tossed where they can root. Bag unwanted viable pieces with yard waste according to local guidance rather than placing them against a garden edge or dumping them in a natural area.
Flowers, fruit, and seed production
The flowers are tiny and usually blend into the foliage, so creeping wire vine is not a dependable choice for a prominent bloom display. They appear in leaf axils and may be pale greenish or yellowish white. If a plant looks healthy but you have never noticed flowers, check closely along mature stems during the growing season before assuming something is wrong.
Botanical descriptions indicate that male and female flowers are borne on different plants in this species. That means a lone clone may flower without producing visible fruit, and fruit set should not be the main reason to buy it. Oregon State describes the fruit as a small shiny black structure, while the University of Auckland lists the fruit as dry; the fleshy or pale surrounding floral parts can make descriptions look different depending on the stage observed.
Do not fertilize heavily to force flowers. Shade, plant age, and seasonal conditions affect flowering, but the ornamental value remains the foliage and spreading habit. If flowers and fruit are important to you, ask the nursery whether its stock is seed-grown or clonal and whether it can supply more than one sex; labels rarely make this detail clear.
Adjust care through winter and summer
Creeping wire vine is often listed as hardy around USDA Zone 6, and Oregon State reports Zone 6 hardiness; other horticultural references describe dependable evergreen behavior in warmer zones and more leaf loss in colder ones. Treat the zone number as a starting point rather than a guarantee. A sheltered, sharply drained site is safer than a cold hollow where winter water sits around the crown, and a plant in a pot is more exposed to freezing than the same plant in the ground.
In cold weather, some foliage may bronze, thin, or drop without the roots being dead. Wait for milder weather before making a severe cut; scratch a small stem or check the crown for living tissue, then remove only clearly dead growth once new growth resumes. In a pot, move the container out of desiccating wind and keep it from sitting in runoff or a water-filled saucer.
During hot summer weather, the plant may grow quickly if water is available, particularly in bright conditions. Check spread more often, but do not compensate for heat by keeping the soil constantly wet. A thin layer of gravel around the root zone can reduce splash and keep the planting visually tidy, while leaving the crown open to air.
Troubleshoot yellow leaves, bare patches, and rot
When leaves yellow across a wide area, check the soil before adding water or fertilizer. Persistently damp soil, poor drainage, or a buried crown points toward root stress; temporarily withhold irrigation and improve drainage if you can do so without damaging the mat. If only exposed tips look dry and the soil is powder-dry, a thorough soak followed by more consistent establishment care may help.
A thin or bare patch can reflect shade, competition, winter damage, or an older stem section that has lost vigor. Trace the living stems back to see whether they are still connected to rooted sections, remove dead material, and give nearby healthy runners room to occupy the gap. For a shaded patch, pruning neighboring plants or moving a small division to a brighter site may work better than adding fertilizer.
Root rot is most likely when drainage is poor and soil remains wet. If the plant pulls up easily and roots are soft or dark, trim away clearly damaged roots with clean tools and replant a healthy rooted section in a better-drained location; recovery is uncertain if the crown is extensively decayed. The species is generally not reported as pest-prone, so inspect for visible insects or disease signs before treating, and avoid spraying a plant when the cause is more likely water or weather stress.
Control spread and remove unwanted growth
A creeping mat can be slow to establish in a cool or shaded garden and then become surprisingly persistent in a favorable one. Monitor the edge rather than waiting for the entire bed to look overgrown, and cut crossing stems where they emerge from the main patch. Remove any sections that have rooted outside the boundary instead of only clipping the leaves; otherwise the rooted nodes can keep sending out new shoots.
If you need to remove a small patch, moisten the soil, lift the mat with a hand fork, and follow each rooted runner as far as practical. For a larger patch, work in sections, bag all viable stems, and check the area repeatedly for missed pieces and regrowth. Avoid shallow tilling that chops stems into fragments and moves them around; careful lifting and repeated follow-up are more controllable.
Local invasive status can differ by region, and vigorous garden behavior does not automatically mean a plant is officially listed as invasive. The UC Master Gardener Program of Alameda County describes a case where a Muehlenbeckia identified as M. axillaris or M. complexa escaped its intended role and became difficult to remove, illustrating why species labels and local conditions matter. Check your state or regional invasive plant authority before planting near wild land, waterways, or a neighbor’s unmanaged edge.
Conclusion
Creeping wire vine is a good fit for a sunny, well-drained rock garden, slope, path border, or container where a low, fine-textured mat can spread without smothering smaller plants. Confirm that the label says Muehlenbeckia axillaris, give it room, keep new roots evenly moist, and let established soil drain between waterings. The plant asks for little routine feeding, but it does ask for a gardener who will watch its edges and choose a site with containment in mind.
If you want a low-maintenance accent that spills over stone, wire vine can earn its place; if you need a plant that will stay exactly where planted without inspection, it is a poor match. Start with a contained patch or a pot, learn how it behaves through one full growing season, and expand only if its pace and winter response suit your garden.



