How to Prevent White Mold on Seedlings
Learn how to tell harmless white fuzz on seed-starting soil from damping-off, then fix moisture, airflow, sanitation, and tray conditions without overcorrecting.
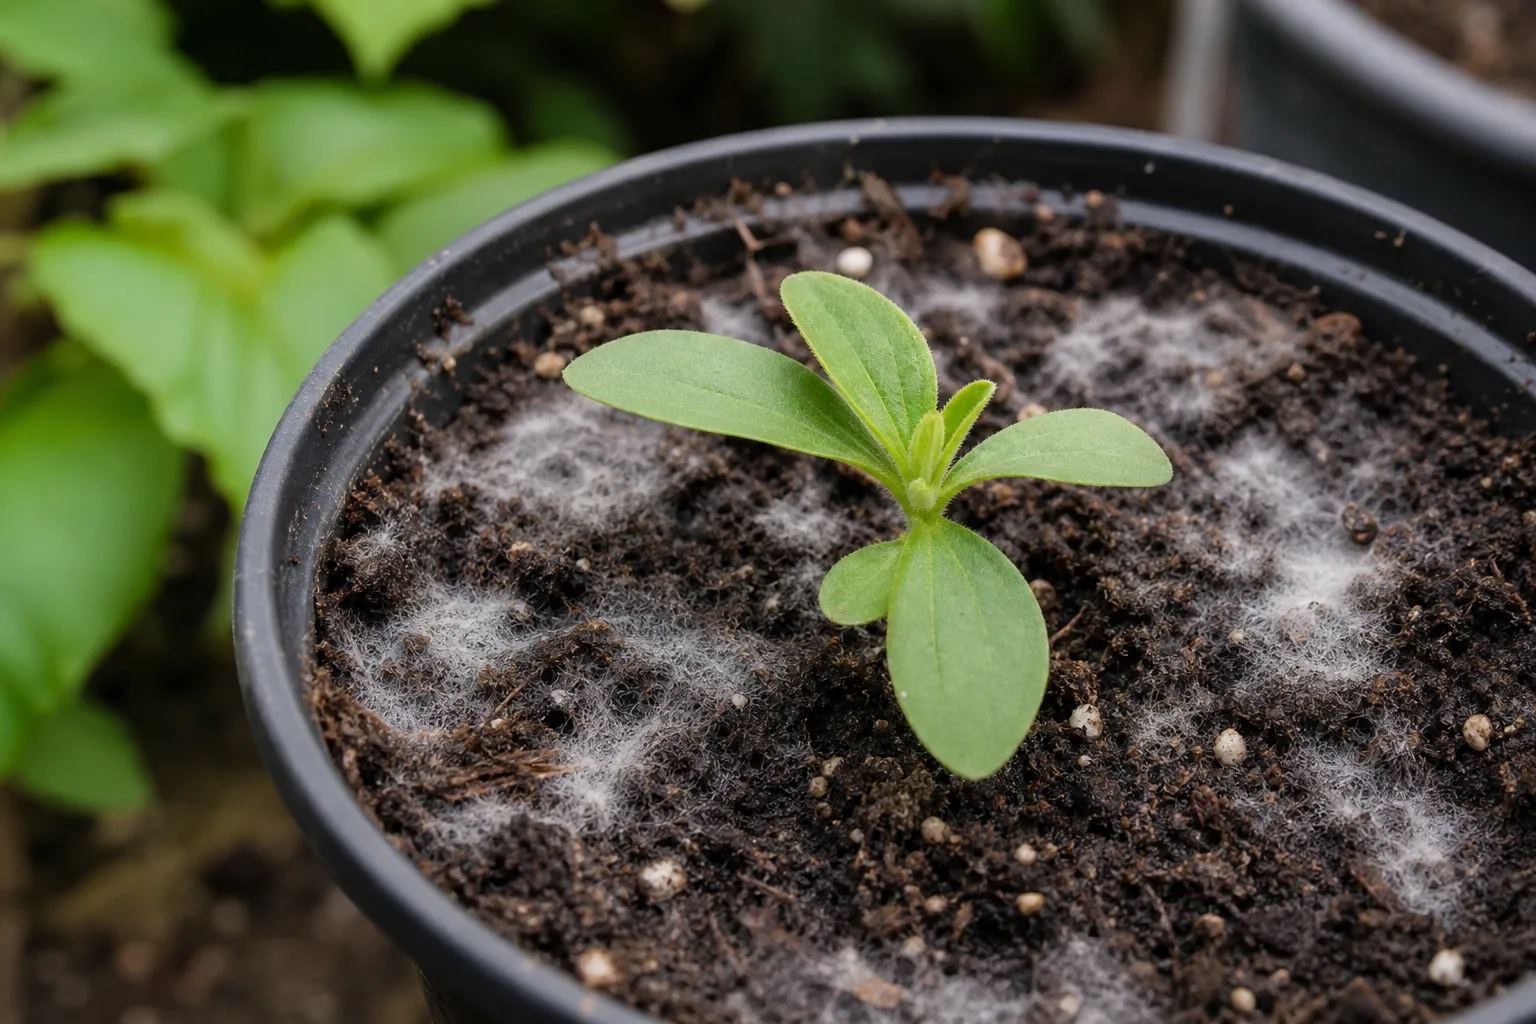
White, threadlike growth on seed-starting mix is not automatically damping-off. The quickest useful check is the seedling’s stem: fuzz spread across the mix with upright, firm seedlings usually points to surface mold feeding on organic debris, while damping-off damages a seed or the stem at the soil line and can make a sprout topple. You cannot identify a fungus from color alone, but you can use that distinction to decide whether to correct the tray’s conditions or remove diseased seedlings.
If the seedlings are standing, start by lifting the humidity dome, checking that drainage holes are open, and letting the mix lose some surface wetness without allowing the root zone to dry out. If stems are water-soaked, pinched, darkened, or collapsed at the soil line, treat that as suspected damping-off: remove affected plants with their surrounding mix, keep the material out of compost, and clean the tray before using it again.
Quick diagnosis: surface fuzz or damping-off?
White growth is a description, not a diagnosis. The visible threads may be saprophytic fungi consuming dead organic material in the mix, but mold can share a tray with a true seedling disease, and a phone photo cannot reliably identify a pathogen. Look at where the growth is and whether the seedling tissue itself is changing.
| What you notice | More consistent with | What to do first |
|---|---|---|
| Thin white fuzz spread over the mix; stems remain firm and upright | Surface fungal growth on organic debris | Reduce persistent surface wetness and improve gentle air exchange |
| Green, slippery film on exposed mix | Algae, often encouraged by light and moisture | Improve drainage and avoid standing water; do not reduce needed grow light |
| Fine hairs on an exposed root, arranged close to the root surface | Root hairs may be visible | Check that they emerge from the root; do not scrape or pull the seedling |
| A seed fails to emerge, or an emerged seedling has a soft, narrowed, water-soaked stem at the soil line | Possible pre- or post-emergence damping-off | Remove the affected seedling and attached mix; inspect neighboring cells |
| Several seedlings wilt or collapse in a wet, crowded tray | Damping-off is a concern, though not visually confirmed | Isolate the tray from other starts and inspect stems and roots |
What surface fuzz can mean
A fine mat sitting on the surface often comes from decomposer fungi using fragments of peat, coir, compost, seed coats, or other organic matter as food. It can appear when the medium stays damp and air around the tray is still; that signals prolonged surface wetness, but does not prove the fungi are attacking a living seedling. Practical seed-starting guidance from Homestead and Chill likewise separates surface growth from the stem rot associated with damping-off.
Color and texture can help you decide what to inspect next, but they cannot tell you which species is present. A white patch may be harmless surface growth, while dangerous damping-off can occur without any visible fuzz at all. Do not pronounce a tray safe or doomed based on “white,” “gray,” or “fuzzy” alone.

What a diseased stem looks like
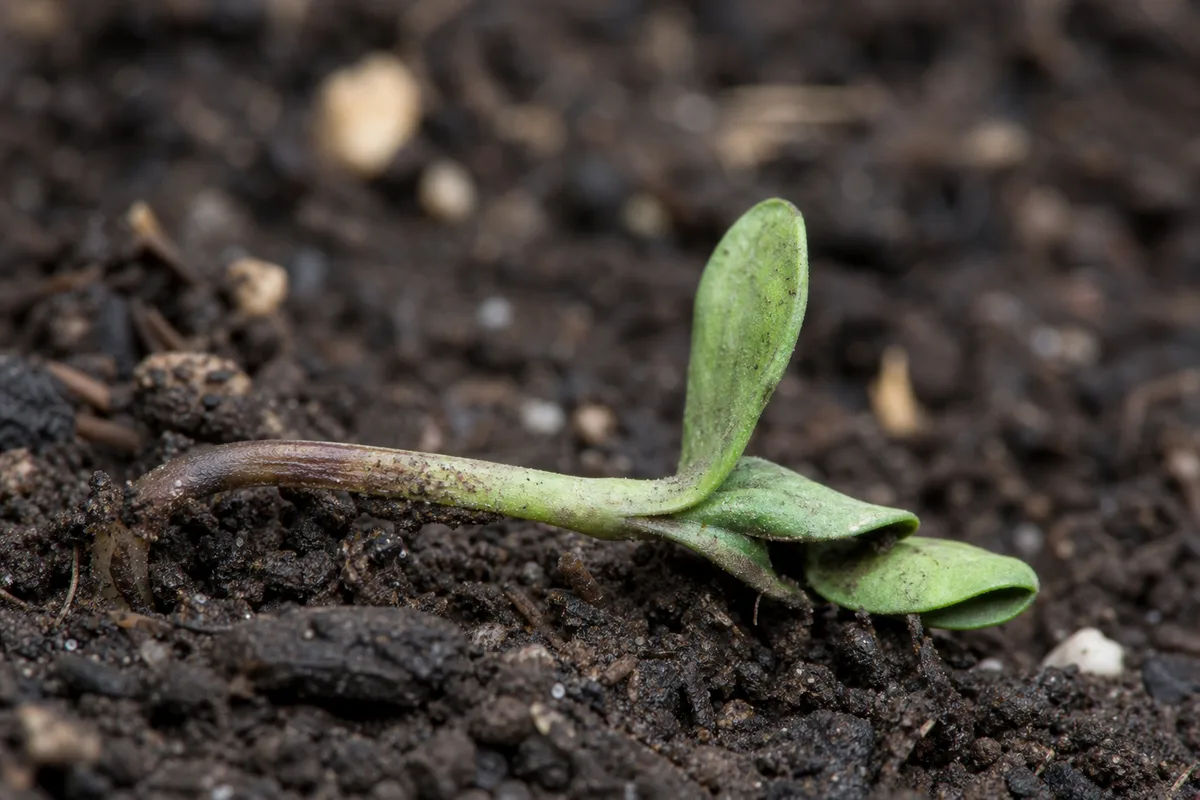
Damping-off describes seed decay before emergence or decay of a newly emerged seedling, commonly at the soil line. The stem may look pinched, translucent, water-soaked, sunken, or dark; the plant loses support and falls over. University pathology guidance from UConn Extension notes that symptoms can include failed emergence and wilt with a water-soaked or sunken lesion at the soil line.
That symptom pattern matters more than surface mold. Some pathogens can also injure older seedlings or cause a constricted, discolored stem without immediate collapse, so a tray is not in the clear simply because a plant is still standing. Conversely, one seed that does not sprout is not enough to diagnose disease: old seed, incorrect sowing depth, cool conditions, or uneven moisture can also prevent emergence.
Why fuzzy growth appears in seed trays
Seed-starting media have a useful but delicate job: they must hold enough water for germination while leaving air-filled spaces around young roots. When the top stays wet under a closed dome, a dense cover, or frequent misting, surface fungi have both moisture and organic food. Poor drainage and stagnant air make that wet period last longer, so the surface may develop fuzz even while the seedlings initially look fine.
Damping-off risk is related but not identical: Penn State Extension and UConn Extension identify excessive moisture, overhead misting, crowded flats, contaminated tools or media, and unsuitable media temperatures as factors that can favor disease. Penn State describes cooler media before germination and hotter media after emergence as risky extremes, but no single temperature fits every crop and stage. Follow the seed packet’s germination guidance rather than leaving a heat mat on by habit.
The terms “mold,” “fungus,” and “damping-off” are often used interchangeably in casual seed-starting advice, but they are not equivalent: damping-off can involve true fungi such as Rhizoctonia and Fusarium as well as fungus-like oomycetes such as Pythium. The visible surface growth may be a different organism entirely. A grower’s practical goal is not to sterilize the whole growing space; it is to stop the mix from staying saturated, avoid introducing pathogens on used tools, and grow seedlings promptly under crop-appropriate conditions.
What to do today when mold appears
First, remove the dome if most seeds have emerged, empty any water left in the catch tray, and check the cells’ drainage holes. Then inspect a few seedlings at the soil line rather than treating every surface patch. This order reduces the moisture problem immediately while avoiding unnecessary handling of fragile roots.
If seedlings are upright
If stems are firm, green, and unpinched, keep the tray and change the conditions. Move it to a spot with adequate light and gentle air movement, allow the surface to become less wet, and wait until the medium actually needs water before watering again. Do not let the plug dry through; the goal is a modest drying of the surface, not a drought around new roots.
If a thick mat blocks the seedling stems or makes the surface hard to inspect, lift a small amount gently with a clean spoon or label, taking as little mix as possible. Bag the removed material if you suspect disease, wash your hands, and clean the tool before moving to another tray. Scraping is optional and cannot prevent regrowth if moisture and air conditions stay the same.
Do not repot healthy sprouts just because white fuzz appeared. Their root systems are delicate, and transplanting them into another wet mix adds disturbance without addressing the cause. Keep them in place unless the medium is waterlogged, sour-smelling, badly contaminated, or the seedlings are showing disease symptoms.
If seedlings are collapsing
A seedling with a constricted, soft, or water-soaked stem at the surface is unlikely to recover. Lift that seedling together with the small plug of surrounding medium, seal it in household waste, and avoid shaking or sprinkling the mix across the other cells. If several cells show the same collapse pattern, treat the flat as potentially contaminated rather than trying to rescue each plant in place.
Set the affected tray aside from healthy starts while you inspect neighboring cells. Discarding a single collapsed seedling does not certify the rest of the flat as clean, and UConn Extension warns that apparently healthy plants in infected media can still develop disease later. If the pattern is spreading, the sensible low-risk choice for a small home sowing is to discard the affected flat and start again with clean supplies.
Build a seed-starting setup that dries evenly
Prevention is a balance, not a campaign to keep seedlings dry. Seeds need steady moisture to germinate, and seedlings need water to establish roots; the problem is prolonged saturation with limited air exchange. A setup that drains after watering and dries gradually is more reliable than a schedule that alternates between soaking and severe drying.
Choose and pre-moisten the right medium
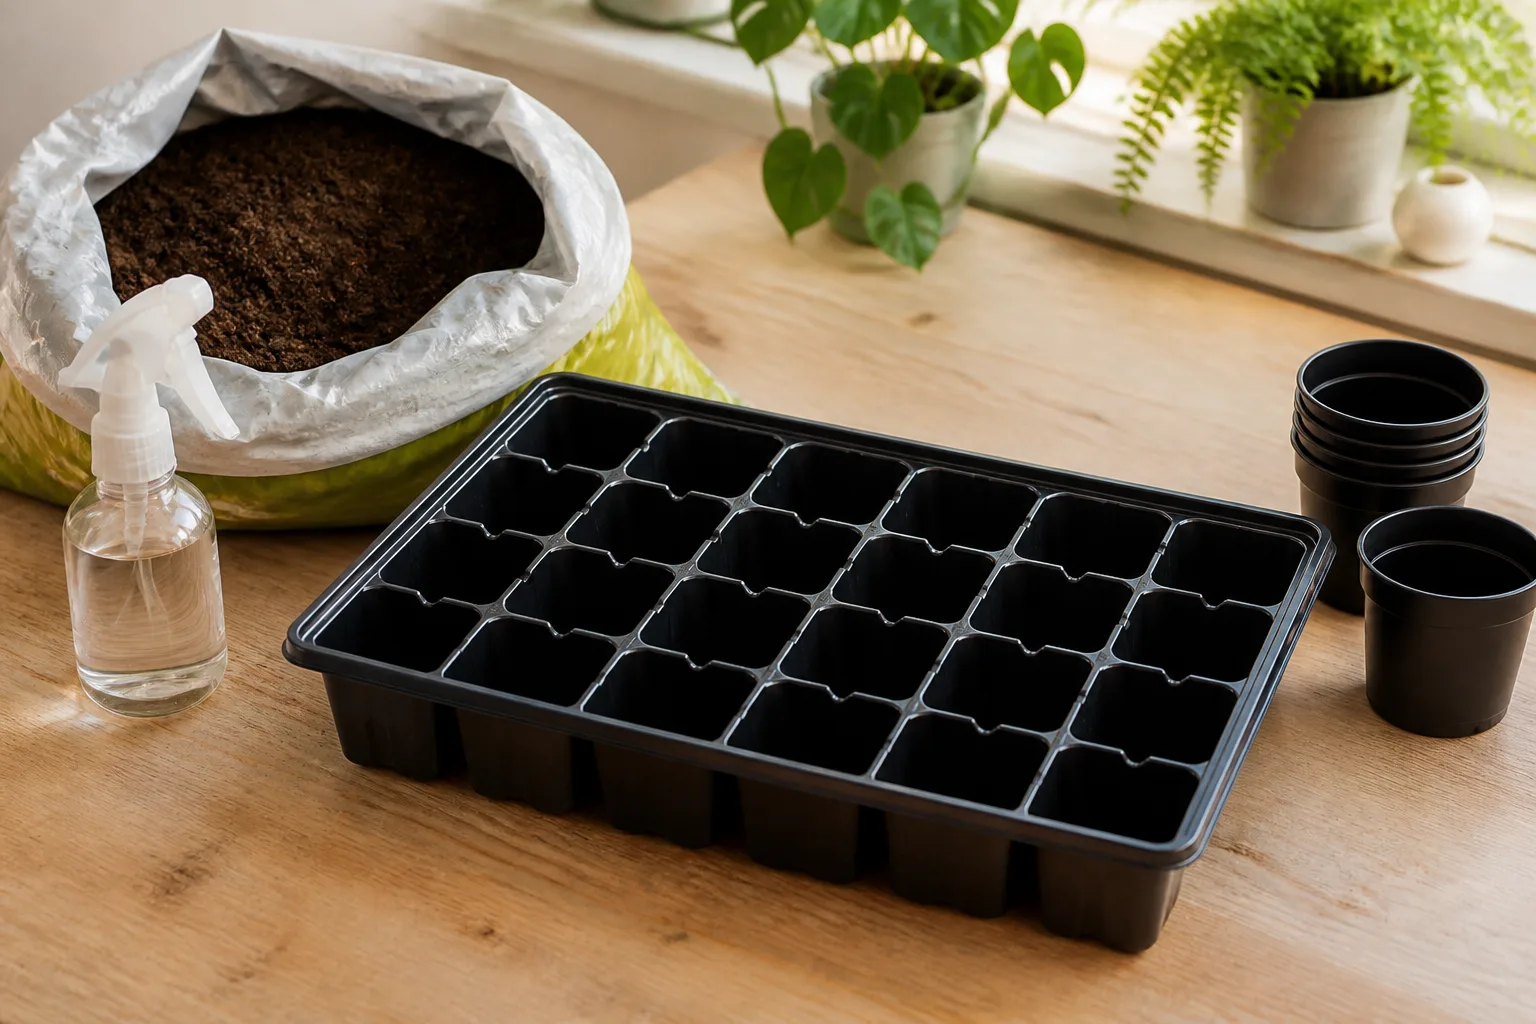
Use a fresh, fine-textured seed-starting mix made for germination, not garden soil, which can compact in small cells, drain unevenly, and introduce organisms into a warm indoor tray. Commercial soilless media are prepared for container use and may arrive with a lower pathogen load, but once opened they are exposed to spores carried on hands, tools, and air. Fresh does not mean permanently sterile.
Before filling cells, add water gradually and mix until the medium is evenly damp but not dripping. A handful should hold together loosely when squeezed and break apart when touched; if water runs out or the mix forms a sticky lump, it is too wet for sowing. Pre-moistening prevents the common correction of soaking the whole tray after dry mix repels water or leaves dry pockets.
Choose cells with drainage holes and avoid packing media tightly. Compaction removes air space and makes it harder to judge moisture from the surface. If seeds are tiny, sow them at the depth and spacing on the packet; planting too deep or too densely slows emergence and increases the time seeds remain exposed to wet conditions.
Clean trays and keep drainage open
Before reusing a tray, remove all dried roots and media from corners, seams, and drainage slots, then wash the surface with soap and water. Follow with an appropriate disinfectant according to its product label, allow the required contact time, and rinse or dry as directed. Do not improvise stronger mixtures, combine cleaners, or use a disinfectant where its label does not permit the intended application.
Cleaning matters most when the prior crop had damping-off or unexplained seedling collapse. Epic Gardening’s seed-starting guidance describes cleaning debris from containers before disinfection; that sequence matters because residue can shield surfaces from contact. After cleaning, store trays dry and keep them off dirty floors or workbenches so you do not immediately recontaminate them.
If a reusable plug tray has narrow cells you cannot scrub clean, or it held a flat with widespread disease, replace it rather than relying on a quick rinse. Penn State Extension recommends sterile containers and clean media for greenhouse seed starting, while UConn advises against reusing plug trays from diseased plants when organic debris is difficult to remove. For most home gardeners, a new inexpensive insert is a better investment than trying to salvage a tray with packed-in roots and soil.
Water without leaving the surface swampy
Use the medium and seedlings as your moisture gauge, not a fixed “once a day” routine. A tray under warm lights may dry faster than one in a cool room, and small cells can swing from moist to dry quickly. Check the surface and the weight of the tray at the same time: a dry-looking crust above a heavy, saturated cell still needs air, not another drink.
Bottom-watering can keep splashes off stems and wet the root zone from below. Add water to the solid tray for the cells to absorb, then pour away leftovers; soak time varies with cell size and medium, so check a cell’s weight instead of adopting a universal timer. Do not leave inserts sitting in standing water between checks.
Top-watering is still useful when the surface needs a careful rinse or a new sowing needs even initial moisture. Use a fine rose or gentle stream and avoid washing seeds out of position. The important distinction is not that top watering is forbidden; it is that repeated misting can keep the surface continuously wet without correcting a dry root zone lower down.
Remove the dome and give seedlings air
A humidity dome is a germination aid, not permanent seedling housing. It slows evaporation while seeds are waking, but once seedlings emerge the cover can trap condensation and keep the surface wet. Vent the dome as soon as the first seedlings appear; remove it when the bulk of the sowing has emerged, while keeping the medium evenly moist.
For crops with staggered germination, a single dome may be the wrong tool after the first sprouts are up. You can vent it, remove it and manage the remaining unsprouted cells separately, or cover only the unsprouted container. Keeping an airtight lid on tall emerged seedlings to protect a few late seeds can create a humid pocket around the plants that already need more air.
A small fan on a low setting can move air nearby, but it should not blast seedlings directly or dry the cells faster than you can monitor them. Leaves may barely tremble; strong bending is a sign the fan is too close or too powerful. Air movement supports drying and stem strength, yet it does not compensate for blocked drainage or waterlogged media.
Keep light and temperature crop-appropriate
Give emerged seedlings enough light to grow compactly. A dim windowsill can produce stretched stems that lean, crowd one another, and remain weak; use a grow light if natural light is insufficient, and follow the lamp’s distance and duration instructions. Do not move a covered tray into direct sun to “dry the mold”: a closed dome in sun can heat rapidly and stress or cook the seedlings.
Temperature should match the crop and stage: some seeds germinate best with bottom heat, but that does not mean seedlings benefit from an endlessly heated, wet tray after emergence. Penn State Extension identifies cold media before germination and excessively hot media after seedlings emerge as conditions that can favor damping-off. Use a thermostat on a mat, check the media temperature if unsure, and reduce or remove heat when the seed packet’s germination phase is over.
Healthy growth is not achieved by drying the tray as aggressively as possible. If a fan, light, or warmer room makes the cells dry rapidly, adjust the equipment or check moisture more often. The best prevention routine holds enough water for roots while avoiding a wet surface that never gets a chance to breathe.
Thin and handle seedlings safely
Crowded seedlings trap humidity between leaves and compete for light, but thinning can injure roots if you yank neighboring plants out. Once you can identify the strongest sprout in a cell, snip extras at the medium line with clean scissors unless the crop’s instructions call for a different spacing method. This opens air around the plant while leaving the keeper’s roots undisturbed.
Handle trays by their edges and use clean tools when thinning or transplanting. Soil and water can move pathogens between cells, so avoid dipping a dirty tool into several containers. If a cell contains a collapsing seedling, clean the tool before using it on a healthy tray.
Do not add fertilizer to solve surface mold. Most seed-starting media and seeds carry enough initial resources for germination, and young roots are sensitive to excess salts. Begin feeding only when the crop and medium call for it, at the label rate, and avoid fertilizer splashes that leave residues around tender stems.
When to discard mix and clean equipment
Discard seedlings and mix when damping-off is the likely diagnosis, especially if multiple plants in one flat are collapsing or the disease is spreading between cells. Put the affected plants and their media in a sealed bag for household disposal rather than a home compost pile that may later be used for seed starting. This is a precaution to avoid moving contaminated media back into a small propagation setup, not a claim that every white surface mold is dangerous.
Clean the tray after removing debris, then disinfect it according to the product’s label. Wash the work surface, scoop, and any reusable inserts that touched suspect media; keep cleaned equipment separate from dirty trays. If roots or debris are lodged deep inside small cells, replacing the tray is more dependable than attempting to sterilize inaccessible residue.
With a lone patch of surface fuzz and healthy upright seedlings, wholesale disposal is usually unnecessary. Correct the environment and monitor the stem bases over the next several days. If new collapse appears, reassess the diagnosis and escalate from “surface mold cleanup” to “suspected damping-off” rather than repeatedly scraping the fuzz and hoping.
Remedies to avoid or use cautiously
Cinnamon, vinegar, baking soda, and household peroxide are often promoted as universal seedling mold cures, but visible fuzz is not a reliable target for an untested spray recipe. A treatment that damages tender roots or leaves can create a second problem while leaving the wet conditions that allowed growth untouched. Start with ventilation, drainage, and measured watering rather than adding an improvised chemical to a delicate germination tray.
Fungicides are not a general-purpose answer for surface mold: damping-off involves different organisms, and product directions must match the crop and setting. Young seedlings may be sensitive to treatments, so if you grow commercially or have repeated disease losses, ask your local Extension plant clinic for diagnosis and use only a labeled product as directed. Never use a home recipe as though it were a tested treatment.
Avoid reducing light to suppress green algae. Algae may look unattractive, but seedlings still need light to grow sturdy stems. Instead, shorten the time the surface stays wet, remove standing water, and keep enough airflow for the tray to dry evenly.
Conclusion
White fuzz on the soil surface and damping-off are related by the conditions that favor them, but they are not the same diagnosis. If seedlings stay upright with firm stems, change the tray’s moisture and airflow rather than throwing the sowing away; if stems are soft, pinched, or collapsing at the soil line, remove affected plants and mix and clean the equipment before restarting.
For the next tray, begin with fresh, pre-moistened seed-starting mix in clean cells with open drainage. Keep a dome only for germination, water when the medium needs it, empty runoff, provide enough light and gentle air, and keep temperature appropriate to the crop. That routine will not make a home seed-starting space sterile, but it reduces the wet, stagnant conditions that turn an ordinary patch of surface growth into a serious seedling problem.



