When to Harvest Radishes: Signs, Timing, and Size Cues
When to harvest radishes depends on type. Use cues for round, French Breakfast, and daikon roots, plus steps for washing, trimming, and cold storage.
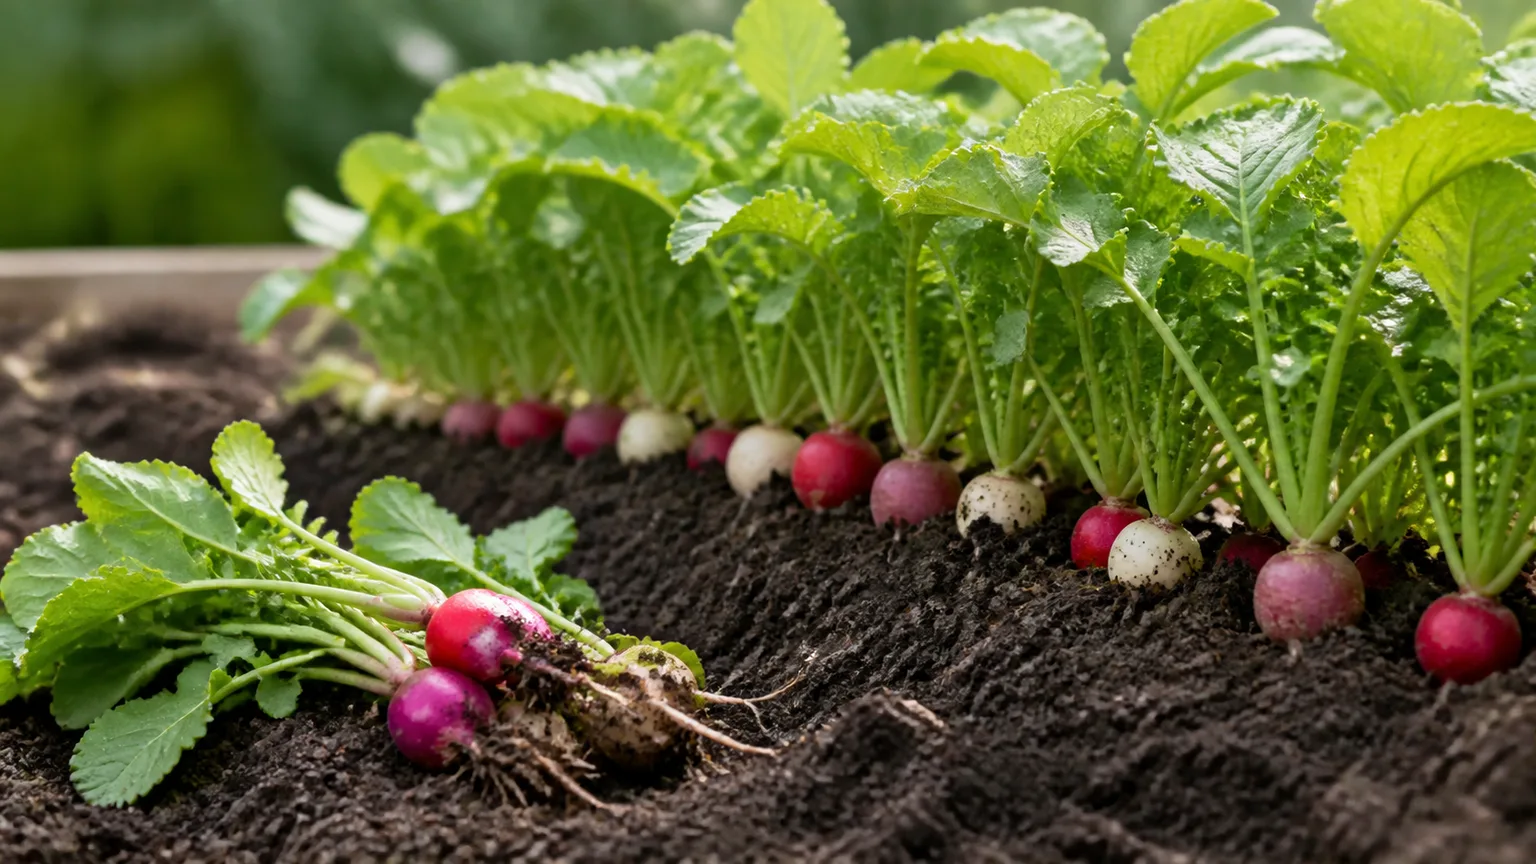
The best time to harvest a radish is when its root reaches the size your variety is meant to be, while it is still firm and crisp. For many round salad radishes, that means checking the row around the packet’s maturity date and pulling a sample when the shoulders begin to show. A test pull settles the question: if the root is close to its intended diameter and feels solid, harvest it; if it is still small and the weather is cool, leave the others to size up.
There is no universal “pick at one inch” rule. Round spring radishes, elongated French Breakfast types, and large daikon roots have different shapes, target sizes, and harvest windows. Utah State University Extension and Virginia Cooperative Extension place many spring radishes around 25 to 45 days from sowing, but that range is a prompt to start checking, not a guarantee that every plant in a row will be ready together. The practical skill is to match the variety, visible root, and weather rather than waiting for every top to look the same.
The quick answer: harvest by root size, not the calendar alone
Check the variety’s stated days to maturity, then begin inspecting a few days before the earliest estimate. Brush loose soil away from one root’s shoulder. When the shoulder is near the size described on the packet—or the typical size for that kind of radish—pull one plant and inspect it. A full, smooth root with firm flesh is ready to eat; a narrow root can remain in the ground if conditions are still favorable.
This approach prevents two common mistakes. Pulling every radish on the first estimated day can waste a row whose growth slowed in cold soil. Waiting several extra weeks for the biggest possible root can leave a tender salad type pithy, woody, or sharper than you like. The packet gives you a calendar window; the root decides the harvest day.
Read the seed packet before the roots emerge
Keep the packet or a photo of it after sowing. Note the cultivar name, days to maturity, recommended harvest size if listed, and whether the variety is a spring salad, winter/storage, or daikon type. “Days to maturity” usually tells you when to begin looking, but seed companies may count from sowing or emergence, and actual growth changes with temperature, soil, light, spacing, and moisture.
The difference matters most when growing more than one type. A quick red globe radish may be ready before a long white winter radish has filled out. Counting both rows from the same date and using one size rule can lead to an early pull in one bed and an overripe crop in the other. If the packet is gone, identify the variety from your seed order or label and use a conservative size cue; do not assume every white or long root is a daikon.
For a broader sowing-to-harvest calendar, see our guide to how long radishes take to grow. Here, the goal is to make the pick-or-wait decision once the crop is already growing.
Use the shoulder as a clue, then verify below the soil
The shoulder is the upper part of the root where it meets the stems. As a radish swells, that area may rise above the soil surface. A visible shoulder lets you estimate width without uprooting the plant, but it can be misleading: soil may cover a nearly mature root, while a shoulder exposed by erosion or shallow sowing may look larger than the root really is.
Move soil gently with your fingertips or the blunt end of a plant label. Expose just enough of the crown to compare its width with the packet’s target. Do not scrape deeply with a sharp trowel beside the root; a nick can damage a radish you hoped to keep. If the crown is hidden and the soil is dry or crusted, use a little water to soften the surface, then check later rather than digging blindly.
Leaves are a secondary clue, not a measuring tool. A vigorous top can sit above a small root when seedlings are crowded, shade is heavy, or the weather is hot. A shorter top does not automatically mean the root is immature, either. Judge the edible root itself and use the foliage mainly to notice stress: a rising flower stalk, wilting during heat, or stalled leaves all suggest the crop’s window may be narrowing.
Match the harvest cue to the kind of radish
The label “radish” covers crops that are harvested at different sizes. Use the following cues as starting points, then defer to the seed packet when it gives a variety-specific size. Virginia Cooperative Extension lists spring roots at about 1 to 1½ inches across, while the Royal Horticultural Society recommends harvesting salad radishes young, often near 1 inch. That variation is a useful reminder that “ready” depends on cultivar and preferred texture, not one exact diameter.
Round salad radishes
Cherry Belle, Champion, Easter Egg, and similar round salad types are often best while small and firm. Begin checking near the seed packet’s date and pull a sample when the shoulder is roughly ¾ to 1 inch across. If the variety is intended to grow larger, or the packet specifies a wider range, let it size up only while the root remains smooth and the weather stays mild.
Do not leave a row until every globe reaches the same diameter. Soil moisture and seedling spacing vary from one plant to the next, so one end of a row may mature several days before the other. Harvest the roots that meet your target and return to the smaller ones after a short interval.
French Breakfast and other elongated salad types
French Breakfast radishes are cylindrical or tapered rather than round. Their color often makes the shoulder easy to see, but diameter alone is not the right finish line. Check the packet for the variety’s expected length and harvest when the root has filled out to that shape, feels firm, and has not developed a thick, coarse base.
For an elongated root, expose the top inch or so and look for a steady taper rather than a skinny thread. A root that is long but still narrow may need more time; a thickened, full-length root is more likely ready. If the soil is heavy or the root is difficult to judge, a single test pull is safer than tugging several tops to compare.
Daikon and winter radishes
Daikon, mooli, Japanese, and winter/storage radishes are not oversized salad radishes. Many need 45 to 70 days or longer, and their expected length can be several inches to more than a foot depending on cultivar. The RHS radish guide notes that oriental roots can reach 30 cm or more and need at least eight weeks. Use the packet’s listed length or diameter and plan to loosen soil around the root before lifting; pulling a long root straight through compact soil can snap it.
Some winter types hold quality longer than tender spring radishes and can be lifted as needed in cool weather. The RHS notes that winter and oriental varieties can remain crisp at larger sizes, while Utah State Extension and Virginia Cooperative Extension recommend harvesting mature crops before severe freezing or storing them under cool conditions. These are not contradictory rules: winter radishes tolerate a broader window, but whether they can stay in your bed depends on how deeply your soil freezes, drainage, and the variety. If a hard freeze is forecast and the ground will become difficult to dig, lift mature roots and store them rather than gambling on access.

Test-pull one root without disturbing the row
A test pull gives you more useful information than staring at the leaves or repeatedly checking the calendar. Choose a representative plant from the row—one with a visible shoulder that looks close to the intended size. Loosen the soil around it if needed, then pull steadily from the base of the foliage. Check the root’s width, length, firmness, and texture before deciding what to do with the rest. Gardening Know How also recommends pulling one root to check size rather than assuming the whole row is ready.
If it is too small but healthy, return to the bed in a few days and leave the remaining plants undisturbed. If it is the right size, use it as a reference for similar plants. If it is oversized, pithy, or splitting, the row has likely reached the point where waiting is costing quality; pick other mature roots promptly and adjust the next sowing or watering routine.
One sample is not a promise that every plant is identical. Take another from a second part of the bed if the soil, shade, or irrigation differs noticeably. This is especially helpful in containers and raised beds, where the edge may dry faster than the center. The goal is to learn how this particular planting is progressing without sacrificing a handful of roots to guesswork.
Harvest selectively as roots reach size
You can harvest radishes one at a time. Pull the largest roots first and leave undersized neighbors to keep growing, provided they are not crowded against mature roots and the weather remains mild. Selective harvest stretches a short crop into several meals and avoids the “all at once” problem that happens when gardeners pull an entire row on its estimated maturity date.
Use the gap left by each harvest to check nearby shoulders and clear weeds, but do not cultivate deeply between the remaining plants. If a root is close to the target and a heat wave or heavy rain is approaching, harvest it now rather than hoping it will improve. A smaller crisp radish is usually a better eating choice than a larger root that has split or become pithy.
Selective pulling works best when seedlings were thinned to the spacing the variety needs. If the crowns are touching or tops overlap densely, the roots may compete for space; leaving a few plants longer will not necessarily correct crowding. Pull mature roots, use the space for a later sowing when the season permits, and thin the next row early enough that each plant has room to swell.
Pull cleanly in loose, dry, or compacted soil
In loose, evenly moist soil, grasp the foliage close to the crown and pull straight upward with steady pressure. Keep the other hand on the soil around the plant if nearby roots are small; that stabilizes the bed and reduces the chance of lifting a neighbor. Avoid yanking by a handful of high leaves, which can tear away from the crown while the root stays buried.
If the soil is dry, crusted, or compacted, loosen it before pulling. A hand fork or narrow trowel works well for long roots: insert it several inches away from the crown, angle toward the root, and lift the soil rather than prying directly under the radish. For a small round type, fingertips may be enough to open the surface. Stop and reposition if you meet strong resistance instead of pulling harder; the root may be longer or more firmly anchored than expected. Gardening Know How’s harvest instructions likewise suggests using a garden fork or trowel when the soil is hard.
Do not soak a dry bed right before harvesting a whole mature row. Utah State Extension warns that heavy watering after a dry spell can contribute to cracking in older roots, and the RHS links uneven moisture with split roots. If the soil is hard, a light, targeted watering can make a test pull easier, but it will not reverse stress that has already affected root texture. When rain is imminent, pick mature roots before the bed takes on a sudden flush of water.
Let weather shape the harvest window
Cool weather generally favors crisp, mild salad radishes; hot, dry conditions can make them sharper, slow root development, or trigger flowering. Utah State Extension notes that radishes grow best before temperatures rise beyond roughly 80°F and that summer heat can promote flower stalks and hollow or hotter roots. The RHS also advises against sowing salad radishes in hot, dry weather because they tend to bolt. These are regional guidelines rather than a universal on/off switch: cultivar, shade, moisture, and local climate change how quickly stress appears.
Check a near-mature row more often when daytime heat is climbing. If roots have reached the target size, harvest them rather than waiting for the tops to become larger. If they are still small and the plant has not bolted, keep moisture steady and use light afternoon shade where practical; do not expect a root already stalled by heat to catch up indefinitely.
Rain and frost change the choice in different ways. After a dry spell, a mature salad radish is vulnerable to cracking when the soil suddenly becomes wet, so pick ready roots before a soaking rain when possible. Before a hard freeze, harvest mature roots that you cannot reliably dig from frozen ground. Winter radishes may tolerate a longer cool-weather window, but they still need protection appropriate to your climate and soil.
When to harvest immediately instead of waiting
Harvest now if the root has reached the variety’s target and a hot spell, heavy rain after drought, or hard freeze is approaching. Pick a salad radish promptly when a flower stalk starts to rise: the plant is bolting, and its energy is shifting toward flowering and seed production instead of a tender storage root. The RHS notes that bolting is often associated with hot, dry conditions; once a root crop has bolted, waiting for a bigger, sweeter root is unlikely to work.
If the root is already a little past its ideal size, pull it and inspect it rather than leaving it in the soil for another week. A firm, sound radish can still be used even if its flavor is stronger than expected. A hollow, spongy, or woody center will not turn tender by staying in the bed. Clear the row and plan another sowing in a cooler window if the season allows.
There is one exception to “harvest at the root stage”: some varieties are deliberately grown for edible pods. Those are harvested for young, crisp seed pods rather than swollen roots, and the harvest schedule differs. The RHS notes that picking the pointed pods while young keeps them crisp. If your seed packet identifies an edible-podded type, follow its instructions instead of applying the salad-radish root cues here.
Diagnose pithy, hot, split, or undersized roots
Texture and shape help you decide whether a row needs more time or has already passed its best window. A firm, smooth root is usually in better condition than a very large one with a coarse surface. Slice a sample if the outside gives no clear answer: crisp flesh is ready to use, while a spongy interior points to an overmature or stressed root.
Pithy or woody roots are commonly overgrown, slow-growing, or heat-stressed. The RHS warns that salad radishes left too long can become pithy and hot. Harvest the remaining roots near target size and shorten the check interval next time; leaving an old root in the ground does not make it sweeter.
Very hot or bitter roots may be an older variety, but heat, slow growth, and water stress also affect pungency. Utah State Extension notes that older, heat-stressed, or slow-growing radishes can taste “hot.” If the root is sound, taste a thin slice before discarding it; stronger roots may still work grated or cooked, but flavor will not reliably mellow in storage.
Split roots often follow uneven moisture, especially when a dry bed receives heavy rain or irrigation as roots mature. Both Utah State Extension and the RHS link irregular moisture with cracking. A crack does not automatically make a radish unusable. If the interior is firm, clean, and free of decay, trim the damaged area and use it promptly; discard a soft, slimy, or rotting root.
Large tops with tiny roots point to a growing problem rather than a harvest-date problem. Crowding, shade, heat, and compacted soil can limit swelling. Pulling the plant earlier will not make the missing bulb appear, so harvest any edible greens, clear the row if it is bolting, and address spacing or soil conditions before replanting.
Trim, rinse, and cool the harvest promptly
Once pulled, separate the leafy tops from the roots if you are not using them immediately. Leaves lose water quickly and continue to draw moisture from the root, so keeping a full bunch attached can leave the radish limp sooner. Harvest to Table also recommends removing the tops promptly. Use clean scissors or twist the tops off close to the crown without cutting deeply into the root. Brush off loose soil outdoors, then rinse the roots under cool, clean running water before eating or storing them.
Handle roots gently. Bruises and cuts shorten the time they stay crisp, and wet roots sealed tightly in a container may deteriorate faster than dry ones with airflow. If you harvested during a warm afternoon, move the crop into shade and refrigerate it soon rather than leaving it on a sunny bench. Do not leave freshly pulled radishes in a hot car or on the counter while you finish other garden work.
The greens can be kept, too, if they are fresh and free of extensive pest or disease damage. Separate them from the roots, rinse away grit, dry them well, and refrigerate them in their own container. The leaves wilt faster than the roots, so plan to use them within a few days.
Store roots and greens separately
For short-term storage, keep radish roots cold and limit moisture loss without sealing in excess water. Utah State Extension gives a storage range of about two to four weeks under cool, moist conditions, while Virginia Cooperative Extension lists three to four weeks for spring radishes under controlled cool, humid storage. Practical home-fridge life varies with variety, harvest maturity, damage, and how steadily the refrigerator holds temperature. Expect the best crunch early, inspect stored roots regularly, and use them before they soften or develop decay.
After rinsing, dry the roots thoroughly and place them in a perforated produce bag or a container that allows some airflow. A slightly damp paper towel can help if the roots dry out quickly, but do not store them sitting in water. Winter and storage types generally keep longer than tender salad radishes, but check them at least weekly and remove any soft or damaged root before it affects others.
Store greens apart from the roots. They usually last only a few days and are best cooked or eaten soon after harvest. If you know you will use roots within a day, you can keep them attached for convenience, but separate the tops for longer storage. Refrigeration preserves texture; it will not repair a pithy root or remove the strong flavor caused by heat and overmaturity.
Use the greens and make the next sowing count
Young radish leaves have a peppery flavor and can be added to salads, blended into a sauce, or cooked like other sturdy greens. Older leaves may be coarse, and leaves with heavy insect damage or signs of disease are better composted. Rinse them thoroughly because soil and grit collect around the stems. If the tops are not appetizing, compost them rather than leaving them attached to roots you want to store.
Radishes do not replace a harvested storage root, so a steady supply comes from planting small amounts at intervals during a suitable cool-weather window. Virginia Cooperative Extension suggests successive spring sowings about 10 to 14 days apart, while Utah State Extension recommends planting at 10-day intervals for a steady supply. Adjust the spacing between sowings to how quickly your garden is maturing: a warm spell can make one row race ahead, while cold soil can slow the next.

Keep a simple note of sowing date, variety, first test-pull date, and the size and flavor you preferred. That record is more useful than copying a generic number of days next season. If a row turned pithy at 1½ inches, harvest that variety younger; if roots stayed crisp while larger, follow the packet and your own growing conditions. Successive short rows also make the harvest manageable, because you can pick at peak size instead of trying to use a whole bed at once.
Conclusion
To harvest radishes at their best, start checking near the variety’s expected maturity date, judge the root rather than the leaves, and use one test pull to confirm size and texture. Round salad radishes are usually picked young; elongated types need a shape-specific cue, while daikon and winter roots follow their own larger target and longer season. Take the largest ready roots first, loosen stubborn soil instead of yanking, and let heat, rain, and freezing weather narrow the window when needed. Trim the greens, rinse and cool the roots, and store both parts separately so the crop you worked to grow stays crisp.