Weed Control Without Chemicals: Organic Methods
Learn which organic weed controls work, when to use mulch or a tarp, how to stop seed production, and why salt and vinegar can damage a garden.
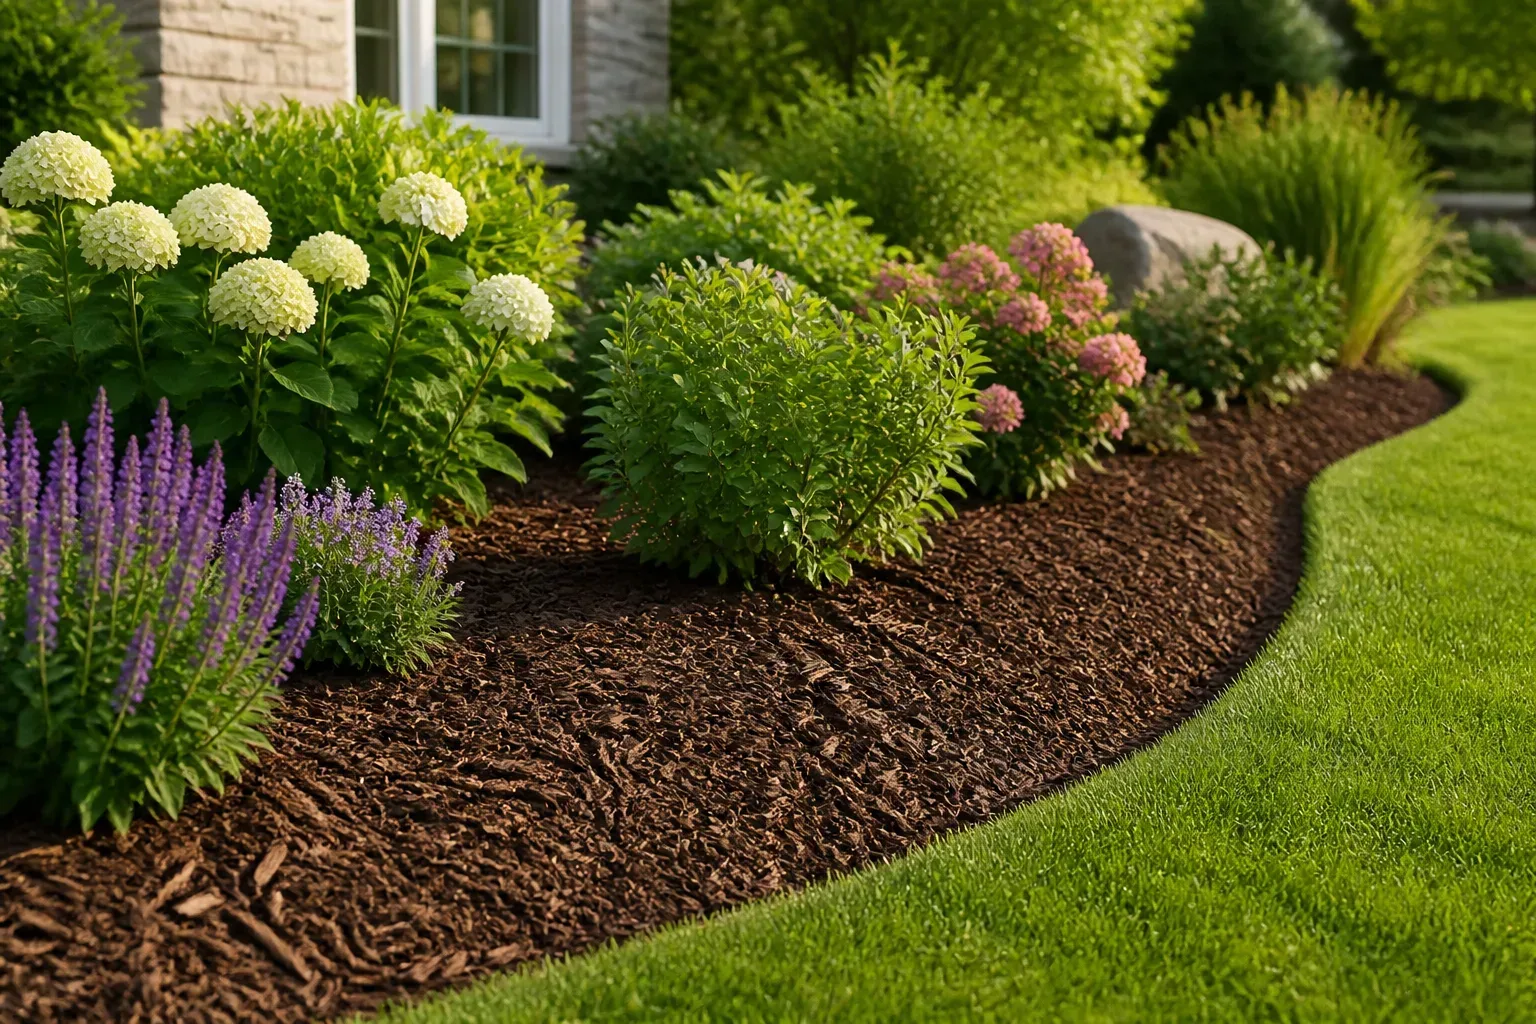
The most dependable way to control weeds without chemicals is to prevent them from establishing, remove young growth before it produces seed, and cover the bare soil where new seedlings would otherwise sprout. In a planted bed, that usually means hand-pulling or shallow hoeing followed by mulch. A neglected, sunny patch may be a better candidate for a temporary tarp, while a lawn needs dense turf and a paved path needs a crack tool rather than a garden-bed treatment.
There is no single treatment that clears every weed permanently. Annual weeds usually respond to early removal and light exclusion; established perennials with deep roots, bulbs, or rhizomes often return after their tops are cut. The useful question is not “What natural spray kills weeds?” but “What is this weed, where is it growing, and how can I keep it from recovering or reseeding?”
Begin with the weed, not the remedy
Start by deciding whether you have an annual weed or a perennial one. Annuals such as many chickweeds, purslanes, and summer grasses grow from seed, make new seed, and die within a season. Remove them while small or keep them from flowering, and you interrupt the next generation. Perennials such as dandelion, bindweed, and some creeping grasses can return from roots or underground stems, so pulling off the top is not enough.
Then look at the site. A weed between vegetables is a different problem from one in a dense lawn, a shrub border, or a crack in concrete. A hoe can slice seedlings in a row but may damage shallow crop roots; mulch can suppress seedlings in a bed but cannot be spread over a lawn; boiling water may be confined to a hardscape joint but can injure anything rooted nearby. Choosing by both weed and location avoids collateral damage and wasted work.
If you do not recognize a plant, take a clear photo and identify it before pulling. Some weeds have irritating sap, thorns, toxic parts, or invasive roots that can spread when chopped or composted. For an unfamiliar invasive plant or a large patch that is difficult to handle safely, check your local Extension or invasive-species program for species-specific disposal instructions.
Stop annual weeds before they make seed
Seed prevention is one of the highest-value jobs in a chemical-free garden. A small plant pulled this week is much easier to dispose of than hundreds of seedlings next spring. Walk beds and paths regularly during active growth, and remove flowering weeds before the seed heads mature. If you cannot pull a large plant immediately, cut off and bag its seed head first so it cannot finish ripening in the garden.
Do not assume a weed is harmless because its flowers are small. Some annuals release many seeds, and wind, water, mower discharge, shoes, and compost can move them into clean areas. Put seed-bearing weeds in municipal yard waste or household trash when your local rules allow; a cool backyard compost pile may not reliably destroy viable seeds or perennial root pieces. For green, seed-free weeds, composting can be appropriate if the pile is managed well.
Timing matters more than doing a perfect cleanup once. A brief weekly or twice-weekly pass while seedlings are tiny can be easier than a long session after weeds have formed sturdy stems and seed heads. University of Nevada Extension emphasizes acting early and combining removal with mulch and dense planting; that pattern makes sense because each action prevents a different route of regrowth. Epic Gardening’s practical weed guide likewise recommends routine pulling while weeds are young.
Pull weeds while roots are still easy to remove
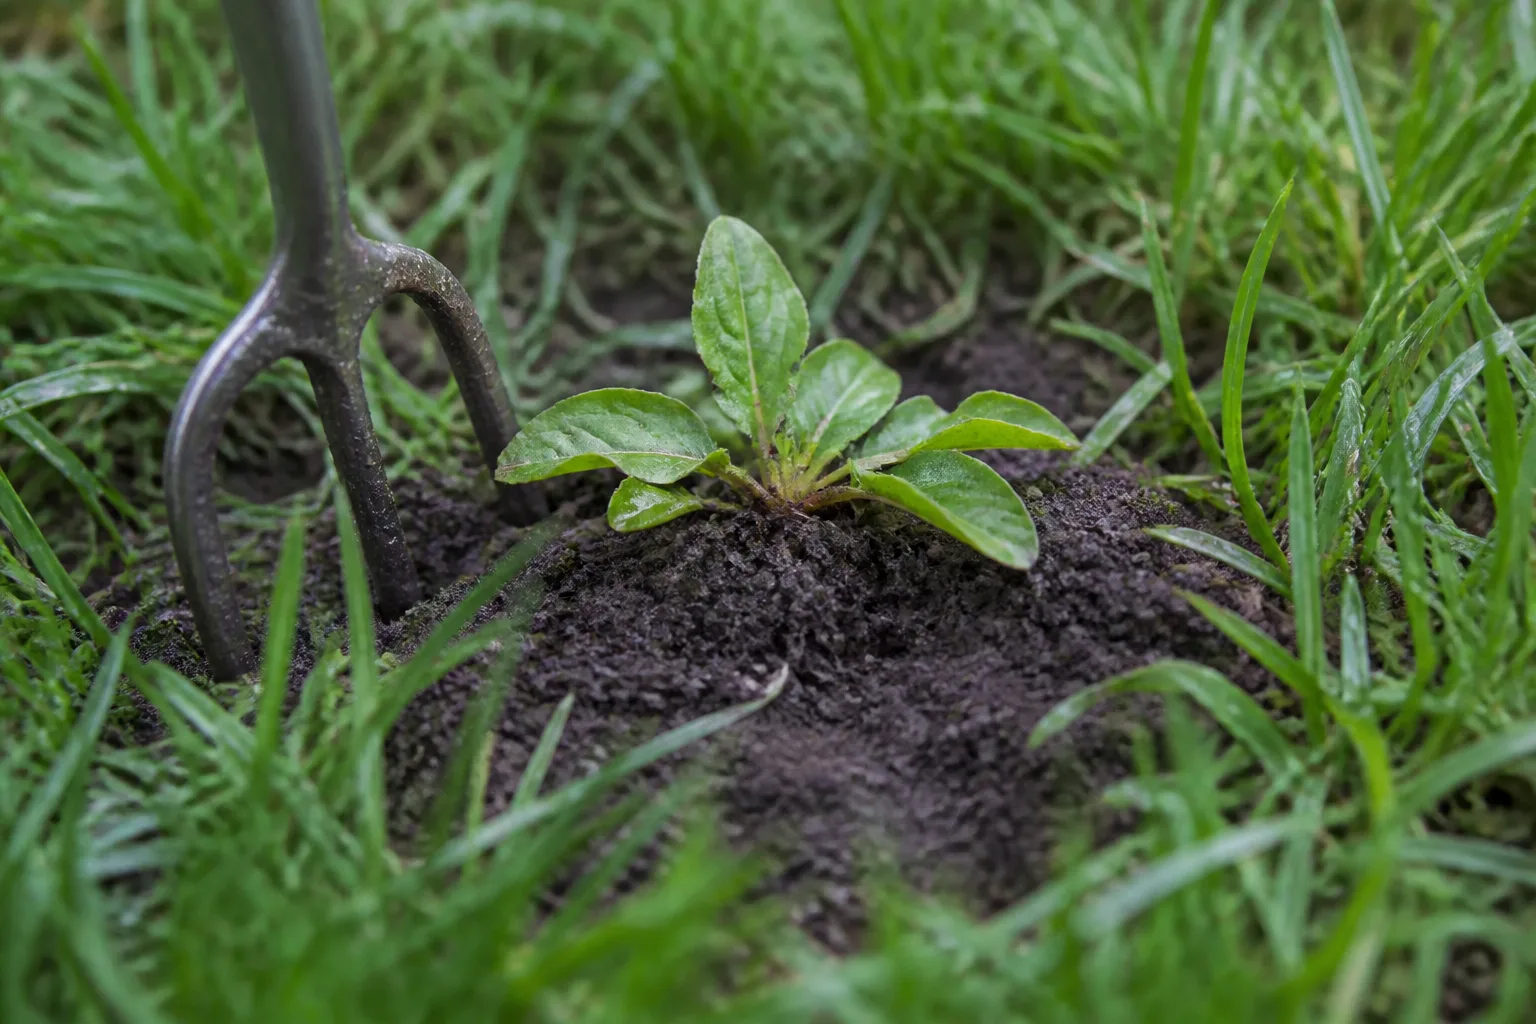
Hand-pulling is precise, inexpensive, and often the best option around flowers, vegetables, and young shrubs. Pull after rain or water the bed first so the soil is moist but not muddy; a root that slides out intact is less likely to regrow than one snapped at the crown. Grip low on the stem, loosen the soil beside the plant with a hand fork if needed, and lift steadily rather than yanking from the leaves.
The goal is not to excavate every inch of a bed. Disturbing a large area of soil can bring buried seeds closer to light and create another flush of seedlings. Work only the soil needed to release the target root, then firm it lightly and cover the exposed spot with mulch. In a dense planting, a narrow tool such as a hand fork or hori-hori knife can be more controlled than a broad hoe.
Lift taproots and runners instead of snapping stems
For dandelions and other taprooted weeds, insert a narrow weeding tool alongside the root and lever the soil open before lifting. If the root breaks, remove as much of the remaining piece as practical and watch the spot for new leaves. Pulling a plant after the soil is damp helps, but a mature taproot can still break; repeat removal is better than digging a large hole that injures neighboring roots.
Creeping perennials need persistence. Bindweed, bermudagrass, and similar plants may resprout from underground stems after one round of pulling or smothering. Remove each new shoot promptly, avoid chopping the rhizome into many pieces with deep cultivation, and repeat the treatment over the growing season. UC IPM’s sheet-mulching guidance notes that even a sheet barrier can struggle with aggressive rhizomatous weeds when shoots exploit seams; for a serious infestation, identify the species and follow a locally appropriate multi-season plan.
Hoe tiny seedlings while the surface is dry
A sharp hoe or stirrup hoe is useful when many tiny weeds are spread across an open bed or between rows. Move the blade just below the soil surface to sever seedlings at the crown, then leave the uprooted plants on a dry, sunny surface where they can wither. Shallow slicing preserves more soil structure and is faster than turning over the entire bed.
Hoe when the soil surface is dry enough that cut weeds will dry out. If you cultivate wet soil, weeds can re-root and the soil can smear or compact. Work close to crop rows carefully, especially around seedlings with shallow roots; a hand tool is safer within a few inches of tender plants. For established weeds, a hoe that only cuts the top may give temporary relief, so dig or repeatedly cut the plant according to its root system.
Use mulch as a light barrier in garden beds
Organic mulch is one of the easiest ways to prevent new weeds in a planted border or vegetable bed. Wood chips, shredded bark, straw, and shredded leaves shade the soil surface, so many small seeds have less light and less open space in which to establish. A practical layer around 2 to 3 inches deep can suppress seedlings in a home garden; use an even blanket, not a mound, and keep it a few inches away from trunks and plant crowns so they are not buried or held constantly wet.
Mulch works best after you remove existing weeds and seed heads. It is a preventive barrier, not a reliable way to smother every mature perennial. UC IPM’s WeedCUT mulching guidance describes mulch as useful for short- to medium-term weed suppression and recommends follow-up weeding and replenishing depth as the material settles. University of Nevada Extension also describes organic mulch as a practical way to block light and reduce new growth. The exact depth depends on material and use: loose straw settles differently from bark chips, so check whether bare soil is becoming visible rather than topping up by calendar alone.
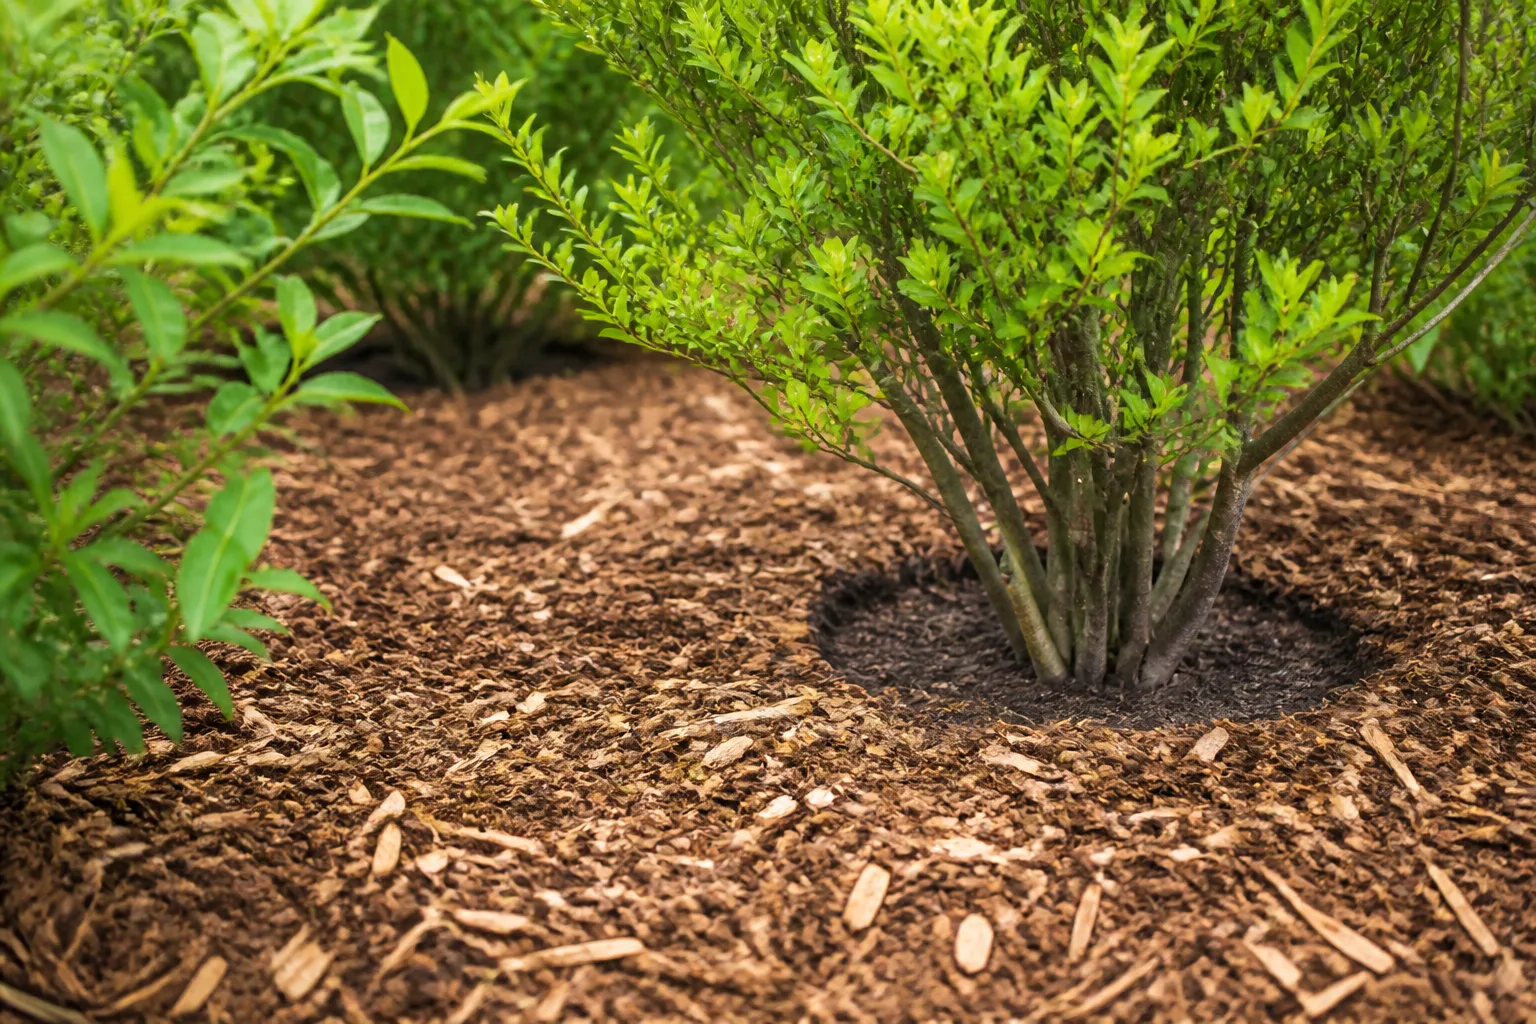
Choose mulch that is reasonably clean and free of seed heads. Avoid piling fresh clippings into a thick, wet mat, which can heat, mat down, and block water or air from reaching the soil. Compost can improve soil, but because it is fine and nutrient-rich, it is not always the best surface barrier against weed germination; use coarser material for the top layer and keep compost beneath it when soil improvement is the goal.
Expect some weeds to appear on top of old mulch as windblown dust and decomposed leaves accumulate. Pull those seedlings before their roots reach the soil below, then refresh the surface where it has thinned. A permanent-looking bed still needs occasional monitoring; mulch lowers the number of weeds and the effort required, rather than making the garden maintenance-free.
Smother a new bed with cardboard or a tarp
For a new planting bed or a patch you are converting from lawn, sheet mulching can block light over a larger area with less digging. First cut tall vegetation low and remove mature seed heads. Lay plain, unwaxed cardboard over the ground with overlapping edges so shoots cannot find seams, wet it so it conforms to the surface, and cover it with several inches of organic mulch to hold it down. Open small planting holes only where you plan to install plants.
This is most useful when the area is relatively open and you can cover it completely. Do not place cardboard over the crowns of plants you want to keep, and do not leave gaps around edges, posts, or irrigation lines. The cardboard decomposes, so check for tears and emerging shoots; a persistent perennial may require repeated cutting or a second season of coverage. UC IPM’s sheet-mulching guidance reports that sheet mulching can suppress some vegetatively reproducing weeds but is not a dependable standalone answer for aggressive bindweed or bermudagrass.
An opaque tarp can also deprive weeds of light. Secure the edges against wind and leave the cover undisturbed long enough for the vegetation beneath it to weaken; the exact duration varies with weather, plant type, and how actively the weeds are growing. Unlike clear-plastic solarization, opaque tarping works mainly by excluding light, so do not assume that a black tarp has heated the soil enough to kill buried seeds. After uncovering, plant or mulch promptly so bare ground does not invite the next flush.
Solarize bare ground in the hottest part of summer
Soil solarization uses clear plastic and strong sun to heat moist soil and reduce susceptible weed seeds and seedlings near the surface. It is best reserved for an empty bed, a future vegetable plot, or a sunny patch being reclaimed—not a planted border where the heat would injure desirable roots. In a warm, sunny climate, it can be an effective reset before planting; in cool, cloudy, or shaded conditions, it may not reach useful temperatures.
To solarize, mow or remove existing growth, smooth the surface so the plastic sits close to the soil, and moisten the soil thoroughly. Lay clear plastic tightly over the area and bury or weight every edge so heat is retained and wind cannot lift it. Leave it in place during the hottest part of the season for roughly four to six weeks in suitable conditions; cooler or cloudier sites may need longer. UC IPM’s solarization guidance notes that the treatment is strongest near the soil surface and that control declines with depth, so do not expect it to eliminate deep roots or rhizomes. Texas A&M AgriLife Extension describes solarization as a chemical-free approach and reports that Texas research plots saw sharply reduced weed numbers after four weeks, with effects extending into the following season.

Once the cover comes off, avoid deep digging that brings untreated seed up from below. Plant the bed promptly or add mulch, and monitor for seedlings that blow in from surrounding areas. Solarization is not a universal sterilization treatment: it can affect beneficial organisms and desirable seeds in the treated zone, uses plastic that must be removed and disposed of, and is ineffective against some deep-rooted perennial weeds. If you only need to suppress existing growth in a cooler region, an opaque tarp may fit better than trying to force a heat treatment that the weather cannot provide.
Fill open soil with plants that can hold their space
Weeds exploit bare, well-lit ground. In a perennial border, place compatible plants at their mature spacing so their leaves shade much of the soil without crowding them into poor airflow. In a vegetable bed, use close but crop-appropriate spacing, succession planting, or a cover crop during an off-season rather than leaving every path and bed edge bare.
Groundcovers can reduce the number of open patches that need weeding, but select them for the site and keep them within bounds. A vigorous groundcover that spreads into paths or overwhelms smaller plants simply replaces one management problem with another. In a bed with new transplants, allow them to establish before expecting them to shade out seedlings; mulch is useful during that gap.
Watering design also changes where weeds thrive. Drip irrigation or a soaker hose delivers water close to crop roots instead of wetting every empty strip, which can reduce germination in unused ground. It will not prevent every windblown seed from sprouting, but it makes water available where you want growth and keeps the rest of the bed less inviting.
Make lawn weeds a turf-care problem
In a lawn, the long-term nonchemical strategy is to help the desired grass close thin gaps. Mow at the height recommended for your turf species and season, avoid scalping the lawn, and repair bare spots with suitable seed or sod. Dense, healthy turf shades the soil and competes with many seedlings more effectively than repeated shallow applications of mulch or surface sprays.
Correct the reason the grass is thin before overseeding. Compaction, poor drainage, excessive shade, drought, and inappropriate mowing can all leave openings for weeds. A soil test can guide pH and nutrient decisions; adding fertilizer without knowing what the lawn needs may feed weeds as well as grass. Water deeply enough to support the turf’s roots while avoiding a schedule that keeps the entire yard constantly wet.
For isolated broadleaf weeds, remove the root with a narrow weeding tool when the soil is moist, then fill the opening with grass seed if the lawn is thin there. Corn gluten meal is sometimes sold as a natural pre-emergent, but it does not remove existing weeds and may interfere with desired seed germination if timing is poor. Treat it as an optional product with limitations, not as the foundation of a chemical-free lawn plan.
Handle weeds between pavers with precise tools
Weeds in pavement usually grow in dust and organic debris that collect in joints, rather than emerging from some deep soil reservoir beneath the entire path. A narrow crack weeder, old screwdriver reserved for garden use, or stiff brush can remove small plants without spraying the surrounding bed. Clear the joint before weeds set seed, and refill or repair loose joint material where appropriate so fewer seeds and crumbs collect there.
Boiling water can be used cautiously on isolated weeds in a hardscape joint, where it is unlikely to contact desirable plants. It kills aboveground tissue on contact but may not kill a deep perennial root, so expect repeat work or combine it with root removal. Carry the pot slowly, keep children and pets away, and never pour hot water where it could run into a planted bed, cross a walkway, or contact landscape fabric. Gardening Know How cautions that hot water is nonselective and can damage nearby roots; scald risk is reason enough to choose a mechanical tool when you can reach the weed safely.
Understand what landscape fabric can and cannot do
Landscape fabric can suppress weeds when installed carefully beneath a long-lived surface such as gravel, but it is not a permanent fix for every bed. Seeds can germinate in dust and decomposed mulch above the fabric, and shoots can find seams or holes. When weeds root through a damaged barrier, pulling them can tear the fabric further and turn a small repair into a larger job.
In a garden where you want to add compost, divide perennials, or change plantings, a permanent fabric layer can make ordinary soil care awkward. Organic mulch alone needs replenishing but leaves the soil accessible; cardboard is easier to use for a temporary bed conversion because it decomposes. If you inherit fabric, remove weeds from the top surface, repair accessible gaps, and decide whether the underlying layer still serves the path or bed before adding more layers on top.
Skip salt, vinegar, and homemade spray recipes
“Natural” does not mean selective, harmless, or chemical-free. Vinegar contains acetic acid and burns foliage it touches; it can also injure nearby flowers and vegetables, while established perennial roots may survive and send up new shoots. Salt can make the soil inhospitable to plants you want to keep, including future plantings, so spreading it in beds or along lawn edges trades a visible weed for a longer-lived soil problem.
Dish soap and rubbing alcohol are not reliable soil-safe weed controls either. They damage plant tissue indiscriminately and can affect the desirable leaves they contact. Household mixtures also do not become safer simply because the ingredients are common. If your goal is to garden without herbicides, choose physical removal, mulching, or cover-based methods instead of redefining a household chemical as a “natural” weed solution.
Use boiling water only on hardscape and with care
Hot water is a physical treatment, not a selective one. It can kill a small weed in a pavement seam, but it can also burn skin and damage shallow roots, worms, and soil life if poured into a planting bed. Keep it away from lawn edges, raised-bed borders, fabric, and any spot where runoff can reach valued plants; do not use it on a windy or crowded route where a spill could injure someone.
Fire-based weed torches carry an even sharper limitation: dry mulch, dormant grass, leaf litter, fences, and nearby buildings can ignite. A flame tool may be marketed for pavement, but it is a poor choice during dry, windy weather or anywhere combustible material is close. A hand tool and a quick repeat visit are usually the calmer, more precise option.
Follow a simple seasonal routine
In early spring, walk the garden before planting and remove winter annuals while they are small. Prepare beds with minimal soil disturbance, add mulch where the surface will remain open, and repair lawn bare spots before weeds occupy them. If you plan to solarize or tarp a bed, start early enough to finish before the crop or flowers need that space.
During active growth, make short, regular passes. Pull or hoe seedlings while young, remove seed heads from plants you cannot fully clear, and check mulch edges and paving joints after rain. This is easier on the back and more effective than waiting for one perfect weekend to weed everything at once.
In late summer and fall, prevent seed production from any remaining weeds and cover exposed soil with mulch, a suitable cover crop, or planned plantings. Keep an eye on aggressive perennials as the weather cools; some continue growing late in the season. Each year’s goal is not a sterile yard. It is fewer mature weeds, fewer new seeds, and less bare ground for the next flush to claim.
Avoid the mistakes that make weeds return
The most common mistake is using one method for every weed. A shallow hoe is excellent on tiny annual seedlings and frustrating on a dandelion taproot; mulch suppresses new germination and may not defeat an established rhizome; a tarp can clear a new bed but may injure plants left underneath it. Matching the tool to the weed’s growth habit prevents repeated work that never reaches the source of regrowth.
Another frequent setback is disturbing more soil than necessary. Deep cultivation can expose buried seeds, while chopping perennial roots can leave viable pieces ready to resprout. Pull deliberately, slice shallowly, and cover soil again after removal instead of leaving a newly tilled surface open.
Finally, do not wait until weeds have flowered and assume mulch will bury the problem. Remove mature seed heads first, then cover or plant the ground. Keep mulch off stems, maintain it as it settles, and return to persistent patches over several weeks or seasons. Consistency—not a secret ingredient—is what makes a chemical-free plan improve over time.
Conclusion
For reliable weed control without chemicals, identify what is growing, stop it from making seed, and use the least disruptive method that fits the site. Pull young weeds from moist soil, slice tiny seedlings with a hoe on a dry day, mulch open beds, and reserve tarps or solarization for bare ground that can stay covered. In lawns, grow thicker turf; in pavement joints, remove plants with narrow tools and prevent debris from collecting.
Expect to revisit difficult perennials, and resist shortcuts such as salt or household sprays that can injure soil and nearby plants. A few brief checks each week, plus a plan for covering bare soil, can turn an exhausting cleanup into manageable maintenance without relying on herbicides.



