Upside-Down Christmas Trees: How to Hang and Decorate
Planning an upside-down Christmas tree? Compare ceiling-hung and stand-supported styles, measure your room, choose lightweight décor, and avoid mounting risks.
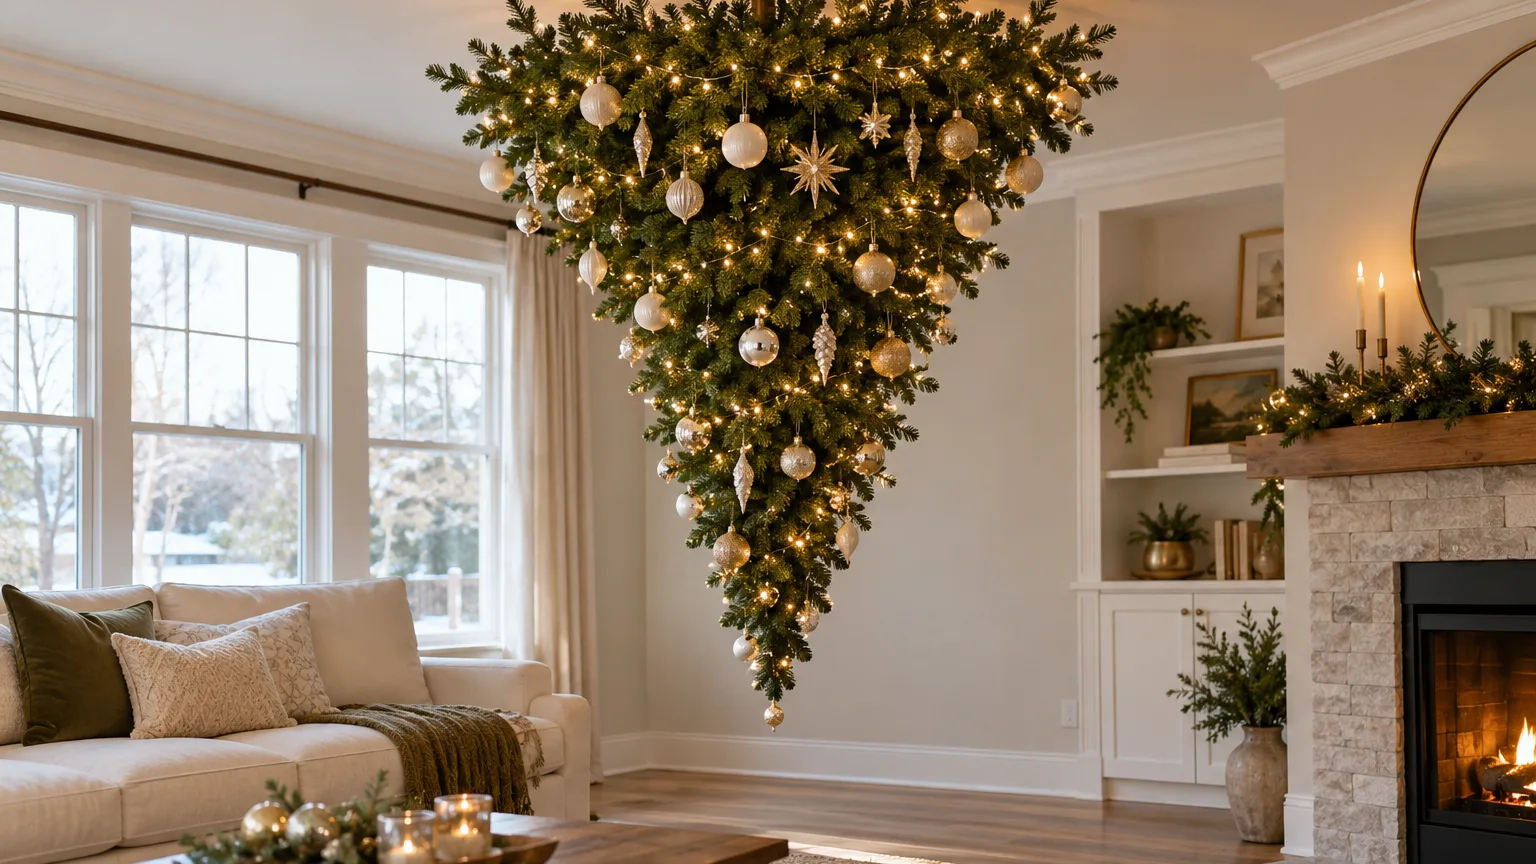
An upside-down Christmas tree turns the familiar silhouette into a ceiling-hung focal point: the broad end sits near the ceiling while the branches taper toward the floor. It can free the floor area an upright tree would occupy, but it shifts the design problem overhead. Before buying one, choose a tree and mounting system intended for this orientation, check the room and load instructions, and decide whether the visual effect is worth the installation trade-offs.
What an upside-down Christmas tree is
An inverted Christmas tree is an artificial or cut evergreen displayed with its trunk tip pointing down and its wider crown above it. There are two main formats: a tree suspended from a ceiling or other approved structural support, and a purpose-built inverted model held by a floor-standing base. They create a similar silhouette but have different installation, mobility, and safety considerations.
The hanging format is the more dramatic one because the tree appears to float, and there is no central pole or base taking up the floor below it. A stand-supported model can be easier to assemble, move, and take down, although its base still occupies space and may need a visual cover. Neither option makes the tree disappear from the room: the branches still need clearance, the display still affects traffic flow, and the ceiling system must safely support the complete decorated weight.
Where the tradition came from—and what is uncertain
Upside-down evergreens have historical precedents in parts of Europe, including the Polish custom known as podłaźniczka, which used a spruce or fir top or evergreen branches hung from the ceiling and decorated. Modern accounts also repeat stories that inverted trees symbolized the Holy Trinity or that a medieval monk introduced the practice. Those explanations are best treated as traditions and interpretations, not as a precisely documented single origin. The historic decoration and its modern revival are distinct from the retail-ready trees sold today; both Martha Stewart and Better Homes & Gardens summarize these historical associations while describing current styles.
The modern appeal is visual and practical. A tree above a table, display platform, or open floor area can draw attention upward and leave room underneath for presents or seating. It also reverses the usual viewing order: people see ornaments hanging from branches that narrow toward the floor, while the crown becomes a broad ceiling-level feature. That can look polished in a room with enough height and breathing space, but cramped if the widest branches crowd a ceiling fan, light fixture, shelf, or doorway.
Choose a display format that suits your home
Ceiling-hung trees
A ceiling-suspended tree creates the most convincing floating effect and can leave the largest usable area below it. It also creates the greatest installation responsibility. The mounting point, bracket, tree, lights, and ornaments form one overhead assembly, so a hook’s advertised capacity by itself does not confirm that a particular ceiling or tree is suitable.
For a home, start with a manufacturer-designed tree and mounting kit whose instructions explicitly permit inverted display. Use the exact tree size and attachment method specified, and ask a qualified installer to identify an appropriate structural attachment point if the ceiling construction or load path is unclear. A plasterboard or drywall surface, adhesive hook, decorative ceiling medallion, or existing light fitting should not be assumed to be a structural anchor.
Stand-supported trees
A floor-supported inverted tree is often the simpler choice for renters, people who expect to move the tree between rooms, or anyone who does not want overhead hardware. The base must be designed for the inverted model; it is not safe to improvise by turning an ordinary tree stand upside down. Read the instructions for the allowable tree height, total weight, branch assembly, and ornament load, then place the base on a level, stable surface.
This format is not necessarily safer in every room. A narrow or lightly weighted base can still tip if a person or pet catches a branch, and the downward-pointing tip can sit at face height. Choose a location where the tree is not likely to be bumped, keep cords out of walking routes, and secure the tree only as its manufacturer directs. If floor space is the reason for choosing an inverted display, measure the stand footprint before ordering; it may be wider than the photos suggest.
Measure the room before you choose a tree
Measure the ceiling height at the exact proposed mounting point, not in another part of the room. Subtract the space needed for the mount, the tree’s full stated length in inverted position, and the clearance you want above the floor or table. Also check the widest part of the crown. On many models the largest branches sit near the ceiling, so ceiling fans, pendant lights, sprinklers, cabinets, and nearby walls can collide with the tree even when the pointed end appears to fit.
Make a full-scale floor mock-up before buying. Lay out the tree’s length and approximate widest diameter with tape, cardboard, or a measuring rod, then walk the routes people actually use: around dining chairs, between the sofa and door, and toward exits. Include ornaments and topper in your dimensions because they extend beyond the branch tips. A tree that fits on paper may still make the room feel crowded once lights, gifts, chairs, and guests are in place.
An inverted tree can give back floor area directly underneath its branches, but it does not automatically solve a small-room problem. You exchange a floor footprint for an overhead object that can restrict movement, sightlines, and access to ceiling fixtures. If the ceiling is low, the room is narrow, or the only possible location is above a doorway or busy path, a wall-mounted half tree, tabletop tree, or traditional slim tree may be a better fit.
Make mounting and fire safety the first design decisions
Do not treat a ceiling installation as a simple decoration hook. Confirm the combined load limit for the tree, mounting hardware, lights, and ornaments in the actual configuration; follow the product instructions, and have a qualified installer assess the support point when necessary. If you rent, live in a condo, or share a building, check permission and building rules before drilling or suspending anything. Do not rely on adhesive hooks, ordinary curtain hardware, a suspended ceiling grid, or a hook placed in drywall alone.
Fire prevention still matters even though an upside-down tree looks different. The U.S. Fire Administration advises keeping trees at least 3 feet from heat sources, inspecting holiday light strands for frayed or pinched wires, following manufacturers’ limits on connected strands, and keeping the tree clear of exits. The Consumer Product Safety Commission also urges consumers to use decorations properly and avoid overloading electrical outlets. A “fire resistant” label on an artificial tree does not mean it cannot burn; use it as one selection criterion, not a reason to relax the rest of the safety plan.
There is a practical reason most inverted home trees are artificial. A cut tree cannot sit in a conventional water reservoir while hanging upside down, so it will dry as the season goes on. Since USFA warns that dry trees can burn quickly, a suspended real tree is a short-lived display with a significant care and fire-safety drawback, not a low-maintenance way to reuse a regular cut tree. If you want fresh greenery, consider a small, secured bundle of evergreen branches in a vessel designed for that use rather than a full dry tree overhead.
When to skip a ceiling installation
Choose a stand-supported model or another tree style if you cannot verify a suitable structural mount, if the ceiling is damaged, if the tree would hang over a regular walking route, or if a landlord or building manager does not approve the work. The same is true if you cannot safely lift and position the model or if reaching its lights and ornaments would require repeated climbing over furniture. A dramatic look is not worth creating an overhead hazard or a repair problem.
Plan the layout and install in stages
Start with an empty-room layout rather than a decorated tree. Mark the crown’s widest point on the ceiling plan, the pointed end’s lowest point, and the boundary of the ornaments. Confirm that the design leaves access to doors, windows, smoke alarms, sprinklers, and light switches. Keep the tree away from fireplaces, radiators, portable heaters, candles, and heat vents; follow the USFA’s three-foot heat-source clearance as a baseline for holiday trees.
Read the specific assembly instructions before unboxing or modifying the trunk. Some products are designed to be assembled in sections and attached in a set order; others require a mounting plate or included stand. Do not drill through a trunk or cut a branch to create a hanging point unless the manufacturer explicitly instructs you to do so. Unapproved changes can weaken a joint, void a warranty, or make the tree’s weight distribution unpredictable.
If the model is ceiling-mounted, install the approved support first and inspect it before adding decoration. Two adults should handle lifting and alignment, with one person steadying the tree while the other attaches it according to the instructions; keep everyone else, pets, and fragile objects out of the fall zone. When it is secured, step back and check that the trunk is centered, branches do not press against the ceiling or walls, and the tree does not rotate or swing when lightly approached. Stop if anything shifts, creaks, pulls away, or feels unstable.
Decorate an inverted tree from lights to ornaments
Fluff the branches and test any preinstalled lights before the tree goes up, if the product instructions allow. A ceiling-hung tree may be easier to wire and shape while it is at a manageable height, but avoid loading it with ornaments before the mount has been installed and checked. Once it is stable, work from the wide upper crown toward the pointed lower end so you can see how the decoration density changes as the tree narrows.
Place lights first, then lightweight garland or ribbon, and finish with ornaments. On an inverted tree, long ornaments and ribbons can hang into walking or sitting space, so test their lowest point before securing the final layout. Use clips or ties intended for holiday lighting and tree branches, keep cords close to the trunk where possible, and route the plug so it does not pull on the mount, cross a walkway, or become pinched by a ceiling edge.
Choose ornaments for low weight as well as appearance. Paper, felt, wood, lightweight plastic, and fabric decorations are easier to distribute than dense metal, stone, or glass pieces. If you keep heirloom glass, place only a few on sturdy inner branches that are away from the tip, furniture, and any place a person could brush against them. Check each hook or tie by hand before stepping away, and skip anything that swings freely into a wall or seat.
Keep the visual weight balanced
The widest branches are now at the top, so ornament clusters can make the crown feel visually heavy even when the display is physically within its stated weight limit. Spread color and reflective pieces through the full taper instead of concentrating every statement ornament at the center. Keep the lowest point relatively simple: a heavy cluster there can swing, snag, or catch a passerby, while a light bow or a few small pieces preserve the tapered silhouette.
Choose a topper that works upside down
The classic star or angel may not make sense at the tree’s upper, broad end, and adding a heavy topper close to the mount can change the load at a sensitive point. Think of the crown as a canopy: use a light bow, a strand of ribbon, or a small ornament cluster attached to branches rather than hanging a basket, stack of faux gifts, or other bulky object from the center. If the tree came with a decorative cover for its mount, use only the supplied component or a lightweight material attached as directed.
You can also omit a separate topper. A well-lit crown and evenly distributed ornaments already create a strong focal point, and the downward taper gives the eye a natural stopping point. If you want a visible accent near the pointed end, make sure it remains above head level and cannot swing into a person or doorway.
Match the tree to your room and decorating style
The reverse silhouette is already attention-grabbing, so a restrained palette often looks more composed than adding multiple competing novelty features. Repeat two or three colors from the room’s existing textiles or metal finishes, then use texture for contrast: matte paper ornaments beside glossy baubles, velvet ribbon with clear lights, or natural wood against a dark green tree. A flocked or white model can be striking, but it also reflects more light, so fewer ornaments may be enough.
Keep a small room open
In an apartment or compact living room, choose the smallest tree that delivers the effect and keep it close to a wall or a furniture zone, not over a doorway. Leave the tip high enough that it does not become a head-height obstacle, and keep the walking route beneath or beside it open. A slim console or sideboard can visually anchor a stand-supported model, while gifts can be arranged in a shallow group rather than spread across the floor.

If the tree is meant to save floor space, resist filling the cleared area with a large pile of presents, baskets, or an extra bench. Keep frequently used furniture accessible and leave enough room to open drawers or move chairs. The arrangement should reduce clutter in everyday use, not simply relocate it under the branches.
Build a dramatic lobby-style display
For a taller room, treat the tree as a vertical installation and give it a quiet background. A single metallic accent, a coordinated light color, or a few oversized but lightweight shapes can make the scale legible without cluttering the branches. Repeat that finish once elsewhere in the room—in a wreath, table setting, or ribbon on the gifts—so the tree looks connected to the rest of the holiday scheme.
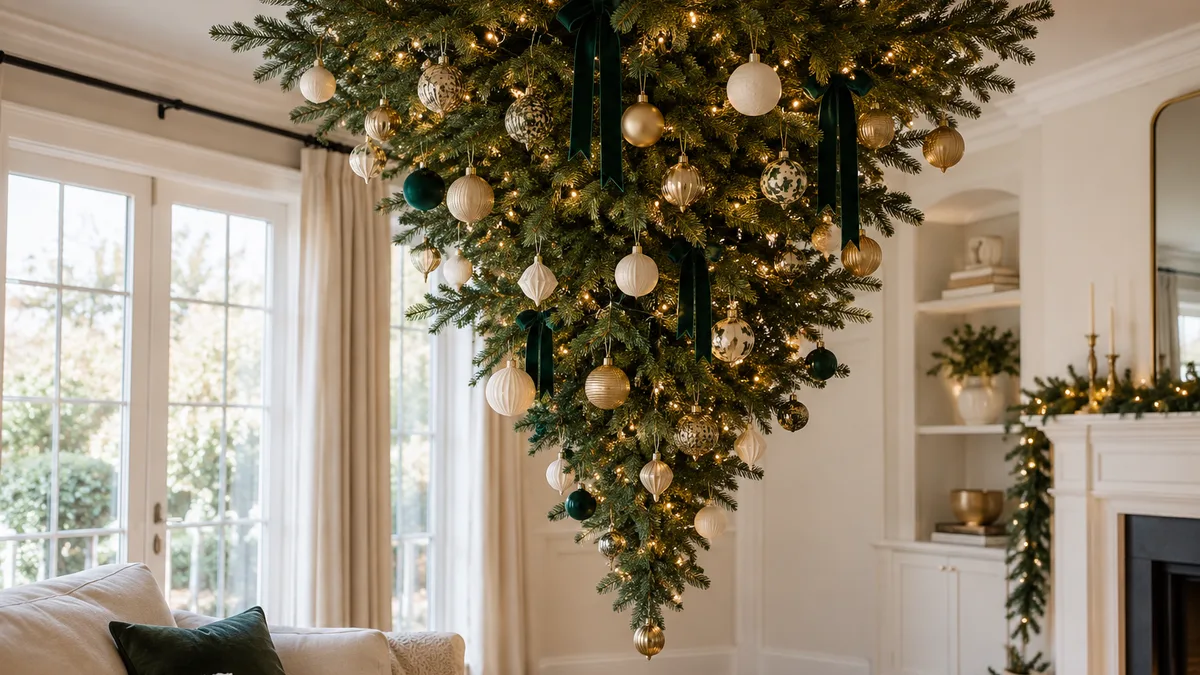
Hotels and event spaces can use professional rigging and staff oversight that a private home may not have. Borrow their restrained styling, not their assumptions about ceiling capacity or crowd protection. In a home, the display still needs a verified mount, a clear exit path, and enough distance from heat and contact.
Place gifts and finish the floor area
Presents can sit under the pointed end, beneath the crown, or off to one side; choose the arrangement that leaves the room easy to use. A low pile of wrapped gifts can make the inverted shape feel grounded, but gifts should not hide the stand, cover a power strip, or form a trip hazard. Keep packages and paper away from candles and heat sources, and leave the path to doors open.
A traditional tree skirt may not work when there is no trunk at floor level. Instead, use a small rug, a shallow basket for cards, or a simple grouping of gifts to define the zone without pretending the tree has a conventional base. Avoid suspending a heavy skirt from the ceiling around the mount; it can hide the hardware and add load where you do not want it.
Fix common decorating and stability problems
If the tree looks crowded at the ceiling, remove some ornaments from the broad crown and repeat them farther down the taper. If it looks visually top-heavy, reduce the size of the largest pieces and add a few smaller ornaments lower on the branches. Step back from the room entrance and from the main seat; the tree can look balanced up close but awkward when its outline intersects a ceiling fan, window, or pendant light.
If ornaments keep slipping, replace loose hooks with branch-compatible clips or soft ties, then test them with a gentle tug before rehanging delicate pieces. If lights sag or cords pull, take the tree out of service until you can route the cable without strain and confirm the connector limits in the manual. Never solve a wobble by adding a heavier ornament or tightening a random wire around the trunk; a moving tree needs its mounting system checked, not more decoration.
If the installation shifts, makes a new noise, or begins to pull away, clear the area underneath and remove the tree only if you can do so safely. Do not stand below it to inspect a questionable ceiling attachment. Ask the installer or manufacturer for guidance, and do not reuse the system until the source of movement is corrected.
Plan takedown before installation day so an overhead display does not become difficult to reach at the end of the season. Follow the model’s removal sequence, first clearing presents and fragile ornaments from the drop zone, then unplugging the lights and taking off detachable ribbon or garland while the tree is still secured. Do not pull a suspended tree down by its branches or use the cord, trunk, or mounting hardware as a handle.
For a ceiling-mounted model, keep people and pets out of the area and use only the support points named in the instructions while releasing the mount. If lowering the tree requires climbing on furniture, working at an awkward angle, or guessing how a bracket unlocks, stop and arrange help from the installer or manufacturer instead. A stand-supported model should be dismantled in its stated order, with the trunk supported so sections do not slip or fall as connectors are released.
Once the tree is on the floor, inspect the mounting parts, trunk joints, light strings, and plugs before packing anything away. Do not reuse a bent bracket, cracked connector, frayed cord, or part that no longer locks securely; check the CPSC’s holiday safety guidance for current product-safety and recall information. Store the manual and all model-specific hardware together in a labeled bag, and note the tree’s assembled dimensions and mount location so next year’s room check starts with accurate measurements.
Conclusion
An upside-down Christmas tree works best when you plan it as both a decorating feature and an overhead installation. First choose between a manufacturer-designed suspended model and a stand-supported version; then measure the room, verify the approved support, preserve exits and heat clearance, and keep the ornaments light. If you cannot confirm those basics, a smaller or upright tree is the better holiday display. When the space and mounting system are right, the inverted silhouette can make a memorable focal point without taking over the room.