27 Sage Green Nursery Ideas for a Serene Baby Room
Explore 27 sage green nursery ideas for walls, trim, furniture, murals, and textiles, plus a practical way to choose a shade and keep the sleep space safe.
Sage green can make a nursery feel grounded and gentle, but the result depends on which sage you choose and where you use it. A gray-green on every wall can look cool in a north-facing room; a warmer olive sage may turn muddy beside orange-toned wood. The best starting point is not a paint trend or a saved room photo. It is the light, floor, trim, furniture, and daily routines already shaping your space.
The ideas below show 27 ways to bring sage into walls, millwork, furniture, textiles, and accents. They are design options, not instructions to add every layer at once. Pick one or two permanent changes, then use things that are easier to swap—like a rug, curtains, or art—to finish the palette. Keep the crib itself simple and the sleep space clear; a beautiful nursery still has to work at 3 a.m.
Choose a sage that works with the room you have
Sage is a broad color family, ranging from pale gray-green through silvery eucalyptus to deeper olive. A paint chip under store lighting cannot tell you how one of those shades will behave next to a warm oak floor, a cool white crib, or a shaded window. Start by identifying the room’s fixed finishes and deciding whether you want the walls to read warmer, cooler, lighter, or more saturated than those elements.
For a dim room or one with a small window, a muted pale sage usually preserves more brightness than a deep, gray-heavy green. A room with strong daylight can carry more pigment, but direct sun shifts through the day, so a color that looks soft at noon may appear sharper in afternoon light. Darker sage is not forbidden in a small nursery; it simply works best as a controlled area or when the room has enough light and warm contrast to keep it from feeling closed in.
Look at the undertone beside something that is actually white in the room. If the green makes a bright white trim look blue, it probably has a cooler cast; if the same trim appears creamy or the green leans khaki, the shade is warmer. The distinction is subtle on a paint card but easier to see on a large sample next to the floor and furniture. There is no universally correct undertone: the useful one is the shade that works with what you already own.
If the nursery shares space with a guest bed or an older child’s room, use sage as a connecting color instead of forcing a complete baby theme. A painted wall or dresser gives the baby area an identity, while shared neutral curtains and wood furniture let the room keep working for everyone. This is also a sensible way to control cost: decide which one surface will carry the most color, then use what you have before buying smaller decorative pieces.
Use sage on walls in three different ways
1. Paint all four walls a pale sage. A light shade gives color without making the walls compete with the crib, dresser, or art. Keep the ceiling and trim a warm white if you want clear edges, or use a very similar pale tone for a softer, less segmented look.
2. Choose a middle-value sage for a full-room color statement. Medium sage can hold its own against white furniture, patterned curtains, and wood. If you like a defined green room, use it consistently on all four walls rather than leaving one random wall white; repeat the same color elsewhere in a small dose so the room feels intentional.
3. Put a deeper sage on one focal wall. A deep green behind a dresser or along the wall opposite the doorway can add depth without wrapping the whole nursery in a dark shade. Place the crib against a wall that can stay visually quiet, and avoid treating a dramatic backdrop as a reason to hang shelves or heavy decor above it.
Give walls shape with paint and millwork
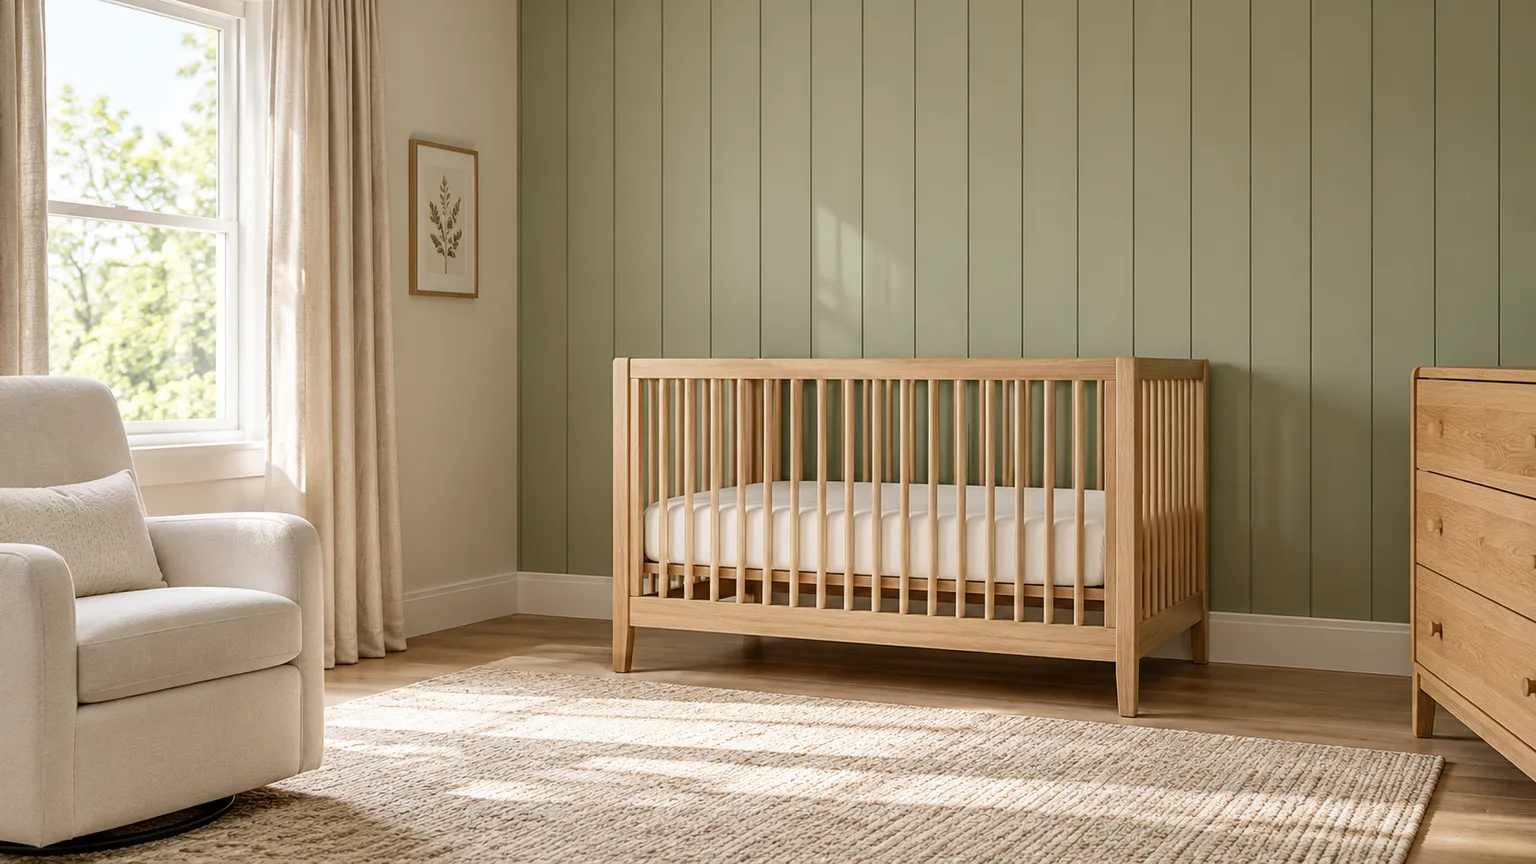
4. Use vertical shiplap for a little height. Narrow vertical boards draw the eye upward and give a flat wall some texture. Paint the boards and their grooves together so the surface reads as one calm field; high-contrast seams can make a small room feel busier than the paint color alone suggests.
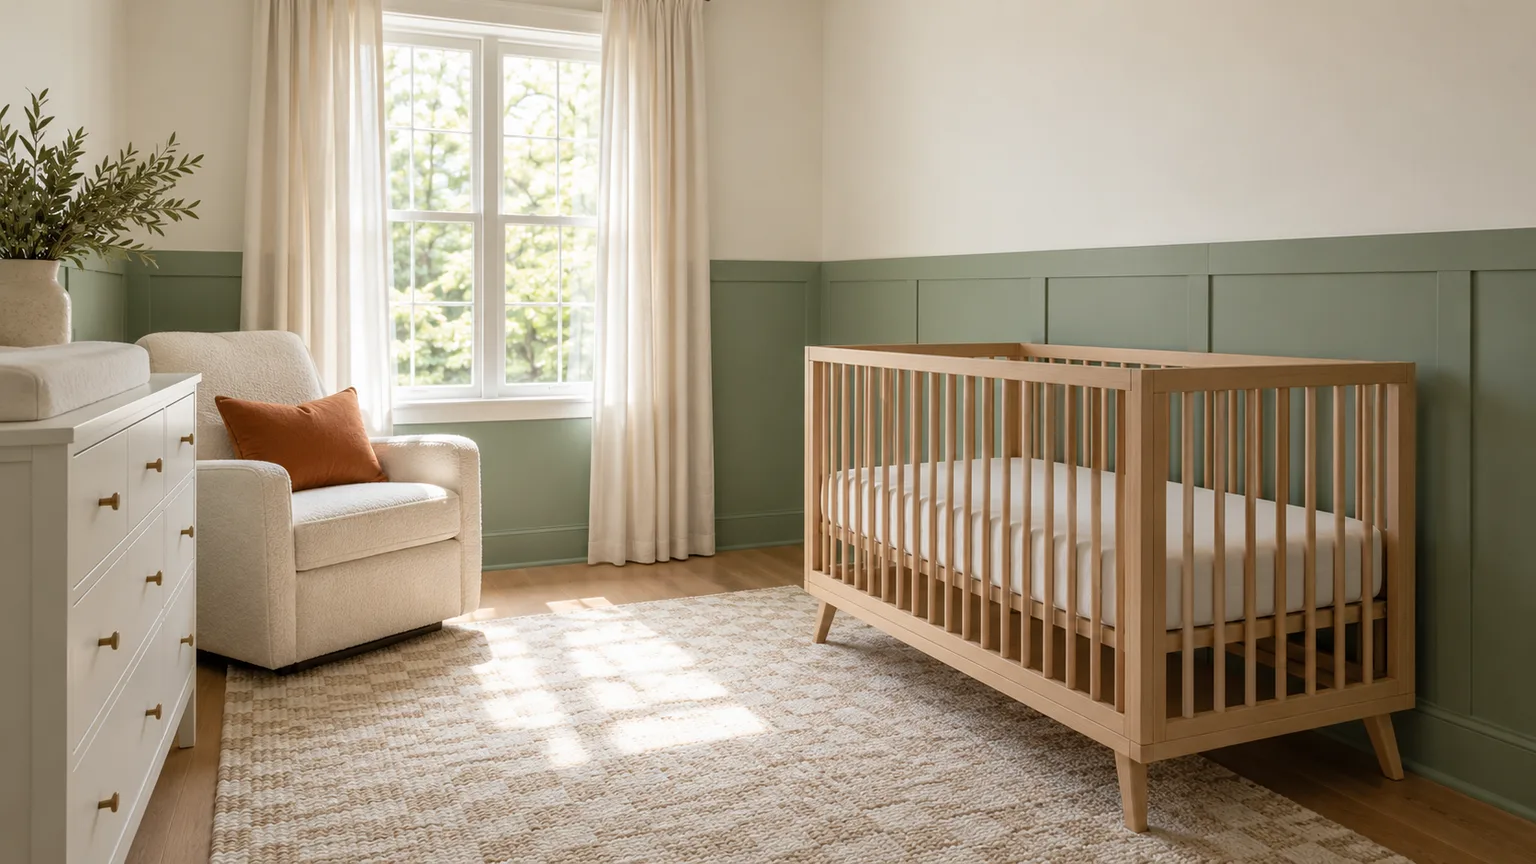
5. Add sage wainscoting below a warm-white upper wall. A lower painted panel creates a grounded band and can visually protect the wall from scuffs around a changing area. Keep the top rail level and consider its height alongside the crib and dresser, so it does not cut through a window, wall art, or built-in in an awkward place.
6. Paint a scalloped or softly arched border. A hand-painted edge adds a playful note with little material cost, especially in a room where wallpaper would be too much. Mark the shape lightly first and repeat the curve at a consistent scale; an irregular motif looks charming when deliberate, but a wobbly line can become the first thing you notice.
7. Use two sage tones on a wall or cabinet surround. A lighter sage inside an arch or niche and a deeper sage on a lower panel gives depth while keeping the palette narrow. Check both colors together in the actual room, because a small difference on a fan deck can become a strong contrast once the shades cover broad surfaces.
8. Add color to trim instead of the main wall. Sage baseboards, a door, or window casing can bring a quiet green accent into an otherwise neutral nursery. Use this approach when you love the color but are not ready to paint a large area; repeat the shade on a drawer pull, lamp base, or basket to make the trim feel connected rather than isolated.
Carry green through built-ins
9. Paint the lower cabinets of built-in storage sage. A green base grounds a wall of shelves and visually separates closed storage from the objects on display. If the room is narrow, use a light sage and keep open shelves close to the wall color so a block of cabinetry does not dominate the floor plan.
10. Give open shelving a lighter sage interior. Painting only the backs of a bookcase or built-in niche creates a subtle backdrop for books and keeps the surrounding room light. Edit what sits on the shelves to a few colors and useful items; tightly packed decor will obscure the paint and create more dusting than the room needs.
Built-ins are a good place to use a second shade because their edges already create natural boundaries. If the nursery has an alcove, a recessed shelf, or a changing nook, treat it as one small color zone. Keep storage that has to be reached every day at an adult-friendly height and leave the crib area clear of hanging organizers.
Use painted furniture as a flexible color anchor
11. Refinish a dresser or changing table in sage. A secondhand dresser can become the room’s color anchor without repainting the walls. Clean and prepare the surface according to the paint system, use a finish made for furniture, and allow it to cure as the manufacturer directs before placing baby items on it or using the room.
12. Paint a small side table or stool. One small sage-painted piece beside the glider is an easy way to test the color before committing to a wall. It also adds a useful landing spot for a water bottle or book; choose a stable table with rounded edges and keep it out of the crib’s reach as the baby grows.
13. Paint the inside of drawers or a cabinet. A hidden sage interior gives a white dresser or wardrobe a small surprise without adding another large block of color. It is especially useful if you want the nursery to remain mostly neutral but still have a visible green connection when a drawer or cabinet is open.
Use furniture paint selectively. A crib is a safety product with a finish and construction designed by its manufacturer, so do not turn it into a DIY paint project unless the manufacturer explicitly allows it and provides instructions. A wood crib against a sage wall already gives the room two distinct materials and is easier to live with than a refinished sleep surface.
Warm the green with wood and metal
14. Pair sage walls with a natural-oak crib and dresser. Pale oak lifts a gray-green shade and keeps it from reading too cool. If your existing floor is honey-colored or red-toned, bring a sample of that wood to the paint store or hold paint samples beside it at home; matching every wood finish is unnecessary, but their undertones should not fight.
15. Use brass or warm bronze in small hardware details. A drawer pull, curtain rod, or lamp base can add a little warmth against sage and cream. Keep metal finishes to one or two related tones so the nursery looks collected rather than like a showroom of unrelated samples.
Repeat sage with practical textiles
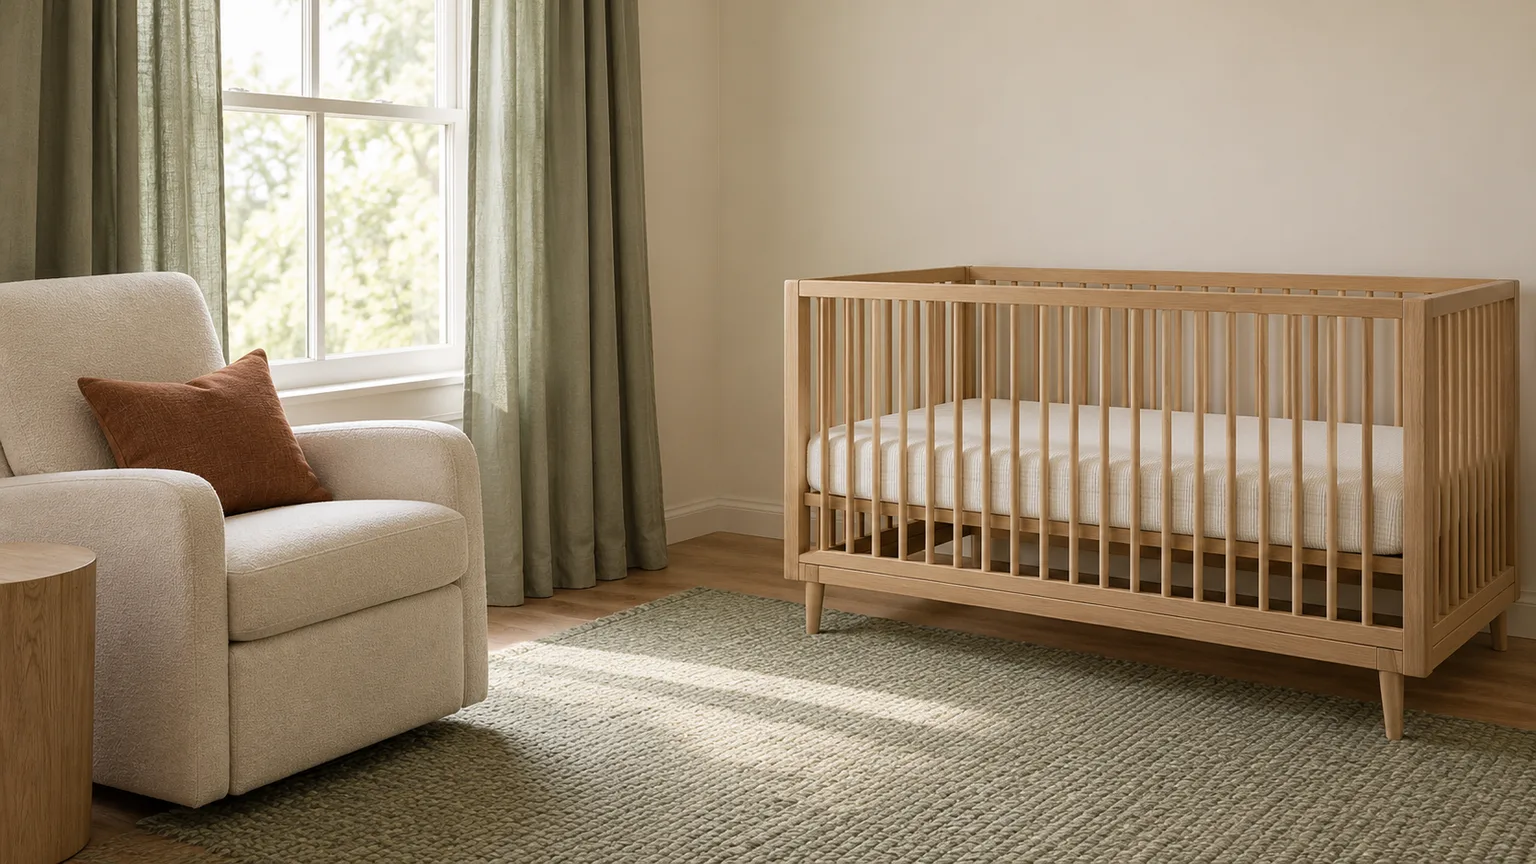
16. Hang sage curtains to frame the window. Curtains give color to a nursery without changing the walls, and a soft fabric can make a large window feel less stark. Choose a secure, cordless window treatment or keep cords completely out of reach, and install panels so they do not drag across a heater or become a future climbing target.
17. Put a sage rug under the adult seating area. A muted rug can connect the glider, dresser, and wall color while giving caregivers a softer place to stand. Choose a washable or cleanable construction that suits your household, use an appropriate nonslip pad, and keep the rug’s edge from becoming a trip point in the route between the door, chair, and crib.
18. Choose an upholstered glider in sage or a neutral with sage piping. The nursing chair is used often, so make it comfortable first and coordinated second. A removable cover or cleanable fabric matters more than a perfect color match; if you choose a neutral chair, a nearby sage side table or curtain can carry the color without requiring a hard-to-clean upholstery choice.
Bring pattern in through wallpaper, murals, and decals
19. Use botanical wallpaper on one wall. A leafy print makes the nature connection immediately, while a sage ground lets the motif stay soft. In a small room, choose a larger, more open repeat rather than a tiny dense pattern; review the full repeat and a physical sample at the distance you will actually see it.
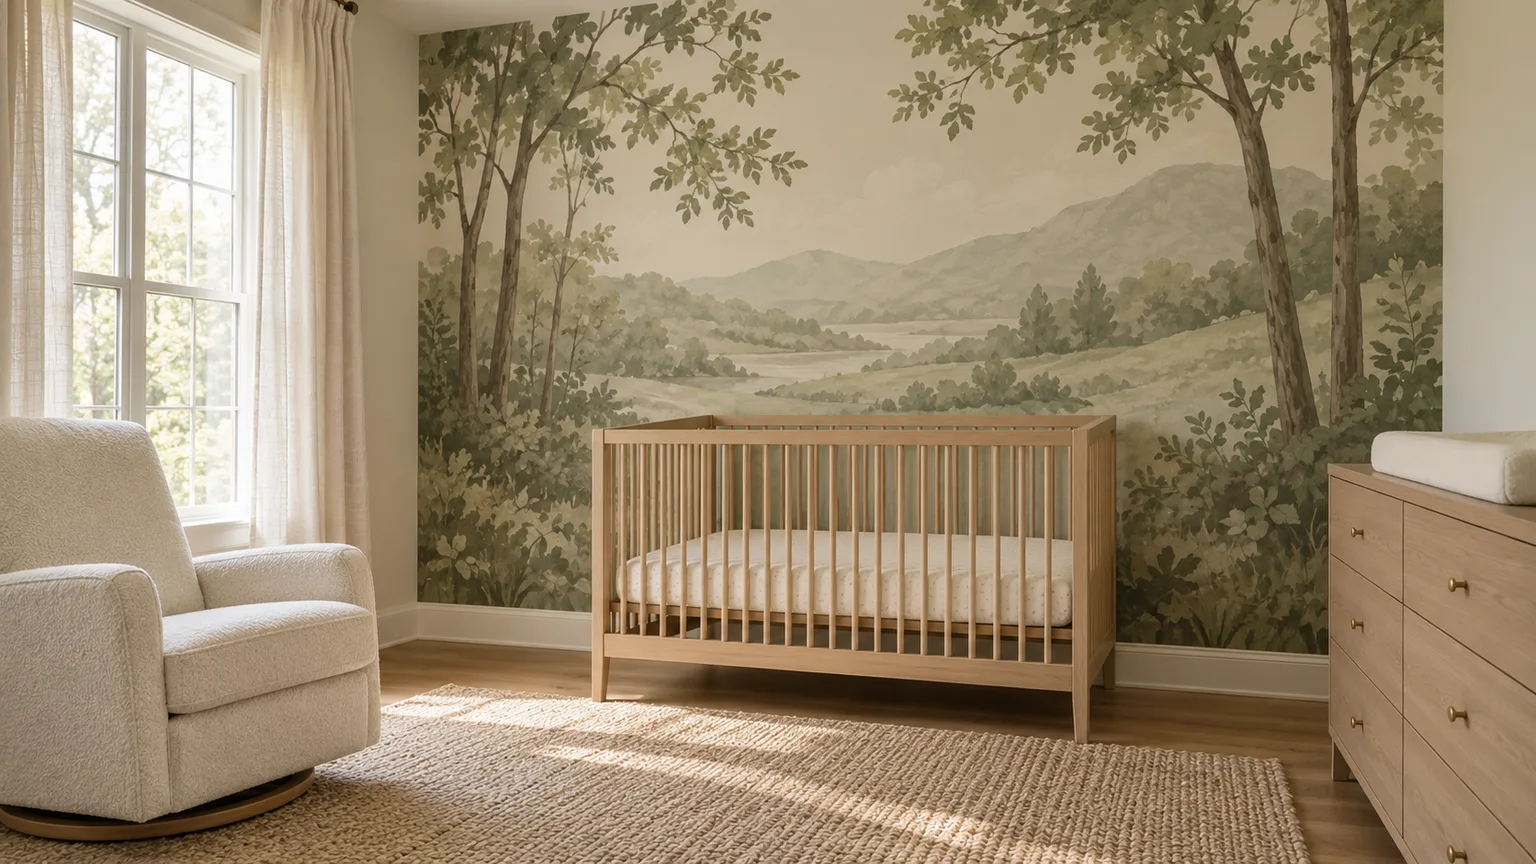
20. Paint a landscape or woodland mural. A low-contrast scene in sage, olive, and warm cream can function as the room’s main artwork without adding a frame or shelf. Keep the imagery simple enough to read from the doorway and use a professional muralist or a measured sketch if the wall is large; a mural is hard to adjust after it is painted.
21. Add removable sage wall decals. Decals are a renter-friendly way to try trees, leaves, stars, or simple geometric shapes. Test one in an inconspicuous spot to see whether it adheres and removes cleanly from your paint, and place every piece beyond the crib so it cannot peel or be reached later.
22. Make a painted arch behind the dresser. A broad sage arch can frame a mirror or changing station and create a focal point with less work than wallpaper. Keep the arch in scale with the furniture below it; a very narrow shape behind a wide dresser looks accidental, while a large shape should leave enough neutral wall around its curve.
Style art and storage without adding clutter
23. Hang botanical or landscape art away from the crib. Framed art can repeat the room’s green without more paint, but keep it securely fixed and outside the crib area. A pair of modest prints above the dresser can create a clear arrangement; choose a frame and fastening suited to the wall rather than relying on a loose adhesive strip for a heavy object.
24. Use sage baskets for linens and toys. A few matching bins make storage feel part of the design while keeping small items easy to collect. Put the baskets where an adult can reach them without crossing the sleep area, and avoid stacking loose items high on furniture where they can fall as children become mobile.
Build a balanced nursery palette
25. Combine sage, warm white, and natural wood for an easy organic palette. This three-part combination works because each material has a separate job: sage adds color, white keeps the edges clear, and wood adds visible warmth. Use one warm white consistently across the ceiling and trim, then let different wood grains vary without introducing several unrelated accent colors.
26. Pair sage with blush or muted coral for a gentle contrast. Pink-toned accents soften a gray-green wall without turning every surface pastel. Try the contrast in a small item—an adult-chair cushion, a lampshade, or a storage box—before buying curtains or painting furniture, because coral can look much brighter against a cool sage than it does on its own.
27. Add dusty blue, ochre, or rust in measured doses. Dusty blue keeps the room cool and quiet; ochre or rust warms it and adds more contrast. Choose one of those accents as the secondary color and repeat it two or three times, instead of giving every accessory a different hue. Better Homes & Gardens’ neutral paint-color guide is useful for thinking about how neutrals shift around a room, while Nursery Design Studio’s nursery paint guide shows practical pairings with wood and muted colors.
You can use the familiar 60-30-10 palette idea as a starting point—most surfaces in a quiet base, a smaller share in sage, and a little accent color—but it is not a rule to measure with a tape. In a green-painted room, sage might already occupy most of the visual field, so keep the accent restrained; in a white room, a green dresser and curtains may be enough. Look at the room from the doorway and remove one color if the eye keeps jumping between unrelated objects.
Test sage paint before committing
Paint samples are most useful when they sit next to the finishes that will remain. Compare the candidate with your flooring, trim, closet doors, crib, and any large upholstered piece; otherwise, a sage that looks balanced alone can become unexpectedly yellow, blue, or gray once it is surrounded by those fixed materials.
Sample more than one wall
Paint large sample boards or use removable sample sheets rather than judging a thumbnail-sized chip. Move them to two or three walls and view them in morning, afternoon, and evening light with the nursery’s actual lamps turned on. If a color looks good only in one corner at noon, it may not be the right whole-room shade.
Compare the paint with fixed finishes
Hold samples vertically beside the floor and trim rather than flat on a table. A green that blends into an oak floor may need a cleaner, slightly cooler companion; a cool sage near bright white may need a warmer textile or wood note. Nursery Design Studio’s paint guidance recommends checking a color around the room, and Better Homes & Gardens likewise emphasizes how surrounding light and finishes affect a neutral. These are visual tests, not a formula for predicting an exact color result.
If you are painting, read the paint label for ventilation, application, and cure instructions. Keep babies and other household members away from wet paint and work areas, ventilate as directed, and do not assume that “low odor” means a room is ready before the product instructions say so. Choose a washable finish only if it suits the wall condition and the manufacturer’s recommendations; a slightly reflective finish can highlight wall flaws, while a flatter finish can be less forgiving to wipe.
Keep sleep and changing areas practical and safe
Design the photo-friendly parts of the room around what is safe and usable every day. The CPSC says an infant sleep space should contain only a fitted sheet; its safe-sleep guidance also advises using a product intended for infant sleep and moving a baby who falls asleep elsewhere to that sleep space. That means decorative pillows, quilts, toys, bumpers, and loose blankets belong outside the crib, even if they appear in staged room photography.
Keep wall art, shelves, mobiles, and cords out of or securely away from the crib’s reach. Anchor tall dressers and bookcases according to their manufacturer’s instructions, secure changing supplies so they cannot be pulled down, and leave a clear path through the room for nighttime checks. As the baby begins to sit, crawl, and pull up, revisit anything initially placed at adult height; today’s out-of-reach display can become tomorrow’s climbing or pulling hazard.
Arrange the room around real routines
Place the crib where you can approach it easily and where it is not crowded by doors, drapes, or furniture. Put the glider and a small table close enough for feeding and reading, with a dimmable task light that can be switched on without crossing the room. The changing station should have daily essentials within the adult’s reach while the caregiver remains beside the baby; color planning should never create a layout that makes supervision awkward.
Before the first night, walk the route from the doorway to the crib in low light. Check that the rug does not curl, the chair can move without hitting the crib, drawers open fully, and the light switch or lamp control is reachable from the chair. These small checks are more valuable than squeezing in a matching side table or a second basket that blocks the walkway.
Consider how the nursery will change. A wall mural or built-in can remain as the child moves from crib to bed, while a sage rug, curtain, or chair can be replaced if tastes shift. Keep a little open floor space for play and avoid buying decor just to fill every wall. The room feels finished when the important pieces relate to each other and the everyday tasks are easy—not when every surface has an accessory.
Conclusion
A sage green nursery can be pale and airy, deep and enveloping, or mostly neutral with color on furniture and textiles. Choose the shade beside your actual flooring and light, decide how permanent you want the green to be, and build the rest of the palette from only a few warm or cool companions. Then arrange furniture for nighttime use and keep the infant sleep space clear; those choices let the room feel considered without making it harder to care for your baby.