How to Grow Pinto Beans from Planting to Dry Harvest
Grow pinto beans from seed with a frost-aware planting plan, steady moisture, simple pest checks, and a rain-safe harvest and storage method for dry beans.
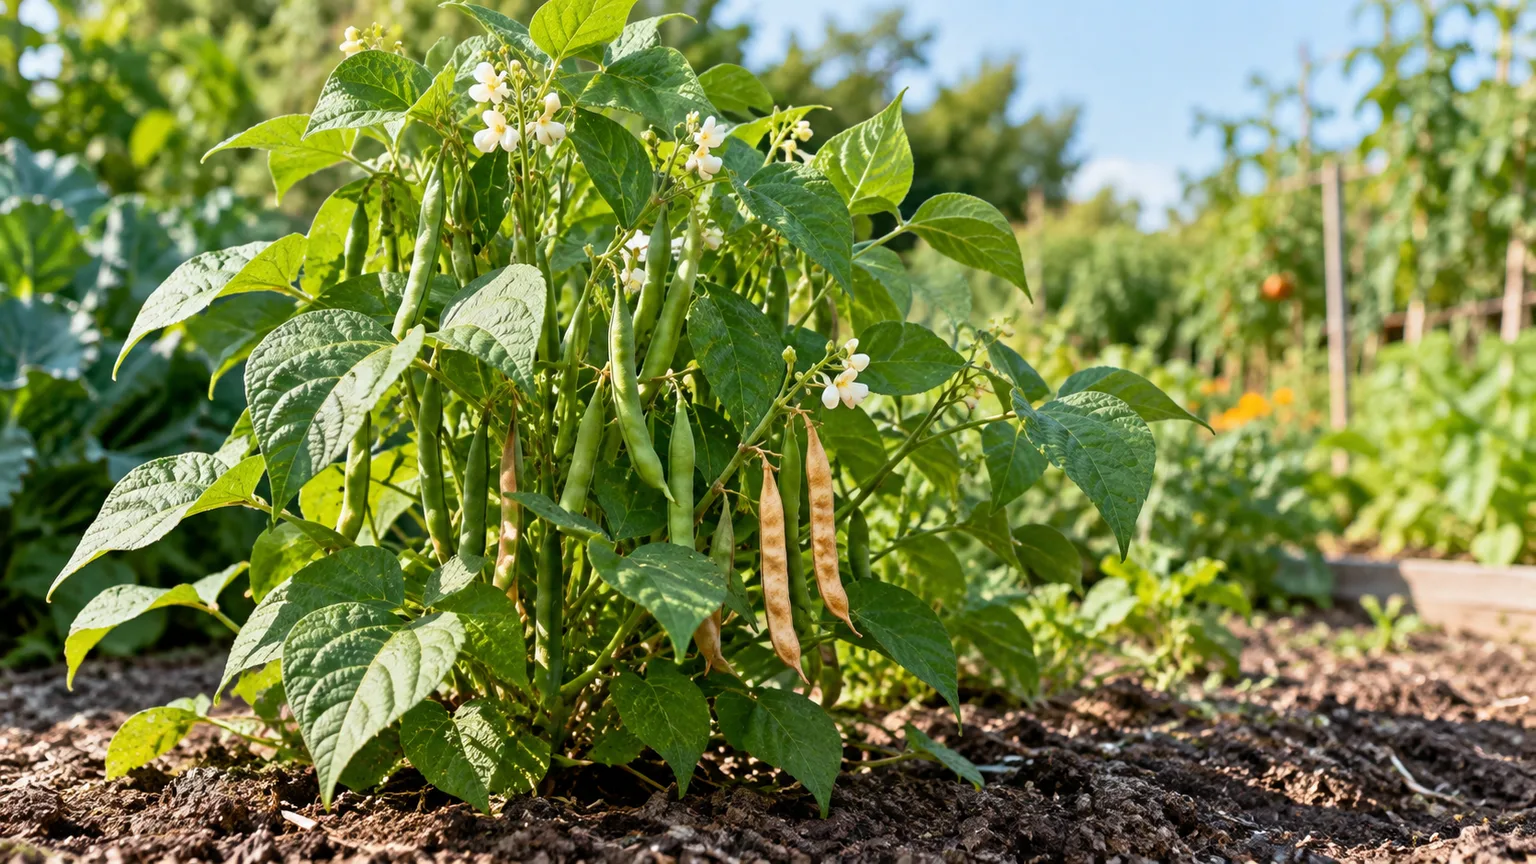
Pinto beans are an annual form of common bean, Phaseolus vulgaris, grown mainly for their mature, speckled seeds. Purdue Extension groups dry pinto beans with other garden beans, whose requirements vary by type and growth habit. They are straightforward to sow, but a dry-bean crop needs enough warm weather to fill its pods and enough dry time at the end of the season to cure them.
The useful question is not just when to put seed in the ground. Choose a variety that fits your growing window, then plan backward from your first fall frost so the pods can finish before cold or wet weather arrives.
Plant pinto beans for the harvest you want
Most gardeners grow pinto beans for their dry seeds, but you can harvest them earlier. When seeds are full-sized but still soft and the pods remain green, shell them and use them as green-shell beans; if you want pantry-stable beans, leave the pods on the plant until they mature and dry. The two harvests require different timing, so decide which one you want before sowing.
Pinto beans are not the same as snap beans harvested for tender, edible pods. A pinto pod can become fibrous before the seeds are ready, so it is usually more useful to judge the crop by the seeds inside rather than expect crisp green beans. If you want both fresh snap beans and dry beans, grow a separate snap-bean variety and let the pintos mature.
Dry beans are a space-and-time investment, not a quick way to fill a pantry. Utah State University Extension gives an estimated 20 to 25 pounds of dry seed per 100 feet of row under its growing conditions; a short home-garden row produces much less, and your results depend on cultivar, weather, pests, and how completely the crop matures. Treat that estimate as a planning reference, not a yield promise, and start with a modest row until you see how your garden performs.
Choose a variety that fits your season and space
Pinto varieties differ in growth habit, maturity, and disease tolerance. Seed packets and regional suppliers may not all carry the same cultivars, so compare the packet’s days-to-maturity estimate and its bush, semi-runner, or pole description before purchasing. For a short summer, favor a variety listed as early or adapted to your region over one chosen only because its name is familiar.
Published garden guides give a wide maturity window for pinto dry beans, from roughly 85 to 150 days after sowing depending on cultivar and conditions. That spread is a reason to trust the specific seed packet and local experience rather than assume all pinto beans take one fixed number of days. Savvy Gardening and Epic Gardening both describe the long, weather-dependent season for dry pintos and the availability of bush and climbing types.
Bush or pole: choose by footprint and harvest
Bush varieties stay relatively compact, need no tall trellis, and often mature in a more concentrated flush. They suit a small row or a first trial, but the crop occupies more ground per climbing plant and may be harder to pick if foliage sprawls close to damp soil.
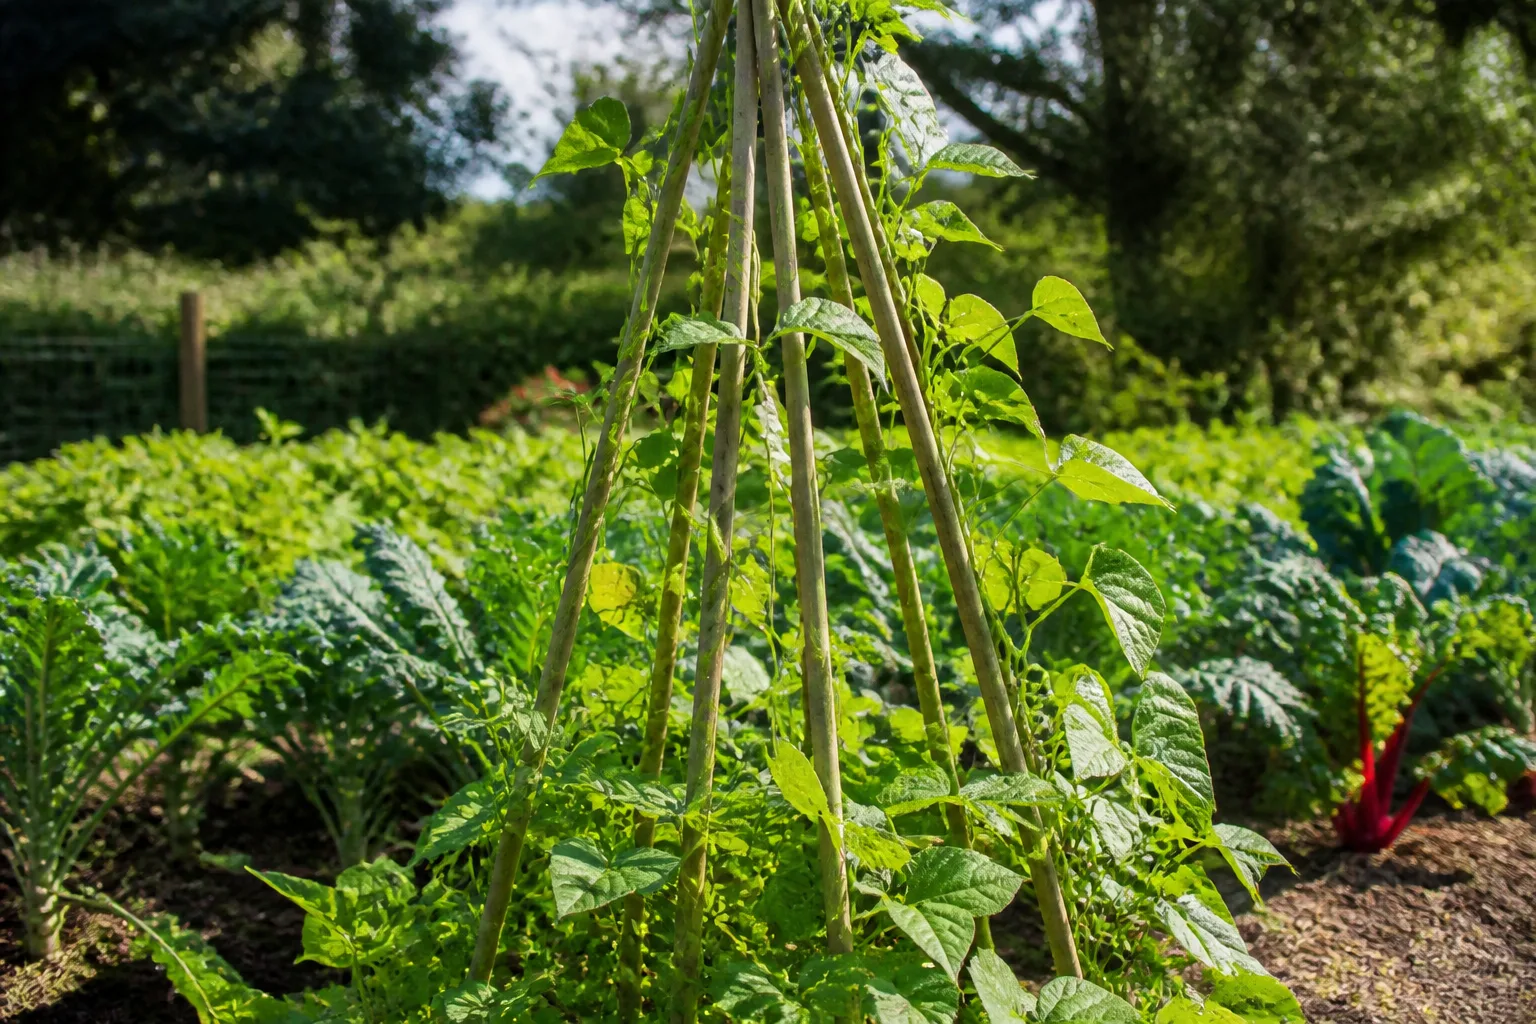
Pole varieties climb and use vertical space, but they need a sturdy support installed before sowing. They may set pods over a longer period, which can spread the harvest and also leave late pods exposed to fall rain. Do not assume pinto beans are always bush beans: check the variety label and match the support to the habit.
| Growth habit | Good fit | What to plan for |
|---|---|---|
| Bush | Short rows, containers, or a concentrated harvest | No tall support; keep spacing open for airflow |
| Pole | Narrow beds and a longer warm season | Stable trellis or poles in place before sowing; pods may mature in stages |
| Semi-runner | Flexible space with light support available | A short stake or open cage can keep a loaded plant upright |
Purdue Extension describes pole-bean supports around six to seven feet tall, while Utah State University Extension notes that trellises make climbing beans easier to harvest. A rough, stable surface gives vines something to grip; loosely woven netting or a fence also works if it can bear the weight of wet foliage.
Time planting backward from fall frost
Wait until frost danger has passed and the soil has warmed to at least 60°F (16°C). For more dependable emergence, aim closer to 65°F (18°C) or warmer; Utah State University Extension reports that beans commonly emerge in about seven to ten days when soil is between 65°F and 85°F. A soil thermometer gives a better signal than a calendar date, especially in raised beds or cool, wet gardens.
Next, count backward from your usual first fall frost. Use the maturity estimate on the seed packet, add time for germination and a buffer for the last pods to fill and dry, then make sure the resulting sowing date is realistic for your spring soil. Some pinto varieties take well over three months, and damp autumn weather can make a crop that is technically mature difficult to cure outdoors.
If your available season is tight, choose an earlier bush cultivar or grow fewer plants rather than sowing late and hoping for a warm autumn. A second planting can work where the season is long, but repeating sowings every two weeks is not automatically useful for dry beans: each planting still needs its full maturity and drying window. Utah State University Extension cautions that dry beans planted after early July may not mature in cooler parts of its region, illustrating why local frost dates and cultivar timing matter.
Cold soil slows emergence and increases the chance that seed will rot before it grows. Purdue Extension warns that germination and rot problems are likely below 50°F; that is a lower danger threshold, not a good target for planting. If a forecast cold snap, waterlogged bed, or cold night is approaching, waiting for settled warmth is usually the better trade.
Choose a sunny, well-drained site
Give pinto beans at least six hours of direct sun, with more sun preferred where summers are not excessively hot. Choose a bed that drains freely after rain; beans dislike roots sitting in cold, saturated soil, and compacted ground can also make it difficult for seedlings to emerge. A sheltered spot helps protect tall pole vines from wind without shading them.
Common beans grow in a range of soils, but a crumbly, moderately fertile bed with organic matter is easier to manage than heavy clay or a very sandy patch. A soil test is the best guide if pH or nutrients are uncertain; Epic Gardening lists a slightly acidic to neutral range for pinto beans, while extension recommendations emphasize drainage and soil structure. Amend the bed broadly with finished compost when needed rather than filling each seed hole with rich material that can hold excess water.
Avoid a spot where beans have repeatedly struggled with blight, root rot, or other soil-related problems. Rotate beans to another bed in the following season and avoid planting another legume in the same problem area; rotation does not cure every disease, but it reduces repeated exposure to pathogens and pests that persist around a crop.
Direct-sow at the right depth and spacing
Direct-sow pinto beans where they will grow for the season. They establish quickly in warm soil, and moving a seedling can damage its roots; transplanting is rarely worth the extra handling. If you need to get an early start in a short-season climate, sow into an individual biodegradable pot and move the intact root ball while the plant is small, but do not separate or tease apart the roots.
A practical starting depth is about one inch in ordinary garden soil. In loose, sandy soil, the seed can go somewhat deeper; in heavy or crust-prone soil, sow more shallowly and cover with a fine, loose layer of compost or potting medium so the seedling can break through. Place the seed with the small eye down if convenient, but moisture, depth, and warmth matter more than exact orientation.
Keep the seedbed evenly damp through emergence, not waterlogged. If you are unsure whether a packet is old, test a few seeds on a plate of damp paper towel in a warm place before sowing the bed; use the result to decide whether to buy fresh seed or sow a few extras, rather than assume every packet has the same germination percentage. Sow extra seeds only where a thin stand would otherwise leave a gap, then thin crowded seedlings while small.
Keep rows manageable for weeding and picking
Spacing varies with growth habit and the seed company’s instructions. As a starting point, bush dry beans can be sown about two to four inches apart in rows roughly two to three feet apart; pole beans are often spaced farther apart along their support. Purdue Extension gives these ranges for home garden beans, while Utah State University Extension recommends a closer bush-bean spacing for its conditions.
| Type | Starting seed spacing | Row or support spacing |
|---|---|---|
| Bush pinto | About 2–4 inches apart | About 18–36 inches between rows, depending on access and airflow |
| Pole pinto | About 6–10 inches apart | Roughly 3–4 feet between rows or enough room to reach the trellis |
Use the packet when it gives a more specific final spacing for your cultivar. If seedlings emerge in clumps, thin them rather than leaving a dense tangle: airflow and access make it easier to inspect leaves, remove weeds, and pick pods without snapping stems. Install the pole support before planting so you do not drive stakes through established roots later.
Containers work for a small trial
A container is a reasonable way to grow a few pinto plants when you lack a garden bed, but it is not an efficient pantry crop. Choose a compact bush variety, use a container with drainage holes, and fill it with a light container mix rather than dense garden soil. Savvy Gardening describes pinto beans in a container of about two and a half gallons or larger; a bigger container holds moisture longer and is usually easier to manage during hot weather.
Plant only as many seeds as the pot can support at the spacing on the packet. If you choose a pole type, anchor a trellis securely to the pot or place the container beside a stable structure before the vine begins to climb. A tall plant in a light pot can tip in wind, so do not wait until it is heavy with foliage to add support.
Check pots more often than garden beds because their soil can dry quickly, particularly in sun and wind. Water when the upper layer begins to dry, then water deeply enough for the whole root zone to become moist and let excess drain away. Expect a small handful of dry beans rather than a large harvest; container growing is best for learning the crop, saving a few seeds, or enjoying a small shell-bean harvest.
Care for steady flowers and pods
Once plants are established, the main goal is to reduce stress while they flower and fill pods. A few strong plants with sunlight, moderate moisture, and open airflow usually outperform crowded plants pushed with extra fertilizer. Keep a simple note of sowing date, variety, and first flowering so you can see which conditions affected your harvest.
Water by crop stage
Keep the top few inches of soil evenly moist after sowing and through early growth. Once roots are established, water deeply when the soil begins to dry rather than giving frequent shallow sprinkles; roughly one inch of water per week is a useful starting benchmark, adjusted for rainfall, soil type, heat, mulch, and container size. Utah State University Extension identifies flowering and pod sizing as the stages when moisture matters most, and Epic Gardening gives the same weekly benchmark for pinto beans.
Water at the soil line in the morning when possible. Wet foliage and crowded plants can help bacterial and fungal problems spread, while a slow soak lets water reach the shallow bean roots without splashing mud onto lower leaves. If the soil is still damp several inches down, wait; adding water to already saturated soil can stress roots and promote rot.
During bloom and pod fill, check moisture more frequently, especially during a hot, windy spell. Drought at this stage can lead to flower drop, fewer pods, and poorly filled seeds. As most pods approach maturity and start to yellow, taper irrigation so the crop can dry; do not leave actively flowering plants in severe drought just to accelerate harvest.
Feed cautiously and use inoculant selectively
Beans are legumes, and compatible soil bacteria can form nodules on their roots and fix nitrogen from the air. That relationship reduces the need for added nitrogen when plants are healthy, but it does not mean beans can grow well in poor drainage or that they automatically fertilize nearby crops. Leave healthy roots in the bed to break down after harvest, but do not count on them as a substitute for a soil test or compost.
Start with finished compost if the soil needs organic matter and use a soil test to determine whether any fertilizer is warranted. Avoid heavy nitrogen applications: they can produce lush leaves and delay flowering or reduce pod set, leaving less time for dry beans to mature. If plants are pale or stunted, first check soil temperature, drainage, root health, and moisture before feeding.
A bean-specific inoculant may be useful when beans have not grown in the bed before or have formed few healthy root nodules in the past. Follow the product label for common beans, sow promptly after treating seed, and do not mix or store inoculated seed unless its directions allow it. Inoculant is a targeted aid, not a remedy for cold, waterlogged soil.
Mulch, weed, and rotate
Remove weeds while they are small, using shallow cultivation so you do not disturb the beans’ surface roots. Once the soil has warmed and seedlings are established, a light layer of clean straw or leaf mulch can slow evaporation and reduce weeds. Keep mulch slightly away from stems so the crown does not stay damp.
Leave enough space between plants for air to move through the canopy. Dense leaves dry slowly after rain and conceal beetle eggs or early leaf damage. Rotate the bed next year, especially if you saw blight, root rot, or heavy insect pressure; avoid following beans with peas or another legume in the same patch when disease has been a recurring issue.
Prevent pests and disease with early checks
Inspect young bean plants once or twice a week, looking on both sides of leaves and along the stems. Aphids cluster on tender growth, while Mexican bean beetle adults and larvae chew leaves; the larvae can cause more damage than the spotted adults. Look for yellow egg clusters under leaves and irregular feeding holes before the canopy fills in. Utah State University Extension’s bean guide includes Mexican bean beetles and leaf beetles among common garden-bean pests.
For a small infestation, remove eggs and larvae by hand or rinse aphids from the plant with water, then check again a few days later. A lightweight row cover can protect young plants from beetles, but secure the edges and remove or open it when plants need more ventilation or when it begins to trap heat. Identify the pest before choosing any treatment, and use only a product labeled for edible beans if one is necessary.
Water-soaked spots on leaves or pods, widespread yellow mottling, and wilting in wet soil can signal different problems, including bacterial blight, mosaic virus, or root rot. These conditions are not fixed by adding fertilizer; remove severely affected plants, avoid handling wet foliage, and improve drainage and airflow. Clean up diseased residue rather than leaving it in the bed, and rotate the next planting to reduce repeat exposure.
Harvest for green shells or dry beans
If you want a small fresh harvest, pick a few pods when the seeds have filled out but are still soft and green. Shell them soon after harvest and use them promptly or refrigerate them; this is a green-shell harvest, not the same as picking young pods for snap beans. Keep the rest of the crop on the plant if your main goal is dry pinto beans.

For dry beans, wait until most pods are straw-colored or tan, papery, and dry to the touch, the mature stage described by Utah State University Extension. Open a sample pod: the seeds should be full-sized and hard, with their characteristic pattern, not soft or dentable. Pods may mature at different times, especially on pole varieties, so pick dry pods in rounds rather than stripping the whole plant too early.
Harvest after dew has dried if you can. If a frost or prolonged rain is imminent and most pods are mature, cut the plant near the base or clip the ripe pods, then bring them under cover; do not wait for every last green pod to dry outdoors. A few immature pods will not become fully developed beans after harvest, so separate them instead of mixing them with the mature crop.
Finish drying, shell, and store
Pinto pods left in a dry climate can finish curing on the plant, but repeated autumn rain creates a risk of mold, sprouting, and uneven drying. When the weather turns wet, spread harvested pods or cut plants in a single layer in a dry, airy place; hang a small plant upside down or use a screen that lets air move around both sides. Avoid piling damp vines in a bucket or using direct heat, which can trap moisture or damage seed saved for planting.
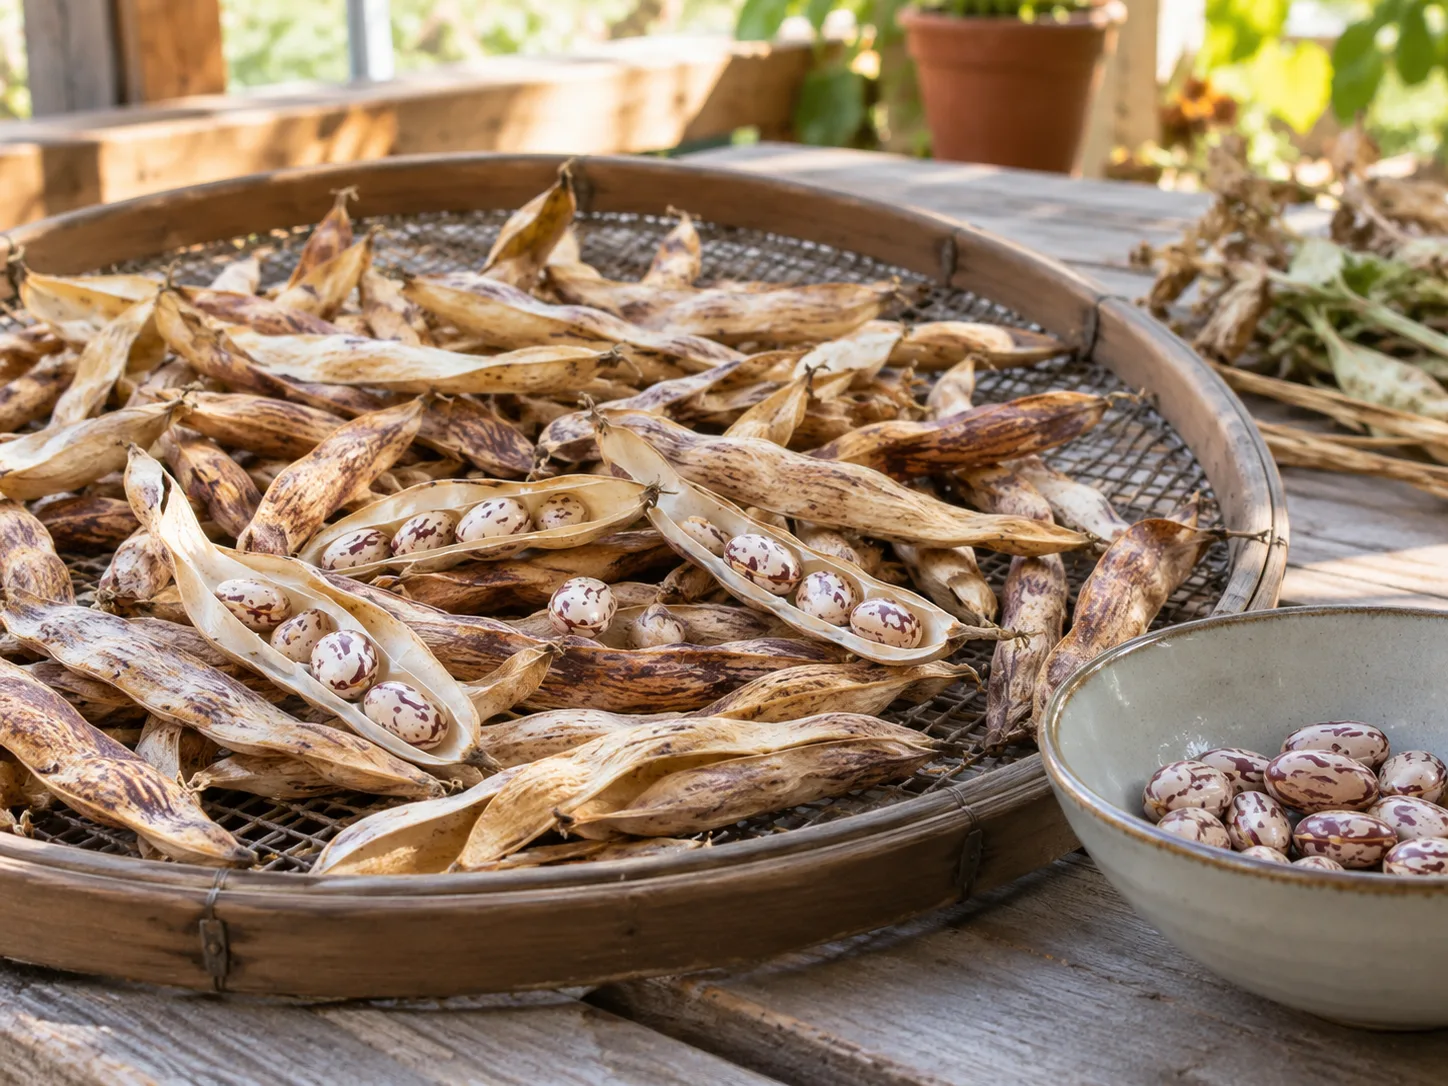
Shell only when pods are brittle and easy to open. For a handful of plants, open the pods by hand over a bowl; for a larger harvest, rub dry pods gently inside a clean cloth sack, then separate the light chaff outdoors on a calm day. Pick out split, moldy, or badly stained beans, and keep them apart from sound seed.
Spread shelled beans in a shallow layer for several more days in a warm, ventilated spot before sealing them. Beans that still feel leathery or bend rather than snap need more drying; sealing them too soon can trap moisture and invite mold. Store fully dry beans in a clean, airtight container in a cool, dark, dry cupboard, and label the variety and harvest year.
If you want seed for next season, save beans only from healthy plants and fully mature pods. Keep planting seed separate from beans intended for cooking, label the variety, and check whether it is an open-pollinated cultivar if you want plants that resemble the parent. Grocery-store beans may sprout if they have not been heat-treated and are still viable, but the variety, age, and disease history are unknown; a small germination test is a safer experiment than relying on them for your whole planting.
Troubleshoot common failures
Use the plant’s stage and the weather to identify the first likely cause. A single symptom can have more than one explanation, so change one condition at a time and watch for new growth rather than expecting damaged leaves or dropped flowers to recover.
| What you see | Likely cause to check first | Useful next step |
|---|---|---|
| Few seedlings emerge | Cold, saturated, or crusted soil; old seed | Check soil temperature and drainage, then reseed gaps while enough season remains |
| Seedlings collapse at soil level | Damping-off or root rot favored by cool, wet conditions | Improve drainage, avoid repeated watering, and remove collapsed seedlings |
| Leaves are lush but few flowers form | Excess nitrogen, shade, or an immature crop | Stop feeding, confirm sunlight, and compare the packet’s maturity estimate |
| Flowers drop without pods | Heat or drought around bloom; occasionally waterlogged roots | Check soil moisture and forecast; mulch and water deeply if the root zone is dry |
| Leaves have holes or stippling | Beetles, caterpillars, or sap-feeding pests | Inspect leaf undersides and stems, identify the pest, then use a targeted response |
| Pods stay green late in the season | Late sowing, long-maturing cultivar, cool nights, or too much late water | Stop nitrogen, taper irrigation as seeds mature, and bring nearly ripe pods under cover before rain or frost |
Utah State University Extension identifies temperatures above about 95°F (35°C) and dry conditions as causes of bean flower abortion. During a heat wave, keep the root zone evenly moist and use a temporary light afternoon shade if the plants are exposed to severe heat; avoid deep shade, which trades heat stress for inadequate light.
If pods are filling but the calendar is running short, prioritize the most mature pods. Bring tan or yellowing pods indoors before wet weather, and let only the already well-developed seeds finish drying under cover. Flat green pods are unlikely to turn into a full dry-bean crop after cutting, so separate them for fresh use or compost rather than expecting them to cure with mature pods.
Conclusion
Growing pinto beans is mostly a matter of matching seed, soil warmth, and harvest goal to the length of your season. Sow directly after frost danger has passed, give plants sun and drainage, keep moisture steady through flowering and seed fill, and avoid excess nitrogen.
For a dry harvest, plan backward from frost and let the pods—not a generic day count—tell you when to pick. If rain arrives before the crop is brittle, finish drying under cover, shell only fully dry pods, and store the beans in a cool, dry place.