How to Make a Succulent Container Garden
Learn how to make a succulent container garden with compatible plants, a drainable pot, gritty mix, an easy planting sequence, and care that prevents rot.
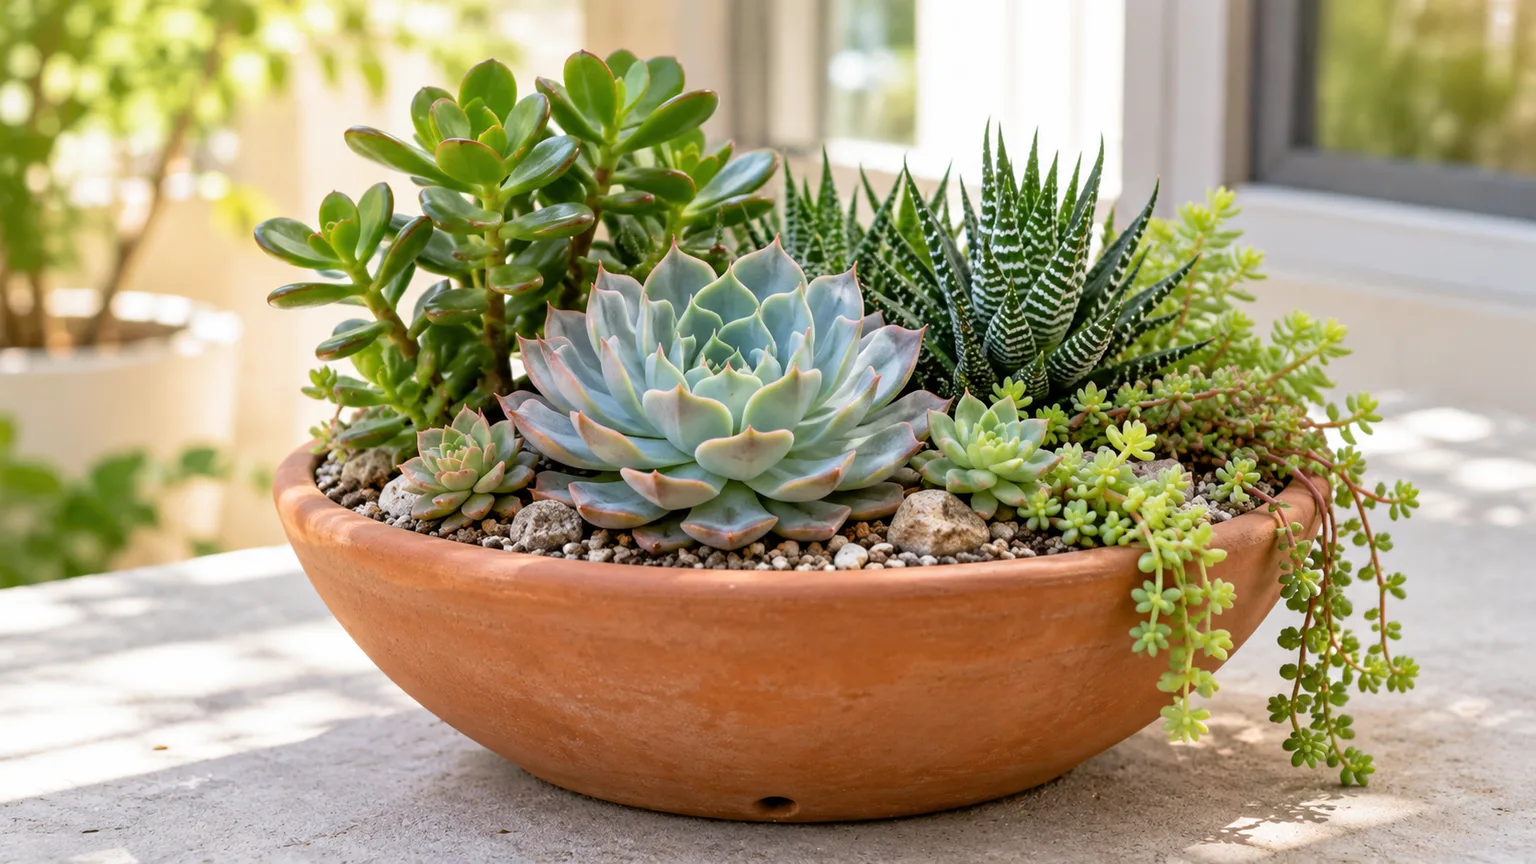
A successful succulent container garden starts with a simple rule: choose plants that want the same light, temperature, and dry-down, then give them a pot that can drain. Once those needs are compatible, you can build a dramatic bowl, a tidy row of repeated rosettes, or a compact windowsill planter without guessing your way through every watering.
Succulents are not all miniature desert plants with identical care. An echeveria that wants strong light, a haworthia that prefers protection from harsh direct sun, and a hardy hens-and-chicks planted outdoors may all be sold beside one another, but they are not automatically good roommates. Plan for the place first. The right combination is the one that still looks intentional after the plants grow and that can be watered as a group.
Decide where the container will live before choosing plants
Choose a location you can describe: a bright south-facing sill, an east-facing window, a covered porch, a sunny balcony, or a patio that receives afternoon heat. The number of hours and intensity of light change from room to room and season to season, so “indoors” or “outdoors” is not enough information to pick plants. A windowsill behind a sheer curtain, for example, may feel bright to you while giving a rosette succulent much less usable light than an open patio.
Then check the difficult conditions. Does rain fall directly into the container? Will the planter be exposed to freezing nights, a reflected hot wall, or wind that dries a shallow bowl quickly? Can you carry it to a brighter window or shelter when the season changes? A movable container is useful because it lets you adjust those conditions without digging up the arrangement.
For an indoor display, pick a spot near the brightest suitable window and plan to rotate the planter for more even growth. For an outdoor display, start with plants that match the exposure and your local winter temperatures. This choice narrows the design options in a helpful way: you will not be tempted by a beautiful plant that needs the opposite kind of light from the place you have.
Container ideas that suit small spaces and different styles
Succulents have varied shapes and leaf colors, so a few deliberate plants can make a fuller-looking composition than a crowded mix. Think of the container as a small landscape: a focal point gives the eye somewhere to land, smaller plants fill gaps, and a trailing plant softens an edge. Not every planter needs all three roles. A repeated pattern or one-species display can look just as finished and is often easier to care for.
A low dish garden with one focal rosette
A wide, shallow bowl is a natural fit for compact echeverias, small sedums, and other plants with modest root systems. Set one larger rosette slightly off-center, then repeat a smaller plant two or three times to make the arrangement feel connected. A little negative space around the rosette is useful; the dish does not need to be packed edge to edge on planting day.
This design works on a sunny table or patio where you can see the rosette from above. It is less forgiving if the bowl is very shallow and has no drainage, or if it sits outdoors where rain repeatedly soaks it. Use a bowl with a drainage hole and enough depth to hold the root balls without forcing them flat. A low dish is a shape choice, not permission to squeeze roots into a thin layer of soil.
A single-variety bowl for a calm, repeatable design
Planting several of the same compact variety creates a simple, graphic effect. Hens and chicks form a colony of rosettes outdoors; echeveria varieties make a sculptural indoor bowl when their light needs are met; small sedums can knit around the edge of a sunny planter. Repetition turns the plant’s shape into the main design feature, so you need fewer contrasting colors or accessories.
A single-variety container also makes care easier to read. If all plants have similar needs, a change in their leaves gives you useful information about the whole planting. The trade-off is that the container may look less varied, and vigorous varieties can fill the space faster than you expect. Check the mature spread on the plant label and leave room for offsets rather than buying enough plants to cover every inch immediately.
A window box or tall planter with trailing edges
A narrow trough can work when it has drainage and enough soil volume for the selected plants. Place compact, upright plants toward the back or center and let one trailing sedum soften the near edge. In a tall pot, choose only a few plants with room for their roots; height can come from the container rather than from forcing a large, heavy species into a small arrangement.
For a small apartment, a single bowl on a sunny desk or windowsill is simpler than a hanging succulent basket. Hanging pots dry quickly, are harder to inspect, and can receive uneven light. If you like a cascading look, let a trailing variety spill over the edge of a stable bowl or planter where you can see when the mix is dry and remove excess water from the saucer.
Choose a pot that drains and fits the root balls
For a beginner, the easiest container has at least one unobstructed drainage hole and is only modestly wider than the combined root area. Choose a pot that gives roots room to settle while avoiding a large unused mass of wet mix. A container about an inch or two wider than the root balls is a practical starting point for a small arrangement; adjust for the actual plants and their mature size.
Terracotta is porous and tends to dry faster than glazed ceramic or plastic, which can help in a cool home or for a gardener who waters too often. It also dries faster in a hot, sunny, windy spot, so the material does not remove the need to check the soil. Plastic and glazed pots hold moisture longer. Use them with a genuinely free-draining mix and a careful dry-down routine, especially in winter when growth and evaporation slow.
Do not add a layer of gravel or pebbles inside the bottom of the planting pot as a substitute for drainage. University of Illinois Extension explains that water can collect in the finer soil just above the coarse layer instead of leaving the pot more freely. A gritty mix throughout the container and a real hole are more useful. A small piece of mesh over a large hole can keep mix from spilling without blocking the exit.
Use a decorative pot without drainage as a cachepot
If you love a ceramic bowl with no hole, keep the succulent in a separate nursery pot with drainage and use the decorative bowl as an outer cover. Lift the nursery pot out to water it at a sink, let it drain fully, and empty any water that collected in the decorative container before putting the plant back. This arrangement also lets you move plants individually when one needs more light or a different watering rhythm.
It is possible to plant directly into a pot without a hole, but beginners have little margin for error because excess water has nowhere to go. Measuring a small pour does not account for how much the roots, soil, and container absorb or how slowly a large vessel dries. A pebble layer at the bottom does not turn it into a drainable planter. If the pot is valuable or difficult to drill, cachepot it instead of making the entire garden depend on perfect watering judgment.
Choose plants that can share one container
Before buying, compare each plant’s light and temperature needs, not just its size or label that says “succulent.” The University of California Cooperative Extension’s container guide recommends grouping plants with like light requirements. That is a useful rule for water too: when one plant needs frequent moisture while its neighbor needs a long dry period, one shared pot cannot be watered perfectly for both.
The foliage can still vary. Combine a broad rosette, a compact upright plant, and a low trailing form as long as those plants fit the same exposure and season. Check the full name on the label when possible; common names can apply to more than one species, and a genus may contain plants with different requirements. If you cannot confirm that two candidates can share the location, use separate nursery pots inside one decorative container until you know how they respond.
Bright indoor combinations
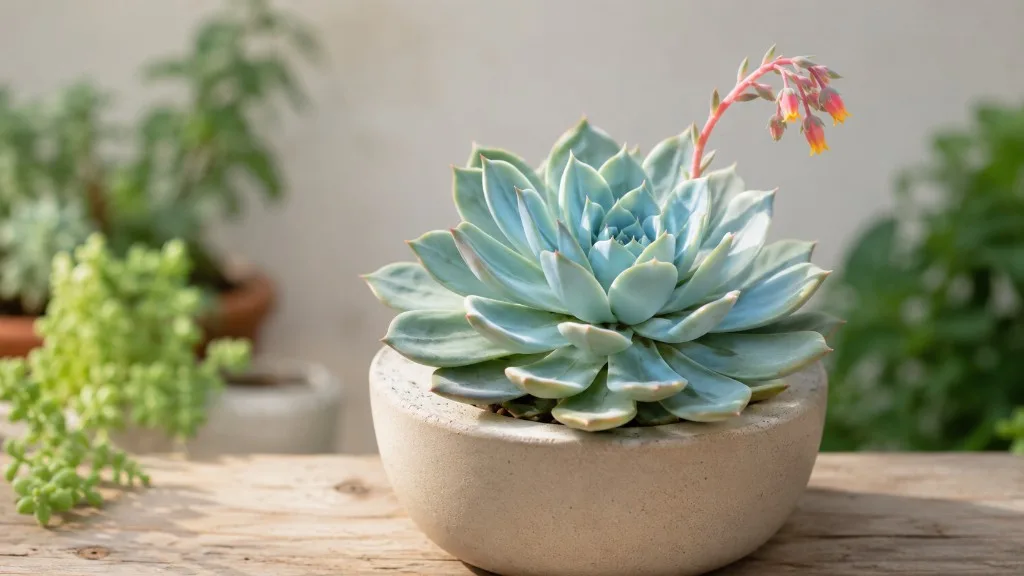
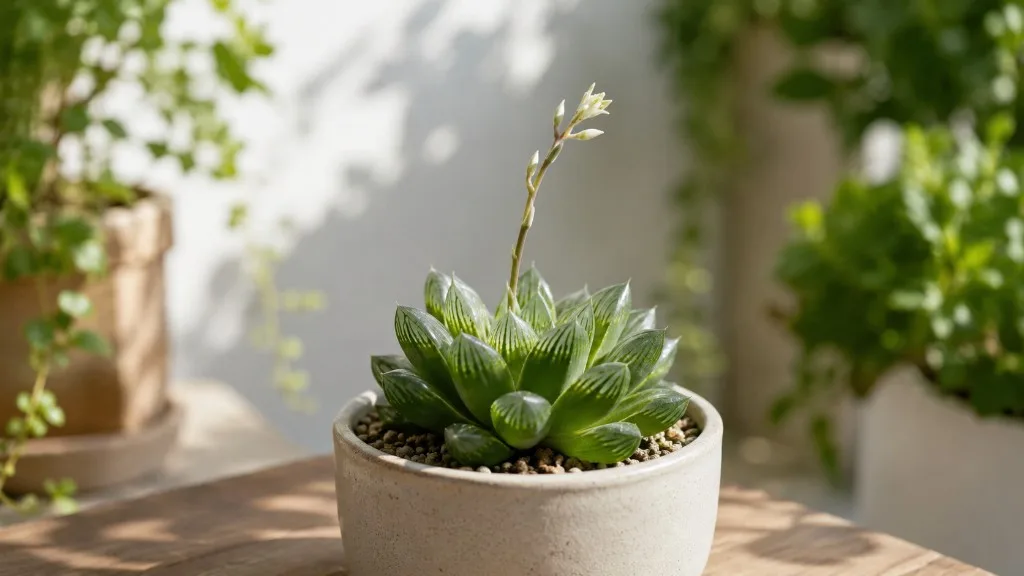
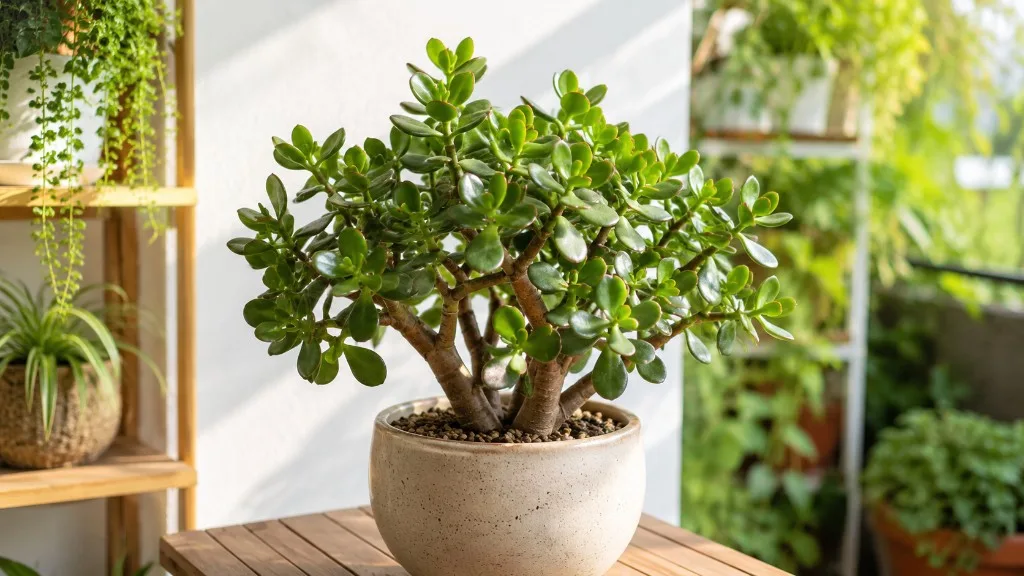
For a bright indoor window, build around an echeveria or compact jade, then add another plant whose light needs are similarly strong. Minnesota Extension’s cacti and succulents guidance emphasizes bright light and a porous medium while noting that species needs vary. A haworthia is often a better choice where light is bright but filtered, but it should not be treated as a universal substitute for a full-sun plant. If the sill is dim, use one plant suited to the site instead of mixing a sun-lover with a shade-tolerant plant and hoping both will compromise.
Sunny outdoor combinations
For a sunny outdoor pot in a mild, frost-free climate, you can use plants such as sedum with compact rosettes, provided their water and temperature preferences align. In cold-winter regions, treat common tender succulents such as echeveria and many jade plants as seasonal patio plants unless you have verified their hardiness. Many Sempervivum are frost-hardy, but North Carolina Extension’s plant profile notes that they can be less heat-tolerant than other succulents, especially in warmer zones. A hardy outside bowl and a warm indoor windowsill bowl are often better as separate plantings.
Design the composition before planting
Set the plants, still in their nursery pots, inside the empty container. View them from the angle where the finished display will usually be seen. Try one main focal plant, then turn or move the smaller pots until the heights and colors balance. For a bowl seen from all sides, the focal point can sit near the middle; for a planter viewed mainly from the front, it can sit just off-center toward the back.
Use odd-number groupings only if they look balanced in the actual pot; it is a design prompt, not a horticultural rule. Repeating the same variety can make a small display feel cohesive, while contrasting leaf size and color can make a larger pot easier to read. Keep the rosettes from leaning on one another and consider how much space each plant will take as it grows. You can leave visible gravel or top dressing between plants for a clean finish, but do not let decorative stones cover the crowns or trap wet debris against leaves.
Take a quick photo of the test fit before removing the plants. It is easier to remember where each pot belongs, especially when a shallow bowl leaves little room to work. The layout also reveals when you have bought too many plants: if you cannot see the potting mix at all or have to bend leaves to fit everything, edit the arrangement now. A slightly open planter will fill in; a crowded one is harder to water, inspect, and refresh.
Plant the arrangement step by step
Gather a container with drainage, a free-draining succulent or cactus mix, a small trowel or spoon, a brush, and a mesh scrap if the drainage hole is wide. The University of Illinois Extension’s succulent container guide describes using a sandy or gritty medium and leaving room below the rim for watering. A simple mix sold for cacti and succulents is a reasonable starting point. If it feels dense or stays damp for a long time in your conditions, blend in coarse perlite or pumice so air and water can move through it.
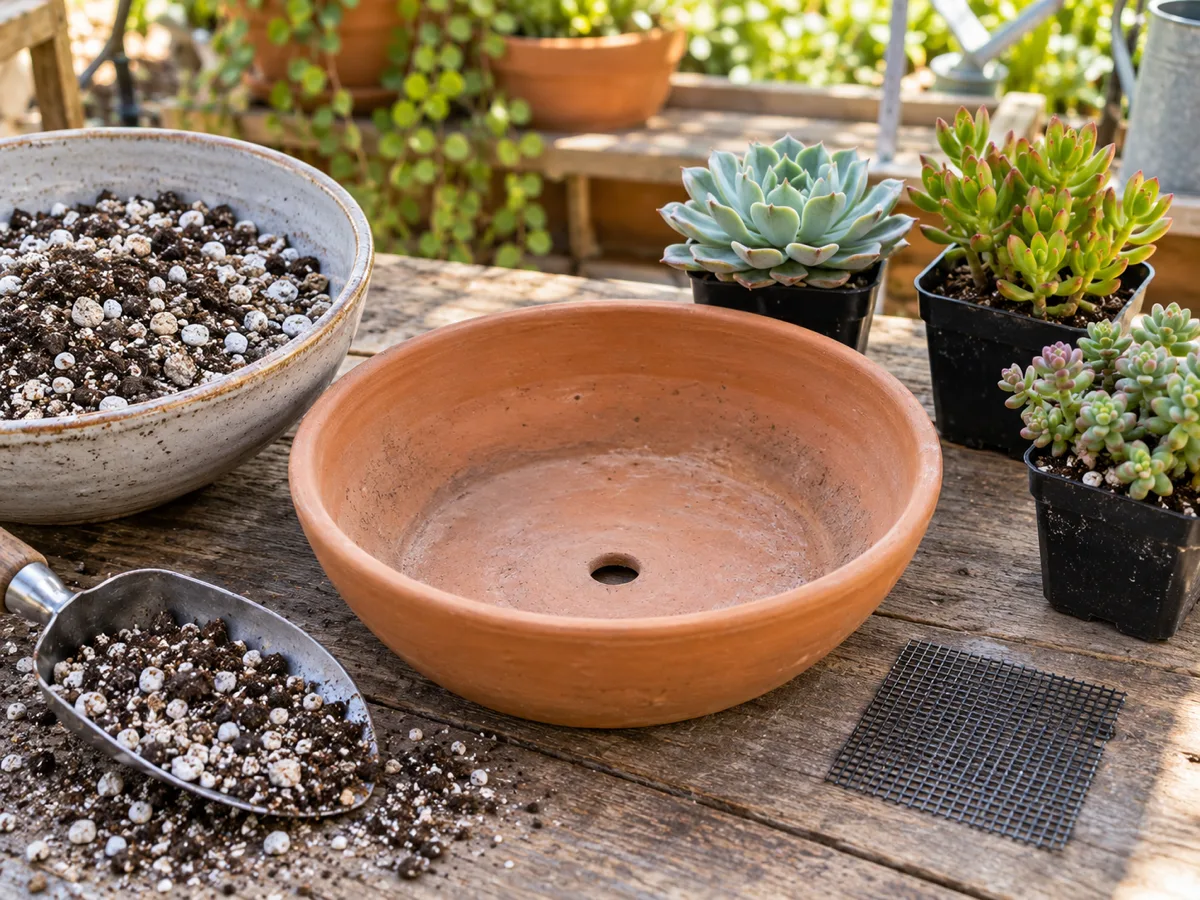
Avoid garden soil, dense compost, and fine builders’ sand. They can hold or pack moisture in ways that make the root zone slow to dry. A practical container guide from garden designer Lee Burkhill also recommends coarse horticultural grit or perlite rather than fine sand and explains why a gravel layer beneath the mix does not improve drainage. Recipes differ because climate, container material, and the ingredients sold locally differ. Aim for an evenly mixed, loose medium rather than layering different textures at the bottom.
Set the soil line and protect the roots
Cover a large drainage hole with mesh, then add enough mix so the plants will sit at their original soil depth with about half an inch to an inch of space below the rim. This headspace helps keep water and loose mix from spilling over when you water. Remove each plant by turning its nursery pot sideways and easing the root ball free; do not pull hard on the leaves or stem.
Loosen only roots that are tightly circling or bound into a solid plug. For a small, healthy plant with a loose root ball, preserve it rather than combing it bare just to make the arrangement look tidy. Work from the largest plant toward the smaller ones so your hands and tools do not crush the focal leaves. If a root ball is wet, soft, or smells sour, pause and inspect it rather than hiding a possible rot problem in fresh soil.
Backfill without burying the crowns
Set each plant into its test-fit position, add mix around the root balls, and firm it gently with your fingertips or a narrow tool. The roots should be supported so the plant does not wobble, but the mix should remain airy rather than packed hard. Keep the soil line where it was in the nursery pot. Succulent leaves resting against wet soil or a buried crown are more likely to stay damp and deteriorate.
Use a chopstick or the blunt end of a spoon to guide mix into narrow gaps. Check that no large air pockets remain around roots, then brush loose grit off the leaves. If you want a top dressing, use a thin layer of porous grit or small stone after the planting is stable. Do not mound material around the central growing point. A clean finish matters, but leaving the crown dry and visible matters more.
Give succulents enough light without scorching them
Most familiar rosette and desert succulents need much brighter conditions than an interior table several feet from a window. The RHS overview of houseplant cacti and succulents notes that most enjoy sun and free-draining compost and can struggle in poor light away from windows. Look at the plant over several weeks: stretched stems, wider gaps between leaves, or a plant leaning strongly toward glass can signal that it needs more light. Rotate the container regularly so one side does not do all the reaching.
However, do not move a plant that has been indoors straight into intense midday sun. Leaves adapted to lower light can scorch, especially after a sudden move outdoors in summer. Increase exposure gradually over a week or two, beginning with gentler morning light or bright shade, and watch for pale, dry patches. A haworthia may prefer filtered light even when an echeveria beside it wants a sunnier position; if one plant repeatedly stretches or burns, separate the grouping rather than forcing a compromise.
Window direction helps, but the distance from glass, nearby trees, screens, latitude, and season all change usable light. If the brightest window still produces persistent stretching, a grow light placed according to its manufacturer’s instructions may be more reliable than adding water or fertilizer. Neither can replace a suitable amount of light.
Water by dry-down, not by the calendar
There is no dependable “every Sunday” rule for all succulent containers. A small unglazed pot in warm sun can dry much faster than a deep glazed bowl in a cool room. Check below the surface with a finger or wooden skewer, and learn how the pot feels when dry. Once the mix has dried through the root zone, water slowly until excess runs from the drainage hole, then empty the saucer or outer pot.
If the mix is still cool or damp several inches down, wait and check again later. Do not give tiny sips on a fixed schedule; that can leave some roots dry while keeping the top layer wet. The Associated Press guide featuring desert-container educator Marylee Pangman likewise advises checking the soil rather than treating a watering interval as universal. Growth, light, pot size, and season all change how quickly the planter uses water.
In active growth, a thorough soak followed by a real dry-down encourages roots to use the whole container. In winter, lower light and slower growth often mean longer gaps between waterings. If water drains slowly, the mix remains wet for many days, or the plant turns soft while the soil is damp, fix the mix or pot before adjusting your calendar. Healthy watering starts with a root zone that can both absorb moisture and regain air.
Manage the first weeks and seasonal changes
After planting, place the container where its light and temperature needs are met and avoid a string of corrective changes. If you damaged or cut roots during planting, let those injuries dry for a few days before watering; if the root balls stayed intact, use the moisture in the mix as your cue. For the first couple of weeks, check the container more often than you water it. That lets you learn its dry-down rate without keeping it constantly damp.
Fertilizer is optional for many beginner arrangements. If the mix contains no nutrients and the plants are actively growing, use a diluted succulent fertilizer according to its label rather than feeding a dormant plant or adding a heavy dose to “make it grow faster.” Remove dead lower leaves before they collect against the soil, and turn the pot so each side receives light. When offsets push plants together or roots fill the container, divide or repot during active growth instead of pruning healthy plants just to preserve a crowded design.
Before a freeze, move tender varieties indoors or to a frost-free protected spot. Some Sempervivum and selected sedums are hardy outdoors, but hardiness is species-specific and container roots face colder, faster-changing conditions than roots in the ground. The RHS Sempervivum growing guide describes them as mostly hardy and recommends free-draining conditions; it also notes that some benefit from shelter from excessive winter wet. Always check the plant label and local conditions before leaving a mixed pot outside.
Fix common problems before rebuilding the planter
If leaves become translucent, soft, or mushy while the mix stays wet, suspect overwatering or poor drainage. Stop watering, empty standing water, and inspect the roots if the plant continues to collapse. Dark, mushy roots should be removed with a clean tool; healthy roots are firmer. Repot into a faster-draining mix if the original stays saturated, then wait for the new medium to dry before watering again. A pot that has no exit hole or a layer of gravel at the bottom needs a structural fix, not a more precise calendar.
If leaves develop dry, bleached, or brown patches soon after a move, think sunburn before assuming thirst. Return the plant to bright shade and reintroduce stronger light gradually. Long, stretched growth usually points to insufficient light; more frequent watering will not make the stem compact again. Move the container to a brighter location, rotate it, or use suitable supplemental light, then prune or propagate the stretched top only if the plant’s growth form allows it.
When one plant looks unhappy but its neighbors look fine, the combination itself may be the problem. A sun-loving rosette may be too bright for a shade-tolerant companion, or a frost-tender plant may be mismatched with a hardy outdoor bowl. Separate the outlier into its own pot and compare what changes. The goal is not to rescue every design by changing all the care at once; it is to identify the condition that differs and make the smallest useful correction.
Conclusion
A beginner-friendly succulent container garden is easiest to maintain when its design follows the plants’ needs. Choose the light and season first, group plants that can share those conditions, and use a well-draining container with a gritty mix throughout. Arrange the pots before planting, keep crowns above the soil, and water only after the root zone dries. With those choices in place, a simple bowl, repeated rosettes, or a trailing edge can look polished without making care complicated.