Landscape Design for Beginners: A Practical Guide
Learn landscape design for beginners: map your site, balance hardscape and softscape, apply six core principles, and follow a weekend planning workflow you can use before buying plants.
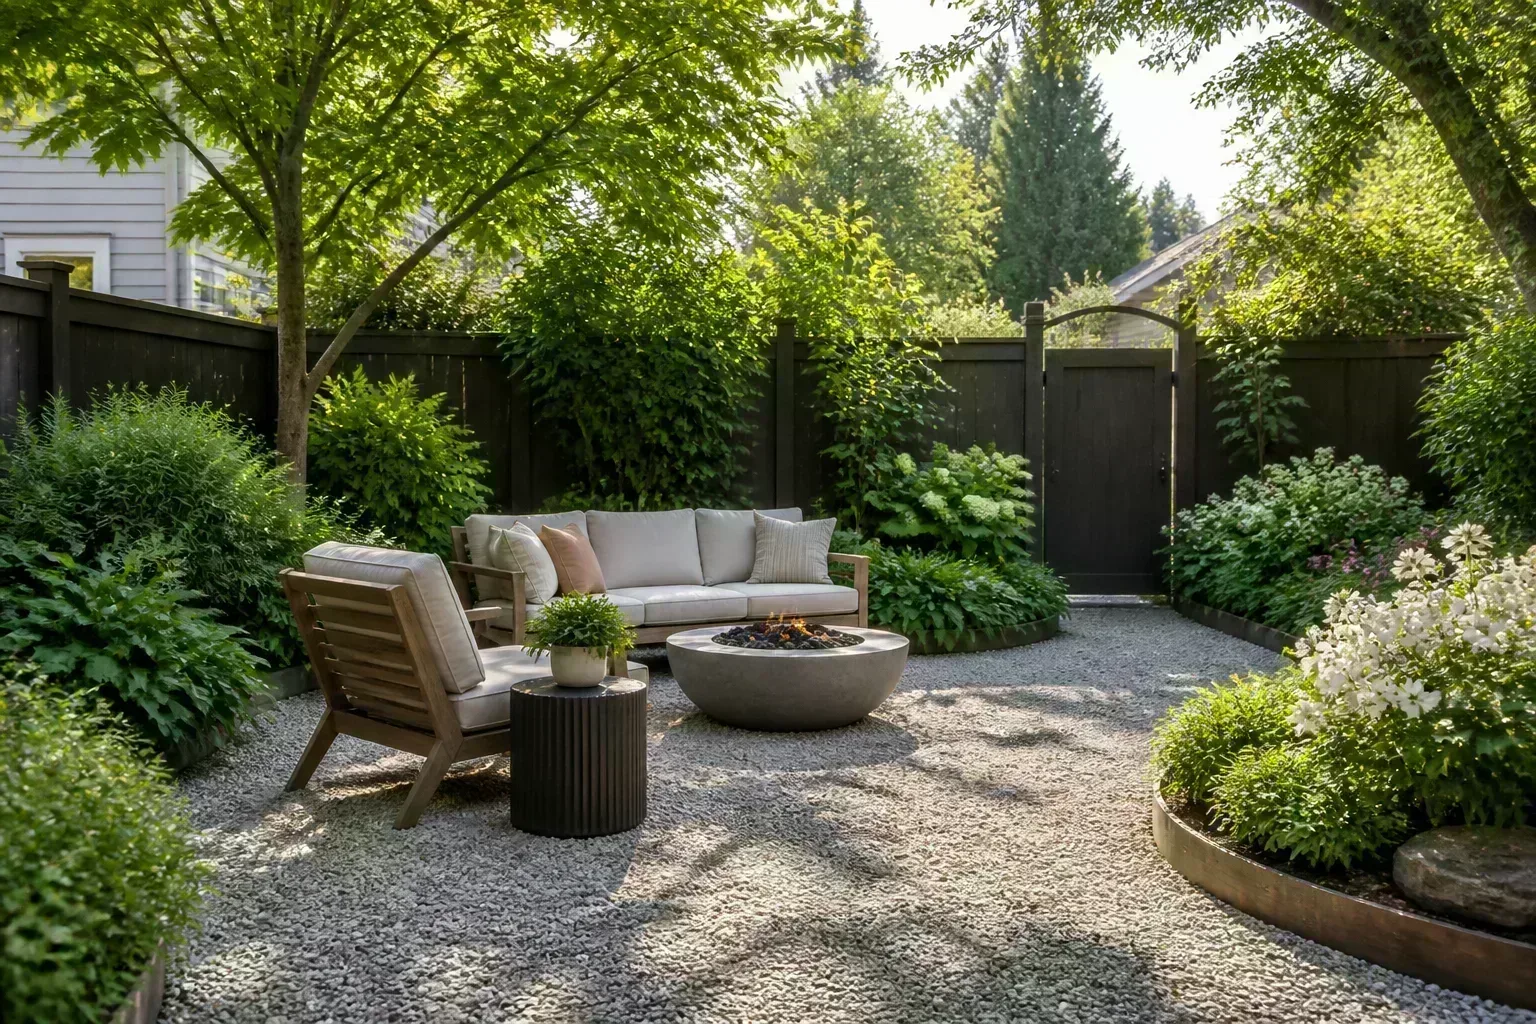
Most yards fail at landscape design long before the first plant goes in the ground. The mistake is not bad taste—it is skipping the questions that matter: who uses this space, how sun and water move across it, and what you are willing to maintain in August when everything is thirsty. Landscape design for beginners is less about picking pretty shrubs and more about arranging hard surfaces, plants, and sight lines so the whole property feels intentional from the curb and comfortable from the patio.
You do not need design software or a landscape architecture degree to make a strong first plan. You need a pencil, a tape measure, and a process that puts function and site conditions ahead of impulse buys at the nursery.
Start With How You Will Actually Use the Yard
Before you debate hydrangea colors, write down how the outdoor space should work on a Tuesday evening, not just in a magazine photo. Landscapes that look designed almost always solve real jobs: a clear path from car to door, a flat play zone, privacy from a neighbor window, a vegetable bed in the sunniest patch, or a seating area that catches afternoon shade.
Walk the property with a notebook and list every activity you want to support in the next three to five years. Mark circulation routes you already use—even muddy shortcuts count, because they tell you where paths belong. Note views you want to frame from inside the house and views you want to screen.
Separate Must-Haves From Nice-to-Haves
Divide your list into must-haves (safety, drainage fixes, primary walkways, pet fencing) and nice-to-haves (fire pit, water feature, cutting garden). Must-haves shape the skeleton; nice-to-haves fill in once the skeleton works. Beginners often invert this order, buying specimen plants before fixing a pooling downspout or a dangerous step grade.
If you are designing for curb appeal, prioritize the approach sequence: driveway edge, front walk, foundation planting, and porch framing. Our curb appeal landscaping ideas guide ranks front-yard upgrades by visual impact if you want a prioritized punch list after the base plan is drawn.
Read Your Site Before You Buy Anything

The single highest-return step in beginner landscape design is site analysis—studying what you already have before sketching what you want. Professional designers do this first because plants placed without understanding light, drainage, and scale rarely survive long enough to look good.
Spend one weekend documenting the lot. Measure the house footprint, driveway, existing trees, and property lines. Photograph the yard from each corner at morning, midday, and late afternoon. Note where snow melts first in winter and where water stands after a hard rain.
Map Light, Slope, Drainage, and Wind
Draw a rough plan—not architectural quality—and label compass direction. Track how many hours of direct sun each zone receives in summer. Full sun means six or more hours; part sun is roughly three to six; shade is less than three. The RHS calls this aspect, and it matters as much as plant labels at the garden center.
Mark slopes steeper than about 3:1 (three feet horizontal per one foot vertical) as areas where erosion or mowing becomes hazardous without terracing or groundcover. Flag soggy zones and roof runoff paths; no amount of color theory fixes a bed that drowns every spring. Note wind tunnels along fence lines and between buildings—coastal and open flat sites carry sustained wind that desiccates evergreens and pushes over top-heavy trees if stakes come off too early.
Call 811 or your local utility locate service before any digging. Underground lines often dictate where trees, posts, and deep beds can go. If drainage is a chronic problem, solve grading and downspout routing in the hardscape phase—not with thirsty plants alone.
Hardscape and Softscape Work as a Pair
Every complete landscape plan combines hardscape (non-living built elements) and softscape (living plant material and soil). Hardscape sets circulation, elevation, and outdoor rooms; softscape provides seasonal change, habitat, and the softness that keeps stone and concrete from feeling sterile.
Thinking in both layers prevents the common beginner pattern of dotting shrubs randomly around an unchanged lawn.
What Hardscape Does in a Beginner Plan
Hardscape includes paths, patios, steps, retaining walls, edging, gravel areas, decks, pergolas, and water features. Its job is to define where feet go and where soil stays put. A well-placed path stops worn grass shortcuts; a small patio creates a destination that justifies the planting around it.
Match materials to the house style for unity—Penn State Extension’s principles of garden design emphasize that repeating materials and forms ties the landscape to architecture. Brick paths echo brick facades; warm decomposed granite suits ranch and farmhouse styles; large-cut flagstone reads more contemporary. In a small yard, limit yourself to two dominant hardscape materials plus mulch or lawn.

For patio and seating layouts, see our backyard patio ideas once your bubble diagram shows where outdoor living belongs. If you are reducing lawn, no-grass backyard ideas can help you choose groundcover and permeable surface mixes that still drain.
What Softscape Does in a Beginner Plan
Softscape is trees, shrubs, perennials, grasses, groundcovers, and lawn. It provides height layers, seasonal color, privacy, and wildlife value. Softscape should follow hardscape lines: beds deepen along paths and walls; tall plants anchor corners and block undesirable views; low plants edge walkways without spilling onto pavers.
Group plants by water and sun needs—this is practical design, not aesthetics alone. EPA WaterSense landscaping guidance recommends grouping plants with similar irrigation needs and prioritizing climate-appropriate species to reduce waste. A drought-tolerant border on a slope and a moisture-loving rain-garden swale at a downspout outlet can both be beautiful when each plant sits in its correct zone.
Six Principles Behind Balanced Landscape Design
Landscape design principles are the rules your eyes already know. They explain why one yard feels calm and another feels chaotic. Most beginner guides list six: proportion, transition, unity, rhythm, balance, and focalization. You achieve them through the five design elements covered in the next section—color, form, texture, line, and scale.
Proportion, Scale, and Transition
Proportion is the sense that every part belongs to the whole. A five-foot retaining wall beside a one-story cottage overwhelms the house; the same wall beside a three-story facade may look right. Scale is proportion applied to individual elements—shrubs that will mature to twelve feet should not sit under a low window without a plan to prune or replace.
Transition softens size jumps. A tall wall next to a low house needs intermediate height—ornamental trees or layered shrubs—so the eye climbs gradually rather than hitting a wall. Abrupt transitions are why beginners say a new bed “looks stuck on.”
University of Minnesota Extension notes in its flower garden design guidance that matching plant mass to bed depth and viewing distance keeps small yards from feeling cluttered. Deep borders (roughly four to six feet minimum for layered perennials) read more professional than six-inch strips along a fence.
Unity, Rhythm, and Balance
Unity means the landscape reads as one composed scene, not a plant collection. Repeat forms and materials: the same shrub species flanking a gate, a recurring gravel color, or repeated grass cultivars along a path. Rhythm is patterned repetition that moves the eye—a hedge rhythm, a line of upright grasses, or evenly spaced trees along a drive.
Balance distributes visual weight. Formal balance mirrors one side to the other—matching urns on porch steps. Informal balance uses different elements of similar weight—a large shrub on one side balanced by a group of three smaller shrubs on the other. Most residential yards look best with informal balance because houses and lots are rarely perfectly symmetrical.
Repeat key plants in odd numbers—threes, fives, sevens—for naturalistic rhythm without monotony. One of everything reads like a botanical catalog; three repeats of the same grass cultivar reads like a plan.
Focal Points Without Visual Whiplash
Focalization directs attention to a chosen feature—a specimen tree, bench, sculpture, or bright door surround—without feeling forced. Strong focal points need breathing room: reduce clutter around them, use color contrast sparingly, and align paths or bed edges to lead the eye.
Avoid multiple competing focal points visible from one spot. From the kitchen window, pick one hero view; from the street, another. Each should have a clear foreground, midground, and background layer.
Five Elements That Give Your Plan Character
Where principles describe relationships, elements are the tools: color, form, texture, line, and scale. Professional designers manipulate these five variables before they debate cultivar names.
Color, Form, and Texture
Color sets mood and season. Warm colors—reds, oranges, yellows—advance visually and energize a space. Cool colors—blues, purples, greens—recede and calm. Beginners often maximize bloom week in June; stronger plans stagger bloom and foliage color across seasons. Use a color wheel to pair complements for drama or analog hues for harmony.
Form is plant silhouette—columnar evergreens, mounding shrubs, weeping branches, stiff vertical grasses. Mix forms for interest, but repeat at least one form type for unity. Texture is fineness or coarseness of foliage—fine ferns against bold hostas, for example. Contrast textures at close range; echo textures at distance for cohesion.

For bed layout templates—tall/back, medium/middle, low/front—see our perennial flower garden layout guide once your base map is drawn.
Line and Scale in the Ground Plane
Line controls movement. Straight lines feel formal and fast; curves feel relaxed and slow. A straight front walk suits colonial architecture; sweeping beds suit cottage gardens. Align bed edges with architectural lines where you want crispness; break them gently where you want softness.
Scale in the ground plane means paver size, bed width, and tree canopy relative to lawn area. Oversized pavers in a tiny courtyard feel heavy; narrow stepping stones on a primary route feel tentative. Match walkway width to use: main paths deserve at least three to four feet; secondary garden paths can be narrower.
A Simple Weekend Planning Workflow
Theory becomes useful when sequenced. This three-pass workflow fits one or two weekends and prevents the costliest error—installing plants before the layout is tested.
Pass 1 — Base map: On graph paper or a simple app, draw property boundaries, house, driveway, utilities, and existing trees to scale (1/8 inch = 1 foot is a common beginner scale). Label sun zones and drainage trouble spots from your site audit.
Pass 2 — Bubble diagram: Trace the base map onto tracing paper. Use loose circles and labels for functions—“play,” “veg,” “sit,” “privacy screen,” “compost”—without choosing species yet. Test two or three arrangements. Circulation should connect destinations without cutting through planting islands.
Pass 3 — Concept plan: Add hardscape lines, bed shapes, and tentative tree locations. Note mature widths from plant tags, not current pot sizes. Sleep on it for a week and walk the paper plan in the yard with stakes and hose curves to feel distances.
Only after Pass 3 should you build a plant list grouped by zone, water need, and mature size. If you want a more polished aesthetic pass on planting layers and bloom calendars, our how to design a garden that looks professional guide picks up where this workflow ends.
Design apps like iScape or browser tools can help visualize, and SketchUp or PRO Landscape suit homeowners who enjoy 3D modeling. Software is optional; a clear base map is not.
Match Plants to Your Climate and Landscape Type
Climate filters every plant choice. Start with the USDA Plant Hardiness Zone Map for winter survival, then refine with summer heat, rainfall, and soil pH. A zone-7 plant that needs dry winters may fail in zone-7 clay that stays wet.
Three broad landscape contexts shape plant palettes:
Mountain and high-elevation sites face short seasons, intense UV, frost pockets, and drying winds. Choose cold-hardy, wind-tolerant species; use boulders and low walls as wind breaks; favor deeper mulch and winter protection for broadleaf evergreens.
Flat and open inland sites expose plants to sweeping wind and temperature swings without hillside cold-air drainage. Windbreak plantings, drip irrigation, and drought-tolerant masses reduce stress. Lawn areas in open sun need realistic irrigation budgets or gradual lawn reduction.
Coastal sites demand salt spray tolerance, sandy or fast-draining soils, and often lower nutrient levels. Avoid sensitive broadleaf evergreens on ocean-facing exposures unless buffered; favor grasses, natives, and salt-tolerant shrubs. Roadside salt from winter plowing creates similar stress far inland.
Within any context, prioritize native and adapted plants for lower maintenance and wildlife value—Penn State Extension wildlife-friendly landscaping resources are a solid starting point for regional lists. Match plant moisture needs to microsites: rain-garden species in swales, xeric plants on south-facing slopes.
Phasing Projects and What They Really Cost
Full-yard transformations are expensive and disruptive. Phasing lets you install in logical order: drainage and utilities first, primary hardscape second, structural planting (trees and shrubs) third, perennials and mulch fourth, accents last.
DIY material-and-plant budgets for a modest front-yard refresh often land roughly $1,500–$4,000 depending on region, bed size, and whether you add paths or edging—well below a full professional redesign. Hiring a landscape designer for a comprehensive plan commonly runs $2,000–$8,000+ for design fees alone, with installation often $10,000–$40,000 for medium lots when hardscape is involved. National averages cited in industry surveys frequently place full designer-led projects around $8,000–$15,000 for design plus partial install, but local labor and material spikes can push higher.
Save money by buying smaller container sizes for trees and shrubs (with patience), reusing divided perennials, choosing gravel over cut stone where appropriate, and DIYing mulch and planting after you pay for grading or patio work that requires equipment. Never phase drainage last—moving saturated soil and drowned plants costs more than fixing grade upfront.
| Phase | Typical scope | DIY-friendly? |
|---|---|---|
| 1 — Site fixes | Downspout extensions, grading, utility locates | Partial |
| 2 — Hardscape skeleton | Paths, patio base, edging, retaining walls | Mixed |
| 3 — Bones | Trees, shrubs, irrigation main lines | Yes with research |
| 4 — Flesh | Perennials, mulch, lawn repair or removal | Yes |
| 5 — Polish | Lighting, containers, art, water features | Mostly yes |
Beginner Mistakes That Undo Good Ideas
Shopping before planning tops the list. Nurseries reward impulse; your site does not. Ignoring mature size is close second—read width at ten years, not height in the pot. One-of-each planting prevents unity; repetition is not boring when textures and bloom times vary.
Shallow beds along long fences look like afterthoughts. Push borders to at least four feet deep where space allows, or switch to a single clean groundcover mass if depth is impossible. Volcano mulch against tree trunks causes bark decay; pull mulch back several inches from trunks and shrub crowns. Our what is mulch guide covers depth and placement.
Competing focal points—birdbath, bright bench, ornate pot, and striped awning in one sightline—create noise. Pick one hero per view. Straight curves drawn as wiggly lines without purpose look amateur; every curve should serve circulation or bed depth, not decoration for its own sake.
Finally, designing for maintenance you will not do guarantees failure. A formal clipped hedge plan on a busy schedule is a mismatch; loose native borders may be smarter. Be honest about mowing, pruning, and watering time before you commit to high-input features like large lawns on slopes or thirsty annual beds in full sun.
Conclusion
Landscape design for beginners becomes manageable when you treat the yard like a small architecture project: define how the space should work, read sun water and wind, lay hardscape for circulation, then plant in layers that respect mature scale. The six principles—proportion, transition, unity, rhythm, balance, and focalization—are not abstract art terms; they are checks you run on your bubble diagram before spending money.
You will refine the plan every season as plants grow and your routines clarify. That is normal. A strong base map, honest phasing, and repetition of a few well-chosen plants will carry you further than a cart full of one-off favorites ever could. Start measuring this weekend; buy plants next month.