How to Revive a Succulent: Read Its Leaves and Roots
Learn how to revive a succulent by checking its leaves, soil, roots, light, and temperature before choosing a fix for dehydration, rot, sunburn, or cold injury.
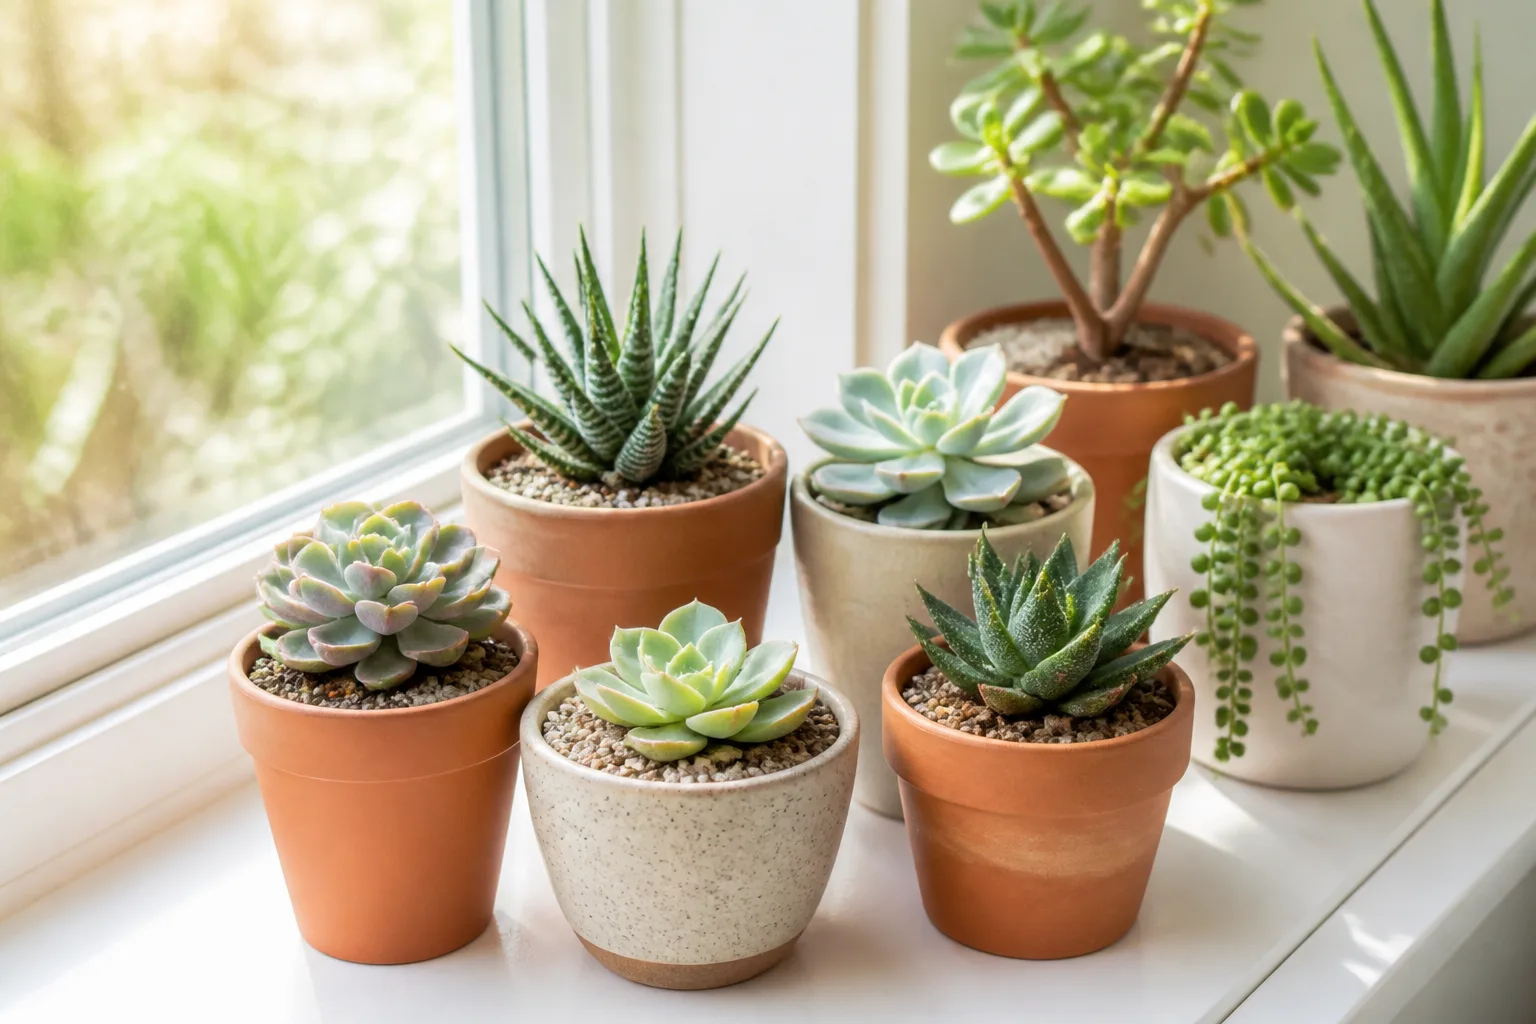
A succulent with wrinkled, yellow, mushy, or scorched leaves may still have healthy roots or a firm piece of stem capable of growing again. But those symptoms point to different problems, and adding water, cutting leaves, or moving the plant into stronger sun before checking can make a recoverable plant worse. Start by comparing leaf texture with the moisture in the pot, then inspect roots if those clues do not agree.
There is no single “revive a succulent” treatment. A plant with dry soil and shrinking leaves needs a measured drink; one with wet mix and soft tissue needs less water and a root check. Sun and cold injuries call for exposure control and time, while pests need isolation and a treatment matched to the insect. The aim is to keep the living parts stable, not to force damaged tissue to look new again.
Start with a quick triage before changing care
Before pruning or repotting, note four things: whether the mix is dry or damp below the surface, whether leaves feel firm or soft, whether the pot feels unusually light or heavy, and what changed recently. Think about a move to a sunnier window, an outdoor summer stay, a cold night, a missed watering, or repeated small drinks. This short history often narrows the diagnosis faster than the leaf color alone.
Feel the mix about an inch below the surface, or use a wooden skewer if the pot is too small for a finger. Check the drainage hole and remove any decorative cachepot or saucer water. If the soil is wet and the plant is collapsing, unpot it to inspect the roots; if the soil is dry and the leaves are merely losing firmness, a root inspection may add stress without changing the first step.
A succulent stores water in fleshy leaves, stems, or roots, so it can look healthy for a while after conditions start going wrong. That reserve buys time, but it also means a plant can show symptoms after the cause has already been corrected. Change the condition you can verify, then give the plant a stable place to respond instead of changing light, water, soil, and fertilizer all at once.
Distinguish a stressed succulent from a dead one
A limp or wrinkled plant is not automatically dead. Look for tissue that remains firm, a stem that is green or pale inside when lightly scratched, live roots, or offsets that are still growing. A plant with at least one firm rosette, stem section, or rooted offset may be salvageable even if most of its leaves are lost.
By contrast, tissue that is black, hollow, dry all the way through, or soft and decomposing is not going to become healthy again. If the entire crown and stem base have rotted, there may be no viable plant left to rescue. Do not keep watering a dead plant in the hope of restarting it; check for separate, firm offsets or cuttings and discard material that is mushy, moldy, or fully desiccated.
Some succulents naturally shed a few of their oldest bottom leaves as they grow. A single dry leaf at the base, with firm new growth and a normally drying pot, is different from widespread leaf drop, a soft crown, or a stem changing color. Remove a fully dry leaf gently only when it detaches easily; do not strip healthy leaves to make a stressed plant look tidy.
Use the symptom pattern, soil, and recent history
Use this comparison as a starting point, not a diagnosis by itself. Several problems can cause wrinkling or droop; soil condition and root texture help distinguish them. West Virginia University Extension describes succulents as water-storing plants that need freely draining containers and a thorough watering after the mix dries, while the Royal Horticultural Society notes that underwatering can cause shriveling and cold damage can leave surface patches.
| What you notice | Check next | Most useful first move |
|---|---|---|
| Wrinkling with dry, light mix | Is the root ball dry all the way through? | Rehydrate once, then drain fully. |
| Soft, yellow or translucent leaves with wet mix | Are roots brown, soft, or foul-smelling? | Stop watering; inspect roots and drainage. |
| Tan, bleached, or crisp patches on the window-facing side | Did direct sun or outdoor exposure increase suddenly? | Move to bright shade and acclimate gradually. |
| Water-soaked, glassy, dark patches after a cold night | Was the plant chilled or exposed to frost? | Keep it above freezing and wait before trimming. |
| Cottony clusters, scale-like bumps, webbing, or sticky residue | Can you see insects or their cast skins? | Isolate the pot and identify the pest before treatment. |
A wet pot does not prove root rot, and dry soil does not prove every root is alive. If the plant continues to wilt while the mix remains wet, or if its stem base is soft, inspect the root system rather than trying another watering adjustment. If the roots look firm and the plant has just been moved, exposed to cold, or sunburned, preserve the roots and correct the exposure first.
Dry soil and wrinkled leaves: rehydrate carefully
When the mix is dry through the root zone and leaves are losing their usual firmness, water the soil thoroughly rather than misting the foliage or giving frequent sips. Pour slowly until water runs from the drainage hole, then let the pot drain completely and empty the saucer. This wets the full root ball; a few spoonfuls on the surface can leave deeper roots dry and encourage an erratic cycle.
If very dry soil has shrunk from the pot or repels water, set the nursery pot in a shallow container of room-temperature water for about 10 to 15 minutes, then lift it out and allow it to drain. Do not leave it soaking for hours. Epic Gardening’s succulent-watering guide similarly emphasizes checking soil and pot weight and letting excess water drain rather than relying on a calendar. If the center of the root ball is still dry after the first drink, rehydrate once more in a controlled way instead of repeating small top-ups every day.
A thirsty succulent may look less wrinkled over the next several days, but the thinnest or oldest leaves may remain scarred or dry. Do not expect each leaf to plump back to its former shape; recovery is better judged by whether the remaining stem stays firm and new growth appears. If a well-watered plant still wrinkles while the soil is damp, stop adding water and check for root damage.
Wet soil and soft leaves: check for root rot
Soft, translucent, yellowing leaves paired with mix that stays wet are a warning to investigate, especially when the stem base feels soft or the pot smells sour. Root rot often interferes with water uptake, so a plant can wilt even though its roots sit in wet soil. The University of Wisconsin–Madison Division of Extension describes root rot symptoms that include wilting in wet soil and brown, soft roots that may have an unpleasant odor.
Do not treat every yellow leaf as proof of rot. A few old leaves can yellow naturally, and a pot may be damp just after a normal watering; what matters is a pattern of decline plus persistently wet conditions or visible root damage. If the plant is stable and the mix is merely slow to dry, remove standing water, improve airflow around the pot, and reassess. If the crown or stem is soft, or the leaves continue dropping, inspect immediately.
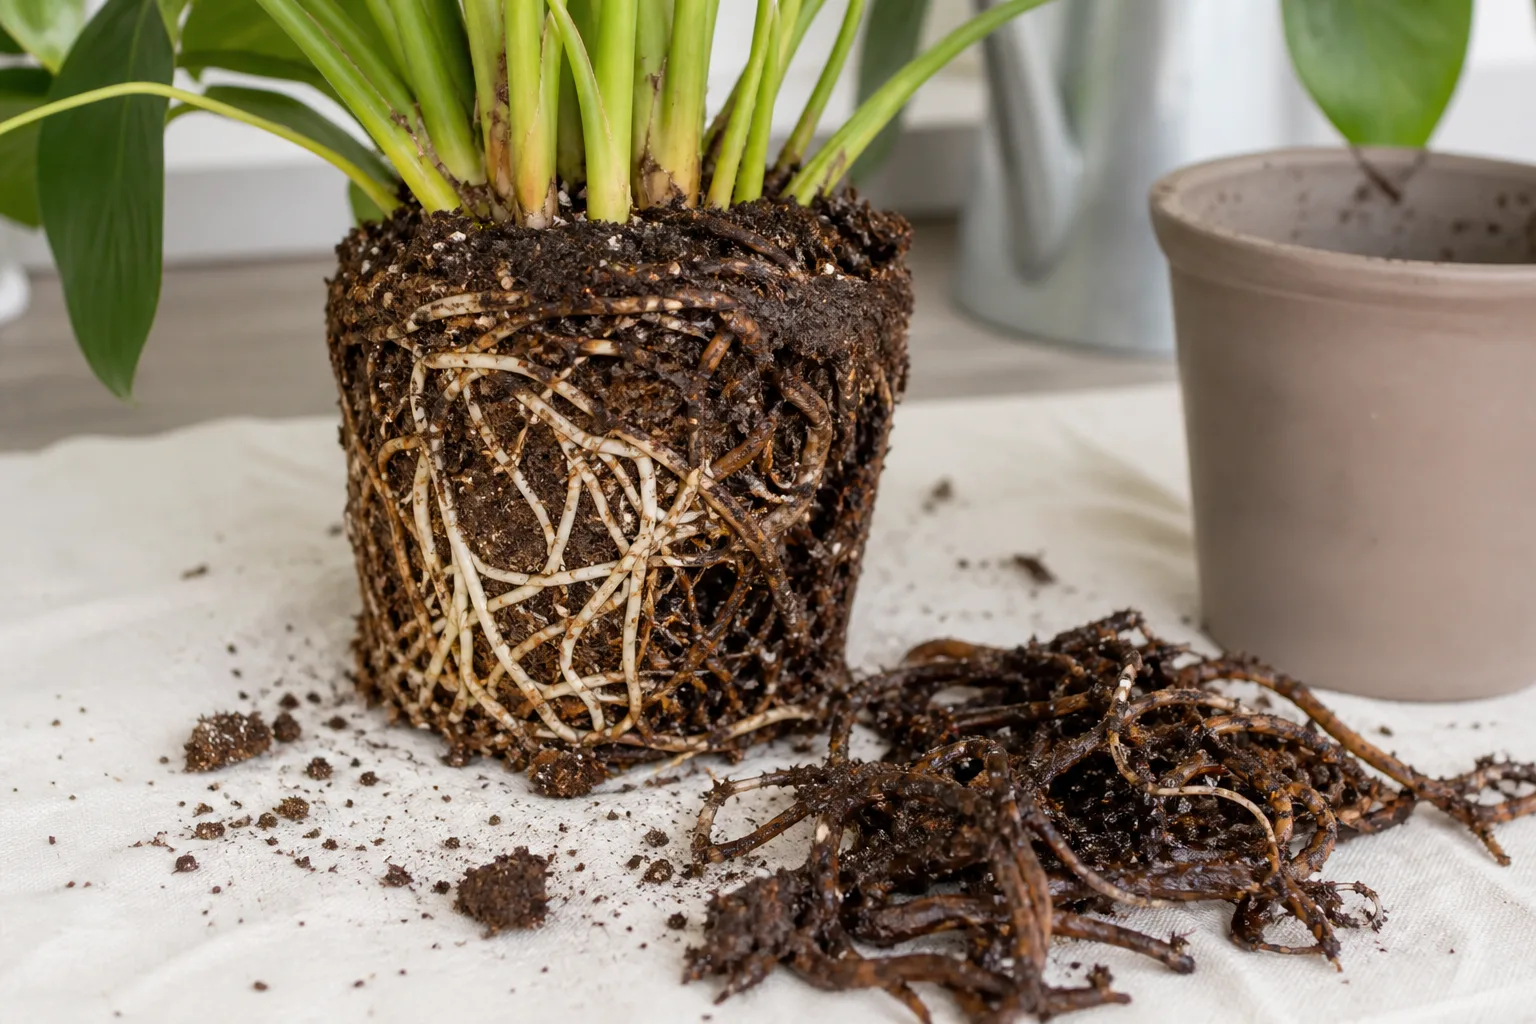
When a succulent wilts in wet mix, inspect the roots before adding more water.
Root-rot rescue: remove damage and preserve firm tissue
Slide the plant out of its pot and gently remove wet mix so you can see which roots are still firm. Healthy roots may be pale, tan, or darker depending on the plant and substrate, so judge texture rather than color alone. Rotten roots are typically soft, collapsing, or slimy; trim them with clean, sharp scissors or a blade, cutting back to tissue that feels firm.
If the stem base is also soft, cut above the damaged area until the cut surface is firm and evenly colored. Disinfect the blade between cuts, especially if you move from rotten tissue into apparently healthy tissue. Do not pour household bleach, hydrogen peroxide, or undiluted alcohol onto the plant; the University of Wisconsin Extension notes that chemical fungicides are often not a practical houseplant fix, while reducing excess moisture and improving drainage are central to managing root rot.
Discard the old wet mix instead of packing it around trimmed roots again. Clean the pot and drainage hole, or use a fresh container with a drainage hole, then let cut surfaces dry in a shaded, ventilated place until they are dry to the touch. The time depends on the size of the cut and humidity; a tiny root trim may need less time than a thick stem cutting. Replant in fresh, barely dry succulent mix and hold off on watering until the cuts have sealed and the plant is anchored.
If little or no root remains but a healthy stem top is firm, treat it as a cutting rather than as a rooted plant. Cut away all rot, let the end callus, and set it on or just into a dry, airy mix. A soft crown, rot running through every stem, or tissue that collapses after trimming has a poor outlook; do not keep sacrificing healthy sections to chase decay.
Sunburn: stop exposure and protect healthy growth
Sunburn is more likely when tan, cream, or brown patches develop on the side facing a bright window or after the plant moves from indoor light to full outdoor sun. The damage can look dry and papery, but it does not usually spread from one leaf to another like rot. The Royal Horticultural Society lists surface patches as a sign of cold damage in some succulents, so use the exposure history and the texture of the tissue to separate sun from cold injury.
Move the plant to bright shade or filtered light, not a dark corner. Existing bleached or brown areas will not turn green again, and removing every marked leaf can strip away useful living tissue. Leave partly green leaves attached unless they are rotting; they still photosynthesize while the plant adjusts. Gardening Know How’s cactus guidance explains that a greenhouse-grown or indoor cactus can scorch when it is suddenly placed in intense sun, and recommends gradual acclimation before increasing exposure.
Once the plant is stable, increase direct sun in small increments over a week or two, beginning with gentler morning light. The exact tolerance depends on species, season, glass, temperature, and whether the plant was previously shaded. If new patches appear, step back to brighter indirect light and acclimate more slowly rather than testing the plant through repeated burns.
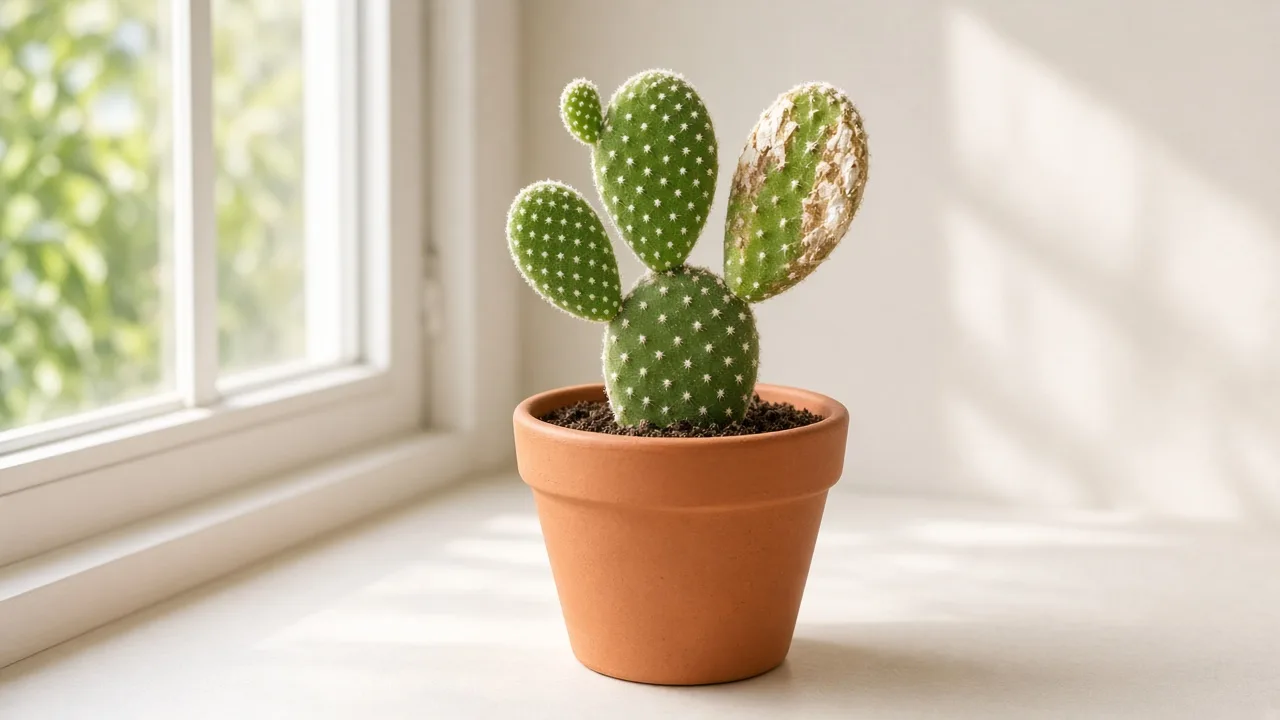
Sun-exposed patches on a succulent do not heal back to green; protect the unaffected growth.
Cold injury: warm gradually and wait for the damage to declare itself
Cold injury often follows a frosty night, contact with a cold window, or an outdoor stay below the plant’s tolerance. Affected tissue may look water-soaked or translucent at first, then darken, soften, or dry as it thaws. This differs from simple underwatering: cold-injured tissue can be wet-looking even when the potting mix is not saturated.
Move a chilled indoor succulent away from the cold glass and keep it in a room with stable, moderate warmth and bright indirect light. Do not place it against a heater, blast it with hot air, or immediately water it; rapid heat and wet roots add stress before you know what tissue is still alive. Wait several days for the boundary between firm and damaged tissue to become clear, then trim only sections that are fully soft, black, or collapsing.
Hardiness varies widely. Some outdoor species, including certain stonecrops and hens-and-chicks, tolerate cold when planted in suitable conditions, while many tender rosette succulents and common houseplant varieties need protection. The RHS advises winter protection for many cacti and succulents in cooler regions and notes that cold damage can appear as surface patches. Do not use a single temperature threshold for every succulent; identify the genus and consider whether it was wet, sheltered, in a pot, or in the ground.
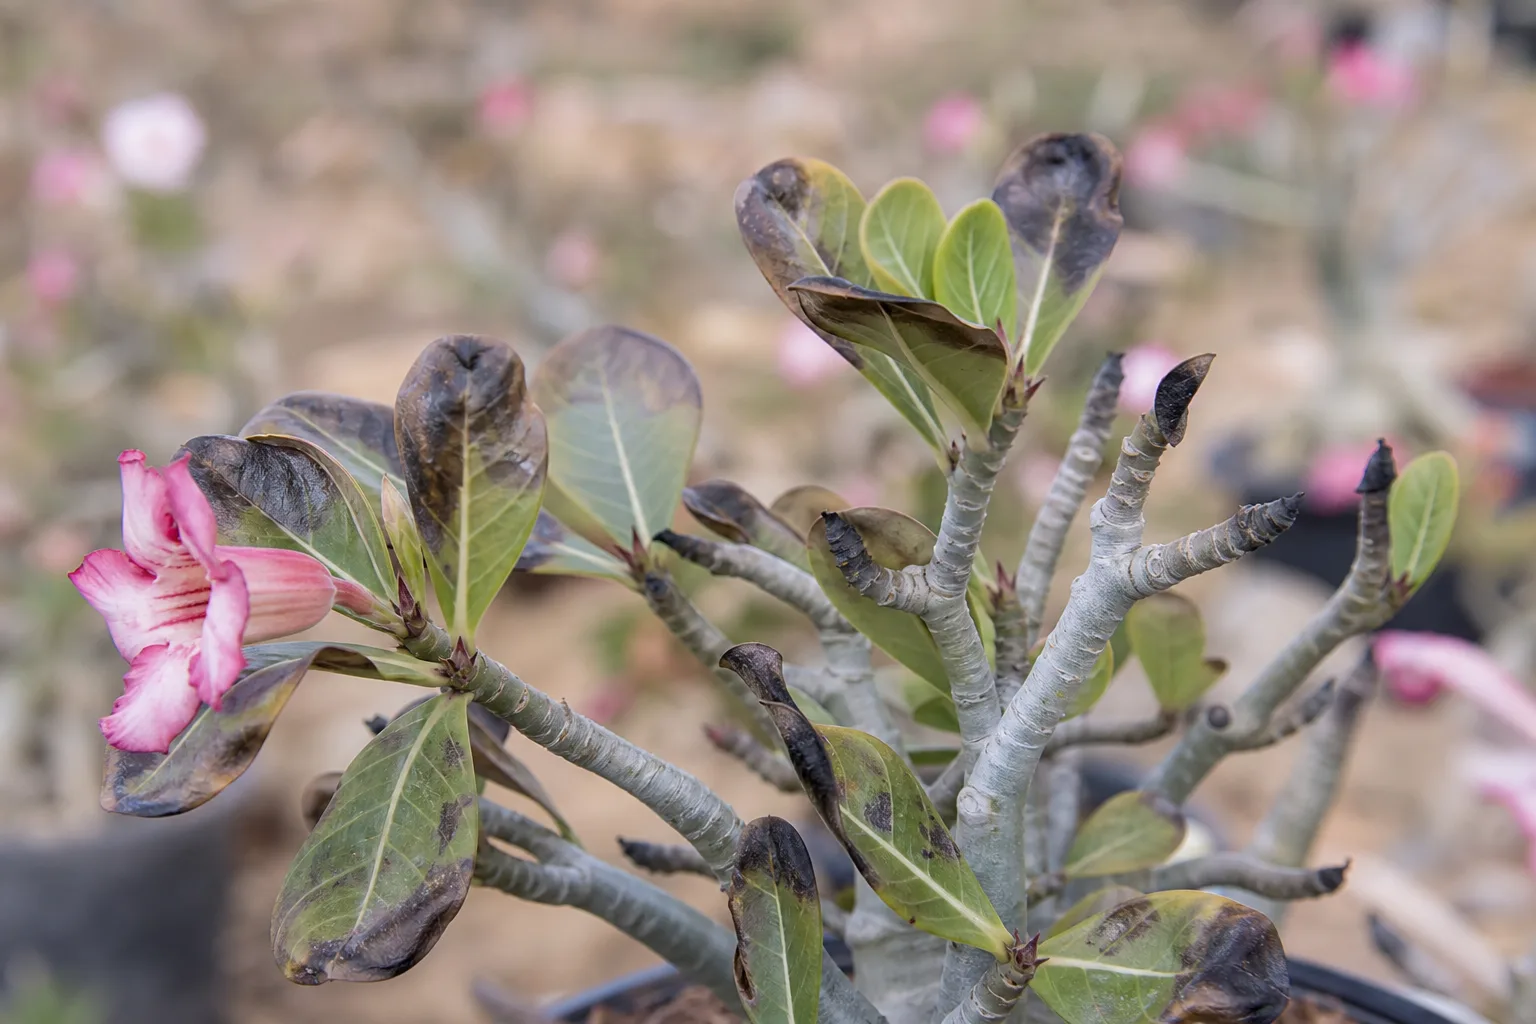
Cold injury can leave patches or water-soaked tissue; assess the plant after it has warmed gradually.
Pests: isolate the plant and treat the insect you identify
Pests are more likely when you can see them or their signs: cottony white mealybugs in leaf joints, small scale bumps attached to stems, fine webbing, or sticky residue. A scar or white mark alone is not enough to diagnose insects. Check the undersides of leaves, crevices, stem joints, and the soil surface with a bright light, then move the pot away from other plants while you investigate.
For a small mealybug or scale problem, remove visible insects with a damp cotton swab and inspect again over the next several days. WVU Extension describes using a cotton swab dipped in alcohol for mealybugs or scale; because succulent leaves can be sensitive, test any treatment on a small area first and keep liquid off tender growth. For a larger infestation, choose a product labeled for the specific pest and indoor plants, follow its directions, and repeat only at the stated interval. Do not combine multiple remedies or spray a stressed plant in hot, direct sun.
When propagation is a better rescue than repotting
Propagation makes sense when the roots or base are failing but at least one stem tip, leaf, or offset remains healthy. It is not a way to revive dead tissue: choose firm, unblemished material and leave any section with black, wet, or soft rot behind. The right method depends on the plant; many Echeveria and Sedum can start from sound leaves, while branching jade and many upright succulents are more reliably restarted from a stem cutting. Aloe and Haworthia often produce offsets that can be separated once they have their own roots.
Use a clean blade to make a neat cut, then leave the cutting out of soil until the cut surface is dry and callused. Thick stems take longer than detached leaves, so do not follow a rigid “one day” rule. WVU Extension’s propagation guidance recommends allowing succulent stem and leaf cuttings to callus before planting and warns that excessive moisture during rooting can cause rot.
Set a callused stem cutting on dry, porous mix with the cut end at or just below the surface; do not bury leaves or pack wet soil around a rootless stem. Keep it warm in bright indirect light and wait for roots or resistance before treating it like a rooted plant. A detached leaf can take weeks or longer to form a small plant, and not every leaf or species propagates successfully.
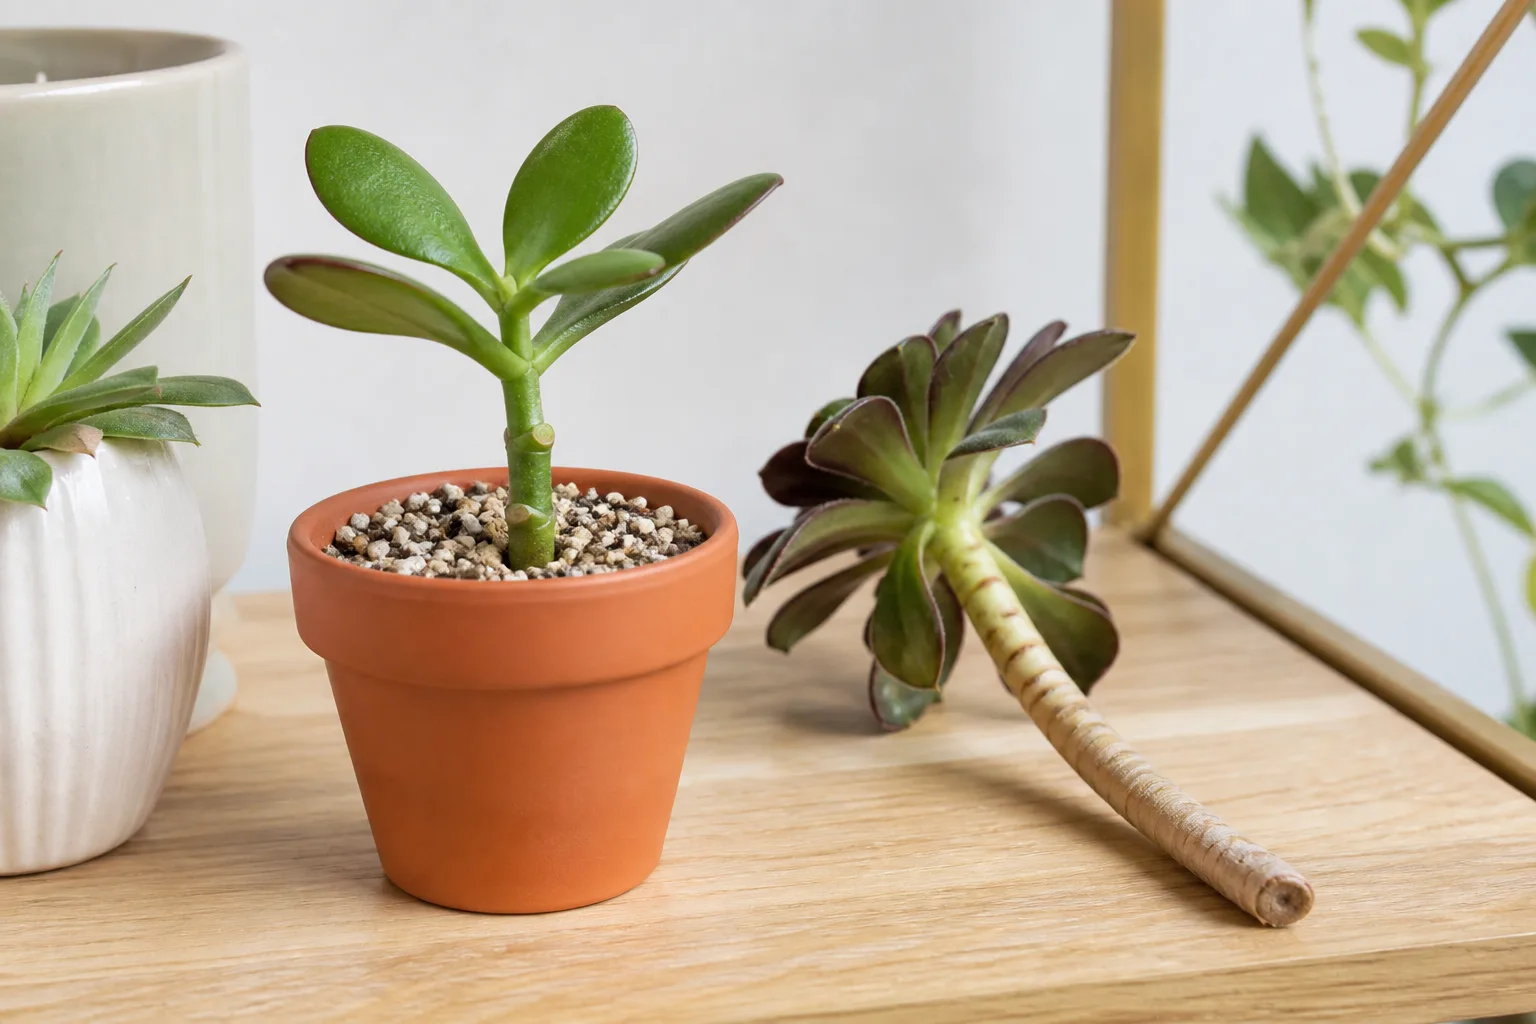
For a cutting, preserve firm tissue and let the cut end dry before it touches moist mix.
Reset the pot and soil so roots can recover
Choose a pot with an open drainage hole that is only slightly larger than the remaining root system. A pot that is too large holds unused mix wet for longer; a decorative pot without drainage makes it hard to control moisture. A layer of rocks in the bottom does not replace a drainage hole, and it can leave a saturated zone above the rocks. Use a free-draining succulent medium that holds the plant upright but lets excess water escape.
If your commercial succulent mix stays wet for too long in your home, amend it with coarse mineral material such as pumice or perlite rather than adding fine garden soil. Keep the stem base above the soil line and avoid burying leaf joints. Clean containers and tools after working on rot, and do not reuse contaminated mix. For a full container reset, see the LeafyPixels guides to repotting succulents and succulent potting soil.
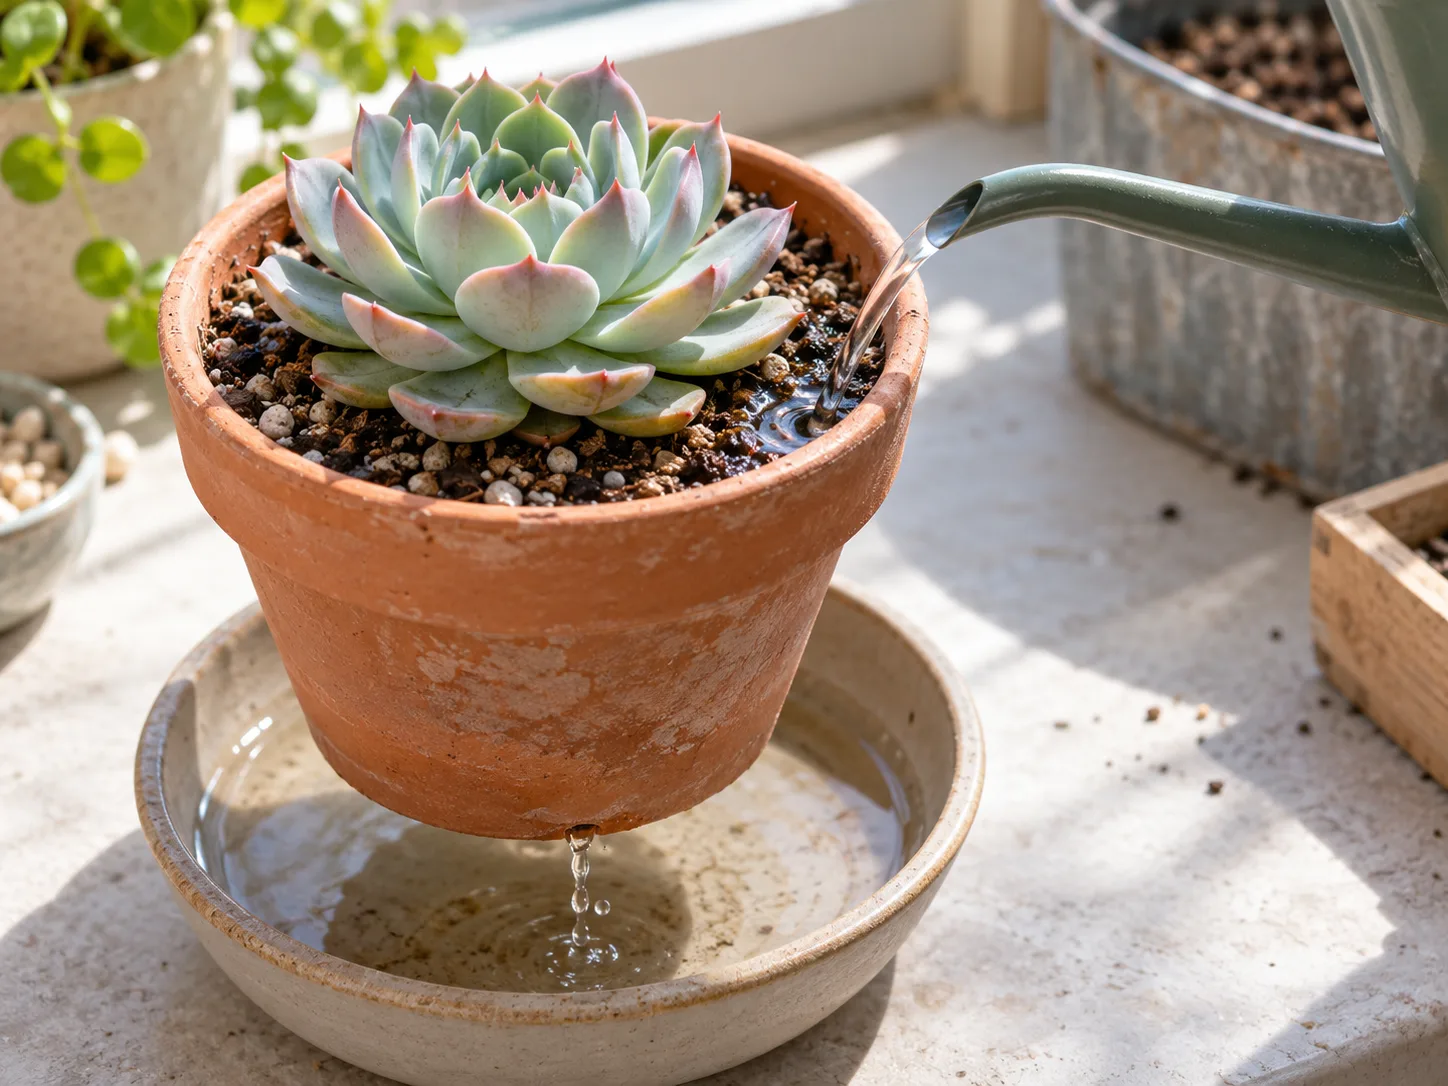
An open drainage hole and mix that dries between waterings make a rescue more manageable.
Recovery care: steady light, dry-down, and patience
After a rescue, keep the plant in bright light suited to its type but avoid a sudden jump to harsh afternoon sun. Maintain steady room temperatures, good air movement, and a pot that can drain. Do not fertilize until you see clear new growth; fertilizer cannot repair dead roots or sunburn and can add unnecessary stress to a plant that is not taking up water normally.
Water only after the mix has dried appropriately for the species and conditions. When it is time, wet the root zone thoroughly and allow excess to drain; do not water on the same weekday just because it is the usual routine. WVU Extension advises waiting until the soil is completely dry for many container succulents, while Epic Gardening recommends checking both soil and pot weight. Tropical or epiphytic succulents, such as holiday cactus, can have different moisture needs from desert rosette types, so identify the plant before applying a strict dry-down rule.
Avoid lifting the plant repeatedly to check for roots. If you need to monitor it, take a quick photo every few days and compare the same leaves and stem points. A stable plant with no new soft spots is making progress even if it has not produced new leaves yet.
What recovery looks like and how long to wait
Recovery is a sequence, not a single overnight change. The first good sign is that the problem stops advancing: no new mushy leaves, no expanding cold patches, no fresh sunburn, and no continuing collapse. A rootless cutting may need several weeks to establish roots before visible growth, and a plant recovering from root loss can take longer to restart than one that was simply thirsty.
Already-brown, bleached, or dead leaves will not become green again. Look instead for a firm center, roots that resist a gentle tug, a new offset, or fresh leaves with normal texture. If the plant remains firm but inactive, keep conditions steady and allow for a slow response, especially during a cool or low-light season. If the stem base keeps softening or rot returns, remove the remaining affected tissue and reassess whether any clean cutting is left.
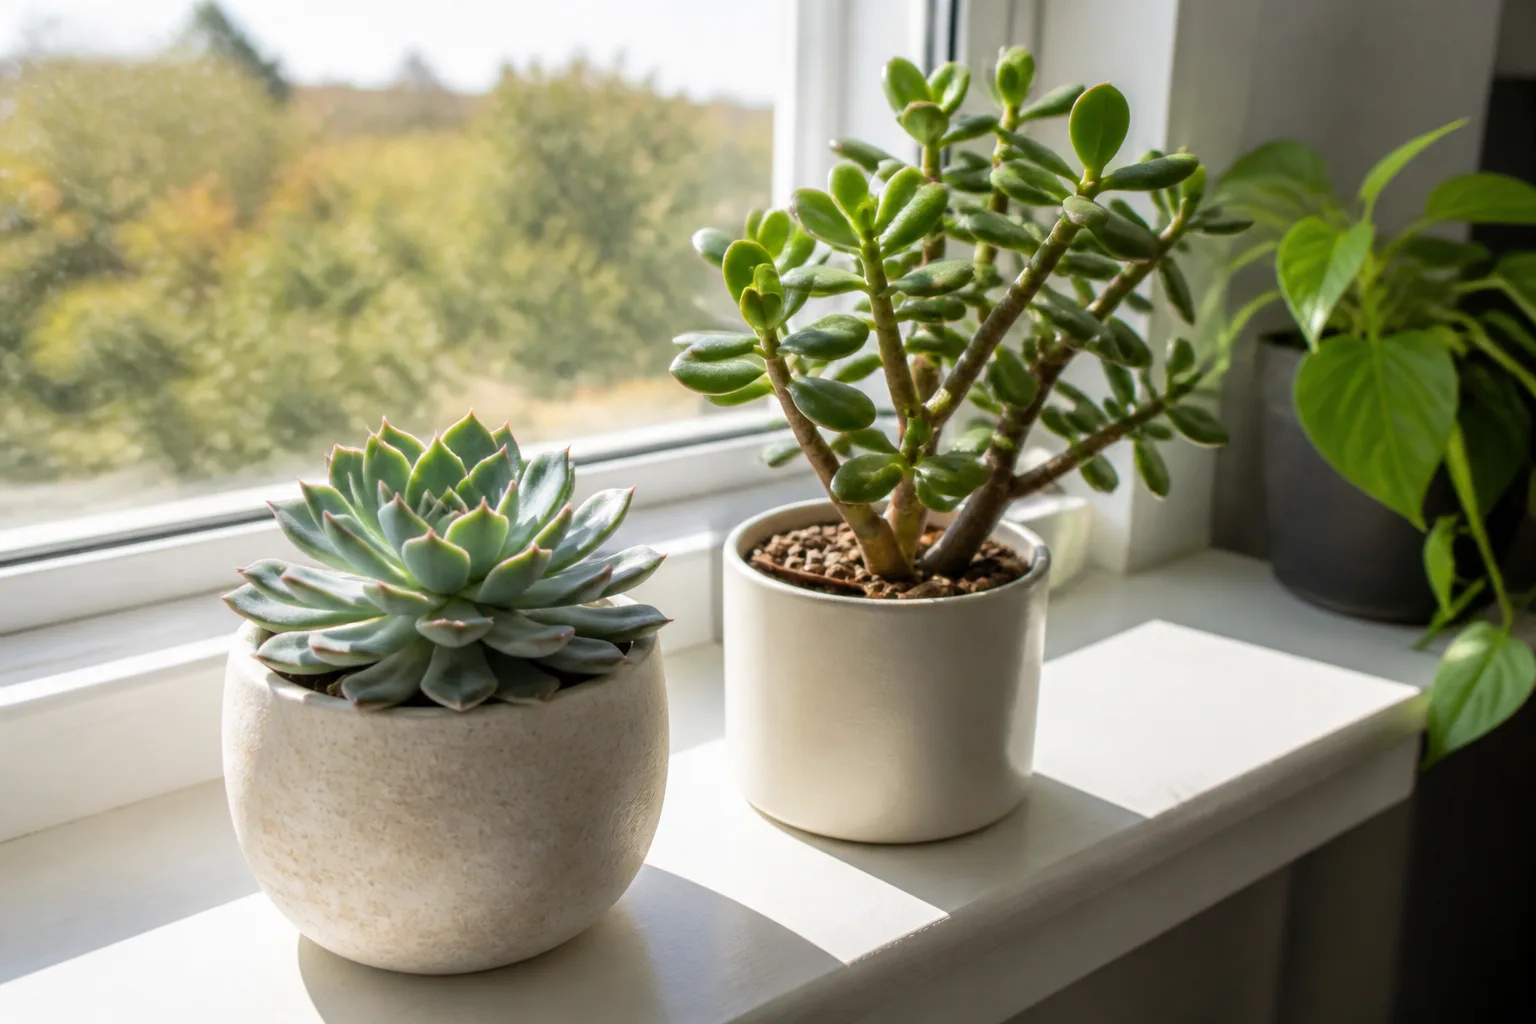
Stable bright light helps recovery; increase direct exposure only after the plant is settled.
Rescue mistakes that can make the damage worse
The most common mistake is treating every droop as thirst. A succulent with wet mix and failing roots can wilt because damaged roots cannot take up water; another drink compounds the problem. Check the soil and pot weight before watering, and open the root ball only when the evidence points to rot or the plant keeps declining.
Other fixes can backfire when they are applied too soon or too broadly. Avoid cutting every scarred leaf, moving a weak plant straight into full sun, using a pot with no drainage, keeping a rootless cutting constantly wet, or fertilizing before fresh growth returns. Do not discard a viable succulent simply because the mother plant looks sparse, but do not keep a rotten crown in a humid, wet mix when all of its living tissue has disappeared.
A better rescue changes one confirmed cause at a time. Remove standing water, correct a drainage problem, shield new growth from harsh exposure, or isolate a visible pest; then let the plant respond before making another major change. That approach makes it easier to see whether the diagnosis was right and protects the healthy tissue that remains.
Conclusion
To revive a succulent, compare leaf texture with the soil before reaching for the watering can. Rehydrate a truly dry root ball, investigate roots when soft growth sits in wet mix, and manage sun or cold injuries by stabilizing exposure while you wait to see what tissue remains alive. Keep firm healthy portions, propagate only clean tissue when the base is lost, and judge recovery by stable stems and new growth—not by whether old damaged leaves look perfect again.