How to Repot a Christmas Cactus Step by Step
Repot a Christmas cactus after flowering, not by the calendar. Check its roots, choose the right pot and mix, handle rot, and restart watering safely.
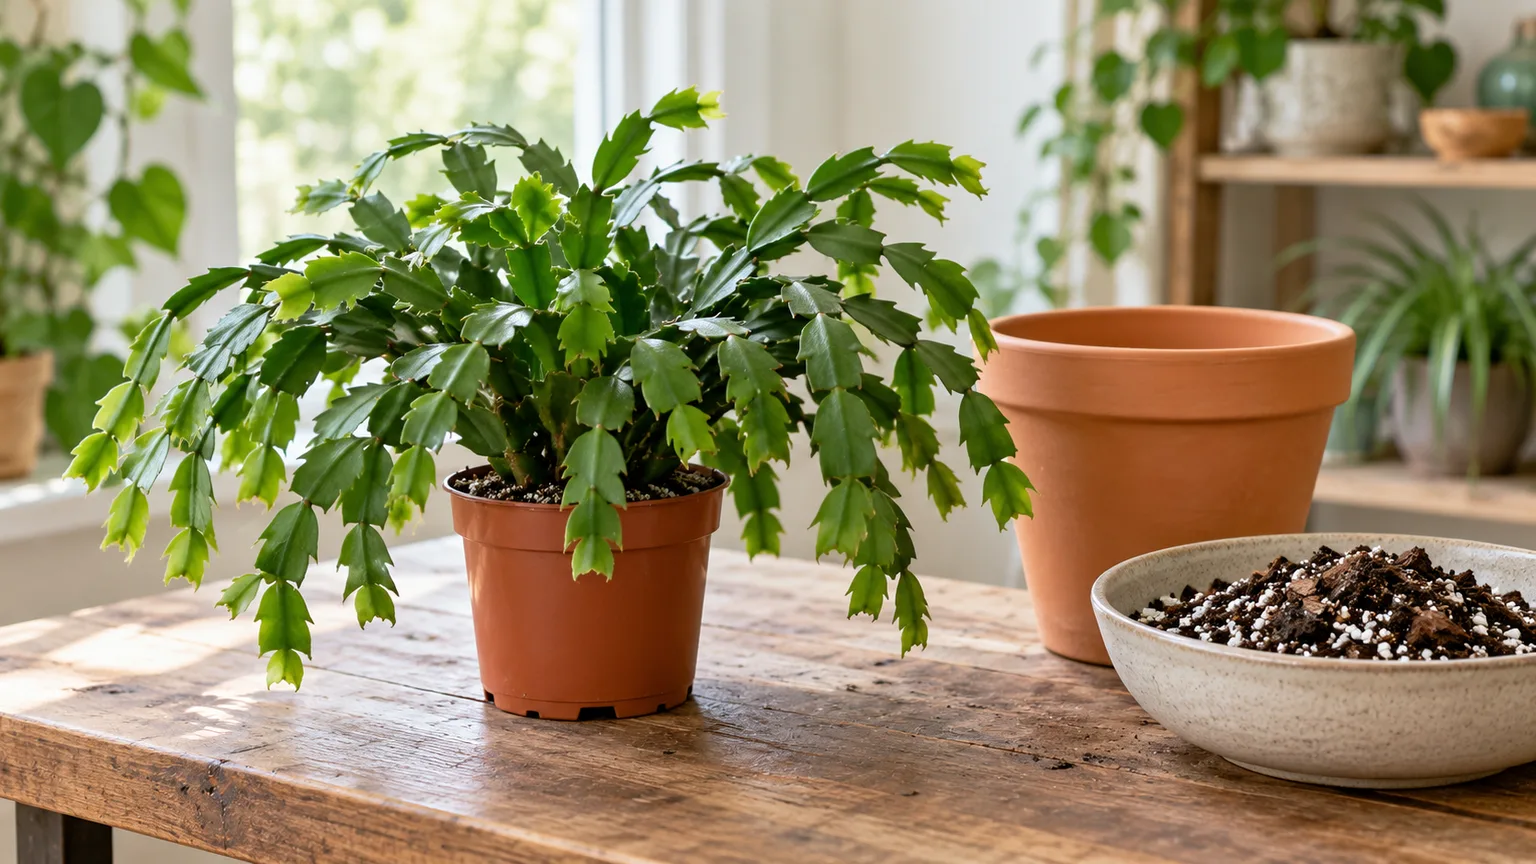
Repot a Christmas cactus after its flowers fade, usually in late winter or spring, and only when its roots, pot, or old mix show a reason to move. This tropical forest cactus does not need a roomy container on a schedule. A modest pot with an open drain hole and fresh, airy mix matters more than giving the roots extra space.
Before you begin, decide whether the plant needs a new container, only a soil refresh, or urgent help for wet, damaged roots. That choice changes how much you disturb the root ball and when you water afterward. If the plant is healthy and covered in buds, leave it undisturbed until flowering ends.
Should You Repot Your Christmas Cactus?
Christmas cactus is a popular name for Schlumbergera, a group of tropical cacti native to Brazil. In nature, these plants grow as epiphytes in humid forests, where they settle in branch forks and collect water and organic debris rather than rooting in deep desert soil. UConn Extension’s holiday-cactus guide describes their preference for an organic, well-drained medium, and NC State Extension likewise distinguishes their moisture needs from those of desert cacti. That difference is the key to choosing a pot and mix: roots need air and drainage, but the plant should not be treated as if it must dry to dust between every watering.
Routine repotting is maintenance, not a cure-all. A Christmas cactus can flower for years in a pot that looks crowded from above because its segmented stems trail far beyond the small root system. Repotting solely because the plant has been in the same container for three years, or because a few roots show at a drainage hole, can create work without solving a problem.
Choose Between Waiting, Refreshing, Upsizing, and Rescuing
There are four sensible outcomes when you inspect a Christmas cactus. Wait if it grows or flowers normally, the pot drains, and the mix still wets evenly. Refresh the soil in the same pot if the root ball fits but the old mix has compacted, broken down, or become difficult to water. Upsize modestly if firm roots have filled the container and watering has become unreliable. Rescue the plant promptly if the mix stays soggy, the roots are deteriorating, or the container has no working drainage.
This framework prevents a common mistake: interpreting every visible root or drooping segment as proof that the plant needs a larger pot. Droop can come from a dry root ball, excess moisture, temperature stress, or damaged roots, and a bigger container will not correct all of those causes. Check the plant and the mix before selecting a new pot.
Signs a Christmas Cactus Needs a New Pot
Look for several signs together rather than relying on one. Roots may form a dense mat around the outside of the root ball or pass through the drainage hole. Water may run down the inside of a dry, packed root ball without soaking it, or the old mix may stay wet unusually long after watering. The plant may also become unstable because the root mass no longer anchors it, or growth may stall even though light and seasonal care are suitable.
Those signs point to different fixes. A root-filled pot with firm roots and an otherwise healthy plant may need only a small size increase. If the roots fit but the medium has collapsed into a dense, slow-draining mass, keeping the same pot and replacing the mix may be enough. If soil remains waterlogged or smells sour, prioritize checking root health and drainage; do not simply cover the problem with more mix.
Read the Roots and Soil Together
Roots at the bottom are a clue, not a verdict. A few roots poking through a hole may be normal, while a tightly circling root mat combined with water that cannot enter the center is stronger evidence that the root ball needs attention. Conversely, a plant with only a few visible roots can need an urgent repot if its medium stays saturated and the roots have begun to decay.
When you remove the plant, use texture as well as color. Firm roots that hold together are generally worth preserving even if the potting mix has stained them tan or brown. Soft, mushy, hollow, or collapsing roots are more concerning. Do not cut healthy roots just to make the root ball fit a pot you already bought; choose the pot around the living roots.
When to Repot and When to Leave It Alone
The safest routine window is after flowering, usually late winter or spring, before the plant enters the next period of flower-bud formation. Penn State Extension’s holiday-cacti guidance advises waiting until flowering has ended and identifies late winter or early spring as a good time; it suggests checking every three to four years when the plant looks tired or roots grow through the drainage holes. UConn Extension gives roughly three years as a typical interval, while Gardening Know How also describes repotting every few years after bloom. These intervals are useful reminders to inspect the plant, not deadlines that override its condition.
If the cactus is budding or flowering, postpone routine repotting. A move changes the root environment and can add stress at the time you want the plant to keep its buds; Homes & Gardens’ seasonal care advice also recommends keeping the plant stable once buds appear. There is one practical exception: act sooner if the pot has no drainage, the mix remains saturated, or you have strong evidence of root rot. In that situation, protecting the roots matters more than preserving the current bloom display.
Avoid repotting a newly purchased, healthy plant just to replace its nursery container. Give it time to settle into your home, then inspect it after flowering. If the pot drains and the mix is serviceable, changing the container can wait. A plant that was recently moved, pruned, or propagated may also benefit from a quieter period before another round of root disturbance.
Choose a Pot That Fits the Root Ball
Size the new pot by the root mass, not by the full spread of the arching stems. For a plant whose roots are healthy but crowded, choose a container only a little wider than the root ball—often one modest size up, rather than several inches wider all around. If the current pot still fits, reuse it after cleaning and refreshing the medium. A container that is much too large holds more wet mix than the roots can use quickly, especially in a cool room, dim window, or humid home.
The replacement should have at least one open drainage hole. If a large hole lets mix escape, cover it loosely with a small piece of mesh; do not seal it or add a deep layer of stones. A gravel layer does not create drainage through a pot that cannot drain, and it reduces the space available for roots. Use a saucer or decorative cachepot if you like, but empty standing water after the pot has drained.
Drainage Matters More Than Pot Material
Terracotta is porous and can help a mix dry sooner, which may suit a home where the soil stays wet for too long. Plastic and glazed ceramic lose moisture more slowly, but they are perfectly usable when the mix is open and watering is adjusted to the conditions. Penn State Extension notes that terracotta can dry faster than less porous containers; the difference is a factor to manage, not a rule that makes one material universally correct.
Choose a pot that is stable enough to support the trailing stems without being oversized. Shallow pots and hanging baskets can work when they drain well and hold the root ball securely. If you use a cachepot, keep the Christmas cactus in a draining inner pot and check that runoff does not collect unseen at the bottom. Drainage, a proportionate size, and the ability to monitor moisture matter more than matching a particular style.
Pick an Airy Mix for a Forest Cactus
The best Christmas cactus potting mix holds some moisture while leaving air pockets around the roots. Do not assume that a bag labeled for desert cacti is automatically ideal. Some cactus blends are very coarse and mineral-heavy, so they may dry too quickly for a tropical epiphyte in a warm, bright home. At the other extreme, dense garden soil or a fine mix that remains soggy can reduce airflow and keep roots wet for too long.
A simple home blend is two parts quality indoor potting mix to one part perlite or pumice. For a chunkier structure, replace part of that mineral amendment with small orchid bark. UConn Extension describes peat-based mix as suitable and gives a traditional recipe using peat, perlite, and sand; NC State Extension also calls for a well-drained medium. The exact ratio is not magic. If your room is cool, your pot is plastic, or your usual mix dries slowly, add more coarse aerating material. If the mix dries almost immediately in a warm, bright spot, keep a little more moisture-retentive potting mix.
Before filling the pot, moisten very dry ingredients lightly so they do not repel water, but do not turn the mix into wet paste. Squeeze a handful: it should loosen when you open your hand, not remain a dense muddy lump. Avoid fine construction sand, heavy outdoor soil, and fertilizer-heavy mixes when you cannot tell how much fertilizer they contain. For broader seasonal guidance, see the Christmas cactus care guide.
Prepare the Plant and Work Area
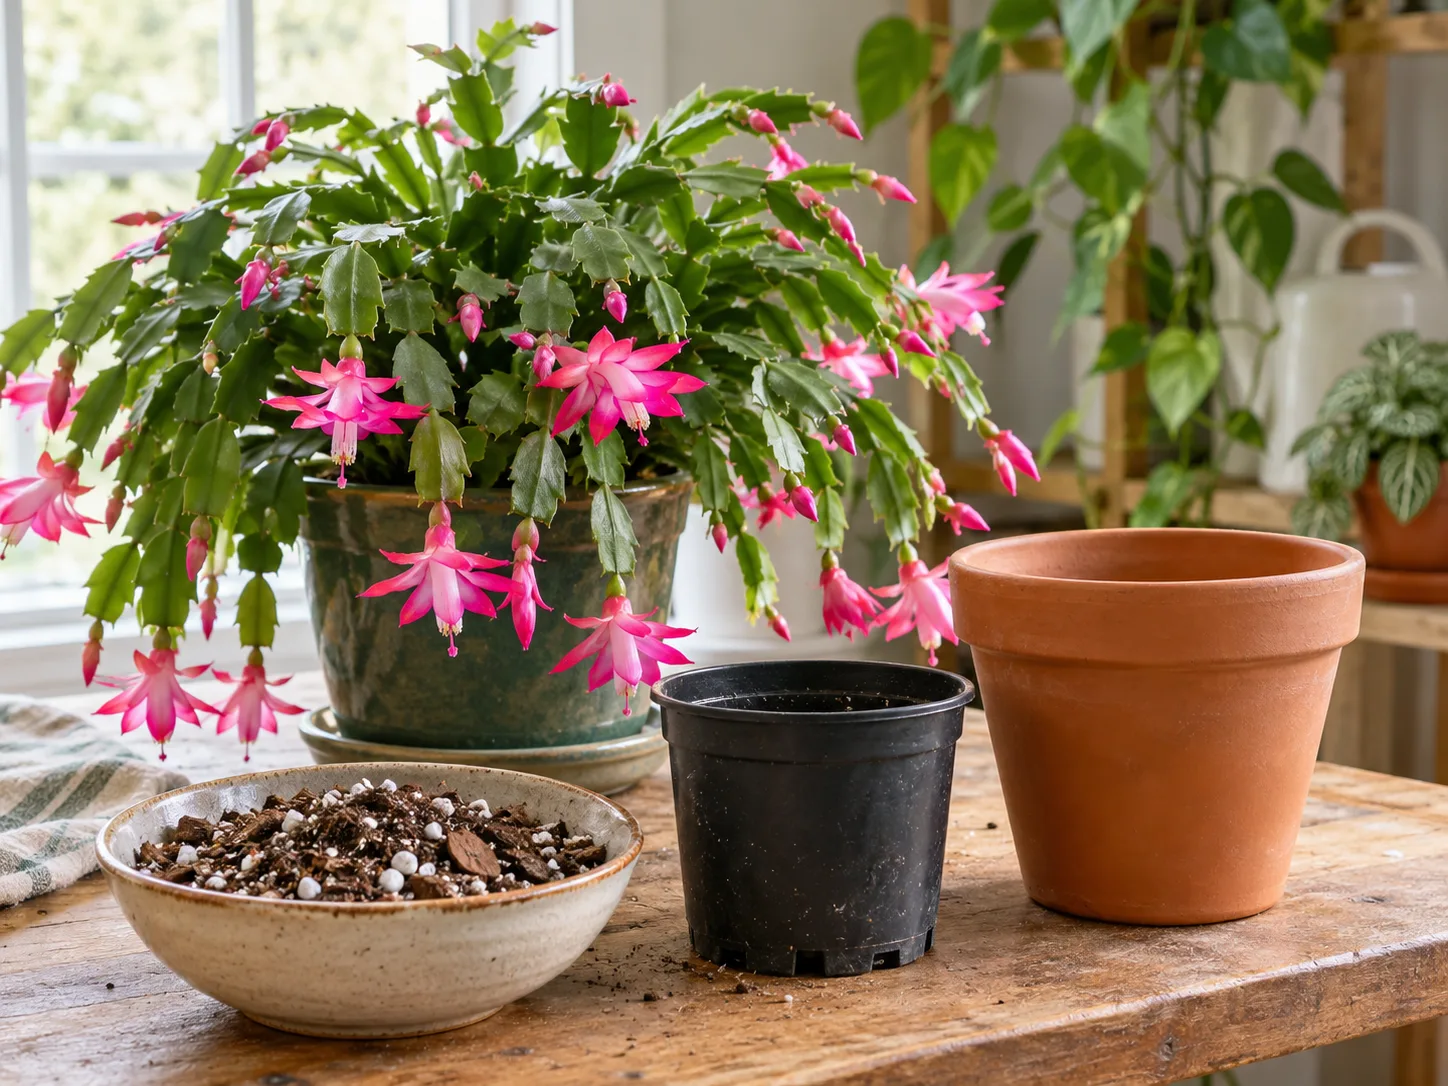
Gather the new pot, fresh mix, a clean work surface, a small blunt tool, and clean pruning snips in case you discover clearly damaged roots. Wash a reused pot to remove old soil and residue, rinse it well, and confirm that its drainage hole is open. Lay a towel or shallow tray beneath the plant to support its long stems and catch loose mix. Because a mature Christmas cactus can be broad and flexible, prepare the landing space before you lift it; supporting the stems loosely is safer than holding the plant by one branch.
Choose a time when the root ball is not saturated and not bone dry. A wet root ball is heavy and smears into the roots; an extremely dry one can crumble and lose fine roots during removal. If the mix is very dry, water lightly ahead of time and let it drain, rather than trying to loosen a dusty root ball by force. If it is already wet, postpone the routine job until the mix is easier to handle, unless rot or a failed pot makes the move urgent.
How to Repot a Healthy Christmas Cactus Step by Step
The aim is to preserve the roots that work, refresh the medium, and return the plant to approximately its former depth. Do not strip a healthy root system bare or compress the new mix hard around it. Prepare the new pot before you unpot the plant so its roots spend as little time exposed as possible.
Slide Out and Inspect the Root Ball
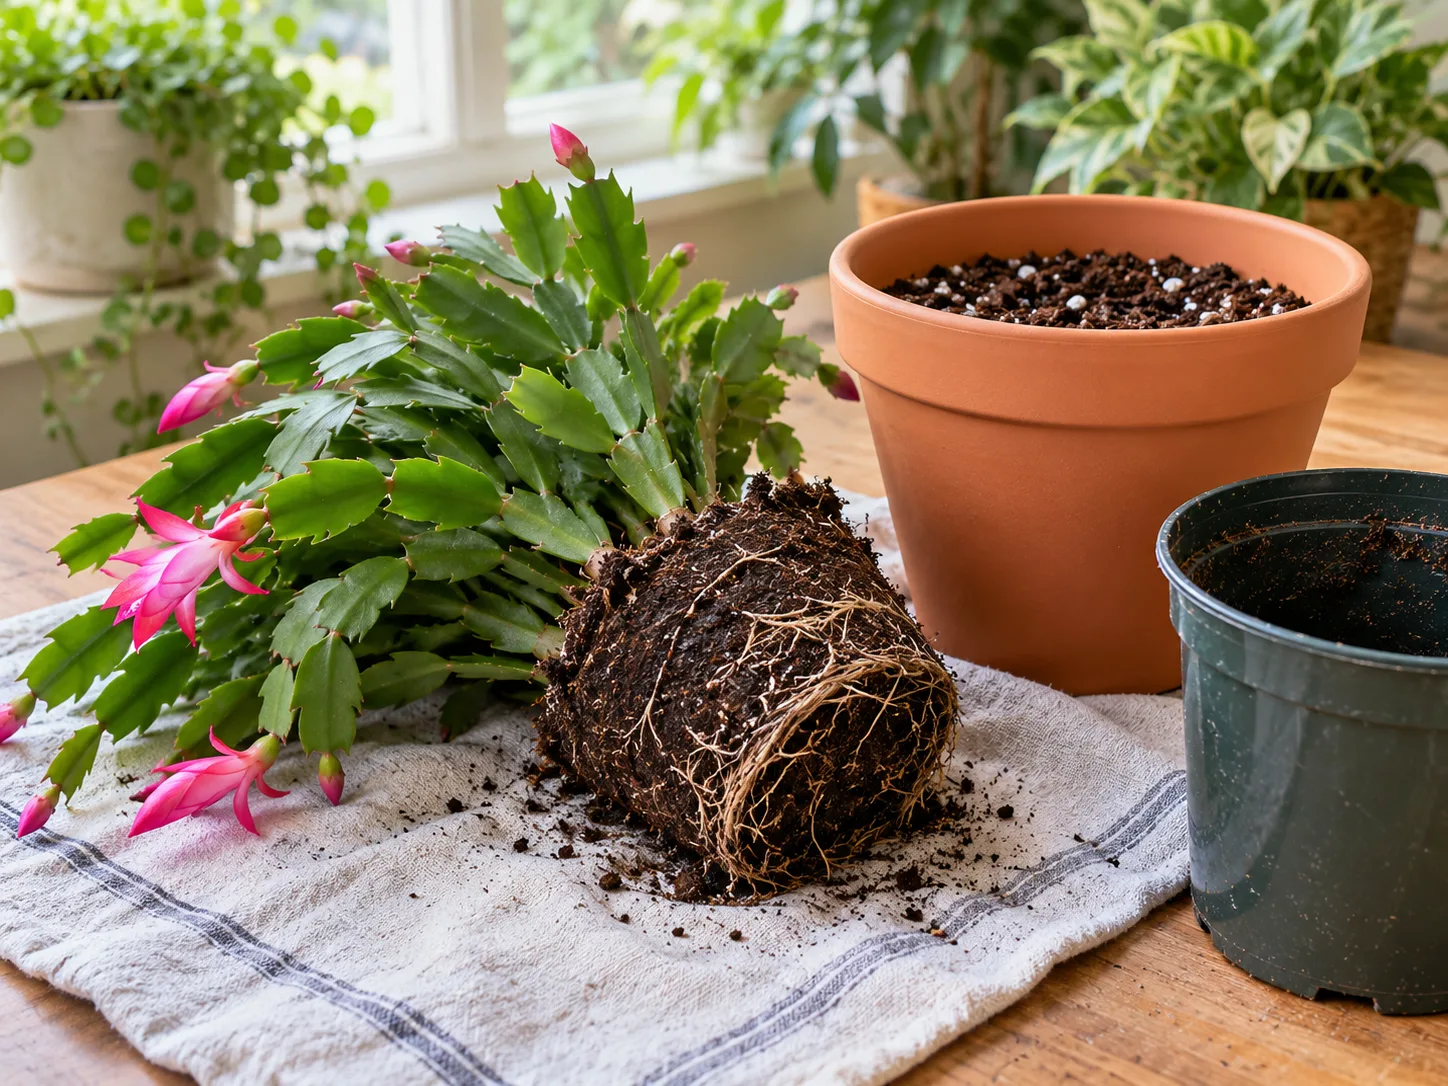
If the plant is in a flexible nursery pot, gently squeeze the sides and support the soil surface with one hand while tipping it. If it is in a rigid pot, run a blunt tool around the inside edge, then tap the pot to loosen the root ball. Do not pull the cactus out by its stems. If a root has grown through a drainage opening, ease it back carefully; if it cannot be released without tearing, trim only that trapped root with clean snips.
Once the root ball is out, inspect the roots and old medium. Let loose soil fall away with a gentle shake, but do not rake through every root. Remove only mix that is clearly compacted, sour, waterlogged, or full of debris. If the roots are firm and the ball is intact, preserve its shape. Tease only a few outer circling roots if they form a tight mat; the plant does not need an aggressive bare-root treatment to benefit from fresh mix.
Set the Original Soil Line and Backfill Gently
Put enough fresh mix in the new pot so the root ball will sit at its old depth, with a little room below the rim for watering. Set the cactus in the center and check that the lowest stem segments remain above the soil surface. Burying more of the stems than before can leave tissue persistently damp and invite decay. If the root ball sits too high or low, adjust the base layer before filling around it.
Add mix around the sides in small portions, guiding it into gaps with your fingers or a chopstick without stabbing roots. Tap the pot lightly to settle the mix. Do not tamp it into a hard plug: water must be able to reach the root ball and excess must leave through the bottom. The plant should stand securely, but the surface can remain lightly springy. If it rocks, add a little mix around the perimeter or use a slightly smaller pot rather than pressing down harder.
What to Do if You Find Root Rot
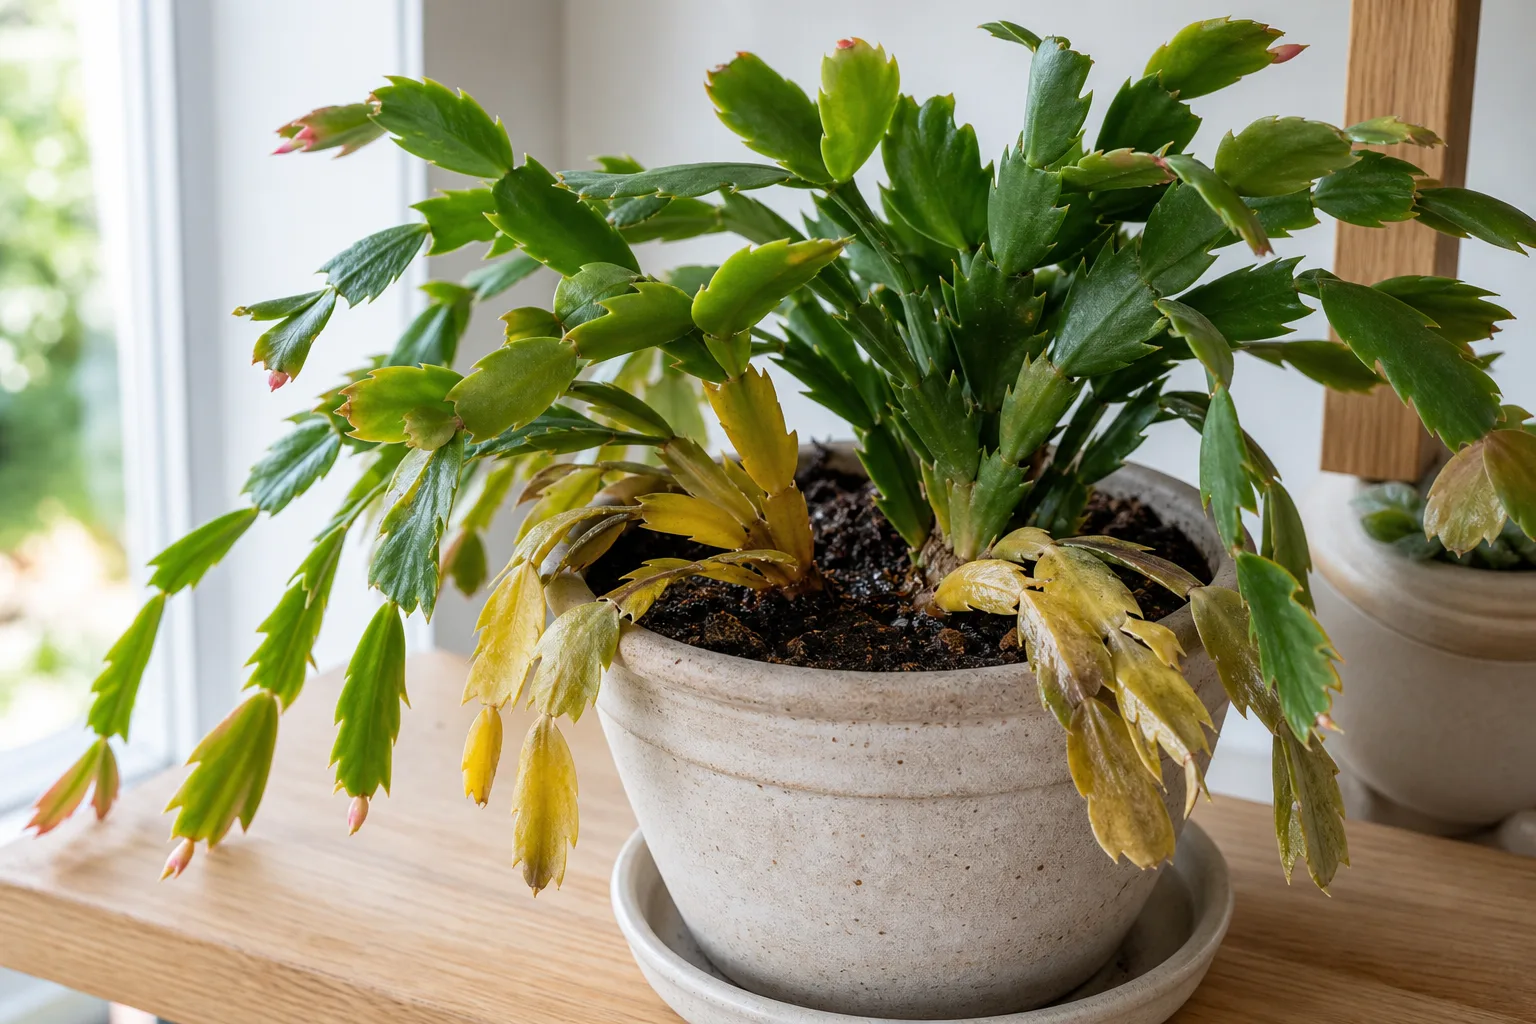
Root rot changes the job from routine refreshing to root rescue. It is more likely when the mix has stayed wet for a long time, the container cannot drain, or the lower stems are soft while the soil is damp. Yellowing by itself does not prove rot, so check the roots and the pot before acting. UConn Extension warns that overwatering and waterlogged roots are common problems for holiday cacti; correcting the wet conditions is as important as replacing the soil.
Remove the wet, degraded medium gently and keep only roots that remain firm. With clean, sharp snips, remove roots that are unmistakably mushy or collapsing; do not shorten sound roots just to tidy the plant. Clean the pot or choose a fresh draining one, and use a mix that will not stay saturated. If a large part of the root system is gone, choose a smaller container sized to what remains rather than putting the reduced root ball back into a large volume of damp soil.
Do not respond to a shriveled plant by flooding it immediately. A damaged root system cannot use water normally, and more saturation can compound the original problem. Keep the plant in bright indirect light, let any freshly cut tissue dry, and water cautiously once the new mix and surviving roots are ready. If the main stem base is soft or decay continues upward, take healthy stem segments as backup cuttings and follow the Christmas cactus propagation guide.
Watering After Repotting
There is no single number of days that works for every repot. A healthy plant moved with its roots intact into fresh mix needs a different response from a plant rescued from saturated soil with roots removed. Penn State Extension recommends moderate watering after repotting, while also emphasizing a well-drained fresh mix; use the condition of the root ball and the moisture already in the new soil to decide what “moderate” means in your pot.
If the new mix is lightly moist and the roots were not cut, do not add water automatically just to settle it. Check that the drain hole is open, let the plant rest, and water when the upper part of the mix begins to dry. When you do water, wet the root zone evenly and let excess drain away; empty the saucer rather than allowing the pot to stand in runoff. If the mix went into the pot dry and the roots are intact, a thorough but controlled watering can settle the medium, provided the pot drains freely.
After root-rot cleanup, avoid soaking a weakened root ball while cut surfaces are fresh. Let the cuts dry, use barely moist or dry-to-touch mix, and resume watering cautiously once the plant is stable. Do not try to compensate for missing roots with frequent sips: check moisture before each watering and change course if the mix remains damp or the stems continue to soften.
Aftercare That Protects New Roots and Buds
For the first few days, keep the cactus in bright indirect light and avoid a hot window, heating vent, cold draft, or abrupt move into a very different location. Penn State Extension advises placing a recently repotted holiday cactus in a shaded location for two to three days before returning it to its regular routine. For a houseplant, think gentle light rather than a dark closet: the goal is to reduce sudden stress while the roots settle, not to deprive the stems of daylight.
Do not fertilize immediately after repotting. Fresh mix may already contain nutrients, and the plant needs time to resume normal growth before feeding adds value. Once new growth appears, return gradually to your usual spring and summer care. Keep the container upright and stable so trailing stems are not repeatedly jolted, and avoid additional pruning or moving while the plant is recovering.
If buds are already present, keep the temperature, light, and watering routine steady after the move. Repotting can interrupt a display even when the plant survives; avoid routine repotting during bud formation in future years. For help with the rest of the year’s watering, light, and bloom cycle, refer to the Christmas cactus care guide after following the immediate recovery steps here.
Repotting Mistakes That Set a Christmas Cactus Back
The most consequential error is using a large pot to “give the roots room.” Extra wet mix does not make a plant grow faster, and it can take longer to dry around a small root system. Size up only when the roots justify it. If your plant is simply in a pot that looks small beside its trailing stems, inspect the root ball before buying a bigger container.
Other avoidable mistakes include repotting in the middle of flowering, using dense outdoor soil, assuming every desert-cactus mix fits a forest cactus, burying stem segments, pressing mix until it compacts, and leaving runoff in a cachepot. A layer of gravel cannot fix missing drainage. Aggressively removing healthy roots is also unnecessary; the goal is to remove failed medium and make room for healthy growth, not to produce a perfectly clean root system.
Finally, do not make several care changes at once. If the plant was recently repotted, moved to a sunnier window, pruned, and given extra water, you will not know which change caused stress. Make the needed pot or root correction first, then keep light and temperature stable while you observe how quickly the new mix dries.
Conclusion
Repot a Christmas cactus after flowering when its roots, drainage, or old mix show that a change will help. The right container is only modestly larger than a crowded root ball, and the right mix stays lightly moist without becoming dense and airless. Because this is a tropical forest cactus, it needs both moisture and oxygen around its roots—not a desert-cactus routine or an oversized pot.
Inspect before you cut, preserve firm roots, and separate routine repotting from a root-rot rescue. Keep the plant at its original soil depth, let water drain freely, and adjust aftercare to the roots you actually have. If the cactus is healthy and blooming, waiting until the flowers fade is often the best care you can give it.