How to Propagate a Dracaena: 3 Reliable Methods
Propagate a dracaena with clear steps for top cuttings, cane sections, and water rooting, plus practical aftercare and fixes for cuttings that stall.
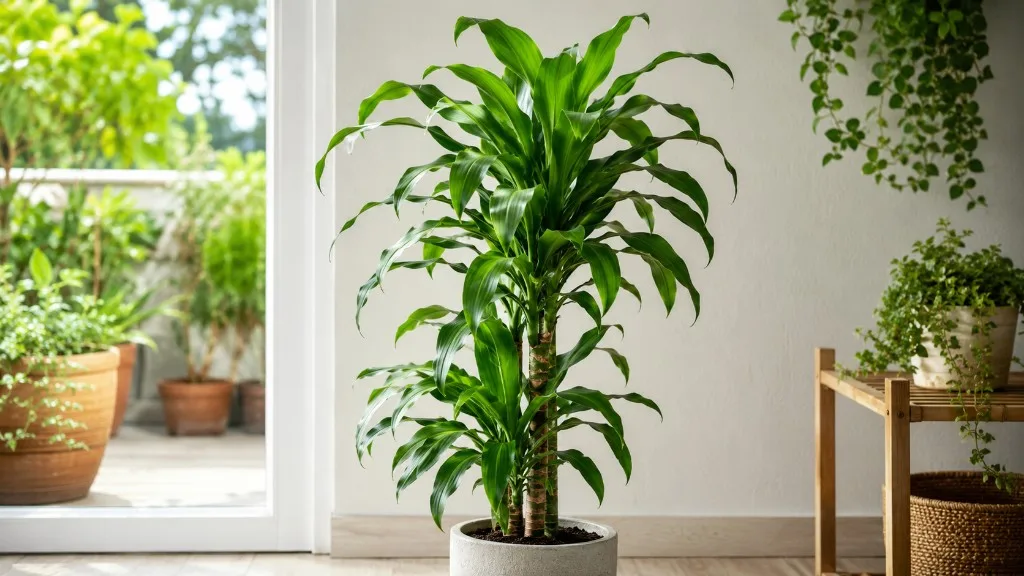
A dracaena that has grown too tall, dropped its lower leaves, or snapped during a move can often become several new plants. Most common indoor dracaenas grow from woody-looking canes, so you can root a leafy top, divide a bare cane into sections, or use air layering when you want roots to form before removing a tall crown.
For a first attempt, take a leafy top cutting and root it directly in a small pot of lightly moist, free-draining mix. You can also root the top in water if you want to watch for roots. Use bare cane sections when your goal is to make several plants from one long stem; air layering is a more involved option for a large cane whose leafy top you want to preserve. The right choice depends on what you are cutting, how much plant material you have, and whether you prefer a visible rooting process or fewer steps.
Choose the method that fits the stem
A leafy top cutting is the most forgiving starting point because it already has a growing tip and leaves to support it while roots develop. Cut below the crown, leaving several inches of bare stem to insert into water or mix. This is a good choice when the plant is leggy or reaching a ceiling, and it gives the original cane a chance to branch below the cut.
A leafless cane section is different: it depends on a dormant bud at a node to produce a shoot. Each piece needs at least one viable node, and you must know which end was uppermost if you plant it vertically. Cane sections make more starts from a long stem but take more attention during setup. Air layering is useful when a large top would be awkward to root after removal; the cane stays attached to the parent until roots are visible in the moss.
Dracaena is a large genus, and not every species grows as a tall, woody cane. The steps here focus on familiar cane-forming indoor types such as corn plant (Dracaena fragrans), dragon tree (D. marginata), and related cultivars. For a Dracaena with a different growth habit, check whether it has a stem section with nodes before choosing cane propagation.
Start with a healthy, actively growing parent
Propagation is a poor rescue plan for a plant whose cane is already soft, collapsing, or severely dehydrated. Choose a firm stem with healthy foliage and no active pest problem. If the whole plant is declining, first identify and correct the care issue; otherwise, a cutting may carry the same weakness into its new pot.
Look at the parent before you cut. Decide whether you want to lower its height, remove a damaged top, or create several plants. A dracaena can often branch from dormant growth points below a pruning cut, but a new shoot is not guaranteed at a particular spot or by a particular date. Leave enough healthy cane and foliage to support the rooted mother plant, and avoid taking every usable stem at once.
A clean break can be rooted if the stem is firm and has a node, but the torn end is more likely to be bruised than a fresh cut. Trim damaged tissue back to a clean surface with a sharp blade. Keep the cutting away from pets while you work: the ASPCA lists Dracaena as toxic to dogs and cats because it contains saponins, with signs that can include vomiting, depression, appetite loss, and excess salivation (ASPCA Animal Poison Control).
Give cuttings warm, bright conditions
The best time to propagate indoors is when the plant is actively growing, usually spring through summer. Warmth and longer days help a cutting keep functioning while new roots and shoots develop. If the only time you can prune is fall or winter, you can still try, but expect slower or less predictable progress, especially in a cool room with weak light.
Set the cutting in bright, indirect light. A little morning sun may be fine in a suitable window, but hot direct afternoon sun can heat a jar, scorch leaves, and dry the top of a small pot. Low light is also a problem: the cutting has less energy to maintain its leaves and make new growth. Rotate the container occasionally if one side faces the window so shoots do not lean sharply toward the light.
Temperature should be steady rather than extreme. North Carolina State Extension lists 70 to 80°F as the favorable growing range for corn plant and recommends stem cuttings as its propagation method (NC State Extension). That range is a useful reference for a warm rooting spot, not a guarantee that every Dracaena species will root on an exact schedule. Avoid cold windowsills, drafts, and direct heat from a radiator or vent.
Prepare clean tools and an airy rooting mix
Use sharp bypass pruners for a stem that fits their blades or a clean knife for a thick cane. Remove soil and sap from the blade, then disinfect it before cutting and between plants; a ragged, crushed cut can dry unevenly and leaves more damaged tissue to inspect. Wear gloves if sap bothers your skin, and wash your hands and tools afterward.
For soil rooting, use a small pot with drainage holes and a loose indoor potting mix. If your usual mix stays wet for a long time, blend in perlite to improve air space; the goal is a mix that stays lightly moist around the cutting but does not turn swampy. Moisten the mix before planting so the cutting does not shift when you water it for the first time.
Keep the setup simple. A clear water glass is enough for a leafy tip cutting; a jar that is too deep can submerge leaves or hold more water than needed. For cane sections, set out separate labels or mark the upper end before cutting. Rooting hormone is optional, not a requirement for ordinary Dracaena cuttings; a healthy stem, clean cut, warmth, and careful moisture matter more than adding a product.
Root a leafy top cutting in potting mix
Choose a leafy crown with several inches of firm cane below the lowest leaves. Make the cut just below a leaf scar or node, then remove leaves from the portion that will sit in the mix. Keep the remaining crown compact enough that it will not topple or lose water rapidly, but do not strip all the foliage. A balanced top with a few leaves is easier to support than a heavy, oversized rosette.
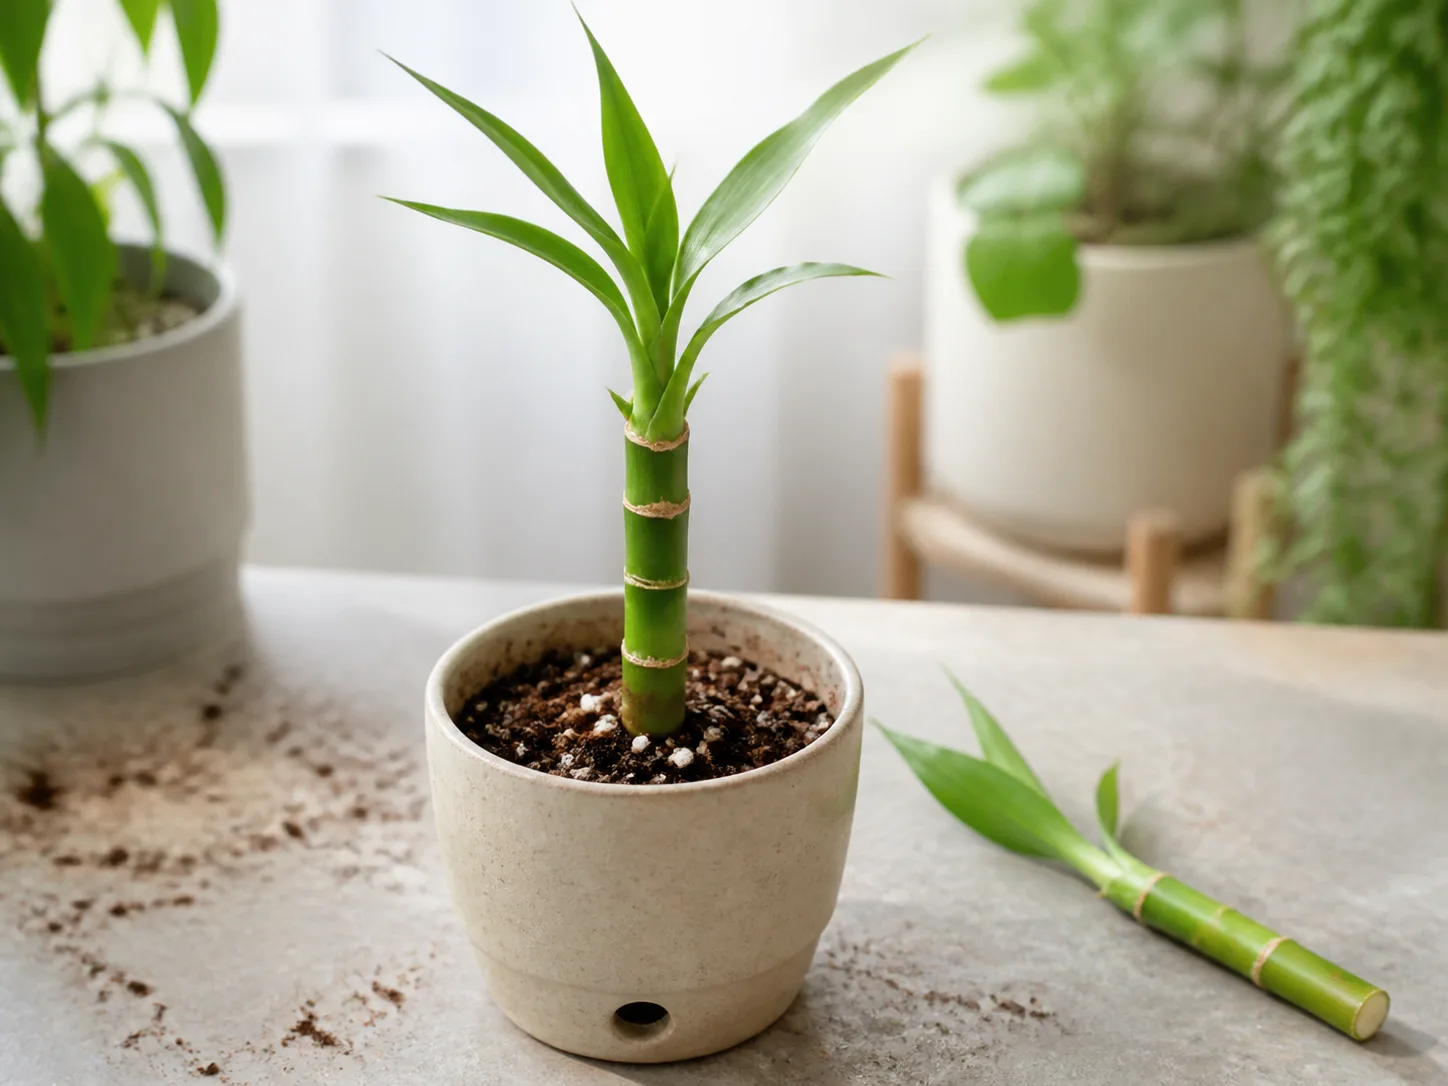
Make a planting hole first rather than pushing the cutting into packed mix, which can scrape the cut end. Insert the bare stem deeply enough to stand upright, then firm the mix gently around it. Do not bury the leaves or the entire crown. If the cutting wobbles, use a small stake or a pot narrow enough to hold it; crushing the stem with extra soil is not a good fix.
Water once so the mix settles around the stem, let excess drain, and then wait until the surface begins to dry before watering again. A cutting has few or no roots at first, so it cannot use water as quickly as an established plant. Keeping the pot constantly wet deprives the base of air and increases the chance of rot. A loose clear bag can help in a very dry room, but it is optional; keep plastic from touching the leaves, open it regularly, and remove it if condensation stays heavy or the stem softens.
Root a leafy cutting in water
Water rooting works well when you want to see whether roots are forming, but it asks for more maintenance than planting directly into mix. Trim off lower leaves that would sit underwater and place only the bare stem base in a clean glass of room-temperature water. Keep the foliage above the waterline and put the jar in bright, indirect light.
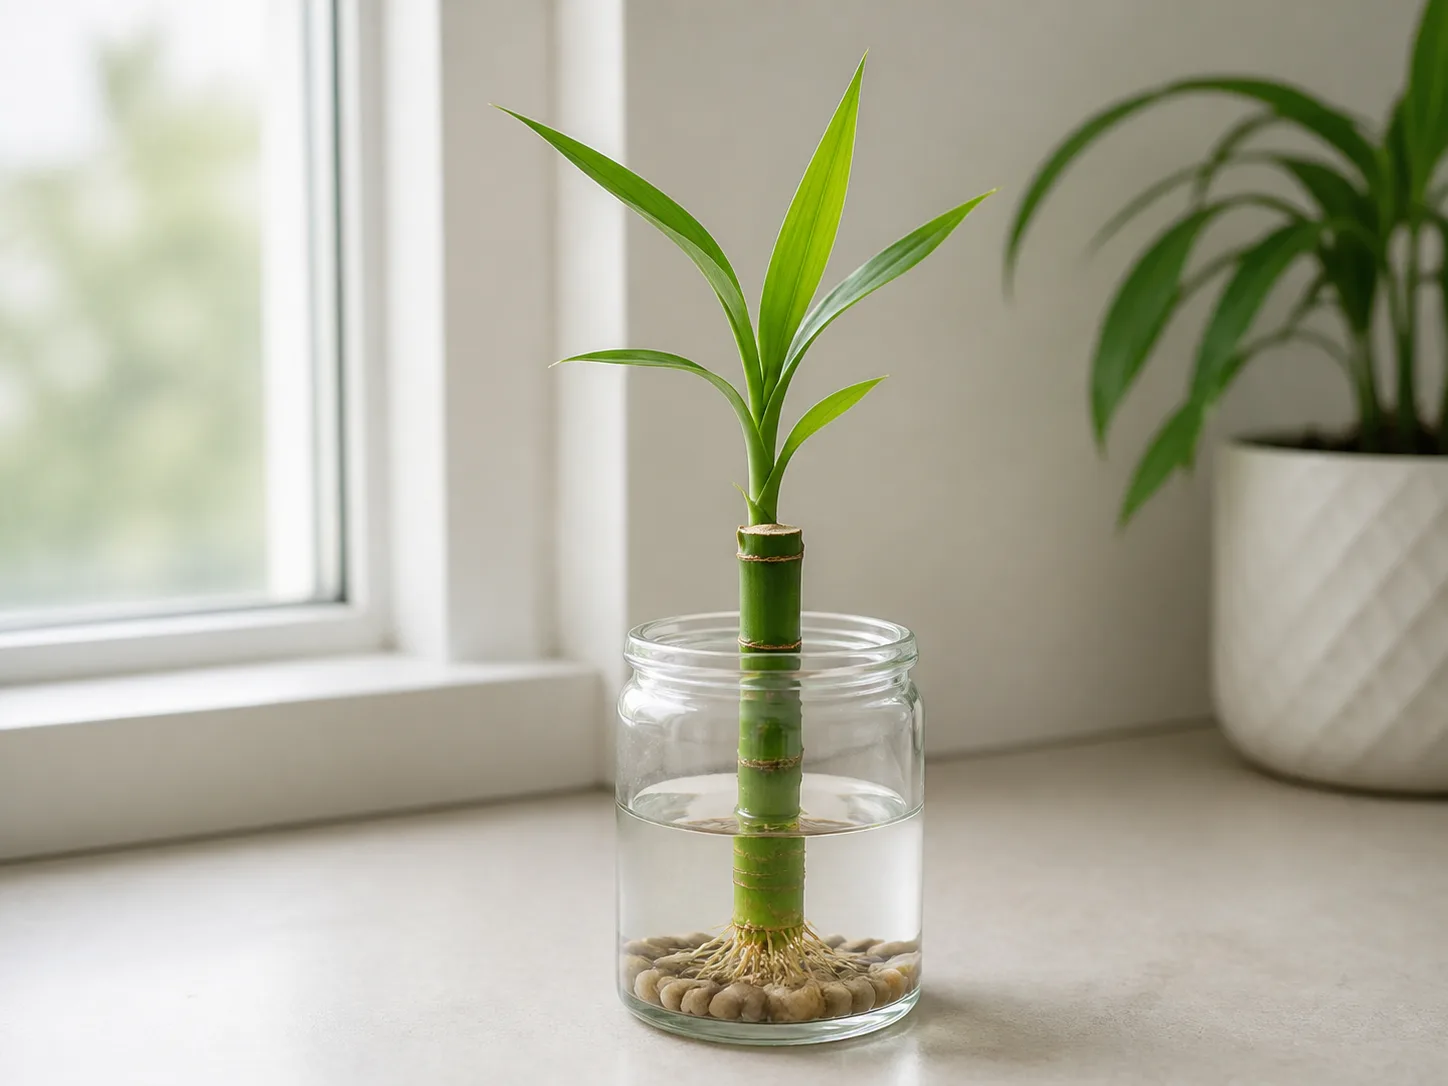
Refresh the water about once a week, or sooner if it becomes cloudy, and rinse the vessel if a slippery film develops. Do not fill a vase to the top: the immersed stem should have access to water without submerging a long section of cane. If several cuttings are in one jar, leave space between them so foliage is not crushed and stems are easy to inspect. Joy Us Garden’s practical notes on D. marginata cuttings also stress changing the water regularly and avoiding low light or hot direct sun (Joy Us Garden).
Wait for several roots to form and grow to roughly an inch or two before potting the cutting. One short root is easy to damage and may not anchor the plant. Use a small pot with drainage and pre-moistened mix; make a hole large enough to spread the roots without bending them sharply. Water gently after planting, then keep the mix evenly but lightly moist while the cutting adjusts.
Water-rooted cuttings may pause or wilt briefly after moving into potting mix because the new roots are transitioning to a different environment. Keep the pot warm and out of direct sun, and do not try to compensate with daily soaking. Once new leaves or steady growth appear, care for it like a young established Dracaena, allowing the upper mix to dry somewhat between waterings.
Multiply a long cane with stem sections
Bare cane sections are useful when a tall plant has a long stretch of leafless stem or when pruning leaves more cane than you want to discard. A healthy section can form roots and a new shoot, but roots alone do not prove it can make a complete plant: the section also needs a living dormant bud. Leaf scars often appear as rings around the cane, and nodes are the places where leaves or branches were attached.
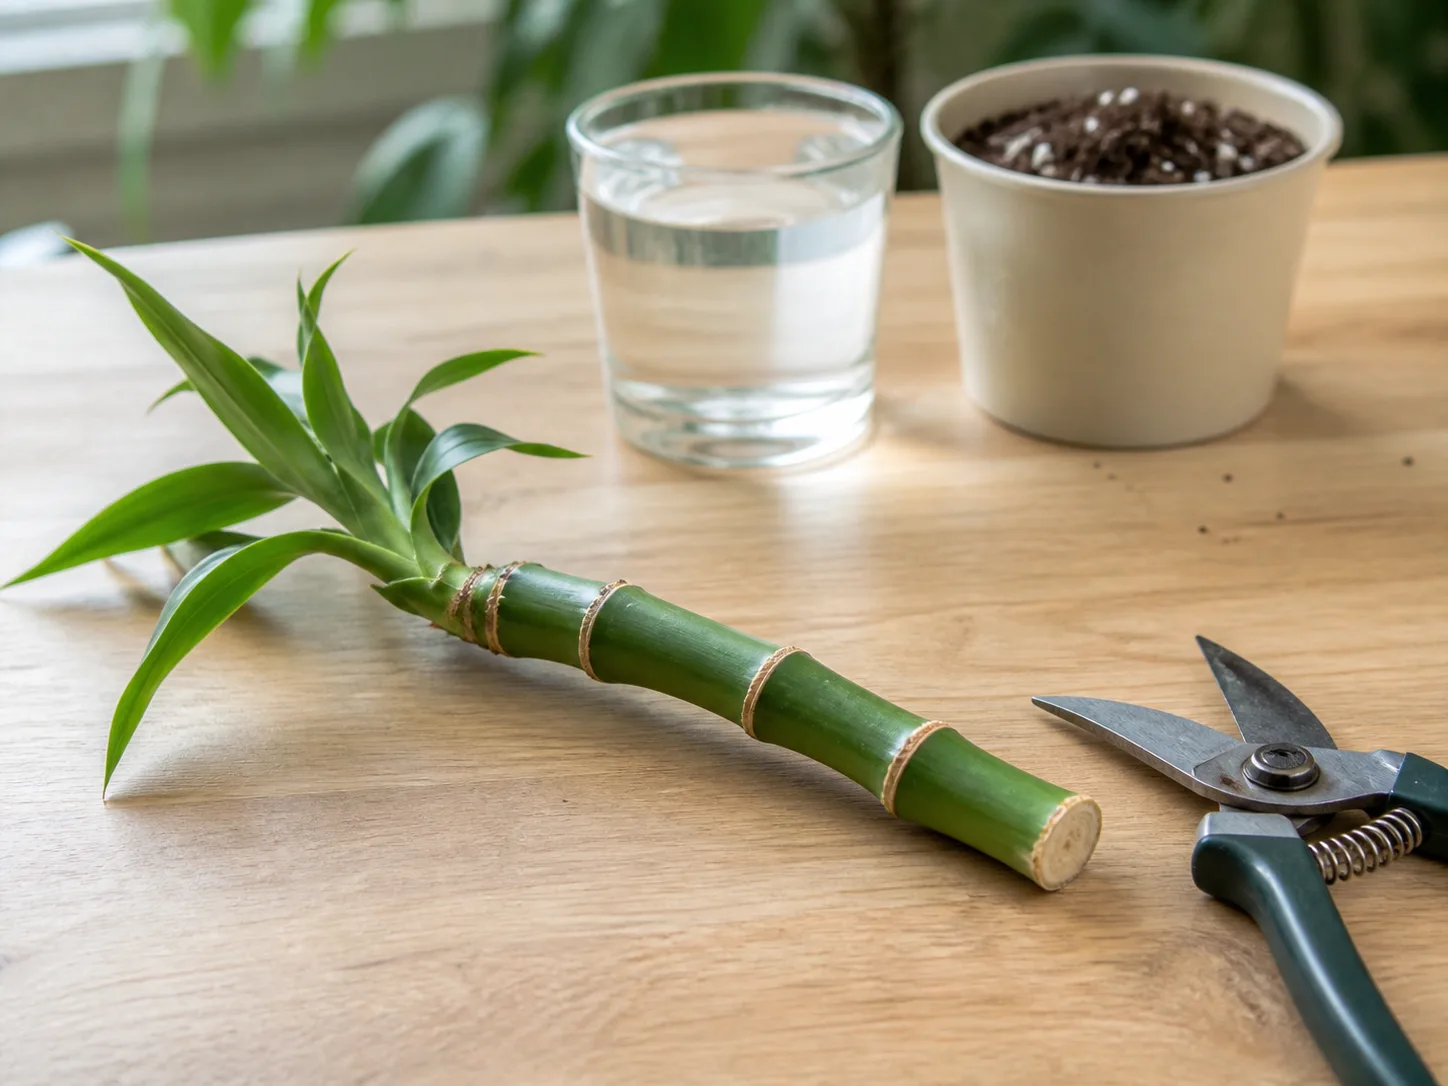
Cut the cane into pieces long enough to include at least one node; on a thick stem, leaving two nodes gives you some insurance if one bud is damaged. Length depends on the space between scars, so inspect first instead of cutting every stem into an arbitrary size. Set the pieces on a clean surface and keep them out of sun while you prepare the pot.
There are two common ways to set a section. For upright planting, insert its lower end about an inch into moist mix and firm it so it cannot rock. For horizontal rooting, lay the section partly on the surface and press it into contact with the mix; this can be useful when orientation is uncertain, but the section must stay stable and the growing medium should not cover it deeply. Do not bury the whole cane in a heavy wet pot.
Keep every section oriented and node-bearing
Before making the separating cuts, mark the top of each cane with a small dot or label. Leaf scars show where leaves were attached, but a short, leafless cylinder can be confusing once it is detached. You can also make the upper cut straight and the lower cut slightly angled as a visual reminder. That angle is not a rooting trick; its value here is helping you avoid planting the section upside down.
If a cane has no visible node or looks shriveled, discard that segment rather than expecting it to become a plant. A section may callus or even produce roots yet never send up a shoot if it lacks a viable bud. Keep cane pieces in separate labeled pots or give them room in a tray so you can identify which pieces stay firm and which ones begin to soften. Gardener’s Path’s Dracaena propagation guide likewise emphasizes clean tools, a draining container, and leaving enough stem and foliage for the kind of cutting being rooted (Gardener’s Path).
Air-layer a tall cane before removing the top
Air layering lets a tall crown begin making roots while it is still attached to the parent. It can be useful when the top is large, valuable, or difficult to keep upright in a rooting jar. It is not the fastest or simplest method for every houseplant, and it requires you to keep moss moist without leaving the cane wrapped in a soggy pocket.
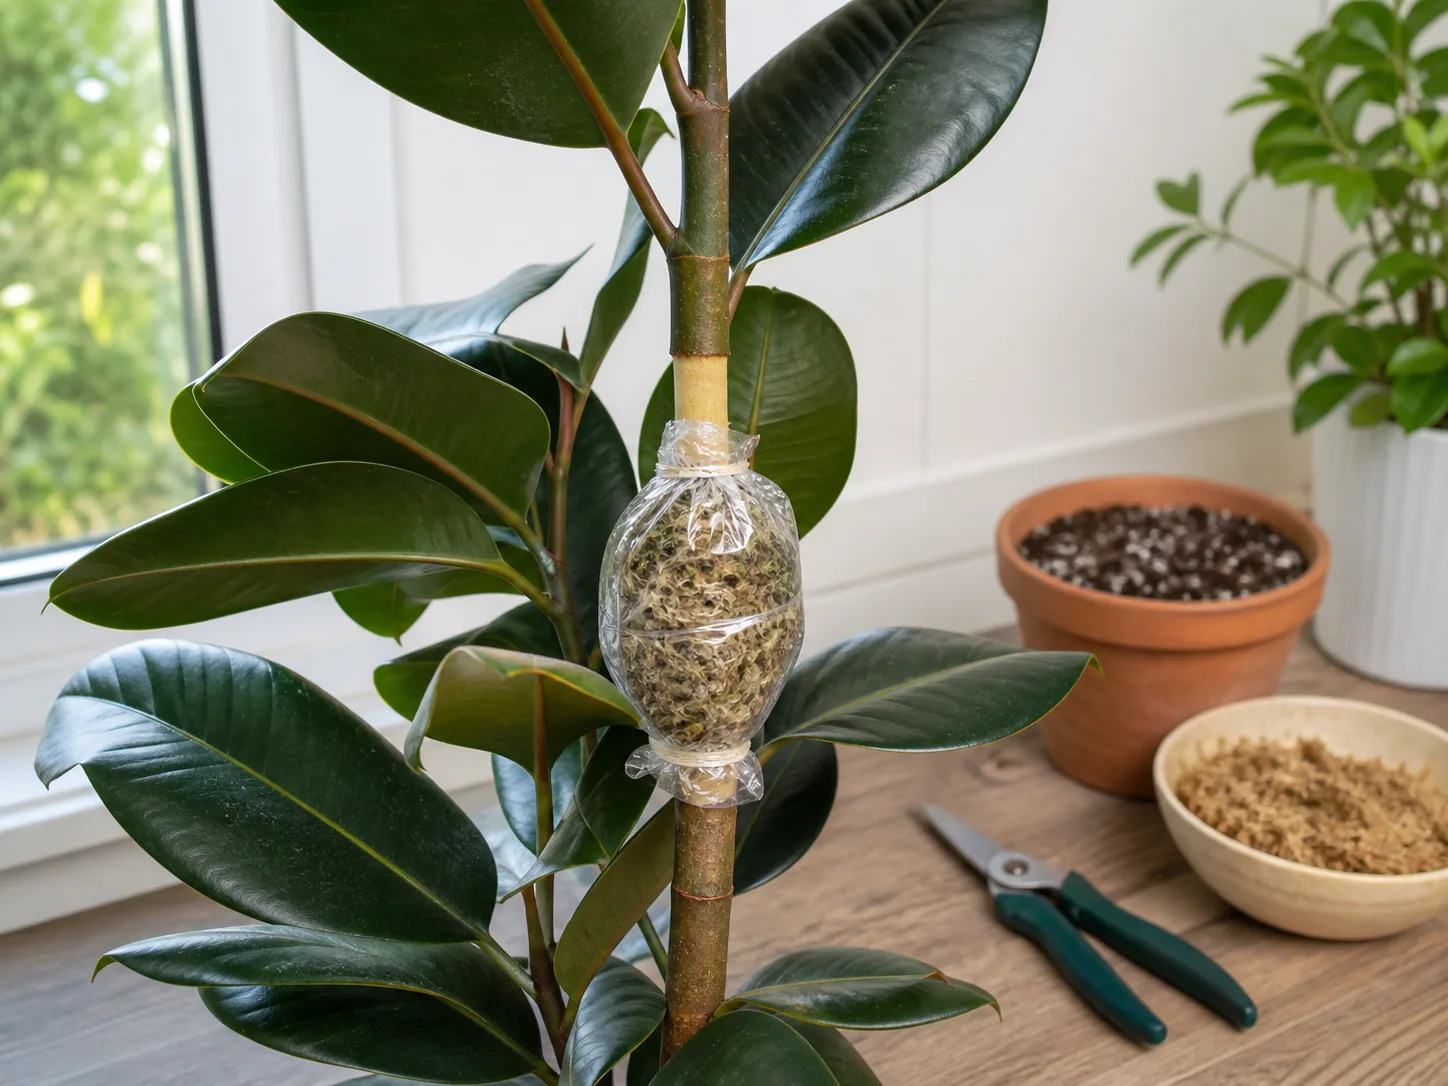
Choose a healthy point below the leafy crown. Make a shallow wound through the outer surface of the cane, taking care not to cut all the way through it, then wrap the area in damp sphagnum moss and cover it loosely with clear plastic. Secure the wrap above and below the moss so it stays in place. Check it periodically: the moss should remain damp, not dripping, and the cane should stay firm. Rooting hormone is optional and should be used only according to its label.
When you can see a group of roots through the wrap, cut below that root mass with a clean tool and pot the new top into a draining mix. Do not separate it as soon as one root appears; a larger root network gives the crown a better chance to take up water after the move. Remove the plastic and moss carefully, and avoid pulling or combing the new roots apart.
What happens to the parent stump?
After you remove a top, the rooted stump usually remains in the pot. Dormant buds below the cut may break and grow one or more new shoots, changing a single bare cane into a branched plant. The exact number and timing depend on the health of the cane, growing conditions, and the individual plant, so a quiet stump is not automatically dead.
Keep the parent in its usual bright, filtered light and water according to how quickly its mix dries. Do not keep it wetter because you are waiting for buds; the stump still has a root system and excess water can rot the remaining cane. If a new shoot appears, let it grow several inches and develop leaves before deciding whether to remove it as another cutting. A small, leafless nub has limited reserves and is a poor candidate for separation.
Pot rooted cuttings at the right stage
Move a soil-rooted cutting only when it has established enough to hold itself in place and shows signs of growth. You can check gently for resistance after several weeks, but avoid repeatedly tugging: the fine new roots break easily. If the cutting is in a clear pot, visible roots near the sides are a useful clue. A new leaf or swelling bud is also encouraging, though the timing varies.
For a water-rooted cutting, use a cluster of roots about an inch or two long rather than waiting for a tangled mass. Pick a pot only slightly wider than the roots and with drainage holes. A very large pot holds unused wet mix around a small root system, making overwatering more likely. Fill around the roots gently and leave the cane at the same depth it occupied in water or the rooting tray.
After potting, water thoroughly once and allow it to drain. Return it to a warm place with indirect light. Do not fertilize immediately; the plant needs to settle and resume growth before a regular houseplant feeding schedule is useful. If it wilts briefly, check the moisture and light first rather than adding fertilizer or repotting it again.
Care for new starts through the first month
Treat the cutting as a small plant with a small root system, not as a mature Dracaena. Check the mix with a finger or lift the pot to judge its weight; water when the upper portion has begun to dry, then drain the saucer. The exact interval changes with pot size, room temperature, light, and the type of mix. A calendar schedule is less reliable than checking the pot.
Keep it away from cold drafts, hot windows, and abrupt moves from low light to strong sun. Once new growth is steady, gradually return it to the conditions you use for other Dracaena. If you used a humidity cover, open it more each day before removing it, especially if the room is dry. Keep any cover vented enough to prevent stale, wet air collecting on leaves and stems.
Keep the new plant and trimmed canes out of reach of cats and dogs. A cutting does not become safe because it has no roots, and fallen leaves or discarded stems still present an ingestion risk. Collect scraps promptly, wipe sap from the work surface, and contact a veterinarian or animal poison-control service if a pet chews the plant.
How long dracaena propagation takes
Rooting time is not a reliable pass-or-fail clock. Some leafy cuttings show roots within a few weeks in warm, bright conditions; others take longer, especially in winter or after a large cut. A visible root on a water cutting is easy to spot, while a soil-rooted cutting can be developing roots before you see a new leaf. Gardener’s Path describes a range of several weeks to a few months for its approach, and a single grower’s result should not be treated as a promise for every species or home.
Judge progress by the cutting’s condition. Firm cane, healthy leaves, and a bud that is slowly swelling are better signs than a specific number of days. A soft, spreading dark patch or sour smell is a warning to inspect immediately. If the cane remains firm but does nothing, hold steady on warmth and moisture rather than pulling it out every few days to look.
Troubleshoot a cutting that stalls or rots
Start with three checks: Is the stem still firm? Is the medium wet or merely moist? Is the cutting getting enough warmth and indirect light? Those questions usually separate rot from slow rooting. Change one condition at a time so you can tell whether the adjustment helped.
Soft, dark, or foul-smelling cane
A soft base, blackened tissue, or sour smell usually points to decay rather than a slow but healthy rooting process. Remove the cutting from the jar or mix and cut above the damaged area with a clean blade. If firm healthy tissue remains and at least one viable node is intact, try again in fresh water or a clean pot of airy mix. If the rot reaches the whole cane, discard it and clean the container before reusing it.
In water, wash the jar and replace cloudy water; keep only the lower end submerged. In soil, empty standing water from the saucer and let the mix dry slightly before watering again. Do not dab the stem with household cleaners or improvise a chemical soak. A clean cut and better aeration are safer fixes than adding an unverified treatment.
A firm cutting has no roots or shoot
If the cane is firm, wait longer before disturbing it. Check that it has a node, is warm, and is not sitting in cold, saturated mix. A bare cane planted upside down may take longer to show a shoot or may fail to grow normally, which is why marking orientation before cutting matters. If the section has no leaf scar or bud and stays unchanged, replace it with a node-bearing piece rather than continuing to wait indefinitely.
A leafy top can also pause after cutting while it adjusts. It may use energy to maintain existing leaves before visible root growth starts. Keep the foliage out of harsh sun and avoid repeated trimming, tugging, or repotting. If the leaves are losing water quickly, remove only badly damaged foliage rather than stripping every leaf from the crown.
Leaves wilt or yellow after cutting
A little stress after a cut or transplant is possible, and an older lower leaf may yellow as the plant adjusts. First make sure the cutting is not standing in water and that the room is warm enough. If the stem is firm and the crown still has healthy leaves, give it time and stable conditions. If the stem is soft at the soil line, treat it as rot instead of ordinary transplant stress.
If several leaves yellow at once, consider whether the cutting is too large for its new roots, whether it is in direct sun, or whether the mix is staying wet. A few strategic leaf removals can reduce the load on an oversized top, but avoid pruning away all foliage. Leaves help the cutting make the energy it needs as its roots establish.
Conclusion
For most cane-forming Dracaena, begin with a healthy leafy top and root it in airy, lightly moist mix; use water if seeing root development will help you monitor the process. Choose bare cane sections when you have a long leafless stem and want several plants, taking care to include a node and preserve top-to-bottom orientation. Save air layering for a tall crown that is easier to root while attached.
Use clean tools, steady warmth, bright indirect light, and restraint with water. A cutting that stays firm may need more time; a soft or foul-smelling one needs a clean restart. With a method matched to the stem and patient aftercare, pruning becomes a practical way to reshape your plant and grow new Dracaena for your home or to share.