How to Plant Succulent Cuttings: Step-by-Step Guide
Learn how to plant succulent cuttings with the right cut, callus time, gritty mix, light, and careful watering so new roots form without rot in a pot.
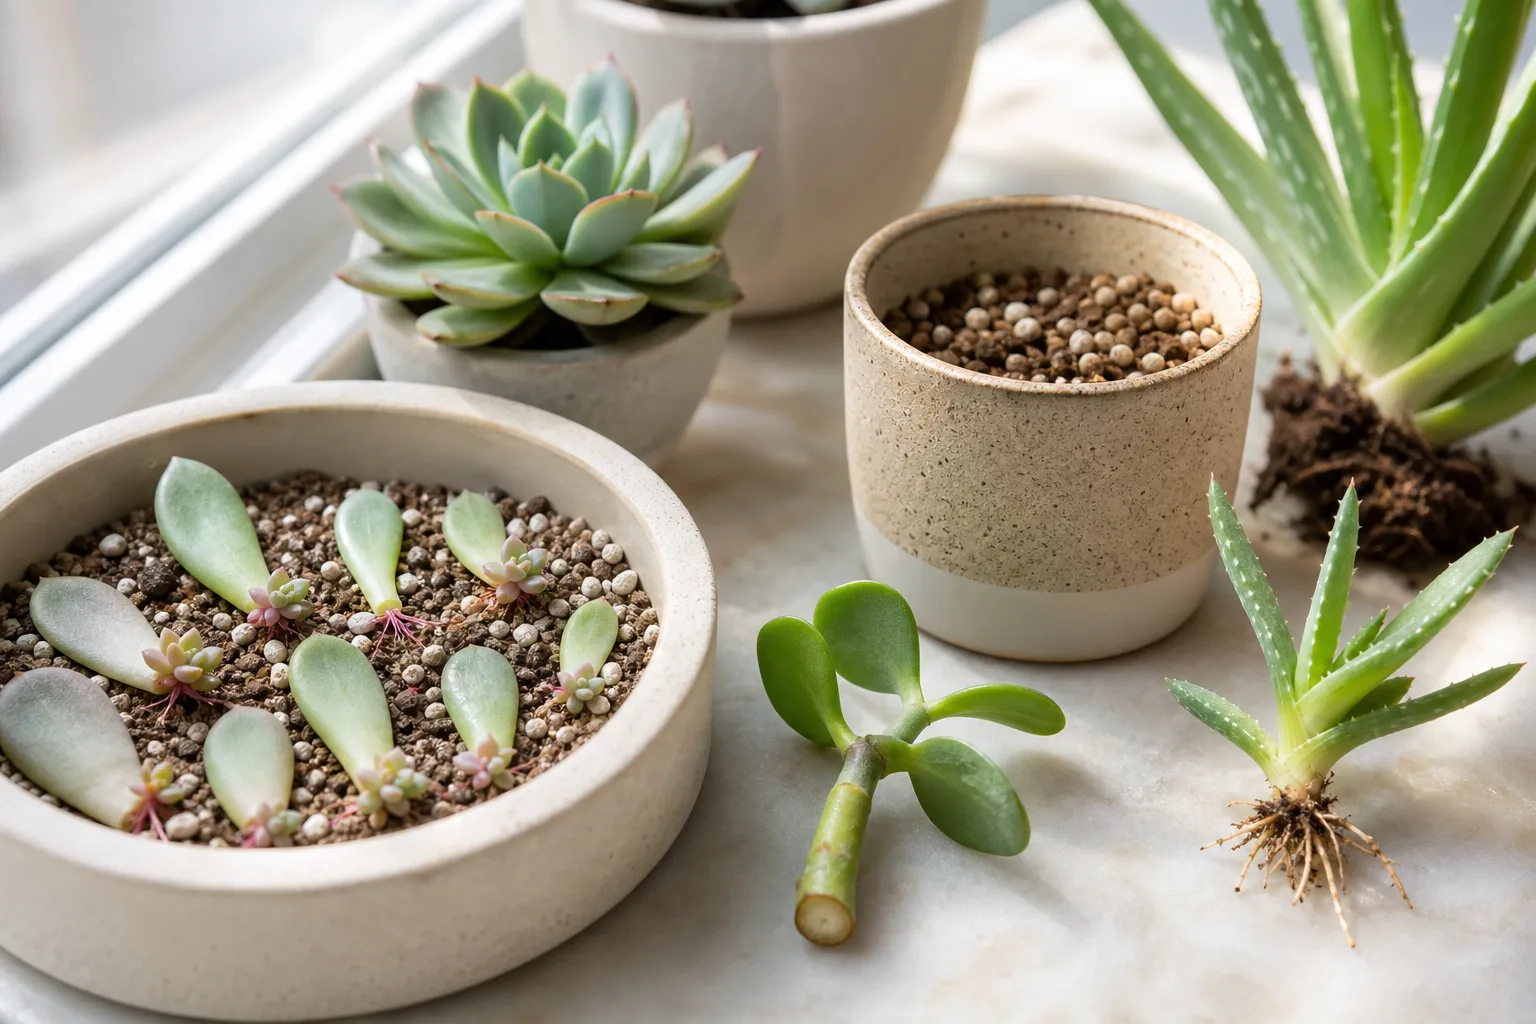
A succulent stem cutting can grow roots even if it has none when you receive or take it. Let the fresh cut dry until it is firm, set the bare stem into a small pot of fast-draining mix, then give it bright light and enough time to root before treating it like an established plant.
The details that prevent failure are easy to miss: a leaf may need to stay above the soil, a thick cut end may need more drying time than a thin one, and watering advice varies by climate and mix. Use the checks below instead of relying on a single number of days.
What a stem cutting needs to become a plant
A stem cutting is a piece of healthy stem that carries at least one living growth point, usually a node where a leaf or branch was attached. New roots form from this stem tissue; the cutting does not need an existing root system before planting. It does need enough stored moisture and a healthy tip or leaves to stay alive while the first roots develop.
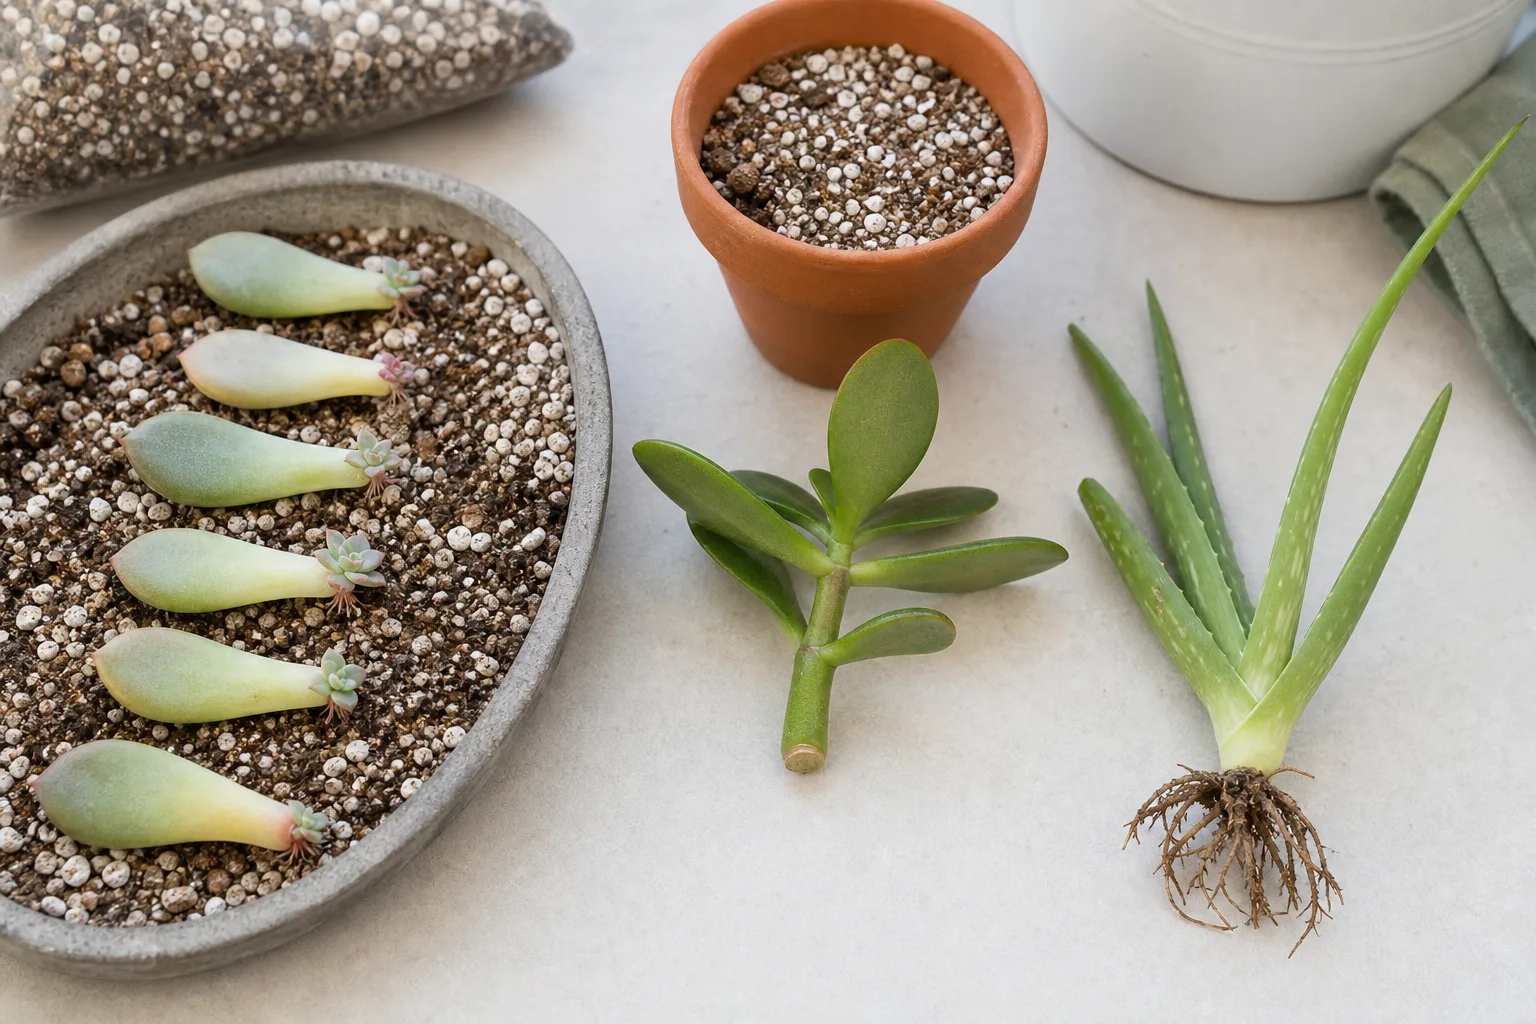
This is different from a detached leaf. A leaf cutting must be removed cleanly with its full attachment point, then usually rests on the medium rather than standing upright with the leaf buried. A pup or offset is a small plant that may already have roots of its own. If you identify what piece you have first, you can avoid burying the wrong part or waiting for a method the plant does not use.
Check whether a stem cutting suits your succulent
Stem cuttings are a practical choice for jade plants, many branching sedums, aeoniums, kalanchoes, and leggy succulents with a visible stem. They are also useful when pruning a plant that has stretched toward a window: the healthy top can become a compact new plant while the original stem may branch below the cut.
Some succulents grow as tight, nearly stemless rosettes and produce offsets or root more readily from whole leaves. Echeveria can be propagated by leaves, offsets, or a beheaded rosette when it has enough stem; the right choice depends on its shape and where the growth points sit. Iowa State University Extension and Outreach lists stem cuttings as a useful method for a broad range of genera, while also describing beheading as a variation for rosette-forming plants that produce few offsets. If the plant has no stem to insert, do not force a stem-cutting method onto it.
Take cuttings when the plant can replace roots and leaves
For most indoor succulents, the easiest time is during active growth, often spring or early summer in the plant’s growing region. A cutting can root at another time if it has steady warmth and bright light, but slow growth in a dim, cool room leaves the cut end exposed to damp mix for longer. If your plant is dormant, stressed, recently repotted, or fighting pests, postpone pruning unless you are removing damaged tissue.
For an outdoor plant, take the cutting when frost or intense heat is not imminent and leave time for establishment before cold weather. Timing follows the species and local growing season, not a universal calendar date. UC Marin Master Gardeners notes that succulent cuttings can be taken in fall, spring, or summer; that range is a useful reminder that healthy stock and suitable conditions matter as much as the season.
Choose a healthy cutting with viable nodes
Pick a firm, unblemished stem with several healthy leaves near the tip. Avoid sections with mushy tissue, blackened lesions, pests, or severe sun damage. If you are trimming a stretched plant, keep the cut balanced so the parent retains enough foliage and does not end up as a bare stump. A cutting with a growing tip and at least one or two leaf nodes is easier to orient and anchor than a short, leafless fragment.
There is no magic length that suits every succulent. UC Marin Master Gardeners suggests a 2- to 3-inch stem piece with one or two nodes; Iowa State University Extension and Outreach gives a 3- to 6-inch range; Illinois Extension describes a 3- to 4-inch cutting with one or two node sets placed in the medium. Read these as adaptable ranges: a compact jade tip may need only a few inches, while a longer branching stem may need extra length to hold upright.
Use clean, sharp shears or a knife and make one decisive cut. Remove leaves from the lower portion that would sit in the soil, leaving the upper leaves intact. Do not strip so much foliage that the cutting has little stored energy, and avoid crushing the stem while trimming. Set the cutting in a dry, airy spot out of direct sun while the wound heals.
Prepare clean tools, a small pot, and a draining mix
Use a pot with an open drainage hole and just enough room to hold the cutting upright. A 2- to 4-inch pot works for many single stems, but choose by the cutting’s height and stability, not by a fixed size. A pot that is much wider or deeper than the cutting stays wet longer than necessary; a small container is easier to monitor while roots are forming. A nursery pot set inside a decorative cachepot is fine as long as you empty the outer pot after watering.
Fill it with a fresh cactus or succulent mix that drains quickly. If a bagged mix feels dense or stays wet for days in your home, blend in a coarse mineral material such as pumice or perlite to create more air spaces. Illinois Extension describes a 1:1 blend of potting mix and perlite as one workable option and stresses that the medium should drain rather than remain constantly moist. Avoid garden soil and fine, compacted mixes that can hold water against a rootless stem.
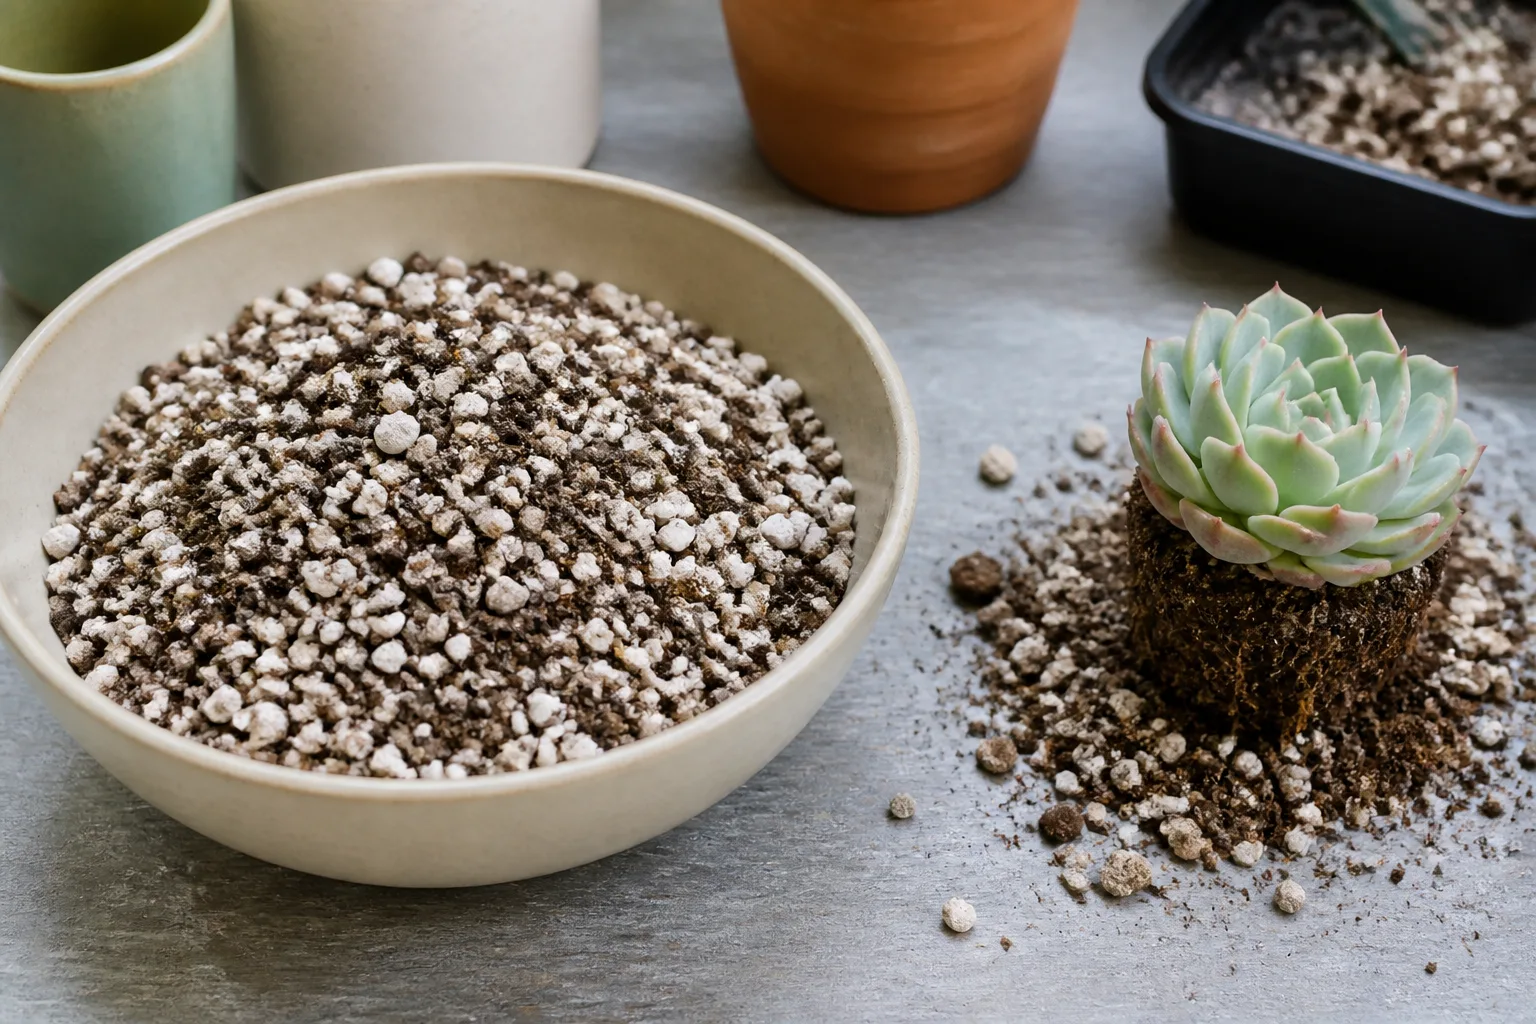
Terracotta can help the surface dry faster in a humid room; plastic retains moisture longer and can be useful in a very dry environment if you water sparingly. Either material can work if the pot drains and the mix suits your conditions. Wash a reused container and clean the cutting tool before starting; UC Marin Master Gardeners recommends clean, sharp tools and sanitized containers for propagation.
Let the cut end callus before it touches soil
Do not push a newly cut, wet stem into moist mix. Set it on a clean tray or paper in a warm room with airflow and no harsh sun. The goal is not to dry the entire cutting; it is to let the exposed surface become dry and sealed so it is less likely to soften and rot after planting.
Published timing recommendations differ. UC Marin Master Gardeners advises waiting 24 to 48 hours, while Iowa State University Extension and Outreach says to let a stem callus for several days and Illinois Extension describes 4 to 7 days. The visible condition is more useful than the calendar: the cut should look dry and matte, feel firm rather than slick, and show no wet shine. A thin cut may be ready sooner than a thick, juicy stem, and cool, humid air can slow drying.
If the cut still looks glossy or feels damp, give it another day and keep it in a dry, airy place. If the end develops a soft patch or spreading dark tissue, do not plant it as-is. Trim back to firm, healthy tissue with a clean blade, then let the new cut dry again.
Plant the cutting at the right depth
Prepare the pot before handling the callused stem so it spends as little time out of place as possible. If the mix is bone-dry and dusty, you can lightly pre-moisten it and let excess water drain before planting; it should feel barely damp, never wet or clumpy. In humid or cool conditions, use dry mix and wait until the cutting is beginning to root before adding water.
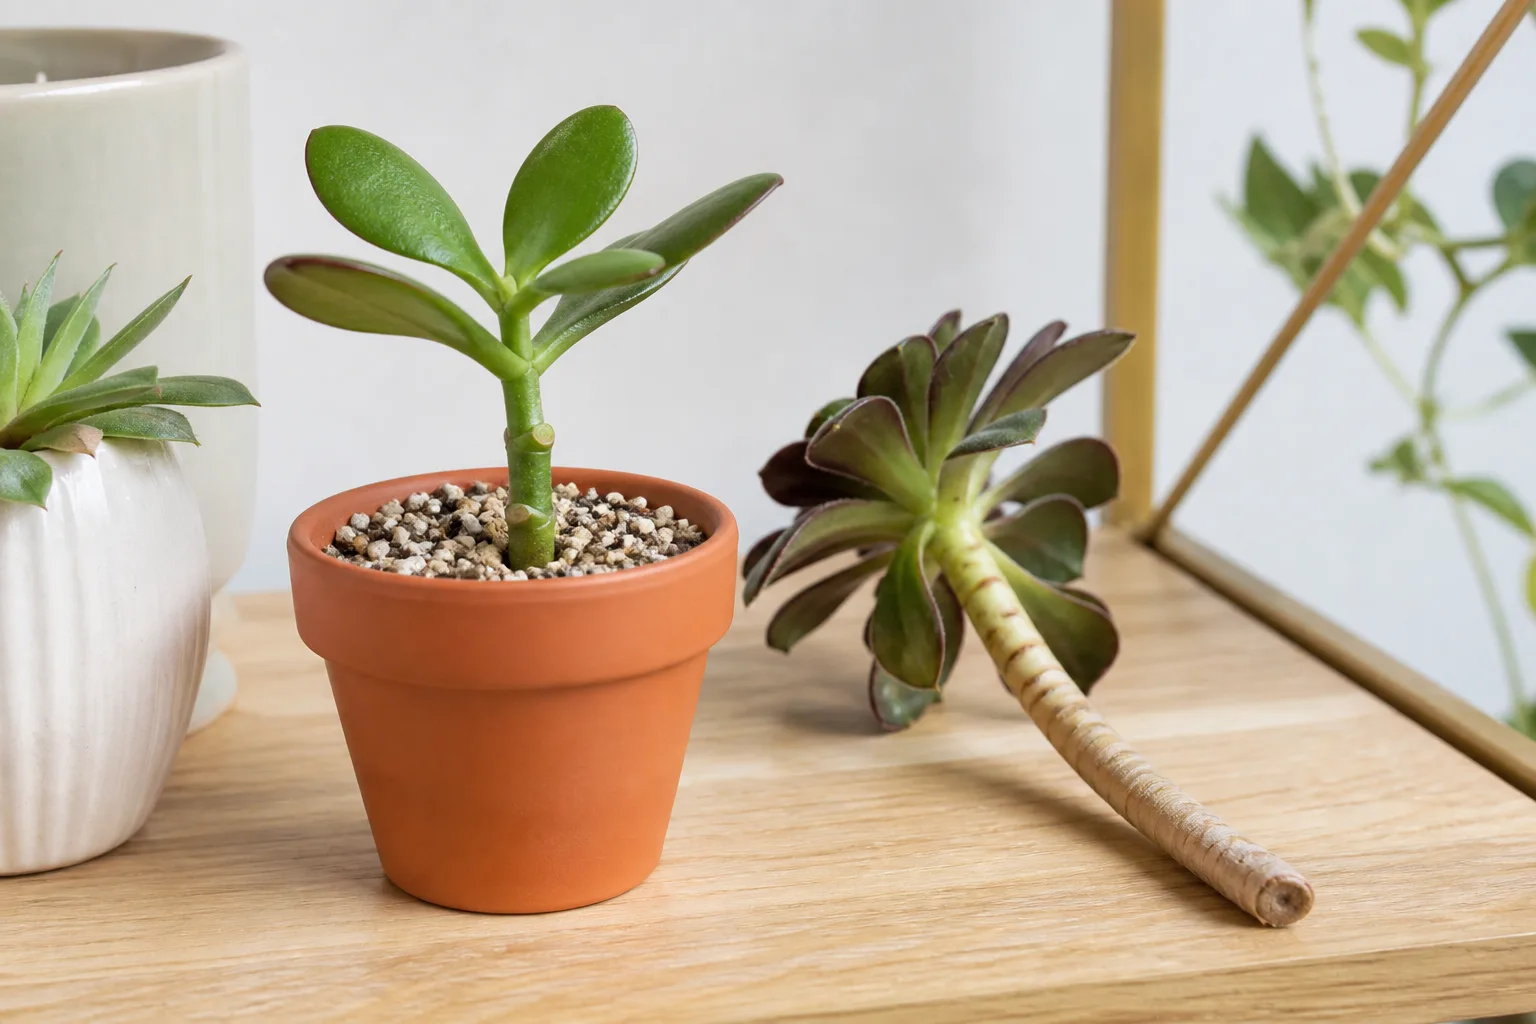
Make a narrow hole with a chopstick, pencil, or fingertip. Lower the bare stem into the hole, then press the mix gently around it so the cutting stands without wobbling. Keep every leaf above the surface; buried leaves trap moisture and are more likely to decay. If the stem is too short to hold, use a small plant stake or place it near the pot edge for support rather than burying it deeply.
How deep should the cutting sit?
Cover enough bare stem to anchor the cutting, usually about a half-inch to an inch for a small piece, and keep at least one node at or just below the surface. Taller stems may need a little more buried stem for stability, but do not bury the leaf rosette or the lowest remaining leaves. Roots can emerge from nodes in contact with the medium, so planting deeper is not a shortcut to faster rooting.
If the cutting leans, check that the mix is not too loose or the pot oversized. Firm the medium lightly around the base, not so hard that you compact it. Illinois Extension notes that the nodes where lower leaves were removed are the sites where new roots arise; orienting the stem so one or two nodes sit in the mix gives it a clear rooting zone.
Give the cutting bright light and airflow
Place the pot where the cutting gets bright, indirect light and good airflow while it roots. A sunny windowsill with a sheer curtain, a bright shelf near a window, or a shaded outdoor spot can work. Avoid strong midday sun on a fresh cutting: without roots to replace lost water, it can wrinkle or scorch before it can use the extra light.
Keep the setup warm and steady, away from cold glass, heating vents, and repeated moves. Succulents differ in their light needs, so there is no single temperature or window exposure for every genus. A warm room and a bright position usually support root formation better than a cool, dark corner, while airflow helps the medium dry between light waterings.
When new growth appears, do not move the cutting straight from shade to intense sun. Increase exposure in small steps over several days or weeks, watching for bleaching, reddish stress coloration, or limp leaves. Some succulents naturally color up in stronger light, but sudden exposure can burn tender new tissue.
Water for roots without keeping the stem wet
Watering advice for rootless succulent cuttings is not perfectly uniform. UC Marin Master Gardeners recommends keeping the mix slightly moist while warning against overwatering; Illinois Extension also places callused cuttings into moist growing medium. Iowa State University Extension and Outreach emphasizes well-drained media, and Epic Gardening advises only a light watering after planting. The shared principle is more useful than any one schedule: avoid a wet, stagnant root zone and do not soak the fresh cut.
For most beginners, start with a dry-to-barely-moist mix and wait until it has dried before adding water. If your room is very dry and warm, give a small amount around the outer edge of the pot rather than pouring water over the stem; the goal is slight moisture in the rooting area, not a saturated pot. In a cool or humid room, leave the medium dry longer. A pot with drainage and a gritty mix makes either approach safer because excess water can escape.
Do not mist the leaves on a schedule or keep a saucer full of water under the pot. Misting wets foliage without telling you whether the roots can use water, and standing water keeps the lower medium saturated. Once the cutting has roots, water the mix more thoroughly, let it drain, then allow the medium to dry before watering again. A newly rooted cutting may need closer observation than an established plant, but it still does not need constant moisture.
Check for roots without disturbing the cutting
Do not keep pulling a cutting out of the mix to check it. Each tug can snap the fine new roots you are trying to grow. Give the planted stem at least a couple of weeks in stable conditions before testing; some root quickly, while species and indoor conditions can stretch rooting into several weeks or longer.
When you do check, hold the base of the stem and give it the gentlest sideways nudge. Resistance means roots have begun to grip the mix; a cutting that slides freely may still be rooting, so return it to the hole and give it more time. A small amount of new growth is another clue, but some rooted cuttings pause before producing leaves.
Illinois Extension says many succulent cuttings and divisions develop a useful amount of roots within a few weeks to a month, then recommends repotting once the root system holds the mix together. Horticulture UK reports that rooting can range from a couple of weeks to months depending on the variety. Treat those ranges as a reason to observe the cutting rather than discard a firm, healthy stem just because a deadline passed.
Recognize normal changes and early growth
A little wrinkling in the lower leaves can happen while a rootless cutting uses the water stored in its tissues. The cutting can still be viable if the stem remains firm and the cut end is dry. Do not respond to every wrinkle by soaking the pot; first check whether the mix is damp, whether the plant is too hot, and whether the cutting has had enough time to root.
New roots may appear before new leaves. They can be pale, fine, and easy to miss against a light mix, so avoid scraping around the base to look for them. When the cutting resists a gentle nudge, the roots can take up water and the stem can begin extending or producing side growth. Keep the original leaves attached unless they are completely dry or rotting; they continue supplying stored energy while the cutting establishes.
If the cutting has stayed firm and dry at the base but shows no change, patience is usually safer than repeated repotting. Check that it receives adequate light and warmth and that the medium is not staying wet. If it is shrinking rapidly, turning translucent, or soft at the soil line, move to the troubleshooting steps below.
Troubleshoot a cutting that stalls or rots
The most useful first distinction is wet rot versus slow rooting. A slow cutting stays firm, even if it has not grown; a rotting cutting usually becomes soft, translucent, or dark where the stem meets the mix. A dry, healed cut end is not the same as a black, wet, spreading lesion. That difference tells you whether to wait or intervene.
Check the pot before changing several things at once. If the mix remains damp for days, improve drainage or airflow and pause watering. If the cutting is firm but the room is cold or dim, correct the light and warmth and leave it undisturbed. Changing the soil, light, and water routine every few days adds stress and makes it hard to see which condition mattered.
If the base turns soft or dark
Remove the cutting from the medium and inspect the stem. If rot is limited to the very bottom, cut above the soft area with a clean blade until the cross-section is firm and uniformly healthy. Let the new wound callus, discard the wet medium, and restart in a clean pot with a quicker-draining mix.
If the soft or dark area has reached most of the stem or the growing tip, the cutting is unlikely to recover; discard it rather than placing decaying tissue back in the collection. Wash the pot and clean the tool before using them again. A fresh cut planted into damp, dense soil is the common setup to correct, so do not simply shorten the callus period or water more often.
If the cutting wrinkles, drops leaves, or stays rootless
A few lower leaves drying or dropping can be part of the cutting’s transition, but a stem that becomes thin, deeply wrinkled, or limp may be losing water faster than it can replace it. Move it out of direct sun and check the base: if it is firm, give it stable bright light and a little more time; if it is soft, treat it as rot. Do not bury additional leaves in an attempt to make the cutting drink.
If a firm cutting has not rooted after several weeks, consider whether the species is better propagated from a whole leaf or offset. Also check for a hidden issue such as a dormant mother plant, low temperatures, very weak light, or a medium that stays either bone-dry in hot air or wet for too long. Rooting hormone is optional; Iowa State University Extension and Outreach and Illinois Extension both note that many succulents root well without it. A healthy cutting does not need extra products to compensate for unsuitable conditions.
Pot up only when the roots can hold the mix
Keep the cutting in its starter pot until it resists a gentle nudge and the root ball begins to hold together. Do not move it simply because the top looks taller. A small but stable root system is less likely to break during potting than a few new roots that have not yet branched through the medium.
To pot up, support the stem and lift the root ball from below rather than pulling the leaves. Choose a container only slightly larger than the root mass, with a drainage hole, and use a similar fast-draining mix. Set the plant at its previous depth, fill around the roots, and avoid pressing the mix hard against the stem. If roots are very fine or the medium is dry, a small amount of water after potting can help settle it; then let the mix dry before watering again.
For a single cutting in a shared tray, pot it separately when roots are easy to handle and neighboring plants begin to crowd one another. Keeping individual starter pots makes it easier to adjust watering and spot rot before it spreads. If the cutting will eventually live outdoors, establish it in a pot first and acclimate it to outdoor sun and temperature gradually.
Aftercare: increase light gradually and adjust watering
Once rooted, the cutting can follow the care needs of its species, but it is not instantly as resilient as the parent plant. Increase light gradually, water when the mix has dried appropriately for that plant, and avoid a pot that dwarfs its roots. A compact jade and a thin-leaved sedum may dry at different rates, so use the plant’s condition and the potting mix rather than a weekly reminder.
Skip fertilizer while the cutting is rootless. After it is growing steadily, a modest dose of a balanced fertilizer during the active growing season is optional; fresh mix and light matter more than feeding a tiny starter. If the cutting becomes leggy again, reassess its light rather than immediately taking another cutting.
For a full routine after rooting, match the species’ mature light and watering needs using a dedicated succulent care guide. Keep in mind that “succulent” includes plants from different habitats, so a desert rosette and a forest-growing holiday cactus should not be treated as identical.
Conclusion
To plant a succulent cutting successfully, choose a healthy stem with viable nodes, let the cut surface dry and firm, then anchor the bare stem in a small draining pot. Keep leaves above the mix, provide bright indirect light and airflow, and keep moisture conservative until roots begin to hold the cutting in place.
Use the cutting’s condition to decide what happens next. A firm, slow stem needs steady conditions and patience; a wet, soft base needs a clean recut and a drier restart. Once roots grip the mix, pot up only if needed and gradually move the plant into the light and watering routine its species prefers.