How to Install Lawn Edging Pavers for a Mowing Strip
Learn how to lay concrete lawn edging pavers for a mower-ready strip, from marking and trench depth to bedding, drainage, curves, and settling repairs.
What a Mowing Strip Does—and What It Doesn’t
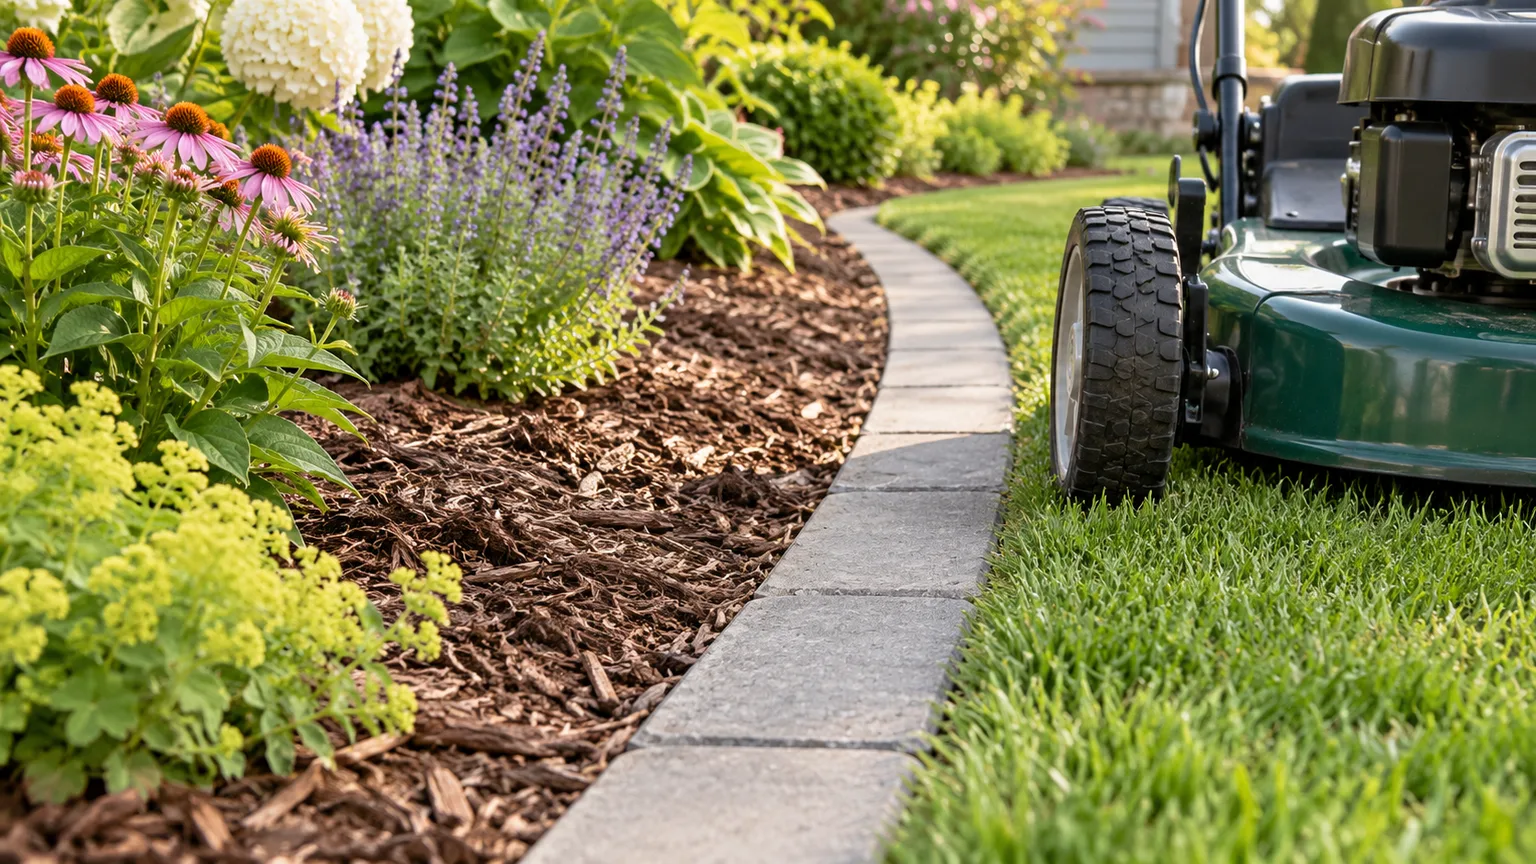
A mowing strip is a narrow, firm band of paving between lawn and a garden bed or other landscape edge. The mower’s wheel can travel on the strip while its blade trims grass near the border, reducing the amount of hand trimming along that run. The surface should be stable and low enough for your mower to cross without the deck or blade touching the pavers.
A strip is not automatically a retaining wall or a mulch barrier. If a bed sits higher than the lawn, soil and mulch can wash over a flush row of pavers; install a separate bed-side restraint or use a different edging design where containment matters. Pavingexpert describes mowing strips as maintenance surfaces that are generally not structural, which is a useful distinction when deciding whether a light bedding layer will do or whether the site needs a more engineered edge (Pavingexpert’s mowing-strip guide).
The project is a good fit for a long, fairly level lawn edge that you mow regularly. It is less suitable as a quick fix for a steep slope, a low point where water already pools, a soft boggy edge, or a boundary crossed by a heavy ride-on mower. In those places, correct the drainage or ask a local hardscape contractor to assess the base and restraint before setting pavers.
Choose Pavers That Fit Your Mower and Site
Use pavers designed for exterior paving, not thin decorative wall caps or brittle indoor tile. Precast concrete edging blocks and concrete pavers are usually consistent in thickness and easy to dry-fit; dense clay paving brick can work when rated for outdoor paving and freeze-thaw exposure in your climate. The top face should be broad and reasonably smooth so a tire does not rock across narrow ridges or deep texture.
Choose the width from the mower you own, not a catalog photo. Measure the tire’s contact width and place one wheel on a sample paver or a cardboard strip laid where the mowing strip will go. Leave enough paving for the wheel to track with small steering variation, then check the mower deck’s overhang: a tire can fit on a paver while the blade housing still clips its inner edge. As a practical starting point, a domestic strip around 8 inches wide is more forgiving than a single narrow brick; Pavingexpert notes that roughly 8 inches can be adequate in some domestic settings and wider strips may suit larger mowers, but your mower’s wheel and deck geometry should decide the final width.
Long rectangular units can create a clean linear run and are easy to align, while smaller blocks follow a curve with less adjustment. Interlocking ends help keep units aligned, but they do not replace a stable base or edge restraint if the strip is exposed to lateral pressure. Before buying, confirm each unit’s actual thickness and length, the manufacturer’s instructions, and whether the surface finish is comfortable under a rolling wheel.
Set Width, Height, and Slope Before You Dig
Lay out the whole strip before excavation. Mark both edges with a garden hose for curves or stakes and string for straight sections, then walk the line from the mower’s normal approach. A strip that pinches at a gate, ends abruptly beside a bed, or curves too tightly for the paver size can turn a useful mowing aid into a series of awkward trim spots.
Set the finished paver surface close to the surrounding grass—typically flush or only slightly proud, often around a quarter inch. That small lip can reduce soil and turf creeping across the surface, but it is not a universal specification: tall pavers may catch a mower deck, trip a foot, or hold a wheel off its intended path. Put a paver beside the mower and check the wheel and deck clearance before you commit to a height; when in doubt, make the transition nearly flush.
Follow the existing grade rather than forcing the entire run perfectly level. A gentle continuous slope is easier to mow and sheds water better than a level strip with isolated dips. Do not create a raised curb that blocks water leaving the lawn or sends runoff into the house, neighboring property, or a planting bed that cannot absorb it.
Tools and Materials
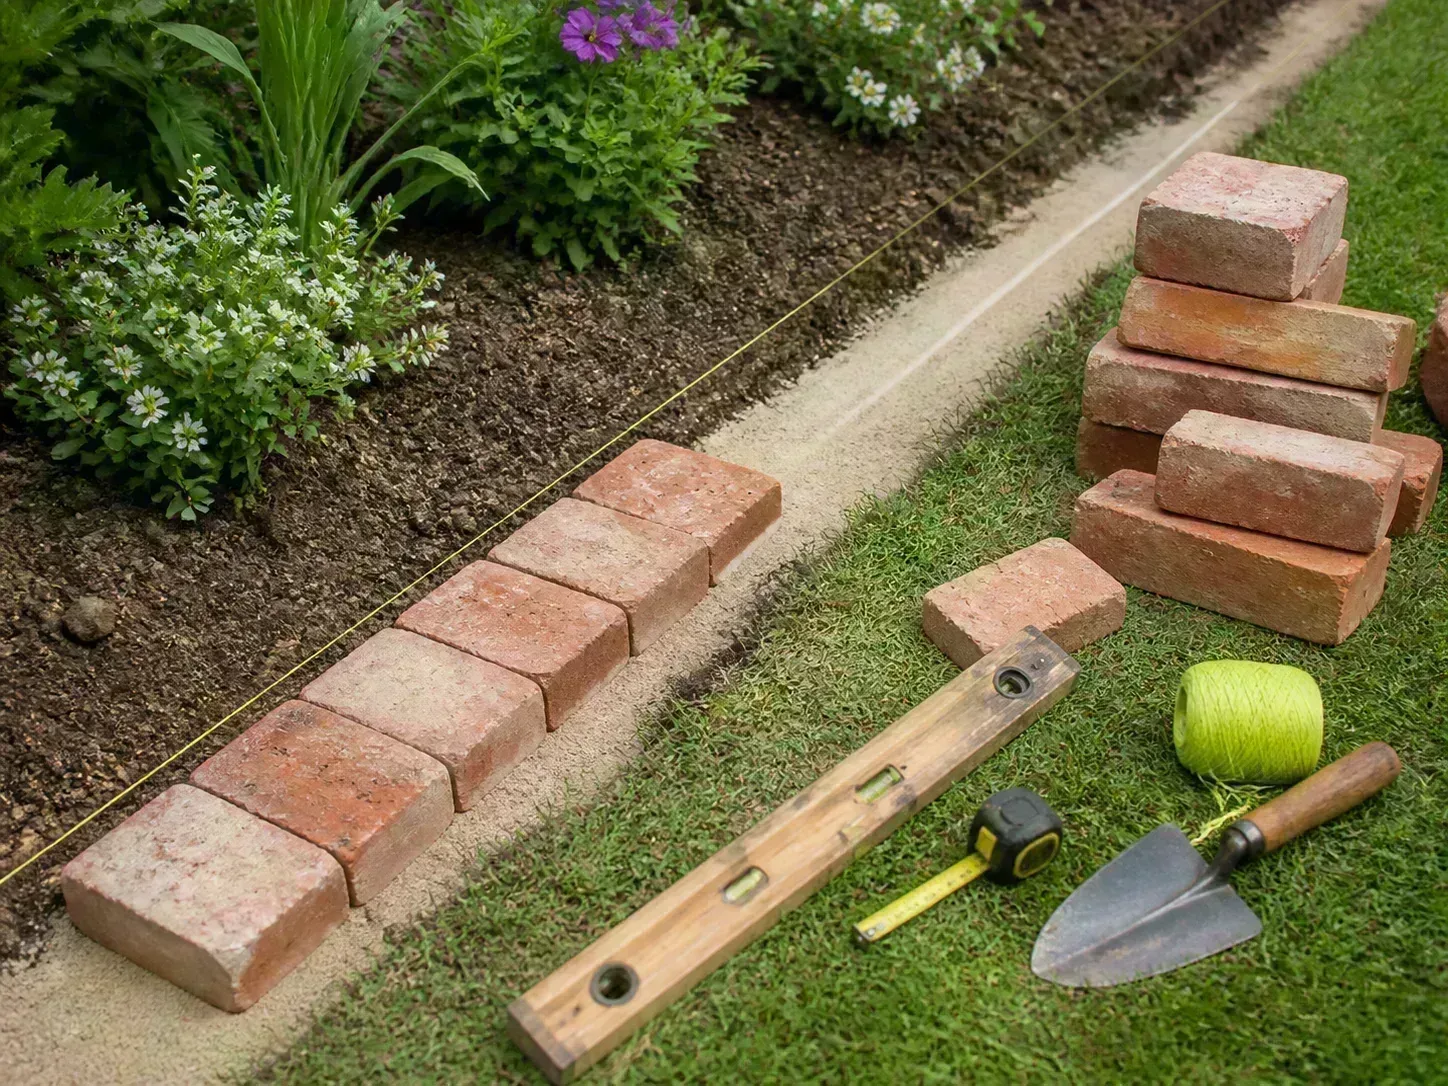
For a modest hand-dug project, gather a tape measure, stakes and string, marking paint or flour, flat spade, trenching shovel or mattock, hand tamper, short level or straightedge, rubber mallet, broom, and wheelbarrow. A longer level helps with straight stretches, while a flexible garden hose makes a smooth curve easier to set out than a series of short string segments.
Choose pavers for outdoor use, a suitable bedding material, and—if the soil or load calls for it—well-graded compactable crushed aggregate for a base. Have clean topsoil or turf soil available for the lawn-side finish, and bed-side soil or mulch ready for backfill. Avoid assuming “sand” means any bag of soft building sand: a coarse, gritty bedding sand is less likely to shift into a soft slurry when saturated; Pavingexpert specifically cautions against building sand under a mowing strip.
For longer runs or difficult ground, rent a plate compactor only if it can be used safely without cracking the chosen pavers or damaging nearby structures. A small hand tamper is enough for a narrow, low-load strip on firm ground. If your layout requires many precise cuts, has a large change in elevation, or must retain substantial soil, price professional installation before buying materials; those conditions are beyond a simple mower-edge project.
Mark the Curve and Locate Utilities
Mark the lawn edge and bed edge separately so the trench width stays consistent. Measure the run in sections, including curves, then buy enough pavers to cover that line plus a small allowance for breakage or later replacement. Dry-lay the units along the marked edge before digging; this catches a mismatch between paver length, curve radius, and desired width while it is still easy to change.
Before putting a shovel in the ground, contact 811 in the United States or the local utility-location service in your area. Underground cables and pipes can be shallow, and a narrow landscaping trench still counts as digging; the official 811 guidance says to request utility marking before shovel work and to outline a small dig area if only that portion of the yard needs marking (Call 811’s before-you-dig guidance). Wait for required markings and clearance, then hand-dig carefully around marked facilities according to the locator’s instructions.
Also check property lines, irrigation, low-voltage lighting, drain lines, and any local rules about work near a sidewalk or road. Utility locators may not mark private irrigation or wiring, so trace those systems yourself or have them identified before trenching. If the planned strip crosses a pipe, cable, tree root zone, or drainage outlet, adjust the line rather than assuming a shallow cut is harmless.
Calculate Trench Depth from Finished Height
Use the paver’s measured thickness, not its nominal size, to set the trench bottom. The calculation is: trench depth = paver thickness + bedding thickness − desired paver height above grade. If a 3-inch paver should finish about a quarter inch above the lawn and sits on a 1-inch bedding layer, excavate roughly 3¾ inches below the surrounding grade; the total buried depth is 3¾ inches, leaving the top ¼ inch proud.
If you add an aggregate base, include its compacted thickness in the total: paver thickness + bedding thickness + compacted base thickness − exposed height. For example, a 2¾-inch paver over 1 inch of bedding and 2 inches of compacted base, with the top set ¼ inch proud, needs a trench about 5½ inches deep. These are planning numbers, not a promise that every soil needs a 2-inch base; match the structure to ground firmness, drainage, frost, and mower load.
Check the depth at several points along the marked run, especially where the lawn rises or falls. A trench that is uniform relative to the pavers but ignores the ground slope may create a low ponding pocket. Keep a note of the selected layer thicknesses so you can correct a test section consistently instead of guessing as you move down the line.
Excavate a Consistent Trench
Cut the two trench edges vertically with a sharp flat spade, staying on the marked lines. Remove sod in manageable pieces and set aside clean turf if you plan to repair the lawn edge afterward. Dig the center to the calculated depth, keeping the bottom close to the intended grade; a narrow trench with ragged sides is harder to compact and makes pavers tilt as you tap them in.
Remove roots, loose organic matter, and soft pockets rather than burying them under the base. A paver placed on buried sod can settle unevenly as the grass decomposes, while a base spread over wet, churned soil may pump or rut under a mower wheel. If the subgrade feels spongy underfoot or water seeps into the trench, stop and let it drain or revise the design before adding bedding.
Tamp the bottom until it feels firm and resists footprints. Use a short level or straight board across the trench at frequent intervals to spot high lumps and unexpected dips; do not make the bottom dead level if the path of drainage needs a fall. Keep excavated soil out of the working trench and avoid piling it on the lawn where it smothers grass or blocks runoff.
Build a Stable, Draining Bedding Layer
For a short strip on firm, well-drained soil with light push-mower traffic, a thin, even bed of coarse sand or fine crushed aggregate may be sufficient. Spread only enough material to make small corrections—often about ¾ to 1 inch after screeding—because a thick loose sand layer is more likely to settle or wash from beneath the blocks. Compact the soil below it first; bedding cannot repair a weak foundation.
Use a compacted aggregate base when the native soil is soft, clayey, frequently wet, prone to frost movement, or likely to carry a riding mower. Add aggregate in thin lifts and compact each lift rather than dumping a deep layer and tamping only the top. Fine Gardening describes a much deeper gravel-and-sand foundation for a pedestrian brick path and notes that compaction can matter in freeze-prone areas; that path is a heavier installation than many mower strips, so treat its dimensions as a comparison, not a universal recipe (Fine Gardening’s brick-path account).
Screed the final bedding layer with a straight board, then avoid walking on it. For a narrow strip, pull the board along rails or use a short template that spans the trench; this gives the first paver a consistent seat. Do not leave bedding piled in waves to “level” every paver independently, since that variation makes the finished surface lumpy and encourages rocking.
Set the First Paver as Your Reference
Start at a stable end point such as a path intersection or a straight section. Set the first paver on the bedding, press it into place, and tap it gently with a rubber mallet until it reaches the planned height. Use a straightedge spanning the paver and nearby lawn to check the exposed height, then check the paver’s top against the intended slope along the run.
The first unit establishes the reference for every unit that follows. If it is tilted, too high, or set in a bed-side low spot, small errors repeat and become a visible wave. BBC Gardening’s brick-path instructions also use marked stake heights and repeated level checks; borrow that checking habit, not its deeper cemented-path layer dimensions, for a mower strip (BBC Gardening’s brick-path instructions). Make the correction now by lifting the paver, adjusting the bedding, and reseating it; do not try to force a bad first unit into alignment by hammering harder.
Once the first paver is right, place the next unit snugly beside it and compare the tops with a short level or straightedge. The goal is a consistent walking and rolling plane that follows the site’s grade, not a bubble centered over the entire run when the ground itself slopes. Check both the longitudinal joints and the height change across the strip so a wheel does not drop into a gap or climb a sudden lip.
Lay and Adjust the Full Run
Work in short sections, perhaps three to five feet at a time, so you can check alignment before the pattern drifts. Butt units according to the manufacturer’s joint recommendation; some interlocking blocks need a small joint while others are designed to meet closely. Keep the lawn-side edge on its guide line and sight down the row every few pavers to catch a gradual curve or kink.
Use a mallet to seat each block, not a steel hammer that can chip the face. If a unit sits high, lift it and remove bedding; if it sits low, add and rescreed a thin amount beneath the whole paver rather than stuffing a handful under one corner. The finished paver should not rock when you press on opposite edges, and adjacent tops should meet without a toe-catching offset.
Pause after each section to check the row from both the lawn and bed sides. The mower wheel follows the lawn-side track, while the mower deck reaches toward the bed, so the line must be straight enough for safe operation even if the planting bed edge curves. A few minutes of checking each section usually takes less time than lifting a long settled run later.
Handle Curves and Corners Without Gaps
A curve made with long rectangular pavers creates wedge-shaped joints: the outside edges need more spacing than the inside edges. Gentle curves can tolerate a small, consistent joint difference, but wide open gaps invite soil, mulch, and weeds to move through and can let a wheel catch the edge of a block. Pavingexpert notes that curved runs can be handled with wedge-shaped joints or by trimming units to fit; the right choice depends on the paver and the radius.
For tight curves, use smaller pavers, purpose-made radius units, or a series of short straight chords with joints kept even. Lay the curve dry first and look at it from the mower approach; if the mower must turn sharply across the row, soften the curve or provide a broader maneuvering area at the corner. Avoid forcing long blocks into a tight arc, which can open large gaps on one side and push the row out of alignment on the other.
If you choose to cut concrete or masonry units, use a proper masonry saw and the manufacturer’s guidance, or have a supplier make the cuts. Wear eye and hearing protection, keep other people clear, and use appropriate dust control; do not improvise with a tool that can kick back or create uncontrolled dust. For a small garden edge, selecting smaller units often avoids the need for cutting altogether.
Check Grade, Crossfall, and Drainage
A mower strip should follow the lawn’s grade smoothly while avoiding dips that hold water. Lay a straightedge along several pavers and look for abrupt humps; then pour a small amount of water near the edge or watch the next rain to see whether the line drains as intended. The surface may follow a gentle overall slope, but the individual paver tops should not form a series of bowls.
Preserve the site’s existing drainage path. A slightly raised row can act like a dam across shallow sheet flow, especially where a bed is uphill from a lawn, and a compacted base can change where water runs. Keep a low outlet open where water must pass, or choose an edging system that does not block the flow; do not redirect runoff toward a foundation, neighbor, or walkway.
If the strip runs alongside a house, keep the finished grade and slope away from the foundation rather than grading paving toward the wall. Follow local building guidance for foundation clearances and downspout discharge. Where a drainage swale crosses the proposed line or standing water already occurs, a surface edging strip may not be the right fix; solve the water problem first.
Finish the Turf and Bed Sides
Backfill the lawn side with soil to support the turf edge, but keep soil from burying the paver face. Replace saved sod or seed the narrow disturbed band with a grass type suited to the site, then water enough to establish it without washing soil onto the new paving. Avoid leaving an abrupt trench edge where the mower tire can slip off the strip.
On the garden side, use a separate restraint if mulch or soil needs to stay in a raised bed. A low plastic or metal edge can be installed close to the pavers, but leave room for drainage and follow the product’s installation direction; do not drive stakes through buried utilities or where they could hit irrigation. For a bed with a significant height difference, use a retaining-style edge designed to hold that soil rather than relying on a single paver row.
Sweep loose sand or aggregate off the paver tops and out of the lawn. If the units have joints that need filling, use the material recommended for the paver type and joint width; keep loose fill from spilling onto grass where it can dull mower blades or create a rough transition. A clean, visible line also makes it easier to spot a block that shifts after the first rain.
Test the Strip Before Mowing
Do a final walk along the whole row before starting the mower. Press each paver at its corners, check joints for gaps, and look for proud edges, rocking blocks, or places where the bed-side soil has slumped. Remove tools, stakes, and loose stones from the mowing area; a mower can throw debris even when the paver work looks finished.
With the mower off, roll it slowly along the intended wheel path and check the deck’s clearance at straight sections, curves, and end points. The wheel should stay on the pavers without the deck or blade housing contacting a raised edge. If a part of the mower overhangs, do not assume the blade is clear; lower the mower only after checking its manufacturer’s safety instructions and actual blade-to-paver clearance.
For the first powered pass, use a walking pace and keep the wheel centered on the strip. Do not mow wet turf if the pavers are slick or the wheel could slide into the bed. If the mower bumps, catches, or pulls toward the pavers, stop and reset the surface or widen the strip before using it as a regular wheel track.
Fix Sinking, Rocking, Open Joints, and Weeds
If one paver sinks, remove that block and inspect the material beneath it. A shallow void can be corrected with fresh, thin bedding over a firm base; a deep or recurring depression usually signals loose subgrade, water erosion, decomposing sod, or inadequate compaction. Repair the cause across the affected section rather than stacking extra sand under the paver, which can wash out and create a new low spot.
A rocking paver often rests on a high point or has support only at two corners. Lift it, remove loose debris, rework the bedding across the full footprint, then tap it down and check it with a straightedge. If adjacent units have moved too, loosen a longer section and re-establish the line instead of forcing a single block against the rest.
Weeds in joints usually root in windblown soil or organic debris that collects on top; the paving itself does not make the edge weed-proof. Pull seedlings while small, sweep joints clean, and refill them with the paver maker’s recommended joint material if needed. The photo below shows the kind of joint buildup worth clearing before roots become established.

Avoid Installation Mistakes That Create Rework
The most common error is choosing a finished height from the paver alone instead of checking the mower. A block that stands an inch above turf might look like a crisp border, yet catch the deck or stop a wheel; another set exactly flush with soft soil may disappear after settling. Test with the mower, and use a small, consistent reveal only when the deck clears it.
A second mistake is putting bedding on loose topsoil or turf. Organic matter settles, water softens disturbed soil, and the row begins to wobble under repeated wheel loads. Strip sod fully, compact the subgrade, and add a compacted aggregate base when the soil, drainage, frost, or mower weight calls for it.
Do not treat a mowing strip as the only bed edging when the bed is higher or heavily mulched. Do not flatten a natural grade just to make the level bubble center, and do not bridge a drainage route with a raised paver lip. Finally, do not assume that a paver row prevents all trimming: grass can grow over joints and the deck’s shape may leave a narrow fringe, so plan for occasional touch-up at corners and irregular borders.
Conclusion
A dependable paver mowing strip begins with a mower-fit width and a finished height that the wheel can ride without the deck striking the edge. Mark the whole line, locate utilities, calculate the trench from the actual paver and bedding thickness, and build a firm base suited to the soil and mower load.
Set the first block carefully, work in short sections, and check alignment, drainage, and mower clearance before you backfill. Dry-laid pavers are relatively easy to adjust when the ground changes, but they still need sound support and occasional inspection. If the strip must retain soil, carry heavy equipment, or redirect water, choose an engineered edge or get site-specific help instead of asking a narrow row of pavers to do a different job.