How to Build a Koi Pond: Sizing, Filters, and Steps
Learn how to site, size, line, plumb, and filter a koi pond, then cycle its biofilter and add fish only when tests show the water is ready for stocking.
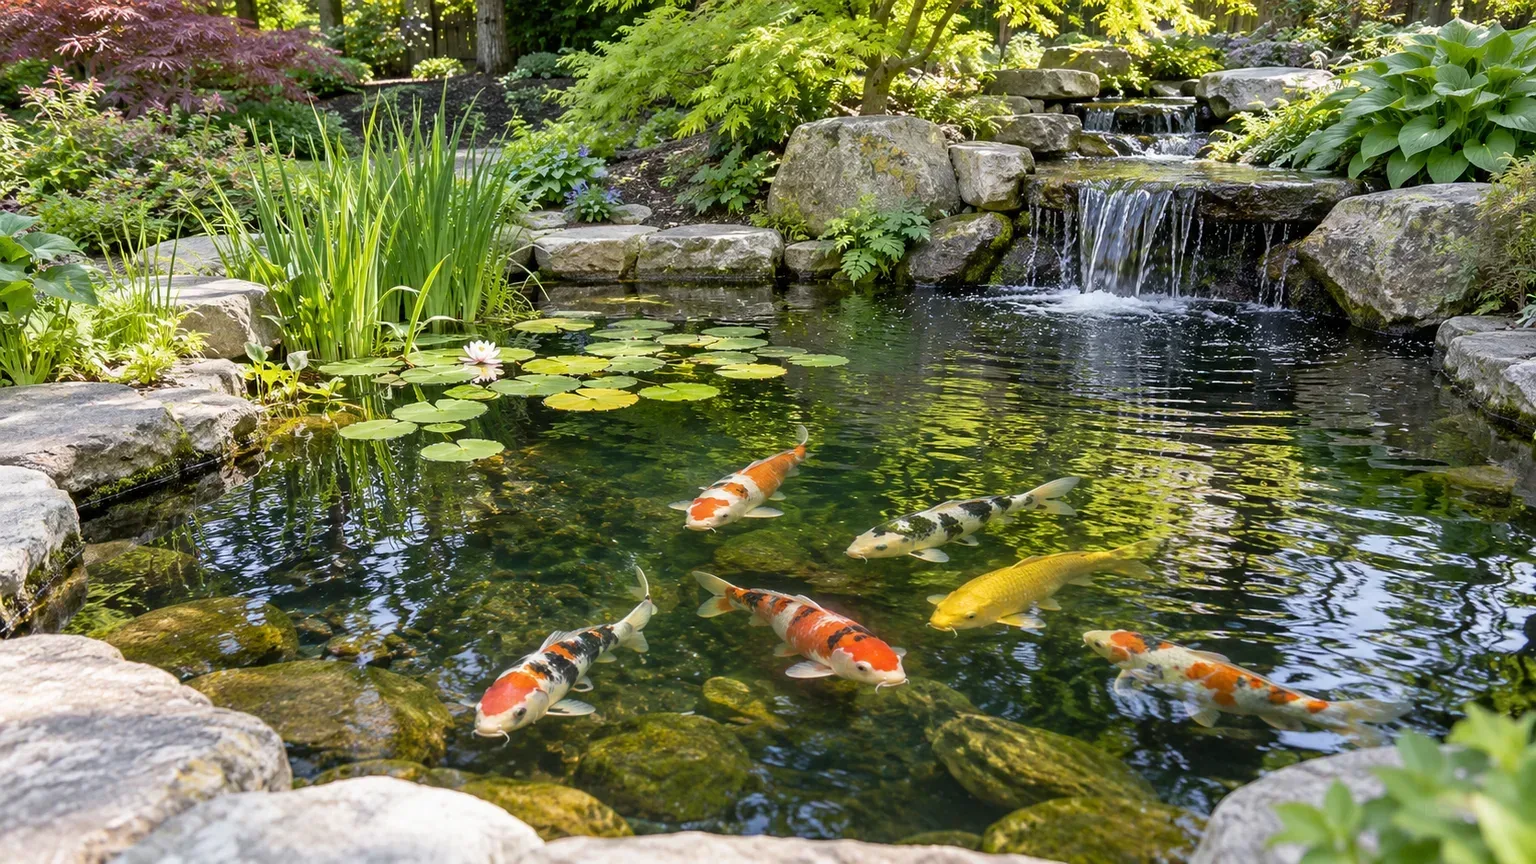
A koi pond is a small life-support system built into your yard. The visible basin matters, but the long-term result depends just as much on where the water goes, how solids are removed, how the biological filter handles fish waste, and whether you can reach every part of the equipment to clean or repair it. Plan those pieces before excavation, and you avoid the most expensive kind of pond problem: reopening a finished landscape to fix a drain, an undersized filter, or an inaccessible pump.
The steps below suit a lined backyard pond and explain where a simple pump-fed setup may be manageable for a careful DIYer and where a gravity-fed bottom drain, retaining wall, electrical connection, or difficult site calls for experienced help. Dimensions and equipment figures are planning guides, not a guarantee that a particular fish load will be safe. Koi grow, local winters differ, and the filter—not a rule of thumb—sets the practical limit.
Decide whether koi fit your yard and budget
First decide whether you want koi specifically or simply the look and sound of water. A shallow, plant-heavy wildlife pond is usually a different design from a koi pond. Koi become large, produce substantial waste, and need dependable circulation, biological filtration, oxygen, and room to grow; a decorative preformed basin or a small patio pond is rarely a good long-term home for them.
The budget is more than a liner and a pump. Include excavation and disposal of soil, underlayment, plumbing, filter and aeration equipment, safe electrical service, edge construction, water testing, fish food, replacement parts, and ongoing water and energy costs. Ask local pond builders for written estimates that separate the basin from filtration and electrical work. If a design only works when you skip the filter, bury maintenance access, or buy fish before the system is ready, reduce the scope or build a fish-free water feature instead.
Koi also need a keeper who can respond to a pump failure, test water when behavior changes, and maintain equipment during hot weather and seasonal transitions. Texas A&M AgriLife Extension treats fish, plants, circulation, and water quality as connected parts of pond management, rather than as optional finishing touches.Texas A&M AgriLife Extension’s pond guide If you travel often or cannot maintain the system reliably, arrange backup care before buying fish.
Size the pond for adult koi and usable volume
Design around the number and adult size of fish you intend to keep, not the small juveniles sold at a garden center. There is no single gallons-per-fish number that makes every pond safe: fish load, feeding, filtration, oxygenation, temperature, and maintenance all affect water quality. As a cautious planning conversation, many hobby sources treat roughly 1,000 U.S. gallons as a small lower-end koi system and prefer several thousand gallons when the yard and budget allow. That is not a stocking certificate; a densely stocked pond can overwhelm even a larger volume if filtration and aeration are weak.
Volume is a better planning measure than the surface outline. For a roughly rectangular pond, multiply length × width × average water depth in feet, then multiply by 7.48 to estimate U.S. gallons. For example, a 10-by-8-foot basin averaging 3.5 feet deep holds about 2,094 gallons before subtracting shelves, rocks, or equipment. A kidney-shaped pond is harder to calculate from a tape measure, so use several cross-sections or confirm the actual fill volume with a water meter when commissioning it.
| Planning measurement | Example | Why it matters |
|---|---|---|
| Surface dimensions | 10 by 8 feet | Determines footprint, liner size, and edge space |
| Average water depth | 3.5 feet | Use average depth, not the deepest point |
| Estimated volume | 10 × 8 × 3.5 × 7.48 = about 2,094 gallons | Helps size the system, but is still an estimate |
Leave room to walk around the pond, open filter lids, remove a pump, and reach valves without stepping on the liner edge. Also reserve space for a filter chamber or external filter, a waste-disposal route, and a safe path to the electrical service. A pond that fits only by pushing equipment against a fence or under a deck may be hard to clean and dangerous to service.
Choose a stable, low-runoff site
Choose level, stable ground that will not receive roof, driveway, or fertilized-lawn runoff. Rain can wash soil, lawn chemicals, mulch, and other debris into the pond; runoff can also carry enough sediment to clog equipment and fuel algae. A slight natural slope can help route overflow away from the house, but do not use a slope to improvise a retaining wall or leave a liner edge lower on one side.
Watch the proposed spot through the day and across seasons. Some sun can warm the water and support aquatic plants, while deep shade can limit those plants; strong all-day sun may make temperature and algae management harder in a small, heavily stocked pond. There is no universal sun-hour target. If the site is exposed, consider a shade feature or a small amount of appropriate aquatic planting, and avoid relying on a waterfall to solve every heat or oxygen problem.
Keep the pond close enough to a hose and service route that water changes and filter cleaning are realistic, but not so close that overflow or a plumbing leak can reach the foundation. Avoid placing the basin directly under trees that drop large amounts of leaves, fruit, or needles. Tree roots can also complicate excavation and eventually press against a liner. The RHS pond-construction guidance recommends choosing the shape and liner with the garden, site, skill, and budget in mind; its shallow wildlife-pond dimensions should not be copied as koi specifications.
Set depth, shape, and safe edges
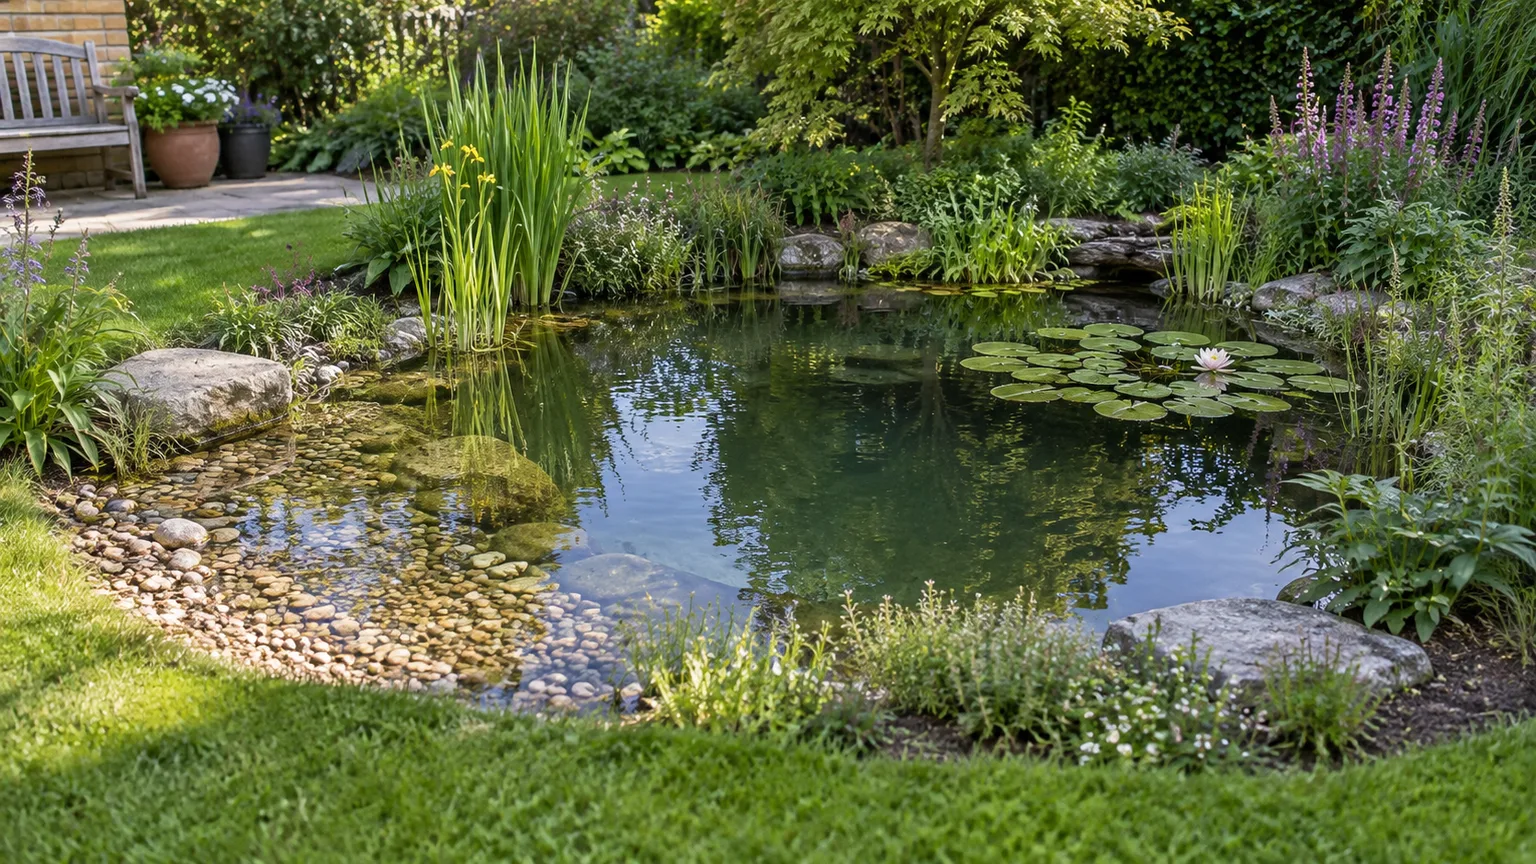
For many backyard koi projects, a practical starting range is a deep zone around 3 to 4 feet (about 0.9 to 1.2 meters), with the final depth adjusted for local summer heat, winter ice, predator pressure, and the design of the pond. The Koi Club of San Diego’s size-and-depth guidance uses a similar range for an average hobby pond, while local winter conditions still determine whether a deeper refuge is needed. The deeper area gives adult fish room and moderates rapid temperature swings better than a very shallow basin, but depth alone does not make a pond safe or suitable. Ask a local koi specialist about overwintering needs in your climate, especially where the pond may freeze deeply.
Steep, smooth sides can help keep raccoons or herons from wading into a fish pond, but they are also a fall hazard and can make a pond harder to exit. Planting shelves may be useful for marginal plants, though broad ledges can collect leaves and give predators a foothold. The compromise depends on who uses the garden: if young children or pets may reach the water, physical barriers and reliable supervision take priority over designing a pond edge as a predator deterrent.
Use a simple, compact basin shape if it gives you clear circulation and easy liner placement. Curves are attractive, but tight corners and multiple shallow pockets can create areas where debris settles or water barely moves. A gentle slope toward a professionally designed drain can help solids reach filtration; avoid loose gravel across the entire bottom because it traps waste and makes inspection and cleaning more difficult. A bare, smooth liner or hard basin is easier to monitor in a koi-focused pond.
Choose a liner or a rigid pond shell
A flexible, fish-safe EPDM liner is a common choice for a DIY excavation because it conforms to a custom shape and avoids some of the structural work required for concrete. Buy a pond-rated product from a supplier who confirms it is suitable for fish, and pair it with a compatible protective underlayment. A preformed shell is simpler to place but constrains the footprint and is often too small or too shallow for adult koi. Concrete or block construction can be durable, but it requires structural design, suitable waterproofing, and skilled installation; an ordinary coating or leftover roofing membrane is not a substitute for a fish-safe pond system.
Measure liner size from the largest length and width of the excavation, including the deepest point and enough material to secure the edges. A common estimate is pond length + twice the maximum depth + about 2 feet of edge allowance, and the same formula for width. So a basin 10 feet long and 4 feet deep would start with about 20 feet of liner length; confirm the allowance with the liner manufacturer and add more if the edge detail needs it. Do not assume the liner can be stretched to fit.
The RHS liner overview describes flexible liners as a way to control pond shape and depth. For installation technique, the Lowe’s DIY pond guide shows the practical sequence of fitting the liner while the basin fills so it can settle into the contours. The key is to remove sharp roots and stones, cushion the base, unfold the sheet without dragging it over rough ground, and leave enough margin to anchor it after the water has settled.
Design the drain, skimmer, pump, and filter together
Think of circulation as a route: water and settled waste leave the pond, mechanical filtration catches solids, biological media gives beneficial bacteria a surface to process dissolved waste, and treated water returns with enough movement and aeration. A skimmer collects floating leaves and surface debris; a bottom drain or accessible solids-collection point handles material that sinks. A biological filter is the essential part that supports the bacteria converting fish waste. A UV clarifier can help with suspended green algae, but it does not replace mechanical or biological filtration.
Two common layouts have different trade-offs:
| Layout | What it does well | What to plan for |
|---|---|---|
| Pump-fed, with an accessible submersible pump and matched filter | Simpler for a modest DIY build and often easier to retrofit | Pump may sit where it collects debris; service access and failure protection matter |
| Gravity-fed bottom drain, prefilter, pump, and biological filter | Can move settled waste efficiently and keep equipment serviceable outside the pond | The drain, pipe size, water levels, valves, and liner or concrete penetration must be designed before excavation |
Not every small pond requires a bottom drain, but deciding against one means planning another way to remove settled waste. A drain is not simply a hole placed in the deepest point: it is connected to pipework and a filtration layout, and a badly sealed liner penetration can leak or drain the pond. The Koi Club of San Diego’s construction guide and NC State’s koi-filtration publication explain why drains, mechanical prefiltration, and biological processing need to work as a system. Have an experienced pond builder design the drain if you do not already understand the gravity-flow layout.
Select the pump by the flow it can deliver after real-world resistance, not by the largest gallons-per-hour number printed on the box. Head height, pipe diameter, elbows, filter resistance, and waterfall lift all reduce flow. Check the manufacturer’s pump curve at the planned head and compare that delivered rate with the filter’s rating for koi or a heavy fish load. Generic ratings for a fish-free garden pond may not apply to a koi pond. The NC State publication and an experienced-keeper walkthrough in Tropical Fish Hobbyist Magazine both emphasize matching filtration to the system and fish load; neither supports treating one turnover slogan as a guarantee.
Build in oxygenation and a failure plan. A waterfall or return jet can disturb the surface, but it may stop if its pump fails; a separate air pump and diffuser can provide another oxygen source. Keep the filter and valves reachable, label the shutoffs, and consider an alarm or backup aerator if a power or pump outage could go unnoticed. Never place electrical equipment where it can be submerged or serviced with wet hands; have a licensed electrician specify and install outdoor, ground-fault-protected equipment under local code.
Check permits, utilities, electrical work, and child safety
Before digging, check with your local planning or building department, homeowners association, and insurer. Rules can depend on pond depth, retaining structures, property lines, easements, fences, electrical work, stormwater, and whether local codes treat the water feature like a pool. There is no reliable nationwide permit rule for every backyard pond, so get the answer for your address before ordering materials.
In the United States, contact 811 or the local one-call utility-location service before excavation; elsewhere, use the equivalent service. Oregon’s public utility commission advises contacting the locate center at least two business days before digging in that state, but waiting periods and coverage vary by location.Oregon’s Call Before You Dig guidance Public locators may not mark private lines such as irrigation, lighting, septic, or homeowner-installed utilities, so ask what is covered and arrange a private locate where needed. Do not excavate until markings are complete and understood.
Electrical service near water is not a beginner wiring task. Pumps, lights, and outlets should be installed and inspected by a qualified electrician, with the correct ground-fault protection, weather-rated components, and local permits. Keep junctions and plug connections out of low spots that flood, and never run a household extension cord as a permanent pond circuit.
For children and pets, use a barrier or rigid safety grid that prevents access to the water and complies with local rules; a loose net is not a reliable fall-prevention barrier. Keep the pond visible from the house, secure gates, remove tempting stepping stones or climbable furniture from the barrier, and provide a stable edge or exit ramp where appropriate. A pond grid can interfere with fish access or maintenance, so choose a rated design and install it according to the manufacturer. The RSPCA’s pond guidance and Gloucestershire Fire and Rescue Service’s safety advice describe grids or fencing as risk controls, not substitutes for supervision.
Build in an order that prevents rework
This sequence assumes the permit, utility, safety, and filter-layout decisions are already settled. The Lowe’s step-by-step guide is a useful practical companion for a flexible-liner build; complex concrete, retaining-wall, or gravity-drain projects deserve a contractor with koi-pond experience. Before excavation, confirm where excess soil will go, how equipment will reach the site, and where filter-cleaning water can drain without flooding a neighbor or polluting a storm drain.
Mark the pond and excavate
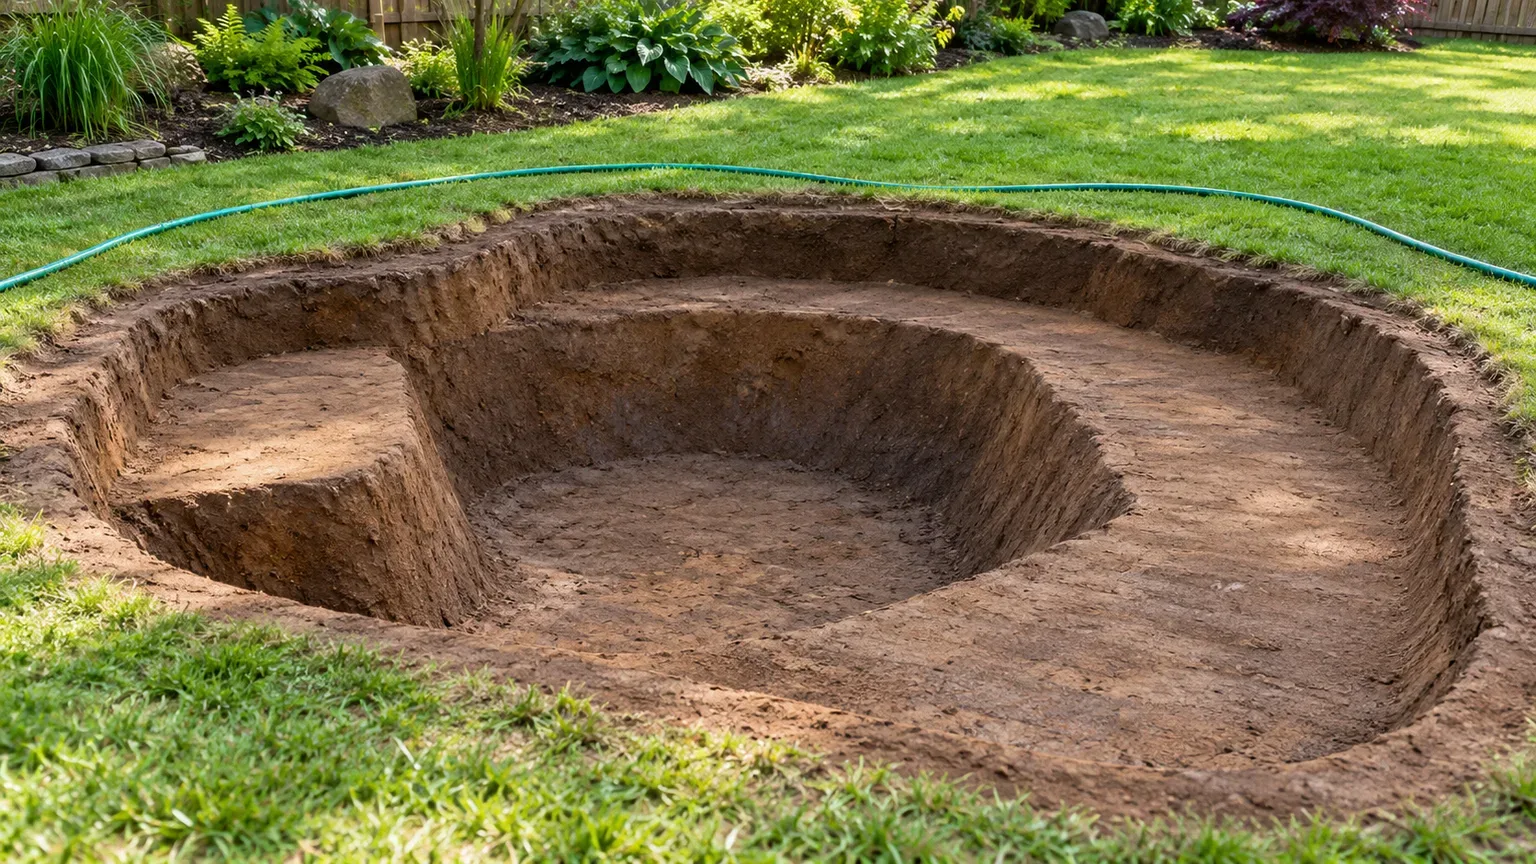
Lay a garden hose or rope to outline the waterline, then mark the excavation beyond it for liner folds, edging, and a safe walking route. Recheck the dimensions and volume estimate before the first bucket of soil is removed. Mark the filter chamber and pipe routes at the same time, because moving a chamber after excavation can require a longer pipe run and reduce pump flow.
Excavate in measured stages and check the levels as you go. Keep the depth and edge consistent so the finished waterline will not spill over one side. If soil slumps, the hole fills with groundwater, the plan needs a tall retaining edge, or machinery must dig close to a structure, stop and get site-specific help rather than standing in an unstable excavation or improvising a wall.
Prepare the base, underlayment, and liner
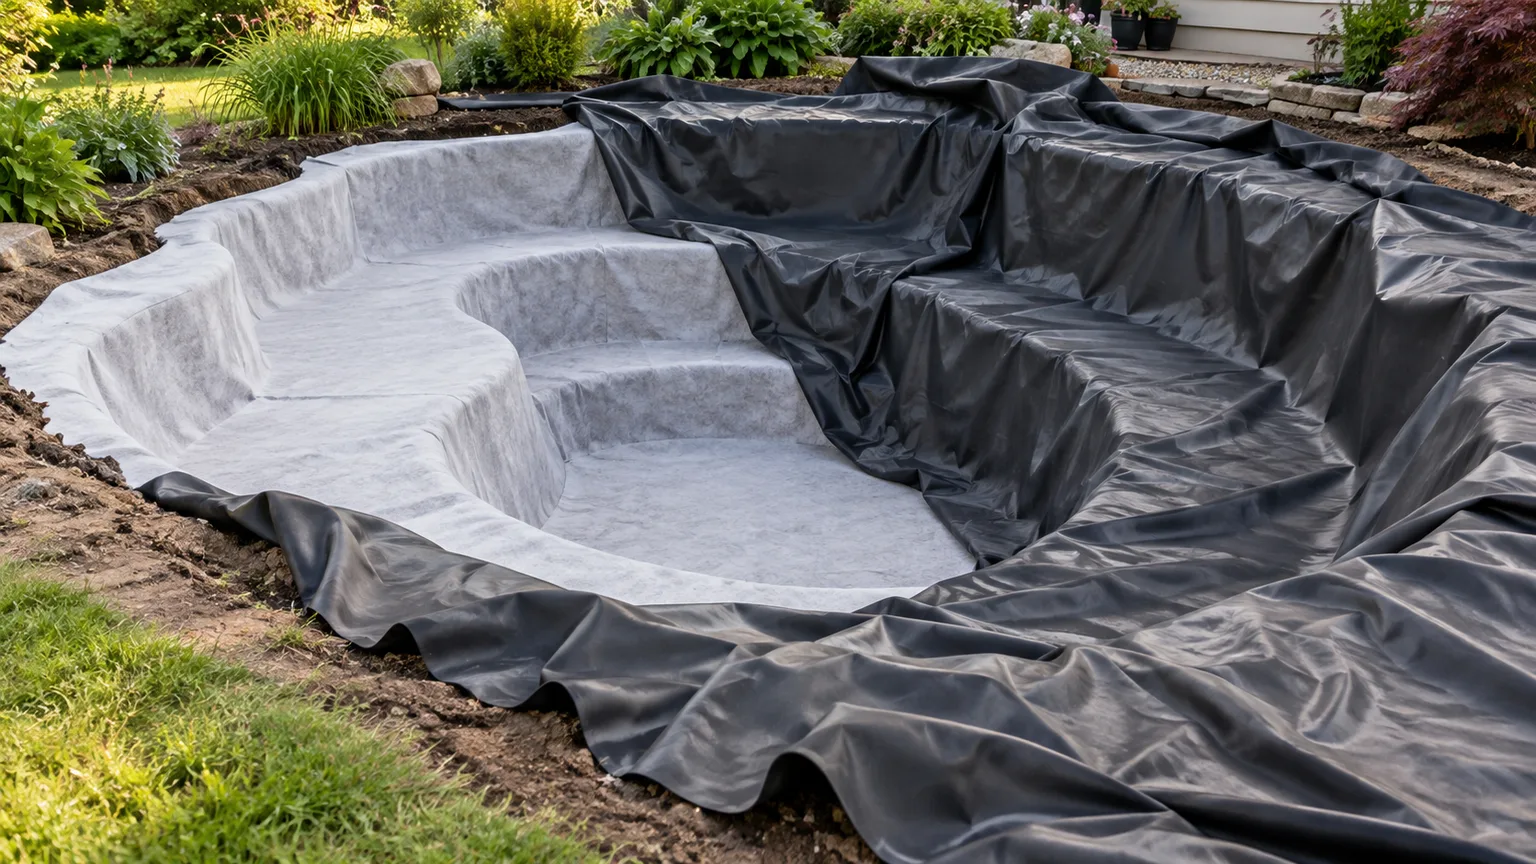
Remove roots, sharp stones, glass, and construction debris from the basin. Smooth abrupt corners and compact loose soil where the design permits; do not compact a structural base by guesswork if the pond includes masonry or a raised wall. Lay a pond-rated protective underlayment over the base and sides, following the liner maker’s guidance about overlaps and seams.
Unfold the liner with a helper and ease it into the excavation rather than dragging or stretching it. Center it so the edge allowance is reasonably even around the perimeter. Begin filling slowly, smoothing large folds as the water presses the material into place; avoid pulling the liner tight because water weight can shift it. Keep the edges temporarily secured, then finish the edge restraint only after the liner has settled and the planned waterline is level.
Install circulation and filtration equipment
Install the pump, skimmer, filter, return, air line, and valves according to the chosen layout and each manufacturer’s instructions. Keep connections accessible for inspection and provide unions or other serviceable fittings where the equipment calls for them. With a gravity-fed drain, have the drain-to-filter relationship, pipe supports, isolation valves, and overflow route reviewed before covering any pipework. Do not improvise penetrations through the liner or use unapproved sealants.
Set the filter where you can reach its lid, drain, and cleaning components without dismantling plants or hardscape. Route hoses and cords so they cannot trip people or be crushed by edging stones. A waterfall can be added as a return feature if the pump can still meet the filter’s required flow at that lift; it should not be the only protection against low oxygen.
Fill, inspect, and commission the system
Fill the pond while watching the liner, edges, fittings, and any drain or skimmer connections. If using municipal water, treat chlorine or chloramine with a conditioner labeled for the actual water source and pond volume; do not assume that letting water stand removes chloramine. Chloramine must be removed before tap water is used for fish, as the City of High Point’s fish-water guidance explains. Use the product’s directions and verify the water before fish are introduced.
Run the pump and filter continuously as the manufacturer specifies, then inspect the water level and every connection for leaks. Confirm that the skimmer draws from the surface, the return creates circulation without leaving dead zones, and the aerator is producing steady bubbles. Measure the actual operating water level and volume, then record the baseline temperature, pH, alkalinity, ammonia, and nitrite. Clear-looking water is not proof that the pond can support fish.
Cycle the biological filter before adding fish
A new filter needs time to establish a community of beneficial bacteria. Those bacteria process ammonia released by fish and decomposing food, then convert it through nitrite toward less immediately toxic nitrate. Ammonia and nitrite can harm fish; Texas A&M AgriLife describes both as common ornamental-pond problems, while UF/IFAS explains the importance of ammonia management in aquatic systems.Texas A&M AgriLife’s water-garden manual UF/IFAS on ammonia in aquatic systems
Cycle the filter without fish if you can. Use a koi-appropriate, fishless cycling method or starter culture according to its label, and test ammonia and nitrite on a schedule. The filter is not ready just because the water has circulated for a week or looks clear. Readiness means the system is processing its intended waste load and the tests remain in a safe range; timelines vary with temperature, filter media, water chemistry, and the method used. If you are unsure how to interpret the test, ask a koi specialist before stocking.
Preserve the bacteria once they are established. Clean mechanical debris traps as directed, but do not sterilize biological media or rinse it in chlorinated tap water unless the manufacturer specifically permits that method. Keep aeration running through the biological stage and arrange backup flow: if the pump stops, the biofilter can lose oxygen and the pond may lose circulation at the same time.
Stock gradually and monitor the pond’s limits
Buy koi from a reputable source and choose fish that appear active, balanced, and free of visible lesions, torn fins, or labored breathing. Introduce only a small first group after the pond has passed its water tests. Follow the seller’s temperature-acclimation instructions, use clean dedicated equipment, and avoid pouring transport water into the pond. Quarantine new fish separately when you have the space and equipment to do it correctly; a quarantine tank also needs filtration and stable water.
Feed lightly at first and remove food that remains uneaten. Each new fish increases the load on the biofilter, so test more often after stocking and add fish in stages only while ammonia and nitrite remain controlled and the fish behave normally. If water quality deteriorates, stop adding fish, reduce feeding while you investigate, increase aeration, and use measured partial water changes with properly conditioned water when appropriate. Do not treat a water-quality problem by adding chemicals or salt without identifying the cause and following qualified fish-health advice.
Watch behavior as well as the test kit. Fish crowding at the surface, rapid gill movement, unusual lethargy, or a sudden loss of appetite can indicate poor oxygen or water quality. Check the pump and aerator immediately, test the water, and contact an aquatic veterinarian or experienced koi professional if symptoms persist or fish are injured. Texas A&M’s guidance identifies water quality and fish condition as related parts of pond management, not separate maintenance jobs.Texas A&M AgriLife Extension’s pond guide
Add plants and landscape without trapping waste
Plants can shade water, soften the edge, and use nutrients, but koi may nibble leaves or uproot planted baskets. Use sturdy aquatic baskets or a separate planted bog/filter zone if you want substantial vegetation, and keep the main koi basin easy to inspect. Do not count plants as a substitute for a properly sized biological filter when the pond carries a meaningful fish load.
Be selective with rocks and gravel inside the basin. Large stones can create hiding places and break up a hard edge, but dense rockwork is harder to clean and inspect; gravel across the floor catches uneaten food and fish waste. If you want a natural-looking border, keep the liner protected where it crosses the edge and secure the perimeter so rainfall cannot wash soil into the pond. The koi pond can still feel integrated into the garden without making the fish basin impossible to maintain.
Landscape for access, not just appearance. Keep a clear route to filters, valves, and outlets, and avoid placing fertilizer, compost, pesticide-mixing areas, or lawn runoff uphill from the water. Check that overflow has a deliberate destination and will not undermine a path, undermine a foundation, or carry pond water into a natural waterway. Never release koi or unwanted aquatic plants into a stream, storm drain, or public water body; contact local wildlife or fisheries authorities for responsible disposal options.
Maintain water quality and solve early problems
Set a repeatable routine around the fish load and test results. Remove leaves and uneaten food, check pump flow and aeration, clean the mechanical stage before it clogs, and test ammonia and nitrite more frequently after stocking, filter cleaning, a heat wave, or a pump interruption. Monitor pH and alkalinity as well, because changes in water chemistry can affect fish and the biofilter. The useful interval is the one that catches changes before fish show distress, not a universal “15 minutes a week” promise.
Replace water in measured partial amounts when maintenance or test results call for it, and condition replacement water for chlorine or chloramine. Avoid a complete drain-and-scrub as routine care: it removes much of the stable biological community, creates handling stress, and can turn a manageable maintenance issue into a new-cycle problem. If the pond has a serious contaminant or disease event, ask a fish-health professional for a treatment plan rather than applying a garden chemical to the water.
Troubleshoot by cause, not by appearance alone:
- Green water: check nutrient input, fish feeding, filter function, and sun exposure. A UV clarifier may help suspended algae, but it does not remove fish waste or correct weak biological filtration.
- Cloudy water after startup: new systems can take time to stabilize. Test ammonia and nitrite, confirm the filter is flowing, and avoid adding more fish or overfeeding while the biofilter develops.
- Fish gasping or gathering at the surface: treat it as urgent. Restore aeration and circulation, check for a clogged filter or failed pump, and test water promptly.
- Falling water level: distinguish evaporation from a leak by checking the level when pumps are off, inspecting wet edges and plumbing, and considering splashing from a waterfall. Keep enough water over the pump intake to prevent dry running.
- Debris collecting on the bottom: adjust circulation or remove it manually; if the basin was designed without a bottom drain, accept that periodic vacuuming may be part of its maintenance.
Before winter or a period of intense heat, check what your local climate does to pond temperature, oxygen, and equipment. Do not assume every koi pond needs a heater, nor that fish will safely overwinter in a shallow basin. Ask a local pond professional what to do in your region and keep an emergency aeration plan available for power outages.
Conclusion
Build the pond around the fish and the maintenance you can sustain: estimate usable volume, choose a stable site, set a locally appropriate depth, and design access to drains, pumps, filters, and aeration before excavation. A flexible liner can make a custom pond achievable, but complex drains, retaining structures, permits, utility work, and electrical service deserve qualified help.
Then test the water, cycle the biological filter, and add koi slowly only after the system can process waste. A pond that is attractive and easy to reach is valuable; a pond that keeps circulation, oxygen, water quality, and safety dependable is what gives koi a better chance to thrive.