How to Start Tomato Seeds Indoors: Step-by-Step Guide
Learn how to start tomato seeds indoors with the right timing, warmth, light, watering, potting-up, and hardening-off steps for sturdy transplants.
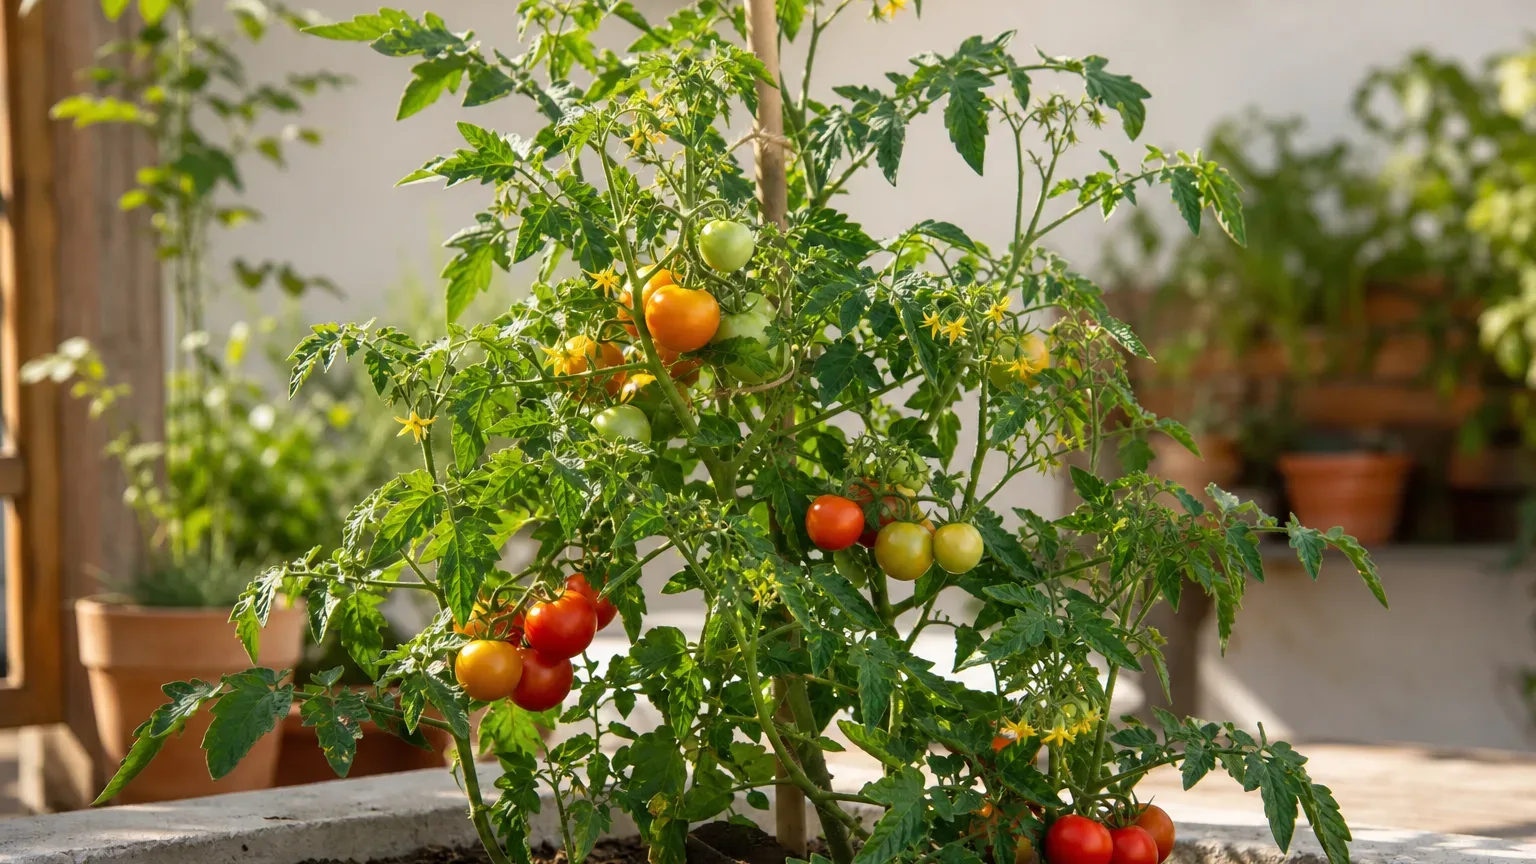
Starting tomato seeds indoors gives you more variety to choose from and lets you raise your own transplants on a schedule that fits your garden. Success depends less on buying a complicated kit than on getting the sequence right: sow warm, move seedlings into bright light as soon as they emerge, and do not send them outdoors until they are acclimated and the weather is ready.
The full process usually takes about six to eight weeks, though a gardener with excellent light may need less time and someone growing in a dim room may need to adjust the plan. Use your seed packet for variety-specific details, then use the cues below—emergence, true leaves, crowding, and outdoor temperatures—to decide what to do next.
Choose a tomato variety for your season and space
Pick the tomato before choosing the start date. A compact determinate or patio variety suits a large container or a small bed; an indeterminate variety grows and fruits over a longer period, so it needs more vertical space and a cage, stake, or trellis. Cherry tomatoes often mature sooner than large beefsteaks, but size alone does not tell you whether a plant will fit your garden; check the mature height, spread, and support needs on the packet.
Look at the listed days to maturity as a comparison tool, not a promise. Seed companies may count from transplanting rather than sowing, and actual harvest timing shifts with temperature, light, and growing conditions. In a short summer, choose a variety known to mature reliably in your region and consider disease-resistance codes if tomatoes have struggled in your garden before. A resistant variety can reduce risk, but it is not immune to every disease.
If you are deciding between a hybrid and an open-pollinated tomato, both can be excellent to grow. Hybrid seed is bred from selected parent lines; seed saved from its fruit may not produce plants that match the original. Open-pollinated seed is more likely to reproduce the variety when isolated from cross-pollination, while “heirloom” usually refers to a traditional open-pollinated variety. For this season, buy seed from a supplier that names the variety and gives sowing instructions; use saved seed only when you know its history.
Time sowing from transplant day, not a fixed calendar date
The right date depends on when you can safely plant outside. University of Minnesota Extension recommends starting tomatoes about five to six weeks before planting out in its climate, while Virginia Cooperative Extension gives a broader six-to-eight-week window before the local last frost. These ranges are not contradictory rules: faster-growing seedlings, strong light, room to pot up, and regional transplant dates all affect how long a plant should stay indoors. For most home gardeners, five to eight weeks before the expected outdoor planting date is a useful starting range.
Count backward from your local frost window
First estimate the date when frost danger has passed in your garden, then check the likely soil warmth and overnight temperatures near that time. A “last frost date” is an average, not a guarantee; a cold pocket, north-facing slope, or unusually late spring can shift the safe planting window. Tomatoes are tender plants, and a seedling that sits indoors for weeks after it reaches transplant size can become crowded and stressed.
Count backward from the likely transplant date by the number of weeks on the packet. If your planned outdoor date is May 20 and the packet suggests six weeks, sow around April 8. Keep the final seven to fourteen days of that window available for gradual hardening off, rather than adding those days on top of the recommended sowing period; otherwise, you risk starting too early and holding an oversized plant indoors. Keep a little flexibility: one or two weeks later is often better than sowing early and trying to maintain an oversized indoor plant in poor light.
| Garden milestone | What to use it for |
|---|---|
| Expected frost-free window | Starting point for a tentative transplant date |
| Soil warming and mild nights | Confirmation that tomato roots can establish outdoors |
| Packet’s weeks-to-transplant guidance | Sowing date, counted backward from planting |
| Seven to fourteen days before planting | Hardening-off period |
| Seedling height and root crowding | A check on whether the sowing date is working |
For a region with a long, warm season, you may not need a very early start. Conversely, a short-season gardener can benefit from a slightly earlier sowing if there is enough light and a plan to pot plants up. Extension sources differ somewhat in how many weeks they recommend, so prioritize the packet and your local growing conditions over a generic calendar chart. The University of Minnesota tomato guide explains its five-to-six-week timing and cautions that earlier starts do not necessarily produce earlier harvests. The RHS timing guide similarly describes how later sowings can catch up when early seedlings face dull weather and must wait indoors.
Gather containers, seed-starting mix, and light
You need tomato seeds, a clean seed tray or small pots, a tray to catch water, a fine-textured seed-starting mix, labels, and a bright place or grow light. A heat mat is optional. It can help a cool room keep the seed zone warm, but it is not useful if the tray already stays in the right temperature range; it can also dry the mix more quickly, so check moisture when using one.
Each container must have drainage holes. Reused nursery cells are fine if they are washed free of old mix and plant debris first. Cleanliness matters because young seedlings are vulnerable to damping-off, a group of diseases that can make stems narrow at the soil line and collapse. Do not use garden soil in a small indoor cell: it can compact, drain poorly, and introduce weed seeds or disease organisms. A bagged, fine-textured seed-starting mix gives small roots a more even environment.
A sunny windowsill can work if it is genuinely bright for much of the day, but window light changes with season, glass, orientation, and nearby shade. A south-facing window in the Northern Hemisphere may help; it still may not give even, overhead light to every cell. If plants lean toward the glass or stretch between leaves, add or improve the grow light rather than rotating the tray as the only fix. Label each variety when you sow it so similar-looking seedlings do not become a guessing game later.
Sow tomato seeds at a consistent depth
Moisten the mix before filling the tray. Add water gradually and stir until it feels evenly damp—like a wrung-out sponge—rather than dusty in the middle or dripping wet. Pre-moistening makes it easier to sow at a uniform depth without a heavy first watering washing seeds into corners.
Fill the cells loosely and level the surface. Place one or two seeds in each cell, or sow in a shallow row if you plan to prick seedlings out early. Cover each seed with about ¼ inch of mix, then water gently with a mister or a slow pour. Tomatoes do not need soaking before sowing. A clear lid or loose cover can reduce evaporation until the first seedlings emerge, but it should be easy to remove and must not be left in direct sun where the tray can overheat. The BBC Gardeners’ World tomato-sowing guide also uses a cover to hold moisture and removes it when seedlings appear; the useful principle is to prevent drying during germination without trapping seedlings in stagnant, humid air afterward.
Use the packet’s directions if they differ on seed depth or treatment. Tomatoes are generally straightforward to germinate, so there is little advantage to elaborate pre-sprouting methods that make tiny roots hard to handle. If you sow more seed than you need, thin extra seedlings later by snipping them at the mix surface; pulling tangled roots can disturb the plant you want to keep.
Create warm, evenly moist conditions for germination
Tomato seeds germinate best in a warm root zone. University of Minnesota Extension suggests keeping the flat around 75–85°F until emergence, and UC Integrated Pest Management places the optimum tomato germination range around 65–85°F. A practical target is about 75–80°F in the mix, but room temperature alone may not tell you how warm the center of a tray is. A thermometer placed near the cells is more useful than guessing from the air in the room.

Warmth speeds germination only when moisture and oxygen are balanced. The surface should not dry out while the seeds are swelling, but saturating the cells pushes air from the mix and can rot seeds before they sprout. If you use a heat mat, follow its instructions, monitor the tray, and remove it or switch to normal seedling conditions as soon as most seeds emerge. A heating mat is an aid to consistent warmth, not a required piece of equipment.
Tomato seeds commonly emerge within about a week when the mix is warm, though cooler conditions or older seed can take longer. Give them up to two weeks before assuming failure. If there is no emergence, check the mix temperature and moisture first; then consider whether the seed was buried too deeply, the packet is old, or the tray dried out. Do not keep digging through the cells—start a small backup sowing if the seed’s expected window has passed.
Move seedlings into strong light as soon as they emerge
As soon as green shoots appear, remove the humidity cover and provide bright light. Seedlings need light immediately after emergence even though tomato seeds themselves do not need light to germinate. A lack of strong overhead light is a common reason stems become long, thin, and tilted. The plants can look healthy green at first while already stretching toward the nearest window.
A timer makes a grow light easier to manage. University of Maryland Extension recommends 14 to 16 hours of light per day for transplants and keeping plant tops close to the fixture; exact safe distance depends on the light’s strength and heat output, so follow the manufacturer’s guidance and watch the leaves. Keep the light centered over the seedlings, raise it as they grow, and give them a dark period overnight. A light that is too far away encourages stretching; one that is too close or too hot can bleach or scorch foliage.
If you rely on a window, place the tray as close as practical to the brightest glass and turn it a quarter turn each day. Check seedlings at midday and again near evening. A tray that leans, stretches, or casts long, thin shadows needs more light. A small fan on its lowest setting can gently move the air, but airflow does not compensate for inadequate light.
Water seedlings without keeping the mix saturated
Check seedlings daily, but do not water automatically every day. Pick up a cell or pot to learn what it feels like when wet, then compare it as it becomes lighter. When the surface begins to dry and the container feels lighter, water thoroughly enough to wet the root zone and let the excess drain away. The medium should remain lightly moist but never sit in standing water.
Bottom watering is convenient for small cells: pour water into the outer tray, allow the mix to wick it up, and empty the tray after the surface has darkened. Top watering is also fine if you use a gentle stream that does not expose roots or flatten seedlings. Alternating between methods is not a problem. What matters is that the mix drains and the plants are not left in a reservoir overnight.
University of Maryland Extension explains why saturated media are risky: water displaces oxygen around roots, and persistently wet conditions favor root rot and damping-off. On the other hand, tiny cells can dry rapidly near a sunny window or over a heat mat. Read the plant and container together: wilting and a very light cell may signal a need for water, while yellowing in wet mix or algae on the surface suggests excess moisture or poor airflow. Adjust the next watering rather than applying fertilizer or a fungicide to an unidentified problem.
Thin and pot up at the true-leaf stage
The first pair of leaves are cotyledons, or seed leaves. They help the young plant begin growing but do not look like mature tomato foliage. The first true leaves have the familiar serrated, compound tomato shape. If you sowed multiple seeds per cell, keep the strongest seedling and snip the others at the mix line once you can compare them. Do not pull out extras if roots have intertwined.
If seeds were sown together in a communal tray, move seedlings into individual pots soon after true leaves appear, while they are still small enough to handle. University of Maryland Extension recommends lifting seedlings carefully and holding them by a leaf rather than the delicate stem. Rutgers NJAES gives the same practical advice and recommends beginning outdoor acclimation about a week before transplanting. A damaged leaf can be replaced; a crushed stem may not recover. Use a dibber, pencil, or small spoon to lift a plug of mix with the roots attached.
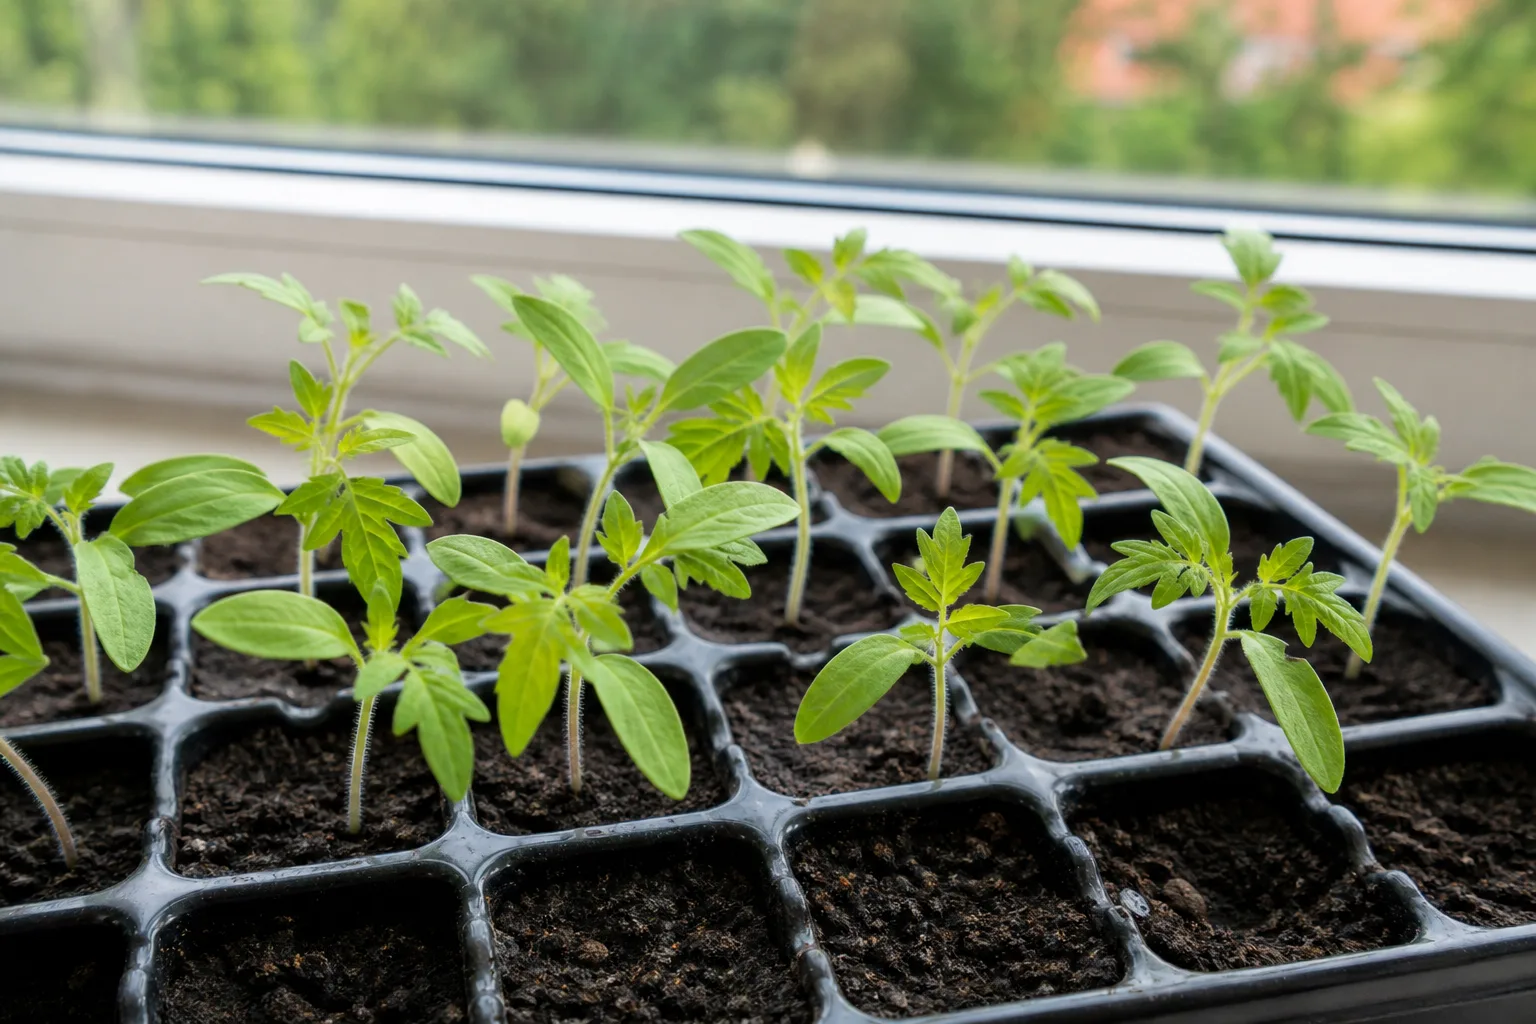
Choose a pot with drainage and enough room for the root ball, often about 3 to 4 inches wide for a first pot-up. Fill it with damp potting mix, make a hole, and set the seedling slightly deeper than it grew before. Tomatoes can form roots along a buried stem, so a leggy plant can be planted deeper, with the leaves above the surface. Do not bury the growing point or any leaves. Water gently to settle the mix around the roots.
You do not have to pot up on a particular day of the week or at a fixed height. The useful signs are true leaves, roots beginning to fill the small cell, and seedlings crowding each other. If roots are still sparse and the leaves have room, leave the plant in place and check again in a few days. Frequent repotting adds work and disturbance without helping a seedling that still has space.
Feed only when the seedlings need nutrients
Seeds carry enough stored energy for germination and the first growth of cotyledons, but the ongoing supply depends on the growing medium. Some commercial seed-starting mixes contain little or no fertilizer; many potting mixes include a starter charge. Read the bag before feeding. A seedling in a mix with fertilizer can be damaged by extra feed, while one that has formed true leaves in a nutrient-free mix may need a dilute, complete fertilizer.
Follow the fertilizer label and start conservatively. University of Maryland Extension notes that many potting mixes support seedlings for at least six weeks, while Iowa State University Extension suggests dilute feeding after true leaves appear. This difference reflects the mix, not a universal formula. If the leaves are a healthy green and the plant is growing steadily, there is no need to add a “boost.” If older leaves pale and growth stalls in a mix known to be unfertilized, a label-rate or appropriately diluted soluble feed may help.
Do not use garden fertilizer at full strength on tiny plants. Excess fertilizer can damage young roots and create salts in a small cell. Keep fertilizer off foliage and water the potting mix, not the leaves. When the seedling is moved into a richer potting mix, reassess before feeding again.
Troubleshoot slow germination and weak growth
When a tray disappoints, isolate the stage that failed. Seeds that never emerged point toward temperature, age, planting depth, or moisture. Seedlings that emerge and then stretch point toward light or crowding. A seedling that collapses at the soil line suggests damping-off, while a consistently wet mix with yellowing can indicate that roots are short of oxygen. Changing several conditions at once makes it harder to learn which correction helped.
For seeds that have not emerged after two weeks, confirm that the mix stayed damp but not flooded and that the cells were warm enough. If it was cold, move the tray to a warmer spot and wait several more days. If the packet is old or the mix dried repeatedly, sow a few fresh seeds in clean cells while leaving the original tray undisturbed. A seed packet’s date is a clue, not a guarantee that every seed is dead or viable.
Correct legginess before stems become fragile
A leggy seedling is usually reaching for light. Move the light closer within the safe distance for the fixture, increase the daily light period if it is too short, and reduce crowding so each plant receives light from above. Keep the room comfortably warm rather than hot; warmth combined with weak light encourages fast, soft growth.
Tomatoes are more forgiving of a stretched stem than many crops because buried stem tissue can form additional roots. Pot the seedling deeper at the next transplant, leaving the growing tip and leaves exposed. If the stem is already bent or very weak, support it temporarily with a small stake and correct the light source immediately. Do not try to solve legginess by watering less until the plant wilts or by brushing it hard; gentle movement can strengthen stems, but adequate light is the main fix.
Prevent damping-off with sanitation and airflow
Damping-off is not simply a seedling that looks tired. It can appear as a water-soaked, narrowed stem at the soil surface followed by sudden collapse. Poor drainage, crowded sowing, contaminated reused containers, and persistently wet mix create favorable conditions. Once seedlings collapse, they are unlikely to recover; remove affected plants and the surrounding medium, then clean the tray before reusing it.
Reduce risk before sowing: wash old containers, use fresh seed-starting mix, avoid overcrowding, remove the humidity cover after emergence, and let the surface dry slightly between waterings. A thin layer of green algae or fuzzy growth on the mix surface is a cue to improve airflow and reduce excess moisture, but it does not by itself identify a specific disease. If an entire flat has damping-off, discard the mix rather than trying to save it for another crop.
Harden tomato seedlings before they go outdoors
Indoor seedlings have not experienced direct sun, wind, or quick changes in temperature. Move them outside abruptly and leaves can scorch, stems can break, and plants can wilt even when the garden soil is damp. Hardening off is a gradual transition, not just setting pots outdoors for an afternoon.
Begin about seven to fourteen days before transplanting. On the first day, place seedlings outside in bright shade and a sheltered spot for a short period. Increase the time outside over successive days, then introduce gentle morning sun before longer exposure. Bring the plants indoors or under cover when nights are cold, wind is strong, or a frost is forecast. Water based on the pot’s moisture; do not deliberately let plants wilt as a hardening technique.
The pace should follow the weather and the plant. If leaves bleach, curl, or wilt sharply after an outing, move the tray back into shade and resume more gradually. A cloudy day still provides outdoor conditions, while a breezy sunny day can dry a small pot quickly. Keep the root ball moist and the plants protected from cold throughout the transition.
Transplant into warm soil and add support
Wait until frost danger has passed and the soil has warmed. Tomatoes may survive brief cool weather, but cold soil and chilly nights slow establishment; planting early does not necessarily win back time. The RHS advises planting young tomatoes once conditions are reliably above about 60°F, while local extension guidance is the better reference for your region’s frost and planting window. Check the forecast, not just the calendar.
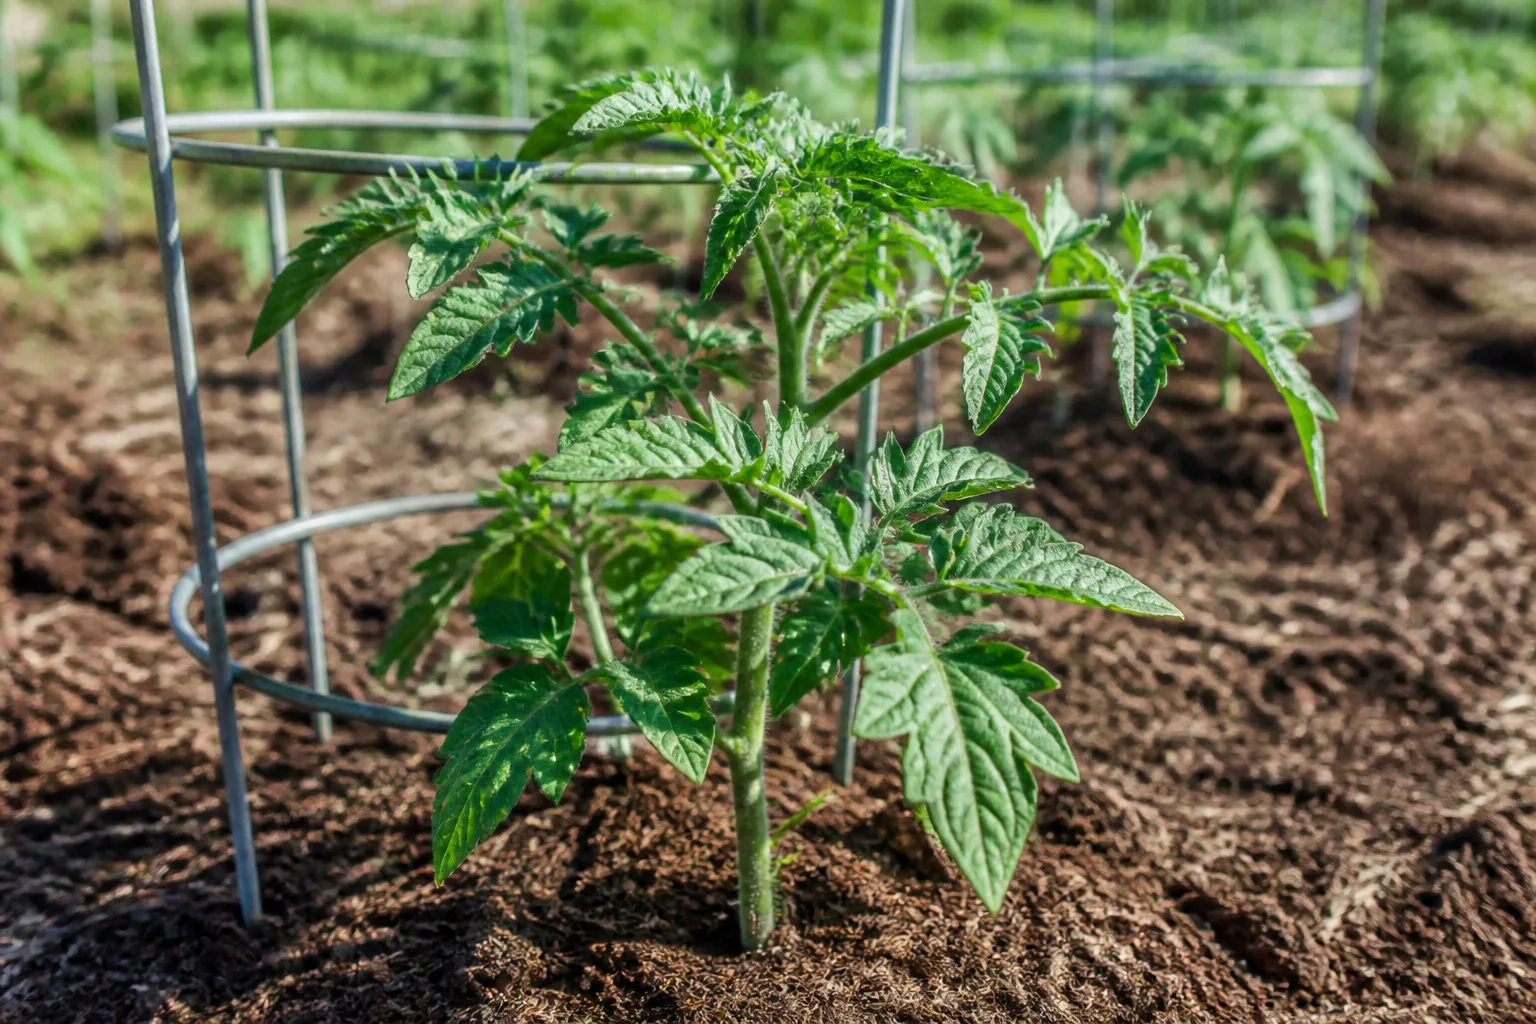
Water seedlings before transplanting. Choose a calm, overcast day or plant in late afternoon to reduce stress, and space plants according to the variety and packet directions. Set stakes or cages when you plant so you do not later drive them through established roots. Remove the lowest leaves and bury part of the stem, keeping leaves above the soil. If a plant is unusually tall, lay it in a shallow trench and gently curve its top upward; avoid snapping the stem.
After planting, firm soil around the root ball and water thoroughly. Keep the root zone evenly moist as the plant establishes, and protect a newly planted transplant from an unexpected cold snap. For a full seasonal timeline, use a region-specific guide to when to plant tomatoes. Indoor seed starting has done its job when the plant can move outside safely; outdoor warmth and consistent care take over from there.
Avoid common seed-starting mistakes
The problems below are common because they appear to save time or simplify the process. In practice, each one shifts risk onto the seedling.
- Sowing too early: Seeds started far ahead of the transplant date can become crowded, root-bound, and hard to keep compact. Count backward from when your garden will be ready, not from the first warm day indoors.
- Using a sunny window as a substitute for strong light: A window can help, but light is directional and varies by season. If stems stretch, add overhead light rather than waiting for them to become sturdier.
- Keeping a humidity dome on after emergence: The cover is useful for germination. Once seedlings are up, stagnant, humid air and wet foliage can invite problems.
- Treating a heat mat as a seedling grower: The mat warms the mix to help seeds emerge. After emergence, light, airflow, and moderate temperatures matter more.
- Watering on a schedule: A small cell under lights may dry faster than a larger pot in a cool room. Check the mix and container instead of following “every morning” advice.
- Adding fertilizer without checking the mix: Starter nutrients may already be present; excess salts can injure tender roots.
- Skipping hardening off: A healthy indoor plant is not automatically ready for outdoor sun, wind, and temperature swings.
- Planting by the frost date alone: Frost-free averages are useful, but soil warmth and the short-range forecast also matter for a heat-loving tomato.
Conclusion
The simplest reliable method is to start with the date you expect to transplant, count backward about five to eight weeks, sow into a clean, well-drained mix, and keep the seed zone warm until emergence. Then remove the cover, give seedlings bright overhead light, water when the mix begins to dry, and pot them up when true leaves and crowding make more room useful.
A tomato seedling does not need to be huge to be ready. A compact plant with a sound root ball, several true leaves, and a gradual week or two of outdoor acclimation is a better transplant than an oversized one that has spent extra weeks indoors. Let the packet, local weather, and the plant’s visible growth guide each next step.



