How to Grow Lavender From Seeds Step by Step
Grow lavender from seed with practical steps for choosing a variety, chilling seeds, preventing soggy mix, and moving seedlings outdoors safely, step by step.
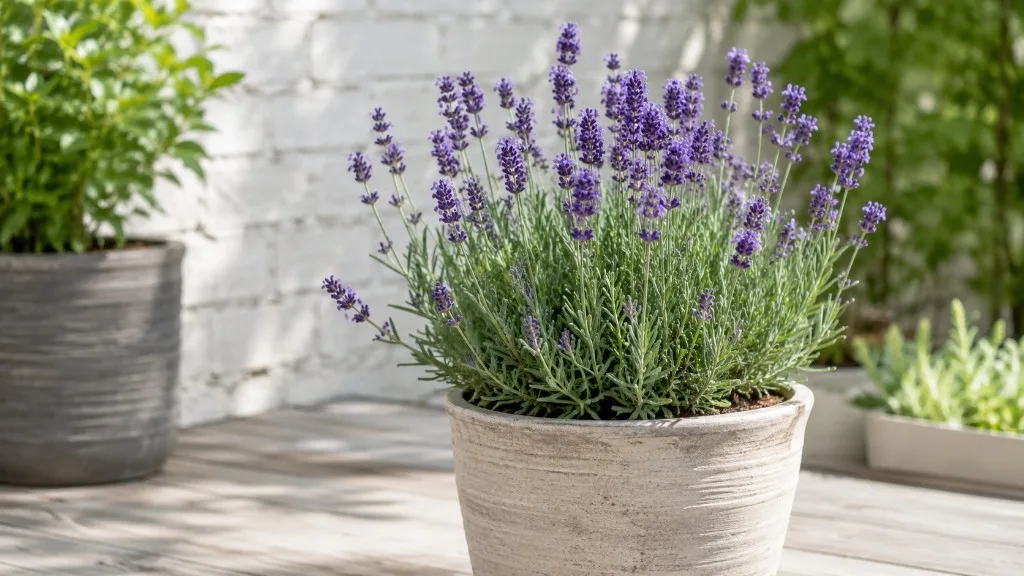
Lavender grown from seed is a patient project, not a quick way to fill a bed before summer. Seeds can take several weeks to emerge, seedlings develop slowly, and the plants may not flower well until their second season. The payoff is choice: a packet can give you many plants for a border or pollinator bed, and seed-grown varieties can introduce small differences in color, height, or habit.
For the most dependable indoor start, sow fresh lavender seed in a clean, free-draining seed mix, press it onto the surface, and cover it only lightly. Keep the mix evenly moist and warm, then move seedlings into bright light as soon as they emerge. Cold-moist stratification often helps, but it is not a universal requirement for every lavender species or seed strain; follow the packet first and treat the refrigerator method as a useful option, not a guarantee.
Decide whether seeds fit your goal
Choose seed if you want several plants, enjoy raising seedlings, or are willing to accept a slower start and some variation. A small packet may cost less than buying a group of established plants, but that saving comes with space, labeling, watering, and a longer wait before the bed looks full. If you need one matching plant in bloom this year, buy a nursery plant or take a cutting from a healthy, correctly identified parent instead.
Cuttings preserve the traits of the parent because they are vegetative copies. Seedlings come from sexual reproduction, so their characteristics depend on the seed strain and its parentage. Utah State University Extension explains that seed germination can be slow and that direct seeding is generally unreliable; most commercial lavender is started from cuttings when growers need uniform plants. That does not make seed growing a poor choice. It simply means the method fits a different goal.
Know what seed-grown plants can inherit
Read the botanical name and the seed company’s description, not just the common name printed in large type. English lavender, Lavandula angustifolia, is a common seed-starting choice, and some seed strains are selected for more uniform color or early bloom. Named plants such as ‘Munstead’ or ‘Hidcote’ may be offered as seeds, but seedlings are not automatically exact copies of a named plant; the producer should say whether its seed strain comes true or stays reasonably consistent.
If a particular flower shade, compact form, fragrance profile, or hardiness is essential, choose a vegetatively propagated plant with a known label. Our lavender propagation guide explains how to compare cuttings and other ways to multiply an established plant. A seed packet can still be worthwhile if you are happy with a family resemblance rather than a clone. Keep the packet with the tray so that you can trace an uneven result to the seed lot before blaming the growing conditions.
Choose a seed strain and plan the timeline
Start with fresh, correctly stored seed from a supplier that lists the species or seed strain and gives sowing directions. Very old seed, a packet stored in a warm shed, or seeds collected from an unidentified hybrid can make a perfectly good setup look like a failure. If you save seed from your own plants, label the mother plant and year, and expect the offspring to vary unless you know the plant reliably reproduces from seed.
Lavender is a slow-growing perennial. Utah State University Extension reports that the time from seeding to transplant can range from roughly 100 to 200 days, which is a useful caution against planning around the fastest germination estimate. Get Busy Gardening gives a common indoor-starting window of about 10 to 12 weeks before the outdoor transplant date, while Burpee’s seed-starting guidance notes seedlings need several sets of leaves before they go into their final location. These are planning references, not deadlines: a small seedling should not be pushed outside just because a calendar says spring has arrived.
Work backward from the date your area is normally safe for tender transplants. Allow time for a cold stratification period if you are using one, a few weeks for uneven germination, several weeks for true leaves and a sturdy root system, and about a week or more for hardening off. If your local spring is short, start earlier under lights; if late frosts are common, prioritize healthy size and gradual acclimation over an early planting date.
Do not mistake germination for maturity. A seed may sprout in a few weeks, but a small seedling still needs to build a root system and enough foliage to handle sun, wind, and changes in moisture. Lavender often concentrates on establishment in its first season, with the showier bloom arriving later.
Pick an indoor or outdoor starting method
Starting indoors gives you the best control over the tiny seed, surface moisture, labeling, and emerging seedlings. Use this route if spring weather is wet, windy, or unpredictable; if birds and slugs disturb exposed seed; or if you want to compare a stratified batch with untreated seed. Sow more seeds than the final number of plants you need, since emergence can be staggered and some seedlings may be weak.
Outdoor sowing can work when you have a protected, weed-free nursery space and soil that drains quickly. It asks for less equipment, but it leaves seed exposed to hard rain, crusting, drying, animals, and competition. A compromise is winter sowing in a vented outdoor container: the container shelters seed while seasonal cold provides a natural chill. In a climate with mild winters or very wet soil, controlled indoor sowing is safer.
Cold-stratify seeds in the refrigerator
Cold stratification is a period of cool, moist storage that mimics winter and can help seeds break dormancy. Get Busy Gardening recommends chilling lavender seed in moist soil for roughly three to six weeks; seed suppliers may specify a different duration or say that their strain can be sown without pretreatment. When the packet gives instructions, use those first. If it is silent and you want to improve the odds of even emergence, a four-week moist chill is a reasonable starting experiment rather than a promise that every seed will sprout.
For a small packet, sprinkle seeds between two clean, barely damp paper towels or mix them into a spoonful of damp sterile seed-starting medium. The material should feel moist when touched but should not drip when squeezed. Seal it in a labeled food-safe bag or container, place it in the refrigerator—not the freezer—and check it weekly for drying, excess water, or mold.
If a seed has begun to send out a root in the bag, plant it promptly with the root facing down and handle it by the seed coat, not the fragile root. If you see a small patch of surface mold on the towel but the seeds look firm, replace the towel and reduce excess moisture; slimy, soft, or heavily moldy seeds are better discarded. Do not open and rewet the bag every day, because repeated handling increases contamination and makes it harder to keep moisture steady.
Stratification is optional for some strains, and the evidence gardeners encounter is not perfectly uniform. Utah State’s home-garden guidance emphasizes warm, shallow sowing and reports emergence in about two to three weeks, while experienced seed-starting writers often recommend a preceding moist chill for better or more even germination. That difference is a reason to honor the seed supplier’s directions and keep a small untreated control batch if you have enough seed—not to assume one method is right for every species.
Direct-sow or winter-sow where conditions fit
For direct sowing, use a site that drains freely and will stay free of weeds while seedlings are small. Sow in spring after the worst freeze-and-thaw swings, or in fall where the bed is sheltered, well drained, and winters are cold enough to provide natural stratification without prolonged waterlogging. The seed is small, so do not scatter it over rough mulch or compacted ground and expect it to establish.
Rake the surface smooth, water it lightly before sowing, and press seeds into the top layer so they make contact with soil. Cover with a dusting of fine mix, sand, or vermiculite only if needed to keep the seed from washing away; a deep blanket blocks light and slows emergence. Mark the row clearly, protect it from heavy rain and animals with fine mesh if necessary, and keep the surface from drying completely until seedlings appear.
Winter sowing offers a useful middle path in places with a genuine cold season. Fill a clean container with drainage holes with damp seed-starting mix, sow the seed shallowly, and cover it with a transparent lid that can be vented. Place the container outside in a sheltered spot, not a heated garage, and inspect moisture during dry spells; the point is natural seasonal conditions, not an enclosed swamp.
Sow lavender seeds indoors

Use a clean cell tray or shallow pot with drainage holes and a sterile, fine-textured seed-starting mix. A loose mix gives very small roots air and makes it easier to keep moisture even; heavy garden soil or rich, compost-laden potting soil tends to stay wet and can crust at the surface. Moisten the mix before filling the cells, then let extra water drain so it feels damp but not muddy.
Sprinkle several seeds on the surface of each cell or small pot, leaving enough space to separate seedlings later. Press them gently against the mix with a fingertip or the flat end of a label. Lavender seed benefits from exposure to light during germination, so cover with no more than a very thin layer of fine vermiculite or mix—about 1/8 inch at most—rather than burying it in a deep furrow. Utah State University Extension gives a similarly shallow sowing depth and recommends warm conditions around 70°F.
Mist with a fine spray or water from below until the surface is moist. A clear humidity dome can slow drying before emergence, but it should not trap condensation so heavily that water drips onto the mix all day. Leave a small vent open or lift the cover briefly once a day; remove it when the first seedlings appear. If you use a heat mat, keep it at a modest setting and measure the mix temperature if possible. More heat is not better if the tray dries out or sits above the range on the seed packet.
Set the tray in a warm, bright place. During germination, bright indirect light is enough if the seeds stay exposed; once seedlings emerge, a grow light becomes more reliable than a winter windowsill. Keep the light close enough to prevent stretching but follow the fixture’s directions to avoid overheating or scorching leaves. A simple setup log with sowing date, treatment, room temperature, and first-emergence date helps you tell a slow batch from a failed one.
Set expectations for germination
Many lavender seeds emerge in about two to four weeks under suitable conditions, but a few seedlings may appear earlier while others lag behind. Utah State University Extension reports germination beginning in roughly 14 to 21 days at a soil temperature near 70°F; Get Busy Gardening gives a broader 14-to-30-day range and notes that emergence may be uneven. Treat these intervals as observation windows, not a warranty. Continue to check a healthy tray for several weeks rather than dumping it the moment the first cell stays empty.
Look for tiny paired cotyledons at first; they are rounded and do not yet have the narrow, familiar lavender shape. The first true leaves emerge afterward and start to look like miniature gray-green foliage. That transition is a better cue for seedling care than trying to identify the plant from cotyledons alone.
Do not keep a tray sealed and soaking because you are waiting for a seed to meet a date on a chart. Check the surface each day: if it is still dark and moist, leave it alone; if it has begun to lighten and dry, mist lightly. A consistently wet medium deprives new roots of air and gives damping-off organisms the conditions they need. Good drainage plus gentle, even moisture beats a daily flood.
Care for seedlings after they emerge
Remove the humidity cover once germination starts, then provide strong light for about 12 to 16 hours a day, depending on the fixture and room conditions. A south-facing window can work in bright spring weather, but seedlings often lean and stretch in a dim room or short winter day. If stems grow long and weak, bring the light closer within the manufacturer’s safe distance, increase the daily light period, and rotate the tray if light comes from one side.
Water seedlings at the root zone rather than spraying their foliage repeatedly. Let the surface begin to dry between waterings, but do not let the small plugs shrink completely away from the tray. Bottom watering works well: set the tray in a shallow basin for several minutes, then lift it out and let every cell drain. Never leave the tray standing in water after the mix has absorbed what it needs.
Lavender does not need a rich diet to grow. Avoid fertilizing during germination, and do not respond to slow growth by adding a strong dose of fertilizer; first check the light, temperature, root health, and drainage. Once a seedling has several true leaves and has been growing steadily, a weak, balanced feed is an option in a nearly inert mix, but it is not a substitute for good light or careful watering.
Thin seedlings and pot them up at the right stage

If several seeds sprout in one cell, wait until the seedlings have at least one or two sets of true leaves, then keep the strongest plant. Snip the extras at soil level with clean scissors instead of pulling them out; tugging can loosen the roots of the seedling you want to preserve. Leave room for airflow as the leaves expand.
Pot up when roots hold the small plug together or begin to show at a drainage hole, not simply because a seedling has reached an arbitrary height. Move each plant into a small individual pot filled with a free-draining mix, set it at the same depth it grew before, and water just enough to settle the mix around its roots. A pot that is far larger than the root ball holds extra wet soil the plant cannot use yet, so increase container size gradually.
Keep newly potted seedlings in bright light and shelter them from harsh midday sun for several days. If a plant wilts once after potting, check that the mix is evenly damp and give it a day out of direct heat; do not keep adding water to a pot that is already wet. Small plants recover best when their roots stay intact and the new mix can drain.
Harden off and transplant without a setback
Indoor-grown lavender needs time to adjust to direct sun, wind, cooler nights, and faster drying. Begin hardening off after seedlings are sturdy and local frost risk is low: put them outside in bright shade for a short period, then increase the time and sun exposure over about seven to ten days. Bring them back in during damaging wind, cold snaps, or heavy rain. A gradual transition is less dramatic than moving a soft seedling straight from a shelf into all-day sun.
Transplant after the local frost danger has passed and the seedlings have developed several sets of true leaves with roots that hold the plug together. Choose a calm, mild day and water the tray beforehand so the plugs slide out intact. Set each seedling at the same depth it occupied in the pot, firm the soil gently, and water once to settle it. Then monitor moisture while roots establish; do not keep the bed saturated in the name of “helping” it settle.
Space plants according to the mature size on the packet, leaving enough room for air to pass between them. Utah State University Extension lists 18 to 24 inches as a useful range for many English lavender plantings, though compact strains and larger types differ. If you are unsure, allow more space rather than trying to squeeze a mature shrub into a dense ribbon. Good airflow helps foliage dry after rain and gives each plant room to branch.
Choose a sunny, fast-draining final site

For a lasting lavender planting, choose a location with full sun and soil that sheds water rather than staying heavy and wet. Lavender tolerates dry conditions after establishment, but roots need oxygen; a low spot that collects runoff is a poor site even if it receives excellent afternoon light. In rainy climates or clay soil, consider a raised bed, a broad mound, or a large container with generous drainage holes instead of digging a small planting hole that becomes a sump.
Utah State University Extension describes English lavender as performing well in dry, sandy, well-drained soil and lists a soil pH range around 6.5 to 7.5. The exact ideal varies with soil and cultivar, so test before changing pH; adding lime by guess can create a new nutrient problem. If a soil test indicates a correction, follow the lab’s rate for your soil rather than a generic “lavender likes alkaline soil” recipe.
Do not make the planting mix excessively rich. In a garden bed, improve drainage with site design and avoid adding a pocket of fine potting mix to a hole surrounded by dense clay, because water can collect at the boundary. In a pot, choose a container with unobstructed drainage and a gritty, airy mix made for outdoor containers; terracotta can dry quickly and be useful in wet climates, but it also needs closer checks during hot, windy weather.
Water more often while a young plant is establishing than you will once it is mature. After planting, check the soil a finger-depth below the surface and water when it is beginning to dry rather than following a fixed weekly schedule. Once the roots spread into the bed, deep, occasional watering is usually safer than frequent shallow soaking. The best interval changes with rainfall, heat, soil texture, and container size.
Troubleshoot slow or failed germination
Before re-sowing, inspect the whole process in order: seed identity and age, chilling instructions, depth, temperature, moisture, and the condition of the medium. One missed condition is enough to produce few seedlings, but several problems can look similar from above. A useful diagnosis starts with what you can observe, not with a fertilizer or additive.
| What you see | Likely condition to check | Next step |
|---|---|---|
| No sprouts after two weeks | Too early to call it a failure; lavender can be slow or staggered | Keep the mix lightly moist and wait several more weeks |
| No sprouts after four to six weeks | Seed may be old, buried too deeply, too cool, or untreated when stratification would help | Check packet and temperature; surface-sow a fresh small batch with the recommended treatment |
| White fuzz on mix or seeds | Surface staying wet, stale air, or contaminated tools/mix | Remove affected debris, increase airflow, reduce watering, and start a clean batch if seeds are soft |
| Seedlings fall over at soil level | Damping off is possible, often encouraged by persistent wetness and poor airflow | Remove collapsed seedlings, empty standing water, improve drainage and air movement |
| Long, pale, leaning stems | Not enough light or light too far away | Move a suitable grow light closer and keep it on a consistent schedule |
| Seeds emerge and then disappear | Seeds may have been washed, uncovered, or disturbed | Bottom-water, cover the tray against splashes, and press fresh seed onto the surface |
If nothing has emerged after four to six weeks, resist changing every condition at once. Compare a fresh small batch with the old tray: use one labeled group with the packet’s specified cold treatment and one without only if the packet permits that comparison. Keep temperature, mix, and watering the same so you can learn whether chilling or seed quality made the difference. If both groups fail, use a fresh packet and inspect the drainage setup before repeating the entire tray.
Plan for the first growing season and bloom
After transplanting, lavender may put most of its energy into roots and compact foliage rather than flowers. Some seed strains can produce a few blooms in the first year under favorable conditions, but it is more realistic to expect a stronger display in the second growing season. A small or late-planted seedling should be allowed to establish rather than pushed to bloom with extra fertilizer.
In its first season, keep weeds from crowding the young plant and water when the root zone is drying, not every time the surface looks dusty. Do not prune a tiny seedling as if it were a mature lavender shrub; remove broken growth and let it build its framework. If flower buds appear on a very small plant, removing some or all of them is a reasonable way to favor establishment, especially where winter is close.
As the plants mature, assess them by their real growth rather than by the picture on the packet. Seedlings from one sowing can differ in height, bloom timing, and color. Keep the ones that suit your site and label them; if a particular seedling is especially good and you want exact duplicates, propagate it later from a cutting rather than collecting seed and expecting the offspring to match.
Conclusion
To grow lavender from seeds successfully, start with a known, fresh seed strain and treat germination as a slow, variable process. Use a shallow sowing depth, a clean mix that drains, steady warmth, and careful moisture; add a refrigerator chill when the packet or your experience supports it. After emergence, bright light, airflow, restrained watering, and gradual potting-up matter more than fertilizer or constant attention.
The safest route from tray to garden is to wait for several true leaves and a root system that holds together, harden seedlings off gradually, and transplant after frost into full sun and fast-draining soil. Seeds reward patience and can produce several plants at once, while cuttings are a better fit when you want a quick, uniform copy. Plan around the plant in front of you, not a promised number of days, and lavender’s slow start becomes much easier to manage.