How to Compost in an Apartment: 4 Practical Methods
Learn how to compost in an apartment with worms, Bokashi, or city collection. Choose a method, prevent odor and pests, and plan where finished material goes.

Apartment composting works when the system matches both your kitchen scraps and the place those scraps will go next. A countertop container only stores waste; a worm bin processes vegetable scraps into castings; Bokashi ferments a wider range of food but produces pre-compost that still needs soil or another finishing step. Choosing that end point first prevents the most frustrating outcome: a tidy bucket full of material you cannot use or transfer.
You do not need a backyard to keep food scraps out of the trash. You do need a leak-resistant container, a short routine, and a realistic destination—houseplants, a balcony planter, a community garden, a building compost program, or a municipal drop-off that accepts your material.
Start with the destination, not the bin
Before you buy a container, decide whether you want to make compost at home or simply collect scraps for a service. If your building has a food-scrap cart, neighborhood drop-off, or garden collection point, a small lidded caddy may be all you need. That route has the lowest maintenance and avoids keeping active decomposition in a kitchen.
If you want to process scraps yourself, decide where the finished material will go. Worm castings can be blended into potting mix or used as a thin top-dressing for plants. Bokashi needs soil, a compost pile, or a compatible collection destination after fermentation. A small aerobic bin also needs time and room to finish, so it is not automatically the easiest choice just because a plastic tote is inexpensive.
Check the rules before using a balcony, shared laundry room, hallway, or community garden. A lease or building policy may restrict stored organic waste, outdoor containers, or liquid drainage. Even when composting is allowed, keeping a tray under a bin and using a sealed transport tub can prevent stains, leaks, and neighbor complaints.
Choose a method that fits your scraps and space
There is no single best apartment composter. The right option depends on whether you want to handle meat and dairy, how much time you can spend on maintenance, how much space you can spare, and whether you can finish the material after the first stage.
A compact method comparison
| Method | Best fit | What it accepts | What comes out | Main trade-off |
|---|---|---|---|---|
| Worm bin | A resident who wants finished amendment for plants | Mostly fruit and vegetable scraps, coffee grounds, and similar plant foods | Worm castings and partly decomposed bedding | Needs living worms, air, bedding, and restrained feeding |
| Bokashi | A small kitchen where a sealed bucket is valuable | A wider range, including cooked foods, meat, and dairy when the system is managed correctly | Fermented pre-compost, not finished compost | Needs bran, drainage, and a soil or compost finishing step |
| Small aerobic bin | A balcony or other ventilated, spill-safe area | Plant scraps mixed with dry carbon material | Compost after enough aeration and curing | Can smell or attract pests if too wet, too compact, or under-aerated |
| Collection caddy | A building or municipal organics program | Only the materials on that program’s accepted list | No home-made compost | Requires regular transfer and checking local rules |
Worm bins and Bokashi solve different problems. Cornell’s worm-bin guidance describes a system that needs moisture, air, food, darkness, and warm—not hot—conditions. Washington State University Extension describes Bokashi as sealed anaerobic fermentation whose output must be buried or otherwise finished in soil or another compost system. Those differences matter more than the shape or color of the bucket.
Some electric countertop “composters” grind and dry scraps quickly, but a dry, soil-like product is not necessarily biologically finished compost. Read the device manual and treat the output as a processed amendment unless the manufacturer explains a curing step and its intended use. Gardening Know How’s overview of indoor methods also separates countertop collection, electric processing, worm bins, and DIY aerobic bins—four tools with different end points.
Why a worm bin works in many apartments
Vermicomposting uses composting worms and microbes to turn a controlled amount of food scraps into dark, crumbly castings. A bin can fit in a closet, utility area, or shaded balcony, and a properly balanced one should smell earthy rather than rotten. It is a strong choice if you mainly generate vegetable scraps and want a modest supply of amendment for container plants.
Worm bins are not miniature garbage disposals: worms process food at a limited rate, and too much wet food can heat, compact, or sour bedding. Start with a small feeding and observe what disappears before adding more.
Choose a shallow, opaque container with a lid that limits light but still permits airflow. Cornell describes a five- to ten-gallon classroom bin and notes that red wigglers are surface dwellers; the exact volume for an apartment should follow the amount of scraps you produce and the bin’s instructions. Match bin volume to the scraps you generate each week.
Red wigglers, often sold for vermicomposting as Eisenia fetida, are more suitable for bins than ordinary earthworms dug from a garden. Buy composting worms from a reputable local source or worm supplier, and ask how many the container is designed to support. Do not collect random outdoor earthworms and expect them to thrive in a shallow indoor bin.
Set up a worm bin without creating a mess
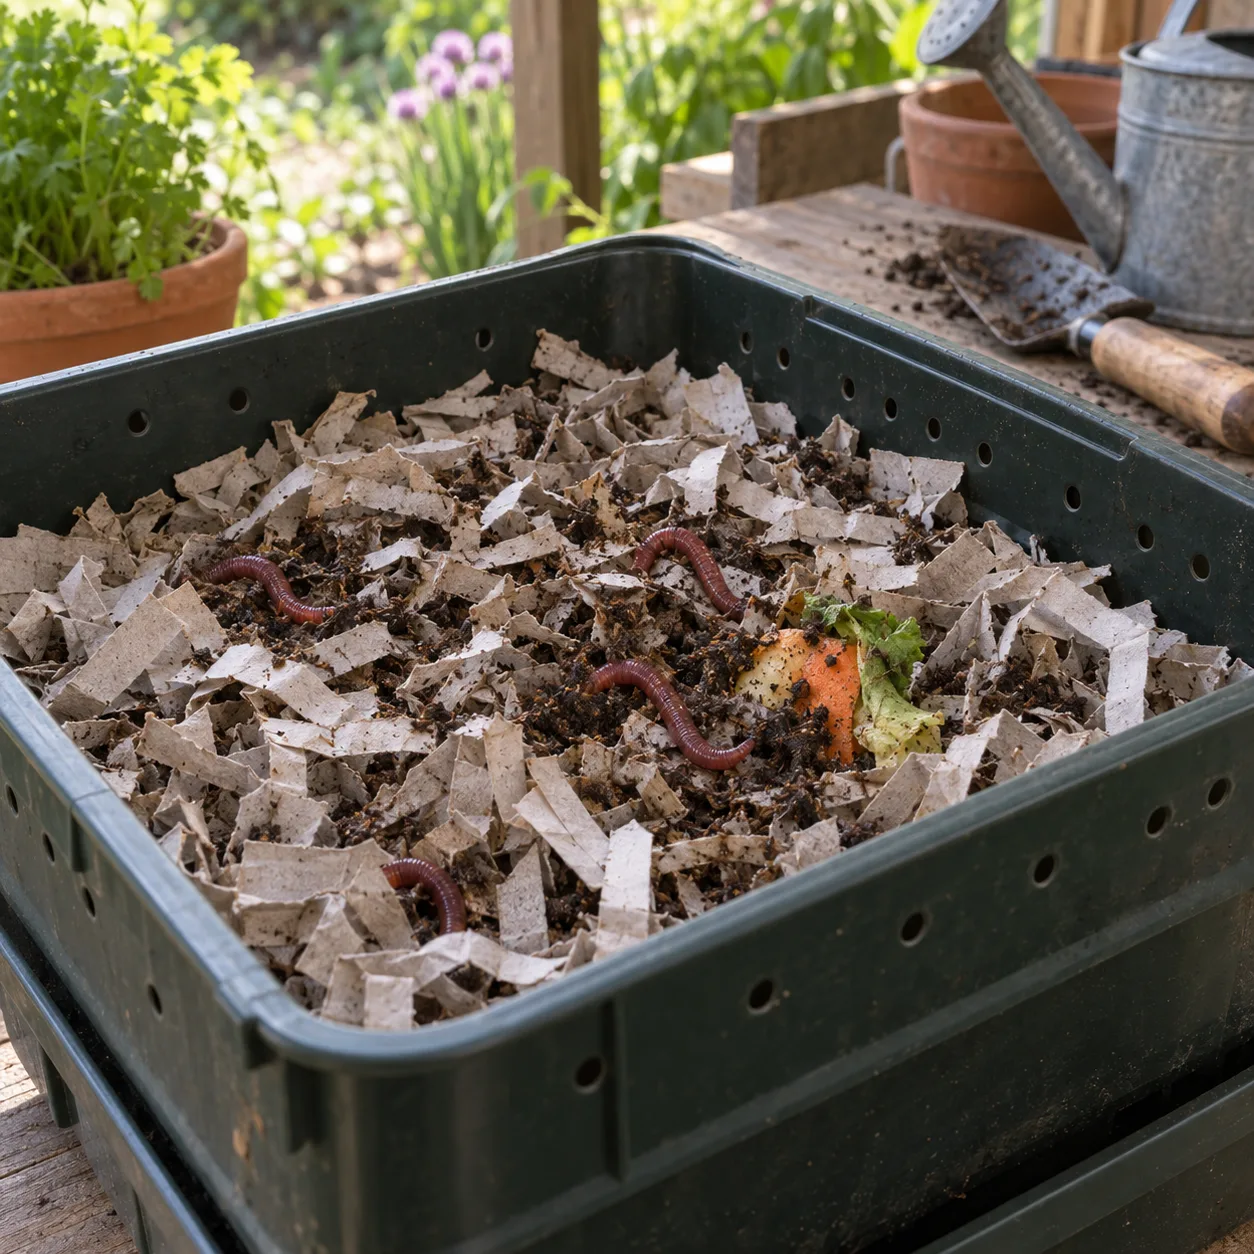
Set up a worm bin with breathable bedding, a protected floor, a small starter feeding, and a spot away from direct sun and hot drafts. A purpose-built tiered system or clean plastic tote can work; prioritize easy access for feeding and harvesting.
Prepare bedding, air, and a spill-safe location
Shred plain cardboard or uncoated newspaper into strips and moisten them until they feel like a wrung-out sponge. The material should hold moisture without dripping when squeezed. Fluff it rather than packing it down, because air gaps support the organisms in the bin and make it easier for worms to move.
Use a shallow bedding layer as the base, then add the worms and a small amount of chopped produce. Cornell’s setup instructions recommend moist newspaper strips, a small amount of soil for grit and microorganisms, scraps buried under bedding, and a loose cover that allows air. Follow the directions for your particular bin if they differ, especially about drainage holes and trays.
Place the bin where the temperature is steady and the container will not bake in sun or sit against a radiator. A utility closet or shaded corner is often better than a cupboard that traps heat or shares space with strong cleaners. Put a waterproof tray under the bin and leave enough room to inspect it without tipping or dragging it across the floor.
Feed slowly and watch the bin, not the calendar
Begin with a small pocket of chopped fruit and vegetable scraps, cover it fully with bedding, and wait until that pocket is mostly consumed before adding more. Bury each feeding in a different corner. This makes it easy to see whether the worms are keeping pace and keeps exposed food from becoming an invitation to flies.
Suitable starter foods include vegetable peels, soft fruit scraps, coffee grounds in modest amounts, tea leaves, and crushed eggshells. Cornell advises avoiding meat, oils, and dairy in a classroom worm bin and limiting citrus; it also notes that some pungent items can smell strong. For a small indoor setup, keep oily cooked leftovers, meat, bones, dairy, salty foods, and large amounts of citrus, onion, or garlic out of the worm bin.
Cutting scraps smaller increases the surface available to decomposers, but do not puree them. A thick wet paste compacts bedding and can turn sour. If you cook in batches, freeze excess scraps and feed a little at a time rather than burying a week of chopped leftovers in one pocket.
The Cornell Waste Management Institute’s worm-bin steps recommend covering food with bedding and using a dry newspaper layer as a barrier against odor and fruit flies. In practice, the goal is simple: every scrap should disappear beneath moist bedding, with a dry, fluffy surface that does not look or feel like a saturated sponge.
Use Bokashi when you need a sealed, broader-scrap system
Bokashi is a compact choice when a renter wants to keep a sealed bucket indoors or compost a wider range of kitchen leftovers than a worm bin can handle. The method uses an inoculated bran or similar starter and an airtight container to ferment food with limited oxygen. It is not conventional aerobic composting and it does not turn scraps into finished soil inside the bucket.
Because the bucket seals, it can be convenient under a sink or in a pantry. The lid and gasket need to close properly, and a bucket with a drain or nested collection vessel makes liquid easier to manage. If you use a DIY container, test the seal and leakage over a sink before putting it in a cabinet.
Ferment first, then finish the material
Add scraps in manageable layers, sprinkle the amount of Bokashi bran specified by the product, press out excess air, and close the lid promptly. Drain liquid when the system calls for it and keep the rim clean so the lid can seal. Washington State University Extension’s Bokashi instructions describe fermentation for roughly two weeks after the bucket is full; the material remains recognizable and must continue breaking down after fermentation.
A successful bucket may smell sour or pickled when opened briefly. A putrid, sulfurous smell suggests the process has gone off track, often because the lid leaks, liquid accumulates, or the starter was not used as directed. Do not hide a bad smell under a thicker lid; inspect the seal, drain as the system instructs, and discard a failed batch according to local waste rules if it cannot be corrected. A practical Savvy Gardening Bokashi walkthrough likewise emphasizes an airtight bucket, fresh inoculant with each layer, and compacting scraps to reduce trapped air.
After fermentation, finish the material in a soil-filled tote, bury it in an appropriate garden bed, or mix it into an existing compost pile. For a no-yard resident, WSU describes a holding-bin approach that mixes one part Bokashi material with about three parts soil or finished compost and lets it sit for several weeks. Keep the tote closed enough to deter pests but not waterlogged, and do not plant into fresh Bokashi material.
If you have no outdoor soil or large tote, contact a community garden or compost program before buying a bucket. Ask whether it accepts fermented Bokashi; some programs accept ordinary food scraps but not a batch that has already been fermented. Our Bokashi composting guide covers the process in more detail, but the decision rule is the same: arrange the second step first.
Drain liquid carefully and follow the bin maker’s directions. Bokashi leachate varies with food and moisture, so do not assume every batch is a dependable plant fertilizer or apply it undiluted to roots. If your system supplies a dilution guide, use it conservatively; otherwise dispose of it according to local wastewater guidance rather than saving a jar of unidentified liquid for houseplants.
When small-scale aerobic composting makes sense
Traditional aerobic composting depends on oxygen, moisture, and a mix of nitrogen-rich “greens” and carbon-rich “browns.” A small tote can begin this process, but it may not build or retain the heat of a larger outdoor pile. In an apartment, think of a DIY aerobic bin as a slower, more hands-on project for a ventilated balcony or shared garden—not as a sealed box to hide under a kitchen counter.
For a balcony bin, layer plant scraps with dry shredded cardboard, paper, or dry leaves, keep the mixture damp rather than wet, and stir it periodically so air reaches the center. Use a lid that sheds rain but does not make the system airtight. Add dry browns when the bin becomes dense or wet; add a modest amount of water only if the material is dry throughout.
Avoid adding meat, fish, dairy, grease, or heavily sauced leftovers to a small open system. Those foods can create strong odors and attract insects or rodents before a compact bin can break them down. If the balcony is shared, exposed to rain, or directly above a neighbor’s space, a worm bin or a collection service is usually easier to manage.
The reward for aerobic composting is that the bin can handle plant scraps and dry carbon material together, but it takes room and patience. The contents are ready only when the mixture is dark, crumbly, and mostly unrecognizable, with no strong sour or rotting odor. A browned pile of food fragments is not automatically finished compost.
Use a countertop caddy or municipal collection system
A countertop caddy is a collection point, not a composting system. It lets you gather food scraps in one place until you empty them into a worm bin, Bokashi bucket, building organics cart, or municipal drop-off. This is often the best low-effort option if your city or building already collects food scraps.
Choose a container that is easy to wash and has a lid that fits securely. A removable inner pail, smooth corners, and a handle make daily emptying simpler than a vessel with narrow seams that trap liquid. Empty it regularly; in a warm kitchen, waiting until the container is packed can turn a collection step into an odor problem.
If you do not want scraps on the counter, keep them in a sealed container in the refrigerator or freezer until the next collection day. Freezing slows decomposition and is useful for a small household that fills a caddy slowly. Before using a curbside or shared bin, check the program’s current accepted list for items such as meat, dairy, compostable packaging, tea bags, and paper towels; the rules differ by location.
Many programs provide the easiest path for residents who cannot store a worm bin or finish Bokashi. Check your city sanitation department, building manager, farmers market, or community garden for a neighborhood drop-off. Carry scraps in a lidded pail or washable bag, and rinse the container after each trip so residue does not build up.
Keep odor under control by fixing the cause
A balanced worm bin should smell like damp earth. Bokashi has a sour, fermented smell when the lid is opened, while a collection caddy should smell only faintly of food if it is emptied and washed routinely. A strong rotten, sewage-like, or ammonia smell means the system needs attention; adding fragrance or a tighter seal only conceals the clue.
In an aerobic bin, a rotten-egg odor often points to excess moisture and too little oxygen. Open the lid in a safe outdoor spot, turn the contents, and blend in dry cardboard or leaves until the texture loosens. If the bin is dripping, stop adding wet scraps until it drains and air returns.
In a worm bin, first check whether food is buried, whether the bedding is soggy, and whether too much food is left in one area. Remove obvious excess food, mix in dry bedding, and pause feeding until the smell improves. Do not add meat, oil, or a “compost accelerator” to fix a sour bin; the problem is usually balance and air, not a lack of ingredients.
For Bokashi, check the gasket and drain, then follow the starter product’s instructions. A sealed bucket is meant to exclude air, so opening it repeatedly to inspect the contents works against the process. The system should not smell like a conventional open compost pile, but it can smell pickled when opened.
Prevent fruit flies and other pests
Most fruit-fly problems begin with exposed ripe scraps, residue on the lid, or a wet caddy left in a warm room. Keep a small brush or cloth near the bin and wipe the rim after opening. In a worm bin, bury the feeding under bedding and cover the surface with a dry sheet of newspaper or torn cardboard.
If flies appear, stop adding food for several days, remove any surface scraps, and replace the wet top layer with dry bedding. A fine mesh over ventilation openings can help keep insects out while allowing air to move, provided it does not block the bin’s airflow. Empty and wash the caddy or drip tray, including the hinge and gasket where food residue collects.
Do not spray insecticide into a worm or compost bin. That can harm the worms and the organisms that do the processing, and it does not remove the food source attracting flies. Keep ripe fruit covered in the kitchen, rinse containers before recycling them, and seal household trash if there is a pest issue elsewhere in the apartment.
Rodents or cockroaches warrant a check of access and contents: keep lids fitted, avoid animal products in open systems, clean drips, and keep Bokashi scraps covered. If pests persist, stop feeding until the source is fixed.
Balance moisture, airflow, and temperature
Worm bedding should feel like a wrung-out sponge: evenly moist but not wet enough to drip. If it is dry and dusty, mist it lightly and mix the bedding; if it is slick or clumped, add dry strips and fluff it. A tray can catch small leaks, but it should not become a reservoir of standing liquid.
Worms need air and darkness, so a worm bin should not be made airtight. Cornell’s guidance recommends a loose-fitting cover and keeping the bin away from windows and heaters. Air holes may be useful in a DIY tote, but avoid openings large enough for flies to enter and protect any holes that could drip onto a shelf or floor.
Bokashi requires the opposite atmosphere: a tight seal and as little air as practical. If a household needs two systems, do not use one container for both methods or copy the ventilation design from a worm bin into the fermentation bucket. A worm’s habitat and a Bokashi ferment are different environments.
Temperature stability matters more than finding an exact “perfect” corner. Keep worms out of direct sun and away from heating vents, stoves, and cold drafts; a room that feels comfortable to people is usually a better starting point than a balcony that swings from hot afternoons to chilly nights. Fermentation and decomposition slow when conditions are cold, so allow extra time rather than adding more waste to force activity.
Troubleshoot a bin that is wet, slow, or attracting flies
When a worm bin is wet, add dry bedding in small handfuls and open compacted pockets so air can circulate. If excess liquid has collected in a tray, drain and wash the tray; do not pour strong-smelling leachate onto a houseplant and call it compost tea. Resume feeding only after the bedding has returned to a loose, damp texture.
When scraps remain untouched, stop adding new food and check the temperature, moisture, and quantity already in the bin. Worms may be adjusting after transport, the food may be too large, or the system may be too cold, hot, or wet. Cut the next feeding smaller and place it in one new pocket rather than distributing fresh scraps across the entire bin.
When fruit flies appear, remove food from the surface, cover the scraps with bedding, replace a wet top layer, and clean nearby surfaces. If the bin is consistently infested, inspect the lid and air openings. A bin that is properly covered and not overfed is easier to correct than one where food scraps have been exposed for weeks.
When Bokashi smells foul instead of sour, look for a failed seal, standing liquid, or too little bran. Follow the product’s rescue instructions; if the batch is slimy, heavily contaminated, or persistently putrid, do not bury it next to plants or put it into a living worm bin. Dispose of it under local waste rules and clean the bucket before starting again.
Finish and use the material safely
Worm castings are ready when much of the original bedding and food is dark, fine, and crumbly. Cornell’s material describes harvest after roughly three to five months in its classroom setup; a household bin may be faster or slower depending on the worms, feed rate, bin design, and temperature. Use texture and the amount of recognizable food as a better guide than a date printed on a kit.
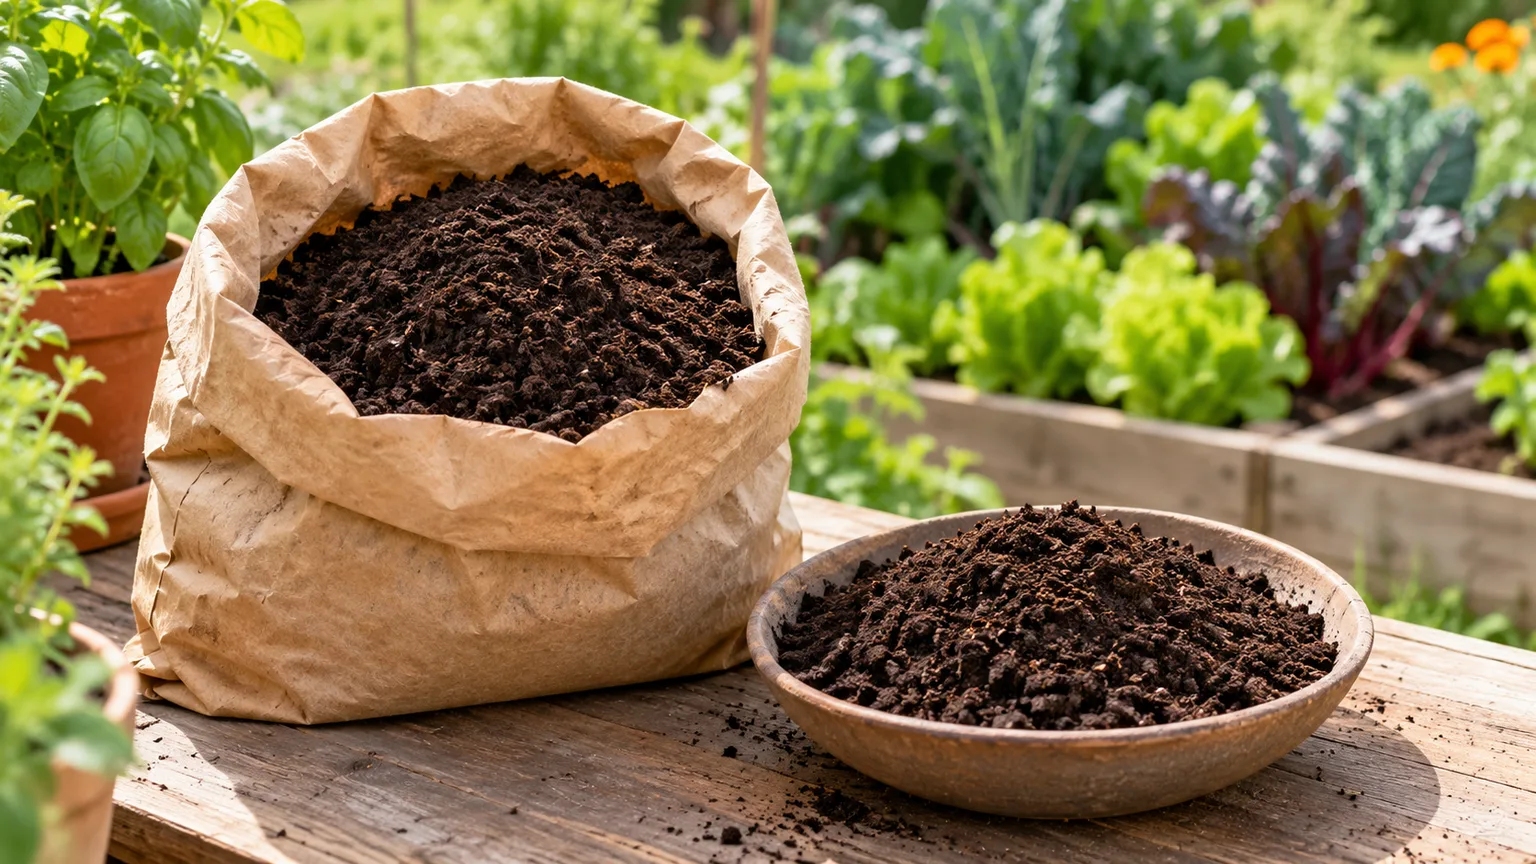
To harvest a small bin, stop feeding one side and add fresh bedding and food to the other. As worms move toward the fresh side, remove the finished material from the old side over the next couple of weeks. Pick out large recognizable scraps and return them to the bin rather than mixing them into houseplant pots.
Blend a modest amount of finished castings into an existing potting mix or spread a thin layer over the soil surface. Do not use a bucket of castings as a complete replacement for potting mix; container plants still need a stable structure that drains and holds air. For seedlings or plants sensitive to salts, start with a small amount and observe new growth rather than applying a heavy layer at once.
Bokashi is different. The fermented contents may still resemble food, and WSU Extension recommends mixing them into soil or another compost system so they can finish decomposing. In a large soil tote, mix the fermented scraps through the soil, keep the blend slightly moist, and wait several weeks before using it; do not plant directly into a fresh pocket of Bokashi.
Build an apartment-friendly weekly routine
Choose one collection spot near where you prepare food and a second, washable container for carrying scraps. After cooking, scrape only the accepted ingredients into the system, wipe the lid and rim, and cover exposed food. Those small actions take less time than cleaning a leaking cabinet or trying to recover an overfed bin.
Once a week, inspect the bin instead of adding food automatically. For worms, check whether the last pocket is mostly gone, whether bedding is still loose, and whether the tray is dry. For Bokashi, check the seal and drain only as the bucket instructions require; for aerobic compost, check whether the mixture is damp and airy enough to turn.
When traveling, pause worm feeding rather than leaving a large pile of scraps for the worms. They can tolerate a short period without new food more safely than an overfed bin that becomes hot or sour. For a collection caddy, freeze scraps until you return or arrange for someone to empty the container into the correct program.
Start with one system for a month before adding another. If it stays clean and fits your cooking routine, increase capacity only when you can identify a real need. If it does not, change the method or use municipal collection; apartment composting should reduce household friction, not add a permanent maintenance project.
Conclusion
The easiest way to compost in an apartment is to choose the destination first, then match a method to your scraps. Use a worm bin for steady vegetable scraps and plant amendment, Bokashi for a sealed system that can ferment a broader range of foods, a ventilated aerobic bin only when you have a safe place to finish it, or a caddy when a city or building program does the processing.
Odor and pests are usually preventable when food is covered, moisture is balanced, containers are cleaned, and each system gets the conditions it needs. Start small, observe what happens, and make a clear plan for the finished material. That is what turns an apartment compost bin from a kitchen experiment into a routine you can keep.



