How to Grow Shallots: Planting to Harvest
Grow shallots in a bed or pot with the right spacing, moisture, and timing. See when to harvest, how to cure bulbs, and which problems to prevent.
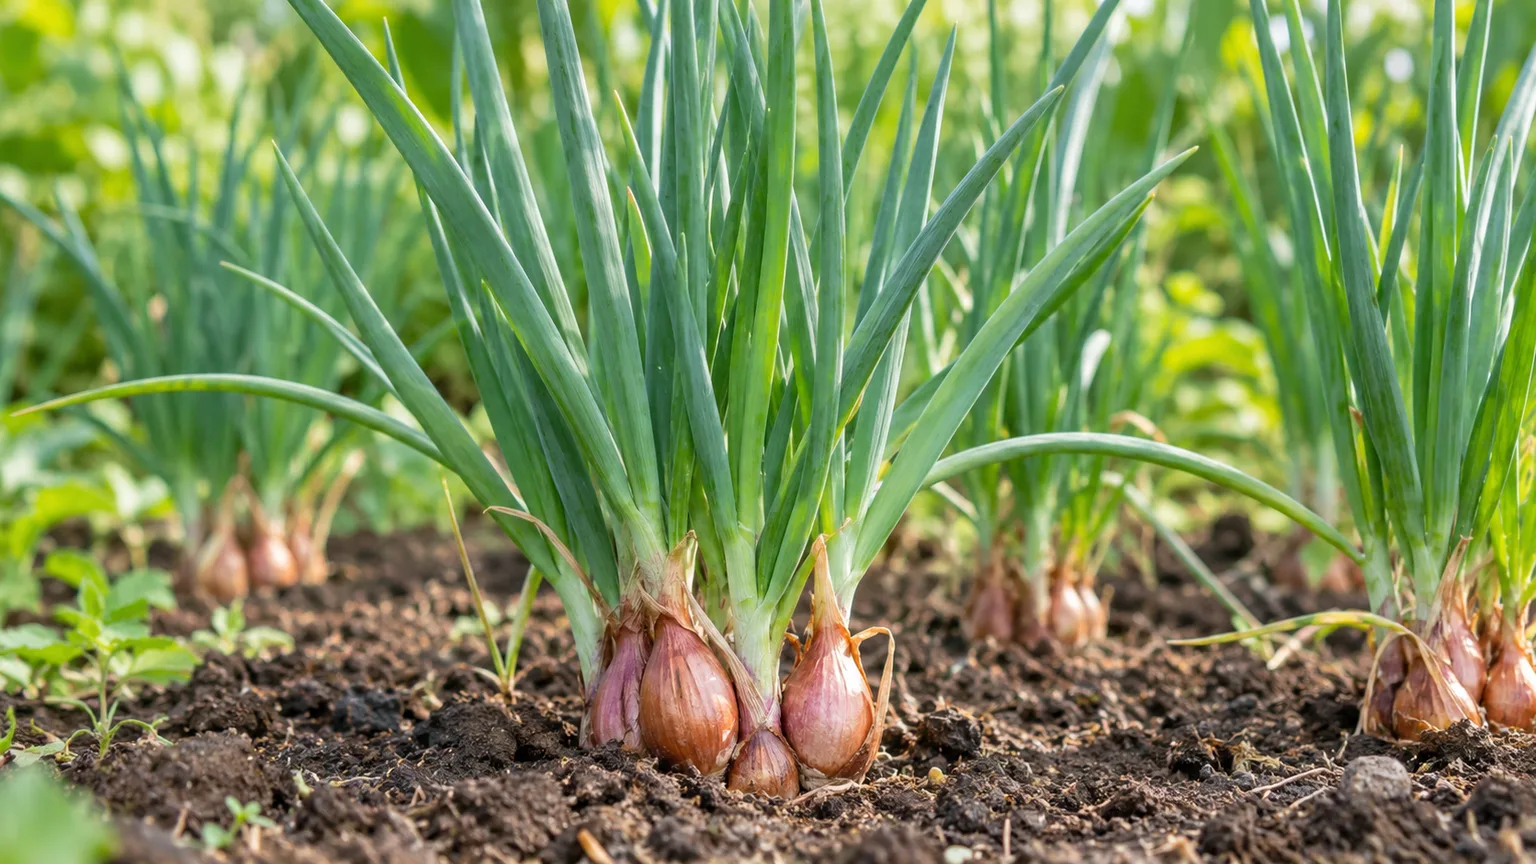
A shallot set is a small bulb planted in the garden; unlike a seed, it usually divides into a cluster of new bulbs. That makes sets the quickest route to a useful crop, while seed is a slower, less expensive option that produces individual bulbs and gives you more cultivar choice. With full sun, loose soil, even moisture during active growth, and a dry finish before harvest, shallots are a manageable crop for an in-ground bed or a sufficiently large pot.
The main decisions are not complicated, but they matter: choose a variety suited to your winter, plant at the right time for your region, and space bulbs according to whether you want a cluster or smaller individual bulbs. Utah State University Extension and the Royal Horticultural Society both emphasize good drainage, early establishment, and harvest after the foliage falls, while their exact planting depths and spacings differ. Those differences are a reminder to treat package directions and local conditions as part of the plan, rather than assuming one number fits every shallot. (Utah State University Extension; Royal Horticultural Society)
Choose a Shallot Type and Planting Stock
Most garden shallots belong to Allium cepa Aggregatum Group, often sold as French, red, gray, Dutch, or multiplier shallots. The names on seed and set packets can vary, and the plants differ in skin color, shape, flavor, storage potential, and whether they are primarily sold as sets or seed. If you care most about long storage, choose a named variety with that trait in its description; if flavor is your priority, try a small number of cultivars before dedicating a whole bed.
A set is a mature, dormant bulb saved for planting. When planted, it commonly forms a clump of daughter bulbs around the base; the number and size depend on the variety, original set, spacing, weather, and care, so a promise of a fixed multiplier is not reliable. Seeds take more time to establish, but can be more economical for a larger planting and may be less prone to bolting than large sets. The RHS explains that one seed produces one bulb, while a set produces a cluster, making these methods useful for different goals. (RHS)
When to Plant Shallots
Plant shallots early enough for leafy growth to establish before the crop shifts toward bulb formation. Shallots are cool-season alliums: they establish in cool conditions, and increasing day length later in spring and summer helps trigger bulbing. The safest calendar depends on winter severity, soil drainage, variety, and whether your sets are sold for spring or autumn planting; a local planting calendar and the supplier’s variety directions are more dependable than a universal date.
Spring Planting
In regions with severe winters, plant sets in early spring as soon as the soil can be worked without smearing or compacting. A little frost after planting is generally less concerning than putting the bulbs into cold, saturated soil that stays wet. Utah State University Extension recommends spring planting when the ground becomes workable; Virginia Cooperative Extension’s allium guidance also describes spring planting for bulb production and notes the importance of cool early growth. (Utah State University Extension; Virginia Cooperative Extension)
Spring planting is also the practical fallback when a fall-planted crop would face waterlogged soil, poor winter drainage, or an uncertain hard freeze. It can delay harvest compared with a successful overwintered crop, but it reduces the time sets spend exposed to winter rot or cold injury. If spring sets are not available, seed can be started indoors in late winter or sown outdoors once the soil is workable; transplant seedlings when they are sturdy and acclimated to outdoor conditions.
Fall Planting
Fall planting can give shallots time to root before winter and produce an earlier summer harvest, but use a variety recommended for autumn planting in your climate. It is best suited to mild or moderate winters with a well-drained bed. A raised bed is a useful adjustment where garden soil stays wet, because the main fall risk is not simply cold: prolonged saturation around dormant bulbs encourages rot.
In colder areas, autumn sets may survive with mulch or a row cover, but winter protection is not a guarantee of a good crop. Utah State University Extension notes that very cold winters can reduce yields and recommends protective covering for fall-planted sets in colder zones. If your winters are severe, spring planting is the more conservative choice; if a set packet does not explicitly say it is suitable for fall, do not infer suitability from a different shallot variety. (Utah State University Extension; RHS)
Choose a Sunny, Well-Drained Site
Choose a spot that receives at least six hours of direct sun on most days, with loose soil that drains after rain but does not dry out instantly. Shallots have a relatively shallow root system, so they do poorly when crowded by weeds or forced into compacted ground. A bed where water puddles after a storm is a poor location even if it is sunny; use a raised bed or a large container rather than trying to correct a chronically wet site with extra watering or fertilizer.
Work the soil several inches deep and remove stones, perennial weeds, and compacted clods before planting. Add mature compost to improve structure and moisture-holding capacity, not a thick layer of fresh manure, which can deliver excess nitrogen and unevenly wet the root zone. Soil pH recommendations vary by source, but a mildly acidic to near-neutral soil is a reasonable target; if your soil is notably acidic or alkaline, use a soil test and follow its amendment recommendations instead of guessing with lime or sulfur. (Utah State University Extension; Harvest to Table)
Shallot Sets, Grocery Bulbs, or Seeds?
For a first crop, certified planting sets are usually the most straightforward choice. They are selected for planting, labeled by variety, and already contain the stored energy needed to establish quickly. Buy firm, dry sets with no soft spots, mold, or active damage; plant them soon after purchase rather than leaving them for months in a warm kitchen.
A grocery-store shallot may sprout and grow, but it is an uncertain planting source. It may be a hybrid or a variety not suited to your day length or winter, and a soft or poorly stored bulb can start with rot. If you want to experiment, choose a firm, healthy bulb and plant it in the same way as a set, but do not count on it to produce a consistent crop or repeat the parent’s traits.
Seeds are useful when you want more plants at a lower cost or want to try a particular cultivar. They need careful moisture and light early on, and the crop takes longer to mature than one started from sets. Seedlings should be kept growing steadily rather than allowed to dry out in a small tray; transplant them without crushing or tearing their roots, then water them in and protect them from weed competition. Both GrowVeg and the RHS describe seed as a viable but slower route than sets. (GrowVeg; RHS)
Plant Shallots at the Right Depth and Spacing
Separate individual sets only if the planting stock is sold as a cluster, and keep the papery skin intact. Identify the basal root plate and the pointed tip; set the root plate down and the tip up. Depth guidance differs: some extension instructions specify planting 1 to 2 inches deep, while the RHS advises leaving the tip just visible at the surface. For most garden sets, plant shallowly so the bulb is anchored and the tip sits at or just above soil level; use the cultivar’s packet directions when they differ, especially for fall-hardy types. (Utah State University Extension; RHS)
Spacing determines the crop you pull later. Closer spacing tends to produce smaller or more single bulbs; wider spacing gives a clump more room to divide, though wider does not guarantee larger individual bulbs. As a workable home-garden starting point, space sets about 4 to 6 inches apart for a denser planting and 6 to 8 inches apart when you want multiplying clusters, with 12 to 18 inches between rows if you need room to weed. Utah State University Extension gives 3 to 6 inches for sets; the RHS uses 6 to 8 inches, reflecting different methods and goals. (Utah State University Extension; RHS)
Water after planting only enough to settle the soil if it is dry. In a wet spring, skip the extra watering and keep the bed open to airflow; a newly planted bulb does not benefit from sitting in mud. Mark the row if the shoots are slow to appear, and check for sets pecked or lifted by birds after planting; push them back into place and cover the bed with light netting if the problem repeats. (RHS)
Growing Shallots in Containers
A container is a good option where garden soil drains poorly or space is limited, but use one large enough for a cluster and deep enough to buffer moisture swings. The RHS recommends a pot at least 30 centimeters (about 12 inches) wide and deep. A container with several drainage holes and a free-draining, soil-based potting mix is more important than the material; terracotta dries faster than plastic, so it may need closer monitoring in warm weather. Avoid a shallow bowl or a pot without drainage.
Plant sets at the same general depth and spacing used in a bed, leaving room for air to circulate. A wide trough is usually more productive than a small pot because shallots need space to divide, and crowded bulbs stay smaller. Put the container in a sunny position, keep it elevated enough for the drainage holes to remain clear, and check moisture more often than you would in the ground. A container dries from its sides and top, so a fixed weekly schedule is a poor substitute for checking the mix.
Water for Steady Bulb Growth
Keep the root zone evenly moist while leaves and bulbs are actively growing, especially during dry, windy, or hot spells. Shallots can tolerate short dry periods better than waterlogged soil, but drought while bulbs are enlarging can limit their size. Check below the surface with a finger or trowel; when the soil in the root zone is drying, water deeply enough to moisten it rather than giving frequent shallow sprinkles that wet only the top layer.
The phrase “one inch of water per week” is a rough garden planning rule, not a shallot prescription. Rainfall, soil texture, mulch, container size, and temperature change how much water is needed. Utah State University Extension advises maintaining moisture through growth and warns that drought stress reduces growth and yield, while overwatering contributes to bulb rot. As foliage naturally yellows and falls near harvest, reduce irrigation and let the soil become drier so the bulbs can mature and cure. (Utah State University Extension)
Feed Lightly and Keep Weeds Down
Start with fertile soil and mature compost, then use a soil test to decide whether fertilizer is needed. Shallots have modest space for roots and compete poorly with weeds, so a healthy bed and steady early growth matter more than repeated feeding. If your soil test calls for fertilizer, follow its product and rate instructions; avoid copying a rate from another climate or soil type.
Too much late nitrogen encourages soft leaf growth when the plant should be finishing its bulbs, and those bulbs may store poorly. Do not keep feeding simply because leaves are still green late in the season; green foliage is the energy source for bulbing, but late fertilizer does not reverse the plant’s natural maturity schedule. Keep weeds down with hand pulling or very shallow cultivation, because deep hoeing can cut the shallow roots or nick bulbs near the soil line. A thin layer of clean organic mulch can conserve moisture and suppress weeds, but pull it back if it holds excessive wetness around fall-planted bulbs. (Utah State University Extension; RHS)
Overwinter Shallots Without Rot
In a mild-winter climate, fall-planted shallots can remain in the ground through winter if the site drains well and the variety is intended for that season. A light mulch can reduce temperature swings, conserve soil moisture, and protect shallow bulbs, but do not bury the bed under a wet, compacted layer. In colder regions, use a row cover or other local winter protection only when your variety and planting window support overwintering; otherwise plant in spring.
Do not interpret “hardy” as “immune to winter loss.” Freeze-thaw cycles can lift sets, saturated soil can decay them, and prolonged severe cold can reduce survival. After a thaw, inspect the bed for bulbs pushed upward or exposed by erosion and gently firm them back in place. If the soil remains saturated, improve drainage next season rather than adding more cover; insulation cannot fix a waterlogged bed.
Prevent Bolting and Handle Flower Stalks
Bolting is the premature formation of a flower stalk, often triggered by a combination of cold exposure, bulb size, variety, and planting timing. A large set may be more likely to bolt than a smaller one, and sets sold for spring are not necessarily suitable for autumn planting. Choose heat-treated or bolt-resistant planting stock if it is offered for your climate, follow the seller’s seasonal advice, and avoid leaving purchased sets warm or dry for long periods before planting. (RHS)
If a flower stalk appears, cut it off close to the base when you notice it, but leave the healthy leaves intact. Removing the stalk may help the plant direct remaining growth toward the bulb, though it cannot undo bolting or restore storage quality. Mark these bulbs and harvest them for near-term use rather than assuming they will keep as long as fully mature, unbolted bulbs. If bolting affects many plants, review set size and planting season before blaming fertilizer or water alone.
Diagnose Pests, Diseases, and Small Bulbs
Shallots are vulnerable to the same main problems as onions and garlic. Start by looking at the pattern: a whole row with pale, small plants may point to poor soil, weeds, timing, or moisture, while one collapsed plant with a damaged bulb suggests a localized pest or rot issue. Pulling affected plants early and keeping allium debris out of the bed can help prevent a problem from spreading; do not compost bulbs that show active rot or heavy pest infestation.
Small or Split Bulbs
Small bulbs often trace back to a short growing season, late planting, dry soil during bulbing, crowded plants, strong weed competition, or a variety poorly matched to the region. Check the planting date and spacing first, then compare soil moisture during the period when bulbs began to enlarge. Split or doubled bulbs can follow inconsistent moisture or other growth stress; they are not necessarily a disease. Harvest usable bulbs, improve the next planting’s timing and watering, and do not respond by adding a large dose of fertilizer late in the season.
Yellowing, Rot, or Damaged Leaves
A gradual yellowing and collapse of most foliage near the end of the season is a normal harvest signal. Sudden collapse in young plants, soft bulbs, foul odor, water-soaked tissue, or white mold around the base is not normal; remove affected bulbs and check drainage, airflow, and crop history. Onion maggots and related allium pests can injure roots and bulbs, while thrips can leave silvery or distorted foliage. Utah State University Extension describes both insects and fungal problems such as Botrytis and downy mildew, and recommends cultural controls such as rotation, sanitation, and reducing conditions that favor disease. (Utah State University Extension)
Avoid replanting shallots or other alliums in the same bed after a serious soil-borne allium disease. Some pathogens persist for years, so a brief one-season rotation may not be sufficient. Record what was planted and what symptoms appeared, and ask your local extension service to identify an unfamiliar or spreading disease before using a fungicide; product labels and legal registrations vary by location. (RHS; Virginia Cooperative Extension)
When and How to Harvest Shallots
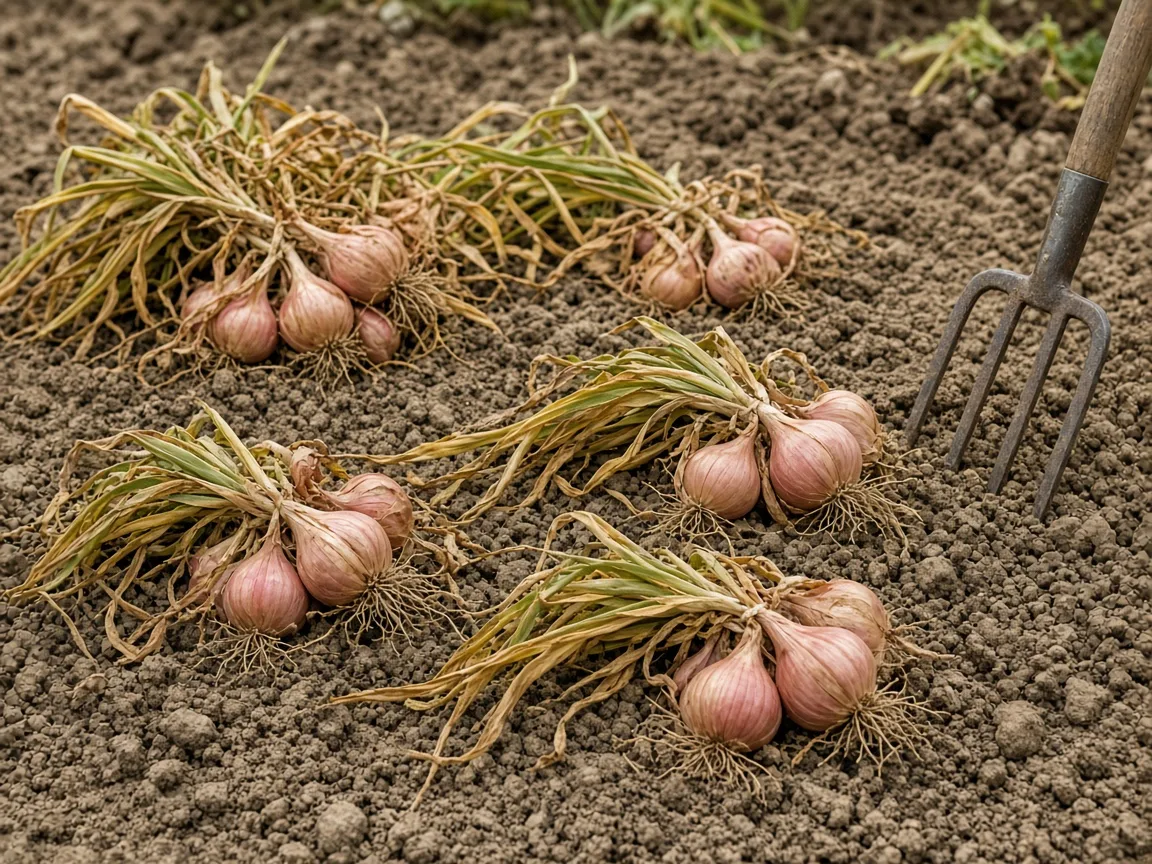
Harvest green leaves selectively when plants are established and the tops are long enough to use, but do not strip every plant if you want mature bulbs. For dry shallots, wait until most tops have naturally fallen over and begun to yellow or dry. A fixed number of days from planting is only an estimate: variety, spring temperatures, fall versus spring planting, and local daylight all affect maturity. The RHS advises lifting when leaves flop and die back; Utah State University Extension similarly uses fallen tops as the signal for mature bulbs. (RHS; Utah State University Extension)
Choose a dry day if possible. Loosen the soil with a hand fork several inches away from the cluster, lift from underneath, and brush off loose soil without pulling hard on the leaves. Bruises and cuts create entry points for storage rot, so handle the clusters gently and do not wash them before curing. If the ground is wet, let the surface dry before lifting when practical; mud clinging to the bulb makes it harder to cure evenly.
Cure and Store the Bulbs
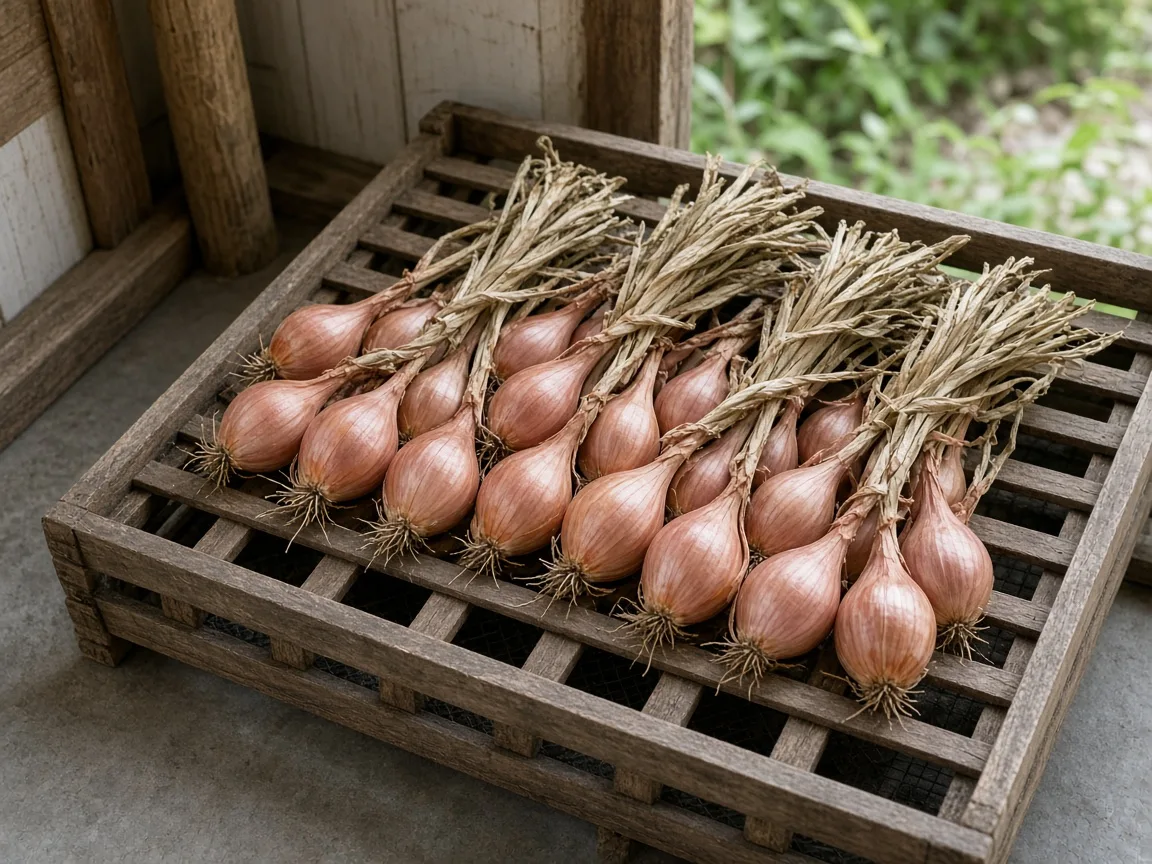
Curing is the drying period that closes the neck and dries the outer skins before storage. Spread lifted shallots in a single layer in a dry, shaded or lightly protected spot with good airflow; a covered porch, airy shed, or rack under shelter is safer than a damp basement or a hot, wet garden bed. Turn or inspect them occasionally and leave the foliage attached until it is dry. Depending on the weather, bulb size, and airflow, curing commonly takes about one to two weeks; the important signal is a dry neck and papery outer skin, not a calendar deadline. (Utah State University Extension; GrowOrganic)
After curing, trim the dried tops and roots if you are storing loose bulbs, then sort the crop. Keep only firm, unblemished shallots; use bruised, split, or bolted bulbs first. Store the rest in mesh bags, a slatted crate, or another breathable container in a cool, dry place with steady airflow. Extension recommendations differ on precise temperatures and storage duration, and the cultivar and curing quality matter, so inspect the crop every few weeks and remove any bulb that softens, sprouts, or develops mold. Do not seal shallots in plastic or leave them in humid conditions, where moisture can collect around the neck. (Virginia Cooperative Extension; RHS)
Save Shallots for Next Year
If you want to keep a planting going, set aside a few healthy, true-to-type bulbs after harvest. Choose firm, medium-sized bulbs without rot, deep cuts, pest galleries, or signs of disease; saving the largest bulb is not always best because very large sets may bolt more readily. Store the selected bulbs under the same dry, ventilated conditions as the kitchen crop, but keep the replanting group clearly labeled by cultivar and intended planting season.
Replanting your own shallots is a practical way to maintain a favorite variety, but it is not a substitute for buying clean planting stock if your crop had disease. Do not save bulbs from a bed with white rot, persistent neck rot, or unexplained bulb decay, because you could carry the problem into the next season. Rotate the planting to a bed that has not recently grown onions, garlic, leeks, or shallots, and replace planting stock if repeated crops become smaller or less healthy. GrowVeg and Harvest to Table also describe reserving sound bulbs for future planting, while the RHS notes that sets should be planted soon after purchase. (GrowVeg; Harvest to Table; RHS)
Conclusion
For a reliable shallot crop, start with sound planting stock, choose spring or fall according to your winter and drainage, and give each set sun, loose soil, and room to divide. Keep moisture steady while bulbs grow, control weeds without damaging shallow roots, then taper watering as tops mature. Lift after most leaves fall, cure gently until skins and necks dry, and store only firm bulbs with airflow; those simple decisions matter more than a rigid calendar or a single fertilizer formula.



