How to Grow Hardy Chrysanthemums in Your Garden
Grow garden mums that have the best chance to return. Learn when to plant, how to pinch, what to do after frost, and why drainage matters.
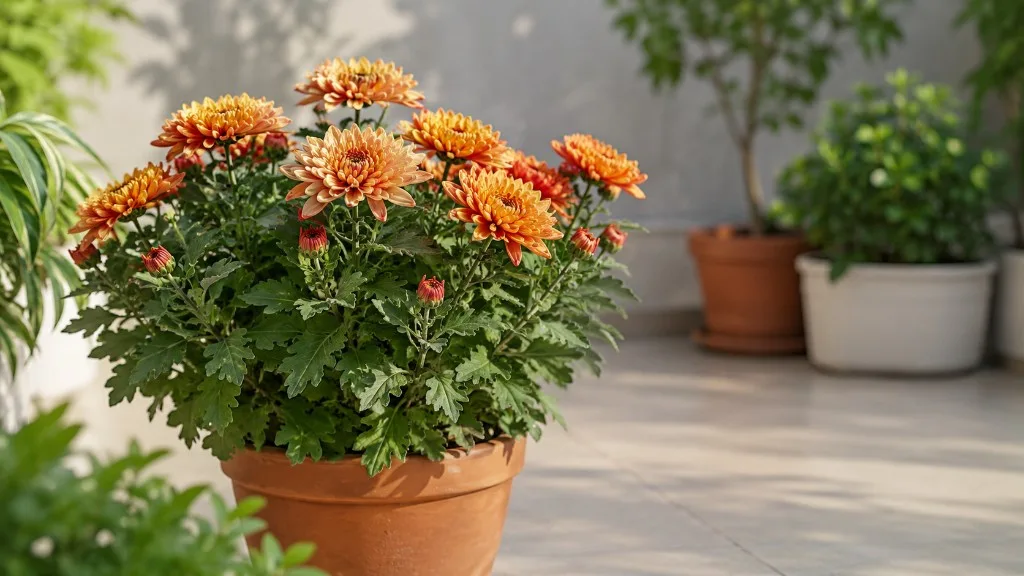
A hardy garden mum can flower brightly in fall and return from its crown the next spring—but “hardy” is a description of potential, not a guarantee. The cultivar, planting date, drainage, and winter pattern all affect whether a chrysanthemum behaves like a lasting perennial or a one-season display.
For the best chance of success, start with a labeled garden cultivar, plant it while there is time for roots to spread, give it several hours of direct sun, and keep its soil moist but not soggy. Pinch stems while the plant is growing leaves, stop before flower buds form, and insulate an established crown after the ground cools. The details below explain how to adjust that routine for your climate and the plant you have.
Is It Actually a Hardy Garden Mum?
Garden mums are herbaceous perennials: the top growth may die back in winter, while a living crown and roots can send up new shoots in spring. But chrysanthemums include many cultivars grown for different jobs. Some are selected for landscape hardiness; others are forced under cover or shaped for an instant fall container display. A label with a cultivar name and a local hardiness range is more useful than bloom color or a rounded shape.
Even a hardy cultivar can fail where winters are wet, soil freezes and thaws repeatedly, or the plant goes into the ground shortly before freezing weather. Conversely, a plant with no clear label may survive in a sheltered, well-drained bed in a mild region. NC State Extension notes that some garden mums do not reliably return to bloom in the Southeast, which is a reminder that both cultivar and regional conditions matter. For a quick comparison of plant types and realistic expectations, see our guide to whether mums are perennials.
Before planting, check the tag or ask the grower: Is this a garden mum intended for outdoor borders, or a florist/display mum? If you already own an unlabeled fall pot, you can still try it in the garden, but treat survival as a bonus rather than a promise.
Choose a Site With Sun and Airflow
Pick a spot that receives about six hours or more of direct sun during the growing season. Good light supports sturdy, branching stems and abundant bloom; in a very hot climate, light afternoon shade can reduce heat stress without leaving the plant in deep shade. Morning sun is especially helpful because it dries dew from foliage early in the day.
Avoid crowded corners, dense shade, and places where roof runoff or irrigation keeps leaves wet. Mums grow into a broad, branching mound, and tight spacing traps humidity between stems. Penn State Extension gives a general spacing range of 18 to 30 inches, but use the mature width on the plant label and leave enough room for air to move through the foliage. A compact cushion cultivar may need less room than a taller, open garden type.
A location exposed to bright artificial light at night can also affect flowering in some cultivars because chrysanthemum bloom is tied to seasonal day length. Most garden settings are fine, but if a plant beside a porch light consistently buds late or unevenly, compare it with one in a darker bed before changing fertilizer or pruning.
Plant Early Enough for Roots to Establish
Spring is the dependable planting window in regions with cold winters. Set a young plant outside after the danger of a hard freeze has passed and the soil can be worked; it then has months to establish before bloom and winter. Penn State Extension suggests giving roots roughly six weeks before the extremes of heat or freezing weather. In mild climates, late summer or early fall can work, but planting a fully flowering mum just before frozen ground is a gamble.
Think in terms of growing time, not the name of a month. A September planting in a region with a long mild autumn is not equivalent to a September planting where the soil freezes soon afterward. If a new mum is already in bloom, plant promptly if you have decided to put it in the ground rather than waiting for every flower to fade. That does not erase the risk of late establishment; it simply avoids shortening the remaining rooting window.
Spring-planted mums are also easier to pinch and shape because you can guide their growth before they form flower buds. Our mum planting guide has more detail on timing by climate and the trade-offs of planting a fall display pot.
Prepare the Soil and Set the Root Ball Correctly
Mums prefer fertile soil that holds some moisture but drains freely. A heavy, saturated bed is more dangerous than soil that is merely less than perfect, especially during winter. If water stands after rain, choose a different site or improve the bed broadly with organic matter; a little compost mixed into a planting hole cannot fix a waterlogged location.
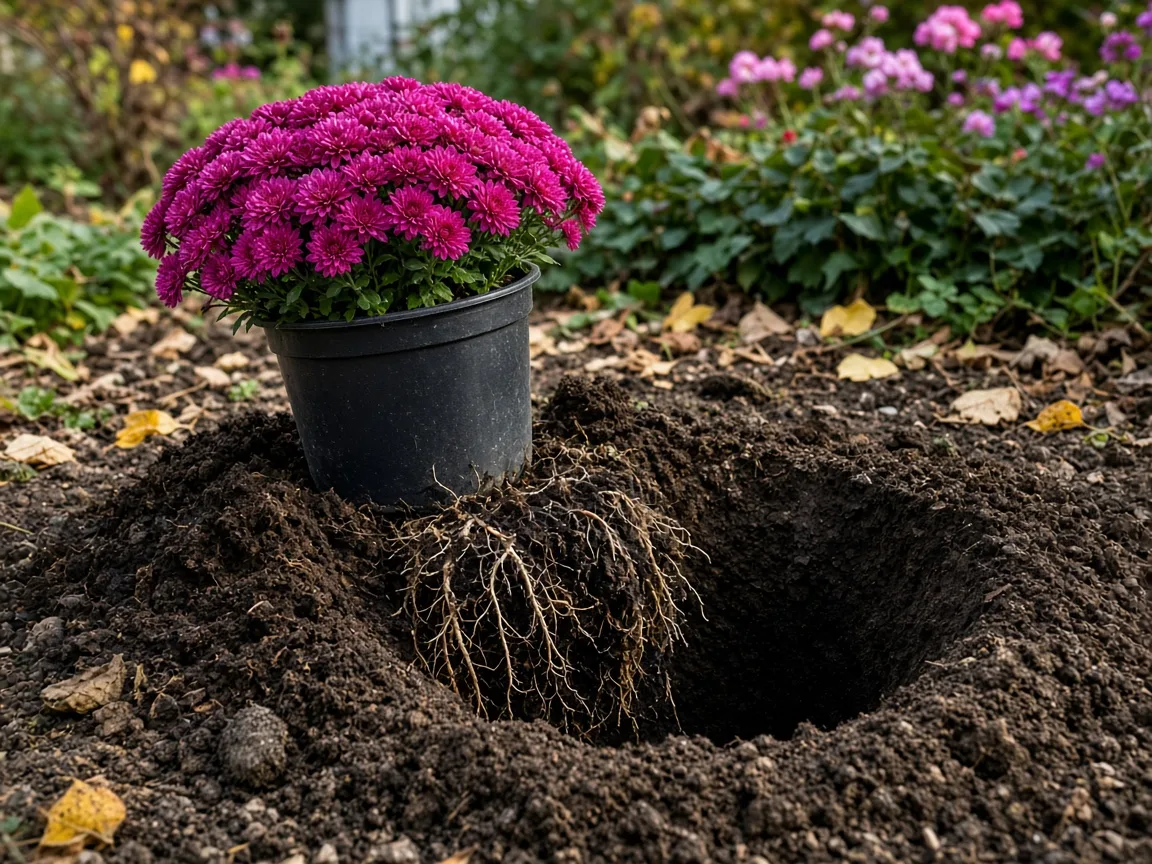
Water the nursery pot before planting so the root ball is evenly damp. Dig a hole about as deep as the root ball and wider than it, then slide the plant out and inspect the roots. If they form a dense mat around the outside, gently tease the outer roots loose so they can grow into the surrounding soil. Do not rip apart the center or bury the crown. Set the top of the root ball level with the garden surface, backfill, press lightly to remove large air gaps, and water thoroughly.
Keep the spacing on the label in mind before setting several mums in a row. A bed that looks sparse on planting day can fill in as the plants branch. Overcrowding later makes it harder for foliage to dry and leaves less access for inspection and cleanup.
Water Deeply Without Keeping the Crown Wet
During establishment, check the soil around the root ball rather than watering by a fixed weekly calendar. If the top inch or two has dried and the root zone is not moist, water slowly at soil level until the surrounding soil is damp several inches down. In hot, windy weather a new plant may need water more often; in cool rainy weather, skip irrigation. The aim is steady moisture, not a permanently wet crown.
Established mums are more forgiving, but shallow roots can dry during heat or drought. Watch for foliage that wilts in the morning as well as the afternoon, dry soil beneath the mulch, or a pot that becomes unusually light. Water the root zone deeply, then allow excess water to drain. Avoid frequent shallow splashes: they wet leaves without encouraging a broad, deeper root zone.
Container mums dry faster than plants in beds because potting mix holds less water and is exposed to sun and wind on every side. Check pots daily during hot periods, but do not assume a wilted plant always needs more water. If the mix is saturated, smells sour, or remains wet for days, improve drainage and let the surface begin to dry before watering again. Root rot from persistently wet soil can look like thirst because damaged roots cannot supply the leaves.
Feed for Growth, Then Stop
A modest amount of balanced fertilizer can support new stems and foliage in spring, especially in poor soil. Start after new growth begins and follow the product label for garden ornamentals; avoid applying extra fertilizer just because a plant looks small. Too much nitrogen can produce soft leafy growth, increase lodging, and delay or weaken flowering.
Stop routine feeding once flower buds begin to form. Penn State Extension recommends light, frequent feeding during the growing season and discontinuing fertilizer after buds appear. This timing keeps nutrition aimed at vegetative growth early on instead of pushing tender growth late in the season. If your bed already receives regular compost or a soil-test-guided fertilizer program, you may need little or no additional feed.
Do not use a high-phosphorus “bloom booster” as a substitute for sun, correct pinching, or a healthy root system. A mum that will not flower is more often dealing with shade, late pinching, heat-related timing, or cultivar mismatch than a simple lack of fertilizer.
Pinch Young Stems for a Fuller Plant
Pinching is a shaping task for a growing garden mum, not something to do to every plant at every season. When new spring stems are about 6 inches tall, pinch or snip off the growing tip just above a leaf pair. Each remaining leaf node can branch, producing a wider plant with more flowering stems instead of one tall central shoot.
Repeat as the new branches grow if the plant is still in its leafy, vegetative stage. The number of rounds depends on how quickly the cultivar grows and when it naturally blooms. Penn State Extension recommends stopping the final pinch about 100 days before the desired bloom period; Missouri Botanical Garden gives a broad late-spring-to-mid-summer window and cautions that hardiness varies by location and year. Treat these as guidance, not a universal July deadline. A late-blooming cultivar in a cool region can have a different last pinch date from an early cultivar in a warm region.
Watch the plant for buds. Once small rounded flower buds appear at stem tips, stop pinching; removing those tips removes flowers. If the plant is already compact and well branched, no additional pinch is needed. Skip pinching altogether for a newly purchased, already-domed fall mum unless you are correcting broken stems—the nursery has already shaped it for display.
Understand Bud Timing and Fall Bloom
Garden mums respond to the seasonal combination of shortening days and cooler temperatures, but the exact bloom date depends on cultivar, planting date, local weather, and growing conditions. Early, midseason, and late cultivars can flower weeks apart. Warm nights can delay or disrupt bud development, while an early cold snap may shorten the display.
That variability is why the flower date printed on one plant cannot be applied to every mum in the bed. A healthy plant can be growing well and still bloom later than expected. Before changing care, confirm that the cultivar is suited to your region, it receives enough sun, and you stopped pinching before visible buds appeared. NC State Extension also notes that return bloom can be unreliable for some mums in the Southeast, so a local nursery or extension office may be able to recommend cultivars that perform more consistently nearby.
If you want a longer fall display, choose cultivars with staggered bloom periods and avoid cutting back plants after buds have formed. A mix of early and late garden mums is usually more dependable than trying to force one cultivar to bloom on a specific holiday.
Deadhead Spent Flowers Without Expecting a New Flush
Deadheading means removing faded flower heads after the plant has bloomed. It tidies the mound and can keep remaining flowers looking fresh, but it is not the same as pinching young stems. Pinching before buds form encourages branching; deadheading after bloom cannot make a chrysanthemum produce a whole new set of buds if its flowering cycle is finished.
Use clean snips to remove a spent flower and its short stem back to a healthy leaf or side shoot. Do not cut deeply into the green plant or remove developing buds while cleaning up. The practical guidance from Epic Gardening’s mum deadheading guide distinguishes these jobs and notes that mums set buds before the flowers open.
Once frost has ended the display, prioritize winter care over cosmetic pruning. Remove diseased material, but healthy dead stems can help you locate the crown during winter and can be cut back in spring.
Grow Mums in Containers With a Winter Plan
A container is useful for a porch, patio, or small garden, but it makes winter survival less reliable. Roots in a pot are exposed to colder air than roots in the ground, and a compact nursery plant may be rootbound. Choose a container with drainage holes and enough room for the root ball plus several inches of fresh potting mix. A heavy decorative cachepot should not hold water around the nursery pot.
Use a free-draining potting mix and water until excess runs out of the drainage holes. During flowering, check moisture frequently because a warm or windy porch can dry a pot quickly. Empty saucers after watering. Once the plant finishes flowering, decide whether your priority is another seasonal display or long-term survival. In cold regions, a pot left outdoors can freeze through; move a hardy plant to a cool, protected, unheated space or plant it in the ground early enough to establish.
For a potted mum you want to keep, follow local extension guidance for winter storage, keeping the root ball only lightly moist and avoiding a warm room that encourages weak growth during dormancy. A sheltered garage or cold frame is not automatically suitable if it swings between freezing and warm, stays waterlogged, or lacks light once growth resumes. Container overwintering is more controlled than a porch pot but still depends on drainage, temperature, and cultivar.

Overwinter Established Mums in the Ground
The first winter is the hardest for a recently planted mum. Roots need time to move beyond the nursery root ball, and shallow crowns can be heaved by repeated freezing and thawing. Good drainage is essential: a thick mulch cannot rescue a crown sitting in wet soil. Gardeners’ Path’s winter-care guide also emphasizes insulating established in-ground plants and treating exposed container roots as a separate, higher-risk case.
After the plant has finished flowering and frost has browned the top growth, leave healthy stems standing through winter or cut them back only to short stubs. Garden guidance differs on fall versus spring cleanup; the useful common ground is to avoid cutting a healthy plant down while it is still green and to keep the crown easy to find. Remove diseased or badly infested stems rather than leaving them in place. Once the soil has cooled, spread a loose insulating mulch such as clean straw or chopped leaves over the root zone. Keep it airy rather than packing wet material tightly against the crown.
In spring, pull the mulch back gradually as new shoots appear and trim off dead stems. If no growth appears, wait until the soil warms and check for living tissue at the crown before declaring the plant dead. A late spring emergence can happen; however, if the crown is mushy, blackened, and smells rotten, winter wetness may have killed it. Our guide to protecting mums from frost covers additional cold-weather precautions.
Divide and Propagate Healthy Plants
Divide an established clump when its center becomes woody or sparse, stems crowd one another, or flowering weakens despite good light and drainage. Early spring, when new shoots are visible and still short, is an easy time to lift the plant and see which sections are vigorous. Penn State Extension recommends dividing every three to five years; Missouri Botanical Garden gives roughly two to three years as a common interval. The plant’s condition matters more than the calendar, so divide sooner if the center is failing and wait if the clump remains healthy.
Lift the clump with a spade and use a clean knife or sharp spade to separate it into sections that each have healthy roots and several shoots. Discard dead, woody, or diseased centers rather than replanting them. Replant divisions promptly at the same depth, water them in, and keep the soil evenly moist while they re-establish. Avoid dividing during heat or just before hard frost, when newly cut roots have little time to recover.
You can also take spring basal cuttings from vigorous new shoots and root them in a clean, moist propagation medium. This is useful when you want more plants of a named cultivar; seed-grown plants may not come true to the parent. The RHS chrysanthemum growing guide describes spring cuttings and division as practical ways to renew plants.
Troubleshoot Pests, Disease, and Weak Growth
Inspect leaf undersides and tender tips when growth looks distorted or sticky. Aphids cluster on soft stems and buds; a strong stream of water can dislodge a small population, while a severe infestation may require removing affected tips. Spider mites are more likely in hot, dry conditions and can cause stippling or fine webbing. Confirm the pest before treating, and follow the label on any product approved for ornamental plants.
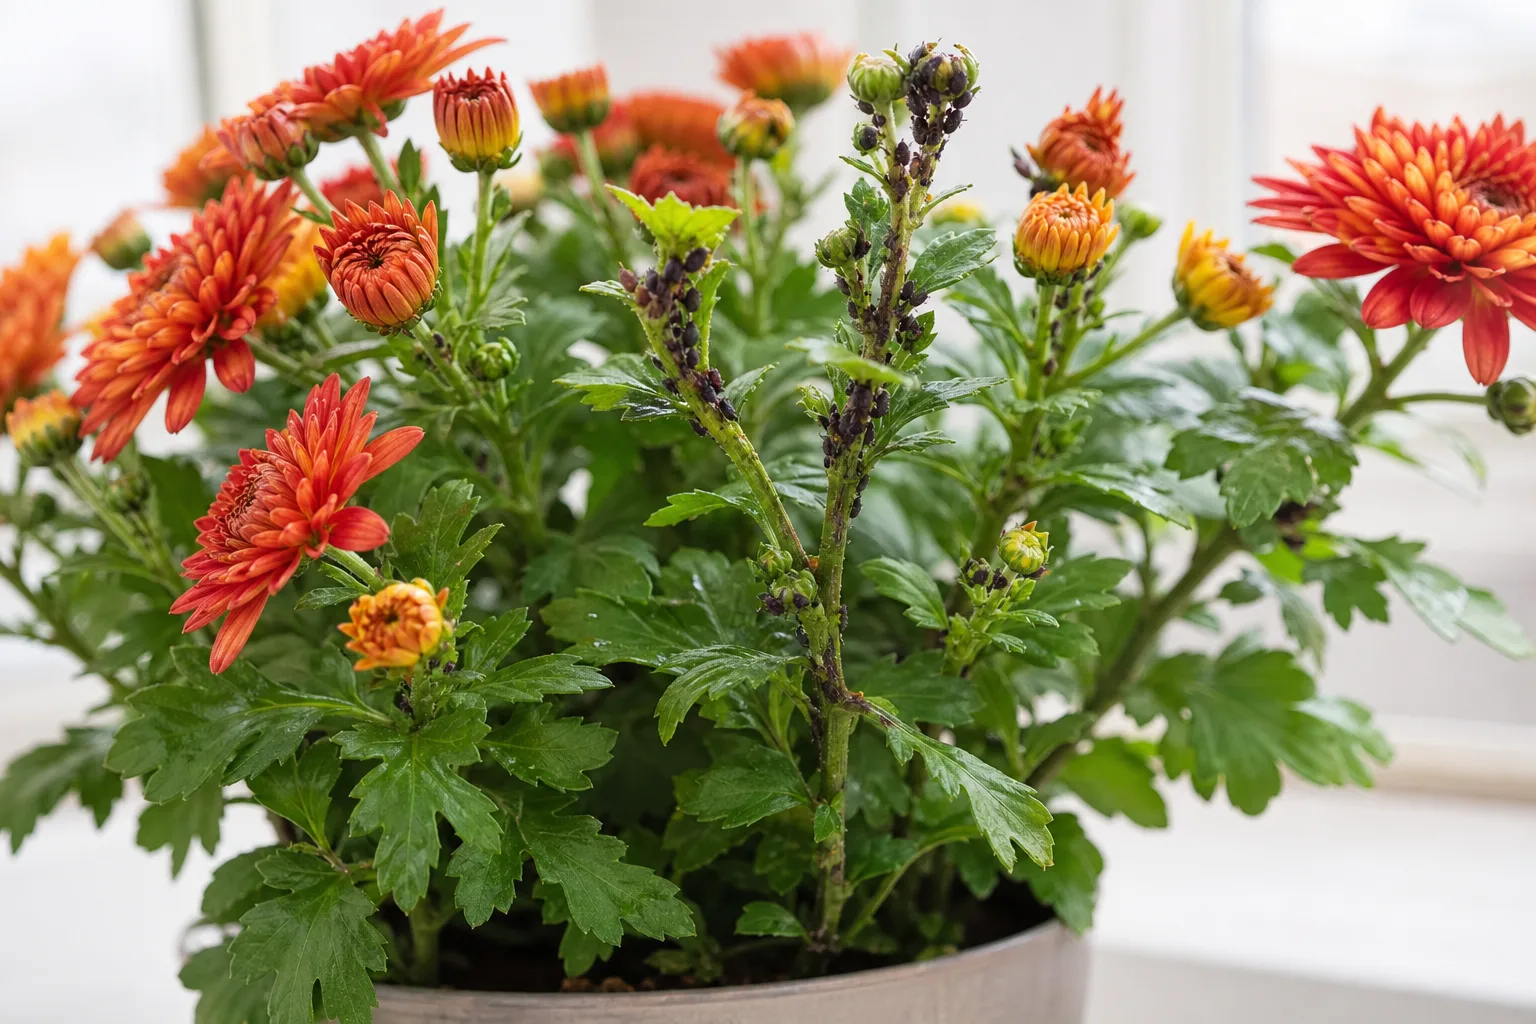
Yellowing leaves are not a diagnosis by themselves. Older lower leaves may yellow as the plant ages, but widespread yellowing with limp stems and persistently wet soil points toward root stress. Powdery mildew appears as a pale coating on leaves, while leaf spots or gray, collapsing tissue can signal fungal disease. Give plants adequate spacing, water at soil level when possible, and remove badly diseased material. Do not compost plants with a suspected systemic virus or a serious disease that could persist in the pile.
If a mum is leggy, check light and pinching history before feeding it. If it grows well but does not flower, check whether you pinched after buds began forming, whether artificial night lighting reaches it, and whether the cultivar is suited to your region. A plant that disappears in winter may have died from saturated soil, insufficient establishment time, exposed container roots, or cultivar sensitivity—not simply because all mums are annuals.
Keep Pets Away From Mum Foliage
Chrysanthemums are listed as toxic to dogs, cats, and horses by the ASPCA Animal Poison Control Center. The ASPCA lists sesquiterpene lactones, pyrethrins, and other potential irritants among the toxic principles, with possible signs including vomiting, diarrhea, drooling, incoordination, and skin irritation. Risk depends on the exposure, so do not assume that a small nibble will cause the same response in every animal.
Place garden mums where pets are less likely to chew them, and pick up cut foliage rather than leaving it where an animal can reach it. If you suspect a pet has eaten the plant or is showing symptoms, contact your veterinarian or an animal poison-control service promptly; have the plant label or a photo ready. This advice concerns pets and does not establish the risk of handling or eating chrysanthemums by people.
Follow a Simple Seasonal Care Calendar
Use growth stages and weather rather than dates alone. A spring checklist makes care easier without turning mum growing into a rigid schedule:
- Early spring: Look for new shoots, pull mulch away gradually, remove dead stems, and divide overcrowded clumps if needed. Plant new garden mums after severe frost risk passes.
- Late spring: Water new plantings as the root ball establishes. Begin light feeding only if the soil or label calls for it. Pinch young stems once they reach roughly 6 inches.
- Early to midsummer: Repeat pinching while stems are actively growing, but stop before flower buds form. Adjust the final pinch to the cultivar’s bloom timing and local season.
- Late summer to fall: Keep the root zone evenly moist, avoid late heavy feeding, and enjoy the flowers. Remove spent blossoms if you want a tidier display, but do not expect deadheading to create a fresh flush.
- After frost and into winter: Remove diseased growth, protect the crown with loose mulch after the soil cools, and move container plants to a protected winter location if your climate is too cold for exposed roots.
- Next spring: Check for new shoots before removing the last mulch. Replace plants only after assessing whether the crown is truly dead.
If you buy a flowering mum in fall, first decide whether you want temporary color or a perennial planting. For temporary color, keep it watered in its nursery pot or repot it into a draining container. For a long-term garden plant, identify the cultivar, assess remaining growing weather and drainage, and understand that late planting is less dependable than spring establishment.
Conclusion
To grow hardy chrysanthemums well, treat them as long-season perennials rather than disposable fall decorations: choose a garden cultivar suited to your region, plant early, provide sun and drainage, water according to soil moisture, and pinch only before buds form. Protect established in-ground crowns from winter wetness and freeze-thaw movement, and plan separately for mums in pots because exposed roots face colder conditions.
If you already have a mum, begin with the plant tag and its site. A sunny, well-drained bed gives a labeled hardy cultivar its best opportunity; if the plant is unlabeled or newly bought in full bloom, enjoy the flowers and treat its return as uncertain. Consistent care improves the odds, but it cannot override cultivar limits or an unusually harsh winter.