How to Grow and Care for Ctenanthe Setosa 'Grey Star'
Learn how to grow Ctenanthe setosa 'Grey Star' with bright indirect light, careful watering, humid air, airy soil, propagation, and clear fixes for leaf problems.
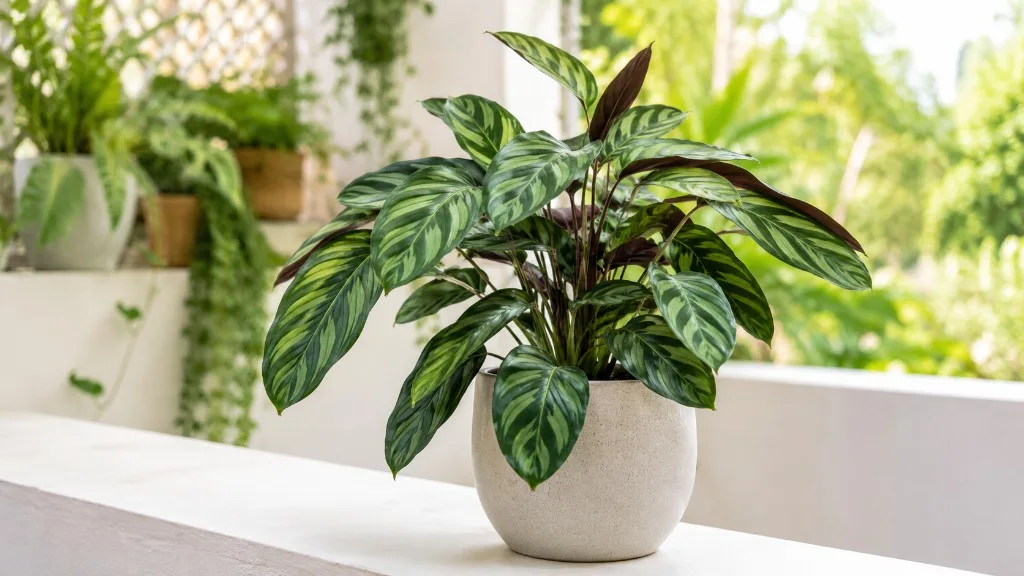
Ctenanthe setosa ‘Grey Star’ is grown for its long, silvery leaves, dark green feathered markings, and deep purple undersides. It can look demanding because a dry room, a soggy pot, harsh sun, or cold airflow can all leave a mark. The reliable approach is to keep the root zone lightly and evenly moist while giving it warm, filtered light and enough air around the roots for excess water to drain.
This guide is for an indoor plant in an ordinary home, where humidity and watering conditions vary from room to room. Instead of following a fixed number of waterings, use the soil and the plant’s growth as cues. That one adjustment prevents many of the problems commonly blamed on a supposedly fussy temperament.
Know What ‘Grey Star’ Is—and What It Is Not
‘Grey Star’ is a cultivated form of Ctenanthe setosa, an evergreen perennial in the Marantaceae family. The cultivar is valued for a silvery-gray upper leaf surface with green markings and a purple reverse; its foliage, rather than its small and infrequent flowers, is the main attraction. The Royal Horticultural Society describes C. setosa as a tender, moisture-loving plant for partial shade and sheltered conditions, while NC State Extension describes the related C. amabilis as a warm-growing Brazilian member of the prayer plant family. Those references establish the genus’s broad growing context, but they do not make every species and cultivar identical.
Nursery labels often use “prayer plant” loosely for several genera in Marantaceae. Ctenanthe, Maranta, Stromanthe, and plants sold under the older Calathea name are relatives, but not interchangeable species. Check the botanical name on the pot if you want species-level guidance. The central care principles—filtered light, warmth, moisture with drainage, and a stable environment—carry across many of these tropical foliage plants, but details such as mature size and tolerance can differ.
The leaves may lift or fold at night and open again in daylight. This regular movement is called nyctinasty and is a normal response to the day-night cycle, not a sign that the plant is wilting. A leaf that remains tightly rolled through the day, becomes limp, or develops dry edges needs a separate check of soil moisture, air conditions, and roots.
Quick Care Snapshot
| Care factor | Practical target | Avoid |
|---|---|---|
| Light | Bright, filtered or indirect light; gentle morning sun can be tolerated | Hot afternoon sun or a dark corner |
| Water | Water thoroughly when the upper layer starts to dry; empty the saucer | A permanently wet pot or a fully dried root ball |
| Mix | Moisture-retentive but airy, with drainage holes | Dense soil that stays saturated |
| Temperature | Warm, steady indoor conditions | Chilly windows, vents, and sudden temperature swings |
| Humidity | Moderate-to-high humidity; measure before adding equipment | Assuming misting alone changes room humidity |
| Feeding | Diluted houseplant fertilizer during active growth | Heavy or routine feeding in winter |
| Propagation | Divide an established clump with roots and shoots | Treating a single leaf as a complete cutting |
These are starting points, not exact thresholds. A small nursery pot in warm, bright air dries sooner than a large ceramic pot in a cool room. The same plant can need water at different intervals across the year, so match the routine to the conditions rather than copying someone else’s calendar.
Give It Bright, Filtered Light
Place the plant where daylight is strong but softened: near an east-facing window, behind a sheer curtain, or a few feet back from a bright south- or west-facing window. A little early sun may be fine if the leaves do not heat up, but long exposure to sharp midday or afternoon rays can bleach the silver areas and scorch the leaf surface. The RHS profile for C. setosa lists partial shade, and NC State’s profile for C. amabilis likewise notes filtered light and intolerance of direct sunlight.
Too little light creates a different set of problems. New leaves may emerge smaller or less patterned, growth slows, and the plant can lean toward the window. Low light also reduces how quickly the pot dries, which raises the chance of overwatering if you keep watering as often as before. Move the plant gradually to a brighter position; a sudden shift from a dim shelf to direct sun can damage foliage before it adapts.
Rotate the pot a quarter turn every week or two if growth consistently leans toward the window. Do not rotate automatically if the plant already grows evenly or if moving it exposes one side to direct sun. Under a grow light, use a timer and follow the manufacturer’s distance guidance; keep the light far enough away that the leaves remain cool and close enough to prevent weak, stretched growth.
Water Thoroughly, Then Let the Surface Begin to Dry
A Grey Star does best with steady access to moisture, but its roots also need oxygen. Water when the top portion of the potting mix has begun to dry—not when the entire root ball has become dusty, and not while the soil is still saturated. When it is time, pour slowly over the soil until water runs freely from the drainage holes. Let the pot drain completely, then empty the saucer or decorative cachepot.
The goal is not to keep every particle wet. Soil that is constantly waterlogged can deprive roots of oxygen and encourage root decay; a root ball that dries hard can make the leaves curl and the plant wilt. Check a few places, including near the pot edge and slightly below the surface. If the mix is cool and damp lower down, wait and check again rather than watering because a top layer looks dry.
Set a watering cue, not a schedule
There is no dependable “twice a week” rule for every home. Light level, room temperature, pot material, pot diameter, root density, and the ingredients in the mix all change the dry-down time. A useful habit is to check the soil every few days while learning the plant, then water only when the upper layer is starting to dry and the pot feels lighter. After a few weeks, you will recognize the interval for that location, but still check before each watering.
In winter, growth and evaporation often slow, especially near a cool window or in shorter daylight. Water less often only because the mix dries more slowly—not because the calendar says winter. In a warm, brightly lit room, the plant may continue to grow and use water throughout the year. Use room-temperature water to avoid a sudden chill to the root zone.
What to do about water quality
If brown margins continue despite consistent moisture, filtered or rain water is worth testing, particularly if your tap water is hard or leaves white mineral deposits on the soil and pot. Bloomscape’s general Ctenanthe care guide also flags tap-water minerals as one possible contributor to edge burn, though its guide focuses on C. lubbersiana, not this cultivar. Water quality is one variable to investigate, not an automatic diagnosis: low humidity, dry roots, fertilizer salts, sun, and airflow can produce similar symptoms.
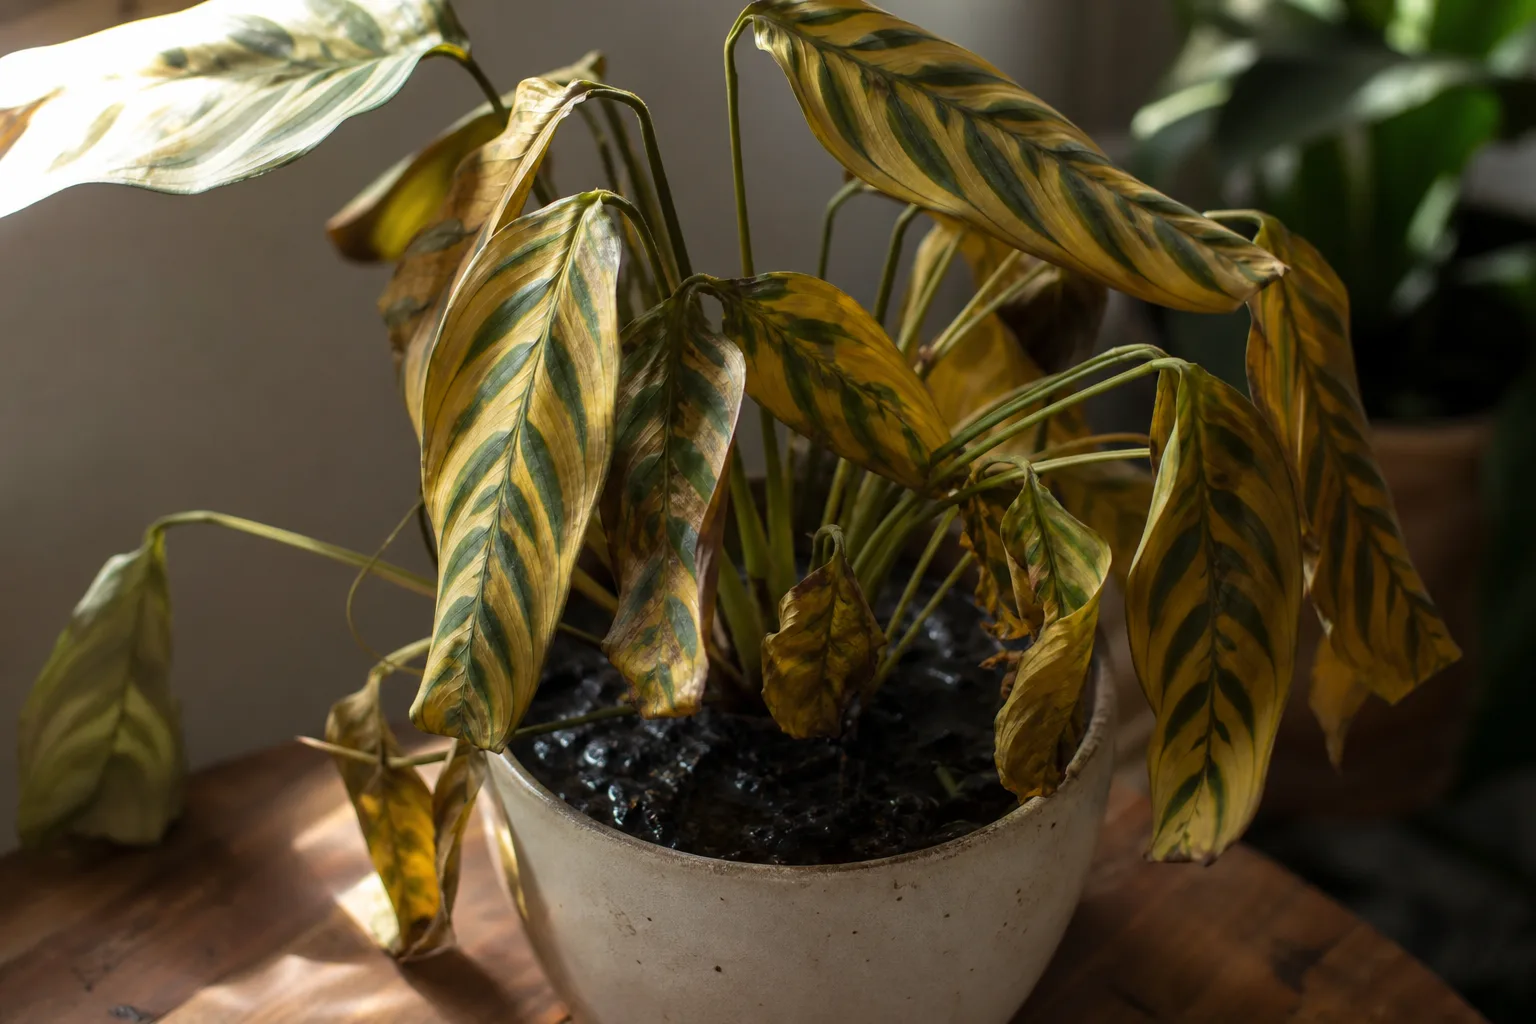
Do not leave the pot standing in water to compensate for a dry room. If the plant looks thirsty but the soil is damp, check the roots and drainage instead of adding more water. This distinction is especially useful when leaves droop: dehydration and root damage can look alike above the soil line, but they call for opposite responses.
Use an Airy Mix and a Pot with Drainage
Choose a houseplant mix that holds some moisture without collapsing into a dense, airless mass. A quality peat-free indoor mix combined with perlite, fine orchid bark, or another coarse component can create a balance between water retention and drainage. You do not need a precise recipe; the finished mix should wet evenly, drain after watering, and remain lightly moist rather than turning to sludge or shrinking away from the pot wall.
Use a container with several open drainage holes. A nursery pot set inside a decorative cachepot is convenient because you can remove it for watering and drain it before replacing it. Avoid choosing an oversized pot just to give the plant room to grow: a large volume of wet mix around a small root system stays damp longer and can invite root problems. A snug pot with good drainage is usually easier to manage than an enormous one.
The RHS recommends a moist but well-drained, loam-based medium for C. setosa. For indoor containers, adapt that principle to a lightweight potting mix that does not compact. If water sits on the surface for a long time, runs straight down the pot wall, or smells sour, the mix may be compacted, hydrophobic, or breaking down; correct the substrate and drainage rather than trying to solve a structural issue with a different watering day.
Maintain Warmth and Practical Humidity
Keep the plant in a warm room with stable temperatures. Avoid placing it against a cold window in winter, beside a frequently opened exterior door, or directly in the stream from an air conditioner, heater, or heat register. These fast changes in temperature and airflow can dry leaf edges or stress the roots even when the rest of the room feels comfortable. NC State’s Ctenanthe profile describes the plant as frost-tender and intolerant of cold drafts and constant dry air.
Humidity matters, but avoid chasing a perfect number without checking the room. A small hygrometer placed near the foliage gives more useful information than a guess from the feel of the air. The New York Botanical Garden’s guidance for the related Maranta leuconeura notes that a pebble tray or occasional mist may not provide enough humidity in a dry winter room and recommends measuring conditions near the plant. That is useful family-level context, not a species-specific guarantee for Grey Star.
If your home is consistently dry and leaf margins keep crisping after you have ruled out sun, dry soil, and mineral buildup, a room humidifier is more reliable than frequent misting. A pebble tray can add a small local buffer when the pot rests above the water on stones, but it will not turn an arid room into a rainforest. Keep good air movement, and do not crowd foliage so tightly that leaves stay wet for long periods.
Feed Only While It Is Actively Growing
New leaves are the clearest reason to feed. During active spring and summer growth, use a balanced liquid houseplant fertilizer diluted to half the label strength, applied to already moist soil. Start conservatively, especially if the plant was recently purchased, repotted, or has damaged roots. More fertilizer will not correct low light, poor drainage, or dry air; it can instead leave excess salts around the roots.
Pause or reduce feeding when growth slows in cooler, darker months. If pale growth appears while the plant is otherwise stable, check light and roots before increasing fertilizer. A white crust on the mix or pot rim, sudden brown tips after feeding, or a decline following repeated applications can point to salt accumulation. Flush the mix with clean water only if the pot drains freely, or repot if the substrate is degraded and the plant is showing root stress.
Repot When Roots Need Room
Repotting is useful when roots circle densely, emerge from drainage holes, the mix dries unusually fast, or growth has stalled despite suitable light and watering. It is not necessary every two years simply because two years have passed. Check the root ball during active growth, ideally in spring, and move up one pot size only when the current pot is genuinely crowded.
Slide the plant out gently and look for firm, pale roots with a fresh earthy smell. Dark, soft, or sour-smelling roots point to decay, which needs a different intervention than a plant that has simply filled its pot. Remove only clearly dead material with clean scissors, refresh compacted mix, and use a container with open drainage. Do not pull apart a healthy root ball aggressively to force it into a much larger planter.
After repotting, water to settle the mix and let excess drain. Return the plant to its familiar filtered-light location and avoid fertilizing until it resumes active growth. A brief pause in growth can happen after root disturbance. Keep care stable rather than repeatedly unpotting the plant to check whether it has recovered.
Prune and Clean Without Overworking It
This plant usually needs only light cleanup. Cut fully yellow, damaged, or dead leaves close to their base with clean scissors, taking care not to cut through neighboring petioles or the crown. A partly brown edge will not turn green again, but you can trim the damaged outline while leaving a small sliver of brown tissue so you do not cut into healthy leaf.
Dust blocks light from reaching the leaf surface. Wipe each leaf gently with a soft damp cloth, supporting it from underneath; avoid leaf-shine products and rough rubbing. Clean leaves also make it easier to inspect the undersides and stems for mites, scale, or mealybugs. Do not prune healthy foliage merely to make the plant smaller if it can be moved or divided instead.
Propagate by Dividing the Clump
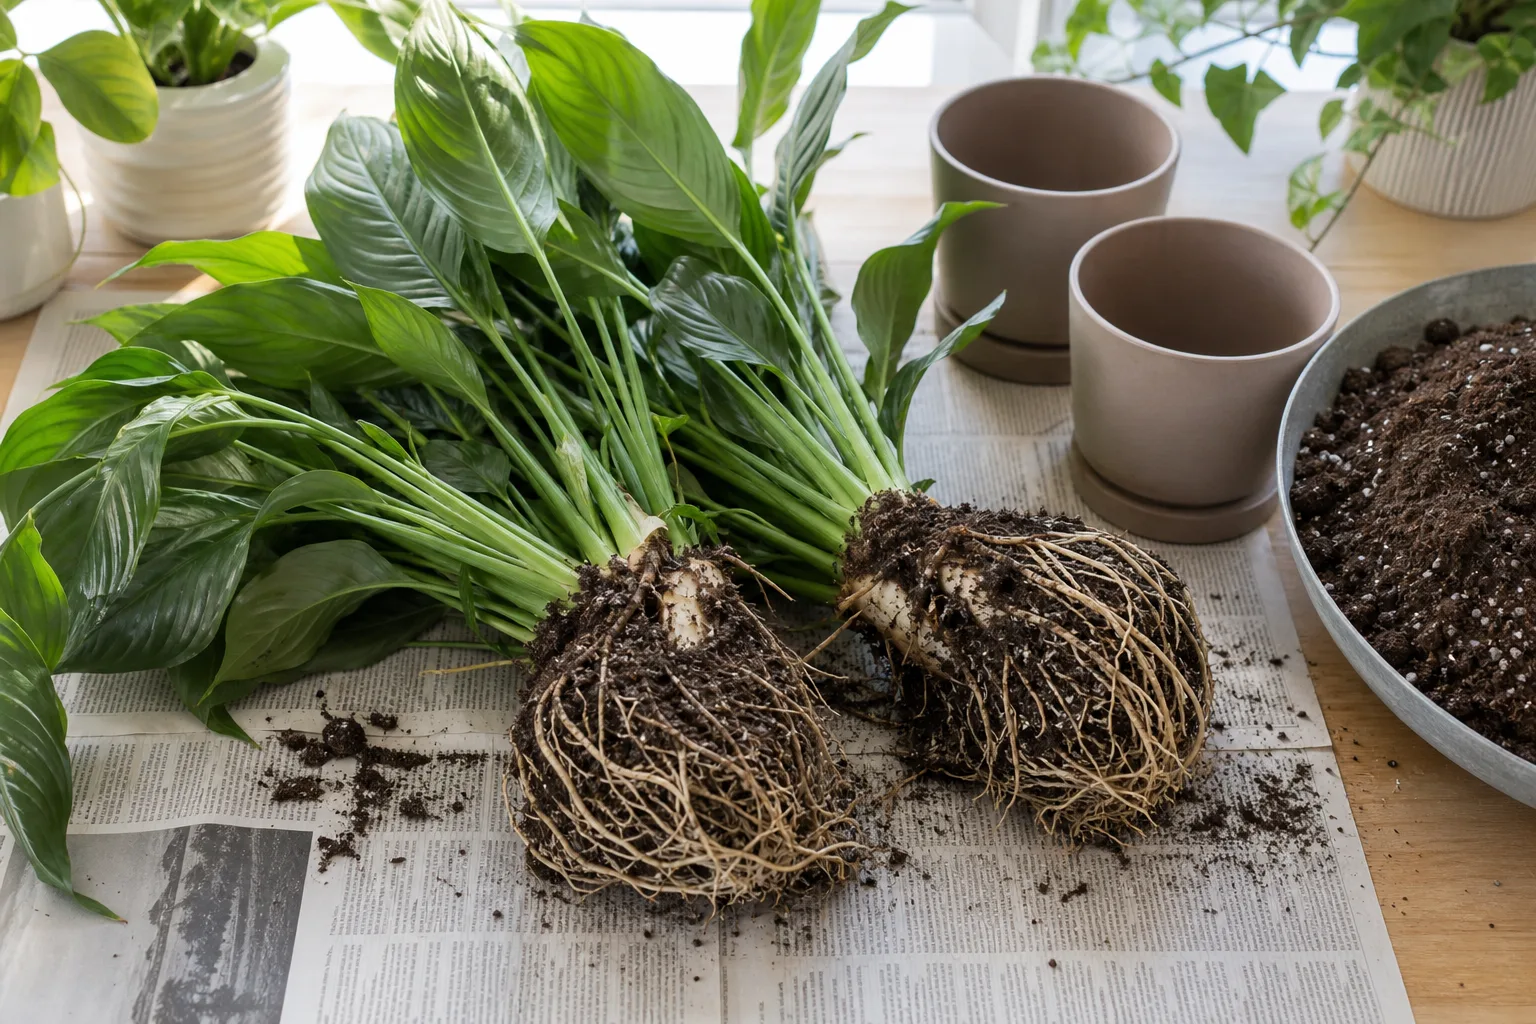
Division is the most reliable home method because each new section needs a growing point and roots. Wait until the plant is established and actively growing, then divide during a spring repot if the clump naturally separates. This is not a good job for a very small plant, one with widespread root damage, or a specimen already struggling with low humidity and leaf loss.
Water the plant a day before dividing if the mix is dry, then slide it from the pot and loosen soil around the outside of the root ball. Look for distinct groups of stems or shoots connected by roots and a short rhizome. Gently tease apart a natural separation; if needed, use a sterile knife to make one clean cut through the root mass. Each division should retain several healthy roots and at least one active shoot or growth point. Do not divide it into tiny leaf-only pieces.
Pot each section into a modest container with fresh, airy mix at the same depth it was growing before. Water enough to settle the medium and drain it fully. Keep the new divisions warm in bright indirect light, with more consistent soil moisture than you would give a fully established plant, but never waterlog them. High ambient humidity can reduce leaf stress during establishment; a loose clear cover can help briefly if airflow is maintained and the leaves do not stay wet. New growth—not a tug test—is the clearest sign that a division has settled.
Grow Outdoors Only in Warm, Sheltered Conditions
In a frost-free tropical or subtropical garden, Grey Star can grow in a protected, partly shaded position with rich, moist but free-draining soil. The RHS lists C. setosa as a tender conservatory or greenhouse plant in its British climate, which underlines the limits of outdoor planting in cooler regions. Do not interpret tropical hardiness guidance as permission to leave it outside through a cold night.
For a seasonal patio move, wait until nights are reliably warm, then acclimate the plant over a week or more. Begin in deep shade sheltered from wind, and increase the amount of gentle morning light only if the leaves stay firm and unscorched. Keep the pot out of torrential rain, which can saturate the mix, and bring it inside before temperatures drop. A container is easier to protect than an in-ground planting in regions with variable weather.
Spot Pests and Disease Early
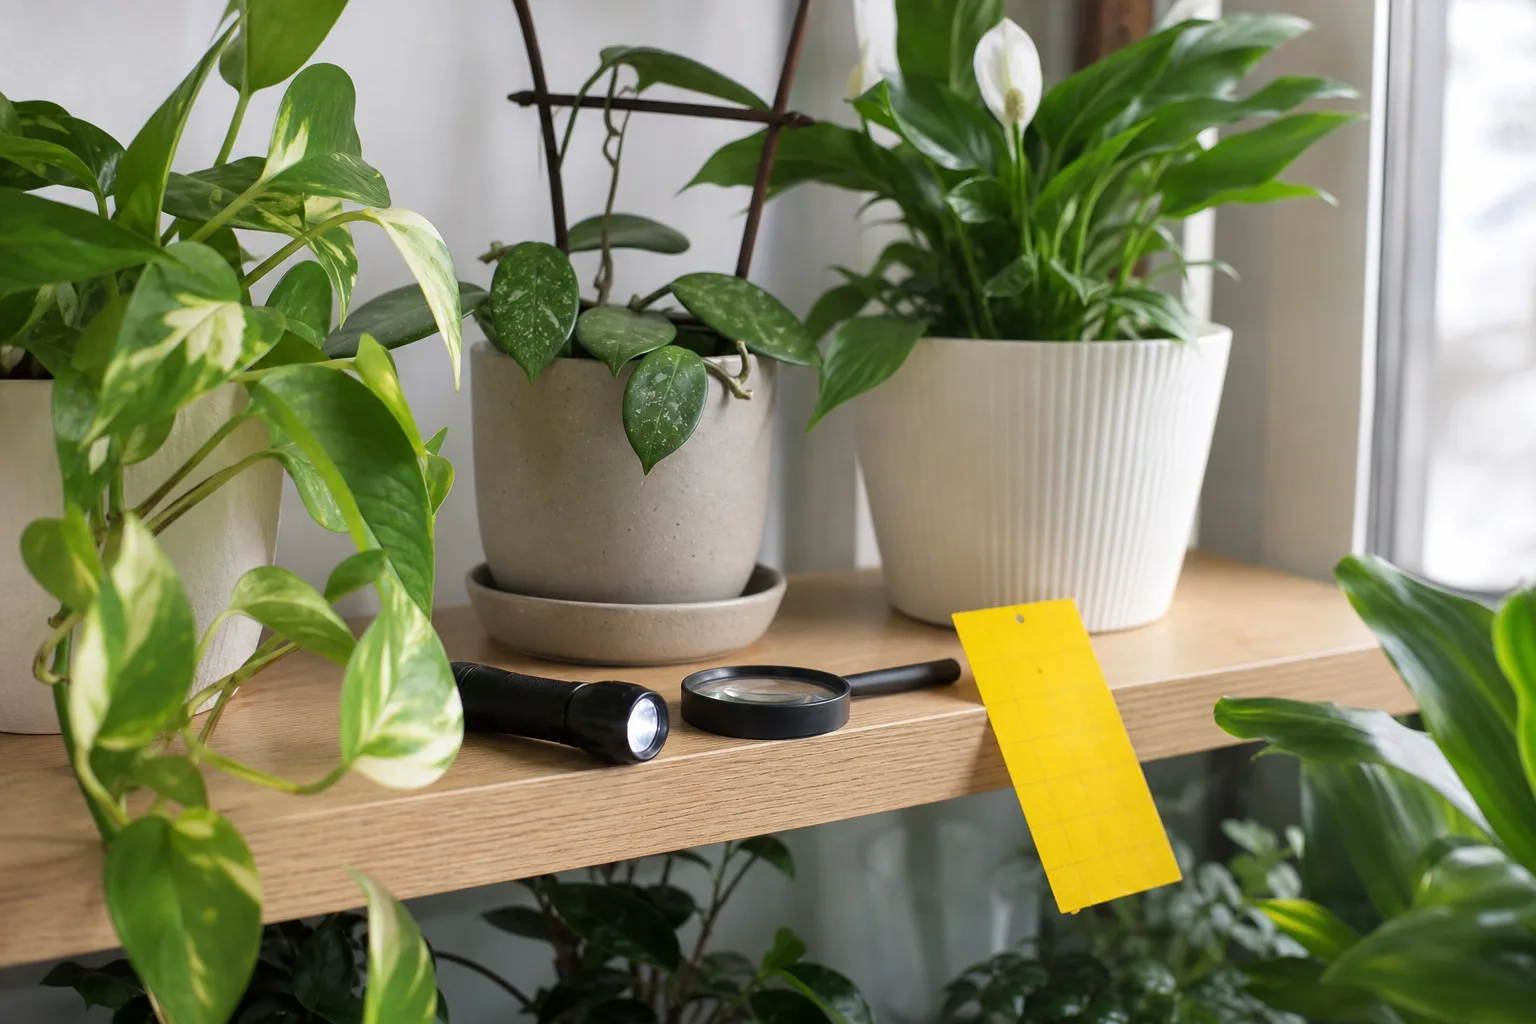
Inspect the leaf undersides, folded leaf bases, and new growth every time you water. Spider mites can leave fine webbing and stippled or bronzed leaves; mealybugs look like small white cottony clusters in protected joints; scale appears as fixed bumps on leaves or stems. A quick top-side glance can miss all three. Isolate a newly infested plant from nearby houseplants and confirm the pest before choosing a treatment.
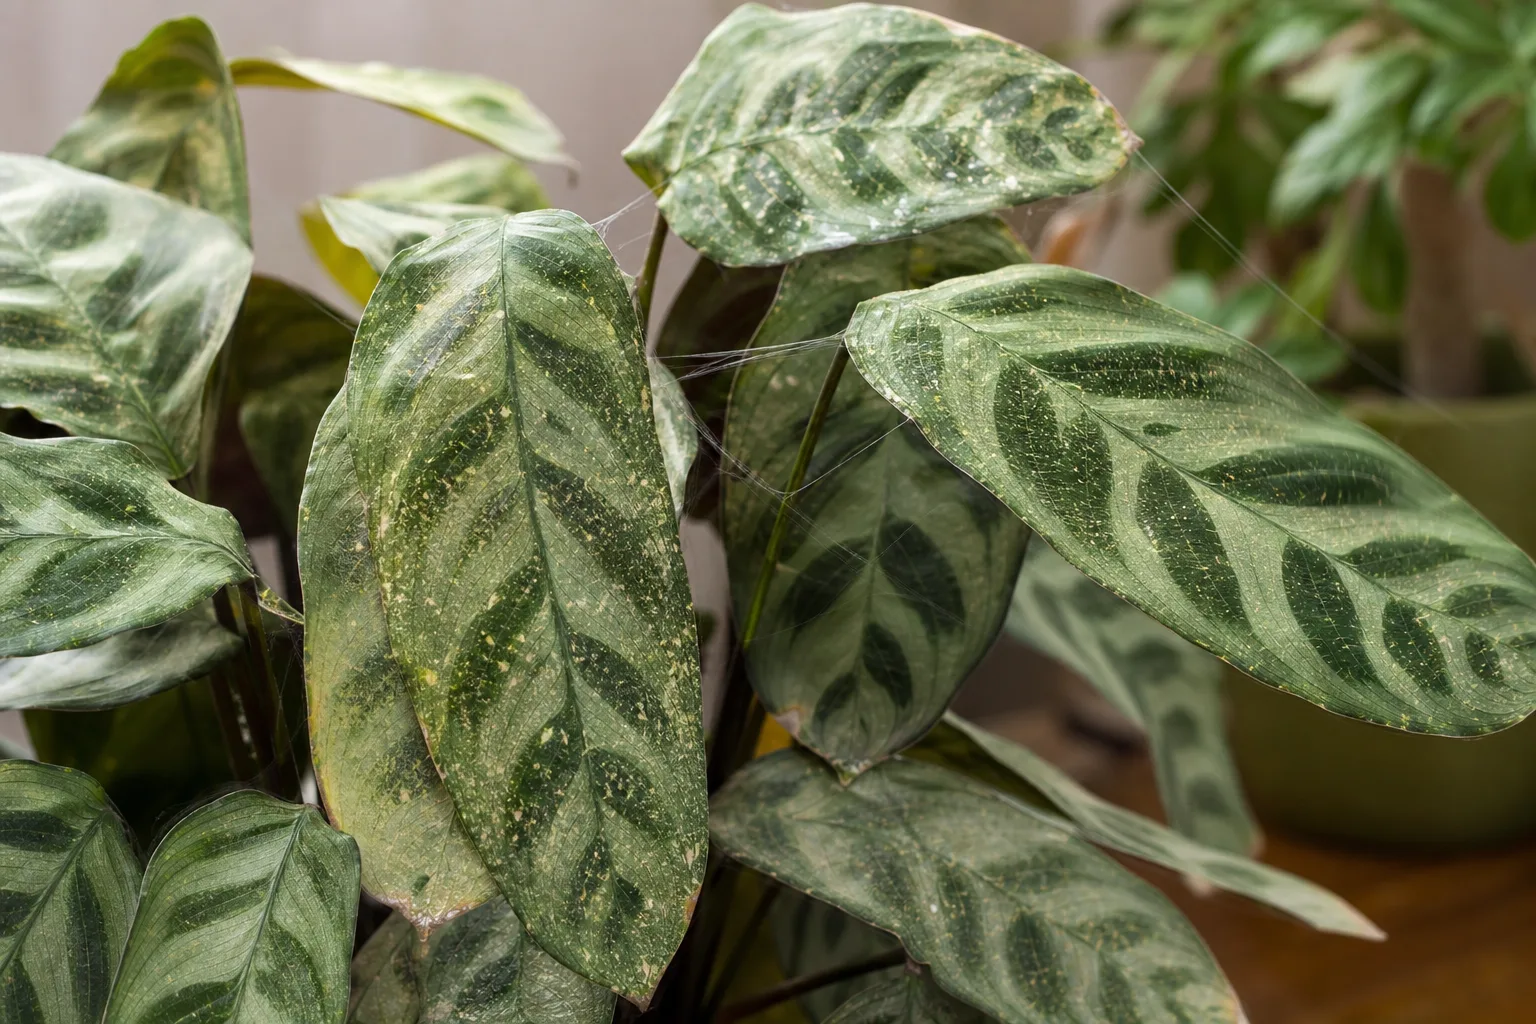
Wipe or rinse a small pest population where practical, then follow the label on any treatment product and test it on one leaf first. Thin foliage can react to sprays, and oils or soaps are not automatically harmless. Repeat inspections because eggs and hidden insects can survive a single wipe. The RHS lists mealybugs among possible pests for Ctenanthe; NC State also notes that related Ctenanthe can encounter mealybugs, red spider mites, and gray mold.
Persistently wet soil and poor air movement increase the risk of root and leaf problems. Water at the soil line rather than repeatedly wetting foliage, remove fallen leaves from the pot surface, and keep the plant from touching cold glass. If spots spread quickly or a stem base turns soft, isolate the plant and check roots before assuming that fertilizer or humidity is the cause.
Diagnose Leaf Changes Before Changing Care
A symptom is a clue, not a diagnosis. Before changing the watering routine, note whether the trouble affects one old leaf or the whole plant, which side faces the window, whether the pot feels heavy, and how quickly the mix dries. Make one correction at a time and give new growth a chance to show whether it helped; existing damaged tissue usually does not recover.
Yellow or limp leaves
One older leaf yellowing near the base can be normal aging. Several leaves yellowing together, especially while the soil stays wet, call for a drainage and root check. Confirm that holes are open, empty standing water, and inspect the roots if the mix smells sour or the plant remains limp despite damp soil. Trim roots only if they are clearly soft or dead, then repot into fresh, airy medium.
If the mix is dry well below the surface and the pot is light, water slowly and let the root ball rehydrate without leaving it submerged. Curling with crispy edges and a dry pot fits dehydration better than a heavy, wet pot with soft, sagging leaves. Avoid flooding an extremely dry root ball all at once if water runs around the sides; apply a little, wait for it to absorb, then water again until it drains.
Brown edges, curling, or fading color
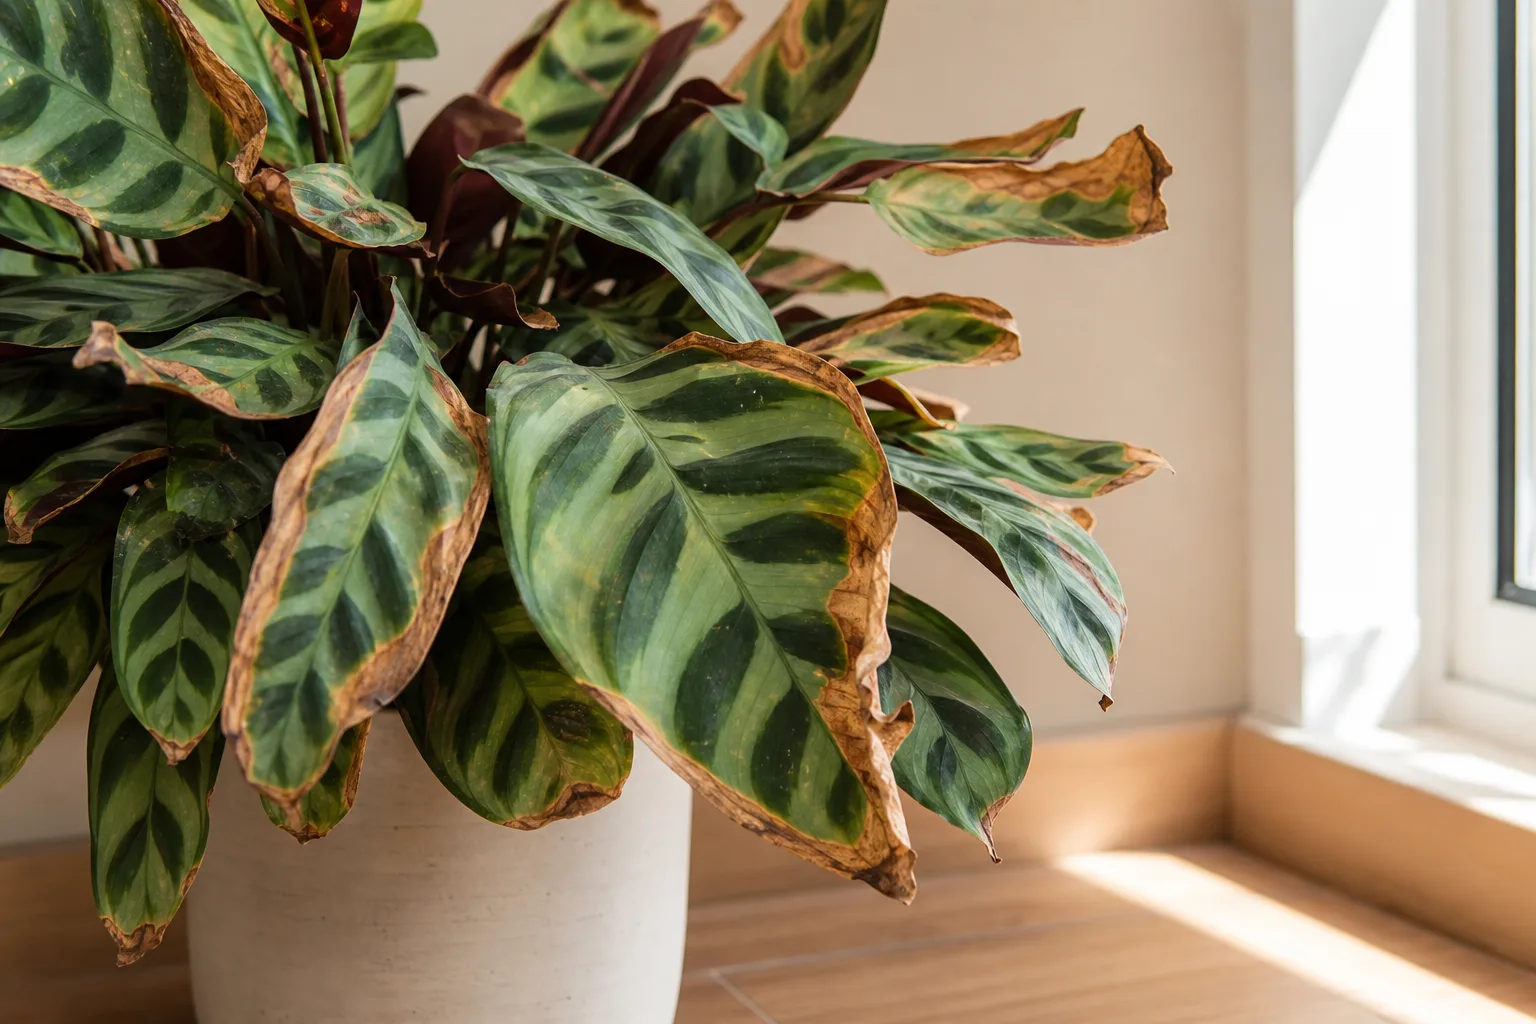
Crispy margins can follow dry air, missed watering, mineral-heavy water, fertilizer salt buildup, strong sun, or hot airflow. Compare the pattern: one bleached patch on the window-facing side suggests sun; repeated brown edges across several leaves suggest a persistent room or water issue; a white crust on the soil points toward salts. Start with the lowest-risk checks—soil moisture, window exposure, vent location, and water quality—before buying a humidifier or changing the entire mix.
Leaves that fold at night and reopen in daylight are behaving normally. Leaves that remain curled during the day may be responding to dehydration, intense light, or low humidity. If new leaves lose their strong pattern and growth stretches, move the plant toward brighter filtered light rather than adding fertilizer. Correct only the condition the evidence supports, then judge the next leaves instead of trying to restore old damage.
Conclusion
Ctenanthe setosa ‘Grey Star’ stays attractive when its environment is steady: bright filtered light, warm air, a lightly moist but well-aerated root zone, and enough humidity to keep new leaves from repeatedly drying at the edges. Water by checking the mix, drain the pot completely, and change one care variable at a time when symptoms appear.
The plant is not asking for a strict schedule or constant rescue. Give it a sheltered position, use a pot and mix that can drain, and inspect the foliage and roots before deciding what a symptom means. When it outgrows its container, divide a healthy clump during active growth; when it slows, check the conditions before adding more water or fertilizer.