Cedar of Lebanon Tree Care and Growing Guide
Cedar of Lebanon care starts with space and drainage. Get practical planting, watering, pruning, propagation, and troubleshooting advice for this long-lived conifer.
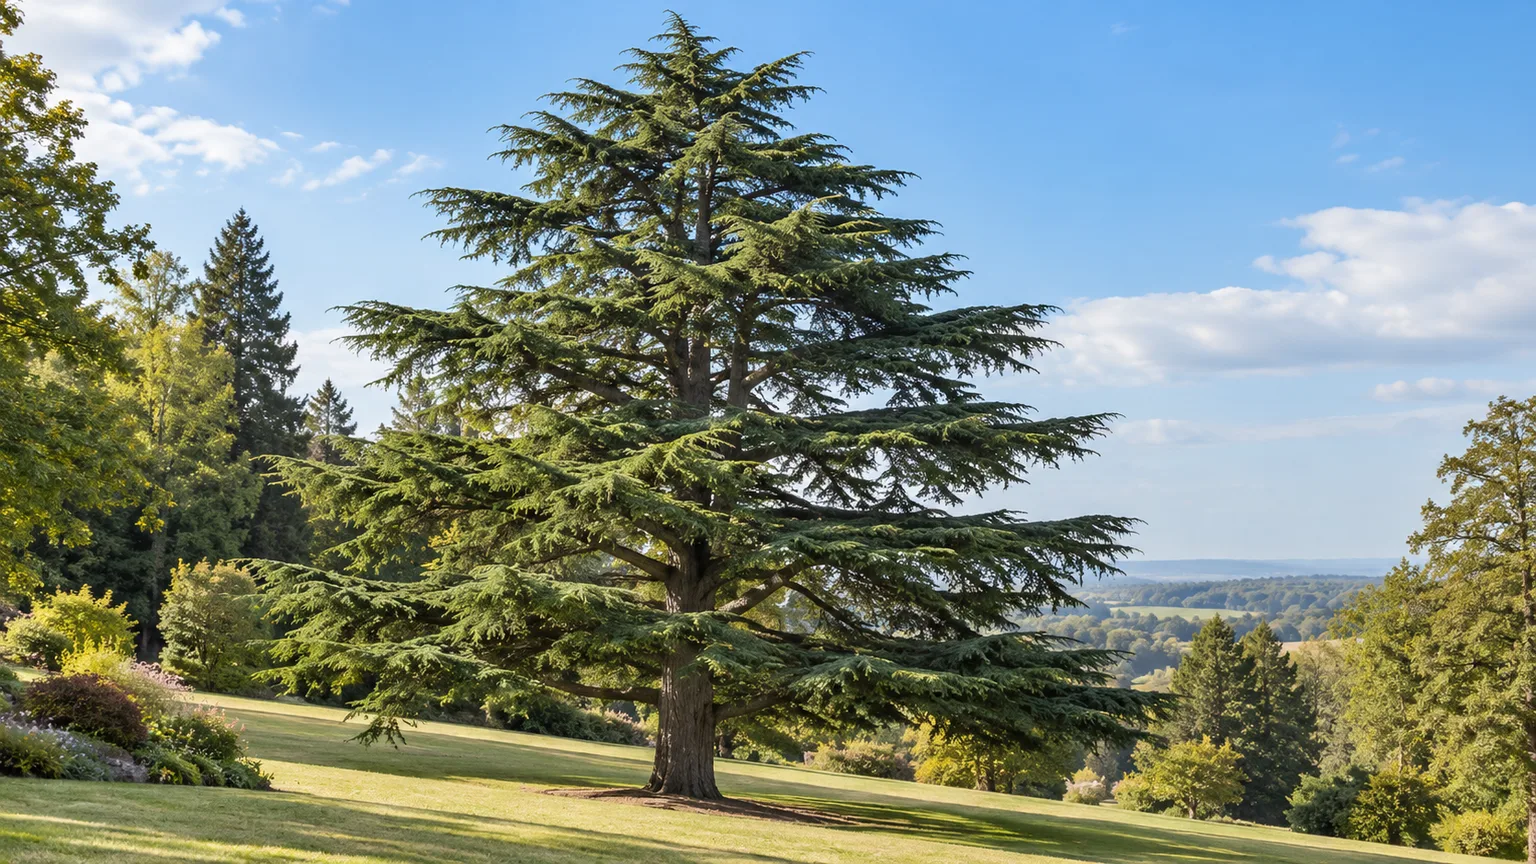
A Cedar of Lebanon is a tree to plant for the landscape you want decades from now. The species, Cedrus libani, develops a broad, tiered crown and can outgrow an ordinary residential yard; the decision that matters most is whether you can give it lasting space and freely draining soil. Once established in a suitable site, it asks for less routine attention than many garden trees.
Choose a sunny, open position with well-drained soil, set the root flare at grade, keep the root ball evenly moist during establishment, and prune only for a clear reason. The sections below adapt that plan to site, climate, and tree size.
Is a Cedar of Lebanon Right for Your Site?
Choose this tree when you have a genuinely large landscape, park-like lawn, or open garden where a broad evergreen crown can mature without being squeezed between a house, driveway, power line, or neighboring trees. A young nursery tree looks compact, but its slow early growth can be misleading: over decades, the full-size tree can dominate the site.
Drainage is the second test. A Cedar of Lebanon tolerates dry spells better once its roots are established, but it is a poor choice for a low spot that holds water, a boggy lawn, or heavy soil that stays saturated through winter. If you cannot correct the drainage without major grading—or if the only available location is cramped—choose a smaller conifer or a compact cultivar with a documented mature size instead of planning to prune a full-size tree into submission.
Hardiness ratings vary and omit summer heat, rainfall, wind, and drainage. Before buying, ask a local nursery or arborist whether C. libani performs in your region; use the tree’s full site needs, not a zone alone, to decide.
Cedar of Lebanon Profile: Form, Size, and Growth
This evergreen conifer belongs to the pine family, Pinaceae, and is native to mountainous areas of Lebanon, Syria, and Turkey. It is a true cedar in the genus Cedrus, not the unrelated eastern red cedar (Juniperus virginiana) commonly called cedar in parts of North America. Look for dark green needles arranged in clusters on short shoots and large, upright, barrel-shaped cones. The crown starts more conical and opens into broad horizontal tiers as the tree ages.
| Feature | What to plan for |
|---|---|
| Botanical name | Cedrus libani |
| Habit | Evergreen conifer with tiered, spreading branches |
| Mature size | Often about 40–60 feet tall and wide in cultivated landscapes; exceptional old trees can be much larger |
| Light | Full sun |
| Soil | Any texture can work if drainage is good; pH can range from acidic to alkaline |
| Establishment | Slow at first; the tree becomes more resilient after roots establish |
| Best use | Long-term specimen tree for a large, open landscape |
The ranges are not promises for an individual garden. Missouri Botanical Garden describes typical trees around 40 to 60 feet tall and wide, while British horticultural references list specimens exceeding 12 meters and report still larger mature examples. Soil, climate, provenance, cultivar, and age all affect the result. Plan around a generous mature crown rather than the smallest number you find on a plant label.
Its value is architectural form, not rapid screening; choose another tree for a narrow column or immediate privacy. A compact cultivar will not develop the species’ broad silhouette.
Choose Sun, Soil, and Shelter
Give the tree full sun and an open position. Shade can slow young trees, and nearby mature plants may compete as the landscape fills in. Protect young trees from persistent strong winds; avoid exposed ridges or wind tunnels.
Drainage matters more than pH. Royal Horticultural Society lists chalk, clay, loam, or sand and acidic to alkaline conditions when the soil drains well. Avoid adjusting pH without a soil test; no amendment can compensate for standing water.
After heavy rain, note whether puddles remain for a day or the ground stays saturated several inches down. Clay may drain on a slope; sandy topsoil can still sit over compacted subsoil. Assess the full soil profile, not texture alone.
Forest Research data comes mainly from forestry and trial sites, so its exposure and rainfall limits are not exact home-garden rules. It confirms that the species prefers relatively dry conditions. In wet climates, choose a warm, freely draining site and ask locally before buying.
Plan for the Mature Footprint
Measure before ordering. Use the mature crown width—not nursery height—to check clearance from buildings, utilities, drives, septic systems, and boundaries. Because lower limbs remain and can spread toward the ground, leave room beneath branches too.
Mark the planting center and outline the expected canopy radius with a hose or string; this makes mature spread easier to picture than a nursery label. Include future sheds, patios, paths, garden beds, and sight lines in your check, because a cedar can eventually shade a seating area or obstruct a route you use often.
Pruning cannot create lasting clearance: cutting lower limbs changes form, while cuts into bare conifer wood can leave permanent gaps. If the tree will shade a roof, block access, or cross a boundary, choose another species now.
Consider how a large evergreen may change neighbors’ light and views. Check local boundary rules and call the utility-location service before digging; an arborist can assess complex sites.
When to Plant a Cedar of Lebanon
Plant a nursery-grown tree from autumn through early spring, when the ground is workable and cool weather reduces the stress of moving a root ball. Avoid planting into frozen ground, waterlogged soil, or during a hot, dry spell. The exact best month depends on local winters: in regions with severe winters, early fall gives roots some time to settle before deep cold; in milder climates, autumn or late winter can both work.
If you buy a container-grown specimen in warmer weather, you can still plant it, but you will need to monitor moisture more closely through the first growing season. A root ball that dries inside surrounding soil can be easy to miss, especially after rain that wets the surface but not the container’s original root zone. Keep the root ball damp, not saturated, and postpone planting if you cannot provide follow-up watering.
Choose a healthy, well-rooted nursery plant with a straight trunk and evenly distributed branches. Check that the root ball is firm and not badly root-bound, and that the trunk base is not already buried under potting medium. For a species that resents being moved once established, getting a sound specimen into its permanent position correctly is more important than buying the tallest tree available.
How to Plant It Without Burying the Root Flare
A broad, shallow planting hole encourages the roots to move outward into the surrounding soil. Dig the hole two to three times wider than the root ball but no deeper than its measured depth. Loosen glazing on the hole’s sides if your soil is heavy, but do not replace the site soil with a pocket of rich potting mix; roots need a gradual transition into the native ground.
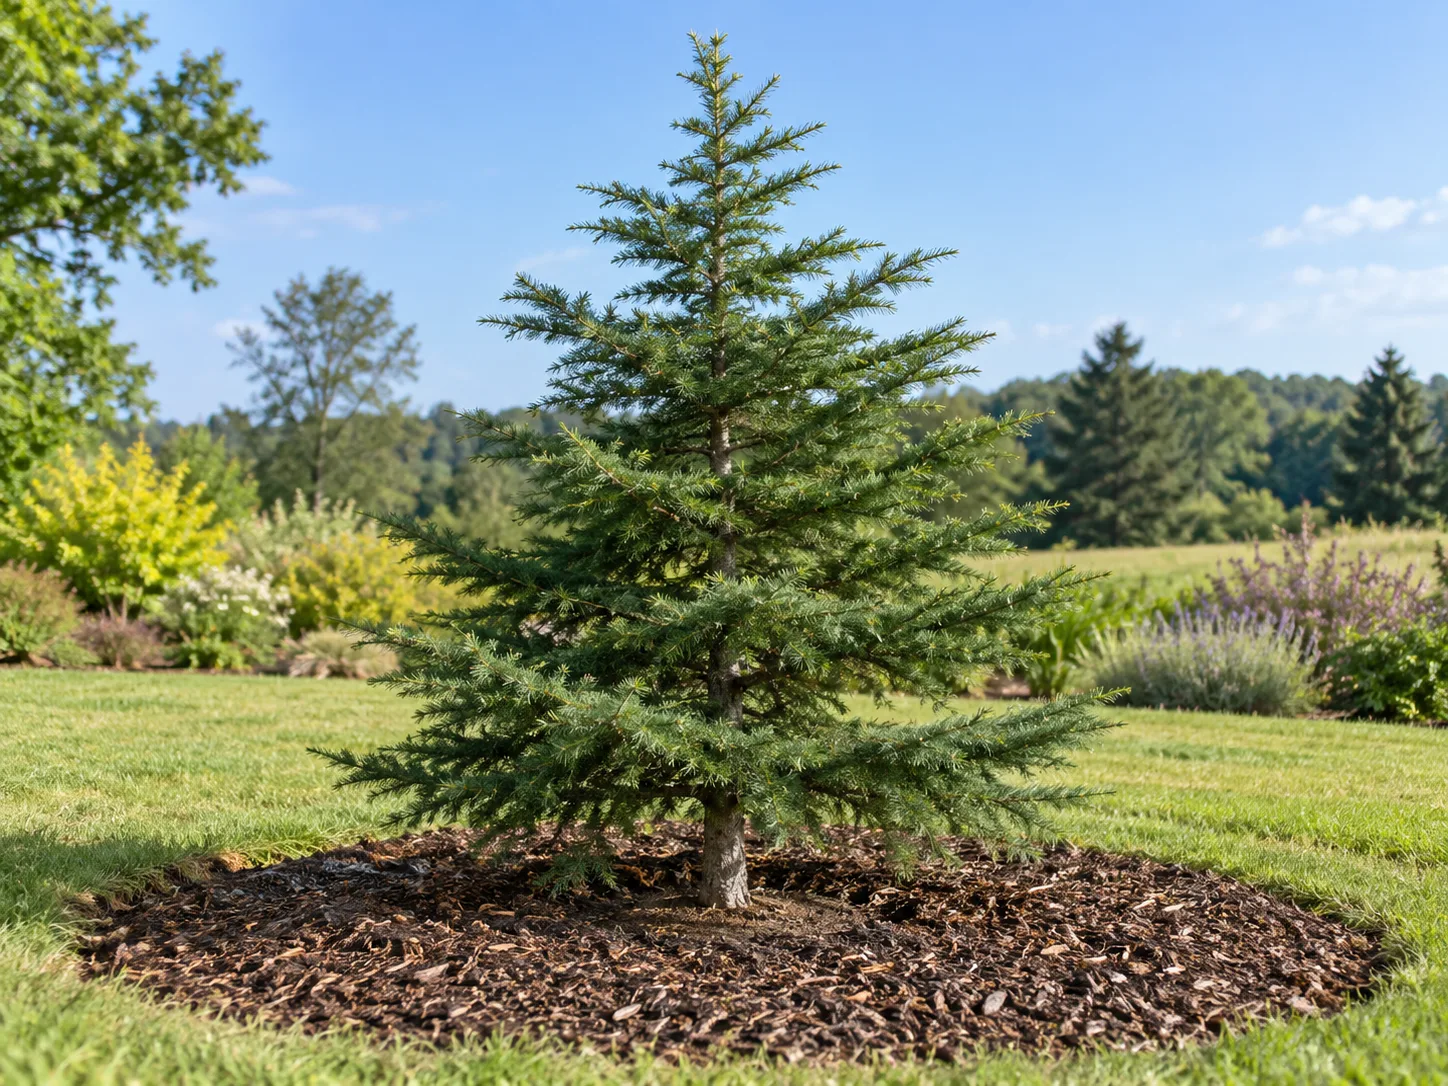
Find the root flare—the point where the trunk widens and the first structural roots begin—before lowering the tree. If it is hidden, gently remove excess soil from the top of the root ball until you find it. Set the flare level with, or slightly above, the finished soil grade so settling does not bury the trunk. Correcting a too-deep root ball now is much easier than diagnosing a buried flare after the tree has declined.
Remove the container or loosen wrapping as appropriate for the nursery stock. If roots circle tightly around the outside, tease or make a few shallow vertical cuts to encourage outward growth; do not chop away a large share of the root system. Set the tree upright, backfill with the excavated soil, and firm it gently by hand to remove large air pockets without compacting the ground. Do not place fertilizer, manure, or gravel in the planting hole.
Water slowly after backfilling so the soil settles around the roots. Add a shallow ring of mulch over the root zone, leaving a clear gap around the trunk and keeping the root flare visible. Stake only if the root ball moves in wind; use flexible ties and remove the support once the tree is stable. A tree that stands securely without staking is usually better left unstaked.
Water During Establishment, Then Adjust
For at least the first two growing seasons, check the root ball regularly and water during dry periods. BBC Gardeners’ World recommends watering until the tree is established—at least two years—and warns against overwatering. That does not mean pouring water on a fixed weekly calendar. Rainfall, temperature, soil texture, root-ball size, and drainage change how often the tree needs irrigation.
Check moisture in the original root ball and the surrounding soil a few inches below the surface. If both are beginning to dry, water slowly and deeply enough to wet the root zone; if the ground is still damp, wait. Newly planted trees need consistent moisture, but saturated soil deprives roots of oxygen and raises the risk of root problems. Frequent shallow sprinkling can leave the deeper root ball dry while keeping the surface wet.
In hot or windy weather, inspect more often because the root ball can dry faster than the surrounding ground. Use a hose set to a slow trickle or a soaker line rather than a brief spray that runs off. After watering, check again later to confirm that moisture reached the root ball. If water pools and remains, stop adding more and investigate drainage rather than increasing the schedule.
Once established, the tree is more drought tolerant, but “drought tolerant” does not mean it never needs water. During an unusually long dry spell, a deep soak may help an established specimen, especially if it is growing in shallow soil or a heat-reflecting paved setting. Do not irrigate automatically through cool, rainy seasons; the soil should have time to drain between waterings.
Mulch and Fertilizer: Keep Care Simple
Apply a two- to three-inch layer of organic mulch over the root zone, extending it outward as the tree grows. Keep mulch several inches away from the trunk so bark stays dry and the flare remains visible. A broad, shallow mulch ring helps moderate soil temperature and reduces competition from lawn grass; a tall mulch cone against the trunk does the opposite by holding moisture against bark and concealing the planting depth.
A healthy Cedar of Lebanon in decent soil usually does not need a routine annual fertilizer. The Royal Horticultural Society lists the species as requiring no pruning, and the care references emphasize site and drainage rather than regular feeding. If the tree has persistently weak growth or unusually pale foliage, first check moisture, planting depth, and root health; those problems are more likely to be fixed by correcting site care than by adding nutrients.
If a soil test identifies a nutrient deficiency, follow the lab’s recommendation and the product label for the measured area. Avoid high-nitrogen feed that pushes soft growth or applying fertilizer late in the growing season in cold climates. Never put concentrated fertilizer in the planting hole or apply it against the trunk. More fertilizer cannot overcome poor drainage, a shaded site, or roots that were planted too deeply.
Seasonal Care Through the Year
In spring, inspect the crown for winter injury, compare new growth with older needles, and check that mulch has not crept against the trunk. This is also a good time to confirm that irrigation lines still wet the root ball evenly. A few scattered older needles turning yellow and dropping as new growth emerges can be normal for an evergreen; widespread browning on current growth deserves closer inspection.
During summer, prioritize moisture checks on recently planted trees. Water when the root ball begins to dry, not simply because the weather forecast is hot. Keep grass and weeds from crowding the trunk and avoid piling soil over surface roots. Once the tree is established, summer care often consists mainly of watching for prolonged drought or unusual symptoms.
In autumn, keep the root zone mulched and remove broken branches that could be a hazard, but avoid cosmetic cuts that are not needed. Continue watering a new tree during dry weather until the soil freezes or local conditions make irrigation unnecessary. A wet fall is not a reason to add more water; the tree should enter winter with moist, aerated soil rather than saturated ground.
A mature specimen generally needs little seasonal intervention. Do not wrap the whole tree or blanket the branches for ordinary winter conditions; choose a locally suitable cultivar and a protected site instead. Container-grown dwarf forms and bonsai are different: their roots are more exposed to temperature swings and they need a separate winter plan suited to the pot and local climate.
Pruning: Preserve the Natural Crown
Routine pruning is unnecessary for a Cedar of Lebanon. Its horizontal, tiered branches are the feature many gardeners want, and repeated shaping can spoil that form. The RHS lists no pruning requirement, and BBC Gardeners’ World recommends cutting only when branches must be removed for safety. Let the leader and natural crown develop unless there is a clear reason to intervene.
Remove a branch only if it is dead, broken, rubbing, diseased, or creating a specific safety concern. Use clean, sharp tools and cut just outside the branch collar rather than flush to the trunk or leaving a long stub. Do not top the tree to control height, shear the sides to reduce width, or cut far back into bare old wood; cedar may not produce replacement growth from a branch section without living needles.
The timing depends on the reason for the cut and local disease risk, not a rule that every cedar must be pruned in fall. Small dead or damaged branches can be addressed when they are noticed, provided the work is safe and weather conditions are suitable. Large limbs, work near power lines, or pruning high in the crown belong to a qualified arborist. Fine Gardening’s general conifer guidance also cautions that conifers are not one uniform pruning group, so avoid transferring a technique from a different evergreen to this tree.
Propagating Cedar of Lebanon From Seed
Seed is the practical home-garden route for raising the species, although it takes patience and the young tree will need years of care before it can go in the landscape. Cedar cones mature on the tree and release seed as they break apart; unlike pine cones, they may not fall intact for easy collection. If you do not have access to a mature tree, buy fresh seed from a reliable supplier rather than collecting unknown or stale seed.
JC Raulston Arboretum at NC State notes that C. libani is among the more difficult true cedars to root from cuttings. It also reports that the seed has little or no dormancy, though a two-week cold treatment at about 40°F (4°C) has been recommended to improve germination. In practice, the seed treatment is a helpful trial, not a guarantee that every seed will germinate. Expect variation and grow more than one seed if you want a better chance of producing a healthy seedling.
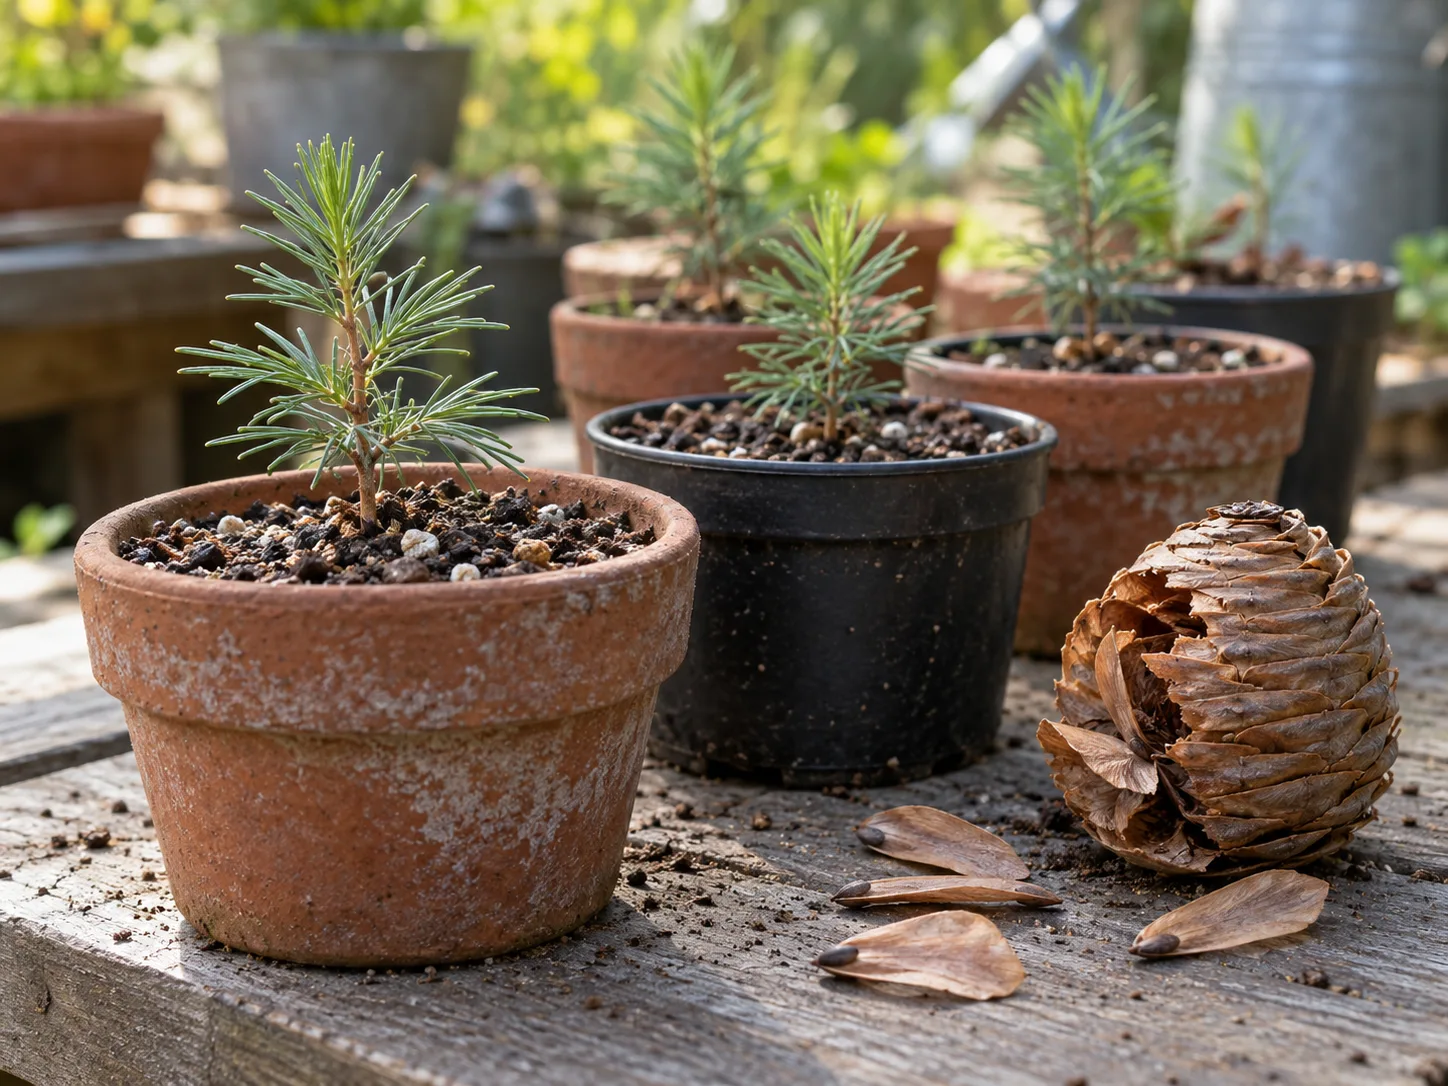
A Practical Seed-Starting Sequence
- Start with mature, fresh seed. If collecting from a tree, use seed from a ripe cone that is opening naturally. Handle it gently and remove loose cone material without crushing the papery wings.
- Cold-treat if you want to follow the arboretum’s recommendation. Seal the seed in a lightly moist—not wet—medium and refrigerate it for about two weeks at roughly 40°F. Keep seed away from freezing and from produce that could introduce rot or moisture swings.
- Sow in a deep, clean container. Use a free-draining seed-starting mix and a pot deep enough to avoid bending the developing root. Cover each seed lightly, then water until the mix is evenly moist and excess water drains away.
- Give the pot bright light and even moisture. Place it in a bright, cool-to-mild location. Do not leave the pot in a saucer of standing water or let the medium dry to dust. Check daily rather than watering by a fixed schedule.
- Pot on before roots become crowded. When the seedling has a stable root system and is growing actively, move it into a deeper container with drainage. Handle the seedling by its leaves or root plug, not by pulling on the delicate stem.
- Harden it off and plant only when it is robust. Gradually expose the young tree to outdoor conditions, then keep it in a sunny, protected nursery position while it builds strength. Plant it in its permanent site when it can tolerate local weather and you can keep the root zone watered.
Seed-grown trees do not guarantee the exact form or color of a named selection. If you want a specific compact or weeping cultivar, buy a plant labeled with that cultivar from a specialist nursery; propagation from seed is for the species, not a dependable way to reproduce a selected clone.
Container Growing: Species Tree, Cultivar, or Bonsai?
The full-size species is not a practical long-term container tree. Its eventual width, root volume, and need for stable soil moisture make a permanent pot a poor substitute for an open landscape. A container can be useful temporarily for a young nursery plant or seedling, but it should not become an indefinite holding place while the tree outgrows the site.
Some compact or weeping selections are sold for containers or bonsai. BBC Gardeners’ World lists small forms such as ‘Hedgehog’ and ‘Sargentii,’ but cultivar names and growth estimates can differ between nurseries. Confirm the exact selection and its expected size with the grower; do not buy a label that says only “dwarf cedar” and assume the plant will stay miniature.
A container-grown cultivar needs a large pot with drainage, a stable growing medium, and regular moisture checks because a pot can dry much faster than garden soil. Protect the container’s root zone from severe cold and drying winds according to the cultivar’s hardiness and local climate. Bonsai require specialized root pruning and watering and should be treated as a separate horticultural practice, not as a shortcut for keeping the standard species small.
Diagnose Browning Needles Before Treating
Browning is a symptom, not a diagnosis. Start by checking which needles are affected, when the change began, and whether the soil is dry, evenly moist, or saturated. A few older inner needles may turn brown and drop during normal seasonal needle turnover; browning at branch tips, on new growth, or across one side of the crown is more concerning.
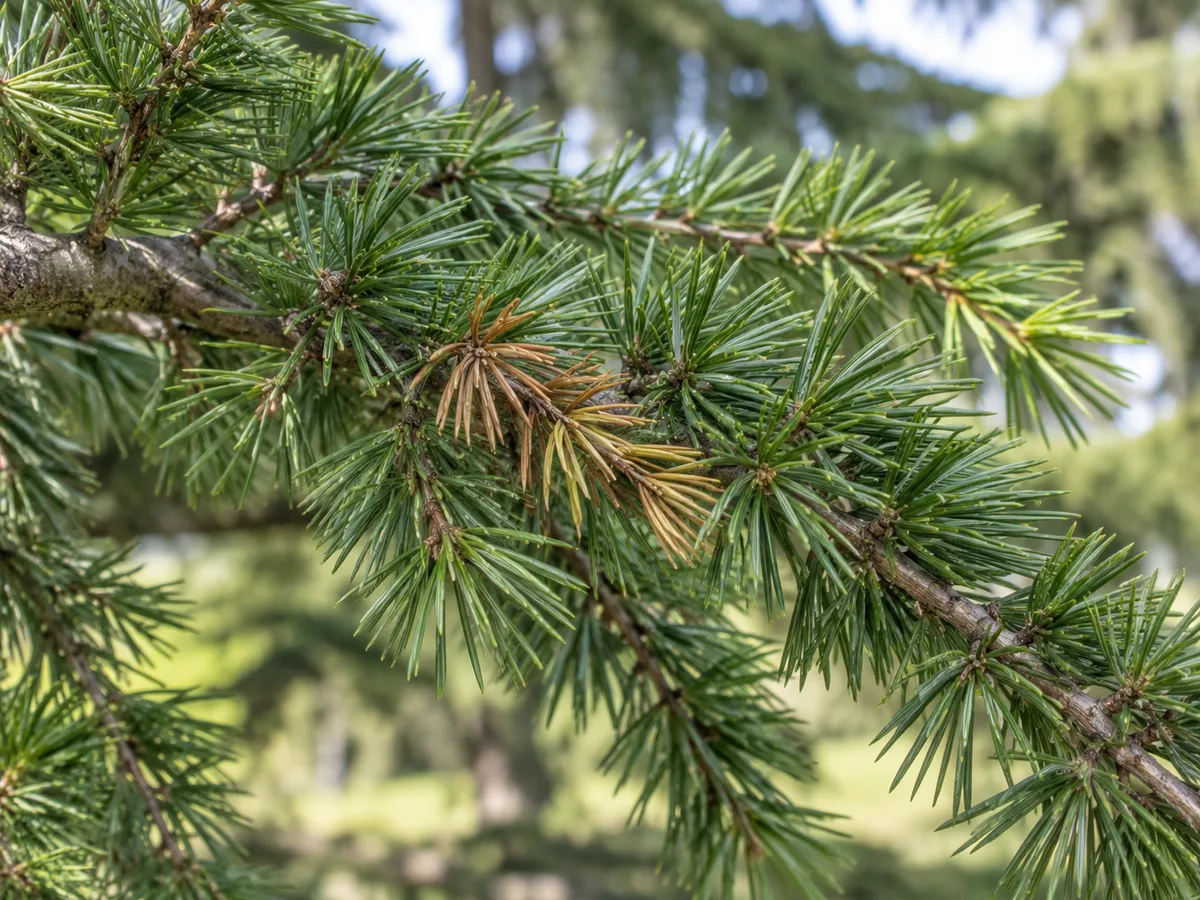
Check the root ball before reaching for a pesticide. If it is dry several inches down, give a slow, thorough watering and monitor recovery over the following weeks; brown needles will not turn green again, so judge the next flush and whether browning spreads. If the soil is wet, drainage, a buried root flare, or root damage may be more important than lack of water. Look for a pattern: scattered interior browning is different from crisp tips across several branch ends or decline isolated to one side.
Then inspect the affected shoots closely. Look for live insects, sticky honeydew, webbing, lesions, or small black fruiting structures rather than assuming every brown patch is an insect attack. Take a clear photo of the whole tree and the affected twig, note whether new growth is involved, and compare the symptoms after correcting a confirmed watering issue. If a large specimen is declining quickly, consult an arborist or local plant diagnostic service; mature conifers are difficult to diagnose from one close-up.
Aphids, Blights, and Other Pests or Diseases
Conifer aphids may feed on cedar and can leave sticky honeydew or visible clusters of insects on shoots. If numbers are low and the tree is otherwise healthy, observation is often enough. For a small accessible branch, a firm stream of water can dislodge aphids; avoid spraying the whole mature tree without confirming the pest and checking that any product is labeled for the site and target.
The RHS lists conifer aphids and honey fungus among possible problems. Missouri Botanical Garden also mentions tip blight and root rot. Forest Research notes that Sirococcus tsugae has been confirmed on Cedar of Lebanon and other Cedrus species in the UK, where the agency monitors its spread. That regional report is not proof that every brown cedar elsewhere has the same disease. If you see expanding tip dieback or unusual lesions, photograph the twig, disinfect cutting tools between affected plants, and ask a local extension or plant-health service for a diagnosis before applying a fungicide.
Avoid blanket pesticide or oil applications as “prevention.” They can affect beneficial insects and may not address the actual cause of browning. If treatment is warranted, use only a product labeled for the specific pest, tree, and location, and follow the current label exactly. Correcting drainage, planting depth, or drought stress is often the more important first step.
Root Rot and Persistently Wet Soil
Root rot is difficult to reverse in a mature tree because the damaged root system cannot simply be dried out or replaced. Warning signs can include declining growth, thinning foliage, branch dieback, or a tree that wilts even though the soil remains wet. These symptoms overlap with drought, transplant stress, and disease, so check the root zone and planting depth before deciding what is wrong.
If water consistently stands near the trunk, stop irrigation and identify why the site remains wet. A downspout, leaking irrigation line, compacted subsoil, or low-lying grade may be the source. For a new tree, correcting the site or replanting at proper grade while the root ball is still manageable may save it; for an established specimen, ask an arborist to assess the drainage and root condition before excavating or adding fill around the trunk.
Do not treat root rot by piling more soil or mulch over the trunk, drilling around the roots, or adding fertilizer. Those actions can make oxygen stress worse. If the tree is valuable or large, get a site-specific diagnosis; there is no reliable one-size treatment for a cedar with a failing root system.
Conclusion
Cedar of Lebanon succeeds when you match the tree to the landscape before planting: full sun, generous room, and soil that drains after rain. Set the root flare at grade, keep a new tree’s root ball evenly moist for its first years, and let the mature crown keep its natural shape. If you cannot offer that space and drainage, choose a truly compact cultivar or a smaller tree instead. Once the site is right, care is mostly careful observation rather than a long schedule of feeding, pruning, and spraying.