How to Grow a Caper Bush: Care and Harvest
Learn how to grow a caper bush in the ground or a pot, choose sharp-draining soil, manage winter, and harvest tight buds without sacrificing every flower.
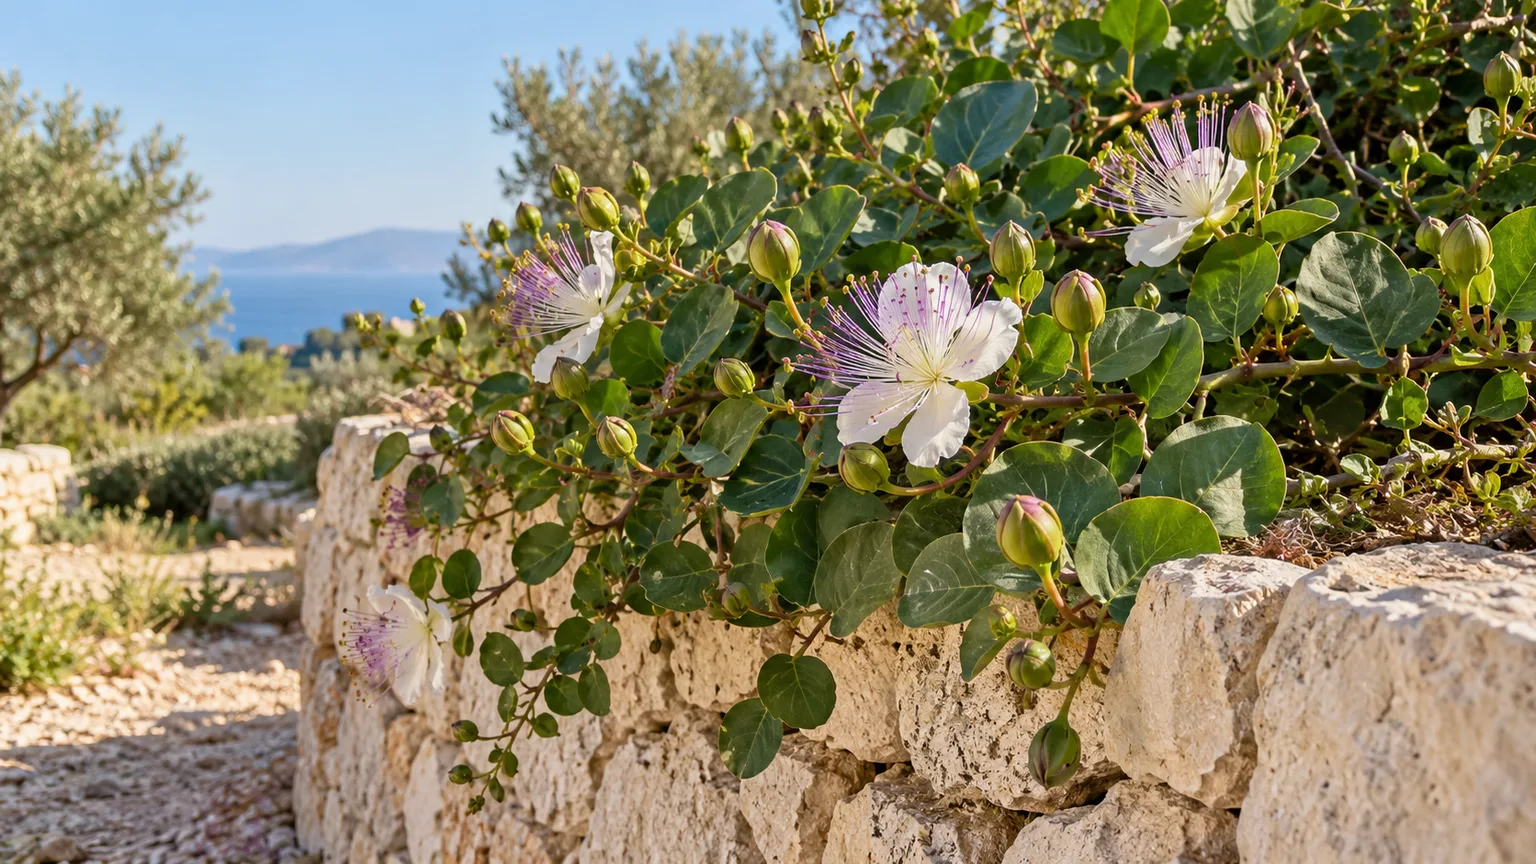
A caper bush is a Mediterranean shrub that rewards the right site more than constant attention. It wants a hot, sunny position, lean soil that drains quickly, and a dry rest through winter; in a cool or rainy climate, a movable container can make those conditions easier to provide. The edible caper is the unopened flower bud, while the shrub also produces large, short-lived white flowers and, if you leave some blooms alone, elongated caper berries.
The main challenge is not keeping the plant fed or lush. It is preventing the roots from sitting in cold, wet soil and accepting that seed germination, rooting cuttings, and the first harvest may all take patience. Use the guidance below to decide where to grow it, establish it with minimal root disturbance, and harvest without removing every flower.
What a caper bush produces
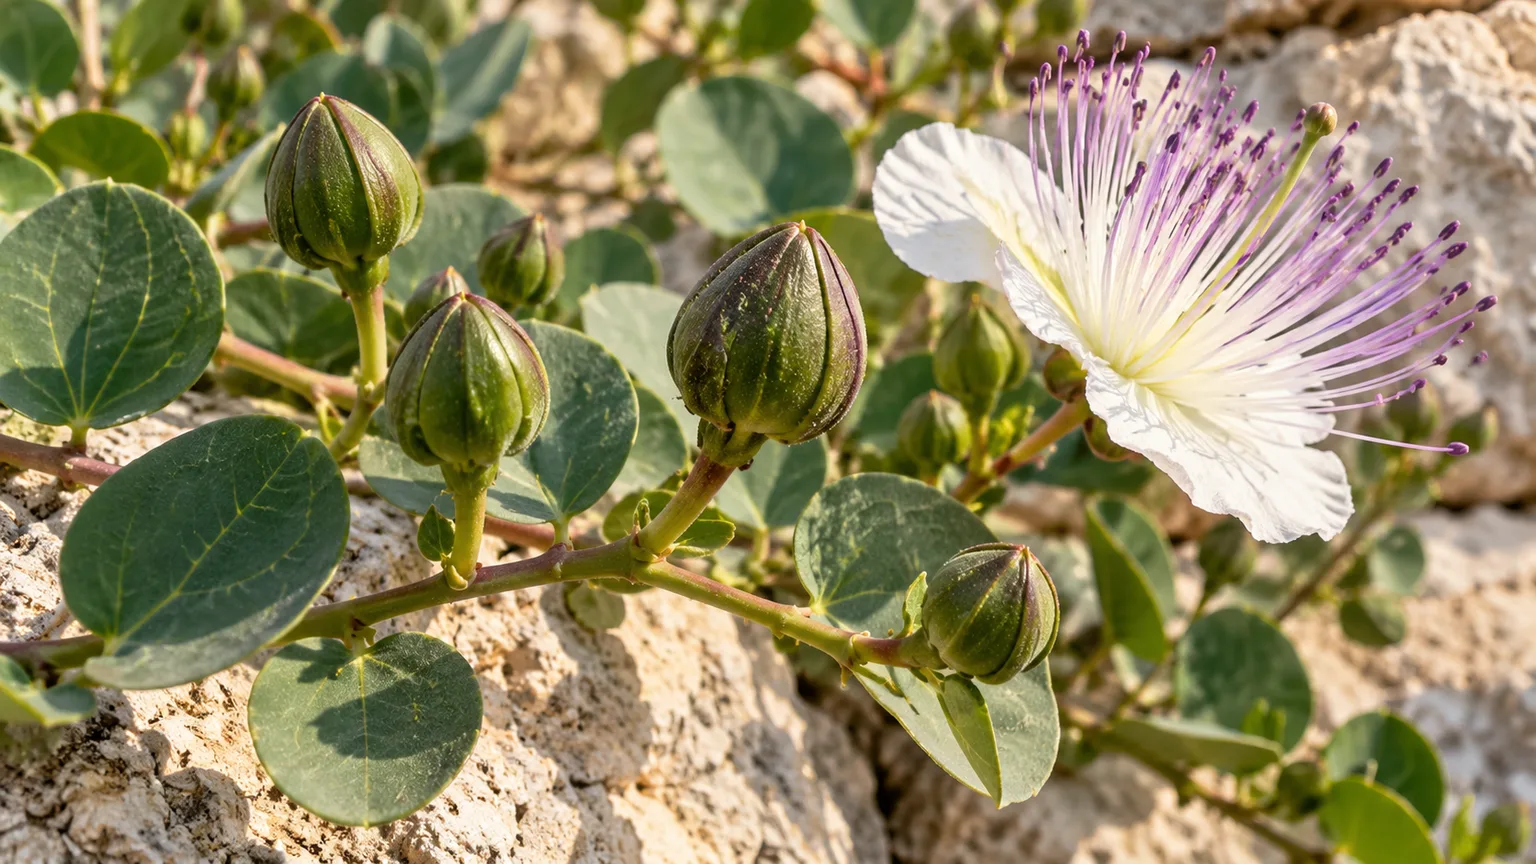
The botanical name is Capparis spinosa. It is a sprawling, woody perennial with rounded, fleshy leaves and long, sometimes trailing stems. A mature shrub can spread several feet wider than it grows tall, so give it room to cascade over a raised bed or wall, or train it along a sunny support where you can reach the buds. Some forms have hooked spines near the leaf bases; ask the nursery whether a plant is spineless if children, pets, or frequent harvesting make that important.
The unopened flower bud is the ingredient sold as a caper. If you leave a bud on the shrub, it opens into a showy white to pinkish-white flower with long purple stamens. The flower lasts only about a day, then may develop into an oblong, many-seeded fruit called a caper berry. Both buds and berries are traditionally preserved, but they are different harvests from different stages of the same flowering cycle. The University of Wisconsin–Madison Extension describes the plant’s sprawling habit, one-day blooms, and the distinction between buds and fruits in its caper growing profile.
That life cycle gives you a choice each morning during the bloom season: pick a tight bud for the kitchen, leave it for the flower display, or leave the flower to form fruit. A young plant may have only a small number of buds, so harvesting all of them can make the shrub look productive in a jar but uninteresting in the garden. Decide what you want from the plant before the first buds appear.
Decide whether your climate suits caper bush
Caper bush is adapted to bright, dry summers, rocky or sandy ground, and relatively mild winters. Heat by itself is not the problem: established plants tolerate hot weather when the root zone drains well. A long cool season, heavy rain, and soil that remains saturated are a much harder combination. The plant’s drought adaptations and use in arid and semiarid regions are discussed in a peer-reviewed review of Capparis spinosa.
Hardiness references are not perfectly consistent. The University of Wisconsin–Madison Extension describes the shrub as marginally hardy around USDA Zone 8a and notes that it may lose its leaves in winter; practical garden accounts give somewhat different lower limits. That variation can reflect different plant material, exposure, drainage, and what a grower means by “survive.” Treat a zone label as a first filter, not a guarantee: a dry, protected wall can be warmer than an exposed bed, while a cold, waterlogged root zone can injure a plant during a winter that looks mild on a map.
If your winters regularly freeze the ground or stay wet for weeks, plan on a container and a bright, cool, frost-protected winter spot. In a reliably mild, dry-summer region, an in-ground shrub is more practical and can develop without repeated repotting. GardenDrum’s practical growing account also emphasizes full sun, sharp drainage, and a warm growing season; its field observations are useful, but local hardiness still depends on your site.
Choose a hot, bright site
Give the plant at least six hours of direct sun, with more sun generally improving flowering and keeping the stems compact. A south- or west-facing wall is useful in cooler summer climates because it reflects warmth and sheds rain away from the crown. In a very hot inland climate, a little late-afternoon shade can reduce stress, but avoid placing the shrub where it receives only a few hours of weak morning light.
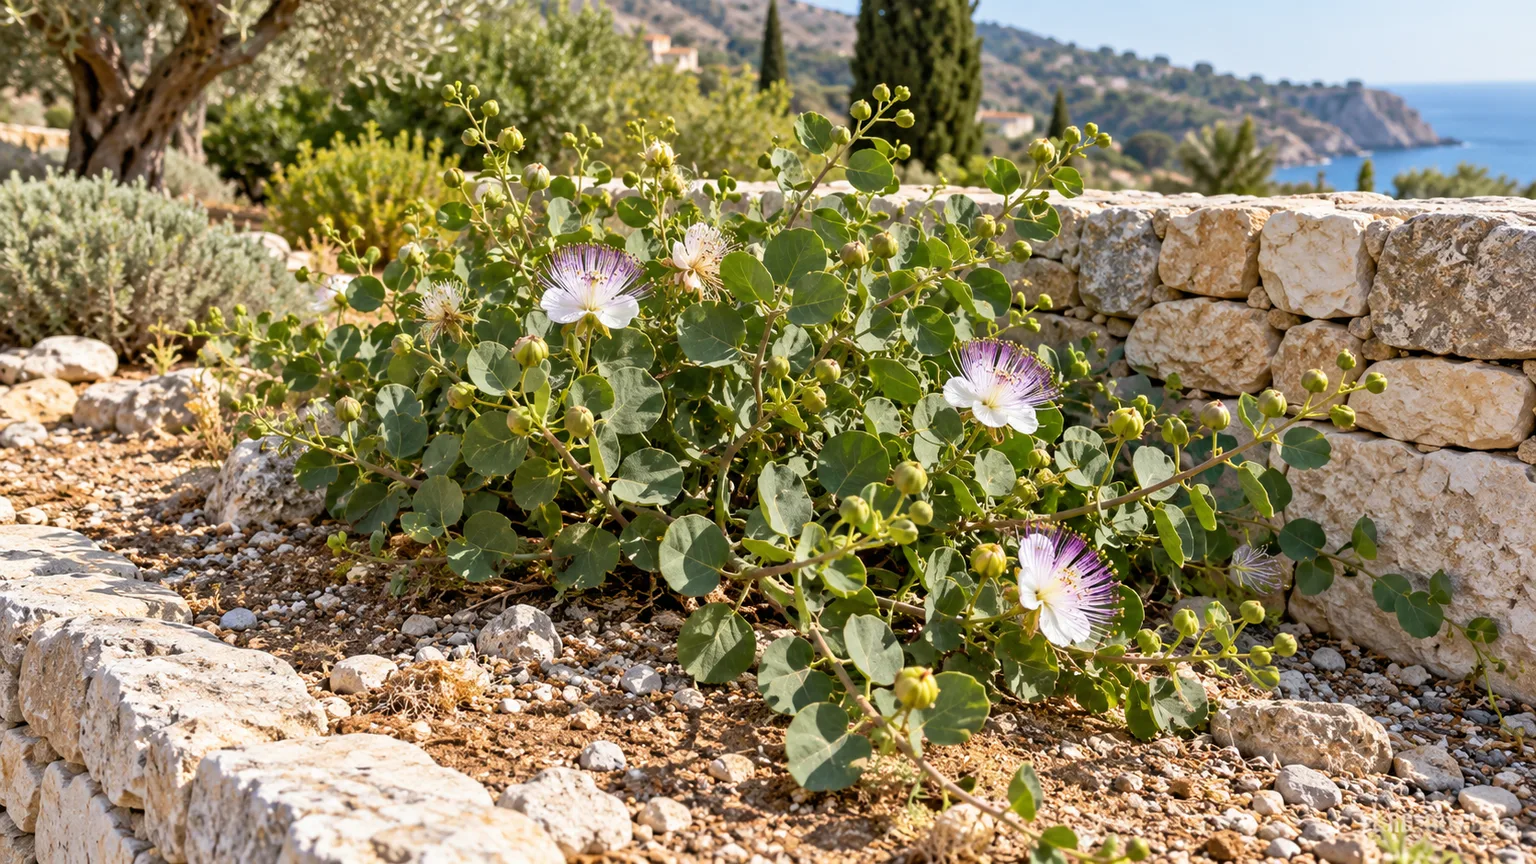
Think about access as well as exposure. Long stems may sprawl across a path, and thorny forms can snag sleeves when you reach into the plant. A raised bed, rock garden, stone wall, or large pot lets the stems trail while keeping the root crown out of standing water. Leave enough clearance for air movement and for you to inspect the underside of leaves, pick buds, and prune without stepping into the shrub.
Before planting, watch the site after a heavy rain. If water collects there or the soil remains sticky and wet long after nearby beds have drained, choose another location or raise the planting area. More sun cannot compensate for a root zone that stays waterlogged.
Build drainage before planting
Capers do not need rich, moisture-retentive soil. They are adapted to lean, stony ground, and the fleshy foliage reflects their ability to manage dry conditions. Use the soil you have if it already drains quickly; if it is heavy clay, plant on a broad mound or raised bed rather than trying to turn a small planting hole into a pocket of potting mix.
A hole amended heavily with compost can hold water like a basin inside denser native soil. Instead, loosen a wider area, remove large clods, and raise the crown above surrounding grade. Blend only a modest amount of mature compost if the soil is extremely depleted; do not enrich the bed to make it soft and dark. The goal is a stable root zone that sheds excess water, not a vegetable-bed mix that stays evenly damp.
For containers, use a pot with unobstructed drainage holes and a coarse, free-draining medium formulated for Mediterranean shrubs or drought-adapted plants. A mineral component such as coarse grit or pumice can improve air space when paired with a suitable potting base. Do not rely on a gravel layer at the bottom of a pot to fix a dense mix; drainage comes from the texture of the whole medium and clear exit holes. Never leave the pot sitting in a full saucer.
Plant a nursery-grown caper bush carefully
Plant in spring after the threat of hard frost has passed, when the soil is workable and the weather is warming. In a long, hot growing season, a nursery plant has time to extend roots before winter. Avoid planting during a heat wave or into saturated ground. Water the root ball before planting if it is dry, then slide it from its pot gently rather than pulling on the stems.
Set the shrub at the same depth it grew in its nursery container. Keep the crown at or just above the finished soil level, backfill with the prepared native soil, and firm lightly so the plant stands upright without compacting the bed. Water once to settle soil around the roots, then let the surface begin to dry before watering again. A thick organic mulch can hold too much moisture against the crown; if you mulch, use a thin layer and keep it away from the stems.
Choose its permanent location with care. Caper bush develops an extensive root system and is not a good candidate for frequent moving; extension guidance notes that seedlings and established plants can be challenging to transplant. For that reason, avoid planting it in a temporary nursery bed with plans to relocate it later. If the site is uncertain, use a container from the start.
Grow caper bush in a container
A pot is the best route for gardeners whose winters are too cold or too wet for reliable in-ground culture. It also makes it easier to give the plant a gravelly mix and to move it under shelter in winter. Choose a sturdy, deep container with generous drainage, as large as you can comfortably move once it is filled. The plant spreads, so a narrow, lightweight pot can become unstable as the stems trail over the rim.
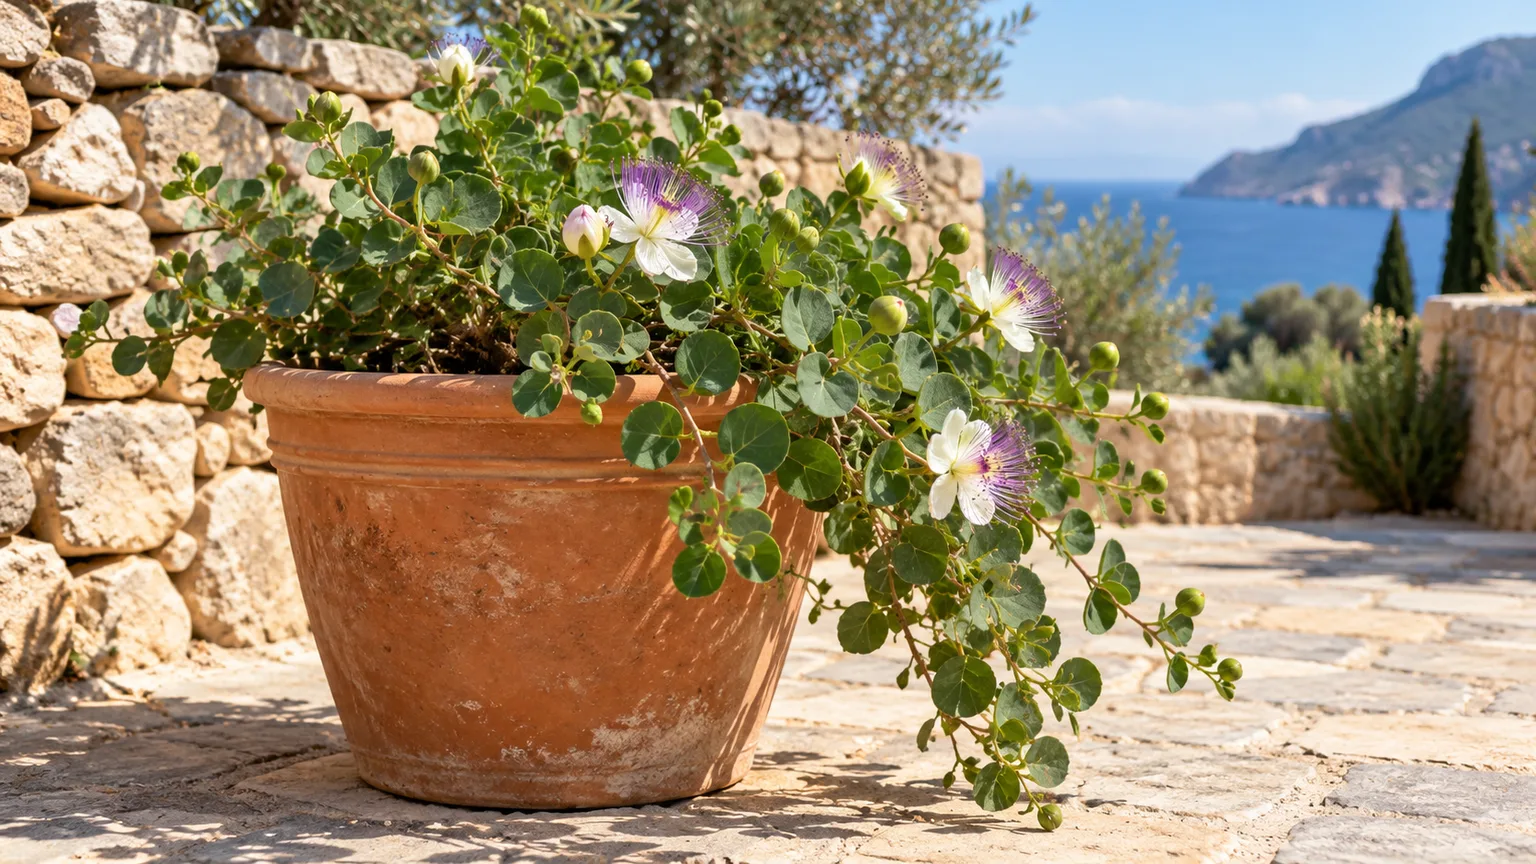
Place the pot outside in the sunniest warm position available through the growing season. A hot patio or wall-side location can work well, but check that reflected heat is not scorching the container or drying the root ball completely in a single afternoon. Water slowly until water exits the drainage holes, then allow the medium to dry substantially before watering again. Containers dry faster than garden soil, so check the actual mix instead of applying the same schedule as an in-ground plant.
Repot only when roots have filled the container or the medium has broken down. Work in spring, handle the root ball gently, and move up to a modestly larger pot rather than placing a small plant in an oversized volume of wet mix. A pot that is too large can remain damp long after the root ball has used its water. If the plant is healthy and the mix still drains freely, a top-up or partial refresh may be less disruptive than a full repot.
Water by establishment stage
Watering needs change as the shrub establishes. During the first growing season, check the soil near the root ball every few days in hot weather. If the root zone is drying and the plant is not yet established, give it a thorough drink, then let excess water drain. Do not keep the soil constantly moist; that encourages weak growth and increases the chance of root problems.
Once an in-ground shrub has rooted into the surrounding soil, it usually needs much less supplemental irrigation. Water during an unusually prolonged dry spell if the plant is visibly stressed and the soil is dry below the surface, but do not water simply because the calendar says it is a certain day. A few older leaves yellowing during seasonal dormancy is different from widespread yellowing with soft stems and persistently wet soil.
Potted shrubs require closer checks because wind, heat, and limited soil volume can dry a container quickly. Even so, do not compensate for a dry climate with small daily splashes. Water the whole root zone, let it drain, and wait until the mix has dried substantially before repeating. Reduce watering when growth slows in winter, particularly if the plant is kept somewhere cool.
Fertilize only when the plant needs it
Heavy feeding is usually unnecessary. A caper bush can flower and grow in poor soil, while frequent high-nitrogen fertilizer can push soft leafy growth without solving the real problems that prevent flowering. First check light, drainage, plant age, and winter damage. If a shrub is green and growing steadily, do not add fertilizer just because other garden plants are being fed.
If container growth is weak after you have ruled out overwatering and insufficient light, refresh some of the old medium or use a balanced, low-strength fertilizer once during active spring growth, following the label. Do not feed a dormant plant or fertilize dry roots. In the ground, a light dressing of mature compost around the outer root zone is usually enough if the soil genuinely needs organic matter; keep it away from the crown.
Prune for manageable growth and flowers
The shrub’s natural shape is sprawling, so prune for access and structure rather than forcing it into a tight ball. Remove dead or frost-damaged stems once you can see where living growth resumes. On an established plant, late winter or early spring—before new shoots lengthen—is a practical time to shorten tangled or overgrown stems and encourage a manageable framework.
Gardeners in Mediterranean climates may cut established plants back hard during dormancy to renew flowering shoots. That approach should not be applied automatically to a young, newly planted, or cold-stressed shrub. Start conservatively: remove dead wood and a portion of the oldest or most unruly stems, then observe how the plant responds through the next growing season. Clean, sharp pruners help make neat cuts; gloves are sensible if the stems have spines.
Avoid pruning during active bud production if harvest is the goal. The capers develop on new growth, so heavy summer trimming removes the shoots that would carry flowers and buds. If you want both a compact plant and a substantial harvest, establish a basic frame while the shrub is young, then do the larger shape correction during dormancy rather than constantly clipping it.
Start caper bush from seed
Seed is a slow, uneven way to get a caper bush. Fresh seed is preferable; seeds that have dried or been stored may need pretreatment, and even treated lots can germinate sporadically over weeks or months. The University of Wisconsin–Madison Extension notes that stored seed may require scarification and/or cold stratification and that germination can take up to three months. Do not assume that a tray has failed after a short wait.
For stored seed, Gardening Know How’s caper propagation guide describes soaking it in warm water, keeping it moist under refrigeration for a period of cold stratification, soaking again, then sowing in a free-draining medium. Some growers also lightly scarify the hard seed coat. These treatments vary with seed freshness and storage history, so sow several seeds and label the date rather than expecting every seed to sprout. Keep the medium lightly moist, not waterlogged, and provide warmth and bright light once germination begins.
The seedlings are delicate. Give them strong light gradually, protect them from both cold snaps and scorching midday sun while small, and avoid pulling them apart by their stems. When each seedling is sturdy enough to handle, move it with as much of its root system and surrounding medium intact as possible. If your main aim is a reliable edible shrub rather than the experience of seed starting, buying a young plant is usually the more predictable choice.
Propagate caper bush from cuttings
Cuttings preserve the characteristics of a known parent, including whether it has spines, but rooting is not guaranteed. Take material from a healthy, established shrub during active growth. A semi-ripe cutting several inches long with multiple nodes is easier to manage than a very soft tip; remove the lower leaves and keep a few at the top. A rooting hormone may help, but clean material and an airy medium matter more than the powder.
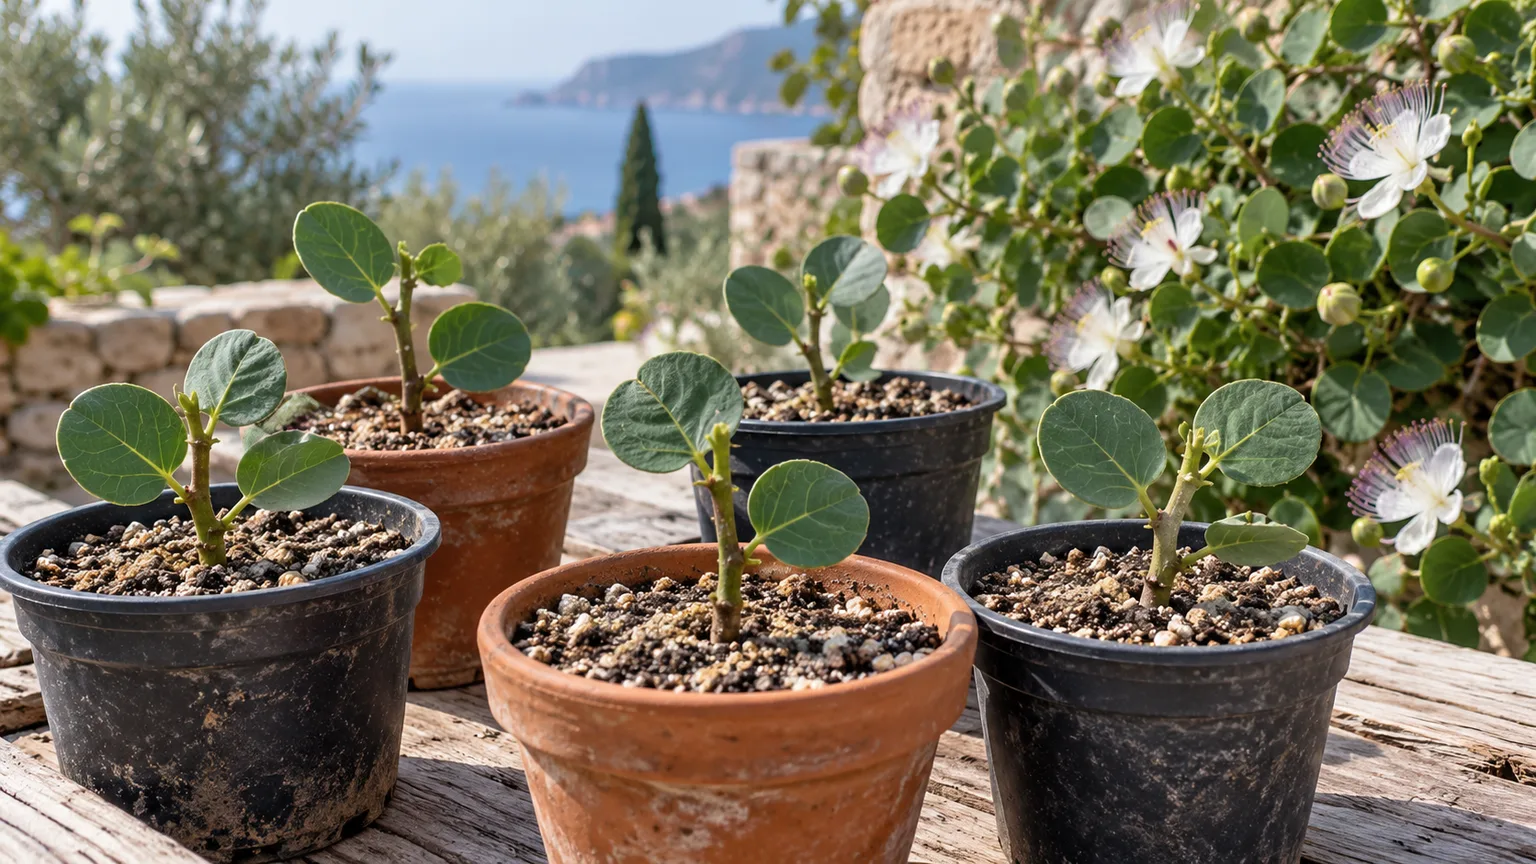
Insert the cutting into a small pot filled with loose, fast-draining propagation mix. Keep the mix lightly and evenly damp while roots form, never saturated. Bright indirect light and gentle bottom warmth can encourage rooting; a clear cover may help retain humidity, but vent it regularly to prevent stagnant, wet conditions. Check for new growth and resistance to a very gentle tug rather than repeatedly pulling the cutting out to inspect for roots.
When the cutting has rooted, acclimate it gradually to stronger sun. Let it fill its first pot before moving it, and choose its permanent garden position early because repeated root disturbance can set it back. If several cuttings are available, start more than one: caper cuttings are considered difficult to root, and a few failures do not necessarily indicate poor care.
Harvest buds at the right stage
Pick buds when they are still tight, dark green, and not beginning to open. The University of Wisconsin–Madison Extension compares the ready bud to a fresh kernel of corn; in practice, select a firm, closed bud rather than waiting for it to become large. In warm weather, buds can move from closed to opening quickly, so check the shrub daily during its flowering season. The morning is a useful picking window before the day’s heat encourages buds to unfurl, a timing also recommended by GardenDrum.
Use your fingers or small snips to remove each bud without tearing the shoot. Some caper varieties have spines, so wear gloves and reach deliberately instead of sweeping your hand through the branches. Place buds in a shallow container so they do not get crushed, and process them promptly; fresh buds are notably bitter and are generally cured with salt or brine before they are eaten.
The first season may offer only a modest crop, especially if the plant is still establishing. Leave enough leafy shoots for the shrub to keep growing, and do not strip every bud if you want to enjoy the flowers or set some fruit. If a plant produces few buds, check its age, sun exposure, winter injury, and soil drainage before assuming it needs more fertilizer.
Choose between caper buds, flowers, and berries
Every unopened bud you harvest is one less flower. On an established bush with many buds, you can pick most and leave selected stems for the display. On a young shrub, it may be wiser to leave the earliest buds alone so the plant can flower and develop rather than trying to collect a handful of capers. A flowering branch also helps you see the plant’s form and identify next season’s pruning needs.
If a flower is left to mature, it can produce a caper berry, the oblong fruit with numerous seeds. These are larger than the buds and are also eaten after preservation. The berries may appeal if you prefer a substantial garnish, while the buds are the familiar smaller, sharper-tasting ingredient. Harvest only a portion of the fruit if you want to save seed; allow some berries to mature fully and split before collecting seed for propagation.
Preserving capers is a separate food-preparation step, not a plant-care task. Follow a tested recipe from a food-preservation authority for salt curing, brining, or storage, especially if you intend to keep jars unrefrigerated. Avoid relying on an improvised vinegar or salt ratio for shelf-stable storage.
Troubleshoot weak growth and missing buds
If a caper bush grows leaves but produces no buds, first ask whether it is mature enough and receiving enough direct sun. A young plant may need time before it flowers. Next, consider whether it spends much of the growing season in shade, receives regular high-nitrogen feeding, or grows in rich, constantly wet soil. Correct the limiting condition one at a time and give the shrub a full growing season to respond.
Yellow leaves can mean different things. A few older leaves turning yellow and dropping as the shrub enters winter dormancy may be normal, particularly near the cool edge of its range. Widespread yellowing during warm weather, especially when the medium stays wet, points more strongly to drainage or root stress. Let the soil dry, clear blocked drainage holes, and protect the crown from repeated rain before adding fertilizer.
Chewed leaves or missing buds warrant a close inspection of stems and leaf undersides for caterpillars or other feeding insects. GardenDrum identifies caterpillars as a common summer pest. Hand-pick visible caterpillars where practical, use a light insect barrier if it does not trap heat, and consult your local extension service before applying a pesticide to a plant grown for food. Do not spray open flowers when pollinators are visiting.
Protect the shrub through winter
In a mild, dry climate, an established in-ground shrub may remain evergreen or lose its leaves temporarily. At the cool edge of its range, the top may die back while the roots survive, especially if the site is sheltered and drains sharply. Mark where the plant is before winter so you do not disturb the crown while it is leafless. Wait until spring growth makes the boundary between living and dead stems clear before cutting back frost-damaged wood.
For a potted shrub, move it before a hard freeze to a bright, cool, frost-protected location. A cool greenhouse, sunroom, or sheltered porch is generally a better winter setting than a heated living room; the plant is a sun-loving outdoor shrub, not a low-light houseplant. Water sparingly while growth is slow, but do not let the root ball turn to dust for months. Ensure the pot drains after winter rain and never leave it in standing water.
Bring the plant back outdoors gradually when freezing weather has passed. Start it in a protected bright spot for several days, then move it to full sun. This reduces the abrupt shift from winter light and airflow to a hot, exposed patio. If your winters are mild but rainy, a roofed outdoor location that protects the pot from constant rain may be more useful than bringing it indoors.
Grow it for its ornamental value
You do not need a large harvest to justify the space. The rounded gray-green leaves, long arching stems, fragrant flowers, and purple stamens make caper bush a distinctive choice for a sunny wall, gravel garden, or raised stone bed. Its trailing habit softens masonry and lets flowers hang where they are easy to see. The same site that gives it good drainage can also make it a low-water accent after establishment.
Use it where its eventual spread will be an asset, not a nuisance. Keep thorny stems away from narrow paths and seating, and check that overhanging branches will not block access to a gate or window. A trellis or low support can keep long growth off the ground if you want a more orderly outline and an easier harvest. In a container, let stems spill over the rim but place the pot where it cannot tip in wind.
The ornamental and culinary uses are compatible if you harvest selectively. Leave several buds on the shrub each week, enjoy the brief flowers, and allow a few to set fruit if you want caper berries or seed. That rhythm is more satisfying than stripping the plant bare and then wondering why it never blooms.
Conclusion
Grow caper bush where it gets intense sun and fast drainage, and decide early whether your winter climate calls for a permanent in-ground planting or a movable pot. Water a new plant while it establishes, then scale back; avoid rich soil, constant moisture, and routine heavy fertilizer. Give it time to mature, prune established growth selectively during dormancy, and take seed or cutting propagation as a patient project rather than a quick route to a harvest.
When buds appear, pick them tight and closed, then leave some behind for the flowers and berries that make the shrub worth growing as an ornamental. With a dry root zone and a warm growing season, the caper bush can provide both a striking Mediterranean accent and a small, distinctive harvest.