How to Grow and Care for Alocasia Azlanii Indoors
Keep Alocasia azlanii's glossy leaves healthy with a breathable mix, moisture checks, warm placement, careful feeding, and clear fixes for common problems.
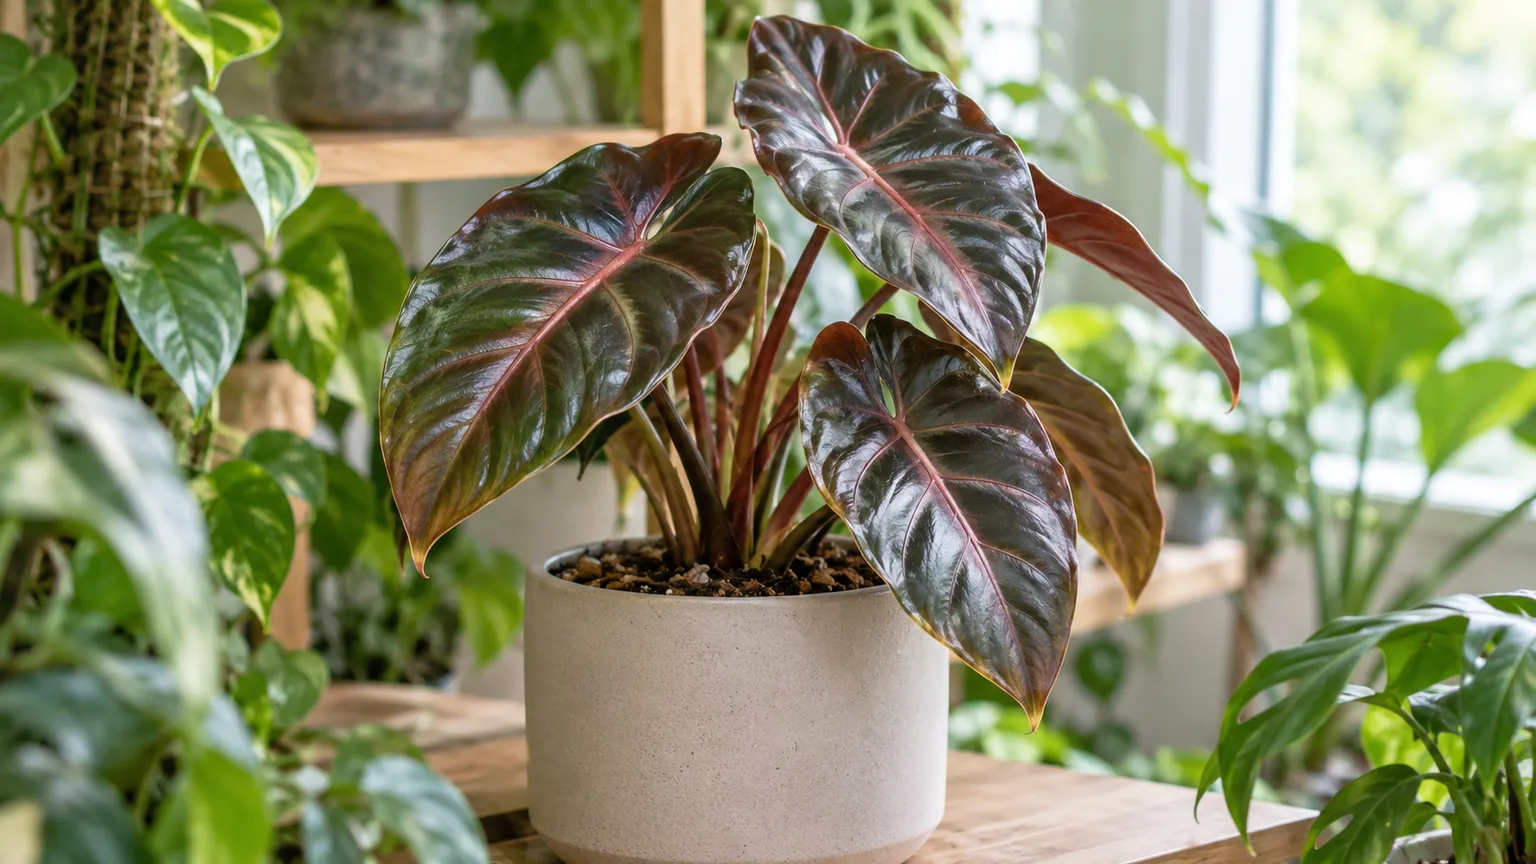
Alocasia azlanii, often sold as Red Mambo, is a compact tropical aroid grown for glossy leaves that can shift between deep green, burgundy, and metallic-looking tones as they unfurl. Its beauty is real, but so is its sensitivity to cold roots and dense, wet potting mix. The easiest way to keep it healthy is to make the root zone airy, give it steady warmth and filtered light, then let the pot—not a weekly calendar—tell you when it needs water.
This species is still relatively uncommon in cultivation, and plants sold under the name vary in size and coloring. Treat care numbers as starting points, then adjust to the light, room temperature, pot size, and mix you actually have. A small plant in a cool room uses water much more slowly than a mature clump near a warm, bright window.
What makes Alocasia azlanii different
Red Mambo is a jewel Alocasia: a smaller-growing member of a genus that also includes much larger elephant-ear plants. The plant forms a clump from an underground rhizome, with individual leaves rising on fleshy petioles. Species accounts describe it as native to Borneo, where warmth, humidity, and filtered forest light explain why a chilly draft or a dark corner can set it back. Sprouted in Soil discusses the species’ compact, clumping habit and its dark, glossy foliage; the exact leaf color and mature size still depend on the individual plant and growing conditions.
Do not judge its health by whether every leaf stays forever. An Alocasia replaces older leaves as it grows, and a single aging leaf may yellow while a new one develops. Several leaves fading at once, a plant that stays limp in damp soil, or a soft crown are different signals: they call for checking roots, temperature, watering, and pests rather than simply adding more water or fertilizer.
Quick care profile
| Need | Practical starting point |
|---|---|
| Light | Bright, filtered light; gentle morning sun may be tolerated after acclimation |
| Potting mix | Airy, free-draining aroid mix that retains some moisture |
| Water | Water thoroughly when the upper 1–2 inches of mix have dried during active growth |
| Temperature | A warm room around 65–80°F (18–27°C); protect it from cold drafts and chilled windows |
| Humidity | Aim for roughly 50–70% if practical, with moving air and dry foliage |
| Feeding | Diluted balanced houseplant fertilizer while new leaves are actively growing |
| Growth | Compact, clumping habit; size varies by plant and conditions |
| Propagation | Separate rooted offsets or grow a viable corm; a leaf alone will not make a new plant |
These are working ranges, not a scorecard. Broad Alocasia guidance from NC State Extension and the Royal Horticultural Society supports warm conditions, bright indirect light, and moist but well-drained growing media. A smaller jewel type in an indoor pot still needs those basics, but it may dry more slowly than the large outdoor Alocasias covered by general care references.
Find bright, filtered light
Set the plant where it can see plenty of daylight without sitting in the harshest hours of direct sun. An east-facing window is often convenient because morning rays are gentler; a few feet back from a south- or west-facing window can also work if a sheer curtain softens direct sun. In a dim room, moving it closer to the window or using a grow light is more useful than compensating with extra fertilizer.
Let the plant adjust gradually if you move it from a nursery shelf or cabinet into brighter conditions. A sudden change to hot, direct sun can bleach or scorch the leaf surface, while too little light tends to produce slow growth and smaller leaves. Rotate the pot occasionally so the clump does not lean hard toward one window, but avoid frequent relocations if the plant is otherwise settling in.
Use an airy mix that stays lightly moist
Alocasia roots need oxygen as well as water. Dense garden soil, a compacted peat-heavy mix, or a pot without drainage holes can stay wet long after the surface looks dry. Use a loose houseplant base amended with orchid bark and perlite or pumice; a practical starting blend is two parts quality potting mix to one part bark and one part perlite. If your home is hot and the mix dries in a day or two, retain a little more fine material; if it remains wet for a week, increase the chunky component and check the pot size.
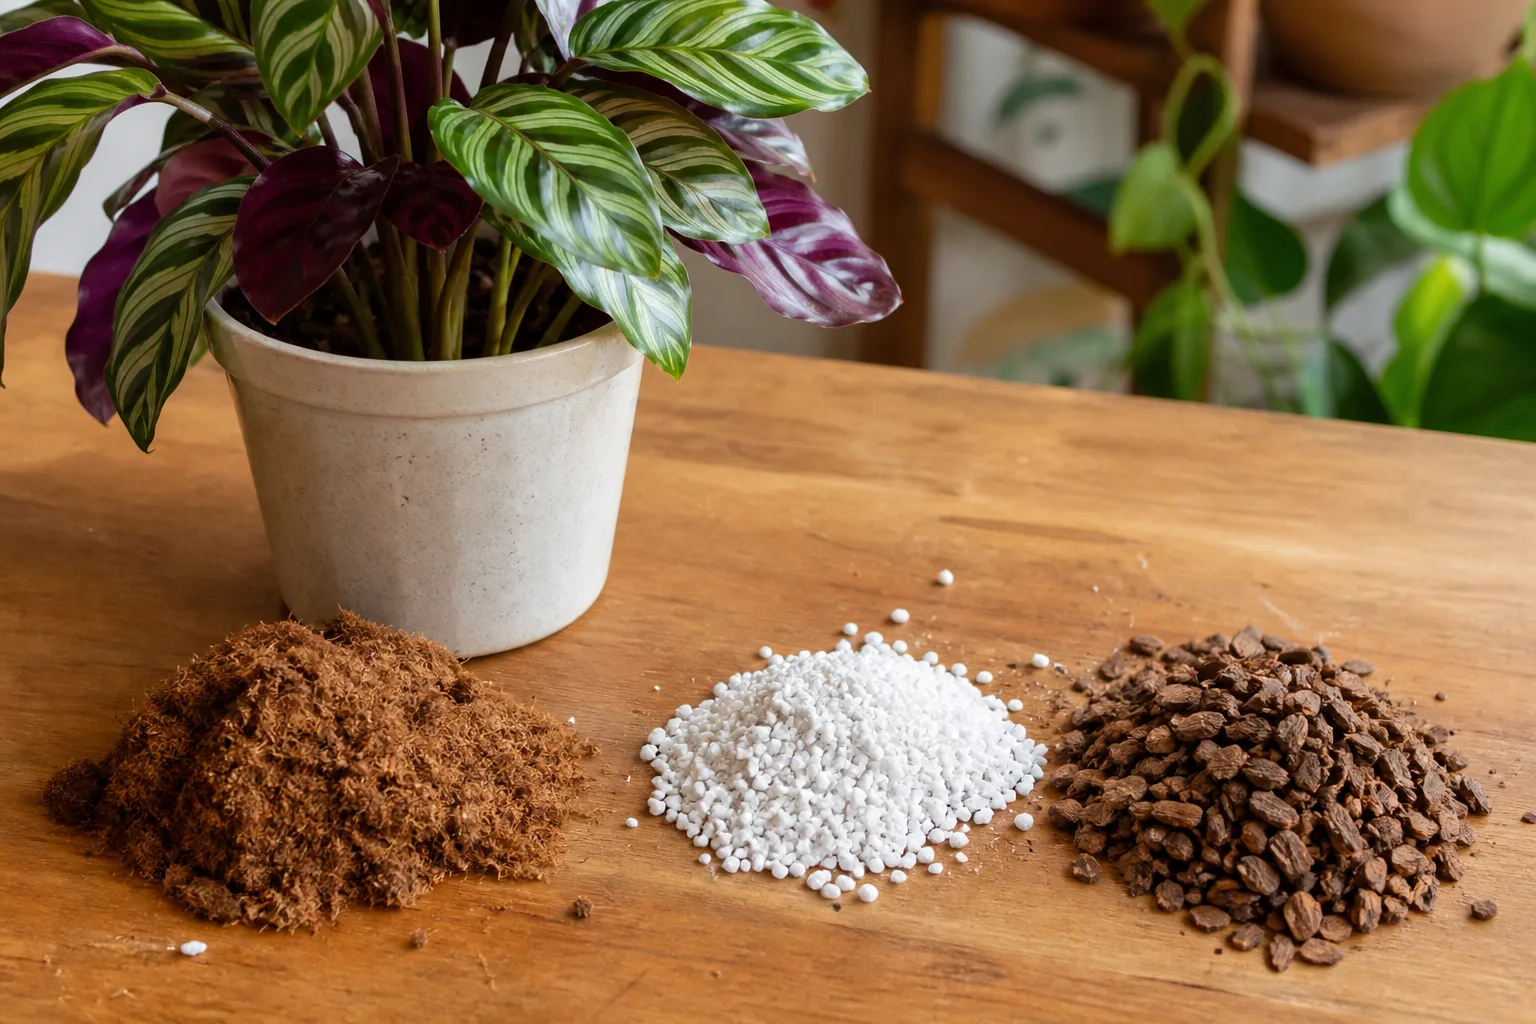
The goal is a mix that absorbs water evenly, drains excess quickly, and does not collapse into a muddy layer. The GrowTropicals Alocasia guide describes an airy substrate with moisture-retaining and coarse components; Garden Design’s Alocasia guide likewise emphasizes the genus’ need for suitable indoor growing conditions. Use either as a starting framework, not a requirement to buy one particular branded blend.
Water by dryness, not the calendar
During active growth, check the top 1–2 inches of mix with a finger or wooden skewer. If that layer feels dry while the root zone is still slightly moist, water slowly until excess runs through the drainage holes, then empty the saucer or cachepot. If the mix is cool and damp at that depth, wait and check again in a day or two. A once-a-week routine might happen to fit a warm, bright room in summer, but it can be too frequent in winter or in a small pot with low light.
This method avoids the two common extremes. A bone-dry root ball can make leaves droop and edges crisp; constantly saturated mix limits oxygen around the roots and can cause yellowing, collapse, and rot. If water races down the sides without wetting the center, the mix may have dried and pulled away from the pot; apply a little, pause, then water again so the root ball rehydrates rather than channeling straight to the saucer. Broad Alocasia care guidance from RHS and practical indoor advice from GrowTropicals both stress moisture with good drainage, not standing water.
Handle winter slowdowns carefully
Shorter days and cooler rooms often slow growth, so a plant that drank every few days in summer may need much longer between winter waterings. Reduce water in response to the mix drying more slowly; do not keep the same summer schedule just because the plant normally likes moisture. Hold fertilizer while it is not producing new growth.
Some Alocasias rest in winter and may shed leaves, but leaf loss is not automatically harmless dormancy. The RHS growing guide notes that Alocasias can go dormant and should then be kept cooler and drier. For a potted azlanii, look at the whole plant: a firm rhizome and crown with no sour smell may be resting, while a soft base or wet, unpleasant-smelling mix points to rot. Keep a resting plant warm enough to avoid chilling, water sparingly so the rhizome does not shrivel, and wait for renewed growth before feeding or repotting unless a problem needs attention.
Keep it warm and manage humidity
Aim for a stable, comfortably warm room rather than a precise thermostat target. A range around 65–80°F (18–27°C) is a useful indoor starting point; avoid cold windowsills, exterior doors, air-conditioning blasts, and radiators that make one side of the plant hot and dry. Alocasias generally prefer warmth and humidity, and the RHS recommends keeping them above about 60°F (16°C). Move the pot back from glass on cold nights, especially if its roots sit in a ceramic container that chills quickly.
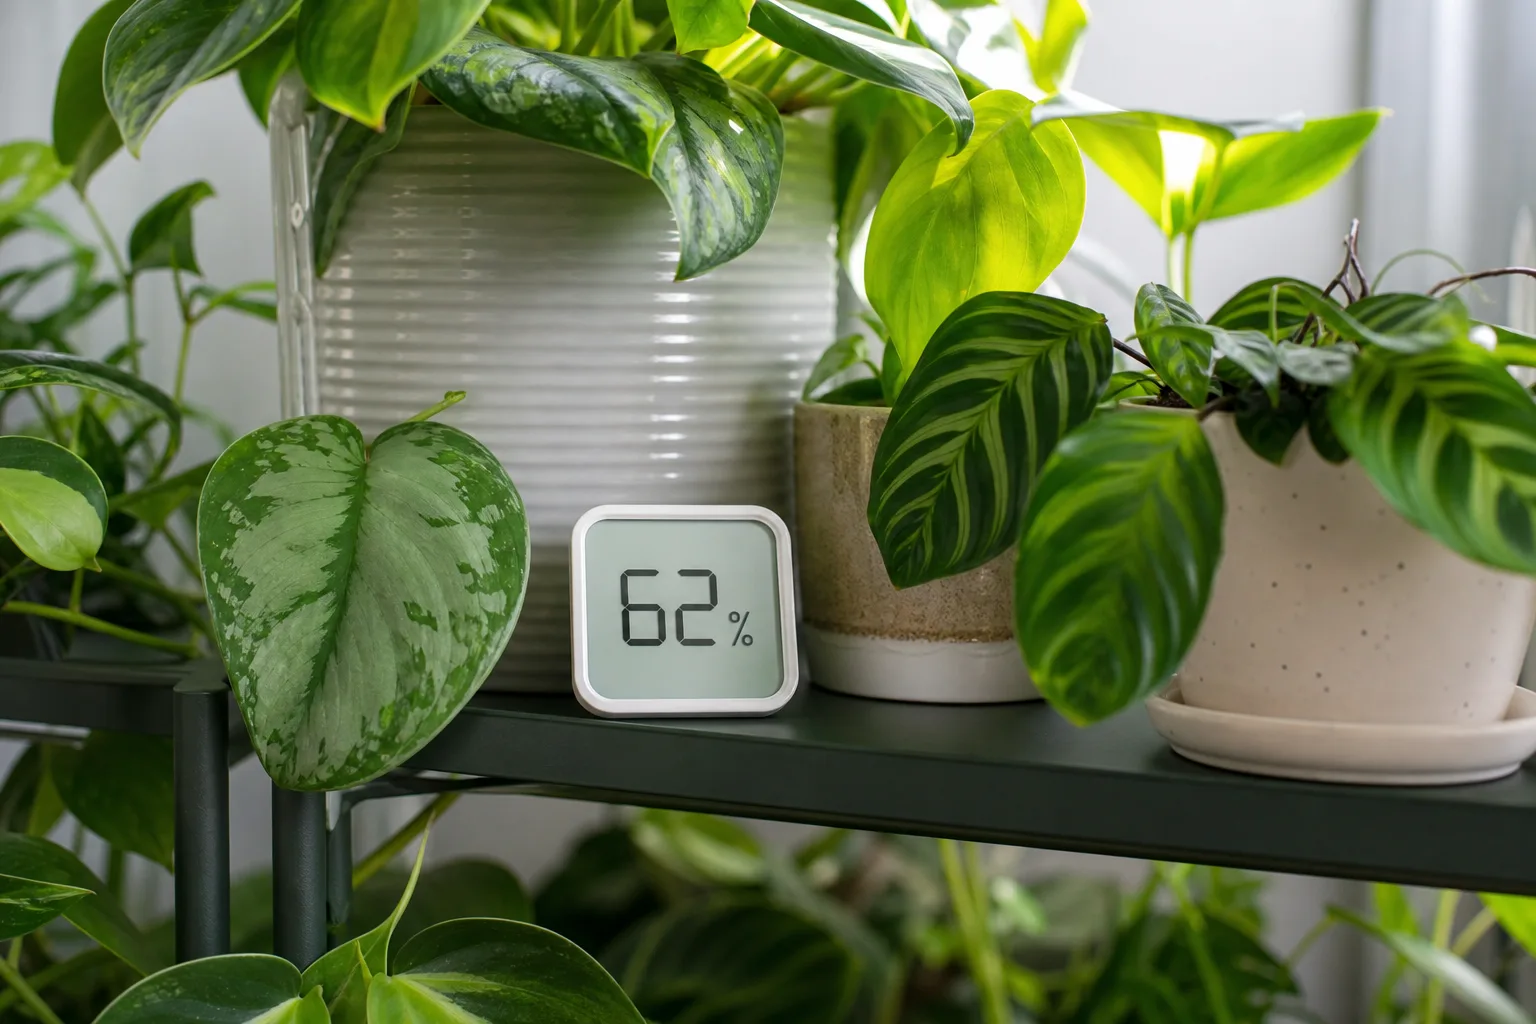
Humidity near 50–70% is usually a reasonable target if you can achieve it without enclosing the plant in stagnant air. A small hygrometer placed near leaf height gives a better reading than guessing from how the room feels. If the air stays very dry, a humidifier near the collection is more consistent than frequent misting; grouping plants may help a little, while a pebble tray only changes the immediate microclimate modestly. Keep air moving gently and let leaves dry after cleaning so increased humidity does not become a reason to leave foliage wet.
Feed lightly during active growth
Use a balanced liquid houseplant fertilizer at half strength, or follow a product’s conservative houseplant directions, when the plant is actively making leaves. Monthly feeding through spring and summer is a manageable starting cadence; if growth is slow because light or warmth is limited, feed less often rather than pushing pale or undersized leaves with a stronger dose. Water the mix first if it is very dry, since fertilizer salts are harder on dry roots.
Pause feeding when growth stalls in winter. More fertilizer will not solve low light, cold soil, or damaged roots, and repeated full-strength applications can leave salts at the mix surface or burn tender roots. If you have not fertilized for months and the plant resumes steady growth, restart gently rather than doubling the dose to “catch up.” The nursery guidance from GrowTropicals also centers feeding on active growth, which is the key adjustment for indoor plants whose seasons do not match a strict calendar.
Repot only when the root ball needs it
Repot when roots circle densely, emerge from the drainage holes, the mix has broken down and stopped draining, or the plant dries out unusually fast despite appropriate watering. A slightly snug pot is safer than jumping several sizes: excess wet mix around a small root system is slow to dry and raises the risk of rot. Choose a container with drainage holes only a little wider than the current root ball, and keep the rhizome at about the same depth it was growing before.
Spring or early summer is the easiest time because warmth and longer days help the plant recover, but a necessary rescue repot should not wait for a particular month. Loosen only enough old mix to inspect the roots; trim mushy, dark roots with clean shears and keep firm pale roots. After repotting, water thoroughly and let excess drain, then give the plant stable warmth and indirect light while it re-establishes. Do not feed immediately if roots were disturbed or trimmed.
Propagate from corms and rooted offsets
The reliable home methods are separating an established offset or growing a viable corm from the rhizome. A detached leaf or petiole does not contain the growth point needed to make a new Alocasia, so leaf-cutting experiments usually produce a leaf that eventually declines rather than a second plant. Propagation is most forgiving when the parent plant is growing and the room is warm; avoid dividing a stressed plant simply to make more specimens.
Start a corm without keeping it waterlogged
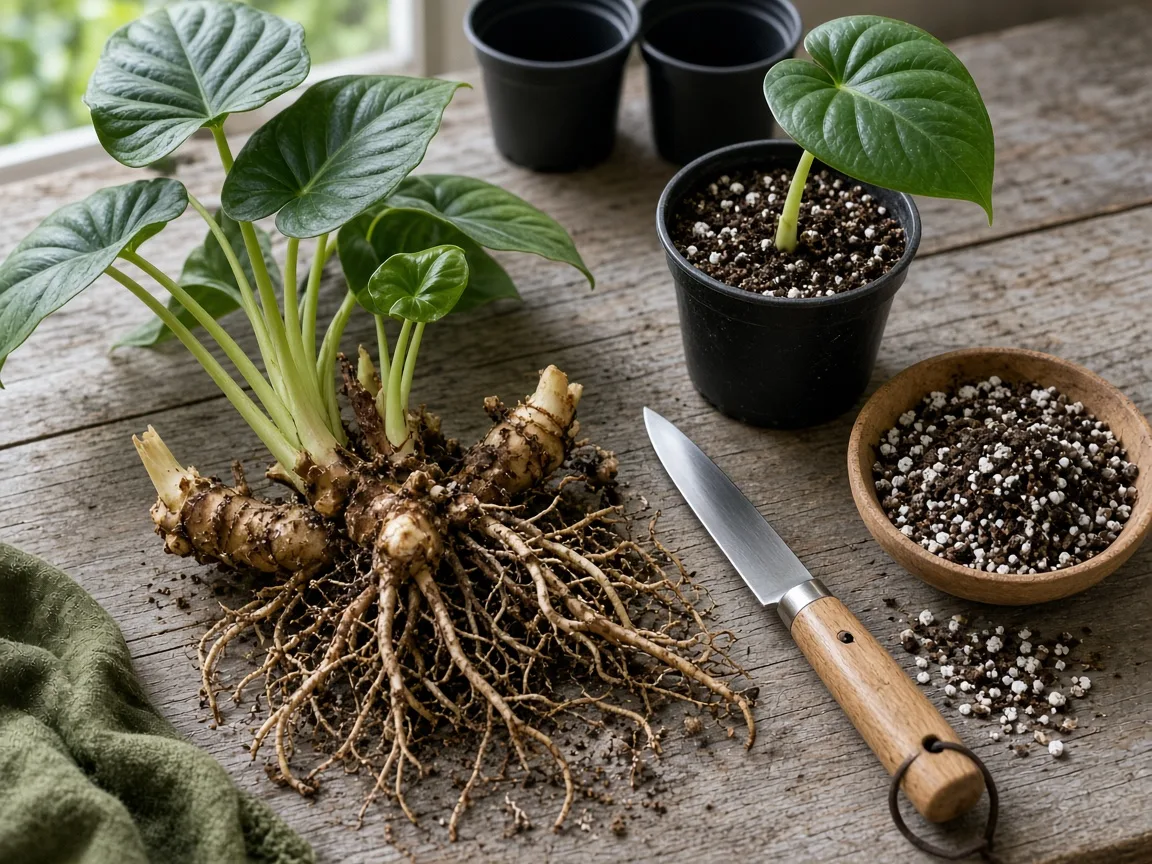
When repotting, look for small, firm, rounded corms attached to or sitting near the rhizome. A viable corm is firm, not hollow or mushy; gently separate it only if it comes away without tearing the parent plant badly. Set it in barely moist sphagnum or a light propagation mix with the growing tip near the surface, then place it in a warm, bright spot out of direct sun. A clear lidded container can hold humidity, but open it regularly and keep the medium damp rather than soaked to limit rot.
Check for a developing root and shoot instead of repeatedly digging it up. Corms do not all wake at the same pace, and some fail; warmth and a viable growth point matter more than adding water or fertilizer. Once the plantlet has a few roots and a leaf, move it into a small pot with an airy mix and keep the root zone evenly moist while it adapts. Do not set a tiny plantlet in a large pot, where the extra mix can remain wet around its limited roots.
Divide only a plant with established growth points
If the clump has separate shoots or a rhizome section with its own roots, you can divide it during repotting. Slide the plant out, brush away enough mix to see how the stems join, and use clean, sharp shears or a knife to separate a rooted section. Keep each division attached to a viable growing point and several healthy roots; a bare root fragment without a bud may not produce a new plant.
Pot each division at its original depth in a container just large enough for the roots. Water it in, let it drain, and keep it warm in bright indirect light. A brief pause in growth or one older leaf yellowing can happen after division; repeated collapse, soft tissue, or a wet-smelling pot calls for immediate inspection. Sprouted in Soil and the practical propagation notes in GrowTropicals’ Alocasia guide both describe clump-based propagation rather than leaf cuttings.
Keep leaves clean and pests contained
Wipe dust from the broad leaves with a soft damp cloth so you can see their color and check for pests. Support the leaf from underneath rather than pressing on its midrib, and avoid oil-based shine products that leave residue. Remove a leaf only when it is mostly yellow, damaged, or pest-ridden; use clean snips at the petiole base and do not cut into the central crown.
Spider mites, thrips, mealybugs, and scale can move from another houseplant, so isolate a new or infested plant and inspect leaf undersides, petiole joints, and the crown. Fine webbing, stippled or silvery patches, sticky residue, and small fixed bumps suggest different pests; use a hand lens if the signs are unclear. Rinse or wipe accessible pests away, repeat inspections every few days, and use only a product labeled for the plant and pest if additional treatment is needed. Keep treated plants away from children and pets, follow the label exactly, and never use a pesticide indoors outside its instructions.
Diagnose common Alocasia azlanii problems
Change one likely cause at a time and watch the newest growth. A fast sequence of changes—watering more, moving to direct sun, adding fertilizer, and repotting—makes it difficult to tell what helped and can add stress. Check the root zone and leaf undersides before treating a symptom as a humidity problem.
Yellow leaves and drooping stems
If one oldest leaf yellows as a new leaf opens and the rest of the plant stays firm, trim the spent leaf once it is mostly yellow and keep monitoring. If several leaves yellow together, check how long the mix stays wet, whether the pot drains, and whether the room has become cooler or darker. Drooping with dry, lightweight mix may improve after thorough watering; drooping in wet mix is more concerning because damaged roots can no longer take up water efficiently.
Also inspect petioles and leaf undersides for pests. If you find no pests and the mix is drying at a sensible pace, review recent changes: a colder night, a move away from the window, or a repot can explain a temporary pause. Restore stable conditions and avoid feeding until active growth returns.
Brown edges or faded color
Crisp brown patches on the window-facing side often point to direct sun or heat rather than a need for more fertilizer. Move it a little farther from the glass or add a sheer curtain, then wait for new leaves to judge the change; old sunburned tissue will not turn green again. Dry edges can also follow low room humidity, irregular watering, or root damage, so compare the symptom with the pot’s moisture and recent room conditions before changing several things.
Leaves that emerge greener than expected do not automatically mean something is wrong. New foliage can darken as it matures, and light affects how its sheen and coloring appear. Give it bright, filtered light, clean the leaves so the surface is visible, and avoid direct hot afternoon rays that bleach the color.
Soft stems and a collapsing crown
A soft petiole base, foul-smelling mix, or dark mushy roots points to rot, not ordinary dormancy. Remove the plant from its pot and inspect the rhizome; discard mushy material with a sterile blade, keep any firm viable section, and repot it in fresh airy mix in a clean container. If the crown and rhizome have turned soft throughout, recovery may not be possible, so do not keep the plant in wet soil hoping it will rebound.
If a single leaf yellows while the rhizome remains firm and the mix is not sour, a seasonal slowdown is more plausible. Keep the plant warm, reduce watering to match slower drying, and wait for a healthy new shoot before resuming fertilizer. The distinction is the condition of the underground growth point and roots, not leaf loss alone.
Keep children and pets safe around the plant
Alocasias contain insoluble calcium oxalate crystals. Chewing the leaves, stems, or other plant parts can irritate the mouth and throat; the National Capital Poison Center describes the risk to people, while the Pet Poison Helpline and LSU School of Veterinary Medicine identify Alocasia as hazardous to pets and list oral irritation and related signs. The Royal Horticultural Society also advises against eating Alocasias and recommends gloves for handling.
Place the pot where a climbing cat, dog, or young child cannot reach it, and collect fallen leaves promptly. Wear gloves when dividing the rhizome if your skin is sensitive, then wash hands and tools. If a person or animal chews the plant, remove any visible material from the mouth without forcing anything, and promptly contact poison control, a veterinarian, or local emergency services for situation-specific instructions; do not wait for symptoms to worsen.
Conclusion
Alocasia azlanii is easiest to keep when you focus on the environment around its roots: warm conditions, bright filtered light, a loose mix, a draining pot, and water only after the upper layer dries during active growth. In winter, let slower drying guide you toward less frequent watering, but check the rhizome if several leaves collapse or the mix smells sour. That simple distinction helps you avoid treating rot as thirst or mistaking every older leaf for a crisis.
If you want to multiply the plant, wait until the parent is healthy and separate a rooted offset or viable corm in warm weather. Keep it away from pets and children, and use steady observation—not a strict weekly schedule—to adjust care as the plant changes through the year.