How to Grow and Care for Thai Pepper Plants at Home
Grow Thai pepper plants in pots or beds with sowing dates, transplant cues, moisture checks, feeding, pest prevention, and tips for picking green or red fruit.
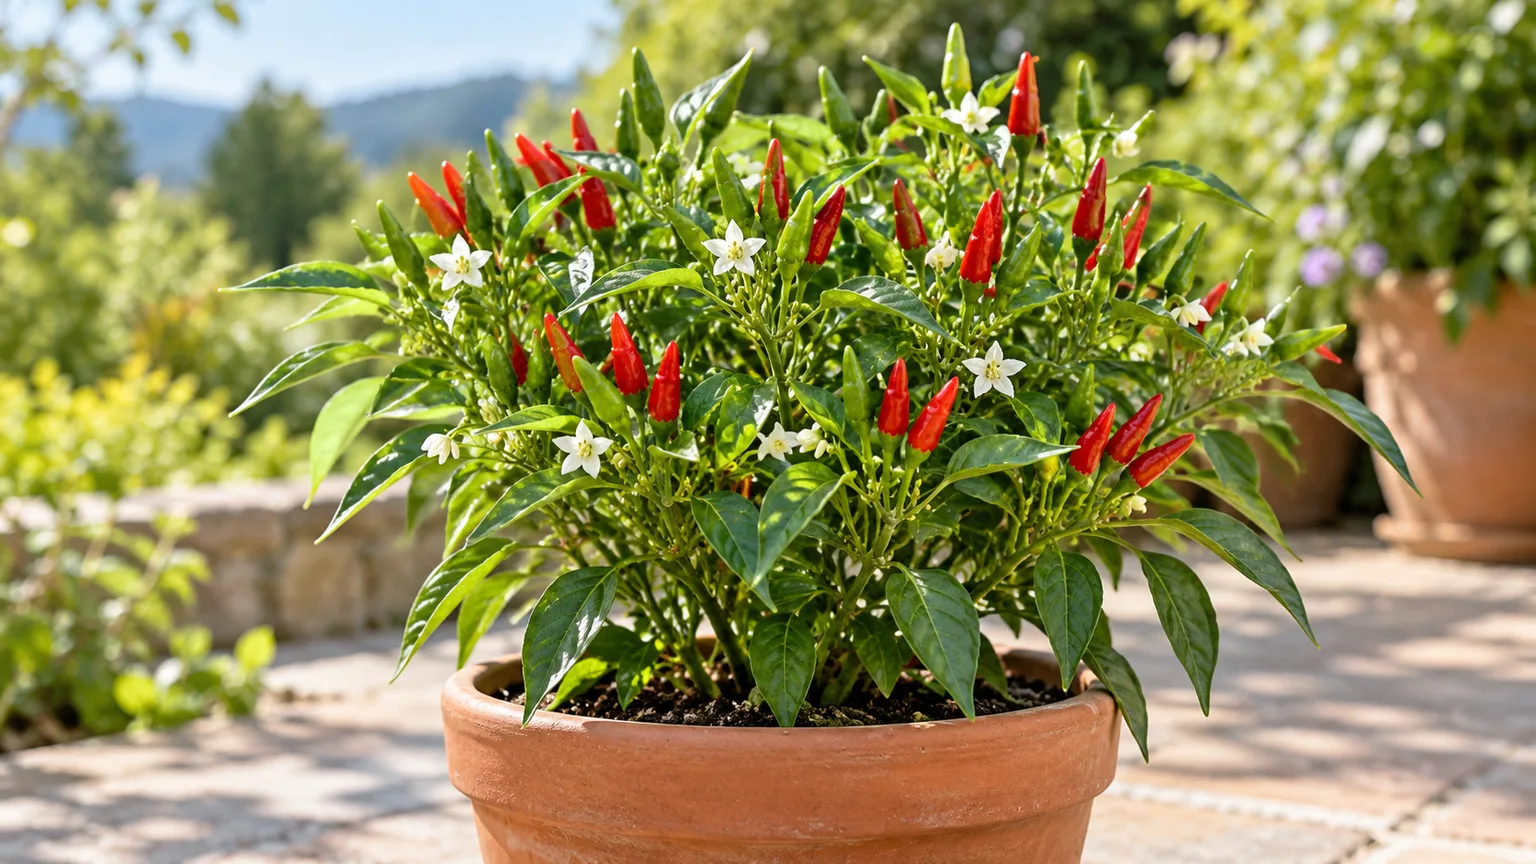
Thai pepper plants need a long stretch of warmth, strong light, and evenly moist soil to set a reliable crop. Start seeds indoors about eight to ten weeks before your last expected frost, then wait to move them outside until frost has passed and the soil has warmed; in a short-season climate, growing in a pot gives you more control over heat and shelter.
Once established, the routine is simple: give the plant at least six hours of direct sun, let excess water drain, feed modestly, and harvest with snips rather than pulling fruit from brittle stems. The most common causes of disappointing crops are an early cold planting, inconsistent moisture, too much nitrogen, and flowers exposed to temperature extremes.
Thai pepper plant care at a glance
| Need | Practical starting point |
|---|---|
| Light | At least 6 hours of direct sun; a warm, brighter position is better for fruiting |
| Soil | Fertile, loose, well-drained soil or a quality container mix |
| Sowing | Indoors 8–10 weeks before the local last frost; keep the seed mix warm |
| Transplanting | After frost; 60°F soil is a lower threshold, while warmer soil near 70°F gives a more conservative start |
| Spacing | About 16–18 inches for many compact types; follow the seed label for the cultivar |
| Water | Keep the root zone evenly moist, not saturated; check pots daily in hot weather |
| Harvest | Pick full-size fruit green or leave it to reach its listed mature color |
| Lifespan | Tender perennial where winters are frost-free; annual outdoors in colder regions |
Treat these as starting ranges, not a rigid recipe. Pepper cultivars vary in mature size, fruiting speed, and fruit color, and a sunny patio pot can dry much faster than a mulched garden bed.
What “Thai pepper” means
“Thai pepper” is a common name used for several hot pepper strains, including types sold as Thai hot, Thai bird’s-eye, or bird’s-eye chili. They are generally compact, productive plants with small, pointed fruit, but fruit can hang or point upward and mature colors can differ. Check the seed packet or nursery label for the exact cultivar, its mature color, estimated days to maturity, and plant size before deciding when to sow or harvest.
Do not assume every plant sold as a Thai pepper is the same as a decorative multicolor pepper. Some ornamental cultivars are bred mainly for appearance, while culinary seed strains are selected for the expected flavor and heat; the label is the best guide to the plant you are buying. The Royal Horticultural Society notes that chili varieties vary widely in fruit shape, color, size, and heat, and that heat can also change with growing conditions and ripeness. The RHS guide to growing chillies is useful for understanding that range, but your own cultivar label should govern the specific harvest cues.
For a concrete example of why names matter, the RHS lists the named ‘Hot Thai’ cultivar as an Award of Garden Merit selection and describes it as producing up to 200 small chillies per plant, with a listed range of 50,000–70,000 Scoville Heat Units. Those figures describe that cultivar under its trial and growing conditions; they are not a guaranteed yield or heat level for every seed packet labeled “Thai pepper.”
Plan around a long, warm growing season
Peppers are warm-season crops and do not recover quickly from cold soil. In regions with frost, count backward from the local last frost date and sow indoors roughly eight to ten weeks ahead; the exact window depends on how slowly your home-grown seedlings develop and how long your cultivar takes to fruit. A nursery transplant can shorten the indoor phase, but it still needs warm soil and a gradual transition outdoors.
“Days to maturity” is not always measured the same way by every seed supplier. Some list days from transplanting, others use different counting conventions, and weather can shift the date by weeks. Use the packet as a planning estimate, then track first flowers and the change from full-size green fruit to the cultivar’s mature color rather than relying on a calendar promise.
Start seeds indoors for a head start
Use clean seed trays or small pots with drainage and a fine-textured seed-starting mix. Sow about a quarter inch deep, keep the mix damp but not waterlogged, and provide warmth near 75–85°F if you have a heat mat; cool seed mix can make pepper germination slow or uneven. The RHS recommends warm germination around 70°F, while GrowVeg’s pepper-growing guide likewise emphasizes warmth and early indoor sowing.
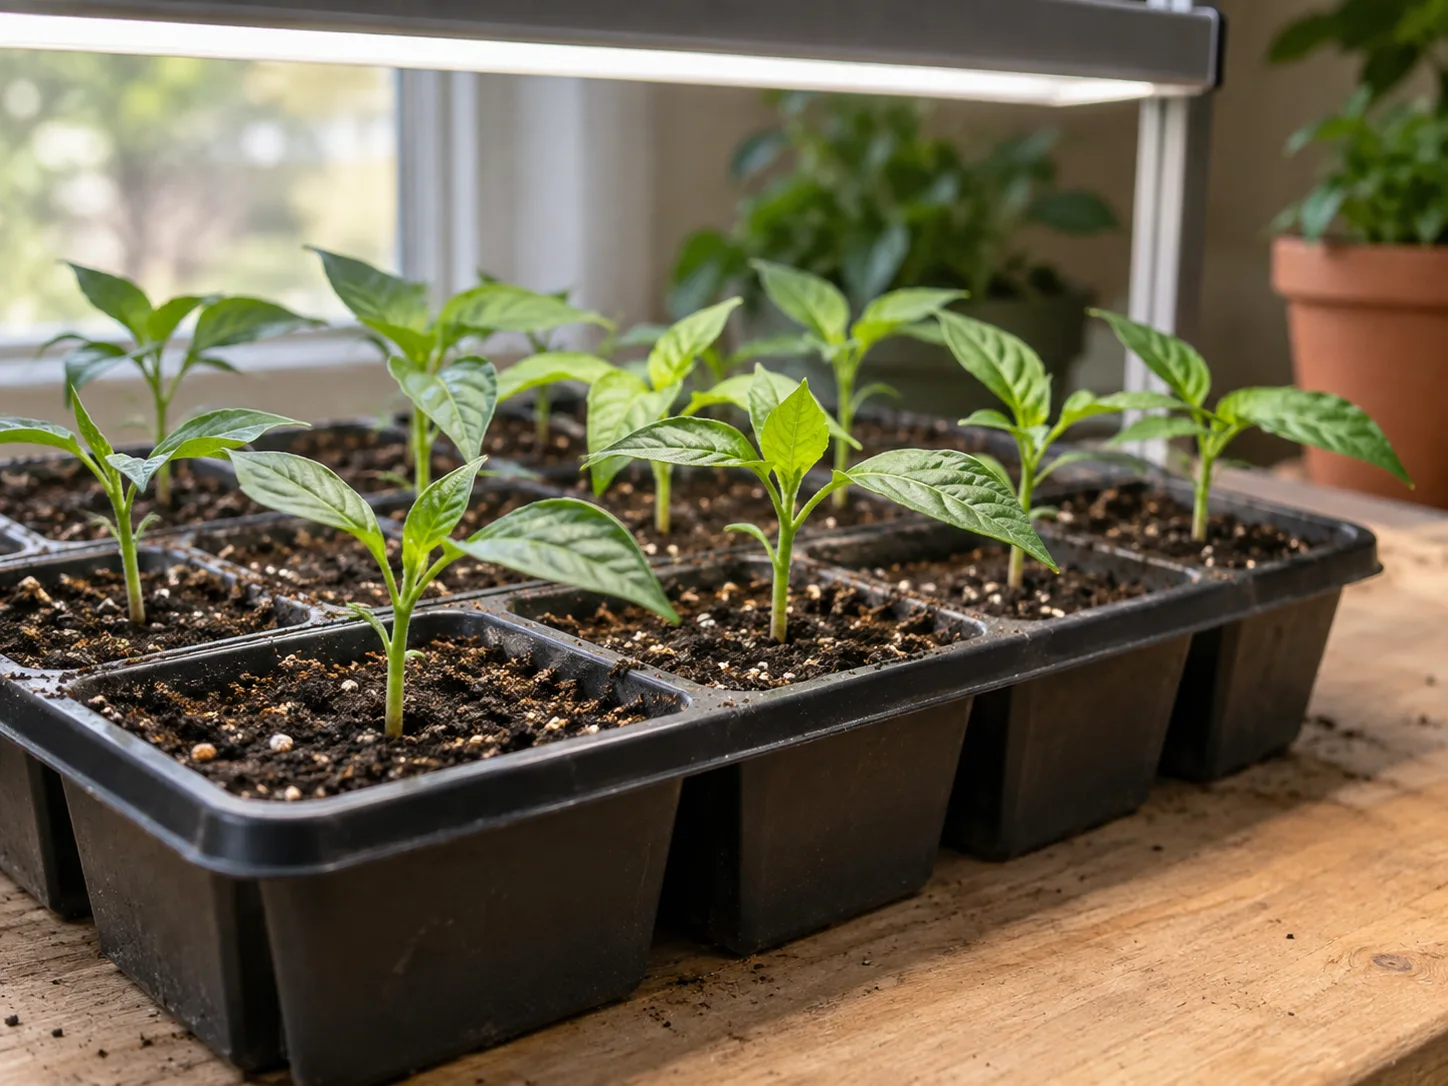
After seedlings emerge, remove any humidity cover and put them under bright light. A sunny window may work in a bright home, but a grow light kept close enough to prevent stretching gives more consistent seedlings during short winter days. Keep lights on a steady daily cycle, rotate trays if growth leans, and let the mix lose some surface moisture between careful waterings so young roots are not left cold and saturated.
Pot seedlings up once they have true leaves and roots begin to fill their starter cells. Handle them by a leaf rather than pinching the stem, and move them into a slightly larger pot rather than a much bigger one; excess wet mix around a tiny root ball can stay cold and wet for too long. If two seeds germinate in one cell, snip the weaker seedling at soil level instead of tugging it up and disturbing the roots of the one you are keeping.
A simple seed-starting sequence is:
- Sow into clean, drained cells and label each cultivar.
- Keep the seed mix warm and evenly moist until shoots appear.
- Remove the cover, then give seedlings strong light and gentle air movement.
- Pot up after true leaves form and roots begin filling the cell.
- Harden the plants gradually before setting them in their final spot.
Harden off seedlings and transplant after frost
A seedling raised indoors has not yet adjusted to direct sun, cool nights, or wind. Over seven to fourteen days, move it outside for a short time in a sheltered, shaded location, then increase the exposure and duration each day; bring it in during cold nights or strong wind. This hardening-off period reduces leaf scorch and transplant shock, both of which can delay the first flush of growth.
Set the plant out only after frost danger has passed and the soil is warm. Extension sources give different practical thresholds: Penn State Extension uses 60°F measured three inches deep for field transplanting, while the current University of Georgia Cooperative Extension home-garden pepper guide recommends waiting for soil near 70°F and nights around 50°F. Treat 60°F as a lower limit, not an ideal; if the season allows, wait for warmer soil and mild nights so roots do not stall. If a cold front is forecast, delay planting or protect the seedling with a ventilated row cover.
Plant at the same depth as the seedling grew in its pot, water the root ball in, and leave enough room for airflow. Many compact Thai strains can be spaced around 16–18 inches apart, while larger or sprawling types need more room; use the label if it specifies a larger spread. Stake a plant only if the branch structure begins to lean under a heavy fruit load or the site is windy.
Choose full sun and fertile, draining soil
Choose the sunniest practical site, with at least six hours of direct sun and preferably more in a cool climate. A warm wall or patio can help extend the season, but reflected heat can become excessive during a hot spell; watch the leaves and fruit rather than assuming more heat is always better. In very hot regions, light afternoon shade during the hottest part of the day can reduce stress while the plant still receives strong morning sun.
In a bed, loosen compacted ground and mix in mature compost if the soil lacks organic matter. Roots need moisture and air at the same time, so improve drainage rather than enriching a heavy soil until it holds water for days. A soil test is more useful than guessing at pH or adding lime and fertilizer by habit; Penn State Extension describes peppers as performing well in fertile, well-drained soil and bases nutrient recommendations on soil-test results.
Mulch the bed after the soil has warmed to limit weed competition and soften swings in moisture. Keep mulch a few inches from the stem so the crown stays dry and easy to inspect. Good spacing and airflow also help foliage dry after rain, reducing the conditions that favor many leaf and fruit diseases.
Grow Thai peppers in containers
A container is a good choice when your summer is short, your garden soil drains poorly, or you want to move the plant into shelter at season’s end. Use one plant in a pot with drainage holes and about 3–5 gallons of volume; choose the larger end for a vigorous cultivar or a very hot, exposed patio. A smaller nursery pot can work temporarily, but it dries quickly and leaves little room for roots as fruit load increases.
Fill the pot with a quality potting mix made for containers, not garden soil. The mix should hold enough moisture for summer but still drain freely; a potting mix formulated for vegetables is a straightforward option. Set the pot where it gets strong sun, and raise it slightly off a flat surface if drainage holes might otherwise sit in water after rain.
Container plants need closer observation than plants in the ground. Check the mix with a finger an inch or two below the surface and feel the pot’s weight; water when the root zone is beginning to dry, not just because a set number of days has passed. On a hot, windy day, a fruiting plant may need water daily, but a shaded or cool pot may remain moist much longer. Do not let the pot stand in a saucer full of runoff.
Water evenly through flowering and fruiting
Pepper roots need a steady supply of moisture while the plant builds leaves, flowers, and fruit. In garden soil, deep watering once or twice a week may be enough in mild weather, but rainfall, heat, soil texture, and mulch change the total; check the soil instead of following a fixed schedule. The University of Georgia guide recommends keeping the root zone moist and notes that consistent watering matters for fruit set and development.
Water at the base of the plant so leaves dry quickly, especially in a humid climate. Drip irrigation or a soaker hose delivers water near the roots with less splash than overhead sprinkling. If you water by hand, apply it slowly enough to soak the root zone rather than running off the surface; a brief sprinkle can leave lower roots dry even when the top looks wet.
Avoid both extremes. A plant that repeatedly dries out may wilt and drop flowers, while a plant standing in soggy soil can develop root problems and yellowing that look like thirst at first glance. Utah State University Extension links irregular watering with flower drop and blossom-end rot in peppers; mulch and an even watering rhythm are better first steps than repeatedly adding fertilizer or calcium products.
Feed lightly and follow the plant’s growth stage
Start with a soil test for an in-ground bed and follow its recommendation for nutrients. In a container, use a complete vegetable fertilizer at the label rate, because frequent feeding in a small volume can build salts quickly. Avoid adding fertilizer to a dry, stressed plant; water first, then feed according to the product directions.
Too much nitrogen is a common reason a pepper plant looks lush but produces few flowers. Nitrogen pushes leaf and stem growth, which is useful early on but can become counterproductive if the plant keeps receiving strong feeds after it begins budding. Utah State University Extension advises against over-fertilizing peppers because excessive foliage can delay fruit set and maturity; the RHS chili guide suggests a higher-potassium liquid feed for container plants once flowering begins.
Use either source as context, not as a universal rate. Potting mixes, local soils, fertilizer formulations, and watering practices differ, so follow the label and adjust to the plant’s response. If leaves are dark green and growth is vigorous but flowers are scarce, pause high-nitrogen feeding and check light and temperature before adding another product.
Help flowers set fruit in heat or indoors
Pepper flowers can pollinate themselves, so one plant can fruit without a second pepper nearby. Outdoors, air movement and insects help move pollen around, but bees are not a strict requirement for fruit set; the University of Georgia Cooperative Extension notes that peppers self-pollinate. For an indoor plant that flowers but does not set fruit, gently tap or shake the flowering stems every few days to help pollen fall within the bloom.
Temperature is often the more important issue. Cold nights and extreme daytime heat can interrupt flowering, and Utah State University Extension notes that pepper blossoms may abort when nights are too cold or days become very hot. Keep the plant warm, but ventilate a greenhouse or sheltered porch during heat waves; do not respond to dropped blossoms with extra fertilizer unless the plant shows a separate nutrient need.
Flowers can also fail when the plant is underlit, chronically dry, waterlogged, or pushed into excessive leafy growth. Check sunlight, moisture, and recent fertilizer first. If the plant is in a pot, move it to a brighter spot only gradually if it has been shaded; sudden full sun can scorch leaves and make the stress worse.
Harvest green or red depending on your goal
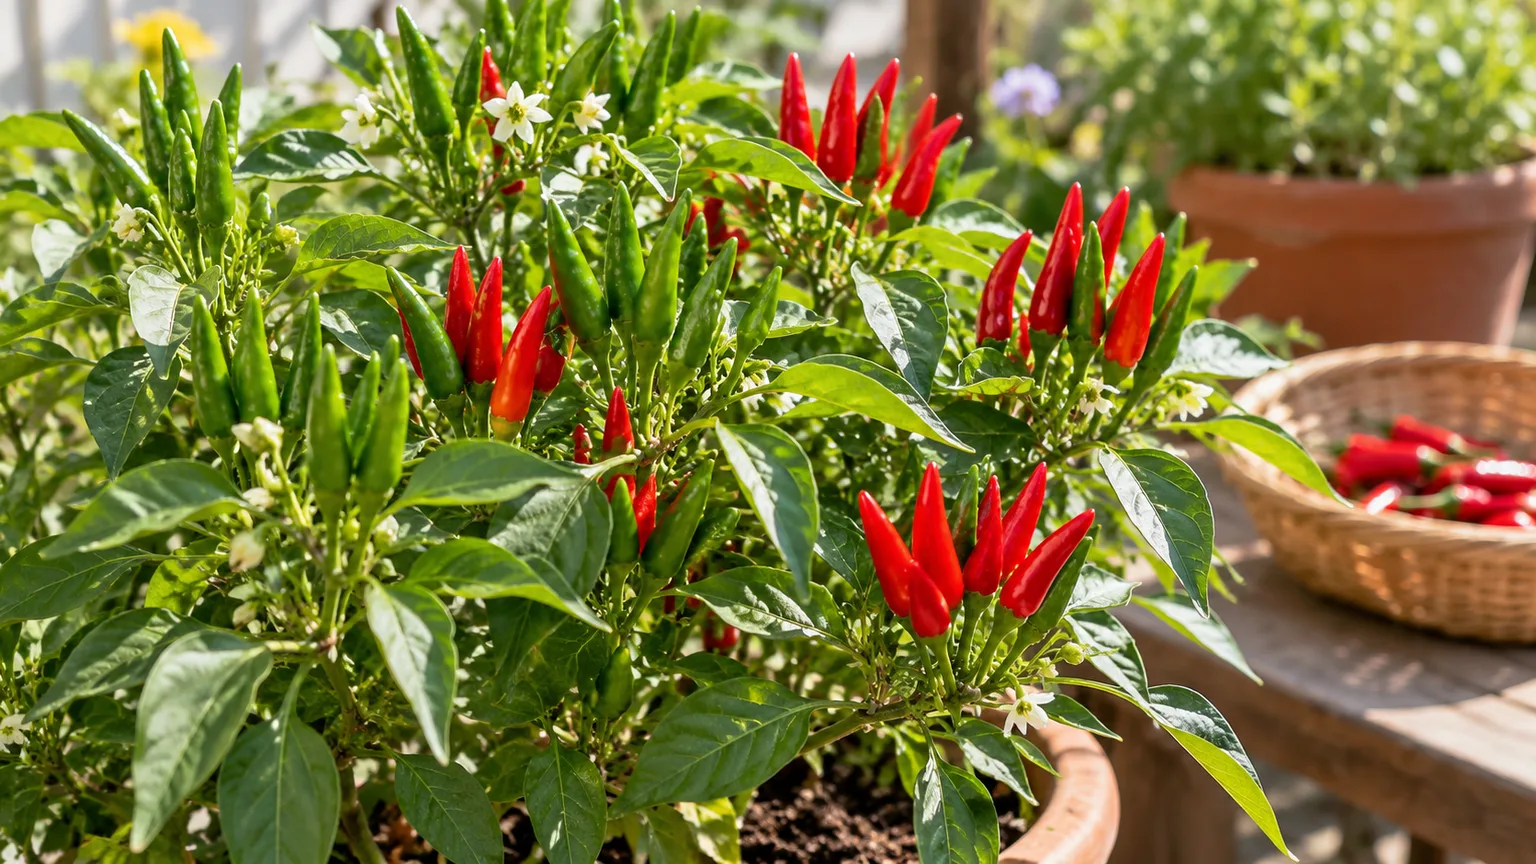
A Thai pepper can be harvested once it has reached full size, even if it is still green. Green fruit is generally less mature and may taste sharper or less developed; leaving fruit on the plant until it reaches the cultivar’s final color gives you the ripe stage the seed label describes. Color and heat vary among strains, so do not use one universal red shade or a fixed number of days as your only test.
The trade-off is crop pace. Picking some full-size green peppers can keep the plant producing new flowers and fruit, while leaving every pepper to ripen fully can slow the next wave. The RHS recommends picking chillies green for continued cropping and allowing later-season fruit to change color; use that approach to balance an early harvest with a few fully ripe pods for fresh flavor, drying, or seed saving.
Use clean scissors or pruners to cut the stem above the fruit. Pulling can snap a brittle branch, especially on a compact plant carrying many pods. Wear gloves if you are sensitive to hot peppers, keep your hands away from your eyes and face, and wash tools and hands after handling; the University of Georgia Extension also advises gloves to reduce skin and eye irritation from hot peppers.
Diagnose common growing problems
When a Thai pepper plant looks weak, check the growing conditions before changing several things at once. Note the latest night temperatures, whether the pot or bed is still wet below the surface, how much direct sun reaches the leaves, and whether you recently fed the plant. Make one change, then watch new growth for a week or two; old damaged leaves may not recover even after the cause is fixed.
| What you see | First checks | Useful next step |
|---|---|---|
| Many leaves but few flowers | Too little direct sun or repeated high-nitrogen feeding | Improve light gradually and pause extra nitrogen |
| Flowers drop before fruit forms | Cold nights, very hot days, or sharp moisture swings | Wait for moderate temperatures and keep the root zone evenly moist |
| Leaves wilt while soil is wet | Poor drainage, oversized pot, or root damage | Let the mix drain and inspect the root zone before watering again |
| Dark, sunken spot at the fruit tip | Blossom-end rot and inconsistent water uptake | Stabilize watering and check the soil or pot drainage |
| Pale, distorted new leaves or spreading mottling | Possible pest injury, herbicide exposure, or disease | Isolate the plant, inspect carefully, and identify the cause before treatment |
Check conditions before changing care
A single symptom rarely points to one cause. Yellowing can follow wet roots, dry soil, low light, pests, or normal aging of an older leaf; check whether the pattern is limited to the oldest leaves or spreading across new growth. A dark patch at the blossom end is not automatically a fertilizer deficiency: uneven water uptake can keep calcium from reaching developing fruit even when the soil contains calcium. For flower drop, Utah State Extension flags nights below about 55°F or days above about 90°F as unfavorable ranges; these are general pepper thresholds, so use them as clues rather than a cultivar-specific guarantee.
Do not use a pesticide, fungicide, or homemade spray until you have identified the likely problem. If a labeled product is warranted, confirm that it is approved for edible peppers and the target pest or disease, then follow the label’s dose, protective equipment, harvest interval, and application limits. A local extension office can help identify symptoms that are not clear from a photo.
Prevent pests and pepper diseases
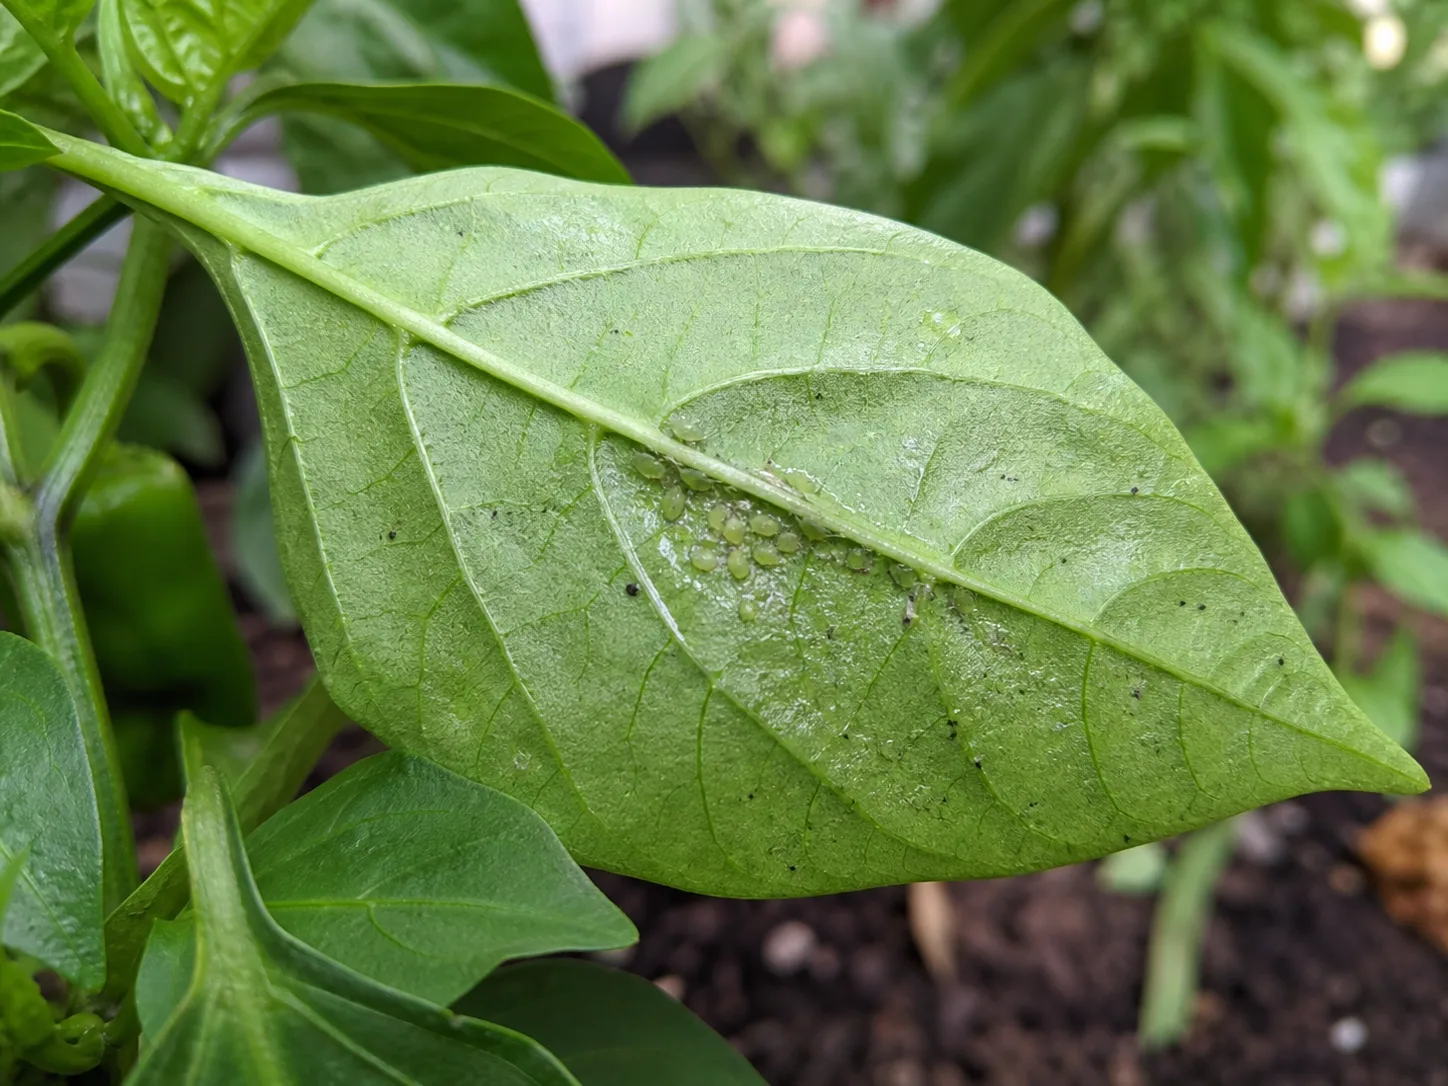
Inspect leaf undersides, new tips, and the base of each plant once a week. Aphids, spider mites, thrips, and whiteflies can build up unnoticed under foliage; look for clusters of insects, webbing, stippling, curled leaves, or sticky honeydew. A small infestation may be dislodged with a controlled stream of water, but repeat the inspection because one rinse will not remove every egg or hidden insect.
In parts of the southern United States, also watch for pepper weevil, a regional pest whose larvae feed inside buds and developing pods. Infested buds or young fruit may yellow and drop; because the larvae are protected inside plant tissue, spraying the outside of a pod will not solve an established infestation. Virginia Cooperative Extension’s pepper-weevil fact sheet describes its regional range, while UC IPM’s guidance recommends removing spent pepper plants after harvest and controlling nearby nightshade hosts. Collect prematurely fallen fruit and ask a local extension office to confirm the pest before considering any treatment.
Keep plants spaced for airflow, water the soil rather than soaking the canopy late in the day, and remove fallen fruit and diseased debris. Rotate peppers away from tomatoes, potatoes, eggplants, and other nightshades rather than planting peppers in the same bed year after year. Georgia Extension recommends rotating pepper locations and removing residue at season’s end to reduce carryover of disease and insect problems.
If symptoms spread quickly, identify the pest or disease before treating. Some pepper problems are viral or soil-borne and will not improve with a general-purpose spray; resistant varieties, clean starts, sanitation, and rotation are more dependable prevention. Follow local extension guidance for any chemical control, since the right product and legal use depend on the pest, crop, and label.
Overwinter a potted Thai pepper plant
In a frost-free climate, a pepper may live for more than one growing season, but it is often grown as an annual where winter frost kills the plant. A container makes overwintering possible: move it indoors before nights become cold, inspect leaves and stems for pests, and remove dead or damaged growth with clean pruners. Avoid bringing insects onto a collection of houseplants; keep the pepper separate while you monitor it.
Give the plant the brightest available window or supplemental light, and water less often as growth slows. Keep the mix slightly moist rather than soaking it on a calendar, and do not continue heavy summer feeding when the plant is barely growing. Some leaf drop after moving indoors can happen as light and temperature change, but stems should remain firm and roots should not sit in water.
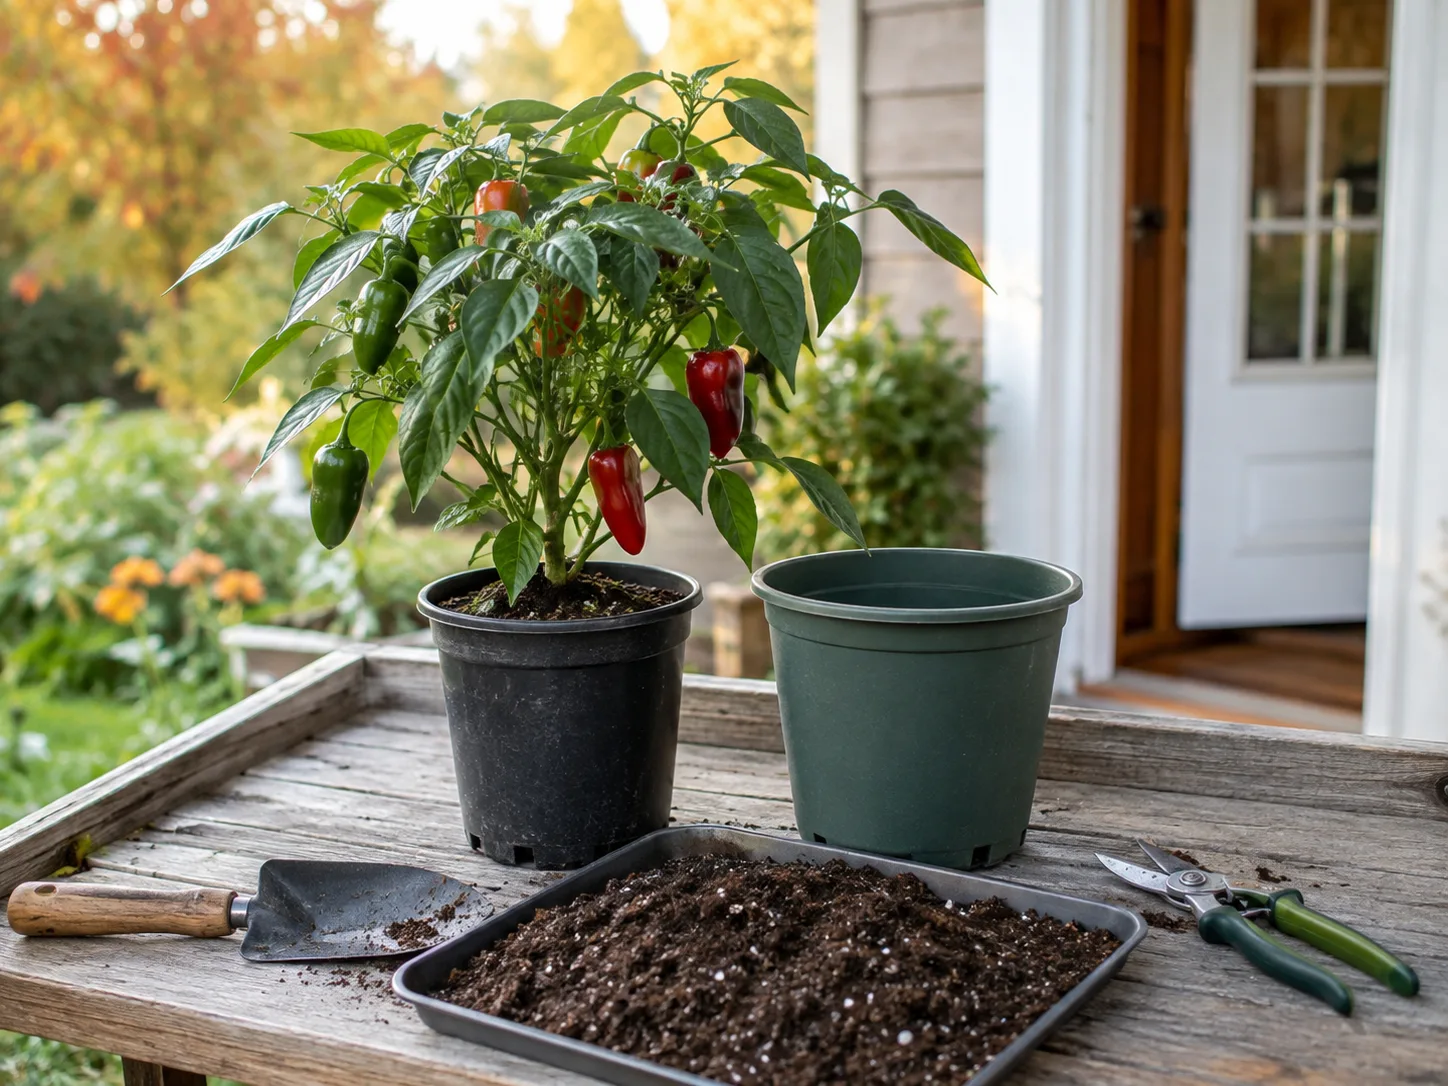
Overwintering saves time if you have a healthy, valued cultivar, but it is not guaranteed to produce an earlier or larger crop. Indoor light can be weak, pests can multiply, and a tired plant may be less useful than a fresh seedling. The RHS and Epic Gardening’s pepper-growing advice both describe overwintering as an option for tender peppers, not a requirement; in a cold climate, starting new seeds each spring is often the simpler plan.
Conclusion
Grow Thai peppers by managing the season in the right order: start early enough, wait for warm soil, give the plant strong sun, and keep the root zone evenly moist without leaving it saturated. Use the variety label to judge mature color and timing, feed according to soil or container needs, and look for temperature or water stress before blaming pollination when flowers drop. Pick fruit with clean snips at the green or fully colored stage you prefer, and move a favorite potted plant indoors before frost if you want to try overwintering it.



