Syngonium Albo Care: Light, Water, Soil & Support
Learn how to care for Syngonium Albo with guidance on bright indirect light, watering, airy soil, support, pruning, propagation, pests, and pet safety.
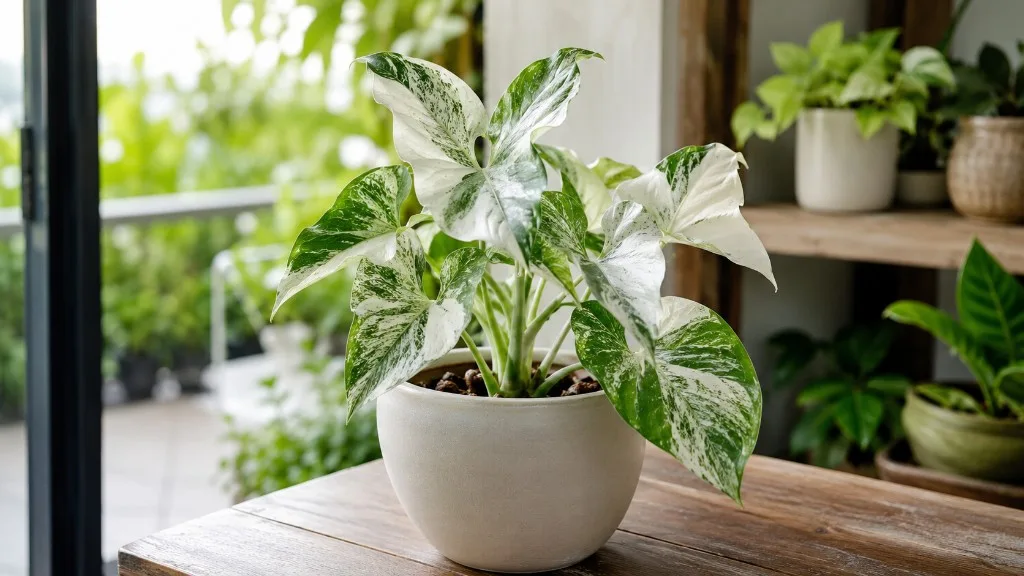
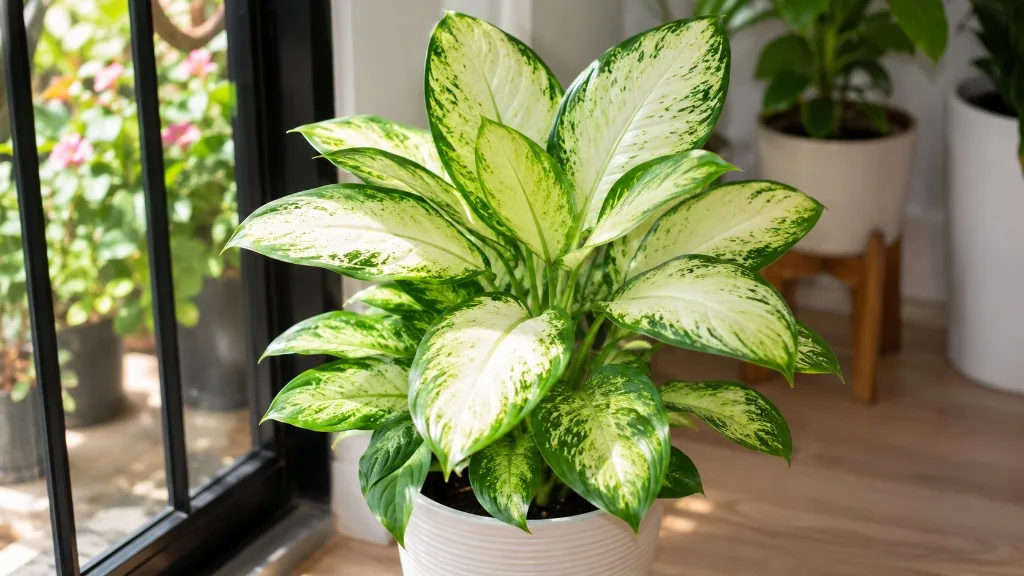
Syngonium albo is a white-and-green variegated form of Syngonium podophyllum, the tropical arrowhead vine. It can stay compact with pruning, trail from a shelf, or climb a support; its leaves may also change shape as the plant matures. Those choices matter as much as a watering schedule, because a young tabletop plant and a long climbing vine do not use water or space in the same way. NC State Extension describes arrowhead vine as a shrub-like young plant that develops a vining habit with age, while mature climbing growth can produce more divided leaves (NC State Extension Plant Toolbox).
The dependable starting point is bright filtered light, a free-draining mix that still holds some moisture, and watering only after the upper mix begins to dry. From there, choose the form you want and adjust pruning or support to match it. The white sectors are part of the plant’s appeal, but they contain less chlorophyll than green tissue; good care can support healthy patterned growth, not force every leaf to be white or keep an all-white leaf indefinitely.
Is Syngonium Albo Right for Your Space?
This is a tropical foliage plant that suits a bright room, shelf, desk, or hanging planter, provided its sap and leaves can be kept away from pets and small children. Its common retail name is used for white-variegated Syngonium podophyllum, though seller labels can vary. Expect a living vine that grows and changes shape rather than a permanently miniature rosette. The species can reach several feet as a climber, but indoor size is manageable with tip pruning and an appropriately sized support.
The Albo form is attractive but less forgiving of poor placement than a plain green arrowhead plant: white tissue can show scorch, and a heavily white leaf has less green surface available to make energy. If you want a plant that can sit in a dark corner or be handled by a curious cat, choose another plant. If you can provide good indirect light and a secure elevated location, its growth is straightforward to manage.
Find Bright Light Without Scorching White Leaves
Place the pot where the leaves receive strong daylight for much of the day without harsh sun landing directly on them for hours. A bright east-facing window is often convenient; a west- or south-facing window can work with a sheer curtain or a little distance from the glass. A north-facing window may be too dim in some homes, especially several feet back from the window, so judge the plant’s new growth rather than relying only on compass direction. Clemson Cooperative Extension likewise recommends bright light for variegated arrowhead vines to maintain their coloration (Clemson HGIC arrowhead-vine guide).
The goal is not to expose the white portions to direct sun so they will “stay white.” They have less protective green pigment and can scorch sooner than the green parts. If pale tan patches appear on the window-facing side after a move, filter the light or step the plant back; do not respond by moving it into deep shade, which can stretch the stems and reduce the plant’s ability to support new growth. Turn the pot a quarter-turn every week or two if growth leans consistently toward one side.
Build a Mix That Holds Moisture and Air
Use a container mix that drains readily but does not dry out in a single afternoon. A practical starting blend is two parts indoor potting mix, one part fine orchid bark, and one part perlite or pumice, measured by volume. The base supplies water retention while bark and mineral pieces create larger air spaces. University of Florida IFAS describes commercial Syngonium media made from components such as peat, pine bark, vermiculite, and perlite, with cultivation pH around 5.5 to 6.5; its greenhouse formula is a reference point, not a requirement to reproduce exactly at home (UF/IFAS Extension’s Syngonium production guidance).
Judge the mix by what it does in your pot. After a thorough watering, water should run from the drainage holes and the mix should be evenly moist, not packed into a slick, heavy mass. If it remains wet for many days in a warm bright room, add more coarse bark or perlite at the next repot. If a small pot becomes bone-dry very quickly, use a slightly finer base mix or check whether the plant has outgrown the container. Never use outdoor garden soil in a houseplant pot; it compacts easily and drains unpredictably.
Choose a pot with at least one open drainage hole. A decorative cachepot is fine if you remove the nursery pot for watering or empty standing water after it drains. Adding gravel to the bottom does not replace a drainage hole and can leave the root ball sitting higher in a saturated zone. Keep the pot only modestly wider than the roots so the unused mix around them does not stay wet after each watering.
Water by Dry-Down, Not a Weekly Schedule
Check the soil before each watering instead of assigning the plant a fixed weekday. Press a finger about an inch or two into the mix, or use a dry wooden skewer near the pot’s edge. If the upper layer is dry but the skewer below comes out cool and damp, wait. If the upper mix is dry, the pot feels lighter, and the lower root zone is no longer saturated, water thoroughly until excess runs out, then empty the saucer. The University of Florida recommends allowing the media surface to dry slightly before watering and reducing frequency in winter without letting the plant dry out completely (UF/IFAS Syngonium guidance).
A wilted plant does not automatically need water. If the pot is dry and light, water it fully and let it drain. If the pot is heavy and damp, stop watering and inspect the lower mix and roots instead: waterlogged roots can fail to move water, so the leaves droop even though the soil is wet. The distinction prevents the common cycle of adding water to a plant that is already losing roots.
Frequency changes with light, warmth, pot size, mix, and season. A small pot near a bright window may dry in a few days during active growth; a larger pot in cool, dim conditions may take much longer. Use the first few weeks to learn your plant’s drying pattern, and repeat the check after moving it, repotting, or adding a support that changes how much foliage it carries. Room-temperature tap water is usually adequate; if hard water leaves a mineral crust, periodically flush the mix with clean water and let it drain completely.
Keep Temperatures Steady and Humidity Moderate
A warm room with stable temperatures suits this tropical vine. UF/IFAS gives 65–80°F (18–27°C) as a range for maintaining leaf color in interiorscapes, which is a useful home target rather than a hard survival threshold. Keep the plant away from cold window glass, frequently opened exterior doors, heating vents, and air-conditioner blasts. A brief cool spell does not mean the plant is doomed, but repeated drafts and cold wet mix slow recovery and can invite root trouble.
Average household humidity is often workable if watering and light are balanced. If the air is especially dry and new leaves repeatedly emerge with crispy edges, run a humidifier near the plant and use a small hygrometer to see whether conditions improve. Misting is short-lived and wets leaves without reliably raising room humidity; it is not a substitute for better ambient moisture or air circulation. Avoid tightly enclosing the plant in a damp, stagnant corner, because stale air and wet foliage encourage problems rather than solving them.
In frost-free tropical climates, arrowhead vine can grow outdoors in a bright shaded position; the species is hardy only in warm USDA zones according to NC State’s profile. In cooler regions, treat it as a houseplant or move it outside only for warm weather after gradually acclimating it to brighter conditions. A patio that gets direct afternoon sun can damage the white leaf sectors, so start in bright shade and watch the foliage before increasing exposure.
Feed Lightly During Active Growth
Feed when the plant is actively making new leaves, usually in spring and summer indoors. Use a complete liquid houseplant fertilizer at the label rate or a modestly diluted rate if the plant is growing slowly or the mix already contains fertilizer. Apply it to damp soil rather than a bone-dry root ball, and do not feed simply because leaves look yellow; yellowing can come from root stress, low light, normal aging, or pests, none of which a stronger fertilizer fixes.
Pause or reduce feeding when growth slows in winter, light drops, or the plant has recently been repotted into fresh pre-fertilized mix. A pale crust on the soil or pot rim, brown tips that worsen after feeding, or a sudden decline following a concentrated dose can point to accumulated salts. Flush the mix thoroughly with plain water if drainage is good, then wait for active growth before resuming a lighter routine.
Choose a Climbing, Trailing, or Compact Form
Arrowhead vine can be displayed as a compact cluster, a trailing vine, or a supported climber. Young leaves are usually arrow-shaped; with age, growth may become more elongated or divided. NC State notes this juvenile-to-adult leaf change and the species’ climbing habit, so a different-looking mature leaf is not automatically a sign that the plant has reverted or is unhealthy. Decide whether you want the juvenile look and shorter stems, or want to let the plant climb and show a more mature form.
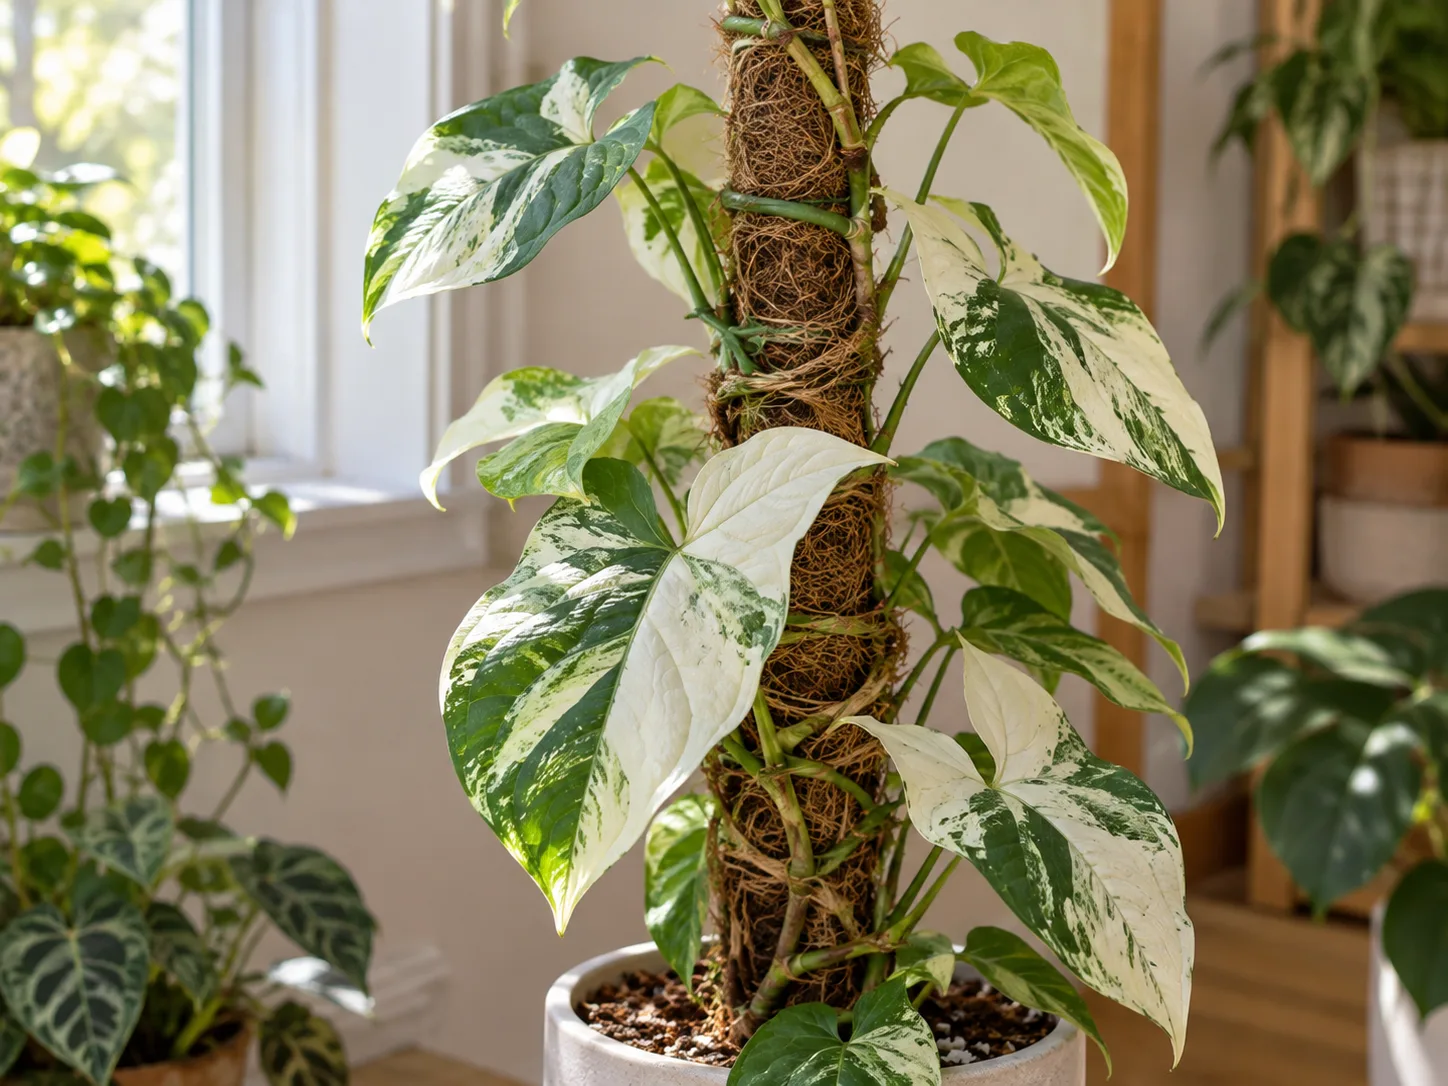
A support is optional. It makes sense if you have vertical room and want to train the stems upward; trailing works just as well if you prefer a shelf or hanging pot. Fasten stems loosely with soft ties and make sure the support is anchored in the pot rather than pressing against the plant’s crown. Aerial roots may attach to a textured, slightly moist pole, but a moss pole needs occasional maintenance and is not a requirement for healthy growth.
Pick a Moss Pole or Trellis by the Growth You Want
A moss or coir pole offers a textured surface that aerial roots can grip; a trellis gives stems a broader route to spread across. Use a trellis if you want to shape the plant across a wall or in a fan, and a pole if you want a narrow vertical line. Neither support guarantees larger leaves: light, maturity, root health, and continued growth all matter. If the stem is soft or the plant is newly rooted, wait until it is growing steadily before adding a tall, heavy support.
Support is easiest to install during repotting, when you can place it without stabbing through the densest roots. If you add one to an established pot, push it near the edge and work slowly. The trade-off is practical: a climber may need the pole extended or replaced as it grows, while a trailing plant needs occasional trimming to avoid a tangled vine.
Prune for Shape and Manage Reversion
Prune during active growth with clean, sharp snips. To shorten a stem, cut just above a healthy node (the point where a leaf and aerial root emerge); new growth can branch from nodes below the cut. Pinching the growing tip can encourage a fuller outline, while removing the longest stems helps keep a tabletop plant balanced. Do not remove more foliage than needed at one time, particularly if the plant is already stressed or recently repotted.
Every cutting that includes a node can be considered for propagation; a bare leaf without a node will not grow into a new vine. If you want to keep the pot full, root a few cuttings and plant them back into the same container after they establish. Remove yellowed or badly damaged leaves with a clean cut at the petiole rather than pulling them off and tearing the stem.
Variegation is variable, and light cannot paint white onto a stem that is genetically producing green leaves. If several consecutive leaves on one branch are nearly all green and you want to preserve the patterned look, trace that stem back and prune to a node with visible variegation. Keep some green growth if the plant has very little; green leaves support the plant’s energy needs. An occasional mostly white leaf may look striking, but it is less self-sufficient and may not last as long as a balanced green-and-white leaf.
Propagate From a Node
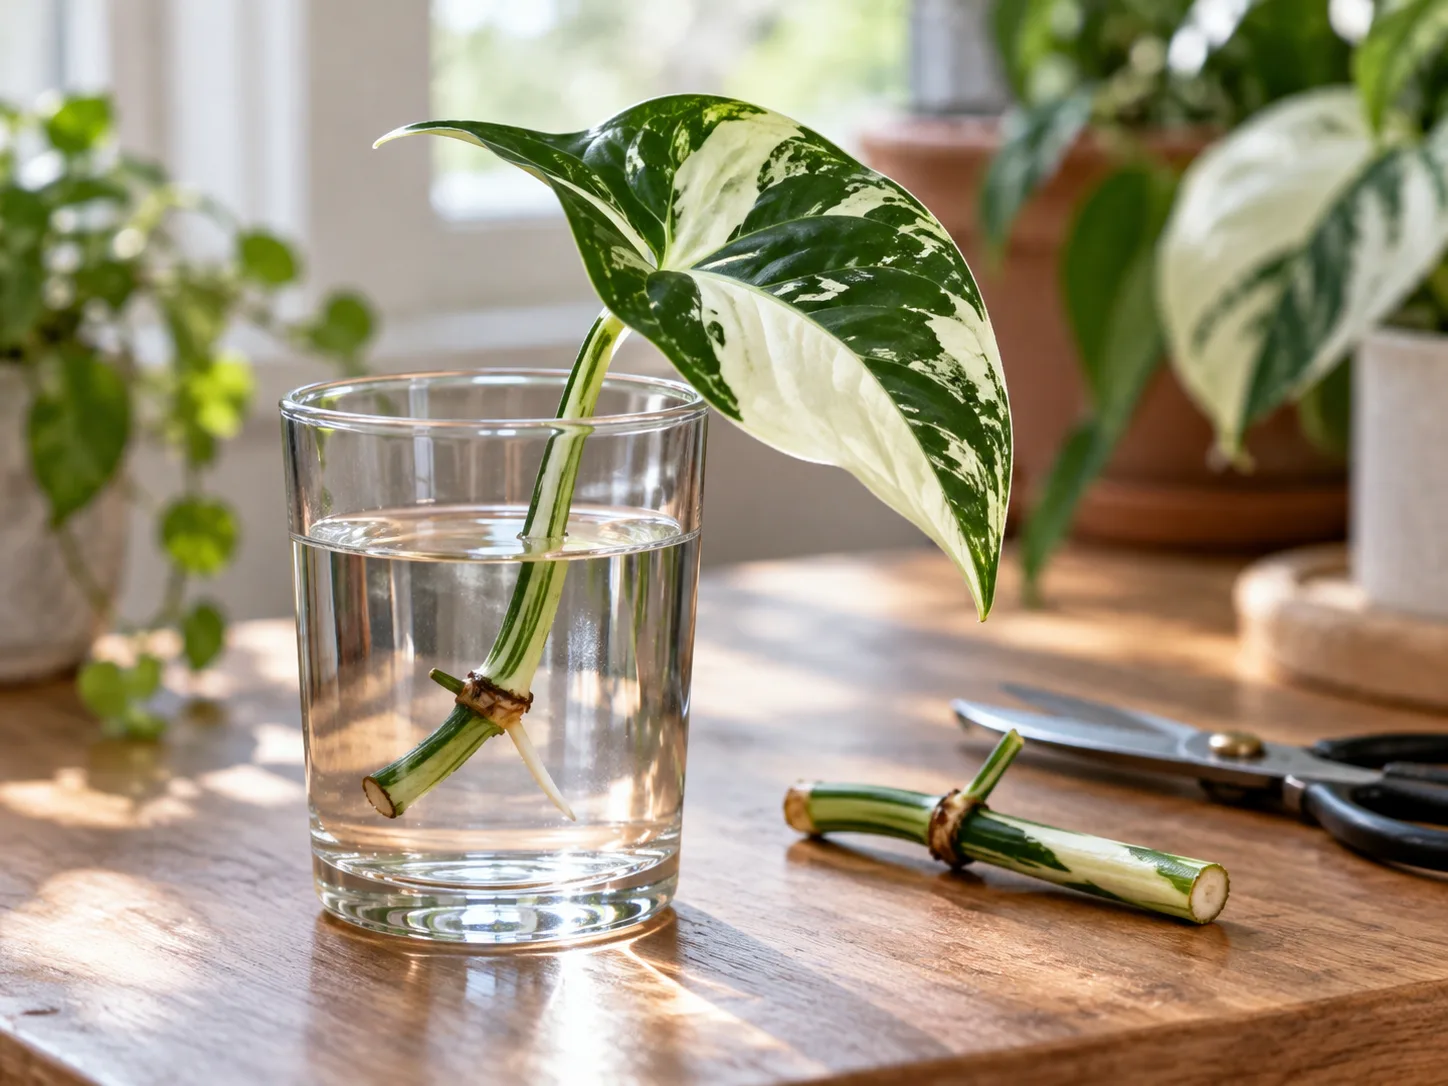
The reliable way to propagate Syngonium Albo is with a stem section that includes at least one node. A node is the slightly raised joint where a leaf attaches and an aerial root or root nub may form. Cut between nodes with clean shears, leaving the node on the piece you intend to root; a leaf or petiole by itself does not contain the growing point needed to make a new vine. UF/IFAS describes single-node cuttings and tip cuttings as standard Syngonium propagation methods, and NC State also lists stem cuttings and layering (UF/IFAS, NC State Extension).
Wear gloves if your skin is sensitive, and keep the cut material away from children and pets. Choose a firm, actively growing stem rather than a soft, yellowing section. Each cutting can have one leaf and node, or several nodes if you want a longer piece; keeping one or two leaves usually gives a manageable balance between water loss and photosynthesis. A horticulture-reviewed Epic Gardening guide to Syngonium also describes cuttings as a practical way to propagate arrowhead vine.
Root a Cutting in Water
Place the node and any aerial root below the waterline while keeping the leaf and most of the stem above it. Use a clean glass, set it in bright indirect light, and change the water if it becomes cloudy or develops an odor. Top it up as it evaporates so the node stays submerged, but do not leave the leaf sitting in water. Warm, steady conditions help; direct sun heats the glass and can stress the cutting.
Once several roots have formed and are a few inches long, move the cutting into a small pot with pre-moistened, airy mix. Water-rooted cuttings may pause while they adjust to soil, so keep the mix lightly moist during the transition without leaving the pot saturated. Do not pot a cutting just because one tiny root tip appeared; a small root system is easier to damage during planting.
Root a Cutting in Potting Mix
A direct-to-mix cutting avoids the water-to-soil transition. Place the node just below the surface of a small pot of airy, lightly moistened mix, then firm the mix around it so the cutting does not wobble. Keep the leaf above the mix and the container in warm, bright indirect light. A clear cover can slow moisture loss, but vent it regularly and remove it once roots establish; trapped condensation and stagnant air can rot the stem.
Check by giving the cutting a gentle tug after a few weeks rather than pulling it up every few days. Resistance and fresh growth suggest roots are forming. If the stem turns mushy, discard the damaged section, clean the container, and try again with a firmer cutting and less saturated mix. Rooting time varies with temperature, light, and cutting condition, so use new growth and root resistance rather than a promised calendar date.
Repot Only When the Root Zone Needs It
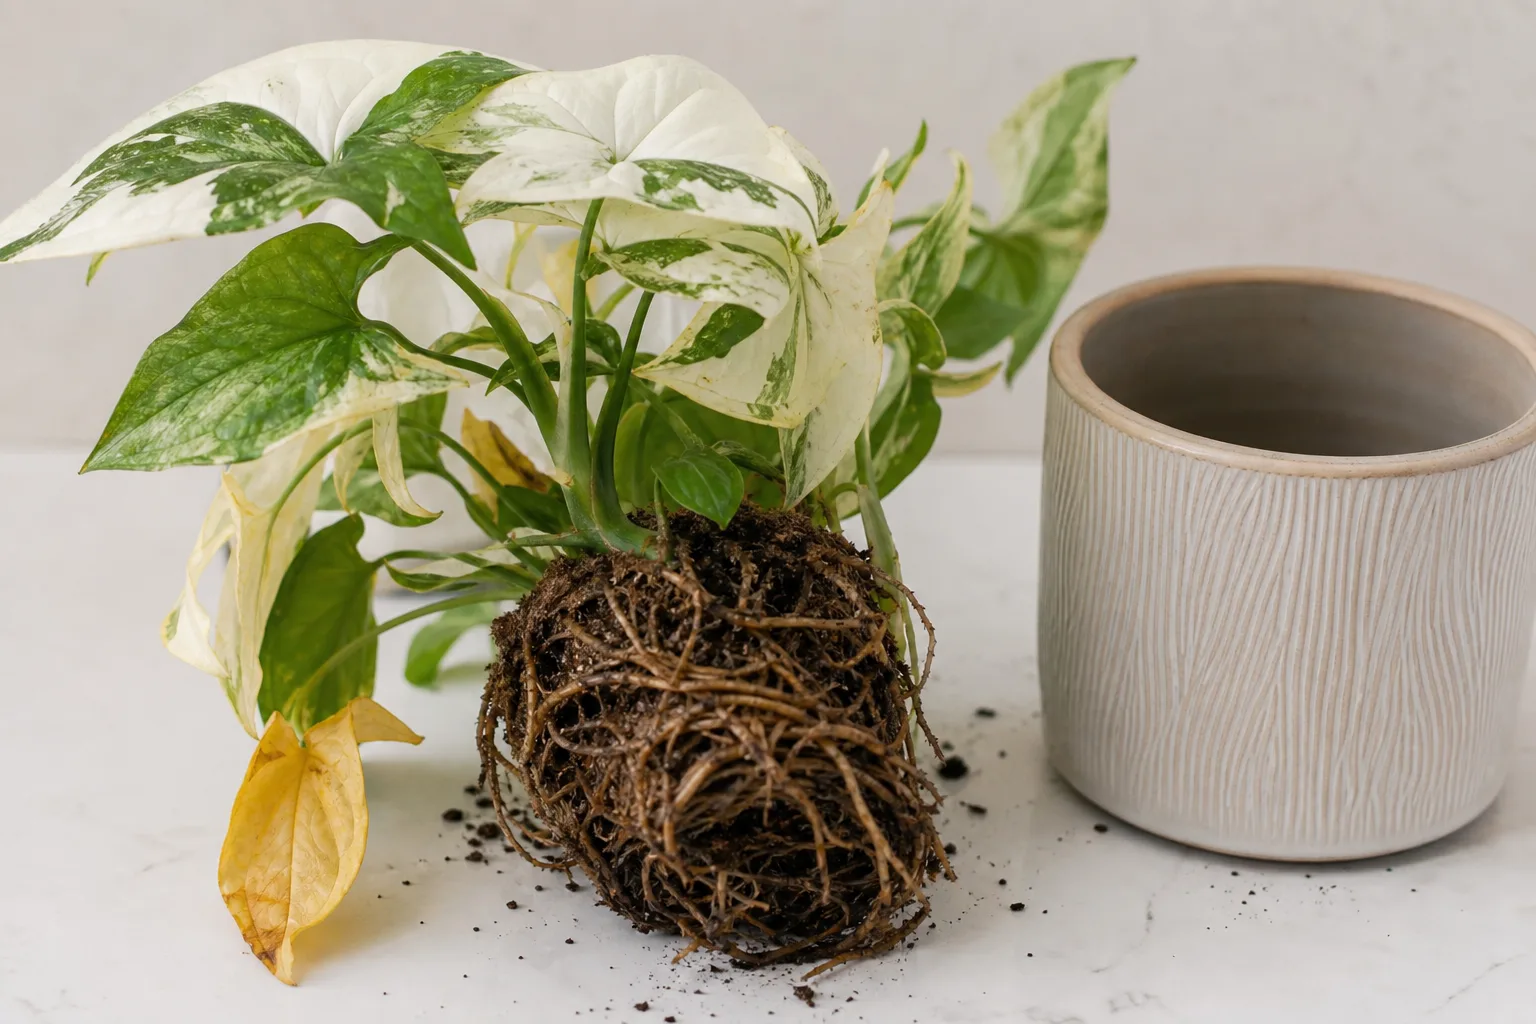
Repot when roots fill the container, circle densely at the bottom, emerge from drainage holes, or the mix has broken down and stays wet too long. A plant that dries within a day despite thorough watering may also be root-bound, though unusually strong light or a small pot can produce the same pattern. If the plant is healthy and the mix still drains well, there is no benefit in disturbing it on a fixed annual schedule.
Move it one pot size up, usually just an inch or two wider than the root ball, and use fresh airy mix. Loosen the outer roots gently; trim only roots that are clearly dead or mushy with clean shears. Set the plant at the same soil depth, water once to settle the mix, and let the pot drain fully. Avoid combining repotting, heavy pruning, and a major change in light on the same day unless you need to address an urgent problem; changing one variable at a time makes recovery easier to read.
Diagnose Leaf Problems Before Changing Care
Treat symptoms as clues, not diagnoses. First check the soil moisture and pot weight, then look at where the damage appears: old lower leaves, new growth, the window-facing side, leaf edges, or one isolated branch. Inspect the undersides and stem joints for insects before changing fertilizer or humidity. Make one adjustment, then watch the next leaves; existing scorch and brown tissue will not turn green again.
Yellow Leaves or Drooping Stems
One older lower leaf turning yellow while the rest of the plant looks firm can be normal aging. Several yellow leaves appearing in sequence, especially with a heavy wet pot, soft stem bases, a sour smell, or fungus gnats, point toward a root-zone problem. Stop watering until the mix has dried enough; if the plant remains limp or smells sour, slide it out and check for dark, mushy roots. Trim rot, replace collapsed mix, and use a pot that fits the remaining roots.
If the mix is dry and the pot is light, water thoroughly and allow it to drain. If it is wet, do not water because the leaves droop. A plant that wilts after repotting may need a few days to settle, but persistent decline calls for checking roots and temperature rather than repeatedly misting or fertilizing it.
Brown Edges or Less White Variegation
Brown edges can follow a dry spell, direct sun, low humidity, salt buildup, or root damage. Look for a pattern: crisp patches on the brightest side suggest sun exposure; widespread crispy edges after missed waterings suggest drought stress; a white crust near the rim or damage after feeding points toward salts. Check the root zone before assuming low humidity, because damaged roots can produce dry-looking foliage even when the air is comfortable.
If new leaves have less white, first make sure the plant receives enough bright filtered light and that growth is otherwise healthy. Low light can encourage weak, stretched growth, but increasing light cannot reliably change the pattern encoded in a stem. Move the plant gradually, not directly into hot afternoon sun, and judge the next few leaves rather than expecting old foliage to change. Fully white leaves are also not a target to maximize: without much green tissue, they have less capacity to support themselves.
Prevent Pests and Respond to Root Rot
Inspect new plants before placing them beside a collection, then check leaf undersides, petiole joints, and the base of stems during watering. Aphids, mealybugs, scale, and spider mites are documented pests of arrowhead vine by NC State and UF/IFAS. Sticky residue, cottony clusters, small bumps, fine webbing, or pale stippling are reasons to isolate the plant and inspect it closely. Remove a small infestation by wiping or rinsing the foliage, then use a labeled insecticidal soap or horticultural oil only if needed; test a small area first and follow the product directions for indoor ornamentals.
Root rot is different from simple overwatering: roots become damaged in persistently wet, poorly aerated mix, then the plant may wilt because the damaged roots cannot supply water. Dark, soft roots and a sour smell are stronger evidence than one drooping leaf. Cut away mushy tissue with sanitized shears, discard the old saturated mix, repot into a clean pot with drainage and fresh airy mix, and wait until the mix begins to dry before watering again. If stem rot is moving upward or bacterial-looking spots keep spreading, separate the plant from others and seek a local extension or plant-diagnostic service rather than spraying products at random.
Place It Safely Around Children and Pets
Treat Syngonium Albo as toxic if chewed. ASPCA lists arrowhead vine (Syngonium podophyllum) as toxic to cats, dogs, and horses because it contains insoluble calcium oxalates; signs can include oral irritation, swelling, drooling, vomiting, and difficulty swallowing (ASPCA Animal Poison Control). Keep the pot and fallen leaves out of reach, and do not rely on a hanging basket if a pet can reach its trailing stems.
The sap can also irritate sensitive skin, so wear gloves when pruning or repotting and wash tools and hands afterward. If a person or pet chews the plant, contact a clinician, veterinarian, or poison-control service for situation-specific guidance; do not induce vomiting or improvise a home treatment. For homes where the plant cannot be kept inaccessible, choose a non-toxic alternative instead.
Conclusion
Syngonium Albo grows best when you balance light, airflow around the roots, and the amount of water the pot can actually use. Give it bright filtered light, an airy mix in a draining pot, and a moisture check before each watering; then prune it compact or add support according to the shape you want. A plant that changes leaf form or produces a greener leaf is not automatically failing, and more water or fertilizer will not correct every symptom. Observe where new growth appears, check the roots when the evidence points below the soil, and keep the toxic foliage out of reach of pets and children.