How to Use Screens to Guard Attic Vents Against Pests
Learn how to choose and fasten attic vent screens, protect net free area, inspect for animals first, and avoid blocking dryer or mechanical exhausts.

To keep mice, squirrels, birds, and other animals out of a passive attic vent, cover the opening with corrosion-resistant metal mesh that has openings no larger than the target pest can pass through, then fasten it to solid framing with no loose edges. For mice, a quarter-inch opening is a practical upper limit; use a smaller opening only when the pest requires it and the vent’s airflow has been checked. A screen is a barrier, not a reason to close the vent: reducing its free area can compromise the ventilation the roof assembly depends on.
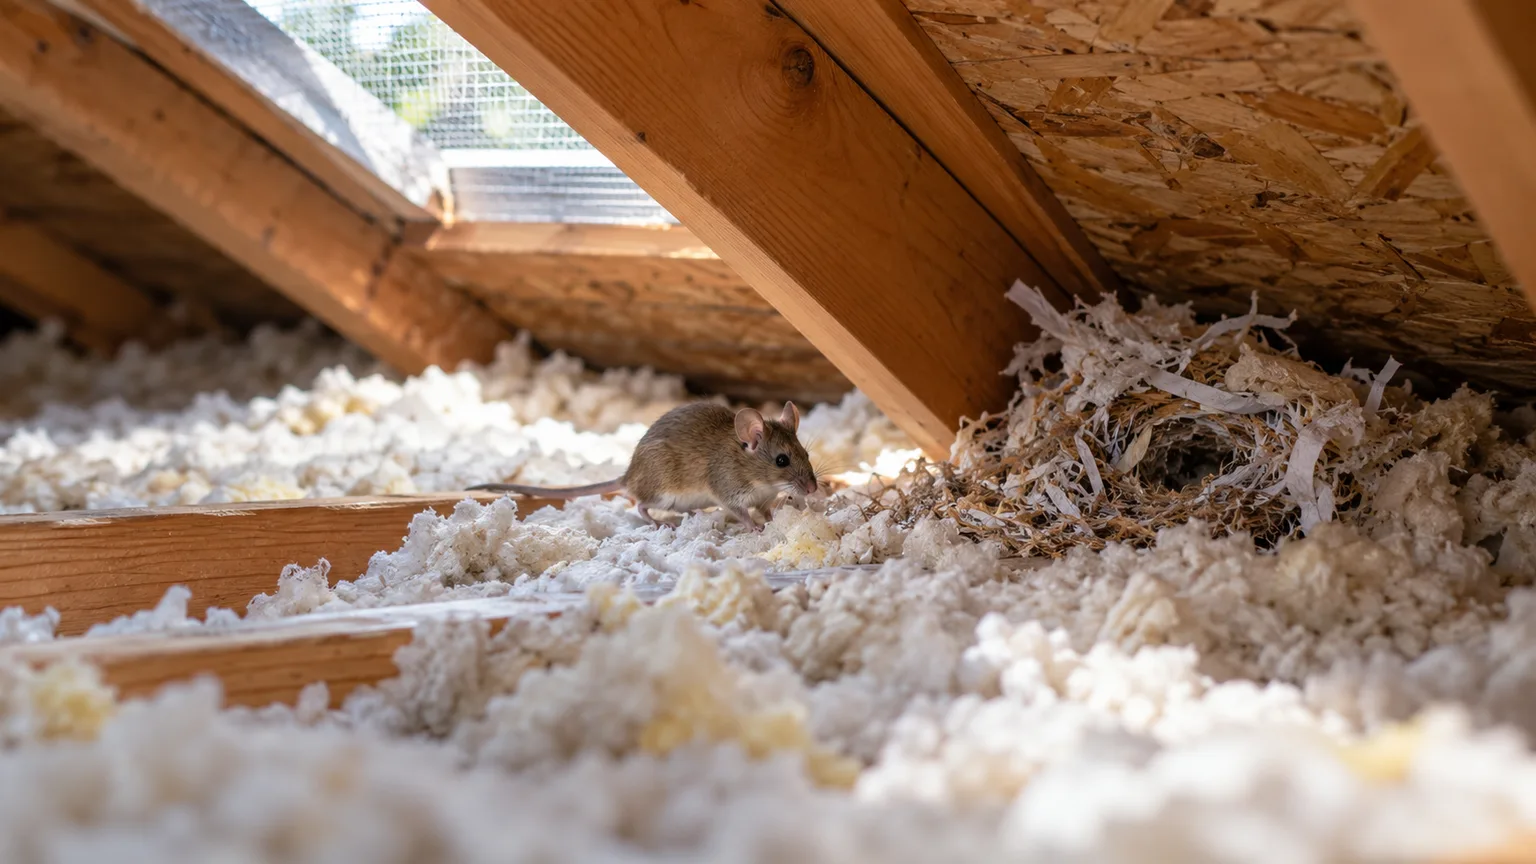
Before you buy mesh, identify the opening. A gable or soffit vent that serves attic ventilation is different from a ridge vent, powered fan, HVAC intake, plumbing stack, chimney, or clothes-dryer exhaust. Some openings already have an integrated screen, and some must not be covered with generic hardware cloth at all. If you find a nest, droppings, a live animal, or repeated sounds inside the roof space, pause before sealing anything; exclusion has to account for what is already inside.
What a good attic vent screen must do
A useful vent screen does three jobs at once: blocks the route an animal could use, stays fixed under weather and chewing pressure, and leaves enough open area for the vent to work. The weakest result is a fine-looking patch that is easy to tear away or that turns a large opening into a small, clogged one. Think of the job as protecting the boundary around a working air path, not plugging a hole in the roof.
That distinction matters because attic ventilation is part of a system. In a typical vented roof, lower openings admit air while higher openings let air leave; soffit, gable, ridge, and roof vents have different roles depending on the design. ENERGY STAR explains that soffit vents need a clear channel into the attic and that insulation must not block them. A screen repair should preserve that pathway rather than cover, flatten, or seal the opening.
The screen also needs to match the actual pest. A barrier with half-inch squares may deter a squirrel or bird from entering a particular opening, but it is not the same protection as quarter-inch mesh against mice. Very fine insect screen can exclude tiny insects, but it is usually weaker than welded hardware cloth and can collect debris more readily. If several pests are a concern, choose the smallest practical aperture, then verify that the vent can still deliver its required net free area.
Identify the vent and animal before buying mesh
Start by mapping where the sound, droppings, nesting material, or damage appears. From the ground, use binoculars or a phone camera to inspect roof edges and gables; from inside the attic, use a flashlight only if there is a safe walkway or platform. Look for a displaced louver, torn screen, gnaw marks, feathers, nesting material, tracks in insulation, or droppings. No single sign identifies every animal, so do not treat a noise as proof that the nearest vent is the entry point.
An animal may enter at a vent, but it may also use a loose fascia board, roof-wall joint, broken soffit, chimney opening, utility penetration, or gap under flashing. A new screen over one vent will not stop an animal using another route, and it can make the remaining route more attractive if a resident is already in the attic. The NPS Rodent Exclusion Manual recommends inspecting the whole exterior—including eaves, gables, soffits, and roof joints—for openings, not assuming a vent is the only access point.
Match the repair to the vent type
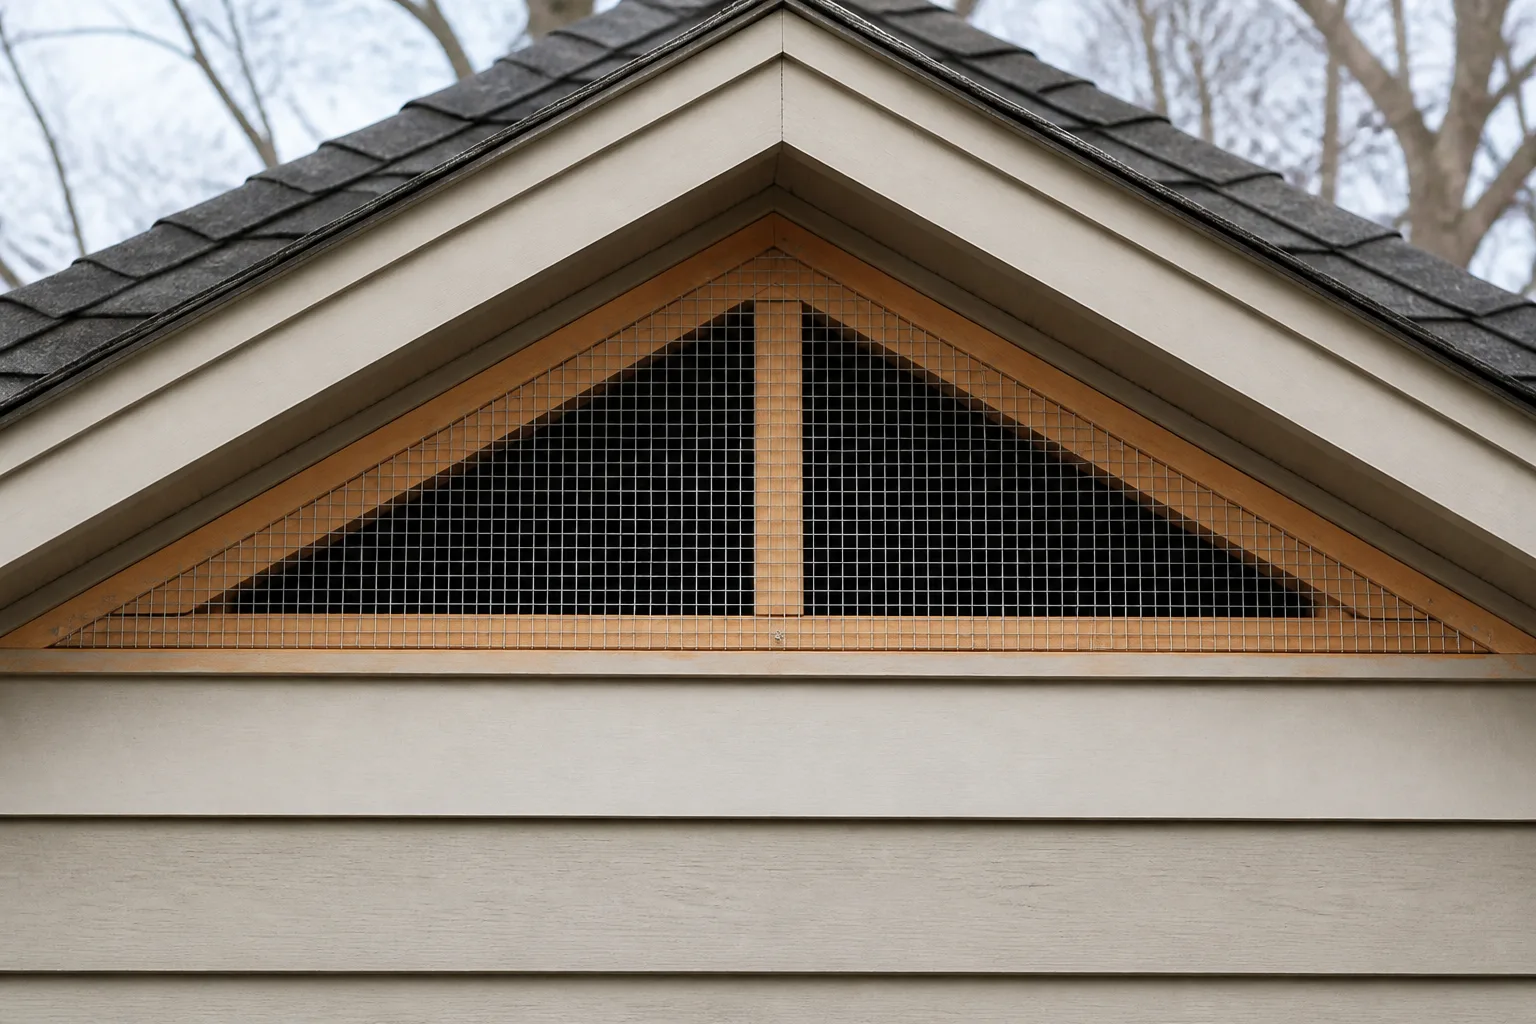
Gable vents are often the most straightforward retrofit. If the vent has a removable grille or screen frame and can be reached safely from inside the attic, you may be able to install replacement mesh behind the louvers, attached to the vent’s solid frame. The mesh must not interfere with moving louvers, drainage details, or an existing backdraft mechanism.
Soffit vents are usually many small openings distributed along an eave. A perforated metal or vinyl soffit may already provide a rated open area; adding another layer across the entire run can sharply reduce that area. Replace a damaged vent panel with a compatible screened part when possible, or have a contractor design a repair that preserves the continuous intake path. Do not staple a loose patch over a soffit and assume it will remain secure in wind.
Ridge and roof vents sit in weather-sensitive parts of the roof assembly. They may rely on a manufacturer-designed baffle, filter, or narrow slot, and a screen laid across the top can interfere with rain-shedding details or void a product warranty. Use a compatible pest guard made for that vent or ask a roofer to inspect it; do not cut, screw, or nail into shingles or flashing to improvise a cover.
Powered attic fans and equipment openings need a different check. A guard can interfere with a fan blade or restrict the air supply to HVAC equipment. PNNL’s screening guide specifically flags air-handler intakes as an exception to general mesh recommendations and warns that smaller openings can reduce airflow. If the opening is connected to equipment or combustion air, use the manufacturer-approved guard or have an HVAC professional assess it.
Choose mesh by target pest, not by label alone
For mice, use a durable metal mesh with openings of 1/4 inch or smaller. PNNL notes that a gap as small as 1/4 inch can let a mouse squeeze into a structure, and its material guidance identifies quarter-inch hardware cloth as the appropriate mesh for excluding mice. The NPS manual also recommends quarter-inch-or-smaller hardware cloth for smaller animals; its larger 1/2-inch mesh is intended for larger or more aggressive animals, not as the all-purpose mouse barrier.
For squirrels, raccoons, and larger animals, mesh strength and attachment matter as much as aperture. A thin flexible screen can be pulled, chewed, or peeled from the frame. Choose welded, corrosion-resistant metal mesh with a gauge and coating rated for exterior use, and fasten it to framing rather than to a thin louver. If a large opening needs a wide span, add support bars so the mesh cannot bow or be pushed inward; PNNL recommends crossbars for large or abuse-prone openings.
For birds, the right opening depends on the species and the vent. A sturdy screen can prevent birds from nesting in an open gable cavity, but very fine mesh is not automatically better if it makes the opening hard to keep clear. If an active nest or eggs are present, do not remove or seal it until you have checked applicable local wildlife rules and received appropriate advice. The repair should deter future entry after the opening is vacant, not trap wildlife behind a barrier.
| Material | Best fit | Limitation |
|---|---|---|
| Welded galvanized hardware cloth, 1/4-inch openings | General rodent exclusion, including mice | Adds airflow resistance; inspect coating and cut edges for corrosion |
| Stainless-steel hardware cloth | Corrosive or persistently damp sites | More expensive and harder to cut and shape |
| 1/2-inch hardware cloth | Larger animals where mice are not the target | Openings may be large enough for mice |
| Window insect screen | Flying insects in a protected, non-chew area | Usually too fragile to act as a rodent barrier |
| Chicken wire or poultry netting | Garden or temporary animal barriers | Large, flexible openings do not make a dependable attic rodent screen |
Mesh labels can be confusing: the opening measurement and wire thickness are separate specifications, and “hardware cloth” alone does not tell you either one. Check the product label for actual opening dimensions, material, coating, and wire gauge. Gauge conventions can vary between products, so compare the manufacturer’s stated wire diameter or intended use rather than assuming that a larger gauge number means a stronger screen.
Protect net free area and attic ventilation
The screen’s net free area (NFA) is the clear area through which air can pass after the mesh, louvers, slots, and other obstructions are counted. A vent’s outside dimensions are not its NFA; a six-inch-by-six-inch grille does not provide 36 square inches of airflow if the louvers and screen occupy part of that area. Use the vent label or manufacturer’s specifications when available, and consider the effect of every added layer.
Mesh that has smaller openings can substantially reduce airflow. PNNL cautions that hardware cloth smaller than 1/2-inch-by-1/2-inch significantly reduces air movement, even though smaller quarter-inch mesh is needed to stop mice. That is not a contradiction to solve by choosing a mesh that lets mice through; it is a signal to check whether the vent system has enough NFA after screening. A vent with a torn coarse screen may need a properly sized replacement, not a second screen stacked on top of the first.
As one illustration—not a universal design specification—the 2021 International Residential Code lists a minimum vent area of 1/150 of the space, with a 1/300 exception only under stated conditions involving climate zone and the distribution of upper and lower vents. Requirements vary with the code edition adopted locally and the roof design. Ask the local building department or a qualified roofer which requirement applies, particularly if the house has a finished attic, unbalanced ventilation, a powered fan, or an unusual roof assembly.
Use a simple check before fastening: does the mesh cover only the opening, or will its frame, folded edges, or a second screen cover more of the vent than intended? Is the screen listed with an NFA rating? Will leaves, dust, pollen, or snow collect against it? Can you clean it later without pulling the vent apart? If the answer is unclear, pause and ask a roofer or building professional to verify the design. A pest barrier that restricts intake can contribute to heat or moisture problems, and those symptoms may appear well after the installation.
The ENERGY STAR attic-ventilation guide explains why the soffit air path must remain open and why insulation should not cover the vents. For a screened retrofit, that means checking not only the visible face but also the attic-side path: insulation cannot be piled against the opening, and a rafter baffle must not be crushed or blocked. Do not add or close vents until someone has checked the complete intake-and-exhaust arrangement.
When to stop: occupied wildlife and special openings
Do not cover a vent if you have reason to think an animal is living in the attic or inside the vent. Listen at dusk and dawn, look for fresh droppings or nesting material, and note whether the opening is used repeatedly. Sealing an occupied entry can trap adults or young, create dead-animal odors and contamination, or force animals into the living space while they search for another exit.
Bats require particular care. They can enter through small gaps, and maternity-season timing differs with local species and climate. Penn State Extension’s bat-exclusion guidance says to avoid sealing openings while flightless young may be inside and to use an appropriate one-way exclusion method only at a suitable time; its calendar reflects regional timing and should not be applied blindly elsewhere. If you see a bat, find droppings beneath a vent, or hear repeated activity, contact a licensed wildlife-control operator or local wildlife agency before changing the screen. Do not handle a bat; the CDC advises avoiding contact and contacting animal control or public health officials if a bat is found in a home or possible exposure occurred.
Bird nests also call for a pause. A screen can be installed after a nest is no longer active, but a nest with eggs or young should not be casually removed or closed behind mesh. Protected species and local rules vary, so ask the relevant wildlife authority or a qualified wildlife professional if you cannot confirm the species or status.
Some openings are not ordinary attic vents. Never put generic screen mesh over a clothes-dryer exhaust termination. The 2024 International Residential Code says dryer exhaust terminations must follow the dryer’s instructions, use a backdraft damper, and must not have a screen at the terminal; lint buildup can create a serious restriction. Use the listed termination hood and keep it clear. Likewise, do not screen combustion-air openings, plumbing vents, or HVAC intakes without checking the appliance and vent manufacturer’s instructions and the applicable code.
Call a roofer when access requires walking on a roof, removing shingles, disturbing flashing, or reaching a steep or high gable. Call an HVAC contractor when the vent serves equipment or you cannot tell whether it is an intake or exhaust. Use a wildlife professional when an animal is present, the species is uncertain, droppings are extensive, young may be inside, or the repair must be coordinated with a one-way exit. Those are not merely convenience calls: they prevent a simple barrier job from creating a ventilation, weatherproofing, or animal-welfare problem.
Materials and tools for a secure repair
For a simple gable vent with a sound, reachable frame, gather a tape measure, flashlight, heavy work gloves, eye protection, tin snips or aviation shears, and corrosion-resistant fasteners suited to the frame. Use quarter-inch galvanized or stainless hardware cloth if mice are the target, with a product that identifies its opening size and exterior rating. Keep a short length of scrap mesh for a fit check before cutting the final piece.
Fasteners need to suit what you are attaching to. Corrosion-resistant staples may work on sound wood framing where the vent manufacturer allows them; screws with broad washers or a narrow retaining strip can make a stronger, serviceable edge. Use roofing nails only where the vent detail calls for them, and never puncture shingles or flashing just to hold mesh in place. If the frame is cracked, rotted, loose, or too thin for secure fastening, repair or replace the vent rather than trusting a screen to bridge the damage.
Gloves and eye protection are not optional. Cut wire edges can be sharp enough to slice skin, and snips can send small metal fragments toward your face. Cut the mesh on a stable surface, keep sharp offcuts in a container, and fold or cover exposed edges so the finished screen cannot snag a hand or roofing material.
Install a screen on a simple gable or soffit vent
The steps below apply to a passive vent with a solid, accessible frame and no animal inside. A removable gable vent panel is the easiest case because you can often work from the attic side, away from the roof edge. Soffit repairs should use a compatible vent or screen panel that does not close the long intake slots; roof-mounted vents should follow the product-specific method or be handled by a roofer.
Step 1: Inspect before closing anything
Wait for daylight and inspect the vent from both sides if you can do so safely. Look for existing factory mesh, broken louvers, corrosion, chewed edges, droppings, feathers, nesting material, and signs of active use. If you see an animal, fresh activity, a bat, or an active nest, stop and use the wildlife guidance above rather than closing the hole.
Also check that the vent is actually part of attic ventilation. If wires, ducts, a fan, or a combustion appliance connect to it, find the appliance label or installation manual before planning a screen. A passive opening with a simple wood frame may be a DIY candidate; an unknown mechanical opening is not.
Step 2: Measure and cut for a solid overlap
Measure the opening and the flat frame around it, not just the visible louver face. The mesh must overlap solid backing all around, with enough space for every fastener to land in sound material. A common gable-screen installation calls for about an inch of extra material beyond the opening on each side; if the frame is narrow, use a purpose-made frame or retaining strip instead of leaving a weak edge. Lowe’s 2025 gable-vent screen guide likewise recommends extending the replacement screen beyond the vent opening and checking the perimeter for gaps.
Lay the mesh flat and cut with tin snips so the piece stays square to the opening. Where possible, cut close to a cross wire instead of leaving long, sharp wire tails. Before cutting, confirm the panel will sit behind the louvers without touching a fan blade, obstructing a moving damper, or covering a drainage opening.
Step 3: Fasten the mesh without gaps
Center the mesh over the opening and secure one side first, keeping it flat but not stretched so tightly that it distorts the vent frame. Fasten around the perimeter into solid framing, using intervals and hardware appropriate to the material and vent manufacturer’s directions. Work from one side across the opening and finish the opposite edge; that sequence helps prevent a bulging pocket that animals can push inward.
Inspect the corners and every seam. The mesh should have no exposed gap wider than its intended opening, and no cut edge should lift away from the frame. For a wide opening, add a support bar or use a framed screen panel instead of relying on unsupported mesh. If the vent is metal or vinyl, choose a compatible mechanical fastening system; adhesive alone may fail outdoors as the panel expands, contracts, and gets wet.
Step 4: Recheck the vent and monitor the repair
Before packing up, verify that louvers can move, the opening is not covered by scrap mesh, and insulation or debris does not block the attic-side path. Look at the surrounding trim and roof edge for other holes; an intact screen cannot compensate for a gap beside the vent. Keep the manufacturer’s vent information if you needed to compare NFA or identify a compatible replacement.
After the first strong wind and again after a few weeks, inspect the screen for loosened fasteners, vibration, rust, bent edges, new gnawing, or nesting. If you cannot safely see the exterior face from the ground, schedule a roofer to check it instead of climbing up to inspect a small repair. Continued scratching or new droppings means the access route may be elsewhere or an animal may have been inside before the screen went on.
Common shortcuts that fail
Using chicken wire for mice is a frequent mismatch. Poultry netting is flexible and its openings are generally too large to exclude small rodents. Use a rigid metal screen with the correct aperture and a firm attachment instead of buying the easiest roll on the shelf.
Using fine plastic insect mesh as a rodent barrier also fails quickly. A screen designed for flies is not necessarily chew-resistant, and its frame may be the part an animal pries open. It may be suitable for insects on a protected opening, but it should not substitute for metal hardware cloth where squirrels or rodents can reach it.
Adding a second layer everywhere feels like extra protection but can choke air movement and create a debris trap. If a vent already has an intact screen, inspect it for an actual gap or break before covering it again. Replace damaged material with a compatible part and confirm NFA, rather than stacking layers across every eave.
Closing a vent with wood, foam, or sealant trades pest exclusion for a blocked air path. Keep the screen limited to the designed opening and preserve the vent’s drainage and weather details. Expanding foam can also be chewed and does not replace a durable physical barrier.
Screening the wrong opening can be dangerous. Dryer exhaust requires an unobstructed terminal with the correct damper; a fine screen can catch lint. A fan or equipment intake can lose needed airflow, while a chimney or combustion-air opening may have fire and appliance requirements that generic mesh does not meet.
Fixing only the obvious vent may leave the actual entry untouched. An animal could climb a branch to a roof-wall joint or enter through a loose fascia return. Trim branches that directly contact the roof where practical, repair adjacent gaps with appropriate materials, and keep checking for fresh evidence rather than treating the first screen as a full-house exclusion plan.
Seasonal inspection and upkeep
Inspect attic vent screens at least twice a year—often in spring and fall—and after severe wind, hail, or nearby tree work. From the ground, look for missing sections, sagging mesh, new discoloration, and birds repeatedly entering. In the attic, check for insulation pushed against soffit openings, water marks, loose pieces, fresh droppings, or signs that an animal is still using the space.
Clean only what you can reach safely and without bending a vent out of shape. A soft brush or low-pressure vacuum can remove dust and cobwebs from an accessible screen, but do not pressure-wash it or force debris deeper into the attic. If the screen is corroded, deformed, or clogged, replace it with a compatible part and recheck its NFA; cleaning a damaged barrier does not restore its strength.
Record the vent type, screen opening, product or part number, and date of repair. That small note makes the next inspection easier and helps a roofer identify what was changed. If the same area shows new animal evidence after a sound repair, widen the inspection to nearby eaves, roof joints, chimneys, and utility penetrations instead of repeatedly replacing the same mesh.
Conclusion: Screen the opening and preserve the vent
For a straightforward passive gable vent, a well-fastened, corrosion-resistant metal screen with quarter-inch openings is a practical way to stop mice and deter larger pests. The result still depends on the frame, the absence of an animal inside, and enough net free area for the vent to do its job. Match the mesh to the target, secure every edge to sound backing, and inspect the rest of the roofline for alternate gaps.
If the opening is powered, serves equipment, lies in a roof detail, or has a resident animal or active nest, pause and get product-specific or wildlife guidance. A screen should protect the attic without sacrificing ventilation, weather protection, or safe animal exclusion.



