How to Grow and Care for Daffodils
Plant daffodils at the right depth, choose a well-drained sunny site, and keep the leaves until they fade. Get practical fixes for pots and bloom failures.

Daffodils are among the easiest spring bulbs to keep for years, but reliable flowering depends on a short sequence: plant healthy bulbs in fall, give them drainage and spring light, then leave the leaves in place after bloom. That last step is what turns this year’s foliage into next year’s flowers. If a mature clump produces leaves but no blooms, look for a growing-condition problem before reaching for fertilizer.
Daffodil is the common name for plants in the genus Narcissus. The familiar trumpet flower is only one form; cultivars also have small cups, split cups, double petals, or clusters of fragrant flowers. Different types bloom at different times and perform differently across climates, so the bulb label is more useful than a blanket rule about hardiness or planting dates. (North Carolina State Extension; Penn State Extension)
What Daffodils Need to Return Each Spring
A daffodil bulb is a living storage organ. It sends up leaves and flowers in the cool part of the year, then uses the leaves to rebuild the bulb after flowering before going dormant in summer. Given a suitable cultivar, well-drained soil, and enough time for the foliage to fade naturally, many daffodils return and slowly form larger clumps. (RHS)
Think of care in two phases. From fall planting through active spring growth, the bulb needs roots, light, and moisture that drains away; after the flower fades, it still needs its leaves and should not be cut, braided, or mowed immediately. Daffodils are low-maintenance, not no-maintenance: interrupting that recovery period is a common reason a formerly reliable planting becomes all leaves and no flowers.
Choose Daffodil Bulbs and Cultivars for Your Garden
Buy bulbs that feel firm and heavy for their size, with an intact dry outer covering. Pass over bulbs that are soft, badly shriveled, moldy, or damaged at the base; a weak bulb may leaf out without carrying enough stored energy to make a good flower. If you shop early, keep the bulbs cool, dry, and ventilated until planting rather than sealing them in a damp plastic bag. The RHS recommends selecting firm bulbs and notes that cultivar groups differ in flowering time and form. (RHS)
The 13 daffodil divisions are a classification system based mainly on flower shape. You do not need to memorize it, but a few labels help you choose: trumpet and large-cupped types make the classic single-flower display; miniature cultivars suit small containers and the front of a border; jonquilla types are often fragrant; and some tazetta daffodils, including paperwhites, tolerate heat and are listed for warmer hardiness zones than many classic garden types. That is not a promise for every cultivar: check the grower’s regional advice because performance depends on the bulb, not just the word “daffodil.” (Penn State Extension; North Carolina State Extension)
For a longer spring show, plant a mix marked early-, mid-, and late-season rather than buying only one cultivar that peaks at once. In a border, choose heights that will not disappear behind emerging perennials; in a lawn, choose cultivars sold for naturalizing and allow time for their leaves to die before mowing. A small, named group is easier to identify and divide later than an unlabeled mix.
Find the Right Spot: Light, Soil, and Drainage
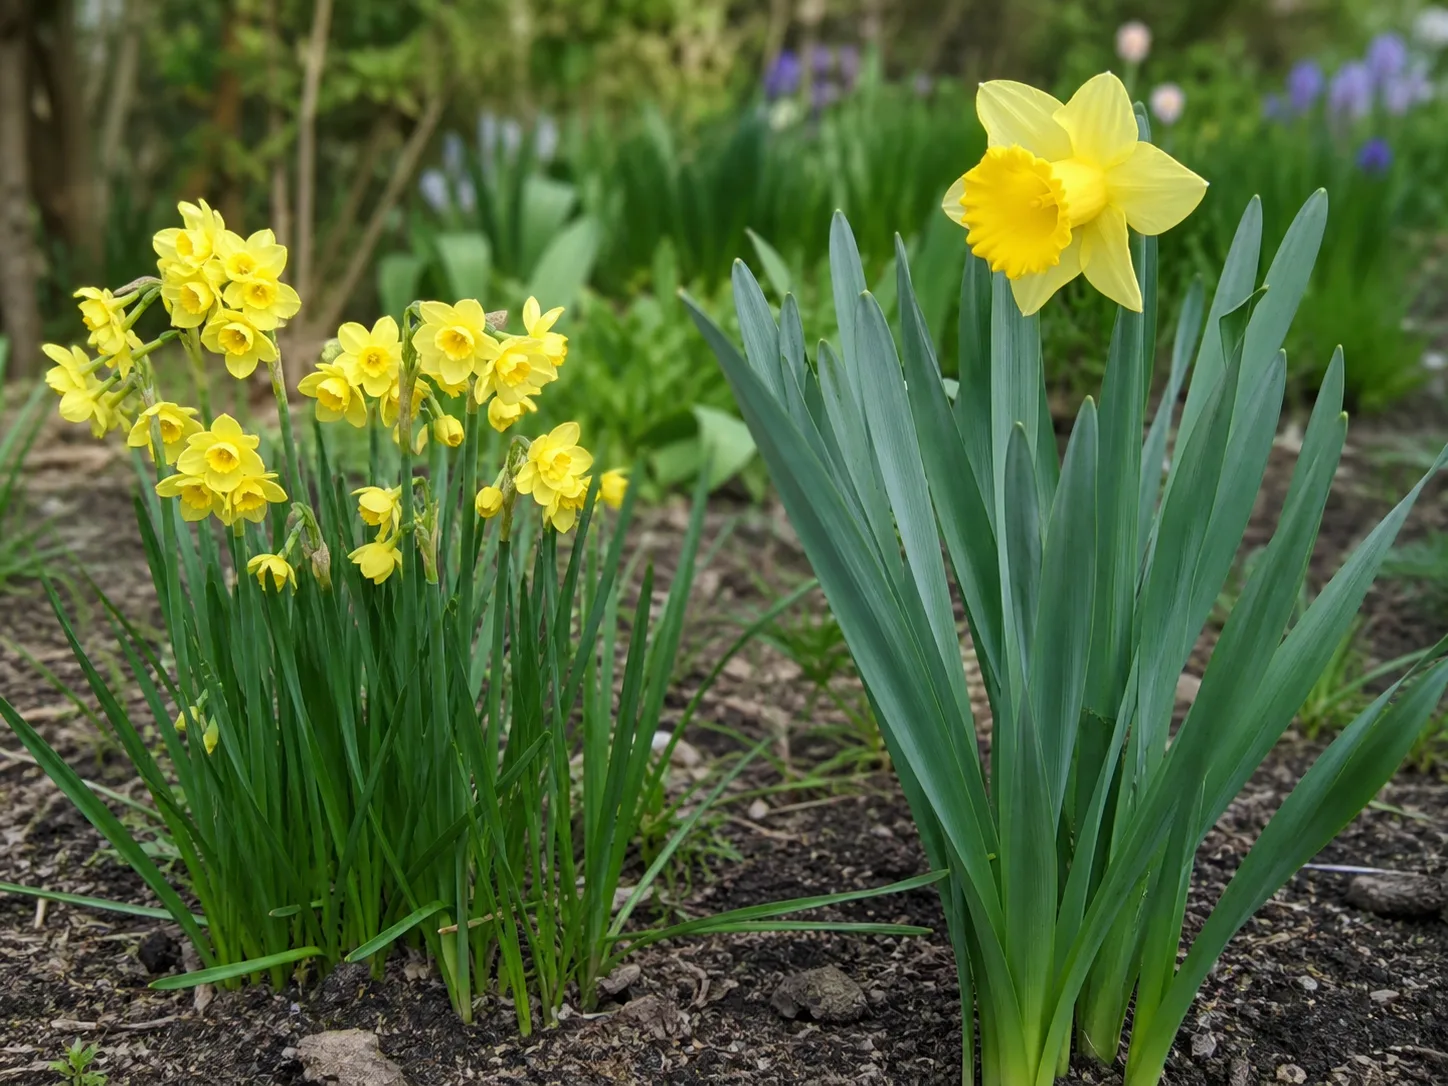
Give daffodils full sun or light shade, with several hours of direct light during their spring growth. A spot beneath a deciduous tree can work because the bulbs emerge before the canopy fills in; deep shade from evergreens or a mature shrub is less forgiving. If a patch used to bloom and gradually stopped, notice whether nearby trees have grown enough to shade or dry it out. (North Carolina State Extension; RHS)
Drainage is more important than rich soil. Daffodils tolerate a range of garden soils, but bulbs can rot when water sits around them for long periods, especially during summer dormancy. Avoid a low spot that stays saturated after rain; on heavy soil, a raised bed or a naturally sloping site is safer than filling an isolated planting hole with loose potting mix, which can collect water like a basin.
If the soil is poor or compacted, loosen a broad area and blend in mature compost before planting. Do not amend only the narrow hole: roots and new offsets will eventually grow into the surrounding soil. A soil test is useful if the garden has a known pH or nutrient problem, but most established daffodils do not need repeated fertilizer applications just because spring has arrived.
When to Plant Daffodil Bulbs
Plant dormant bulbs in early to mid-fall while the soil is cool but still workable, and give them time to root before the ground freezes. The calendar varies by region: the RHS recommends early autumn in the UK, while Penn State’s Pennsylvania guidance places planting in October to early November. Follow a local extension service or the bulb supplier’s window instead of treating one month as universal. (RHS; Penn State Extension)
If you are planting late, get the bulbs into the ground as soon as the soil can be worked safely. A late-planted bulb may produce a weaker first display, but leaving it dry in storage until spring is generally not a better bet. Do not plant into frozen earth or a bed that is waterlogged; if the season has passed, keep the bulbs cool and dry only briefly and ask a local horticulture extension office how to handle that region’s stock.
Winter conditions matter. Many garden daffodils need a cool dormant period, while certain cultivars are better suited to milder winters; some bulbs sold for indoor forcing have already been prepared for that use. In a warm-winter region, choose a cultivar recommended for your location and buy from a supplier that explains whether chilling is needed. A hardiness-zone range is a starting point, not proof that every cultivar will flower well in every yard. (Penn State Extension; North Carolina State Extension)
How Deep and Far Apart to Plant Daffodils
Depth guidance can look inconsistent because some sources measure from the soil surface to the base of a bulb while others specify the soil cover above its top. These measures can describe nearly the same planting: a bulb set with its base roughly three times its height below the finished soil line has about two bulb-heights of soil above its tip. Check your supplier’s instructions and use the bulb’s size as the guide rather than digging every cultivar to one fixed number. (RHS; Penn State Extension)

Set the pointed neck upward and the broader basal plate downward. If the bulb has no obvious point, lay it on its side; the shoot will orient itself as it grows. Shallow planting can lead to crowded offsets and smaller bulbs that do not flower, while a very deep planting can delay or weaken the display, so do not improvise with a shallow dusting of soil.
For a display that will remain in the ground, leave about 4 to 6 inches between standard bulbs, adjusting to cultivar size and the label. You can plant closer for an immediate dense container display, but closely packed bulbs will need more frequent attention and may be better transplanted into a garden after flowering. A group of six or more bulbs reads as a drift; scatter irregularly rather than setting every bulb in a straight line. (Penn State Extension; RHS)
A Reliable Fall Planting Method
Start with the layout, not the trowel. Mark where the clump will go, where nearby perennials will fill in after spring, and whether the site will remain reachable for watering or summer division. If you are planting several colors or cultivars, draw a quick map or keep their labels; foliage looks similar before flowers open, and a map prevents guesswork years later.
- Prepare the ground. Remove perennial weeds, loosen compacted soil across the bed, and incorporate compost if the soil needs it. Check that rain drains rather than pooling around the future bulbs.
- Place the bulbs. Set out groups in a natural, uneven pattern so you can see the spacing before digging. Keep bulbs firm and avoid those with soft spots or damaged bases.
- Dig to the correct depth. Use the bulb height and supplier instructions, remembering whether the measurement refers to the bulb’s base or the soil above its tip.
- Plant and backfill. Set each bulb point-up, cover it fully, and gently firm the soil so there are no large air pockets. Do not press hard enough to compact the bed.
- Water and mark. Water once to settle dry soil, then label the area or add it to your garden map. You usually do not need a rigid weekly schedule after that; let local rainfall and soil moisture guide the next watering.
For naturalized groups in grass, a bulb planter or spade can lift a small flap of turf. Place the bulbs at the correct depth, replace the turf, and keep the planting pattern loose. Avoid sites where spring mowing has to resume before daffodil leaves have yellowed; that conflict is easier to prevent during layout than to fix later. (RHS)
Water and Fertilize Daffodils Without Overdoing It
After planting, water if the soil is dry so it settles around the bulb. In spring, water during a prolonged dry spell while the leaves and flowers are actively growing; do not keep an outdoor bed constantly wet just because bulbs are underground. Once the foliage has died back and the bulbs are dormant, a well-drained site usually needs little supplemental water.
A dry spell right after bloom is different from summer dormancy. Leaves continue to replenish the bulb for several weeks after flowering, so if spring turns unusually dry, water deeply enough to moisten the root zone until the foliage starts to yellow. This helps avoid premature leaf dieback; it does not mean the soil should stay saturated. The RHS identifies dry conditions after flowering as one cause of poor flowering in later years. (RHS daffodil blindness guide)
Skip routine feeding in a healthy bed with fertile soil. If flowers have declined and a soil test or weak growth suggests a nutrient shortage, use a bulb fertilizer according to its label and apply it at the recommended stage; do not pile fertilizer against the bulb or compensate for deep shade, rot, or early leaf removal with extra nutrients. Mature compost worked into the bed or used as a light surface mulch can improve soil structure without forcing lush leaf growth. In containers, nutrients wash out faster, so a restrained, labeled feed during active growth may be useful. (RHS; Gardening Know How)
Grow Daffodils in Containers or Force Them Indoors
Choose a sturdy pot with drainage holes and enough depth for both roots and the bulb’s normal planting depth. Use a free-draining potting mix, not heavy garden soil, and plant bulbs close for a full display while leaving a little space between them so they do not press against one another. Smaller cultivars are easier to manage in a window box or shallow container; taller selections look better in a larger, heavier pot. (RHS; Garden Therapy)
Outdoor pots dry and freeze faster than a garden bed because cold air reaches them from the sides as well as from above. Check moisture during dry weather, keep drainage open, and move or insulate the pot if your winters regularly freeze the root ball solid. Do not leave a container sitting in a saucer of water through winter. When bulbs are grown in a temporary spring display, plant them more deeply in a garden after the leaves have finished their recovery cycle; repeatedly forcing a bulb indoors can reduce its future display.
For winter flowers indoors, buy bulbs specifically sold for forcing or pre-chilled for indoor bloom, then follow the supplier’s chilling and temperature instructions for that cultivar. Not every garden bulb can be made to bloom on a convenient indoor schedule, and warm rooms can make stems stretch and flowers fade quickly. Once a forced display finishes, keep the leaves in bright light and continue watering until they yellow; then the bulbs can be planted outdoors if the cultivar is hardy for your region, though rebloom may take time.
Care for Daffodils After They Bloom
When a flower fades, snip off the spent bloom or seed pod while leaving the green flower stem and foliage intact. Removing the fading flower keeps the plant from investing in seed production, while the leaves continue photosynthesis and return energy to the bulb. Deadheading is optional for a wild, naturalized look, but it is useful when the goal is a stronger repeat display. (RHS)
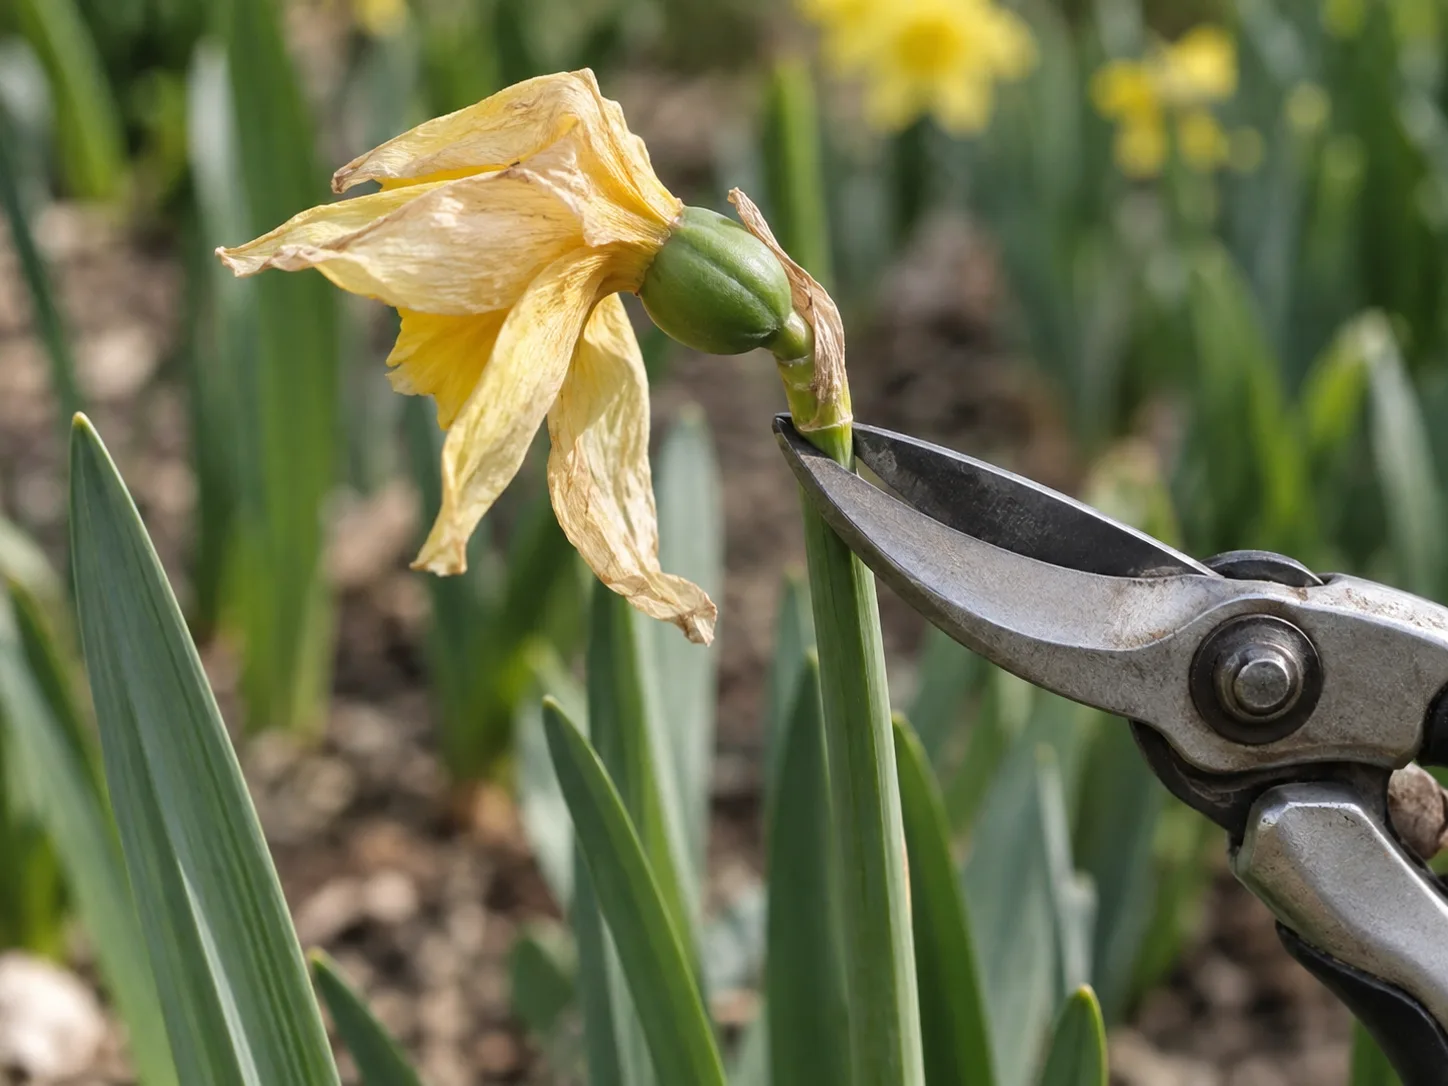
Keep watering if the soil is very dry and the foliage is still green, especially after a dry spring. Do not tie the leaves into knots, fold or braid them, or hide them under a dense mulch; those shortcuts reduce the leaf area doing the work. Plan the planting so later perennials can soften the look of fading foliage without smothering it.
How Long to Leave Daffodil Leaves
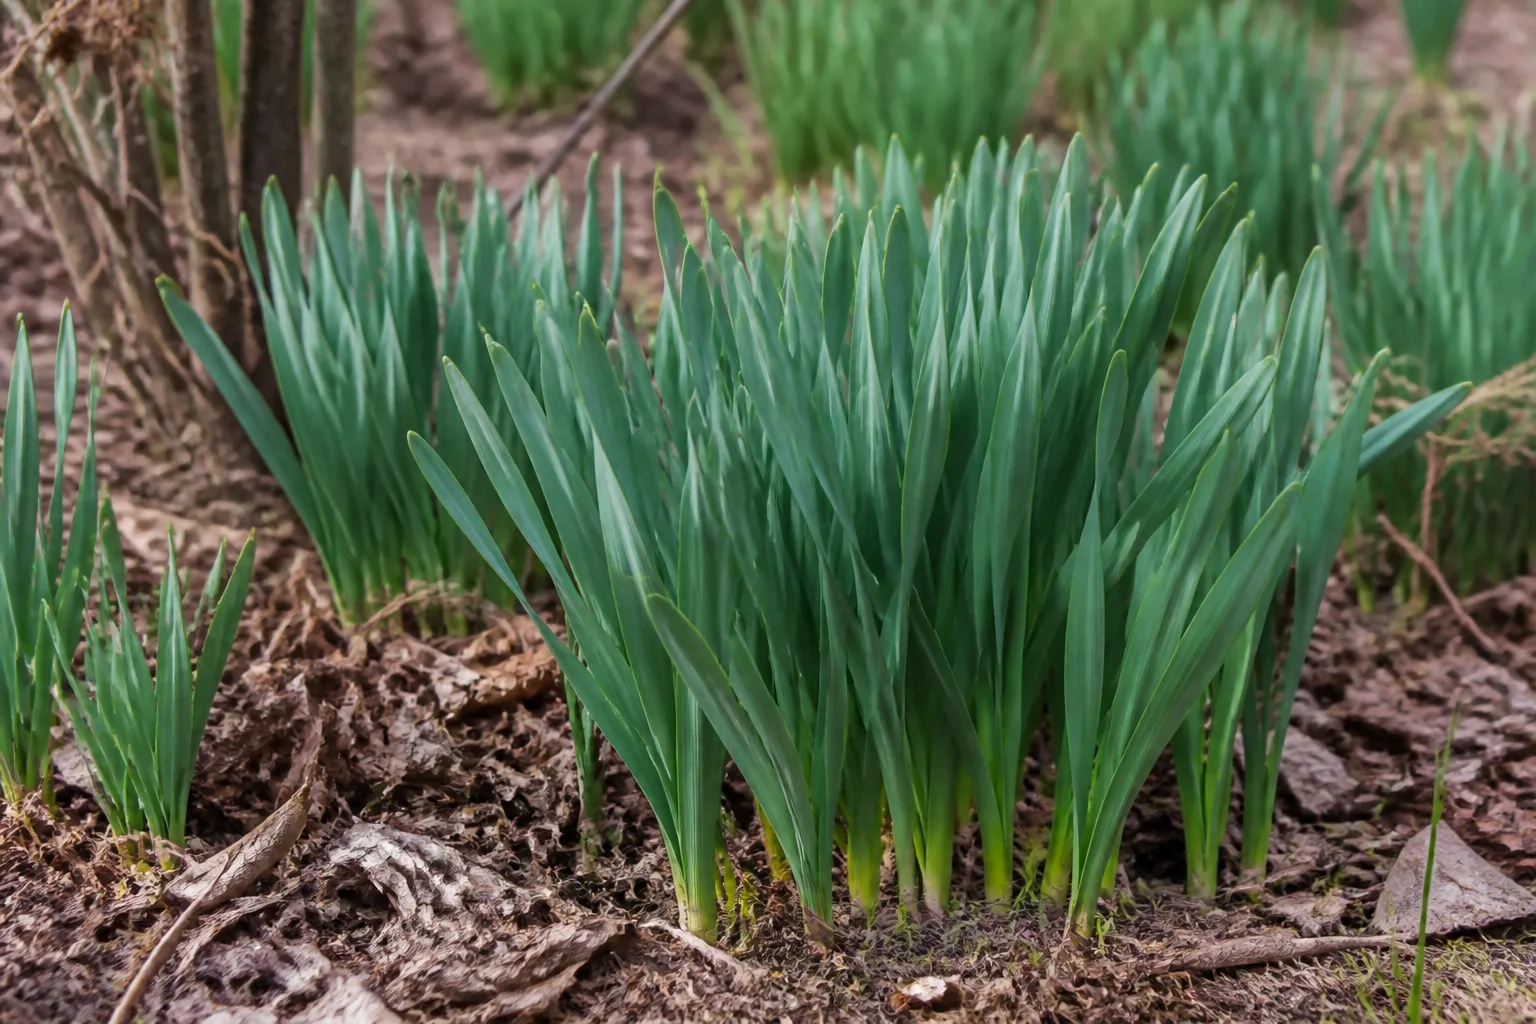
Leave the leaves until they turn yellow and begin to die back naturally, often about six weeks after flowering. The visible cue is more reliable than a fixed date: cultivars and local weather do not all finish on the same schedule. If the foliage remains green, it is still supporting the bulb even when the flowers have been gone for a month. (RHS; Penn State Extension)
Once leaves are fully yellow or brown and loose, cut them at ground level or gently remove them. In a lawn, delay mowing that patch until this point; if you cannot wait, naturalizing in that part of the grass may not be a good fit. The Royal Horticultural Society recommends leaving foliage for at least six weeks after flowering and warns against tying it up. (RHS daffodil blindness guide)
Divide Crowded Clumps at the Right Time
Daffodils multiply by producing offsets, so a clump can become crowded over several seasons. You do not need to divide on a rigid three- or four-year timetable if flowering remains strong; lift the bulbs when a dense clump starts producing fewer flowers, or when you want to move them to a better site. Poor bloom can also come from shade or premature mowing, so assess those conditions before disturbing every bulb.
Wait until the leaves have yellowed and died back, then use a garden fork to lift the clump from outside the foliage. Separate firm offsets by hand, discard soft or damaged bulbs, and replant the larger bulbs promptly at the proper depth and spacing. Small offsets may need another year or more to reach flowering size, so keep them together in a nursery bed rather than expecting every piece to bloom immediately. (North Carolina State Extension; RHS)
If you must store bulbs briefly, let surface moisture dry in a shaded, airy place and keep the bulbs cool, dry, and labeled. Replant in fall rather than leaving them for months in a hot shed or sealed container. Daffodils can stay in the ground for years when the site is right; digging every year adds work and increases the chance of damaging bulbs.
Naturalize Daffodils in a Lawn
A lawn planting works best where grass can be left unmown through the bulbs’ green recovery period. Choose cultivars recommended for naturalizing, plant them in loose drifts rather than ruler-straight rows, and avoid the spots you need to mow early for paths or play. The trade-off is simple: the spring flowers can spread through turf, but the grass will look longer until the daffodil leaves yellow. (RHS)
For a convincing drift, toss a handful of bulbs onto the prepared area and plant them where they land, keeping the spacing appropriate to their size. Do not plant so shallowly that mowing equipment or later lawn work exposes them. Mark the patch on your maintenance calendar so no one cuts it down in the weeks after bloom; if the garden needs a uniformly short lawn, use a border instead.
Daffodils are less attractive to many browsing animals than some other bulbs, but no plant is completely protected from hungry wildlife. Treat animal resistance as a helpful tendency, not a guarantee, and protect new plantings if local deer, squirrels, or other animals routinely dig in the garden. (North Carolina State Extension)
Diagnose Daffodils With Leaves but No Flowers
A clump that produces healthy foliage but no flowers is often called blind. Start by asking what changed since it last bloomed: more shade, a dry spell after flowering, earlier mowing, shallower planting, or several years of crowding are all more useful first checks than adding a large dose of fertilizer. The RHS lists cultural conditions, pests, and diseases among possible causes, so inspect both the planting site and the bulbs if the problem persists. (RHS daffodil blindness guide)
| What you see | Likely cause to check first | First response |
|---|---|---|
| Plenty of green leaves, few flowers over several years | New shade, crowding, or shallow planting | Compare spring light; lift and divide only after leaves die if the clump is crowded |
| Leaves yellow soon after flowering | Dry spring or foliage removed too early | Keep the leaves and water during a dry recovery period |
| A new planting makes leaves but no blooms | Small or immature bulbs, late planting, or unsuitable winter conditions | Give healthy bulbs another season and confirm the cultivar fits the local climate |
| A few plants are stunted or wilted; bulbs feel soft | Rot or a bulb pest | Lift one affected bulb to inspect; remove damaged bulbs and correct drainage |
Do not diagnose every leaf-only clump as a fertilizer problem. RHS notes that premature mowing or tidying, lack of moisture after flowering, shallow planting, crowding, and bulb pests or disease can all reduce flowering; each needs a different fix. Improve the most likely condition and give the bulbs a full growing cycle before deciding that the planting has failed. (RHS daffodil blindness guide)
Watch for Rot, Pests, and Disease
Healthy daffodils usually have few serious pest problems, but poor drainage can turn a resilient bulb into a soft, rotting one. If a section repeatedly fails in a wet hollow, move future bulbs to a raised or better-drained location rather than treating waterlogging with fertilizer or routine pesticide. Remove soft or foul-smelling bulbs when you find them and do not replant them in the same saturated pocket. (North Carolina State Extension)
Bulb fly larvae and bulb-feeding nematodes can weaken or kill bulbs, and viruses may cause streaked foliage or declining vigor. Because several problems can look similar above ground, dig up one declining bulb after the foliage dies and inspect it; take a sample or clear photos to a local extension service if the cause is not obvious. Avoid spraying an unidentified problem, especially with a product not labeled for that pest and site. (RHS daffodil blindness guide; North Carolina State Extension)
Cut Daffodils for the Vase
You can cut daffodil blooms for indoor arrangements without sacrificing next spring’s display as long as the foliage remains on the plant. Use clean snips and take flower stems, not a handful of green leaves; do not strip or cut the leaf fans simply to make a bouquet look tidy in the bed.
Daffodils release sap after cutting, which can shorten the vase life of some flowers in a mixed arrangement. Garden Therapy recommends conditioning them separately in cool water before combining them with other stems; if you prefer not to manage separate conditioning, keep the daffodils in their own vase. (Garden Therapy)
Keep Daffodil Bulbs Safe Around Children and Pets
Daffodils contain toxic compounds, with the bulb the part of greatest concern if eaten. North Carolina State Extension also notes that handling bulbs, flowers, or stems can irritate sensitive skin. Keep bulbs clearly labeled and stored away from edible onions, garlic, and shallots, and do not let children or pets chew any part of the plant. Wear gloves if you have had plant-related skin irritation before. (North Carolina State Extension; RHS)
If a child or pet eats a bulb or plant part, contact a poison-control service or veterinarian promptly with the plant name and estimated amount. Do not try to induce vomiting or use a home remedy unless a qualified professional tells you to. The point of the warning is sensible handling and prompt advice after an ingestion, not a reason to avoid a flower that can be planted safely in a managed garden.
Conclusion
For dependable daffodils, plant firm bulbs in fall at the depth recommended for their size, choose a sunny-to-lightly-shaded spot that drains well, and water during active growth if the soil dries out. After flowering, remove faded blooms if you wish, but leave the leaves and keep the soil from drying severely until they yellow; then let the bulbs rest through summer.
If flowers decline, check spring light, moisture after bloom, mowing or cleanup dates, depth, and crowding before you feed or replace the bulbs. That simple order protects the bulbs’ stored energy and often restores the display with less digging and guesswork. With a cultivar suited to your climate and a planting site that does not stay waterlogged, daffodils can return as a reliable part of the spring garden for years.